


How to Build Banquette Seating With Built-in Storage
Optimize seating and storage with an L-shaped bench that will turn any corner into a cozy destination.
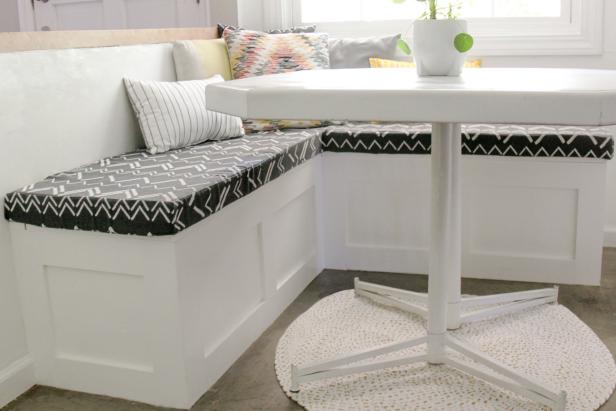
Need additional seating at your kitchen table but you can't quite squeeze in another chair? Build a banquette bench to fit more people around the table in less space. This DIY seating bench opens up, providing extra space to stash things like those occasionally-used small appliances.
Tools and Materials
These quantities are for an L-shaped banquette seat that measures approximately 63” x 57”.
- circular saw
- drill
- level
- orbital sander
- (8) 2x4 x 10’ lengths of lumber
- (1) 4' x 8' 1/2” plywood sheet
- (1) 4' x 8' 3/4” plywood sheet
- (4) 1/2” x 3-1/2” x 10’ pre-primed trim
- (2) 48” piano hinges
- wood screws
- sandpaper
- paintable wood filler
- paint
- paintbrush
- painter's tape
1. Prepare the Space

Carla Wiking
Remove baseboard and/or any other existing trim pieces where your bench is being installed. Then find and mark the studs in the wall.
2. Start Frame

Carla Wiking
For a corner bench, start with the longer side. To get the exact measurement of the length, measure from the corner to where the final edge of the bench will be, then subtract 1” to accommodate the plywood and trim. Cut two 2x4s to that size. We made the depth of our bench 17-1/2”. So, we cut two 2x4s to 14-1/2”, laid them inside the longer 2x4s which added the additional 1-1/2” per side. Screw all four pieces together. Then build an identical rectangle for the upper part of the bench.
3. Build Box

Carla Wiking
To make the four vertical parts of the frame, cut four 2x4 to 9-3/4”. Screw them upright on each of the four corners. Place the second rectangle on top of the four upright pieces. Screw all the pieces together to create a box. Slide it into place.
4. Frame Second Side

Carla Wiking
To determine the size of the shorter side of the banquette, measure from the edge of the first framed box to where you want the final edge to be, then subtract 1” for plywood and trim. Repeat the steps for building the first box using this length instead. Slide the short box next to the long box and screw them together. Push the frames back into the corner and screw them to the wall. Be sure to screw into the wall studs and use a level while screwing to make sure the frame goes in straight and even.
5. Reinforce Framing

Carla Wiking
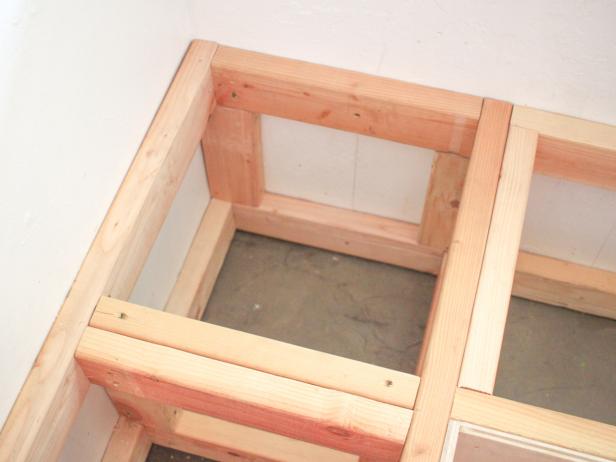
Carla Wiking
Cut seven 2x4 x 14-1/2” pieces and six 2x4 x 9-3/4” pieces to use as horizontal and vertical reinforcements. Install these supports where the two pieces intersect and also halfway from the end of the bench to the corner intersection (Image 1). Install the seventh 2x4 x 14-1/2” piece on the inside corner of the longer box (Image 2). This extra piece is needed to attach the corner benchtop.
6. Face Frame With Plywood

Carla Wiking
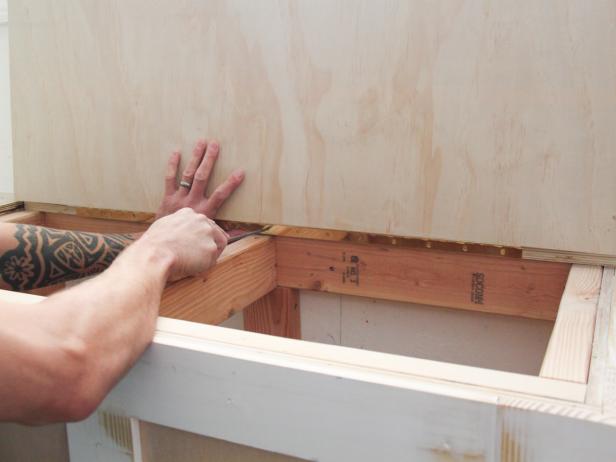
Cut two 17-1/2” x 16-3/4” pieces of 1/2” plywood, pre-drill, and screw them onto the ends of each box. Cut one piece of 1/2” plywood 16-3/4” tall and the length of the long face of the bench from the inner corner to the edge including the end piece of plywood you just installed. Screw this piece onto the long face. Measure and cut a 1/2” piece of plywood to cover the remaining shorter face and install.
7. Install Trim

Carla Wiking

Carla Wiking
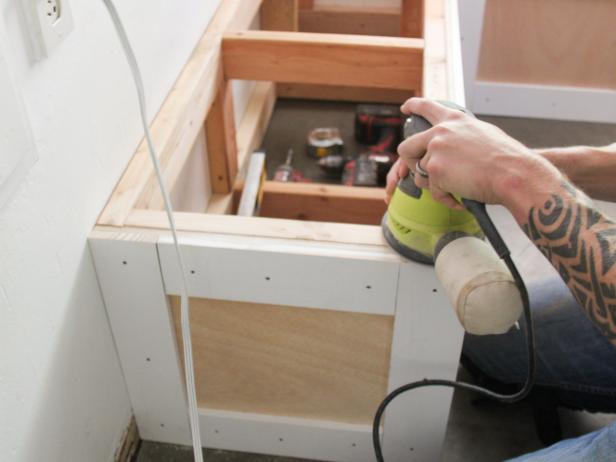
Carla Wiking
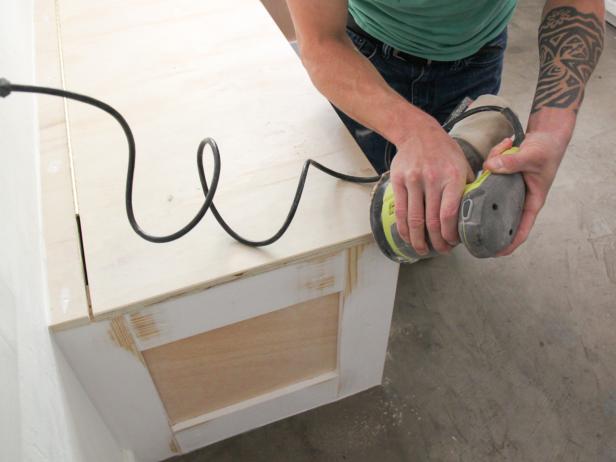
Cut the 1/2” x 3-1/2” primed trim into eight 16-3/4” pieces. Pre-drill and screw them vertically onto each edge and corner of the face of the benches (Image 1). Measure and cut eight trim pieces to fit horizontally between each of the vertical pieces. Then cut two 9-3/4” pieces to put vertically in the middle of each bench face (Image 2). Pre-drill before screwing to prevent the wood from splitting. Sand the top edges of the benches to smooth out any unevenness, this will help make sure the benchtops will sit flush (Image 3).
8. Prepare Lids

Carla Wiking
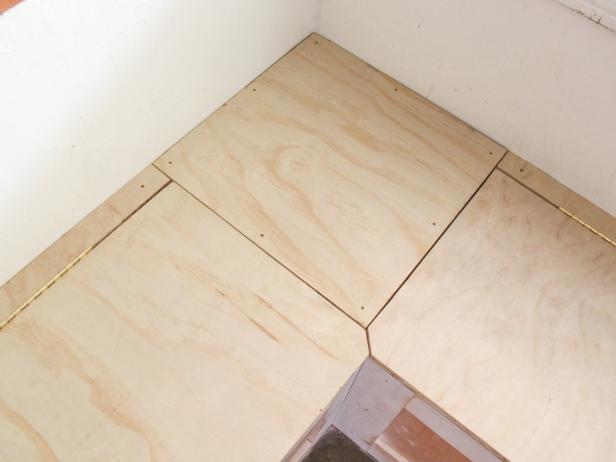
Carla Wiking
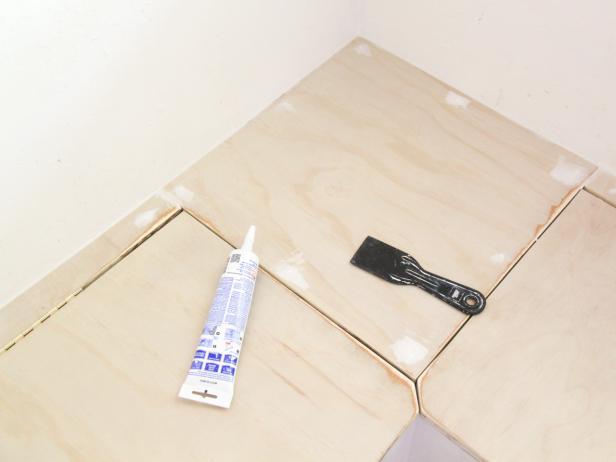
Cut a 17-5/8” x 17-5/8” square piece of 3/4” plywood and screw it down onto the corner of the bench (this piece will be stationary). Measure and cut two pieces of 3/4” plywood for the benchtop/lids. Each piece will be 16-3/8” x the length (the edge of the bench to the square piece in the corner). To make the stationary piece of benchtop that will go against the wall, rip a 1-7/8” piece lengthwise from each of the lid pieces and screw them face down along the wall on each side of the bench. Lay the remaining larger pieces of the lids face-up on the bench. Leave a 1/16” gap between the plywood pieces for the hinge. When the lid pieces are set, use a pencil to mark where you will need to cut a diagonal notch from the inner corners of the lids so they can close without overlapping.
9. Install Hinges

Carla Wiking
Carla Wiking
Center the piano hinges on the inner edges of the plywood lids, screwing them in by hand (Image 1). Start with the center screw so you can attach the hinge and then properly align the edges before putting in the remaining screws. Then lay the lids in the open position and screw the other side of the hinges to the 1-7/8” piece (Image 2). Close each lid to make sure everything is aligned.
10. Prep and Paint
Carla Wiking
Carla Wiking

Carla Wiking
Use a sander to smooth out any rough edges inside and out. Be sure to sand the faces of all the separate pieces of trim so they seem to form one solid surface. Vacuum and then wipe the surface to remove all dust. Fill all screw holes and hairline gaps with a paintable wood filler. Paint as desired.
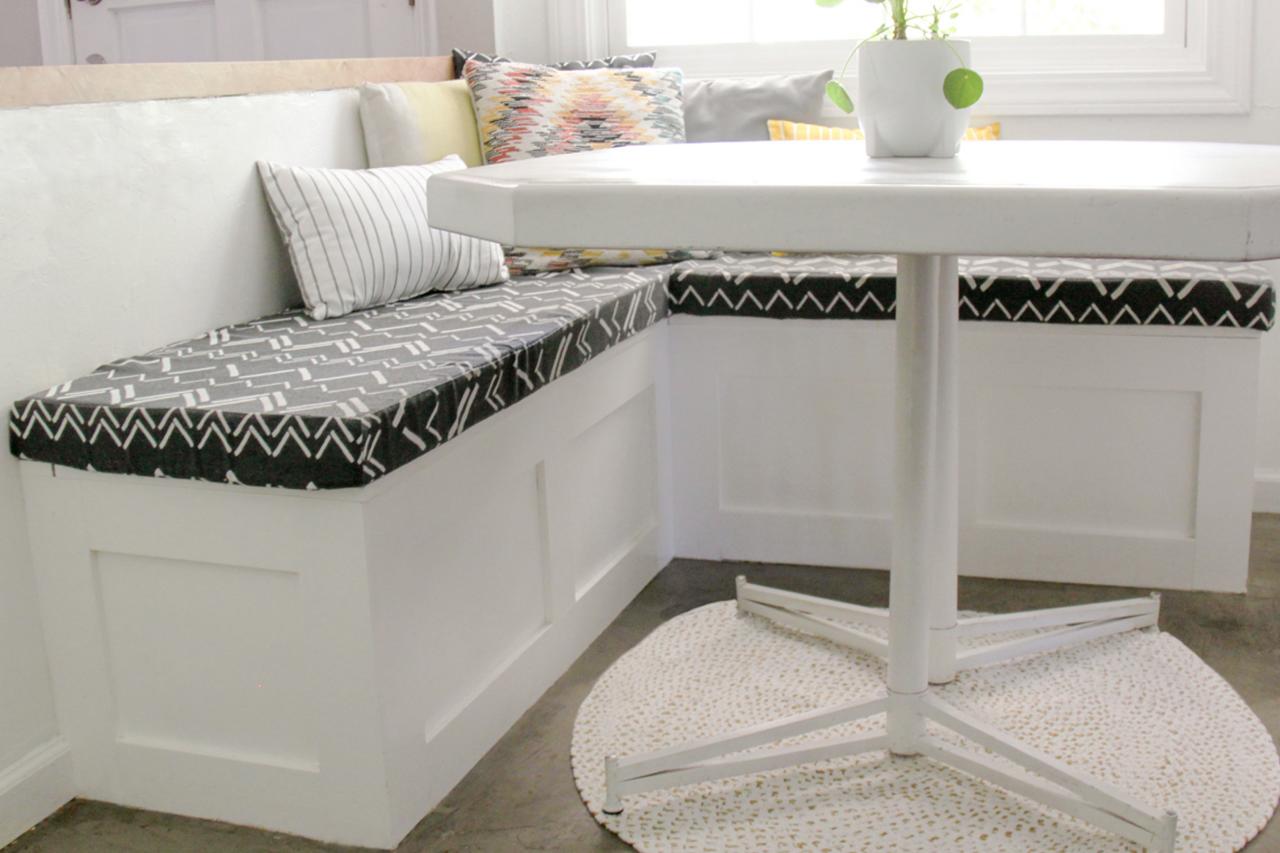
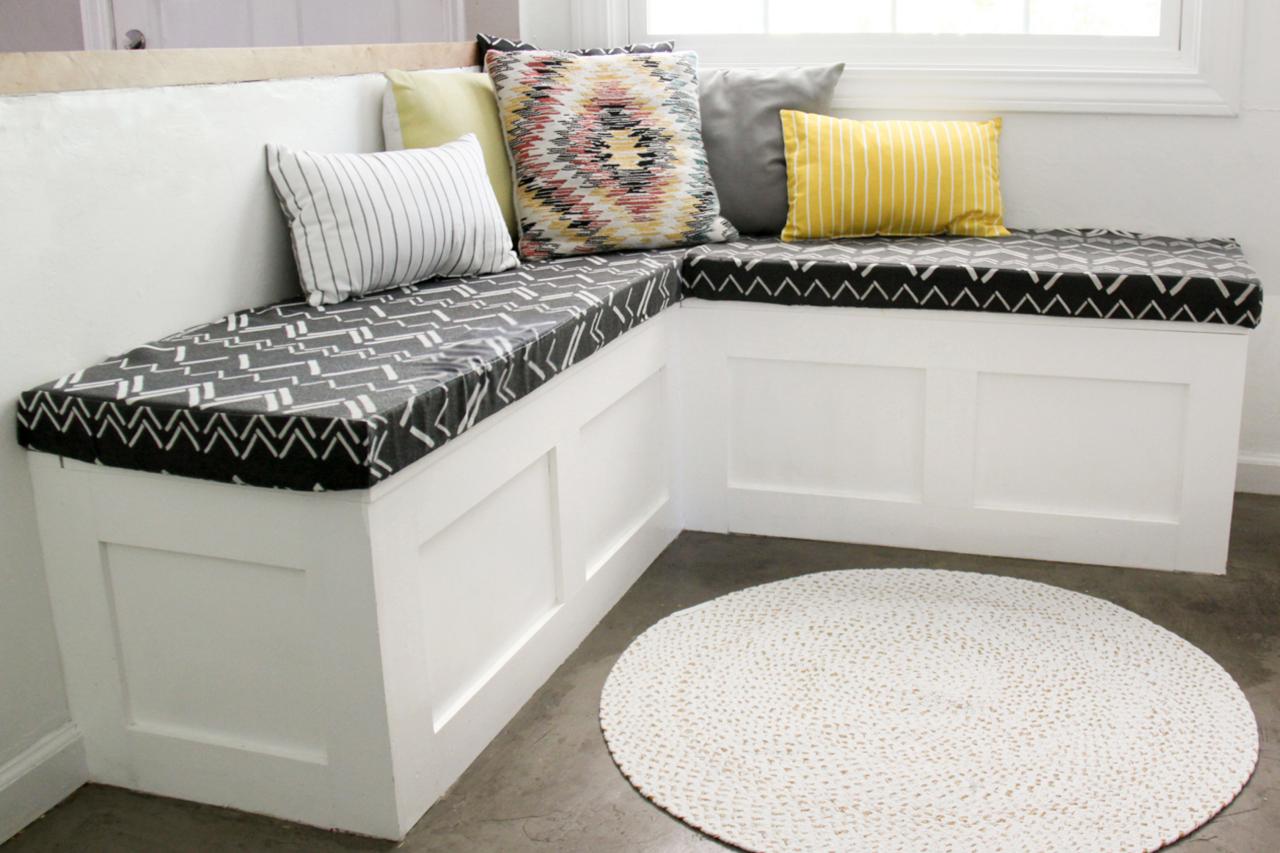
11. Stash Items
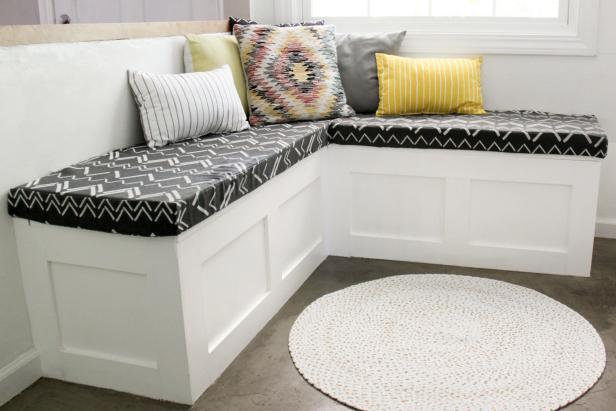
Use your new storage to free up space in your kitchen. For extra comfort, top the benches with cushions and enjoy your custom kitchen nook.

Sew a Simple Bench Cushion
See how you can turn a fabric shower curtain into an upholstered foam cushion with a machine-washable cover; perfect for a kitchen banquette, window seat or patio furniture.


