


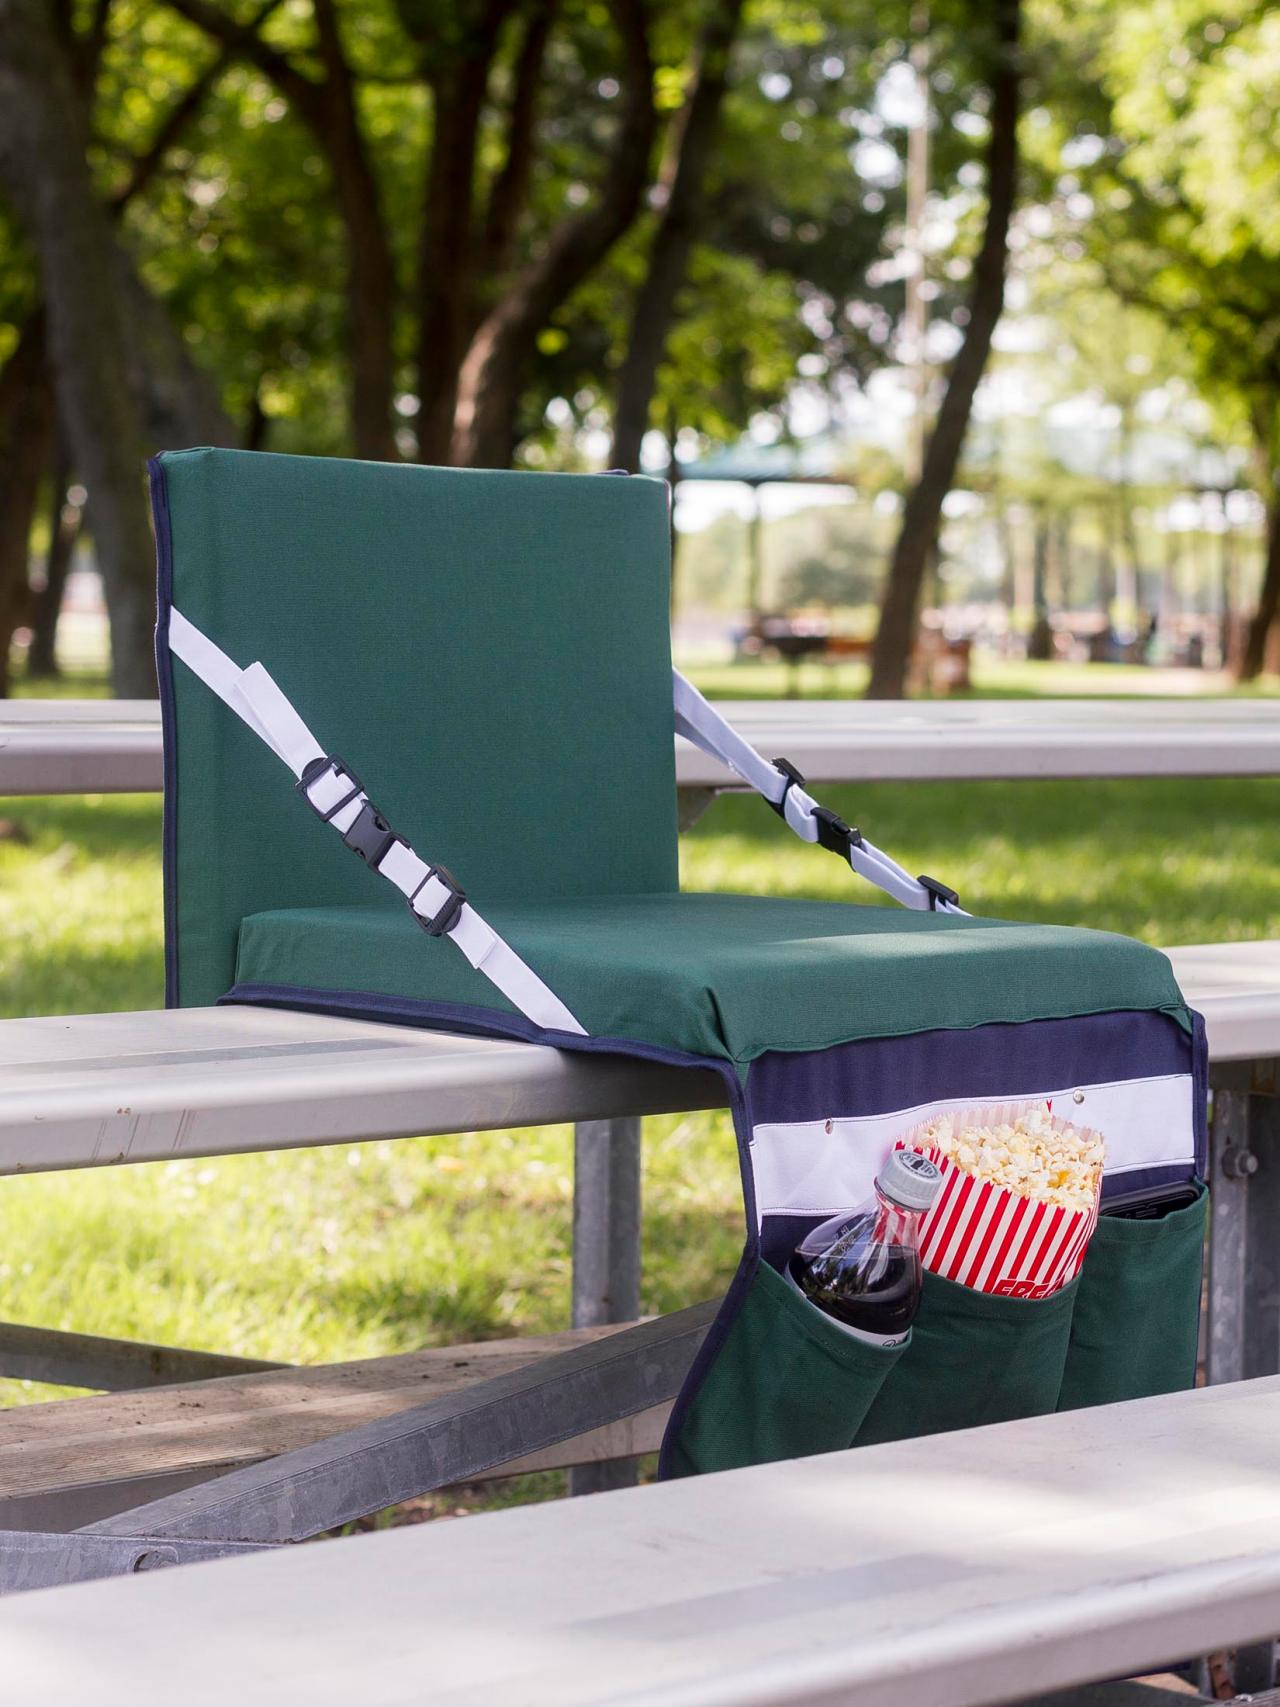
DIY Stadium Seating With Pockets
Create your own custom stadium seat complete with pockets made to suit your needs. Choose colors that support your team and sit in comfort.


Sam Henderson
This sewing project is simple and allows you to create a custom stadium seat to sit in comfort while you support your favorite team. Different from many stadium seats, this one is complete with pockets to hold drinks, snacks and even your mobile phone.
Materials and Tools
- (2) 15"x15" chipboards (get these cut at the home improvement store to save time)
- (2) 15"x15" high density foam pads, 2" thick
- spray adhesive
- electric knife (optional)
- 1-1/2 yards weather resistant cloth or duck clock for base color
- 2 yards weather resistant cloth or duck cloth for seat and pocket color
- 1/2 yard weather resistant cloth or duck cloth for strap color
- hook and loop tape
- (2) 3/4" strap buckles
- (4) 3/4" strap adjusters
- iron and ironing board
- corresponding thread
- sewing machine
- pins
- scissors or rotary cutter and cutting guides
- 1-1/2"leather strap (9-10 inches long)
- rivets and riveting tool for attaching leather strap
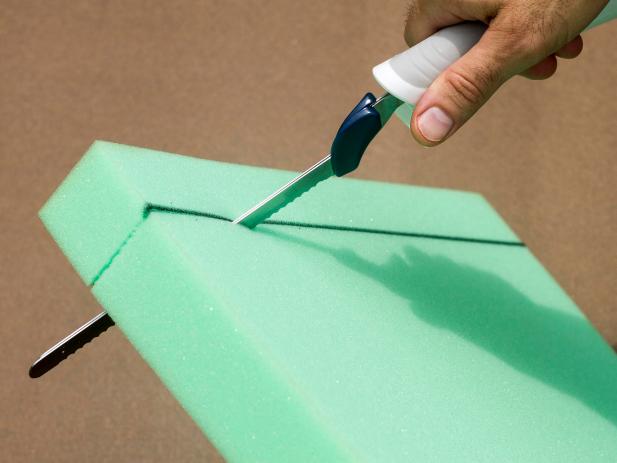
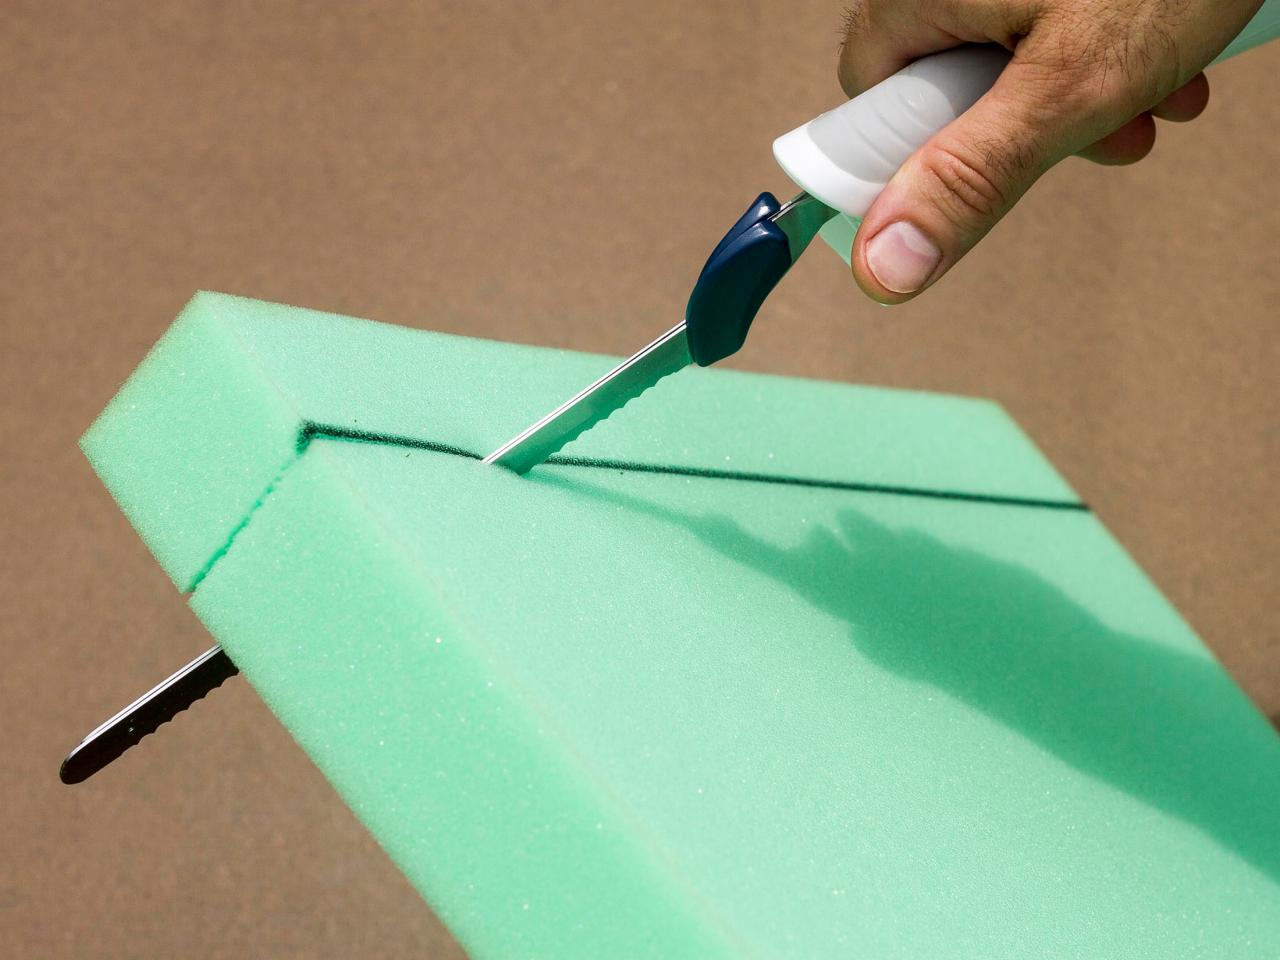
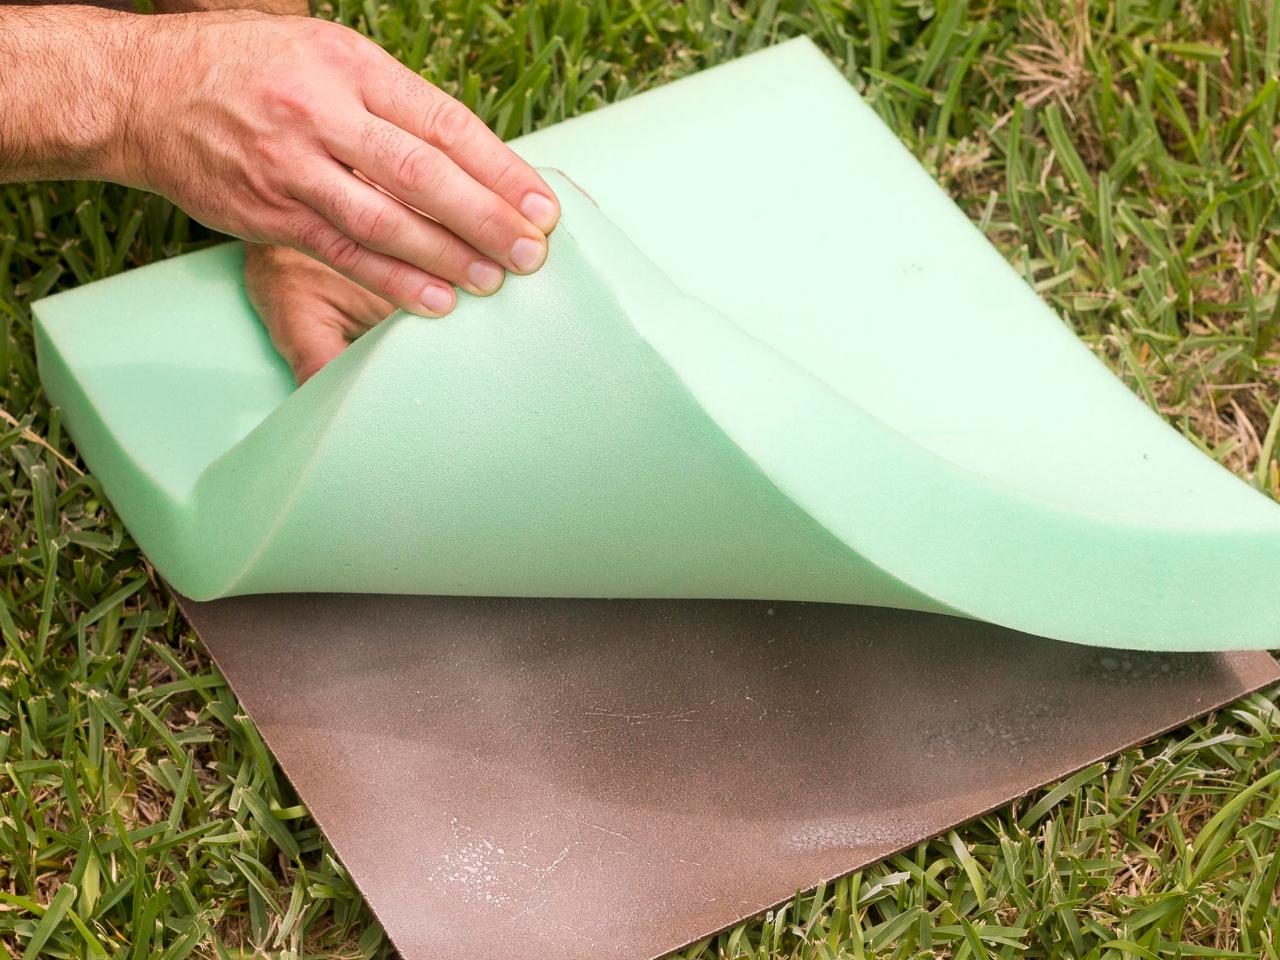
Creating the Cushions
Mark the foam to 15” x 15”. Cut the foam with an electric knife or a serrated knife to the measurements. Coat one side of the chipboard and one side of the foam with spray adhesive. Allow to rest one minute before lining them up carefully and pressing them together. Repeat for other foam and chipboard. Set aside.
Sam Henderson

Sam Henderson
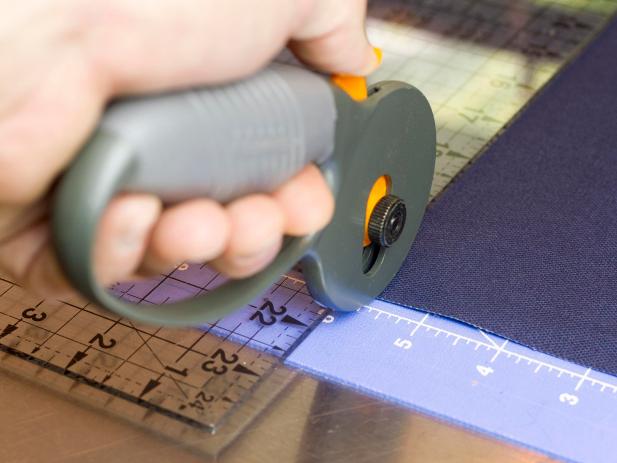
Creating the Base
Cut the base color fabric to 17-1/2” x 53” using scissors or a rotary cutter. Fold over each edge 1/2” and press in place. Then fold each edge 1/2” again and press in place. Do not sew.
Sam Henderson

Sam Henderson
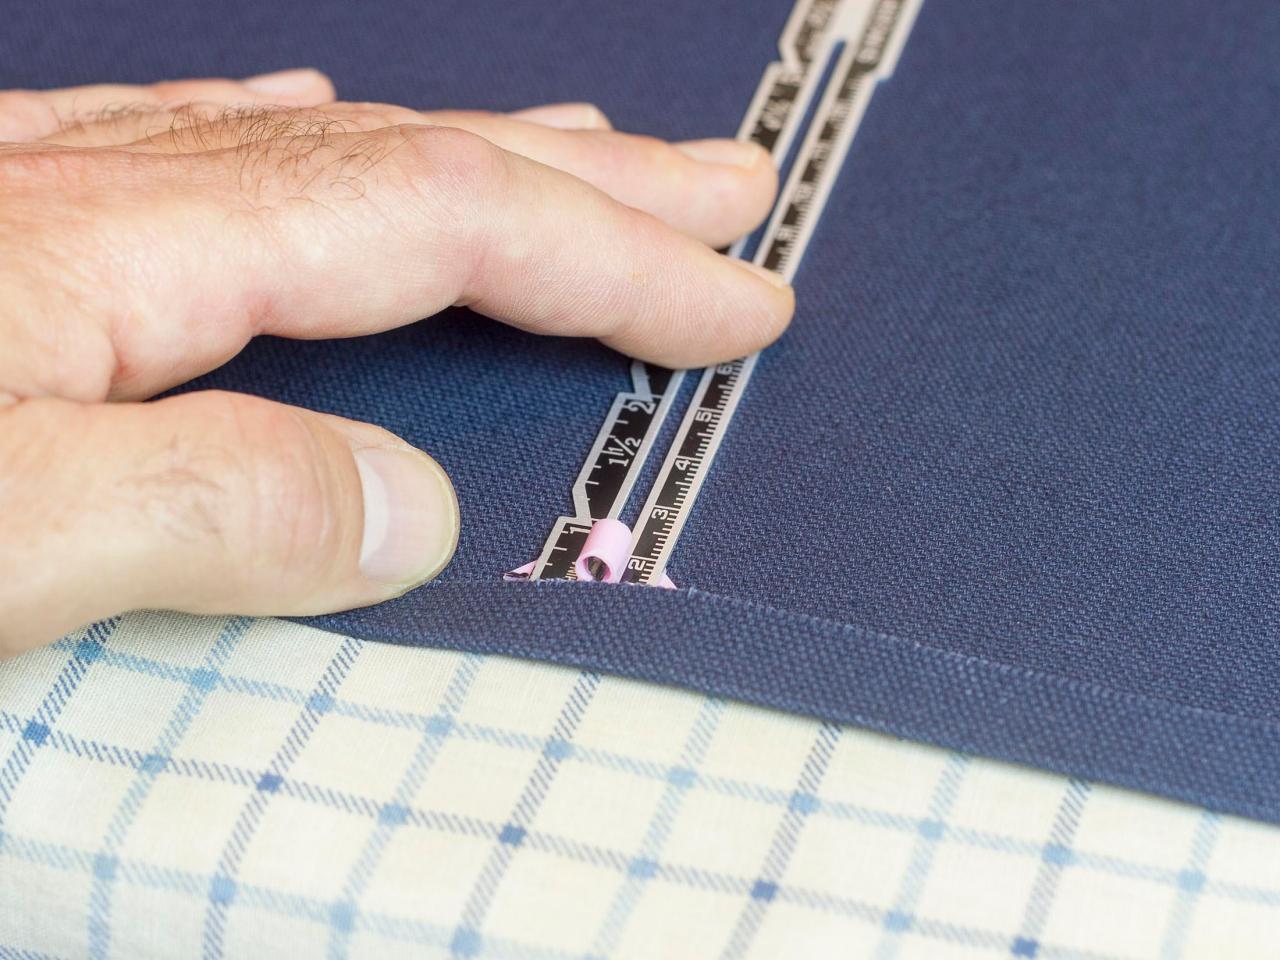
Creating the Cushion Covers
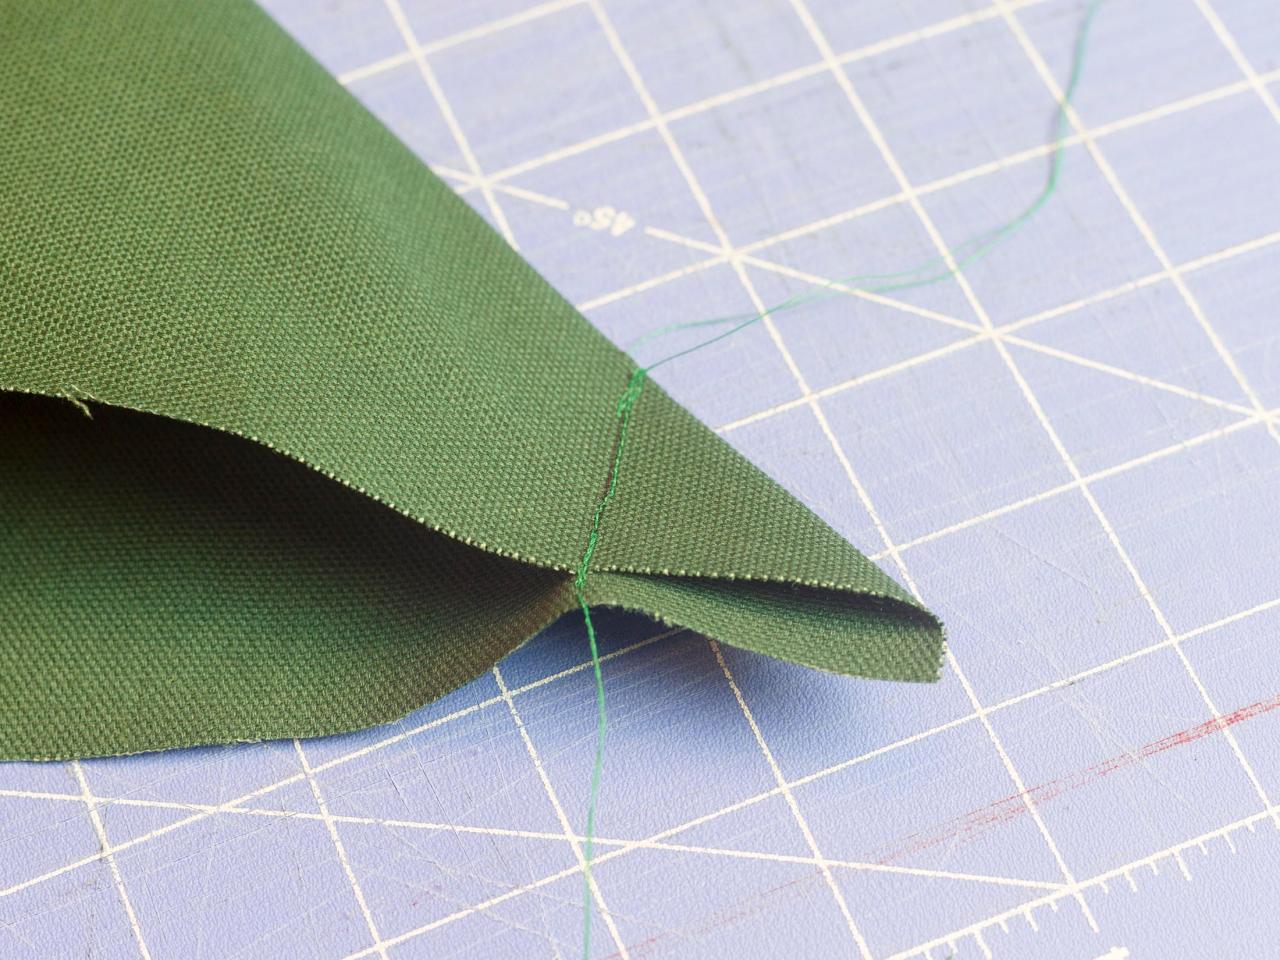
Cut two pieces from the seat cover fabric to 18-1/2” x 19". Make a mark in each corner of each piece that is 1-1/2” in from each side of the 18" edges and 2” in from each side of the 19" sides. Fold the 18" side over the 19” side creating a triangle. The 19” side should extend 1/2” beyond the 18-1/2” side. Sew a straight line from the 19" edge to the mark for that corner. Repeat for the other corners. Be sure to sew on the same side of the fabric for each corner. Cut way the excess fabric and turn the cover inside out with the seam on the inside.

Sam Henderson
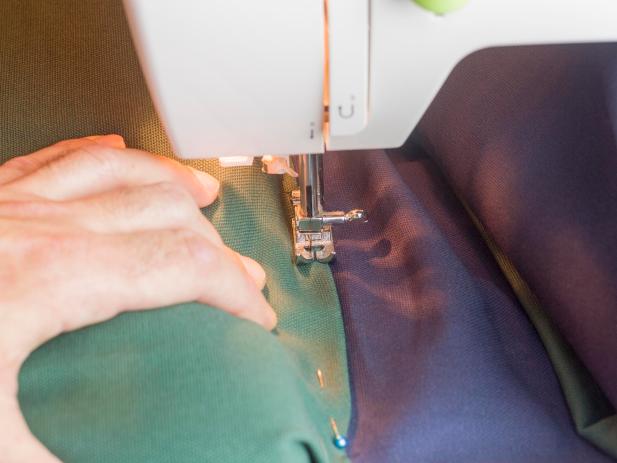
Attaching the Cushion Covers
Line the 18” edge of one of the cushion covers up with one short end of the base color fabric. Insert the cushion cover under the fold of the base fabric and pin in place at the end and on the sides leaving the opposite end open to insert the cushion later. The open end should be folded under 1/2” and placed under the fold of the base fabric. Sew the cushion cover in place.

Sam Henderson

Sam Henderson
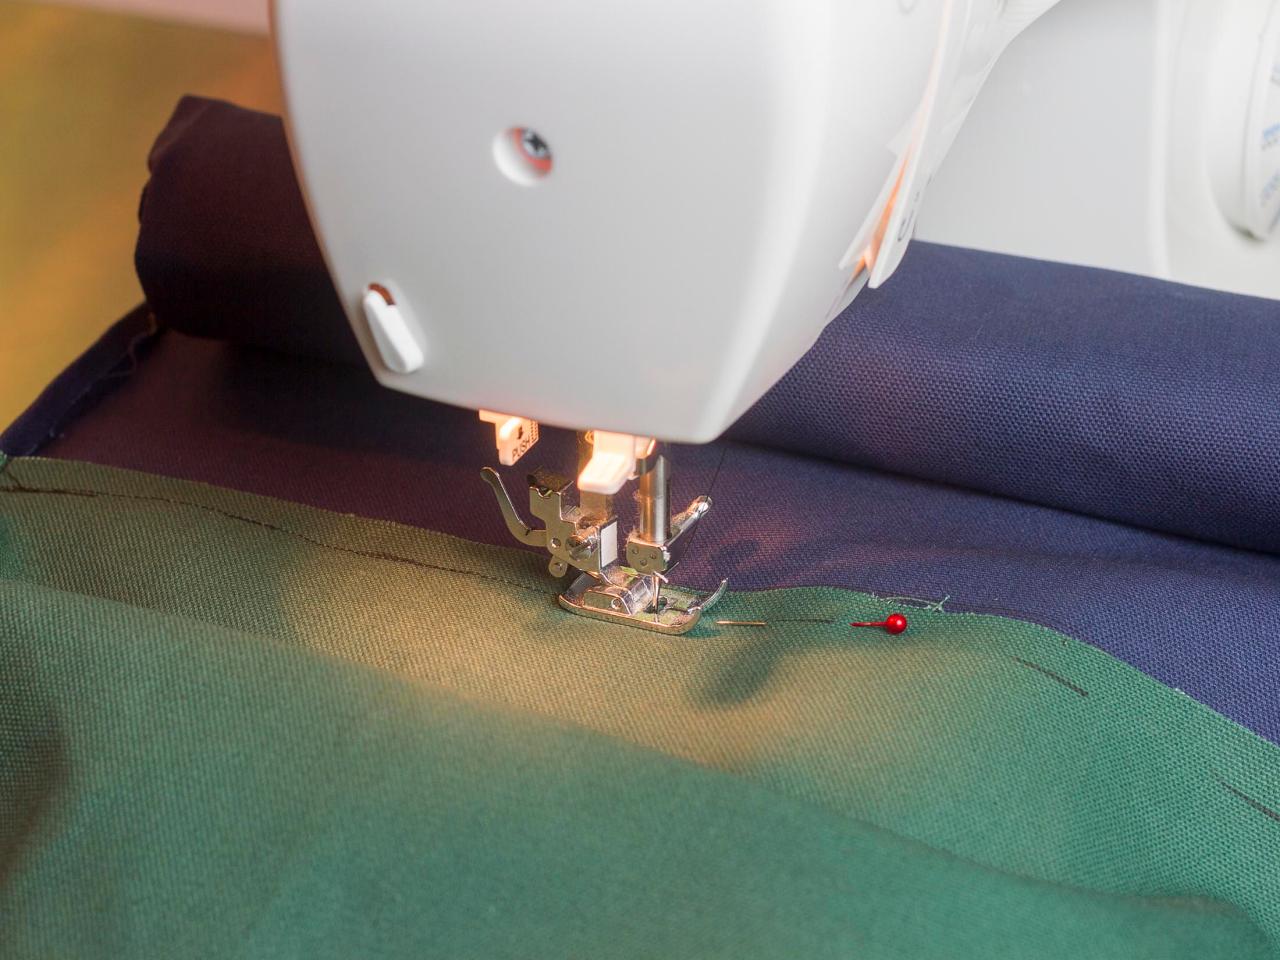
Mark a spot on the base fabric 3-1/2" from the bottom of the first cushion cover on both sides. Lay one of the 18” edges of the second cushion cover on the base fabric with the edge pointing away from the first cushion cover and with the inside of the cushion cover facing up. Pin in place and sew with a 1/2” allowance just between the folds. Do not sew on the folds. Flip the cushion cover over, insert the sides under the folds of the base fabric and pin in place. Fold over the open, bottom edge 1/2”. Sew the second cushion cover in place along the fold of the base fabric, leaving the bottom open to insert cushion later.
Attaching the Pockets
Cut a piece of fabric for the pocket to 7-1/4” x 22”. Fold over one long edge of the fabric 1/2” and press in place. Fold it over 1/2” again and press in place. Sew a seam very close to the edge of the fold to secure the fold. This will be the top of the pocket. Fold over the opposite long edge 1/2” and press in place.

Sam Henderson
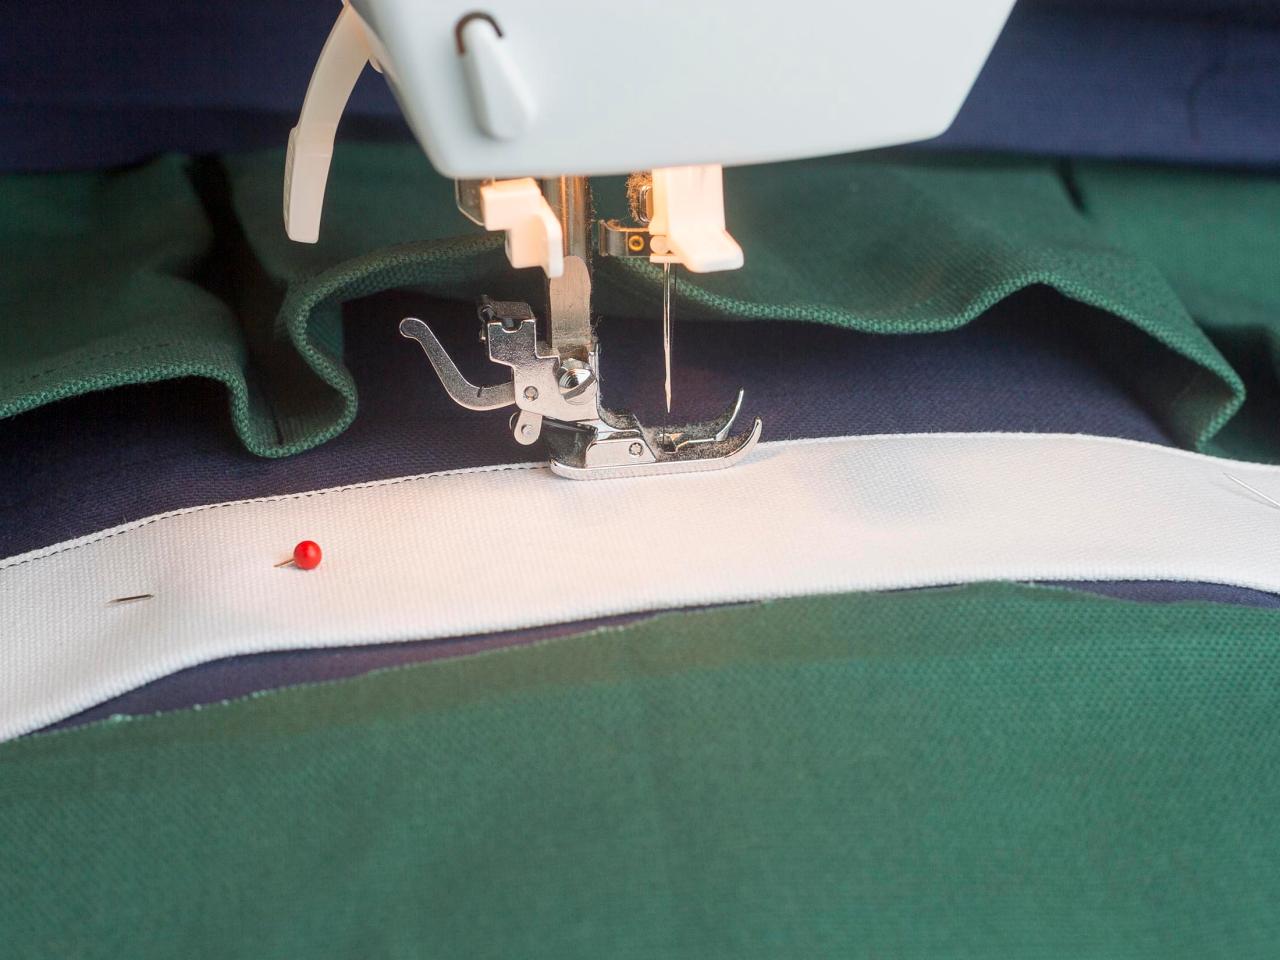
Mark a point of both sides of the base fabric 9-1/4” from the bottom of the second cushion cover. Insert the short edges of the pocket fabric under the fold of the base fabric with the top of the pocket starting at the marks you’ve made. Pin and sew in place on the base fabric fold.

Sam Henderson
Measure 7-1/4” of pocket fabric from both sides. At the top and bottom of the pocket fabric, pin that spot in place on the base fabric, 4-1/2” in from the side edges of the base fabric. Sew a line from the top to bottom of the pocket fabric at these points, creating humps. Fold over the side of each hump to flatten them at the bottom. The folds should meet at the sides of the base fabric fold and at the edge of the divider lines previously sewn. Pin these folds and sew in place close to the bottom edge of the pockets. Backstitch over the folds for durability.

Sam Henderson
Attaching the Handle Reinforcement
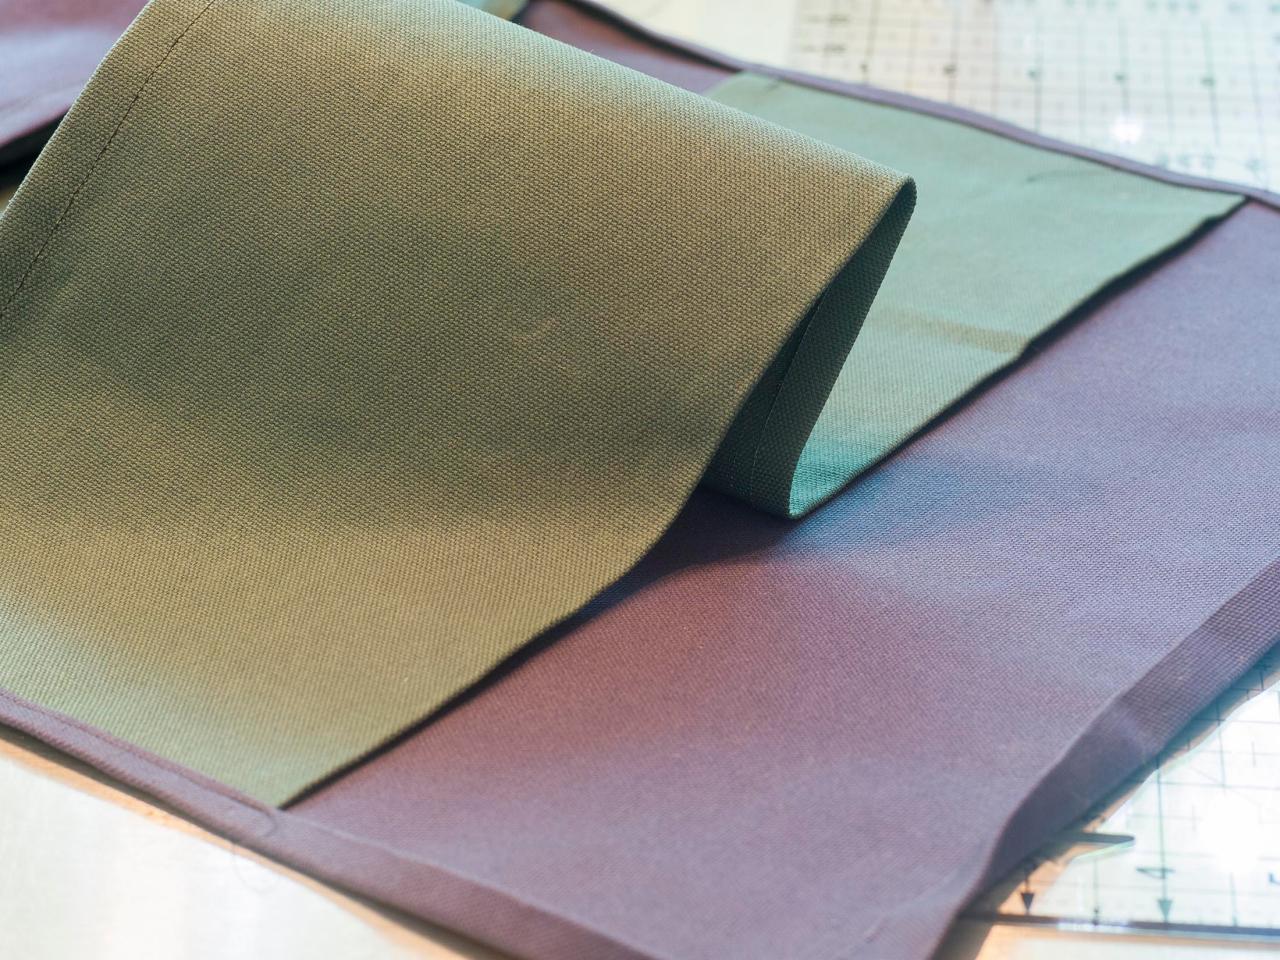
Cut a piece of strap fabric to 8” x 15-1/2”. Fold it in half lengthwise and press it. Fold both raw, long edges into the center to meet at the crease and press. Fold the two sides together with the raw edges on the inside. Press again.
Sew a seam along the long, open edge, very close to the edge.
Center this piece between the bottom of the second cushion and the top of the pockets, inserting the sides under the fold of the base fabric. Pin and sew in place on all edges.

Sam Henderson

Sam Henderson
Adding the Straps
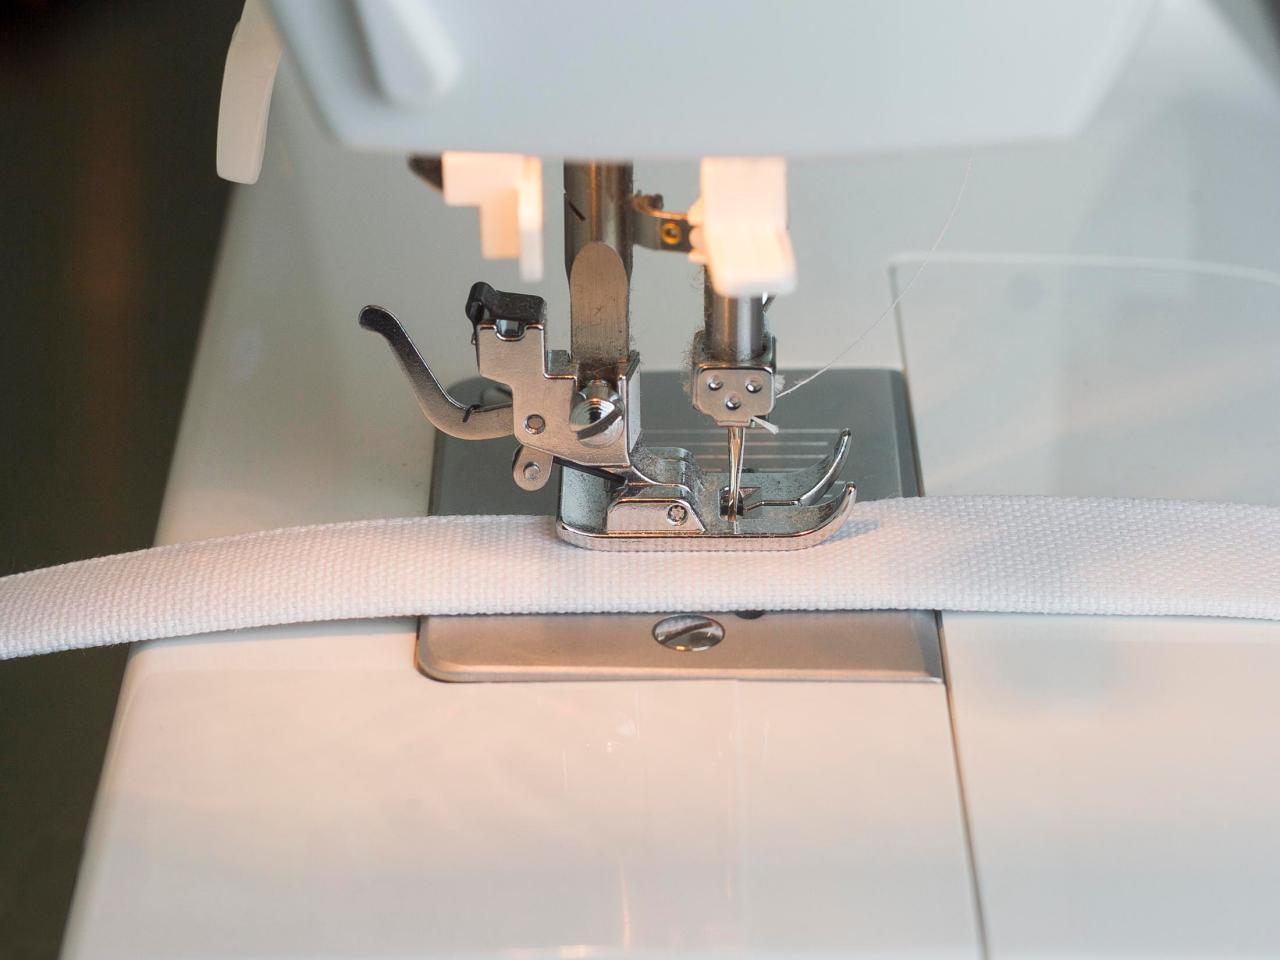
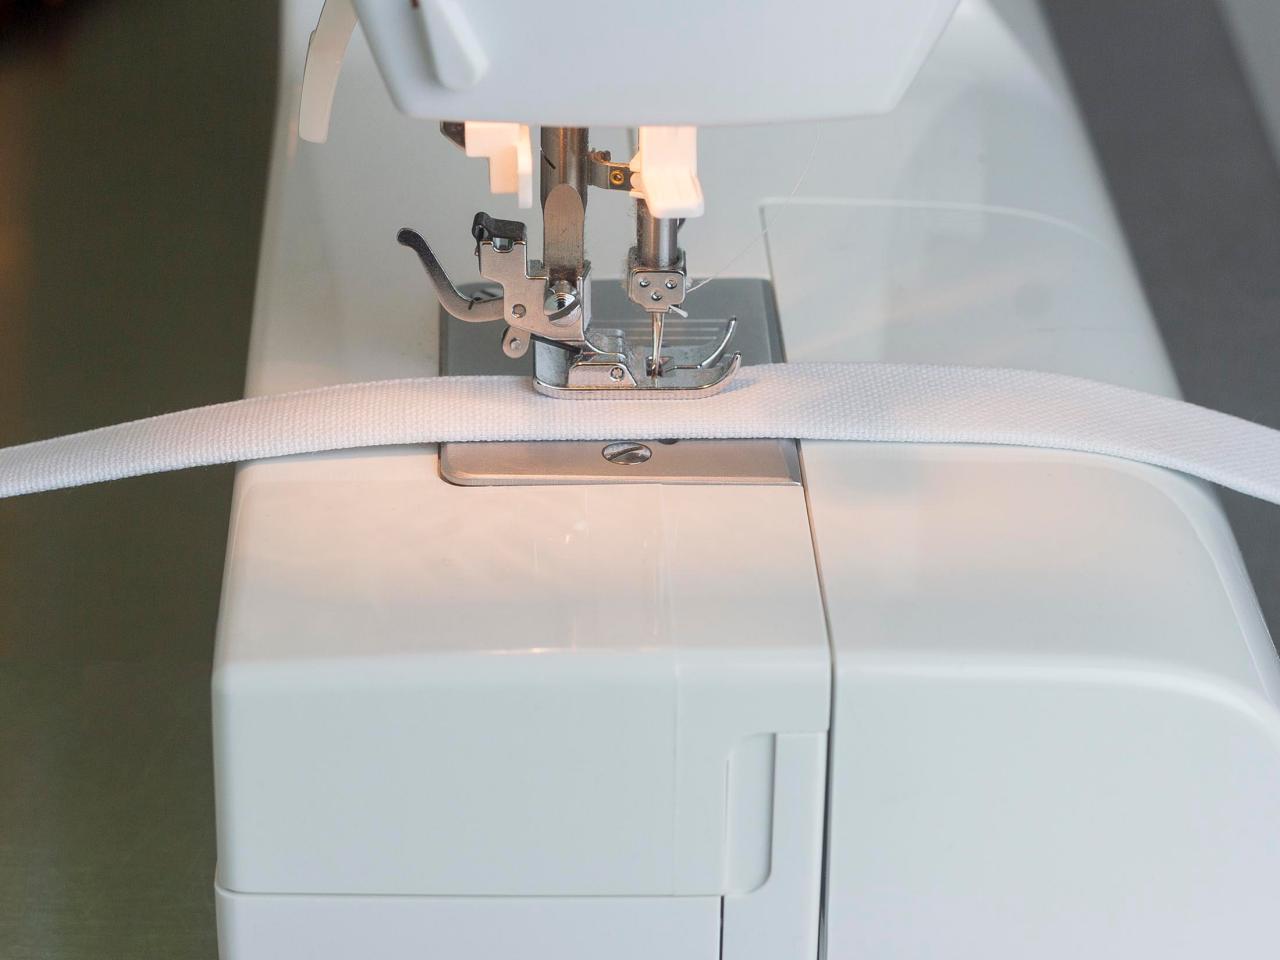
Cut two pieces of strap fabric to 3” x 24”. Fold one in half lengthwise and press it. Fold both raw, long edges into the center to meet at the crease and press. Fold the two sides together with the raw edges on the inside. Press again. Cut the piece in half creating two 12” pieces. Sew a seam along the long open edge, very close to the edge. Sew one end of each piece closed. Cut the opposite end of each at a 45-degree angle. Repeat for other 24” piece of fabric.

Sam Henderson
On the sides of the second cushion cover, remove 1-1/4” of stitches beginning at 4-1/2” from the bottom of the cover. Insert the angled ends of the straps in these spaces, with the opposite ends pointing toward the first cushion cover. Pin and sew in place, backstitching for durability.

Sam Henderson
On the sides of the first cushion cover, remove 1-1/4” of stitches beginning at 3” from the top of the cushion. Insert the angled ends of the straps in these spaces, with the opposite ends pointing toward the second cushion cover. Pin and sew in place, backstitching for durability.

Sam Henderson
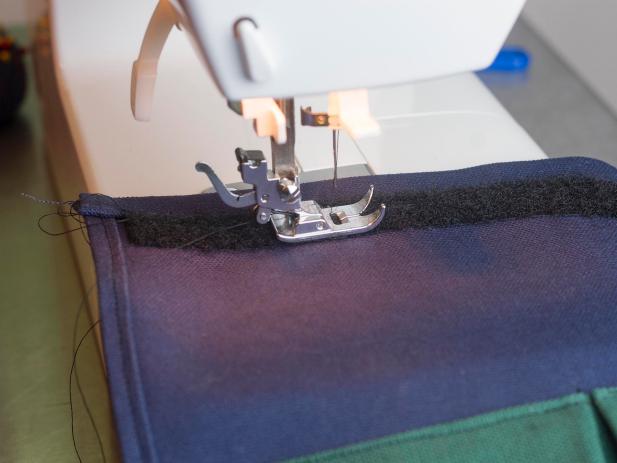
Finishing the Base
Add soft side of hook and loop tape to the bottom of the base fabric, just above the bottom fold by sewing it in place.
Sew any parts along the fold of the base fabric which have not already been sewn.
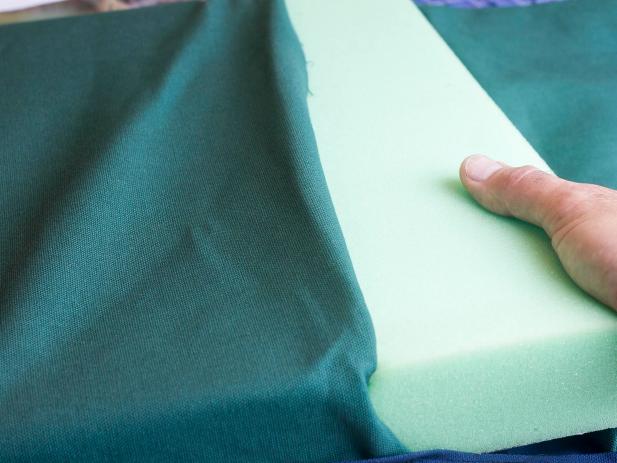
Insert cushion into the first cushion cover. Fold the bottom edge under at least 1/2”. Pin and sew in place, double stitching at ends for durability. Add second cushion to cushion cover and repeat pinning and sewing.
Sam Henderson
Sam Henderson
Sam Henderson
Press the opposing side of the hook and loop tape to the attached side. Fold the cushions together and fold the pocket flap over. Determine the position of opposing hook and loop tape and mark it. Attach the opposing side of the hook and loop tape with fabric glue or by hand stitching.
Remove any excess threads on entire project.
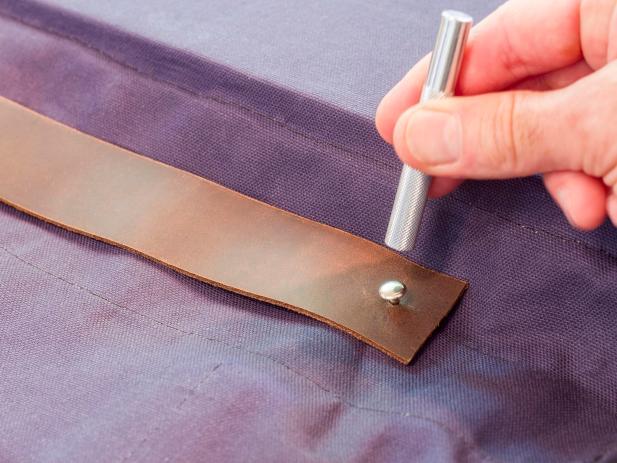
Finishing Touches
Center the leather strap on the back side of the base fabric over the reinforcement added earlier. Use rivets and a rivet tool to secure the leather strap in place.
Sam Henderson
Sam Henderson
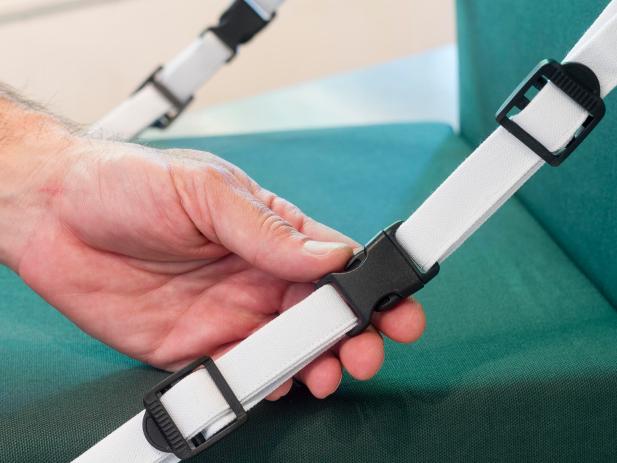
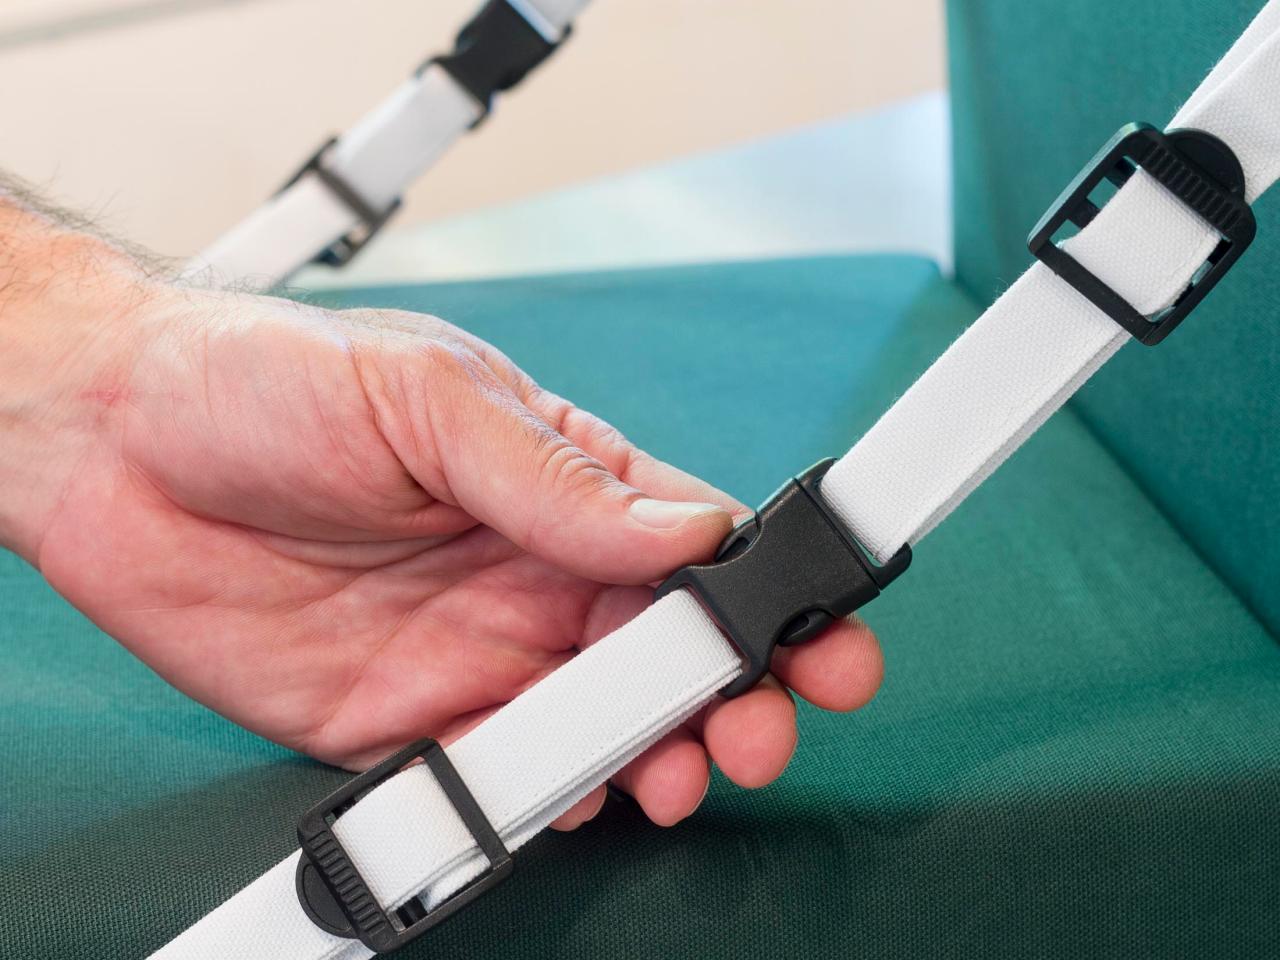
Add buckles and strap adjusters to the straps. Adjust as necessary to make seat back sit upright.

Sam Henderson


