


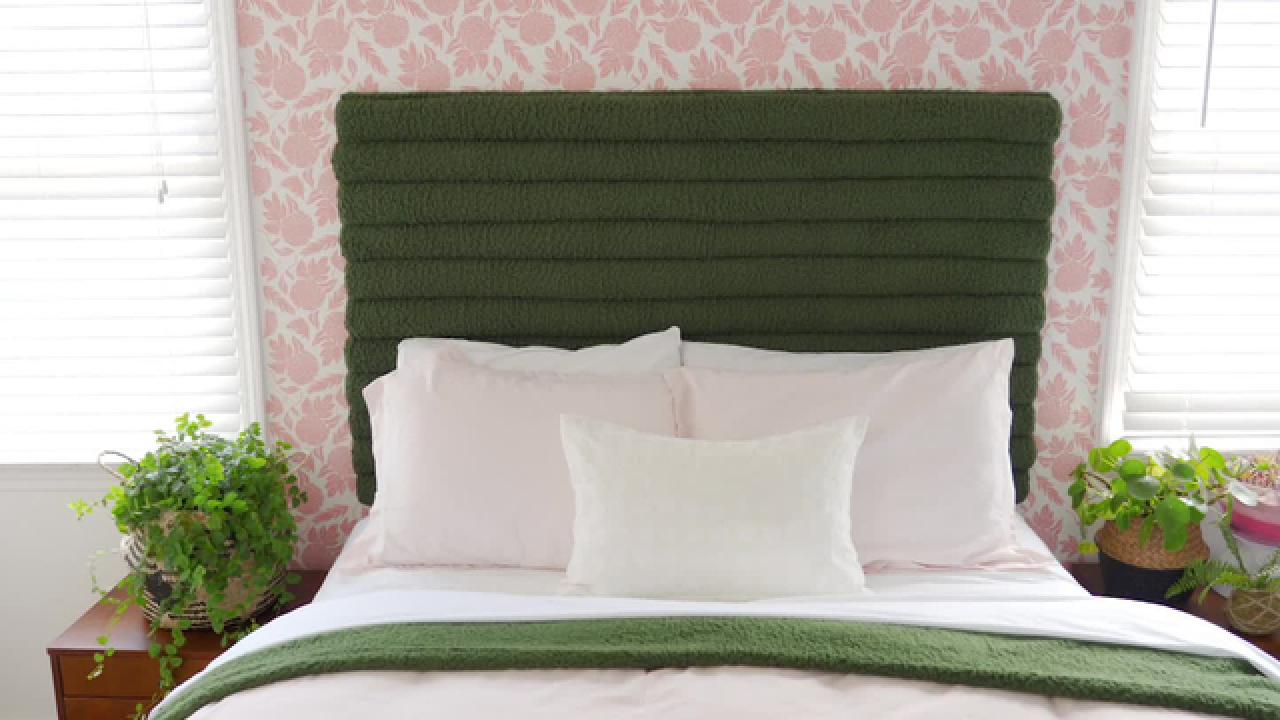
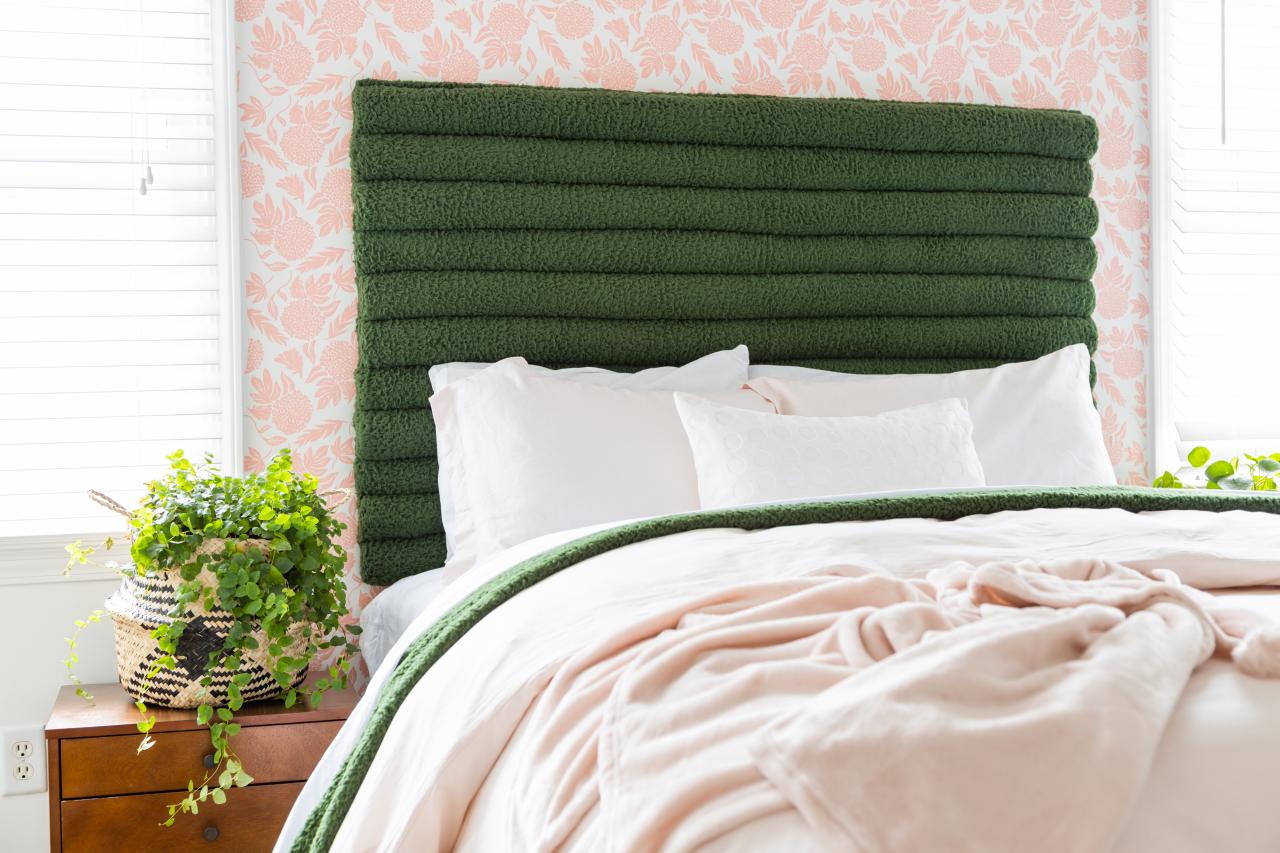
How to Make a DIY Tufted Headboard From Pool Noodles
Pool noodles in the bedroom? Yes, it sounds sketchy but trust us — if you can handle a staple gun, you can make this dreamy DIY headboard. Dive on in!

Materials Needed
- pool noodles
- 1/4” plywood (cut to size in store)
- blanket (or fabric)
- electric knife
- staple gun +1/4” staples
- duct tape
- removable adhesive strips
- utility knife
- permanent marker
- tape measure
- construction adhesive
- caulk gun
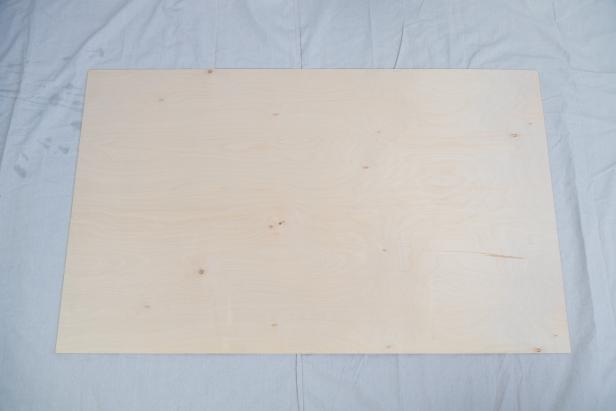
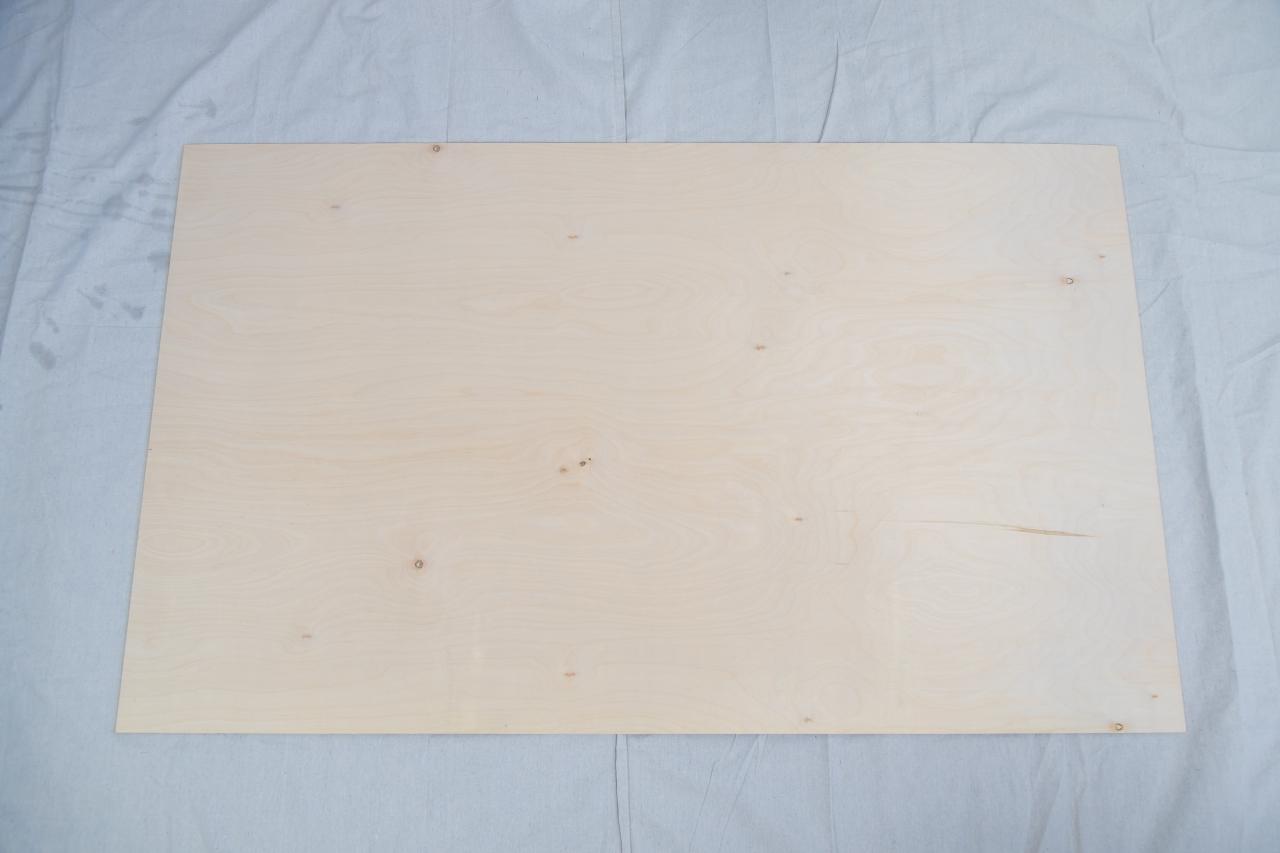
1. Measure and Cut Plywood
First, determine the headboard's desired width and height. For the board's width, add 4 inches to the width of your mattress. For the height, ours is 4' tall; for your space, you may want to create a headboard that's taller or shorter. Plywood comes in 8’x 4’ sheets, so while you’re at the store, have the board cut to your desired size.
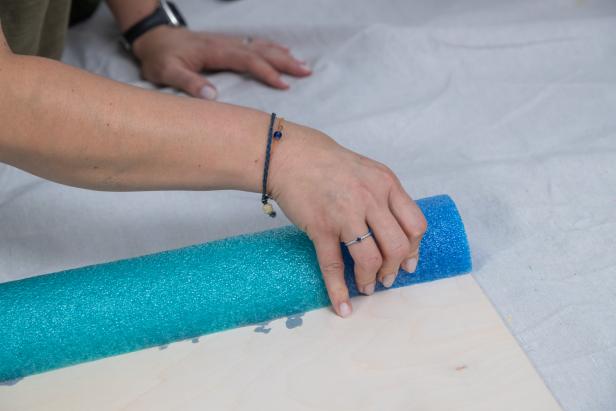
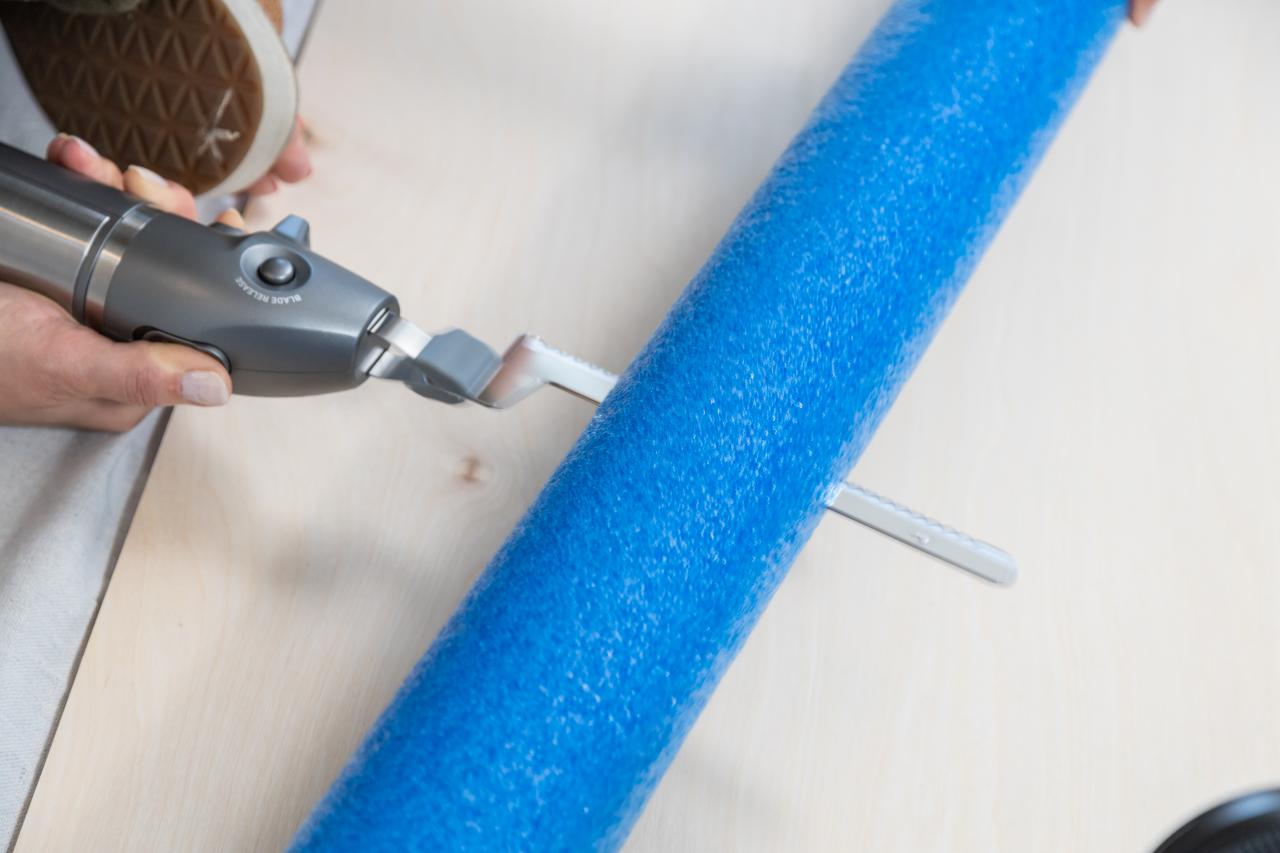
2. Cut Noodles
Use an electric knife to slice all the pool noodles in half lengthwise, so they'll lay flat against the plywood. Temporarily place cut noodles on the board to asses any gaps. Then, use the electric knife to cut any necessary smaller pieces to fill in gaps.

3. Trim Blanket
Trim the blanket to allow 8" of extra fabric on either side of the headboard, so it's easier to work with during the upholstering process. Leave the length as is — you'll need extra fabric to accommodate the channel tufting upholstered effect.

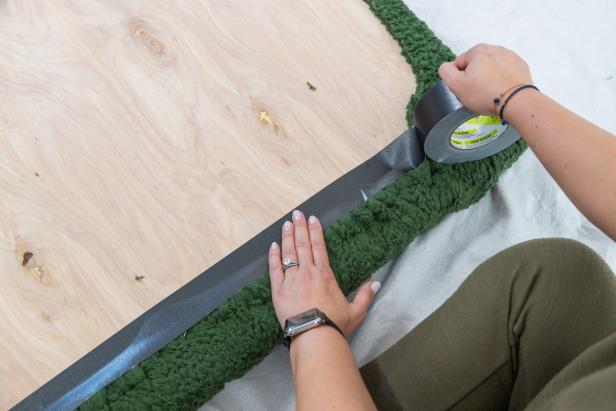
4. Attach Top Row
Apply construction adhesive to the flat side of the first row of noodles, then align them with the top edge of the plywood and hold in place for a few seconds. If you're concerned about the noodles shifting until the adhesive is dry, use duct tape to keep them in place.
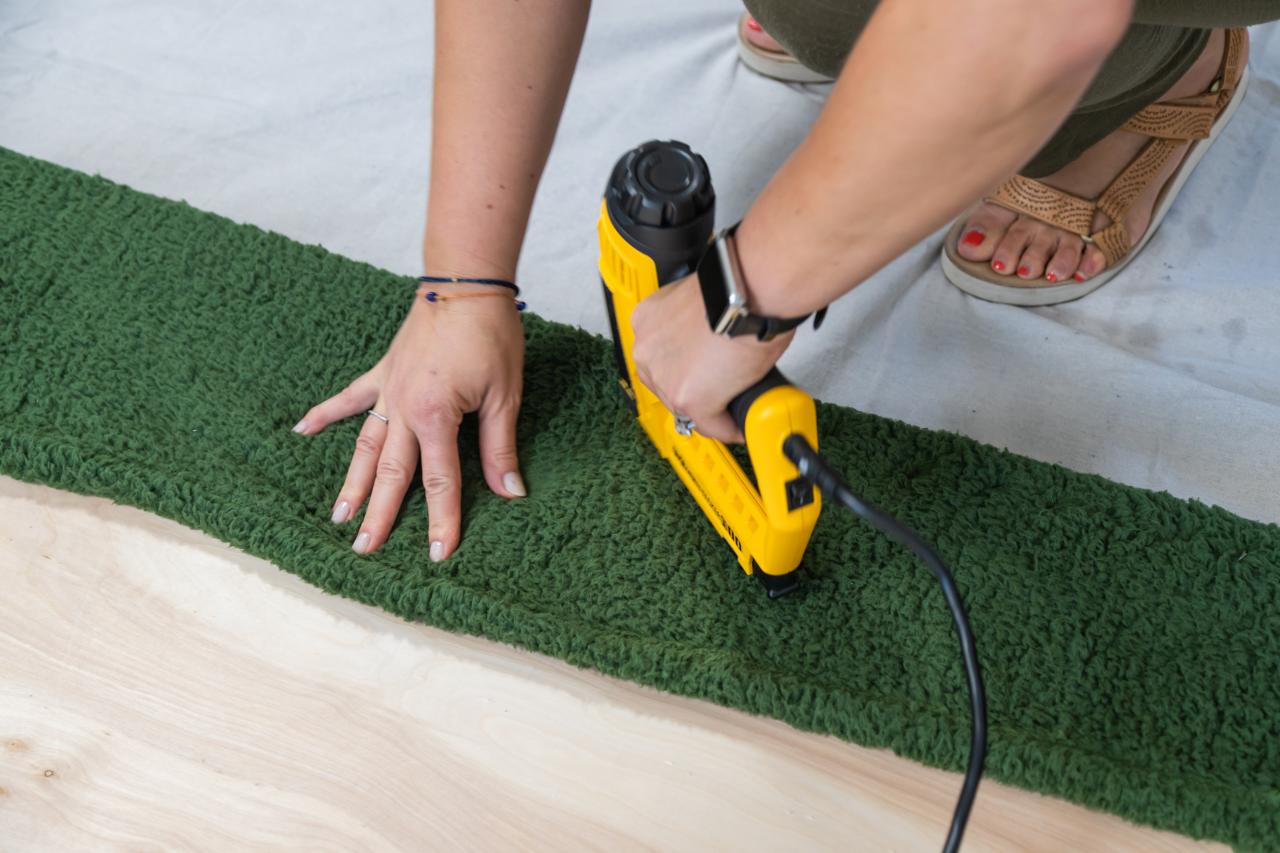
5. Attach Blanket
Next, staple the top edge of the blanket along the backside of the plywood. If you’re using a one-sided or directional fabric, make sure it's correctly oriented so the "good side" hangs as intended when flipped over to the front of the headboard.

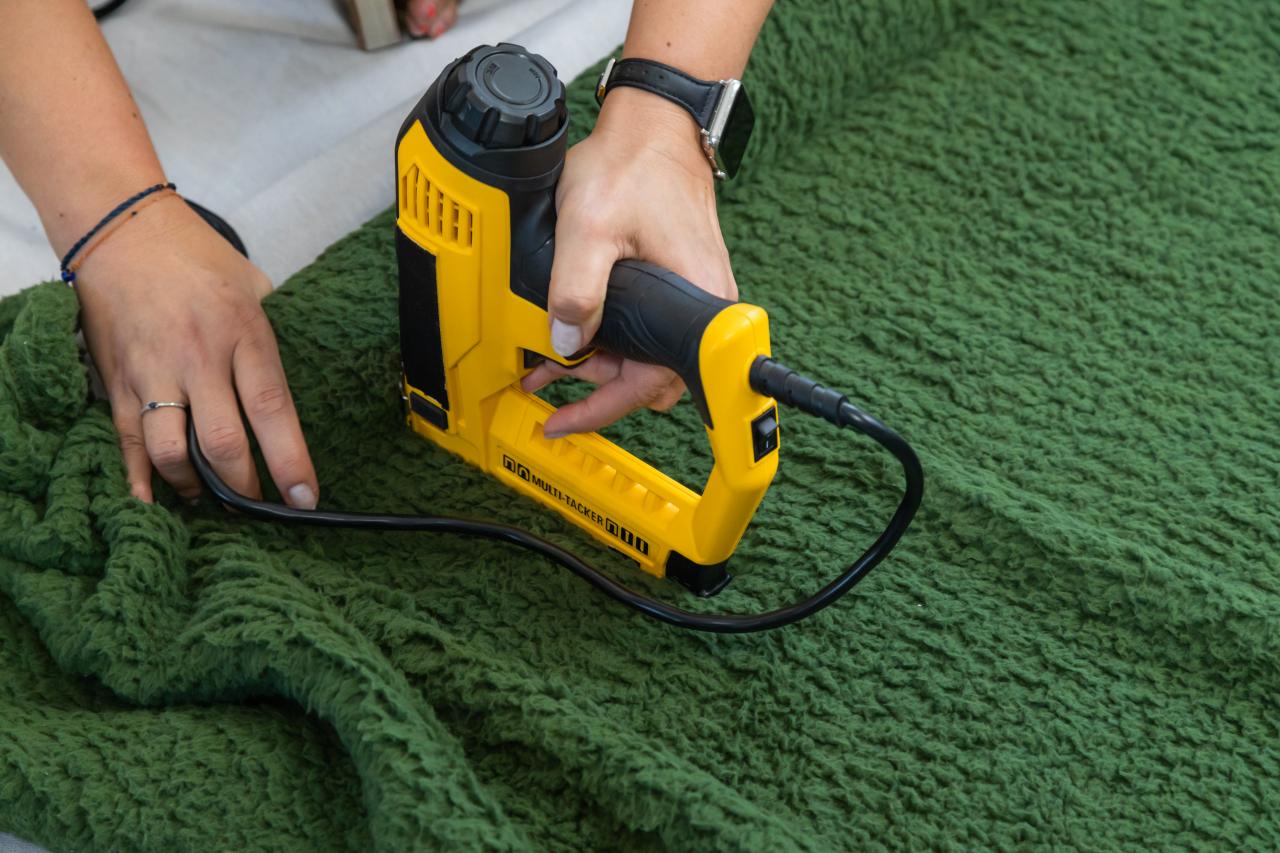
6. Cover Top Row
Once secure, flip the blanket back over to the front, snuggly wrapping the top row of noodles. Staple the blanket across the width of the headboard, getting right up under the noodle.

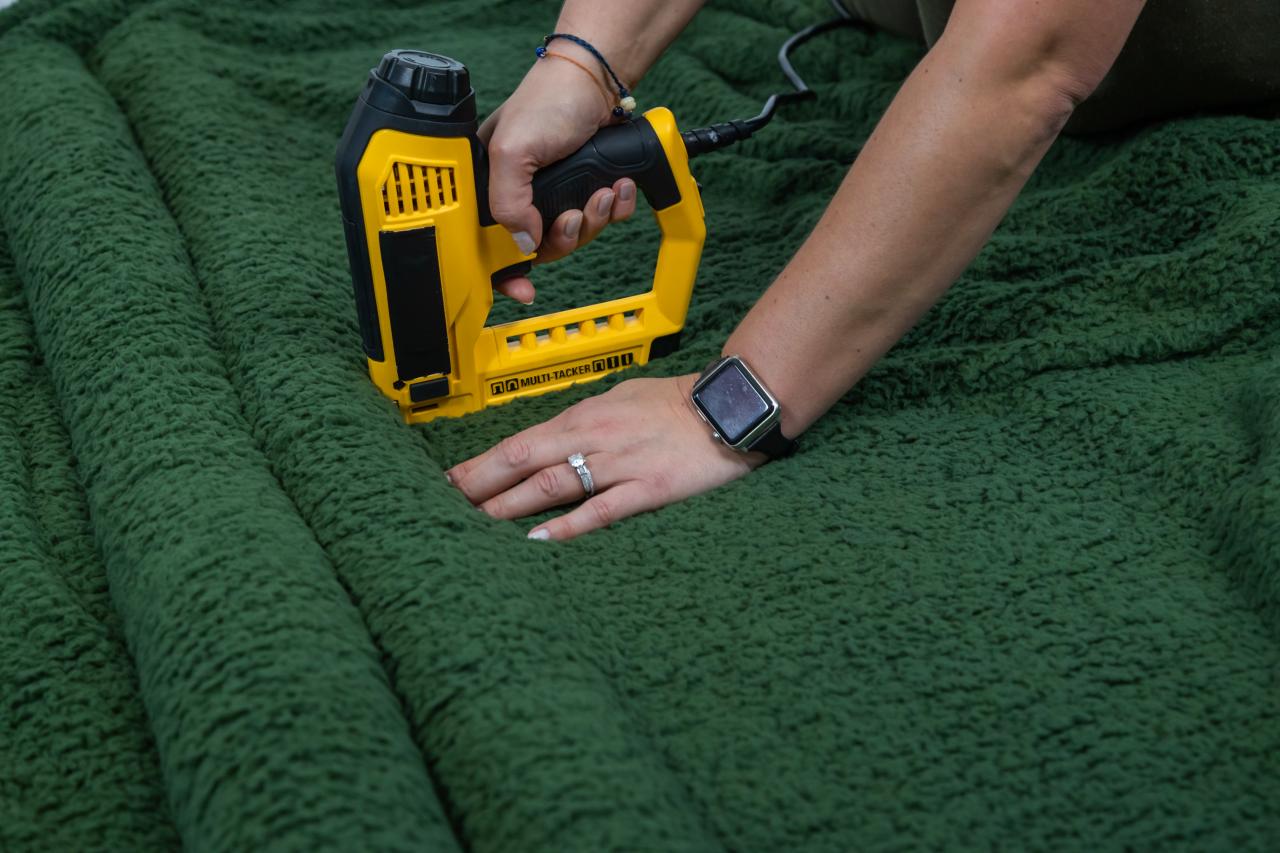
7. Continue Upholstering Headboard
Continue the upholstery process by flipping the blanket to the back and out of the way, applying the next row of noodles with adhesive, then flipping the blanket back to the front to cover the new row of noodles, then stapling the blanket in place. Continue the process until you reach the plywood's bottom edge.

8. Staple and Trim
Along the headboard's bottom and sides, tightly wrap the remaining fabric to the back of the plywood, then secure with staples.
9. Clean It Up
Trim excess fabric from the backside of the headboard to eliminate bulk, then tape down the raw edges.
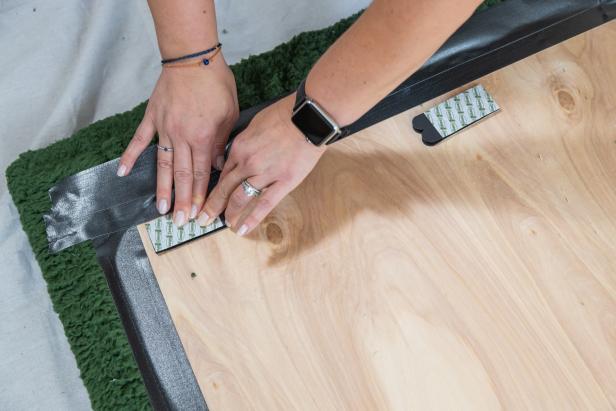
10. Add Adhesive Strips
Add several sections of removable adhesive to the back of the plywood, removing the paper backing from the "wall side" strips, to ready the headboard for installation.
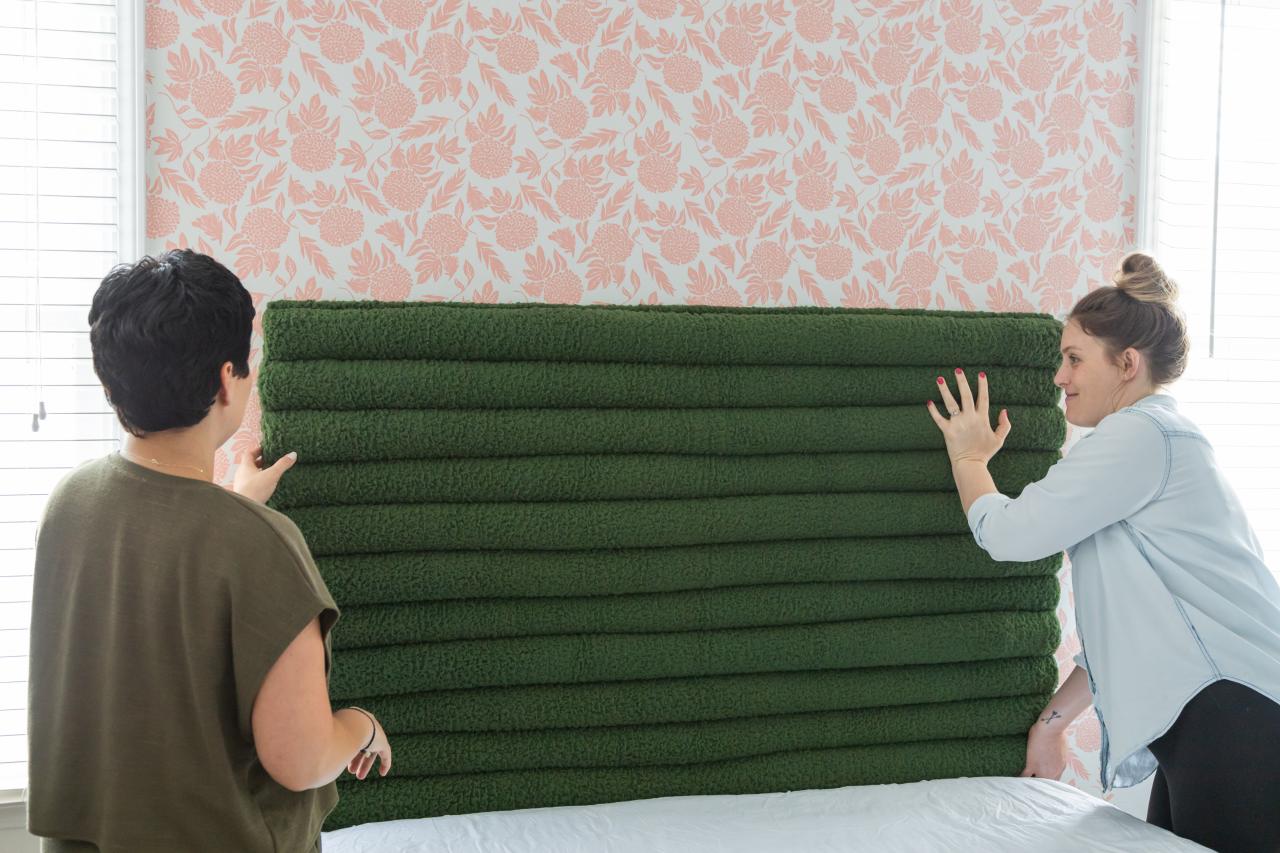
11. Hang Headboard
With a friend, carefully position the headboard, pressing it firmly to the wall. Hold for a bit, while the adhesive strips set.


