


How to Make Decorative Lanterns From Dollar Store Picture Frames
These farmhouse-inspired accessories are as easy to make as they are pretty to look at.
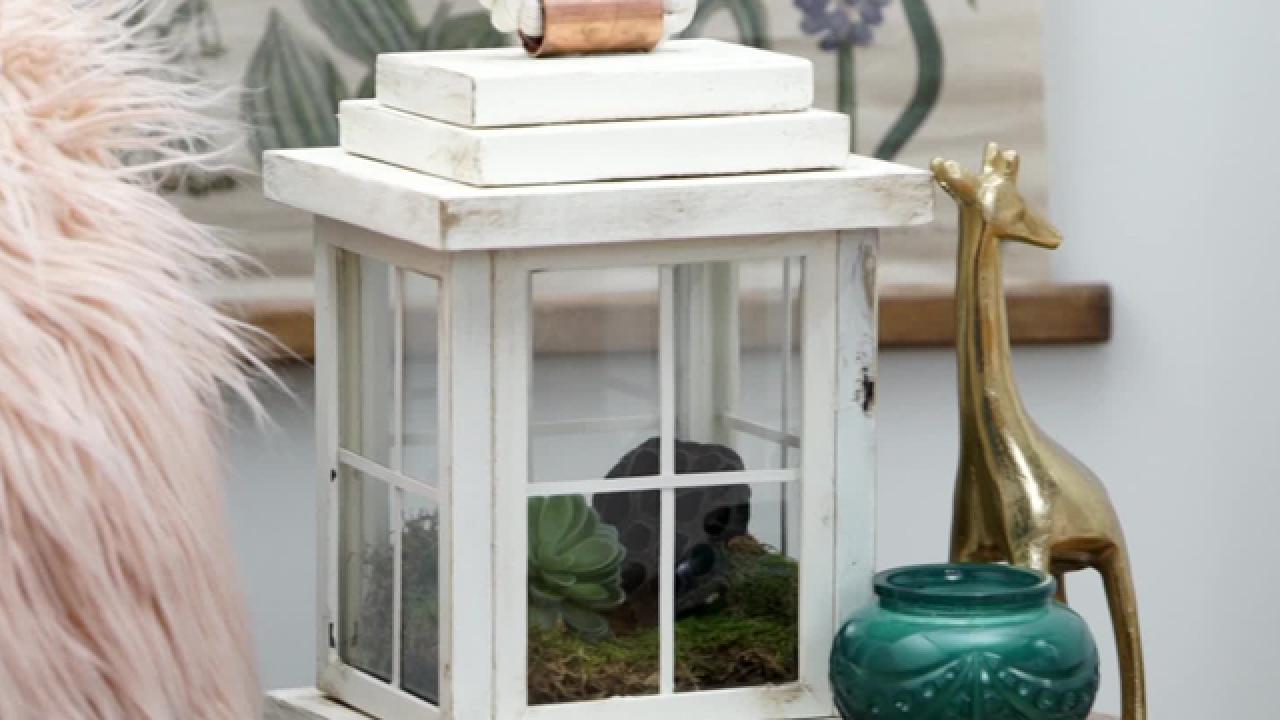

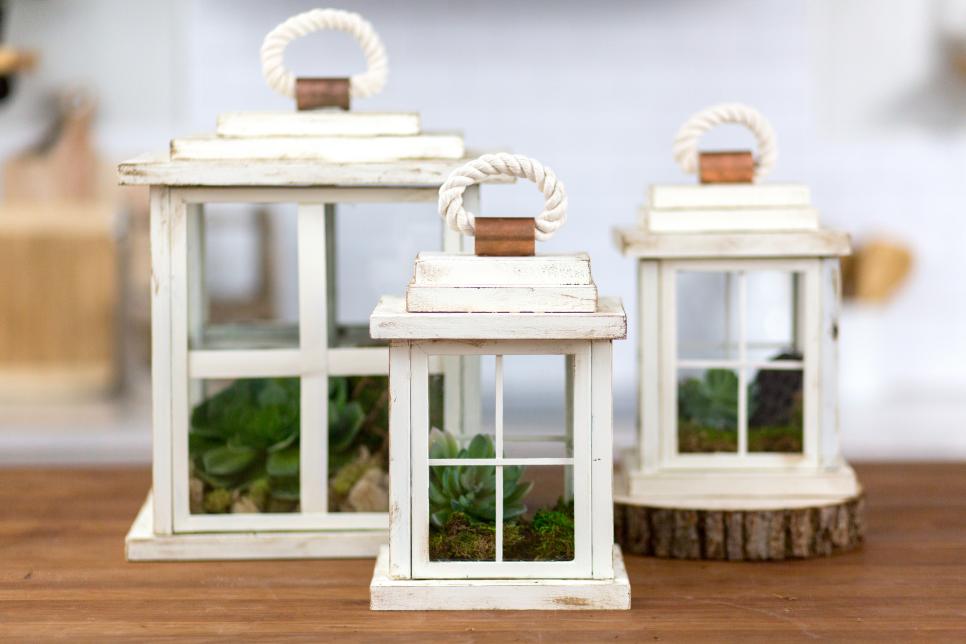
Why pay upwards of $40 for decorative lanterns when you can make your own for less than $10? These gorgeous, farmhouse-inspired pieces are a cinch to make, requiring just a few basic craft supplies and some dollar store picture frames.

Cassidy Garcia
What You'll Need
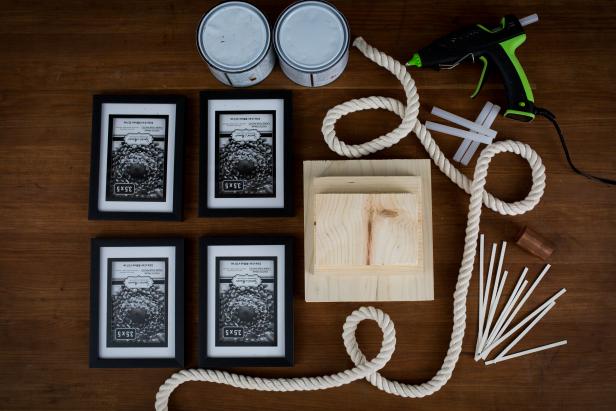
To make a medium-sized lantern, you'll need:
- (4) 5x7 picture frames
- wooden stir sticks
- white chalk paint
- hot glue gun + glue sticks
- (2) 8"x7.25"x1" wood blocks
- 6"x5.5"x1" wood block
- 5.5"x4"x1" wood block
- 2" copper fitting
- short length of thick rope
Paint Frames
Remove glass and backing from the picture frames, setting glass aside for later. Paint with one coat of white chalk paint. Don't worry if some of the original frame shows through — it adds to the rustic charm. Once the frames are dry, you can either leave as is or lightly sand and/or stain the edges for a distressed look.
Add "Panes"
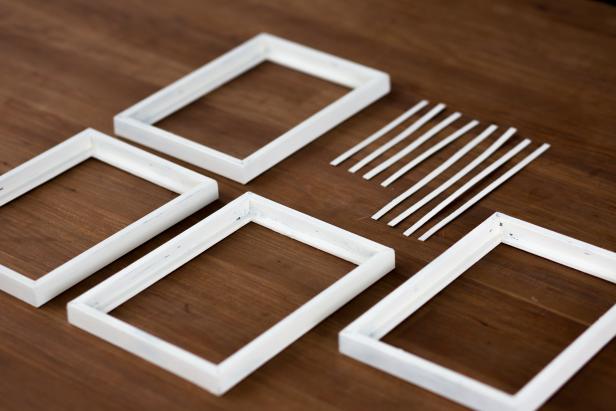
With wooden stir sticks, create faux window panes inside each picture frame. Cut a stick to size length-wise and width-wise inside each frame, resulting in four long sticks and four short sticks. Paint the sticks white and let dry.
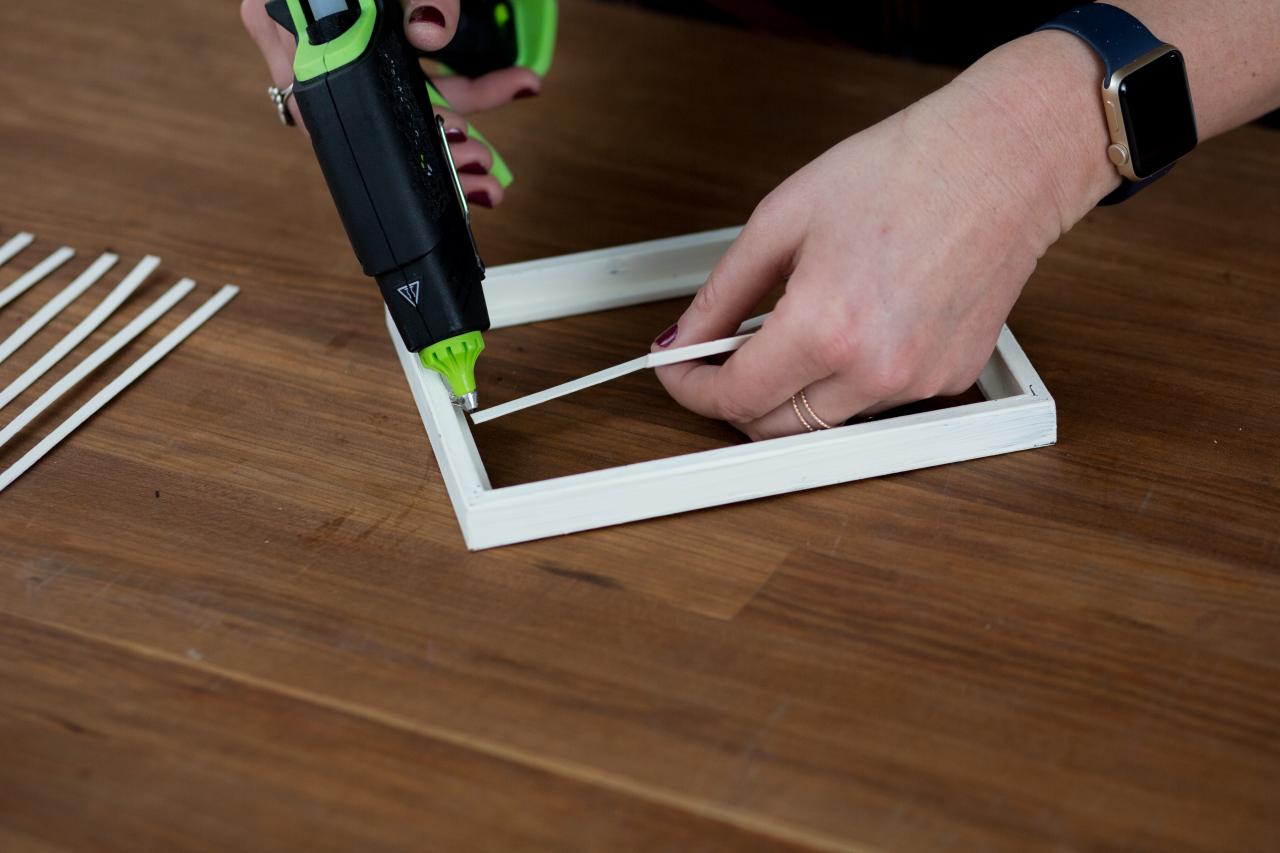
Finish Frames

Image 1
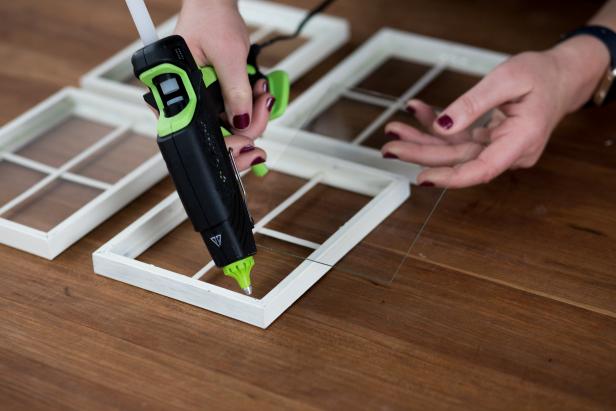
Image 2
Glue the sticks inside each frame, attaching the long stick first in the middle of the frame vertically (Image 1), then the short stick horizontally, creating a cross. Working quickly, run a bead of hot glue along the inside lip of the frame and replace the glass behind the sticks, securing it in place (Image 2). Finish by running another bead of glue along the edge of the glass to seal. Repeat this process on the remaining three frames.
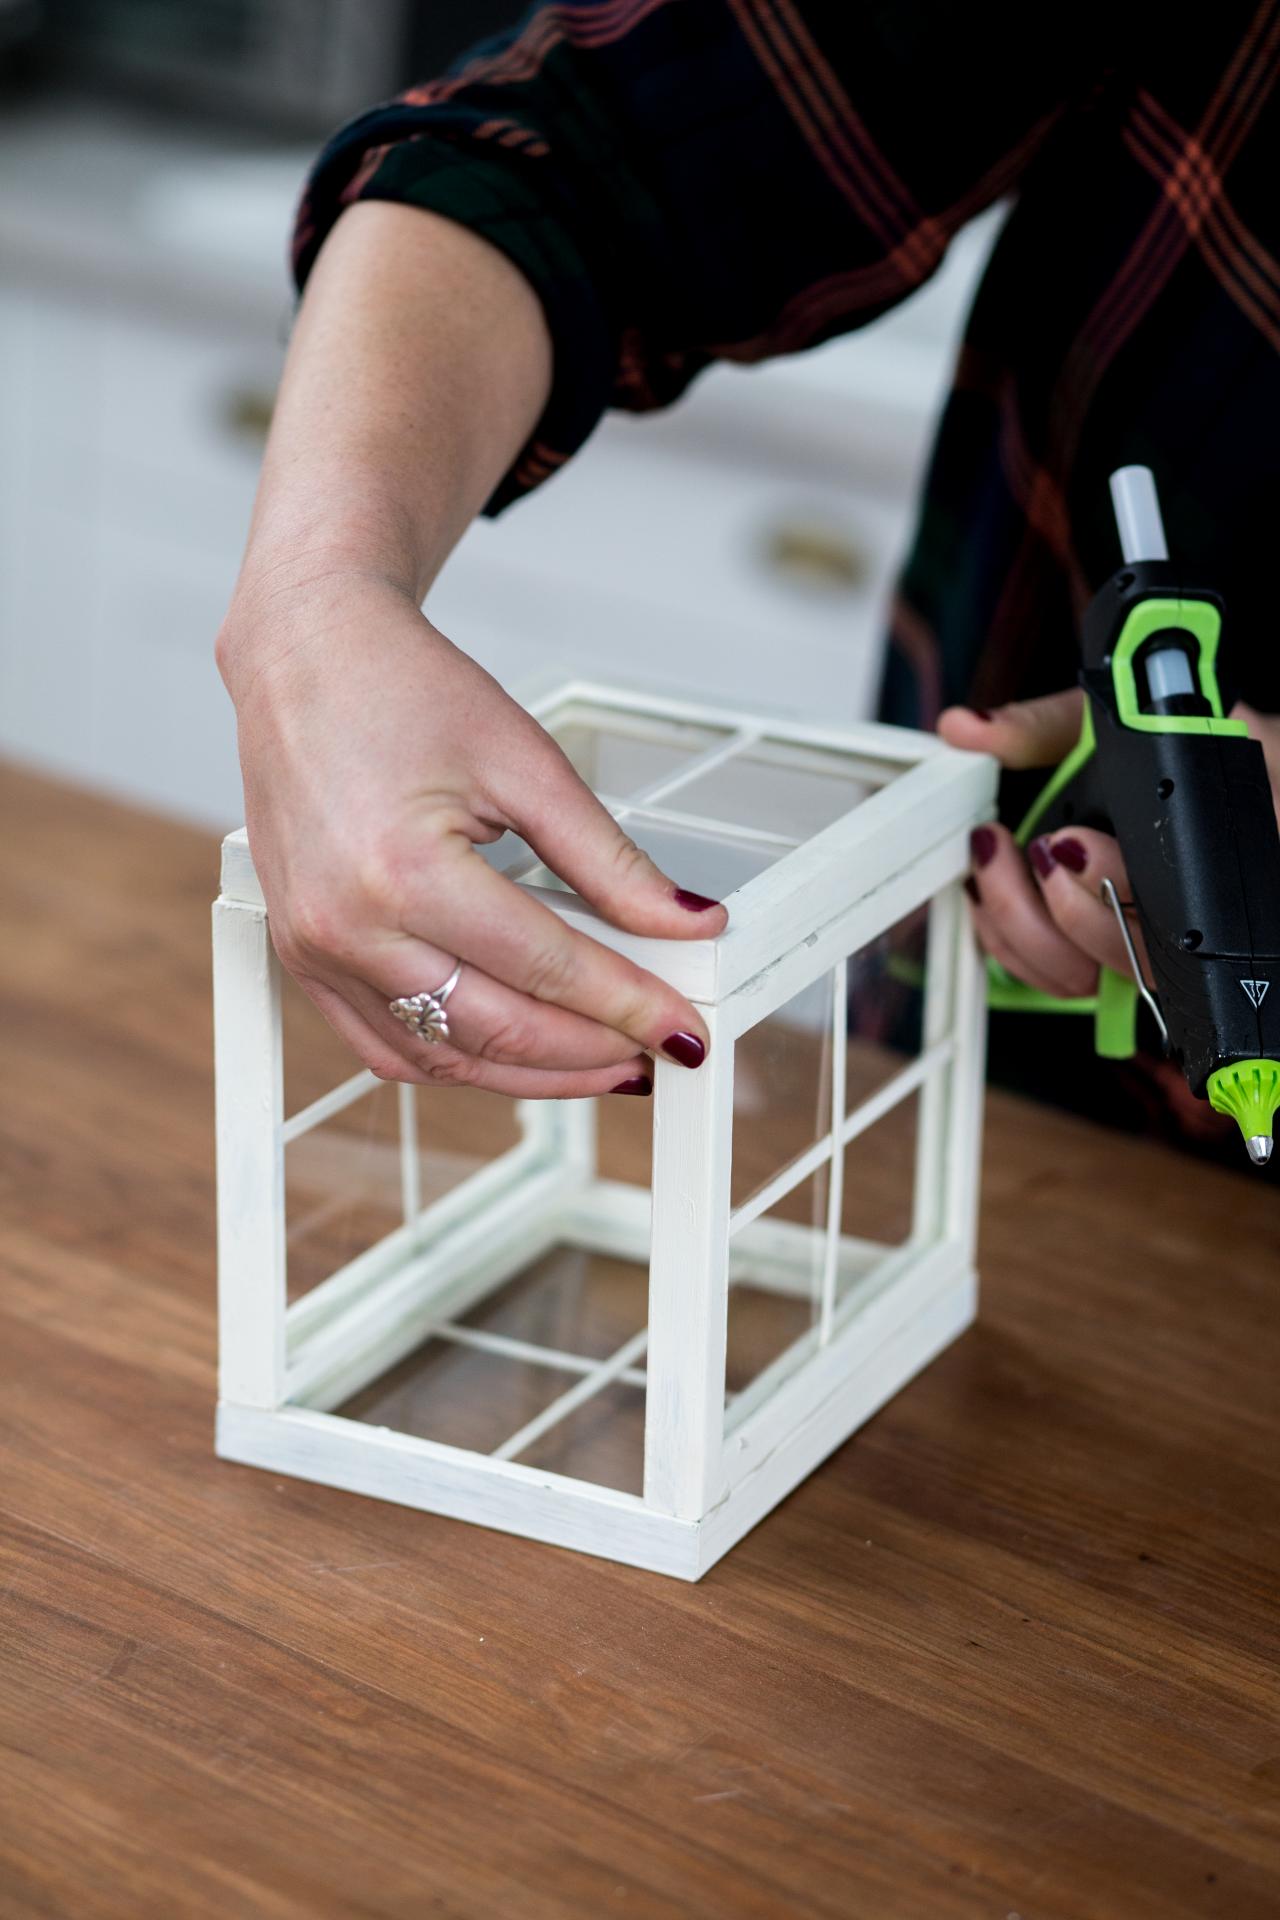
Glue Frames Together

Using hot glue, glue all four frames together until they form a tall box.
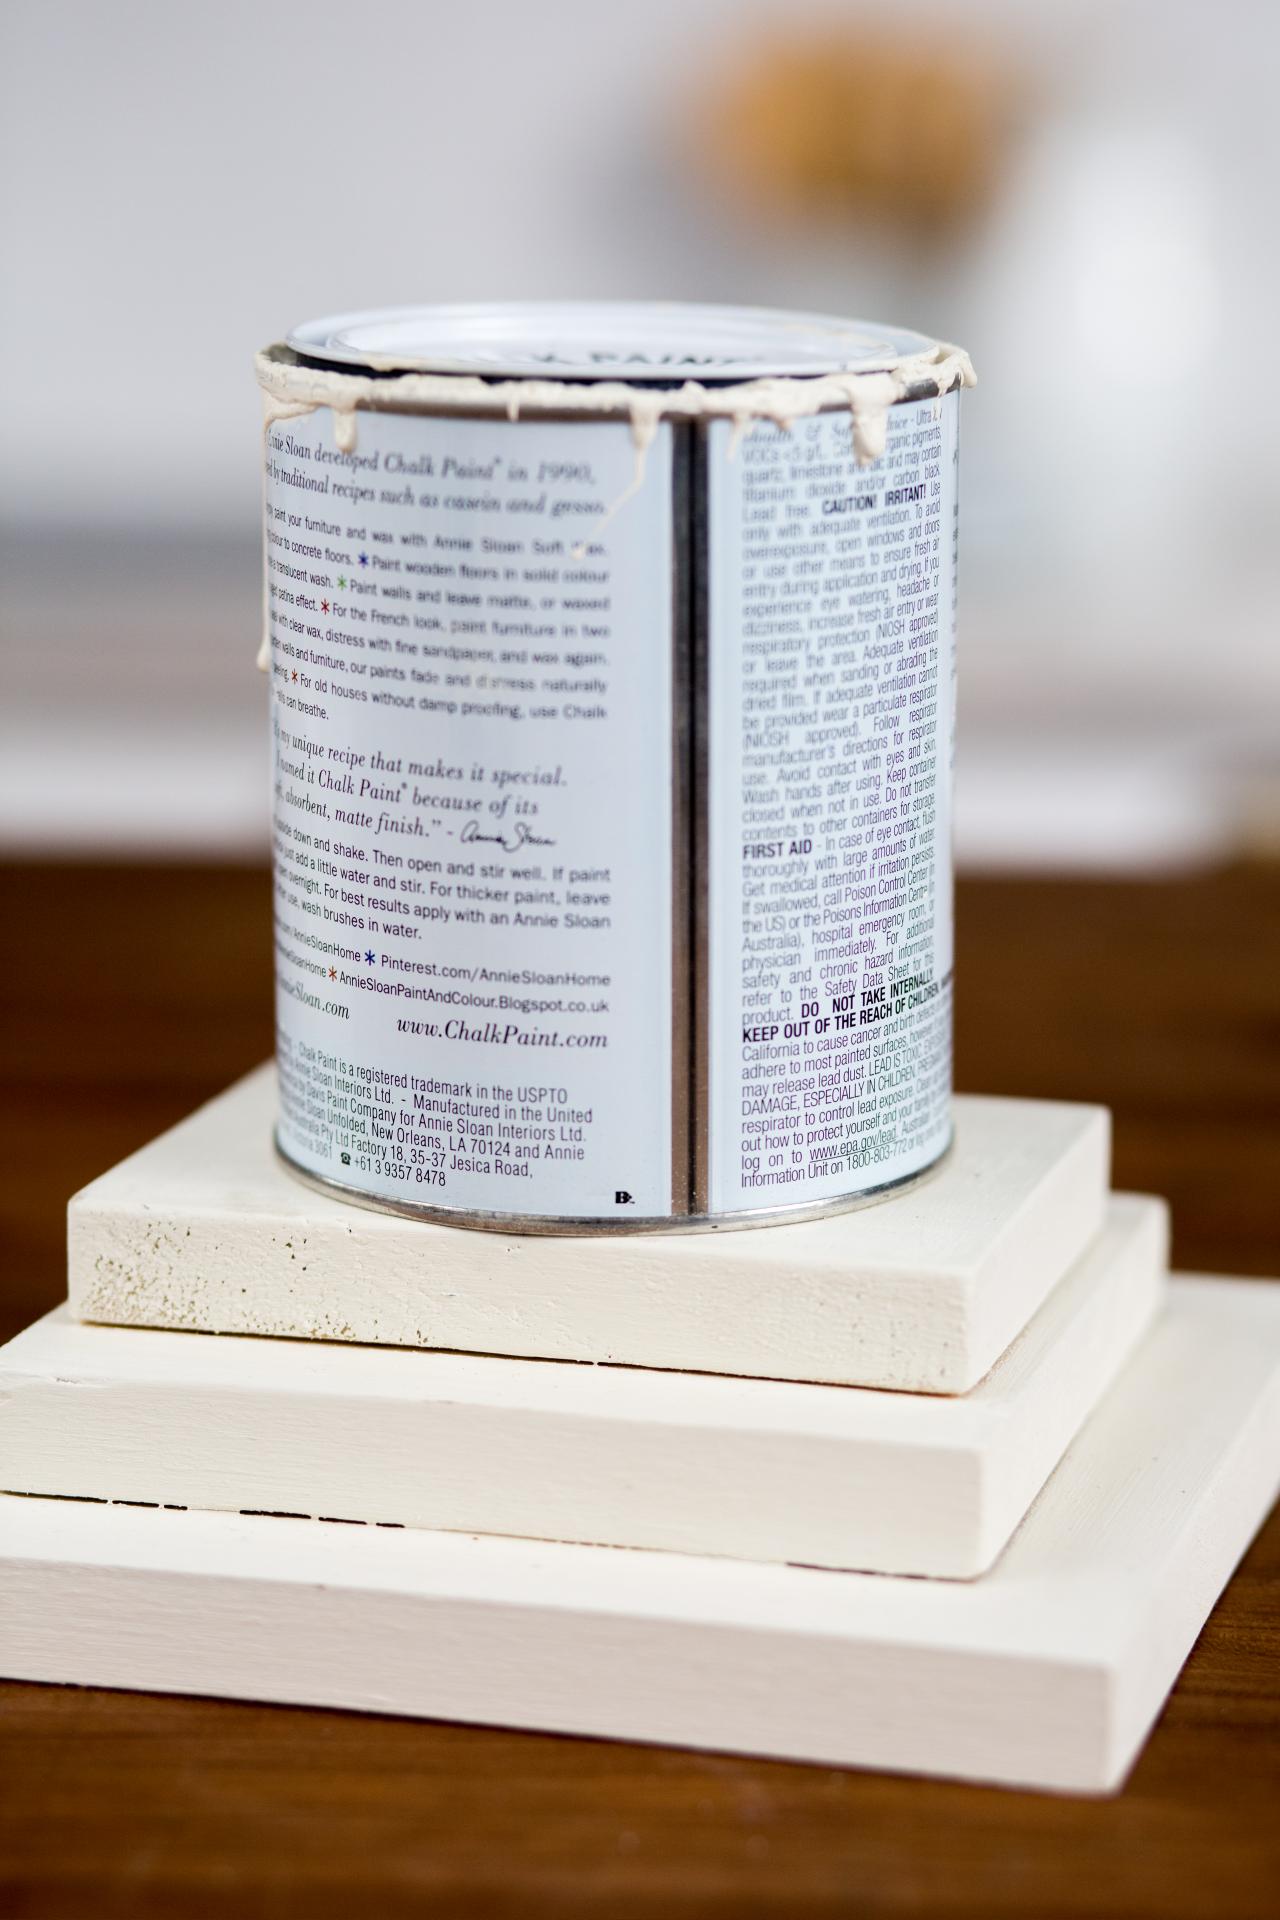
Prep Wood Blocks
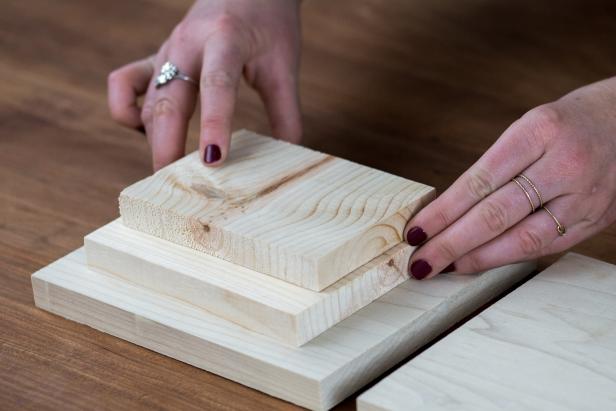
Image 1

Image 2
Place one of the 8"x7.25" wood blocks on your work surface. Stack the 6"x5.5" block in the center of the larger block and hot glue in place. Repeat by stacking the smallest block on the very top and gluing in place (Image 1). Paint the block stack and the leftover large block with white chalk paint (Image 2). Let dry.
Add Details
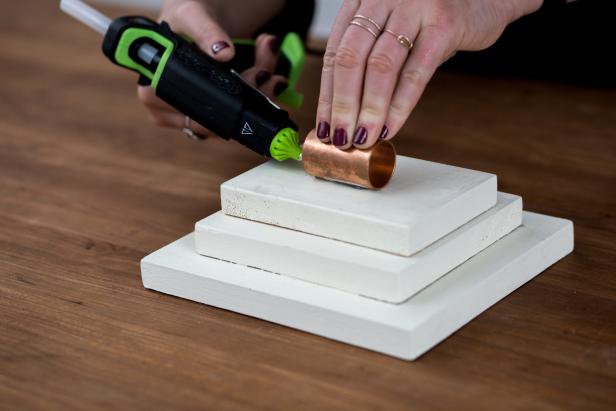
Image 1

Image 2
Glue a 2" copper fitting to the top of the block stack (Image 1). Then, glue the ends of a short length of rope and thread through each side of the fitting, until the ends are no longer visible (Image 2).
Finish Up
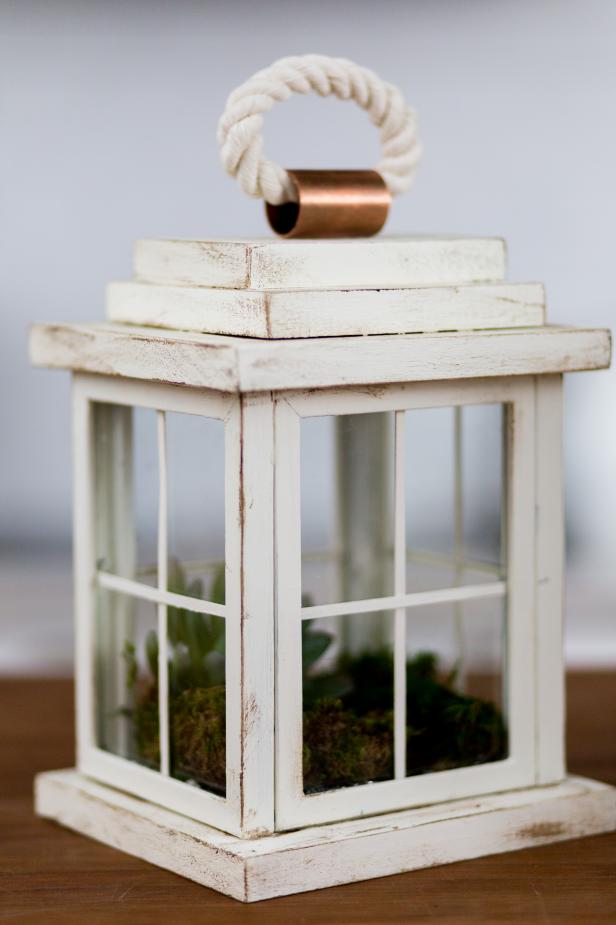
Hot glue the picture frame box to the center of the leftover wood block. Fill your lantern with succulents, moss or other decor, and place the decorative wood stack lid on top. The lid can be easily removed to swap out decor seasonally. Tip: these lanterns are best used indoors. We also suggest NOT using candles unless they're flameless.


