


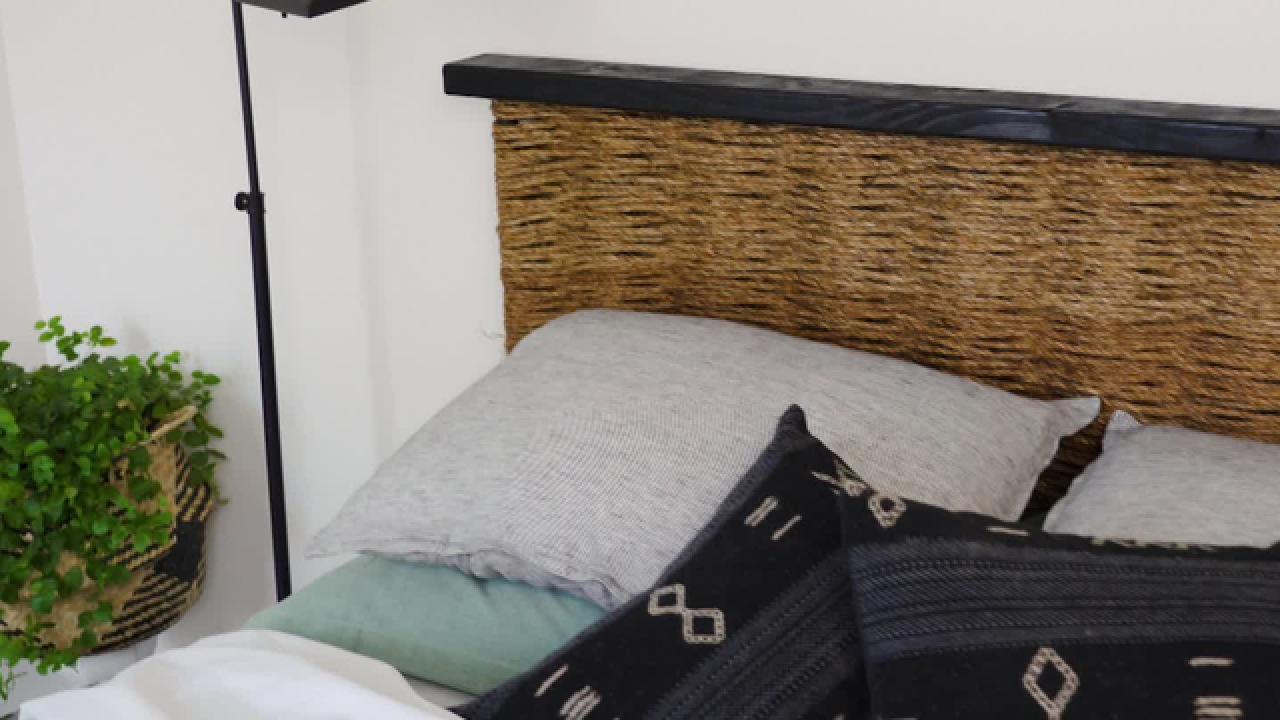
DIY Woven Dowel + Rope Headboard
No headboard? No problem! DIY one on a budget that's perfect for your first home or apartment.

Materials Needed
- 12) 48” wood dowels that are 1" in diameter
- (2) 2x4x6 cut to size at store
- screw gun or drill
- 1" spade bit
- tape measure
- marker or pencil
- rubber mallet
- wood glue
- gloves
- spray paint
- drop cloth
- tie-down straps or bungee cords
- jute rope
- hot glue gun and glue sticks
- hook-and-loop tape
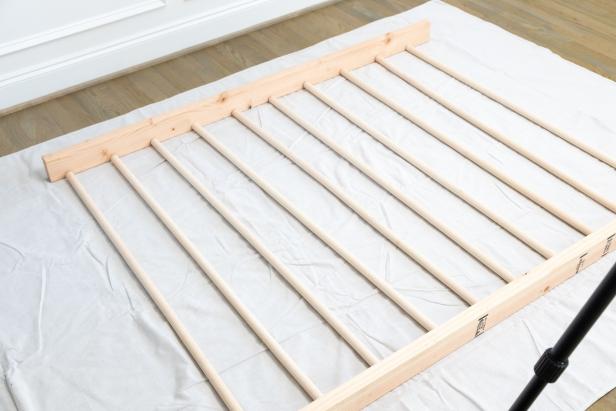
Determine Placement
Note: To determine the final cut length for the 2x4s, add 4" to the width of your mattress. Lay everything out and use a tape measure to evenly space the dowels from the center. We spaced ours 5" apart. Keep in mind, the tighter your spacing, the more dowels you’ll need.
Tomas Espinoza Photography
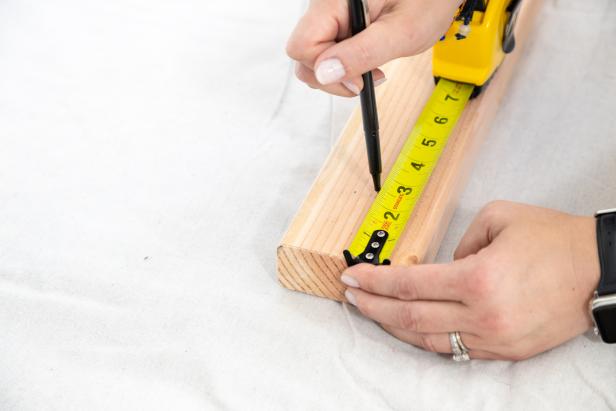
Mark Holes
Using a tape measure and marker, mark where you'll drill holes for the dowels. Be sure to mark both the top and bottom boards accurately so the dowels will line up.
Tomas Espinoza Photography
Bore Holes
Using a 1" spade bit, bore holes approximately 1/2" deep in both boards. If you don’t trust your eyes, place a bit of painter’s tape with a 1/2" depth mark on the bit as a guide.

Tomas Espinoza Photography
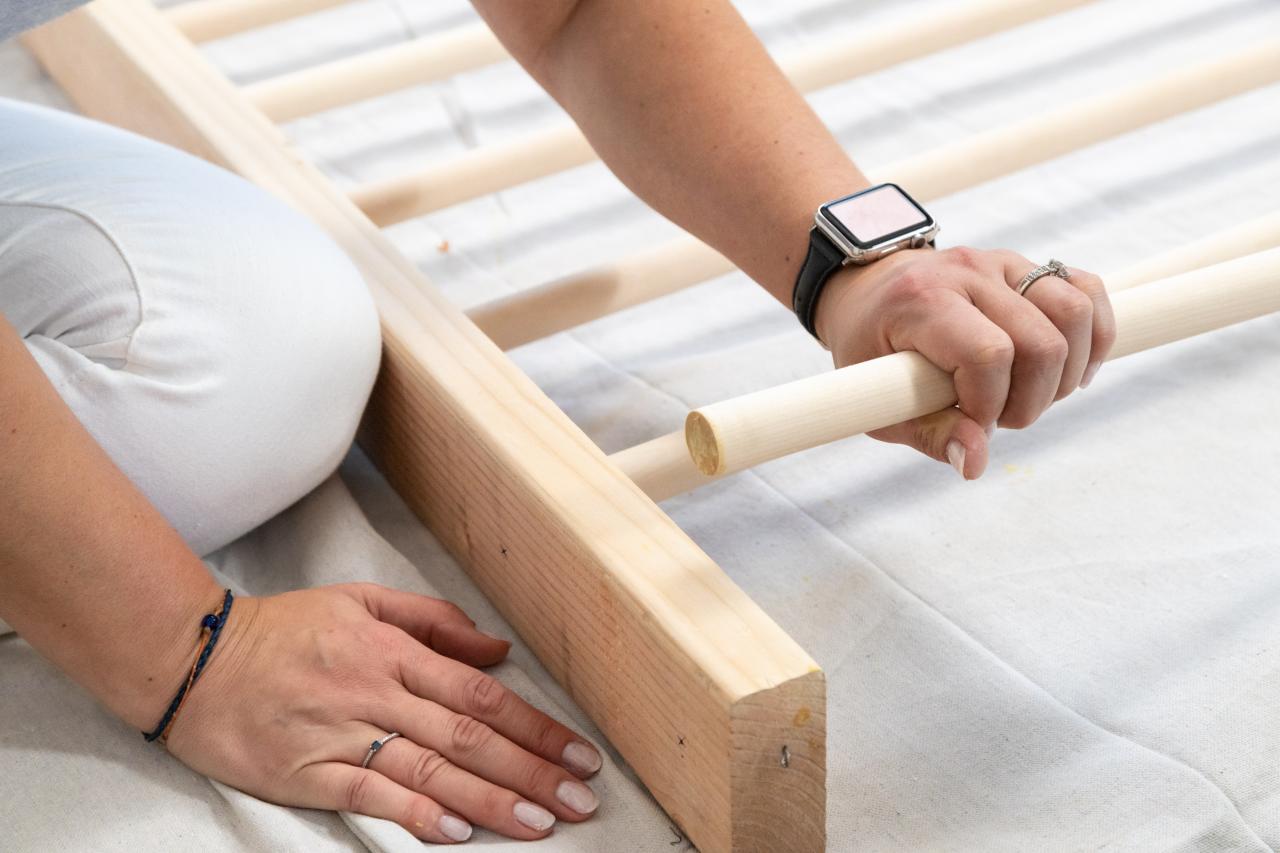
Insert Dowels
Place a drop of glue into each bored hole, then insert the dowels. Tip: This is easier if you have one person insert dowels into the top 2x4, while another person inserts the other end into the bottom 2x4 simultaneously.

Tomas Espinoza Photography
Hammer to Secure
With the dowels in place and one person bracing the bottom board, use a rubber mallet to make sure each dowel is fully inserted into the top board. Hammer across the top, then swap jobs and let your friend hammer along the bottom board. If you’re flying solo for this part, brace the frame against a baseboard, moving everything carefully while the glue is wet.

Tomas Espinoza Photography
Strap Tightly
Use tie-down straps or bungee cords to keep tension on the frame while the glue dries. This will ensure every dowel is secure and your frame is built to last.

Tomas Espinoza Photography
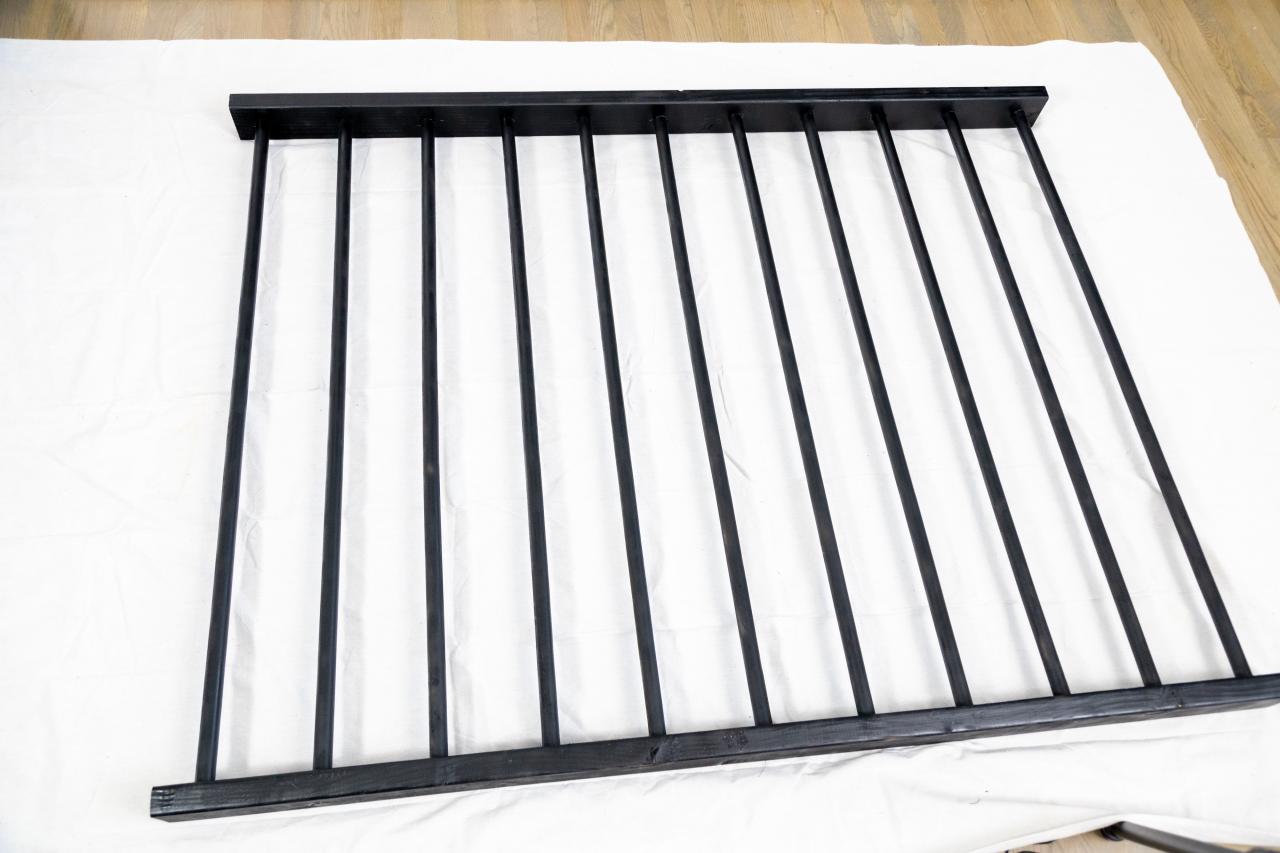
Paint Frame
After the frame has fully dried, move it onto a drop cloth for painting. We painted it black for a clean, transitional look. Keep it simple and go with spray paint — just use light, sweeping motions, especially along the top board to avoid any visible drips or splotches.

Tomas Espinoza Photography
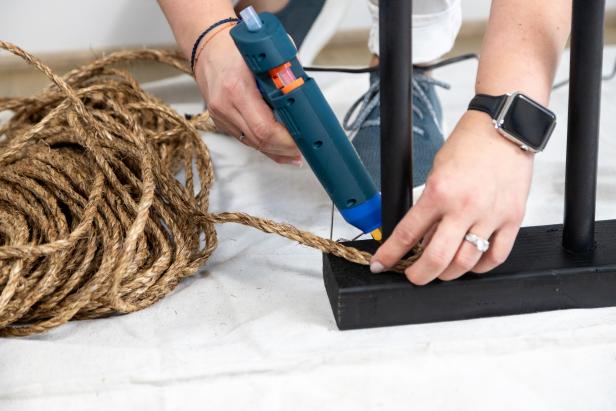
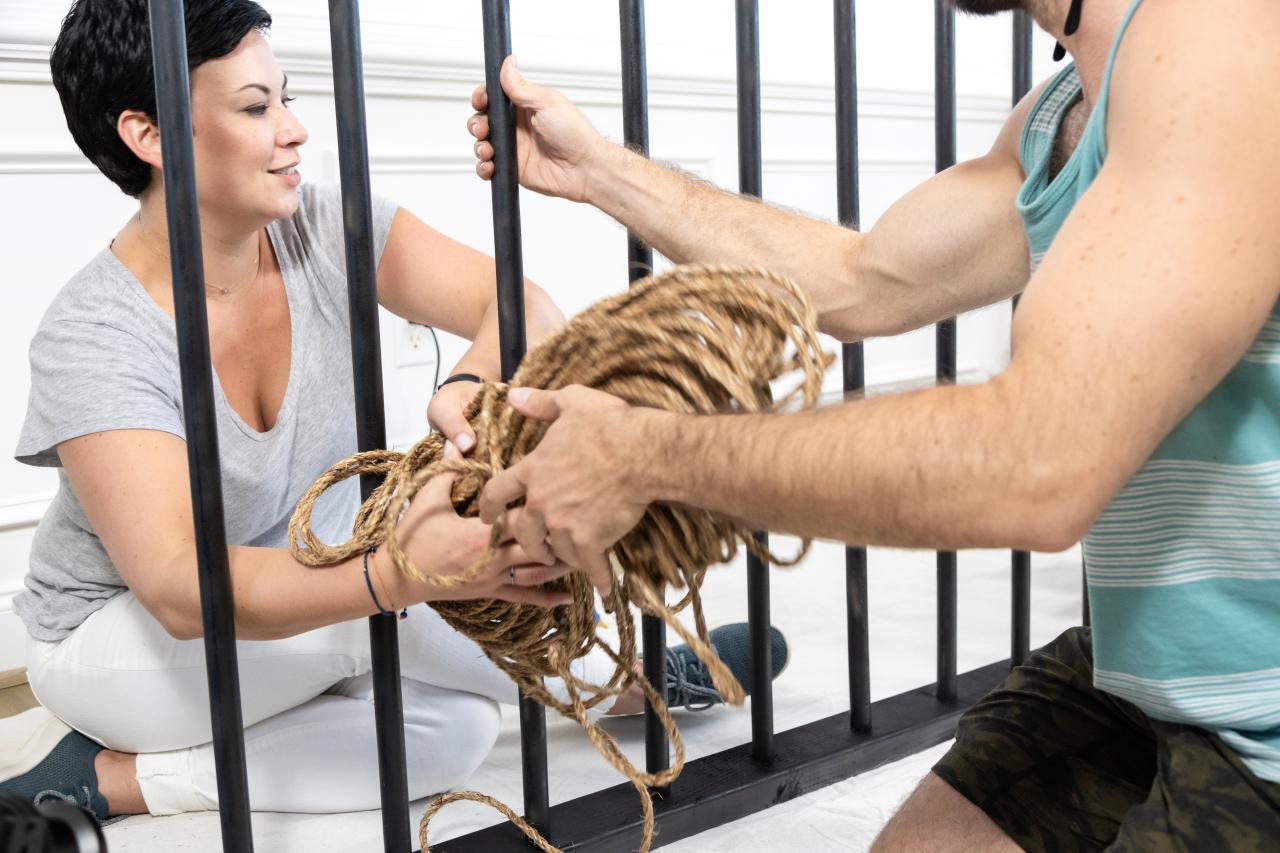
Secure Rope
Once the painted frame is dry to the touch, begin the weaving process. Start at the bottom corner of the headboard frame. Knot one end of the rope around the outermost dowel, then secure with hot glue and allow to dry.
Tomas Espinoza Photography
Weave Rope
Weave the rope back and forth horizontally through the dowels moving from left to right and working your way up toward the top of the frame. Tip: The weaving part will go a bit faster if you do it with a friend.

Tomas Espinoza Photography
Complete Woven Design + Attach to Wall
While weaving, skip the section that’ll be hidden behind the mattress and box spring. Once you’ve trimmed and tied off the other end of the rope, secure it in place with glue. Stand it up and secure the backside of the headboard to the wall with a few long strips of hook-and-loop tape.


