


Give a Dated Wood Headboard Fresh Farmhouse Charm
Give new furniture vintage-style charm and patina. Learn our designer trick for creating a distressed, painted finish in a flash.

Sarah Busby

Materials Needed
- wooden headboard
- white candle
- medium-grit sandpaper or sanding block
- drop cloth or plastic to protect work surface
- paintbrush
- flat or eggshell interior paint in the color of your choice
- cotton cloth
- clear furniture wax
- paper towels or tackcloth
Before: Dark and Dated
This solid wood headboard, picked up at an estate sale, has vintage-style charm with reeded posts and thick, scrolling details but the dark cherry finish, marred by a deep gouge, has seen better days.

Sarah Busby
After: Old Is New Again
Freshened up with a coat of flat white paint that shows just the right amount of wear-and-tear, this new headboard looks like a well-loved family heirloom.

Brittney Gazaway
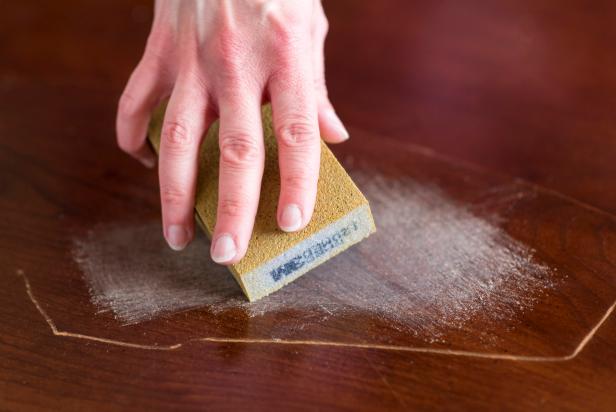
Scuff Up Stained Finish
Using medium-grit sandpaper or a sanding block, rough up the headboard's existing stained and sealed finish to allow the paint to better adhere to the wood (Image 1). Using a damp paper towel or tackcloth, remove sanding dust (Image 2).
Sarah Busby

Sarah Busby
Add Wax Resist
Rub a white candle over the areas of the headboard where you don't want paint to fully stick — for instance, along the raised details, bed posts and other areas that would typically see wear with age. Tip: The wax will form a barrier preventing the paint from bonding to the wood, making it very easy to create a distressed finish by remove these areas of dried paint in a future step.

Sarah Busby
Paint Headboard
Cover all areas of the headboard in two solid coats, allowing the paint to dry between coats. Tip: One inexpensive sample-size pot of flat interior paint was just the right amount for our headboard.

Sarah Busby
Distress Paint
When both coats of paint have fully dried, gently go over the headboard using medium-grit sandpaper, concentrating your sanding efforts on the areas where you applied the wax resist (Images 1 and 2). Because the wax resist prevented the paint from fully bonding with the wood, the paint in these areas should sand off easily.

Brittney Gazaway

Brittney Gazaway
Seal Painted Finish
Using a waxing brush or clean cotton cloth, completely cover the headboard in a layer of clear furniture wax (Image 1). Following manufacturers' instructions, allow wax to fully cure (typically 24 hours) before using a second clean cotton cloth to buff for a more durable finish and a light sheen (Image 2).

Brittney Gazaway

Brittney Gazaway
Enjoy Your New/Old Headboard
Complement your freshly distressed headboard with antique accessories (Image 1), farmhouse-style bedding (Image 2) or have fun with pattern and color (Image 3).

Brittney Gazaway; Styling by H. Camille Smith

Brittney Gazaway; Styling by H. Camille Smith

Brittney Gazaway; Styling by H. Camille Smith
Farmhouse-Style Distressed Painted Headboard
Give new furniture vintage-style charm and patina. Learn our designer trick for creating a distressed, painted finish in a flash.
Photo By: Brittney Gazaway; Styling by H. Camille Smith
Photo By: Brittney Gazaway; Styling by H. Camille Smith
Photo By: Brittney Gazaway; Styling by H. Camille Smith


