


How to Stain & Stencil a Concrete Patio
Transform your drab slab into a bright, beautiful outdoor oasis with this easy stenciling project inspired by colorful Morrocan tile.

Cassidy Garcia

Who doesn't love spending time outdoors when the weather's nice? Unfortunately, a ho-hum outdoor space can put a damper on even the sunniest of days. Get your patio summer-ready with our step-by-step instructions for cleaning, staining and stenciling a drab concrete slab to mimic the look of trendy (and expensive!) cement tile.

Materials Needed
- weedeater
- pressure washer (optional)
- painter's tape
- solid-color concrete stain, white
- paint tray & liner
- paint roller
- paint roller covers, 3-pack
- extension pole
- trim brush
- 16" x 16" stencil
- exterior semi-gloss paint & primer (details below)
- stencil brush
- high-quality foam pouncers
- lint-free rag
- clear concrete sealer
Prep & Clean Concrete
Trim grass along the perimeter of the patio with a weedeater, then use a pressure washer to blast away built-up dirt and gunk. A clean surface will ensure maximum paint adhesion and a longer-lasting result. No pressure washer? No problem. A stiff brush, a bucket of soapy water and some elbow grease will also do the trick. Let dry for 24 hours.
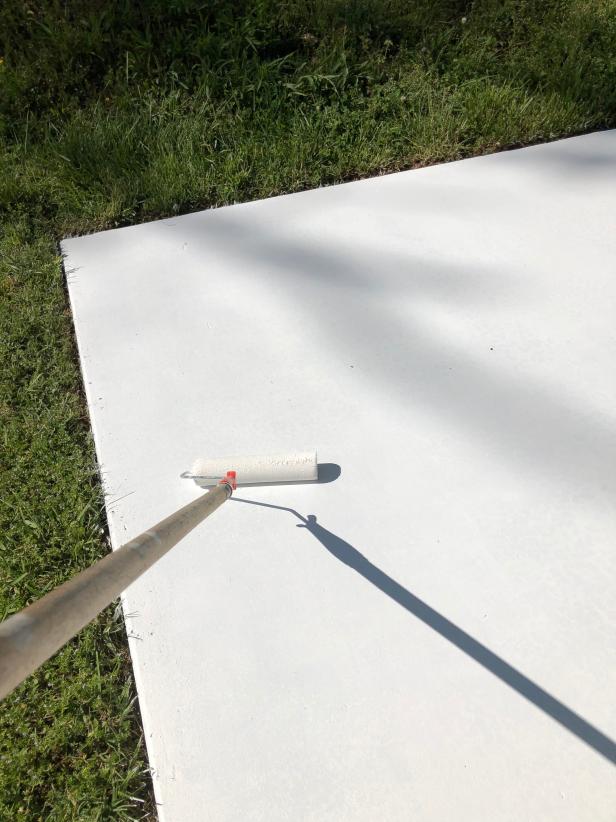
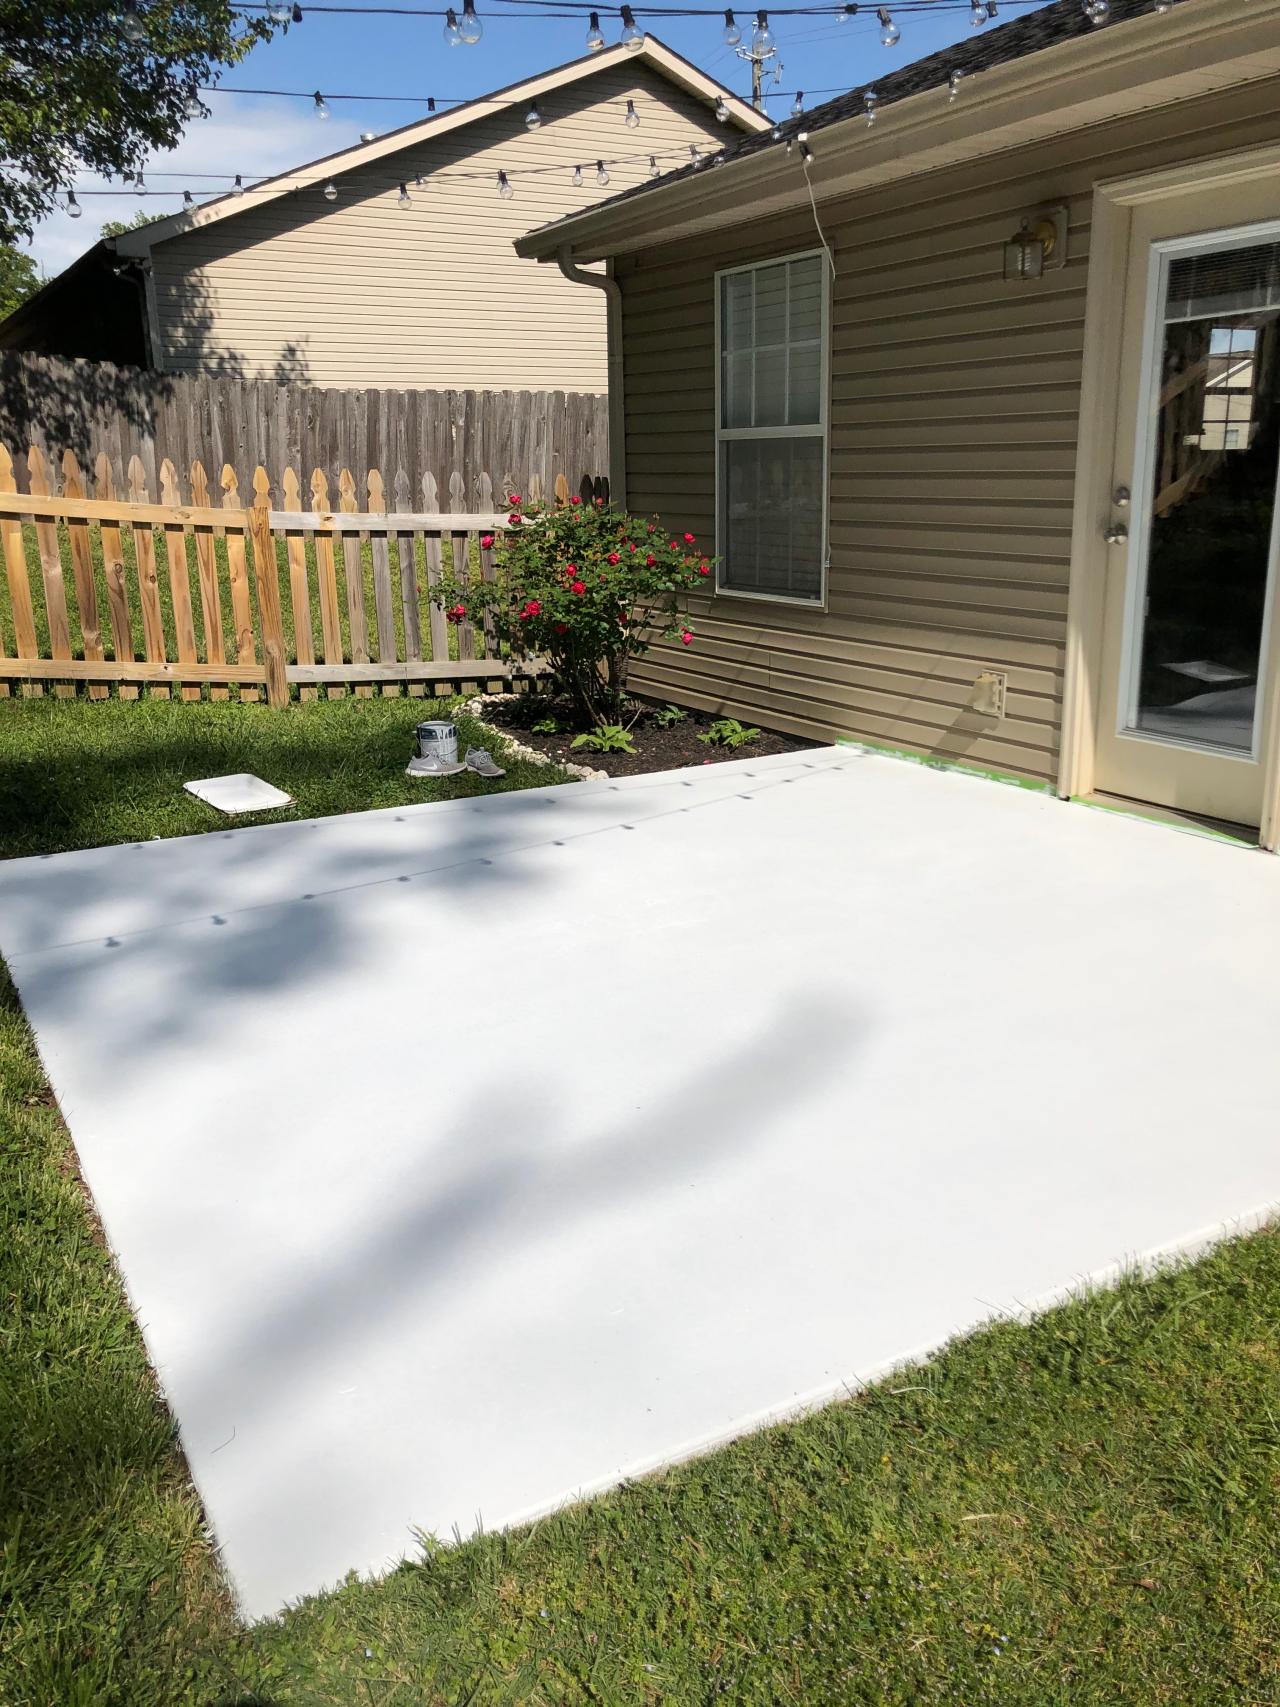
Apply Concrete Stain
Protect your patio and create a bright, clean background for your stencil with concrete stain. Solid-color concrete stain covers as well as paint but isn't slick when wet. It can also be tinted to a variety of colors, just like paint. Place painter's tape along your home's exterior where it meets the patio, then pour concrete stain (I chose white) into a paint tray. Roll on the first coat of stain with a 9-inch polyester paint roller attached to an extension handle (back saver!), then let dry (Image 1). Repeat three or four more times, letting the stain dry between each coat until the surface is opaque (Image 2). Use a trim brush to fill in around the edges.
Chelsea Faulkner
Save your back! Attach an extension pole to your paint roller.

Chelsea Faulkner
After three coats of stain.
Place First Stencil
Situate your stencil in the upper right-hand corner of the patio, closest to the house, and secure with painter's tape. My stencil featured 2 inches of blank space around the perimeter, so when aligned with the edge of the patio, created a crisp white border. If your stencil doesn't have this feature, tape a border around the perimeter of the patio with painter's tape before you begin.

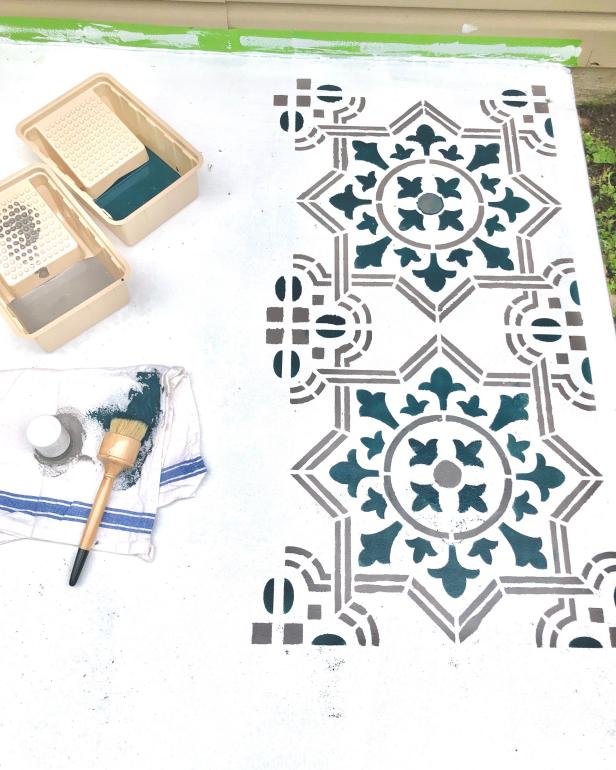
Stencil It
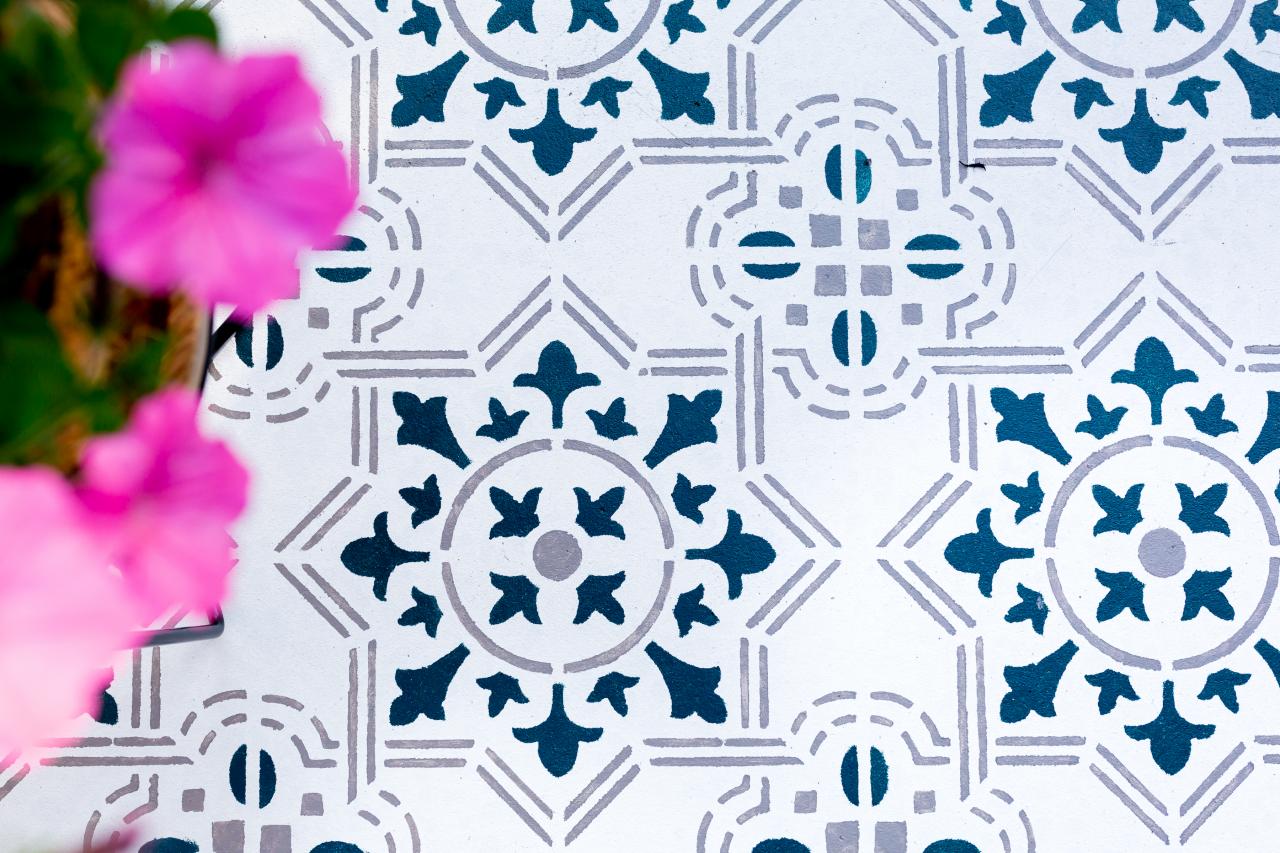
For this project, you'll need three or four sample-size paint cans (8 ounces) from the hardware store. I used Behr Marquee interior/exterior semi-gloss paint & primer in the shades Thermal and Suede Gray. Originally, I poured the paint out into mini paint trays but found it dried too fast, so I ended up dipping my brushes directly into the small plastic sample cans instead.
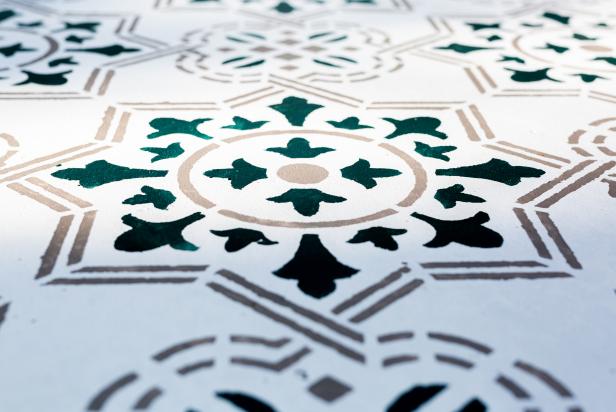
Load a 1-1/2-inch stencil brush with a small amount of paint, then dab the excess onto a lint-free rag — less is more here. Starting in the center of the tile, use a straight up-and-down pouncing motion to apply paint. If stenciling with two paint colors, decide the pattern before you begin. Here, I used the stencil brush to apply blue paint to larger areas, then a small foam pouncer to fill in the finer details with gray paint (Image 2). When finished, peel back the stencil to reveal the painted pattern. Reposition it below the previously finished tile, lining up the repeat on the stencil, and smooth down the painter's tape again to secure. Continue the process in a straight line, using the edge of the patio as a guide (Image 1), then continue row after row (Image 3) until you reach the opposite end. If your stencil extends past the patio at the bottom, tape a 2-inch border along the bottom edge and stencil down to it for a clean finish.
Pro Tip: Check the back of the stencil periodically and wipe off any excess paint with a lint-free rag before repositioning.
Chelsea Faulkner
For this project, you'll need exterior paint + primer, a good stencil brush, high-quality foam pouncers and a 16" x 16" tile stencil.
Cassidy Garcia
Imperfections make the final result even prettier.
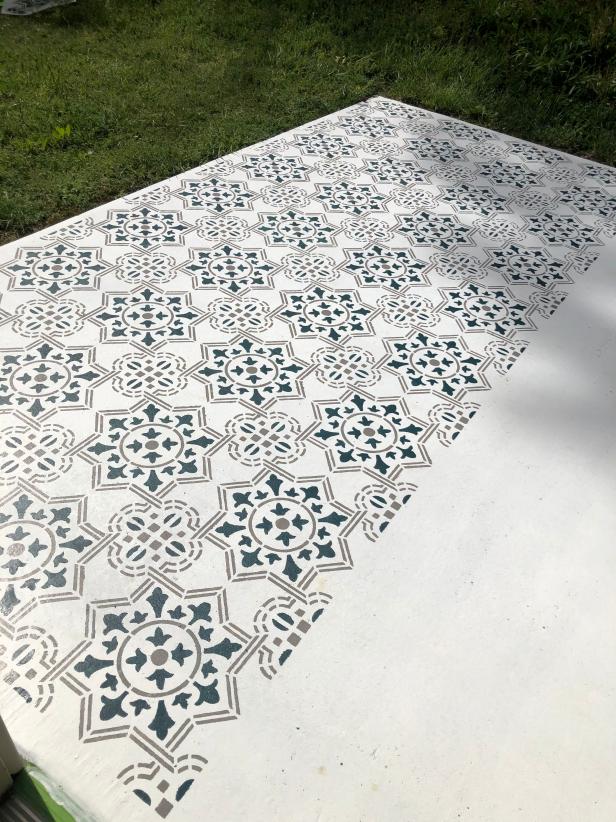
Halfway done. I had to take a lot of breaks thanks to the rain.
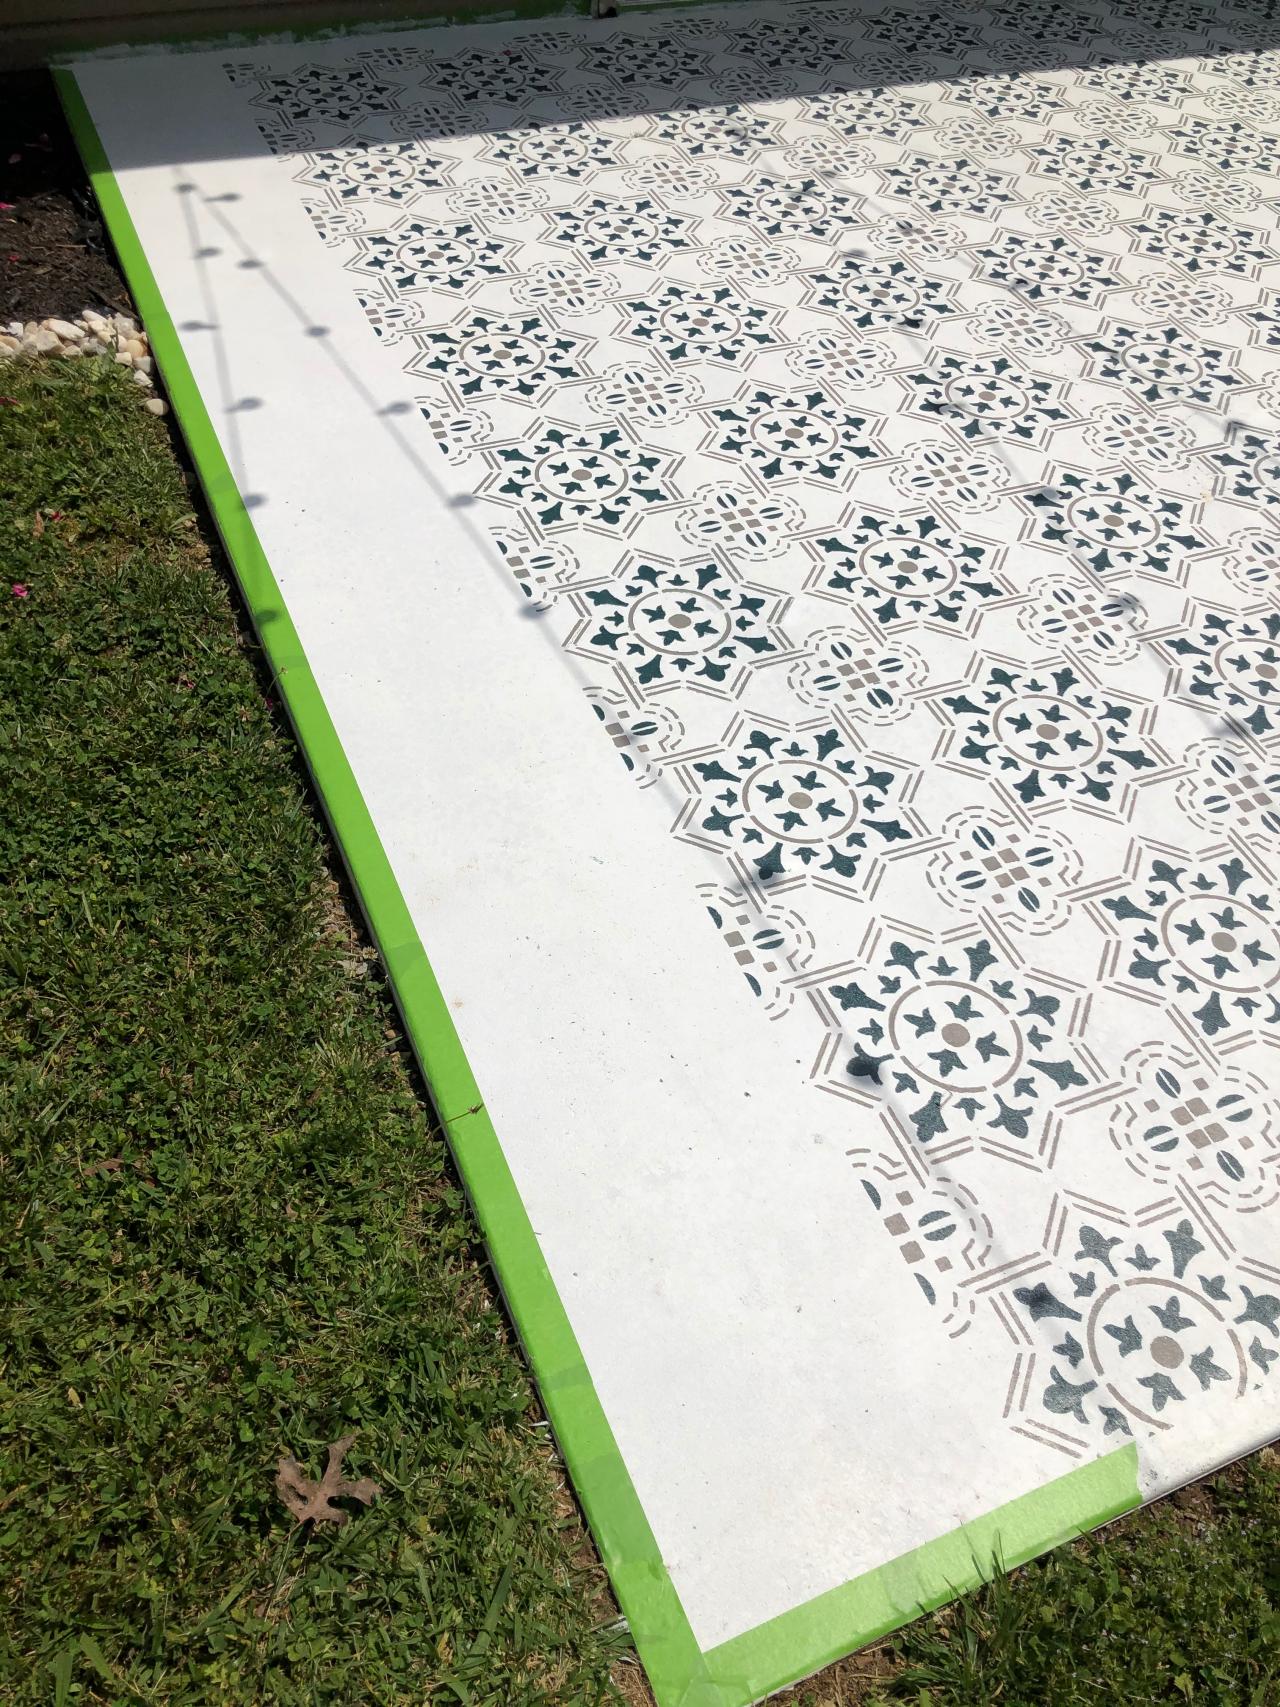
Finish Up
Once you've reached the final row, you may find that your stencil doesn't fit perfectly. To remedy this, tape a 2-inch border down the edge of the patio (Image 1), then stencil as usual. When you're done stenciling the row, remove the tape to reveal a straight edge and clean white border (Image 2). Let paint dry for 24 hours.

Chelsea Faulkner
To create a crisp, clean border, tape off the edge of the patio with painter's tape.

Cassidy Garcia
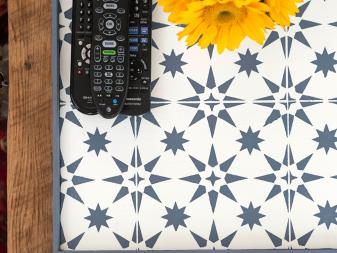
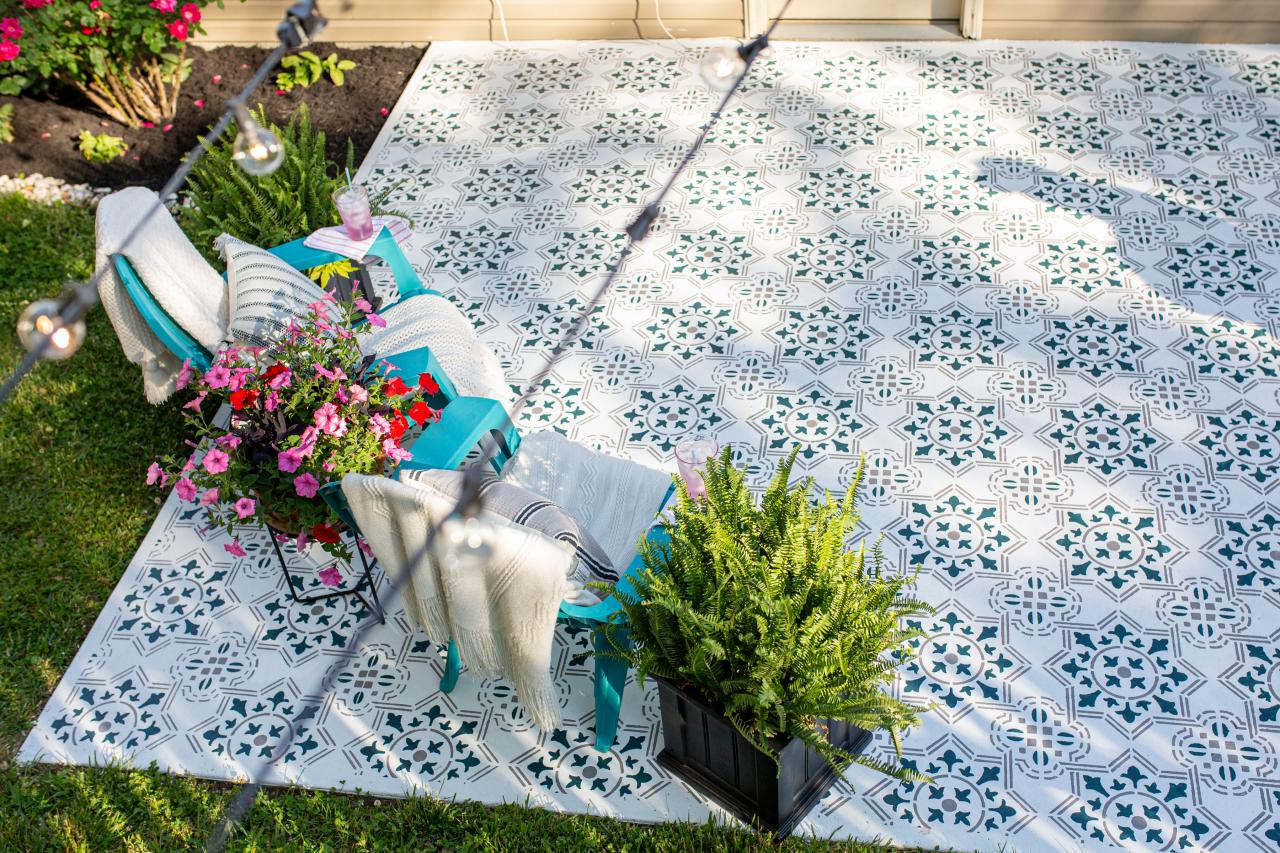
The end result is stunning!
Optional: Seal It
Keep your beautiful patio looking good as new for years to come with a coat of clear acrylic concrete sealer. Once the paint is fully dry, use a roller brush to apply a protective layer of sealer following manufacturer instructions. Let cure for 24 hours before re-installing patio furniture and more on the surface. Note: This step is optional.
Maintenance & Final Thoughts
To clean, blast the patio every few weeks with a water hose or use dish soap and a stiff brush to remove tough stains like bird poop, dried-on leaves, etc. (it won't chip or fade the paint). Five months later, my patio still looks like new and is holding up well under regular foot traffic, a messy toddler and weather.
Stenciling is not a perfect art. There will be many times when the stencil doesn't line up perfectly or the paint bleeds through. Embrace it! The end result is gorgeous and the imperfections make it even more so. Another thing to take into consideration is time — I spent about 12 hours total on this project, spread out over two weeks (it rained a lot those two weeks). But it was fun to have something easy to work on in the evenings while I listened to podcasts. And the best part? I totally transformed my outdoor space for about $85 — a fraction of the cost of a new concrete slab.

Cassidy Garcia
Stenciling your patio is an easy, inexpensive way to make a big impact on your outdoor space.
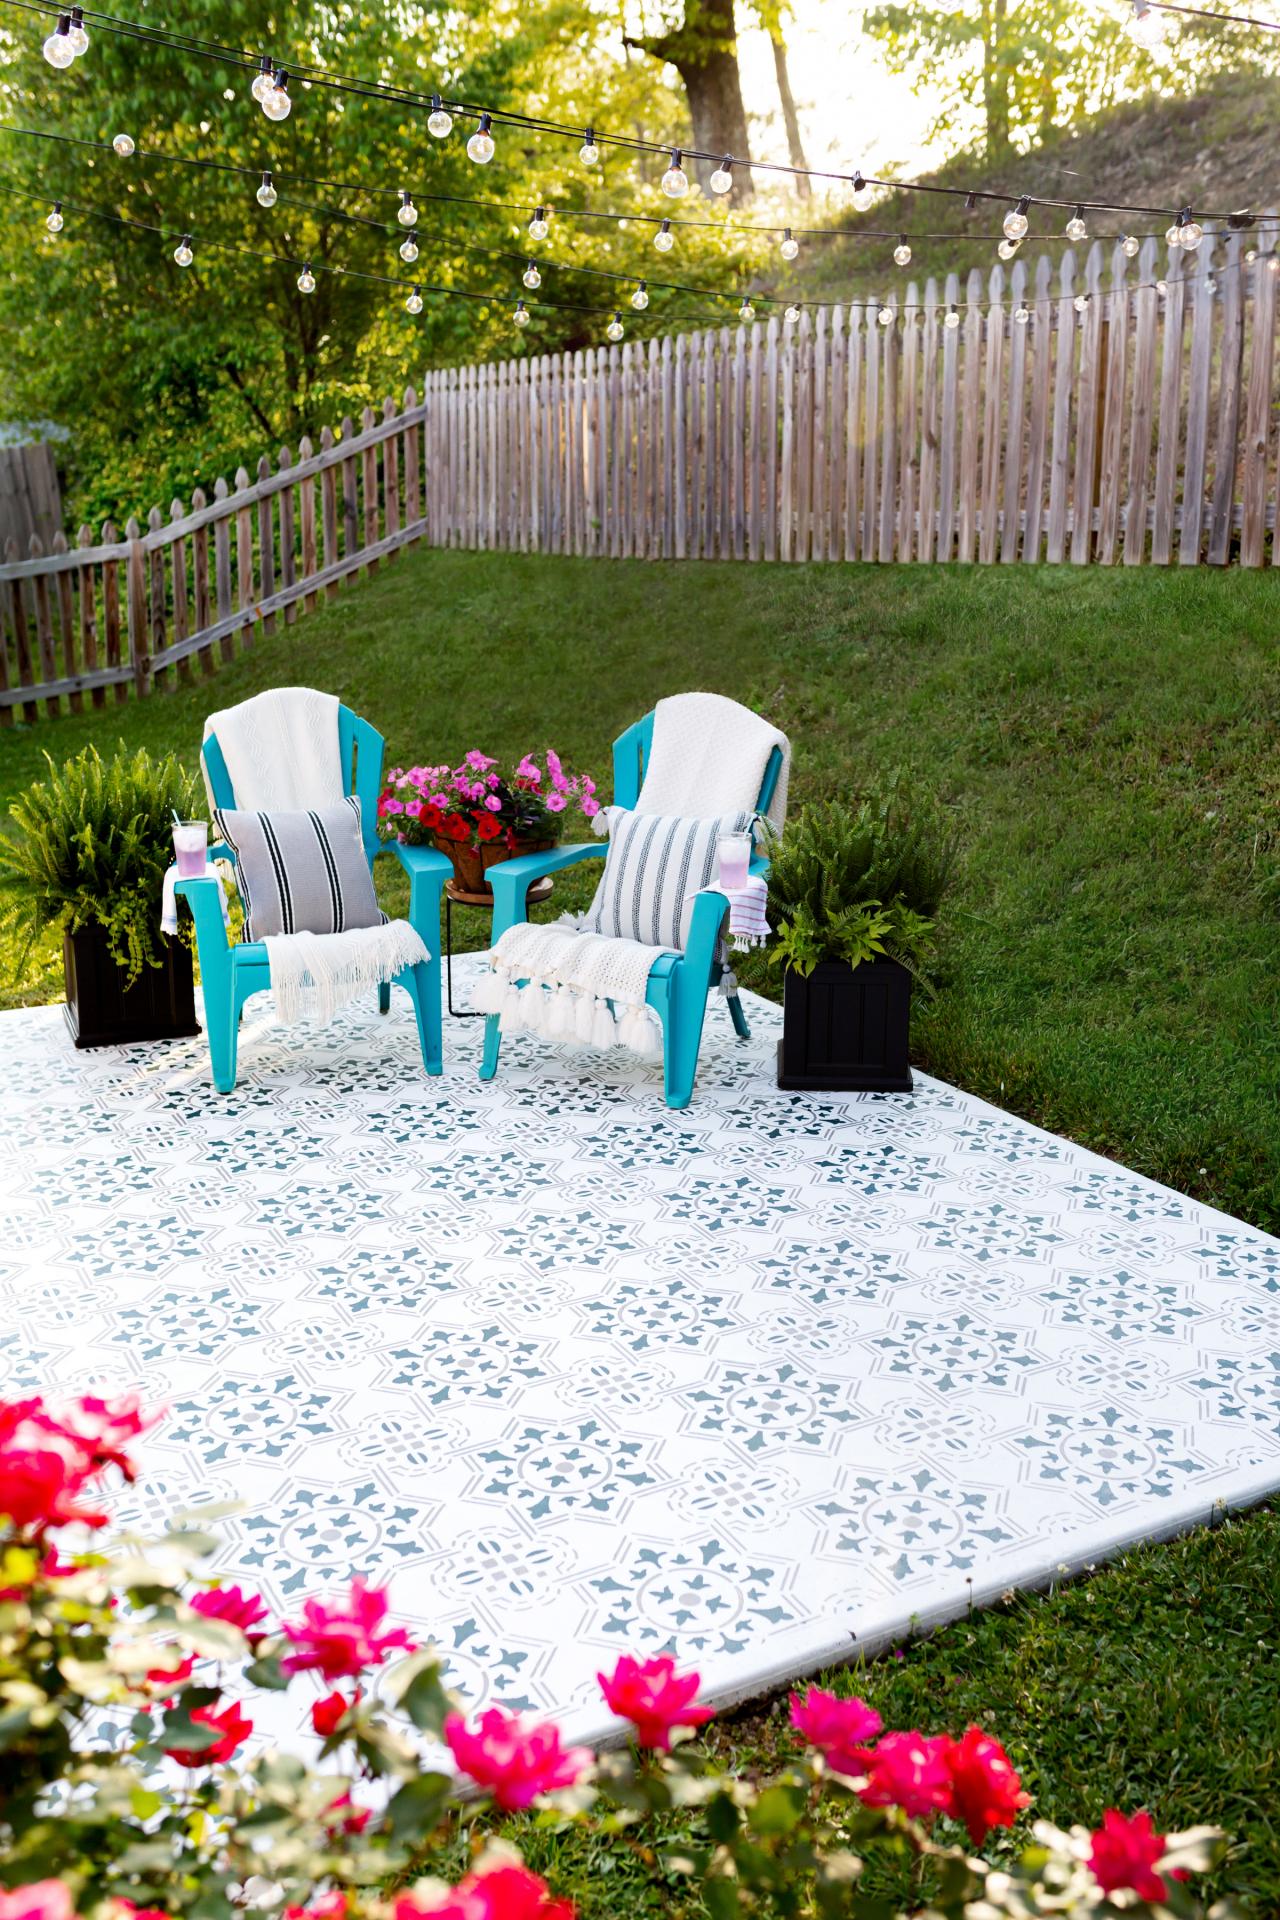
Sit & Sip in Style
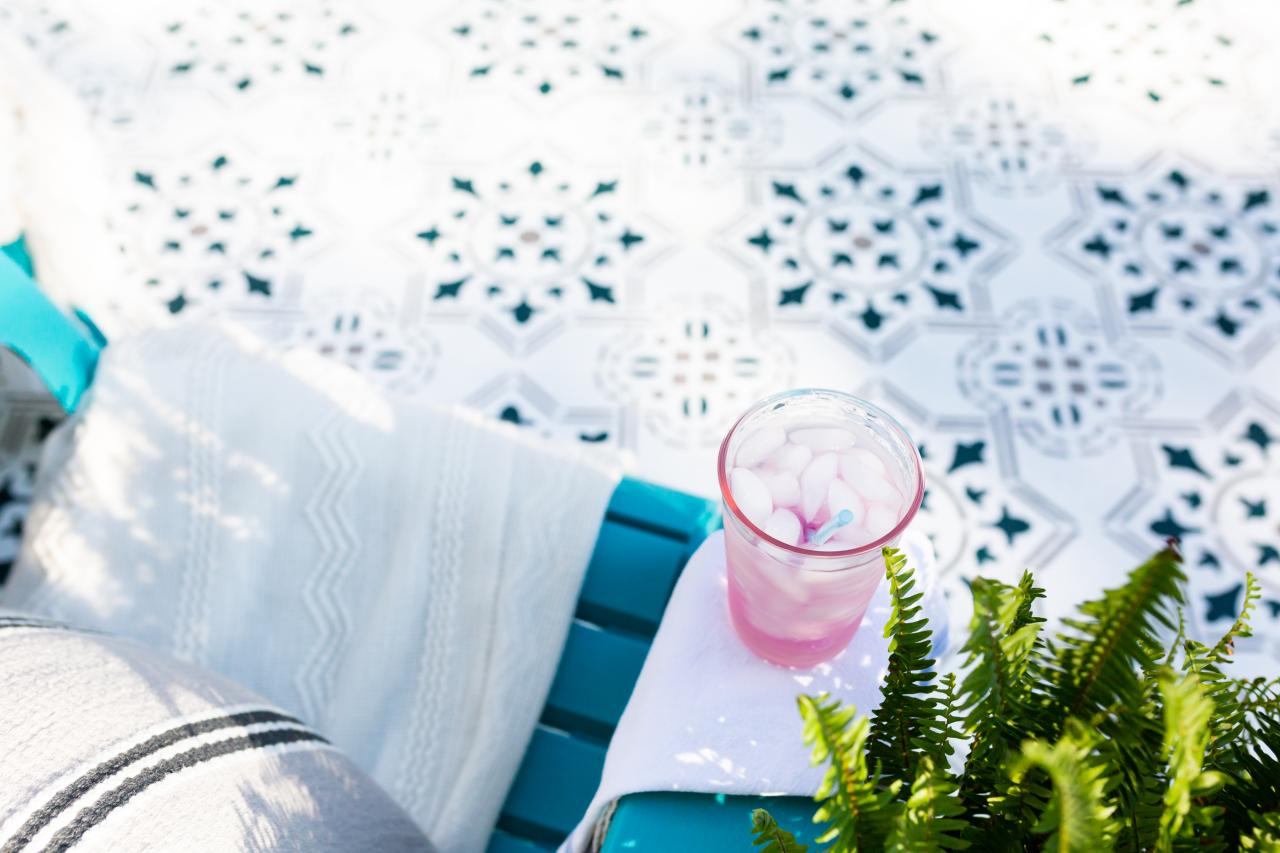
Pull up a few outdoor chairs, mix up some cocktails and enjoy lazy summer evenings on your pretty new patio.
Cassidy Garcia

Cassidy Garcia

Cassidy Garcia


