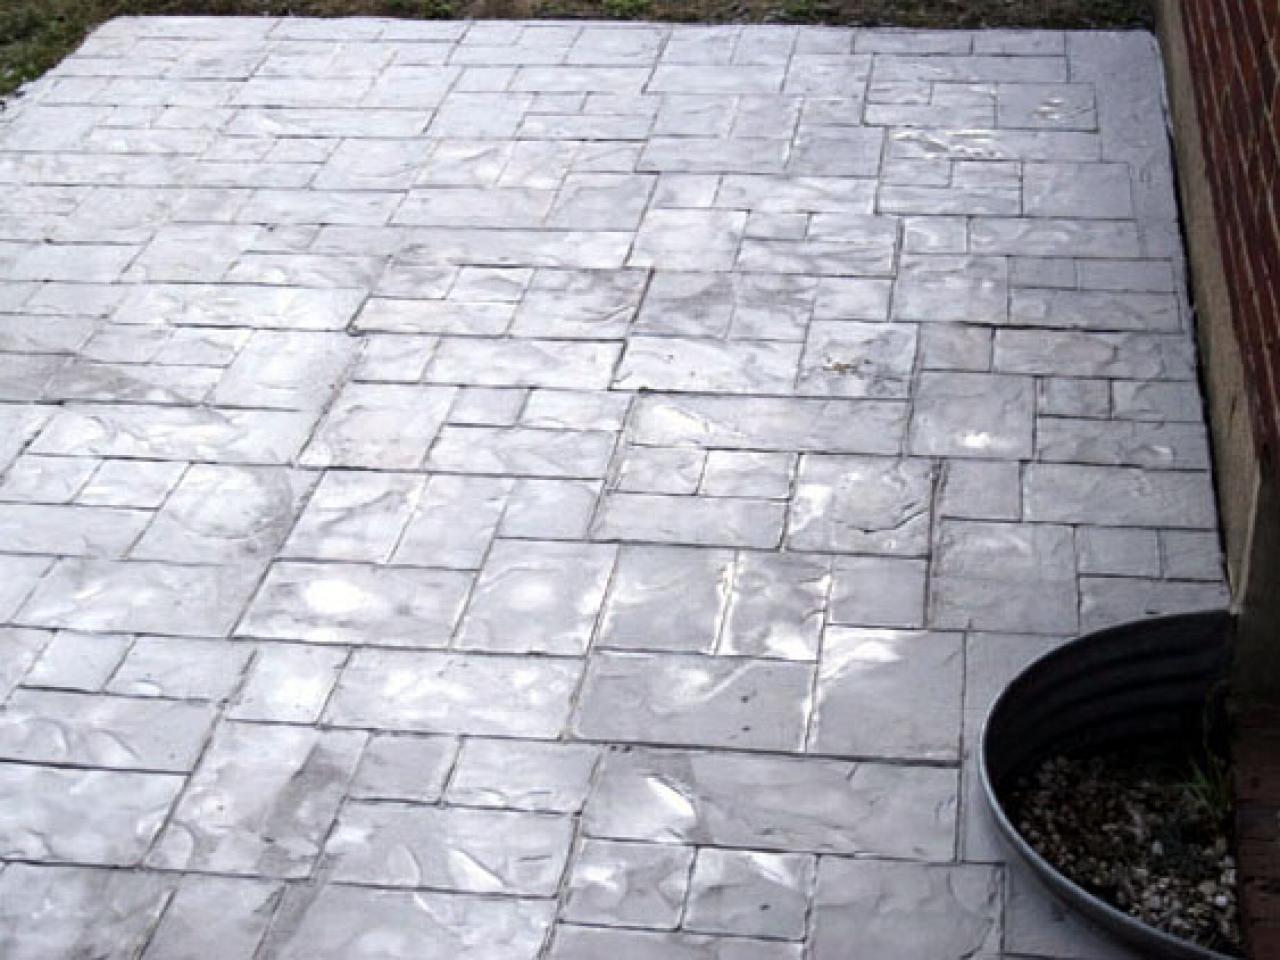
Enhance an Existing Patio With Concrete Stamping

Steve Watson and crew help re-make a patio area by giving the tired floor surface a distinctive "stamp" treatment.

hdswt405_1cz_finished_pattern

Once the stamped pattern is completed, the surface is given a protective and slip-resistant coating.

Once the stamped pattern is completed, the surface is given a protective and slip-resistant coating.

The Siscos are a newly married couple who recently bought their first home together. Between making wedding plans and their busy work schedules, household projects have been last on the to-do list. Janelle and Chris are looking for the inspiration to finally take on some of the bigger jobs.

Materials and Tools:

stamping kit (rental)
polymer resin (5 gallons)
thinset (50 lb. bucket)
stain sealer (5 gallons)
tinting agent
pressure washer (optional)
garden sprayer
gauge rake
bucket
broom
safety glasses
gloves

hdswt405_1fa_spreadConcrete2

Steps:

1. First, make sure the surface you're applying the thinset onto is clear of debris. If sweeping doesn't get it thoroughly clean, use a power washer to clean all residue from the concrete porch.

2. Once the patio is dry, apply two coats of a "bond crete" polymer resin. This will allow the thinset to apply to the existing concrete.

hdswt405_1fb_stamp-Patern1

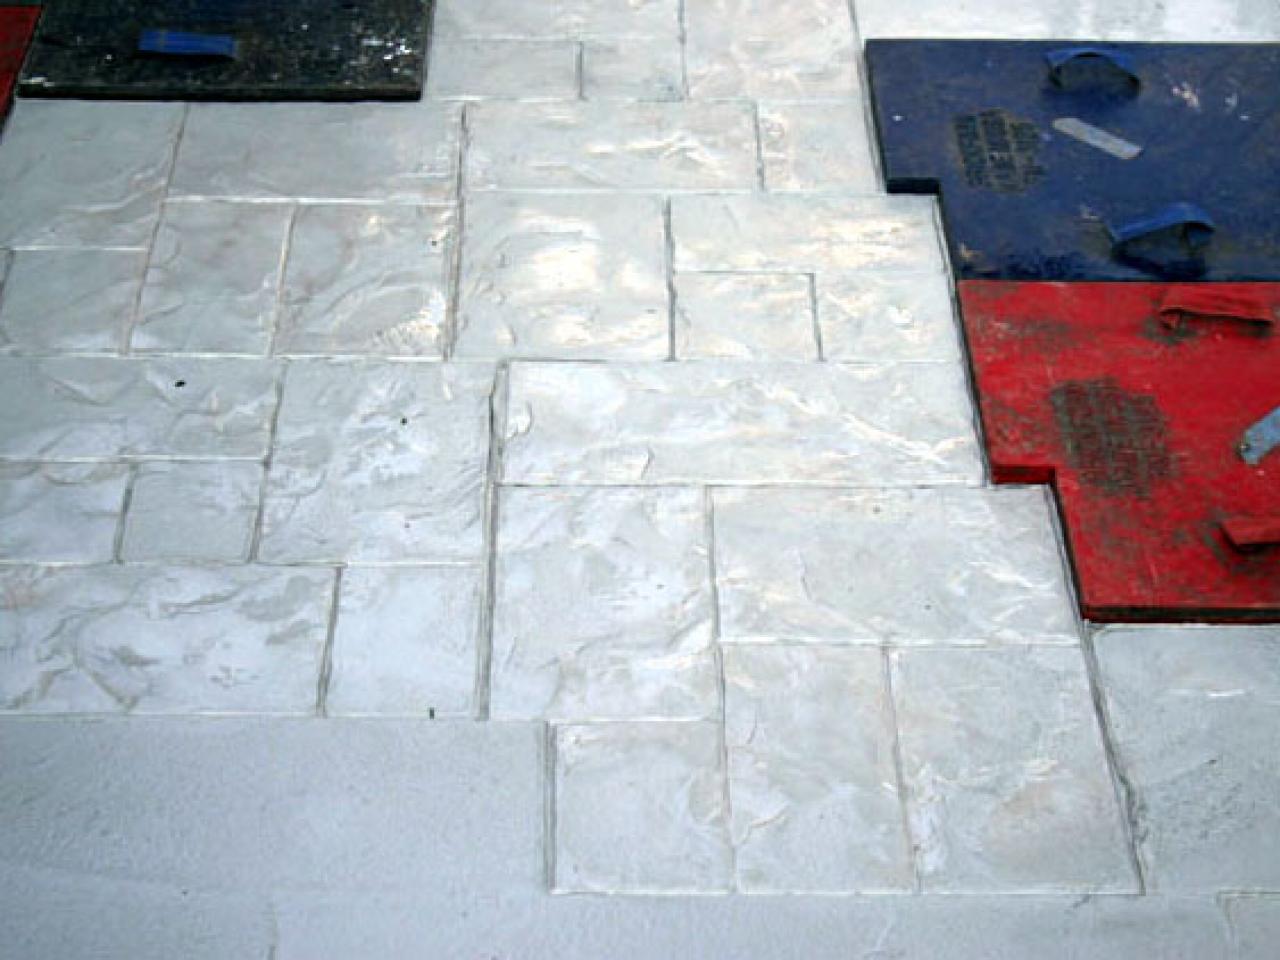
3. Mix the thinset and apply a thin coat on the resin. Fill any expansion joints with thinset powder to help it adhere to the new layer. The thinset needs to be a uniform 1/4" thickness. This can be achieved by using a gauge rake. A gauge rake has adjustable pins which allow you to set the height.

4. Once you have an area level, use the stamp to make the imprint in the concrete.

Important: The stamp relief needs to be sprayed with a special coating so the thinset will not stick to the stamp.

hdswt405_1fd_stamp-Patern2

5. Continue the process of thinset, spray, stamp, until the area is complete.

6. After the stamping is done and the thinset is dry, you may want to add some color. Both accent color and durability can be added to the stamps using some tinting agent, applied using a garden sprayer.

7. After coloring the concrete, you'll want to seal the surface against weather and wear damage. This is also a great opportunity to add some non-slip coating to help prevent falls. Mix the non-slip compound directly into the sealer, and apply the mixture using a paint roller.

Next Up

How to Stain & Stencil a Concrete Patio

Transform your drab slab into a bright, beautiful outdoor oasis with this easy stenciling project inspired by colorful Morrocan tile.

How to Build a Pea Gravel Patio

A crushed pea gravel patio framed in concrete pavers is one of the easiest and least expensive patios to DIY. Learn how to install one in less than a weekend.

How to Build a Porch Swing Out of a Door

A porch swing doesn’t have to cost a fortune. This simple DIY porch swing project uses basic 2x4s and an old door.

Gas Fire Pits: Propane vs. Natural Gas

Which fuel is best for your fire pit — propane or natural gas? Learn about the pros and cons of propane and natural gas fire pits.

DIY Concrete Vintage Camper Planter

Vacation starts now. Your plants can hit the road and see the sights in style in this vintage-inspired concrete camper.

How to Clean Patios

Get tips for cleaning your patio made of concrete, natural stone or flagstone without a pressure washer, plus get tips on cleaning and maintaining patio furniture.

How to Make Planter Posts for String Lights

Extend the party into the night with these wooden whiskey barrels made into planters with posts that hold string lights.

How to Hang a Shade Sail Over a Patio

Add instant shade for not a lot of money and just a little bit of elbow grease by hanging a triangular shade cover over your patio or deck.

60 Best Patio Furniture Buys for Every Style and Budget

From Adirondack chairs to benches to gliders, refresh your space with our top picks for patio furniture seating so you can kick back with a cold drink and enjoy patio season in your outdoor oasis.

How to Build a Fold-Down Outdoor Bar

Love to entertain, but don’t have space for a permanent bar? Build a foldaway table and cabinet so you’ll be ready for a party at any time. We built ours for the patio, but it can be hung indoors too.

Go Shopping

Get product recommendations from HGTV editors, plus can’t-miss sales and deals.

On TV

Follow Us Everywhere

Join the party! Don't miss HGTV in your favorite social media feeds.