


Stencil Your Way to a Stunning Cement Tile Tray
Beautiful and timelssly on-trend, cement tile adds a big punch of color and pattern to any room — but it's pricey ... and heavy. Get the same luxe look without the hefty price tag (and, well, heft!) by stenciling a board to create a gorgeous tray.


Photo by: Sarah Busby; Styling by H. Camille Smith
Sarah Busby; Styling by H. Camille Smith
Materials Needed
- 3/4" board, cut to 16" x 32" (Tip: Have it cut at your local hardware store)
- 1/4" wood lattice, 2 pieces each: cut to 15-3/4" x 32-1/2" (Tip: Have it cut at your local hardware store)
- cream matte craft or latex paint
- blue-gray matte craft or latex paint
- chip brush
- medium- and fine-grit sandpaper
- cement tile stencil
- stencil brush
- heavy-duty staple gun (or tack nails and hammer)
- matte or satin water-based polyurethane
- wood putty
- painter's tape
- paper towels
- ruler and pencil
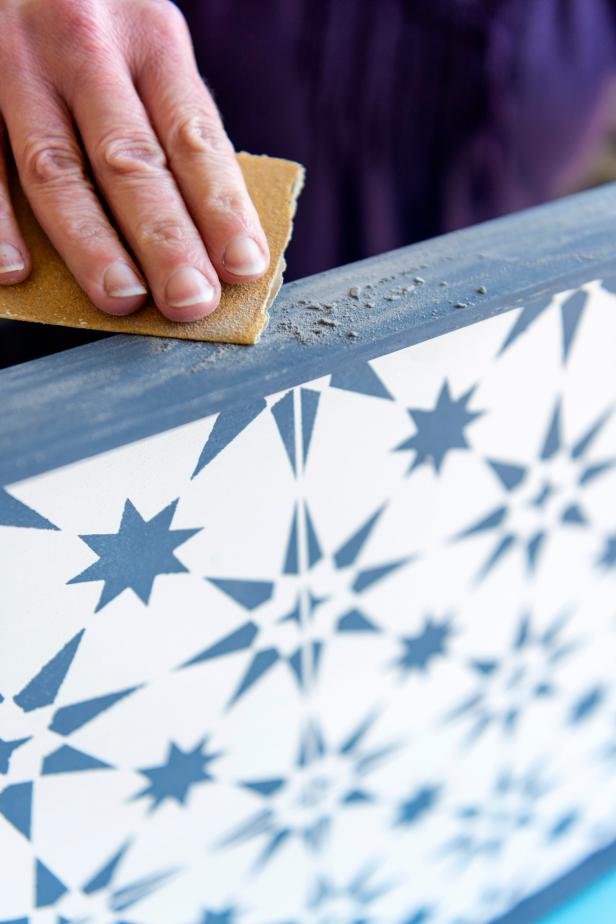
Sand Board and Side Pieces
Using first medium- then fine-grit sandpaper, smooth the board's cut edges and any surface roughness. Keep in mind that you're replicating the look of cement tile, which is smooth, so also fill in any knotholes or dents in the wood.

Sarah Busby
Paint Board With Base Color
Give the board a solid coat of cream paint and allow to thoroughly dry. This color will be the base color of your stenciled tiles. Tip: Cement tile often has a slightly mottled color so one thick coat will be sufflicient.

Sarah Busby
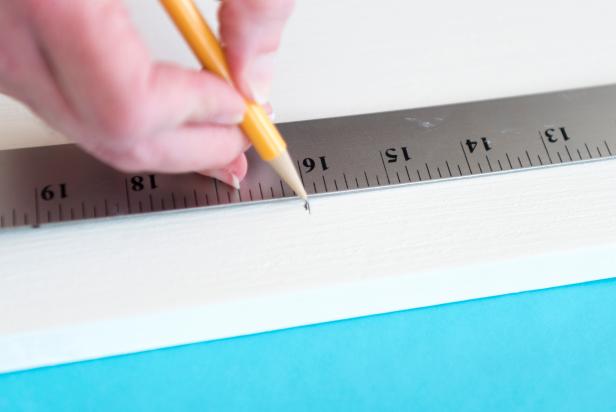
Mark Board's Center
First, find and mark the board's lengthwise center (Image 1). Draw a light pencil line for reference (Image 2). Note: This is where you'll begin stenciling so the finished pattern will be centered.
Sarah Busby

Sarah Busby
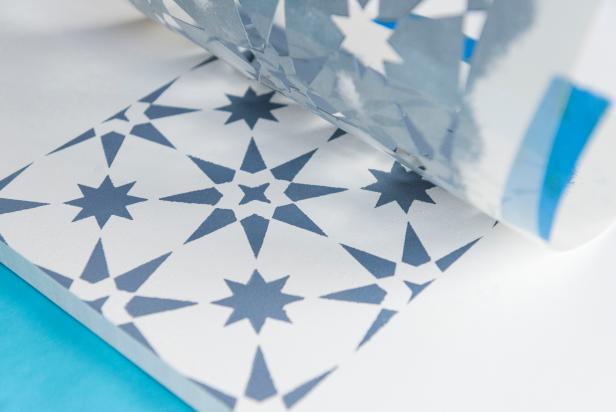
Stencil First Tile
Center the stencil over the pencil line and use painter's tape to prevent it from shifting (Image 1). Pour a small amount of paint into a shallow dish and lightly — more isn't better — load up the stencil brush (Image 2). Starting in the center of the tile, and working your way out to the edges, use a straight up-and-down pouncing motion to apply paint to the stencil (Image 3). Carefully remove the stencil to reveal the painted pattern — ta da! (Image 4).

Sarah Busby

Sarah Busby

Sarah Busby
Sarah Busby
Clean Back and Edges of Stencil
To prevent transferring errant paint smears as you stencil the second tile, flip the stencil over and use a damp paper towel to clean off any leaked paint. Tip: This is why it's important to use minimal paint when stenciling; some will always leak thru but light paint application helps to minimize it. Also, clean 2 sides of the stencil's front so you can see through the plastic to better line up the pattern's repeat.

Sarah Busby
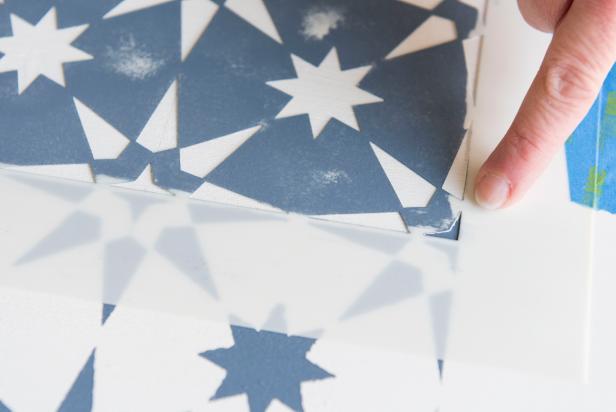
Continue Stenciling
Allow the first tile's paint to fully dry (usually just a few minutes) then using one of the sides you've cleaned for reference, line up the stencil for the second tile. Tip: Use the stencil's repeat (an area you painted previously) to help you line up the stencil (Image 1). Secure the edges with painter's tape (Image 2), then lightly load up the stencil brush and repeat the straight up-and-down pouncing motion to paint the second tile. Continue stenciling, following the steps of cleaning the stencil's back and front between tiles and only working next to dried tiles, till the entire board is covered.
Sarah Busby

Sarah Busby
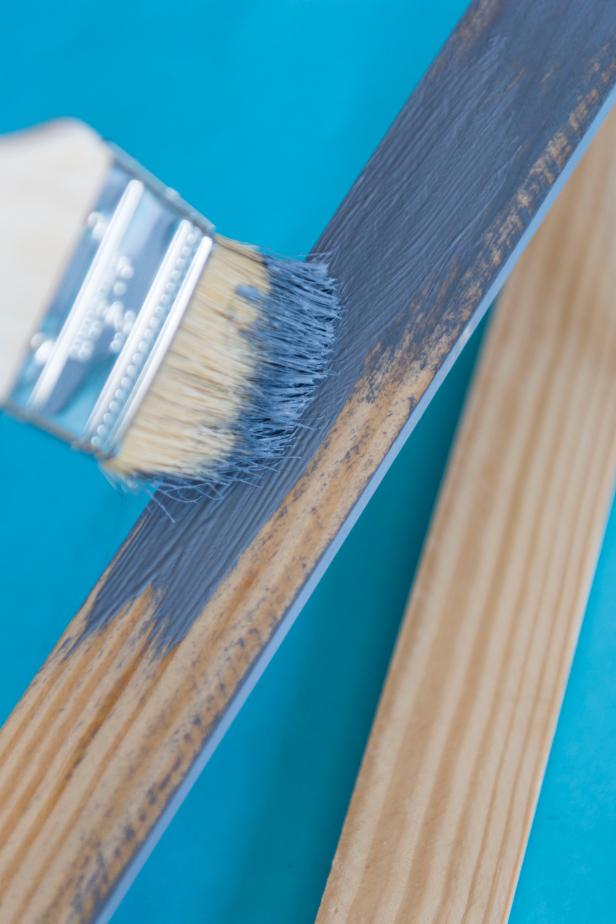
Paint Lattice Strips
Using a chip brush and matte latex or acrylic paint, coat the pre-cut lattice strips on all sides and allow to dry.
Sarah Busby
Add Tray's Sides
Position the tray's sides: 2 shorter lattice strips on the 16" side and 2 longer lattice strips on the 32" side to create a simple butt joint. Use painter's tape on each end to secure the trim as you attach it using a staple gun (Image 1) or nails and a hammer. Fill the nail or staple holes with wood putty (Image 2) and allow to dry. Sand any excess dried putty (Image 3), then touch up the paint on the tray's sides (Image 4). Finally, protect the painted surface with a coat of polyurethane.

Sarah Busby

Sarah Busby
Sarah Busby

Sarah Busby
Thoroughly Wash Stencil
Place the stencil (as flat as possible) in the kitchen sink and clean using dish soap and water, being careful not to twist or tear the stencil. Allow it to fully dry, then store between 2 sheets of cardboard or in a flat location so it can be used again.

Sarah Busby
Display Your Cement Tile Lookalike Tray
Perfect for stylishly corraling remotes on your coffee table and lightweight enough that you can use it for serving drinks, this tray is a stunner you'll want to use in any room of your home.

Sarah Busby; Styling by H. Camille Smith

Sarah Busby; Styling by H. Camille Smith
Photo By: Sarah Busby; Styling by H. Camille Smith


