


How to Make a Decorative Clay Seder Plate
It's not a Passover Seder without a Seder plate. Make your own elevated version with oven-bake clay and gold gilding paint.

Rebekah Lowin

A Seder plate is a very special Jewish ritual object. Traditionally, it remains on the table throughout the entirety of the Passover Seder — the lengthy, spirited holiday dinner — and contains specific ritual items that represent a different aspect of the story of Passover. If you're hosting a Seder this year and find yourself without one of these cherished heirlooms, there's good news: You can create your own at home. This simple tutorial will guide you along — no experience working with clay required.
Note: Though the ritual items placed on top of a Seder plate are not intended to be eaten, it’s still important to note that this plate is not food-safe. Do not consume any items you place on top of it.

Materials Needed
- white polymer clay
- gold gilding paint
- small paintbrush
- mini rolling pin
- small knife
- (6) small oven-safe bowls
- mini alphabet stamps
- large baking sheet
- parchment paper
- gloss glaze (optional)
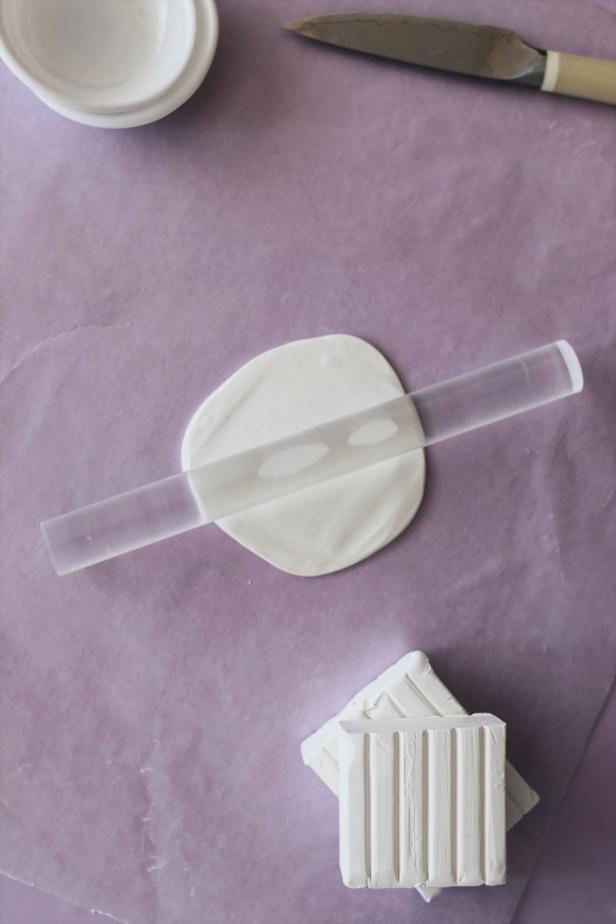
Roll Out Clay
Preheat the oven according to the instructions on the clay package. On a smooth surface, lay down parchment paper and use your hands to knead and warm up a small cube of clay. When it's a bit more pliable, use a rolling pin to flatten it to about a 1/8-inch thickness.
Rebekah Lowin
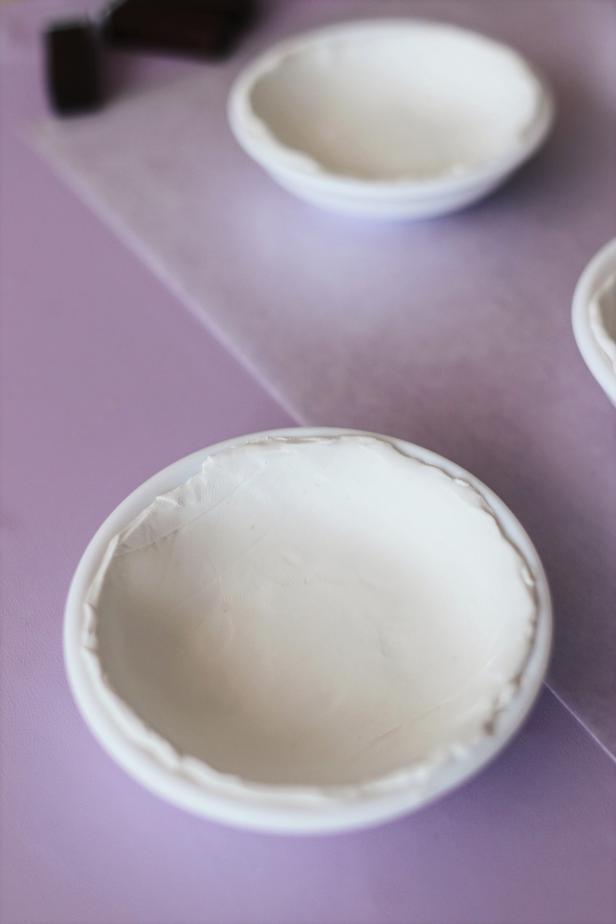
Create Small Bowls
Invert a small bowl on top of the clay, then use a sharp knife to trace around the edges, creating a similarly sized circle of clay. Repeat this process five times, rolling out more clay as needed. Carefully press each circle of clay into its own oven-safe bowl, using your fingers to release any air bubbles. Finally, use miniature letter stamps to imprint the symbolic names of each ritual ingredient into the interior of the bowls: Beitza, Maror, Charoset, Karpas, Chazeret and Zeroa.
Rebekah Lowin
Create Plate
Roll out a large piece of clay to about a 1/4-inch thickness. Invert a dinner plate on top of the clay, then use a knife to trace around the edge, creating a similarly sized "plate" of clay. The plate should be large enough to house all of the smaller bowls on top of it.

Rebekah Lowin
Bake
Place the larger clay plate onto the baking sheet, then place the six small bowls beside it. Bake according to polymer clay instructions. Remove from the oven and allow to cool.

Rebekah Lowin
Decorate
Shake the gold gilding paint to ensure it's well mixed, then apply a thin layer around the rim of each bowl and plate using a paintbrush (Image 1). You can also use acrylic paint for this step if another color is desired. Optionally, apply a layer of gloss glaze to the surface of the components. Assemble the bowls by placing them on top of the plate, then add to your Seder table.

Rebekah Lowin

Rebekah Lowin

Rebekah Lowin


