


How to Make a Bench Cushion With a Removable Cover
Learn how to use a fabric shower curtain to sew an upholstered cushion for a kitchen banquette, window seat or patio furniture.

Carla Wiking
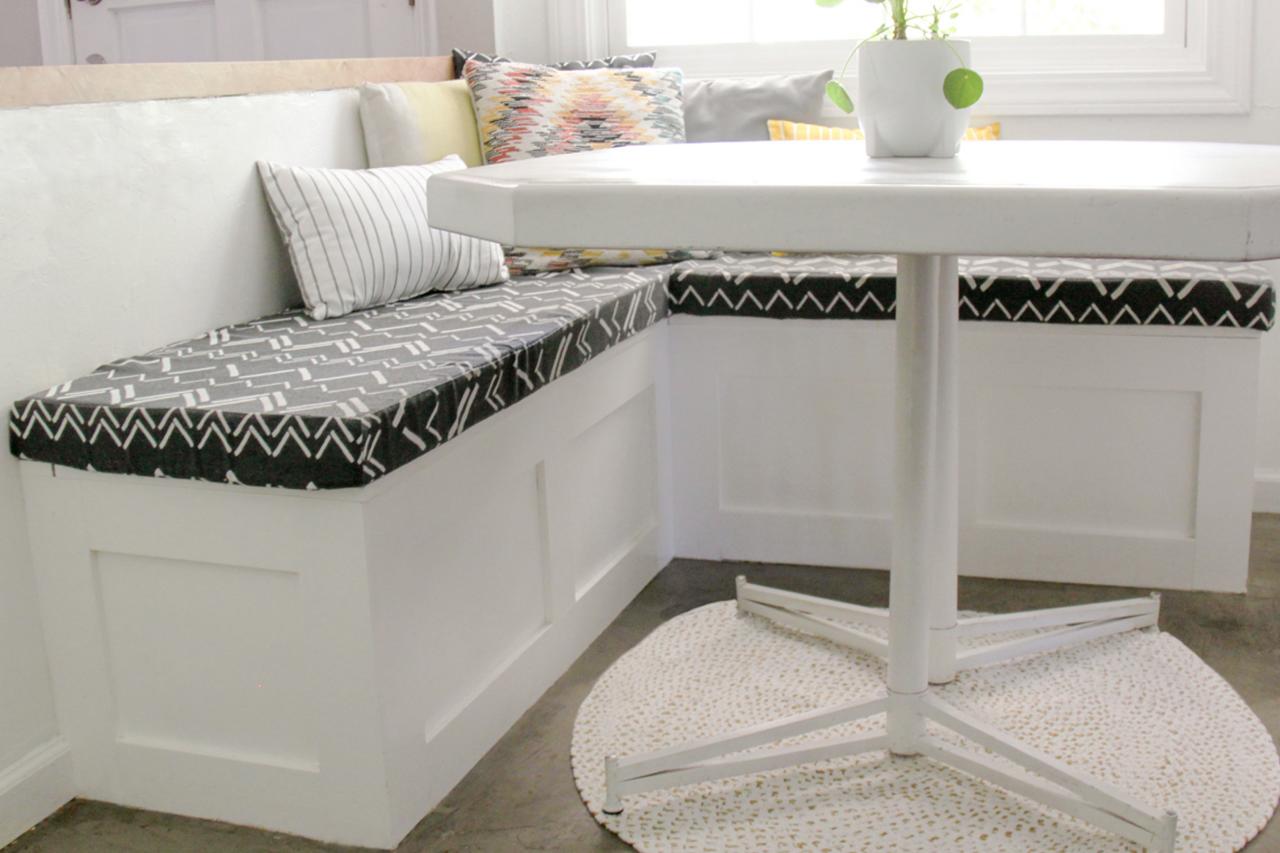
We made two bench cushions to accommodate an L-shaped banquette seat.
With these instructions, you can create a custom, foam-filled bench cushion to fit any space. If you’re searching for a budget-friendly, durable fabric for this project, look no further than the shower curtain aisle of your favorite store.

Carla Wiking
Tools and Materials
- 3” foam (large enough to cover the seat or bench)
- home decorator/outdoor fabric (fabric shower curtains are an affordable alternative!)
- sew-on Velcro
- coordinating thread
- sewing machine
- iron
- rotary cutter and mat or scissors
- pins
- marker
- serrated knife, electric carving knife or reciprocating saw with fine blade
Step 1: Cut Foam

Carla Wiking
Use a marker on the foam to mark the dimensions of your cushion. Carefully cut along the lines using a serrated tool like an electric carving knife. For the best results use slow sawing movements and try to keep the blade as straight as possible.
Step 2: Cut Fabric

Carla Wiking
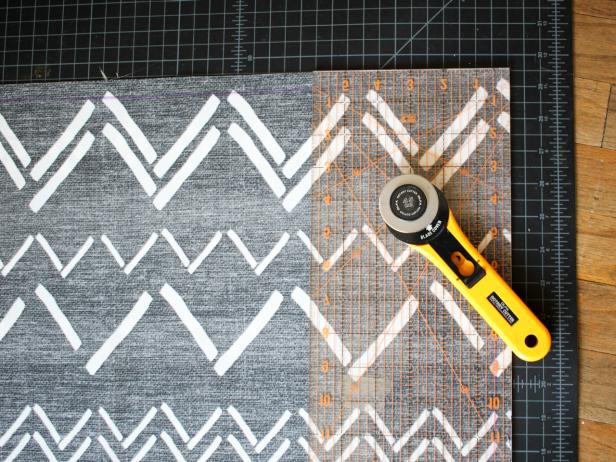
Carla Wiking
Fold your fabric in half or place two layers on top of each other, wrong-side facing up. Place the foam on top and trace around it. Using a ruler and rotary cutter or scissors, carefully cut 1/2” away from your traced line for seam allowances. Be sure to cut through both layers, these will be your top and bottom pieces of the cushion cover.
Cut a 4" tall strip that will run along the front of the cushion cover. It will need to be as long as the long side of the cushion plus 1” for seam allowance.
Cut the two short-side pieces of the cushion cover; they should be 4" tall and 3” longer than the short sides of the cushion.
For the back flaps (where the Velcro closures will be), you will need two pieces as long as the front strip and 4-1/2” tall (they will overlap). Note: if you are using a shower curtain you can cut your back flaps along the hemmed edge in which case they would only need to be 3-1/2” wide.
Step 3: Sew Edge Pieces
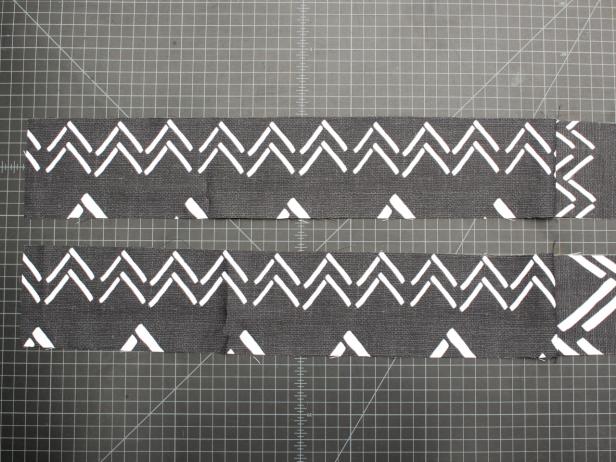
Carla Wiking
Sew the side pieces to the front piece to create one long edge piece. To do this, lay one side piece on top of the front piece along the short end, right-sides facing. Pin and sew along the short edge with a 1/2” seam allowance. Repeat on the other side.
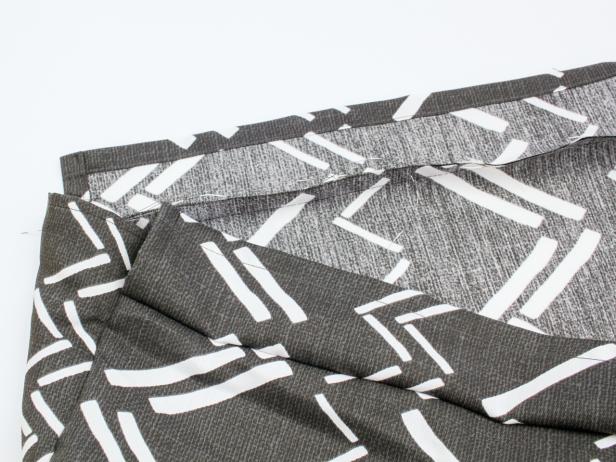
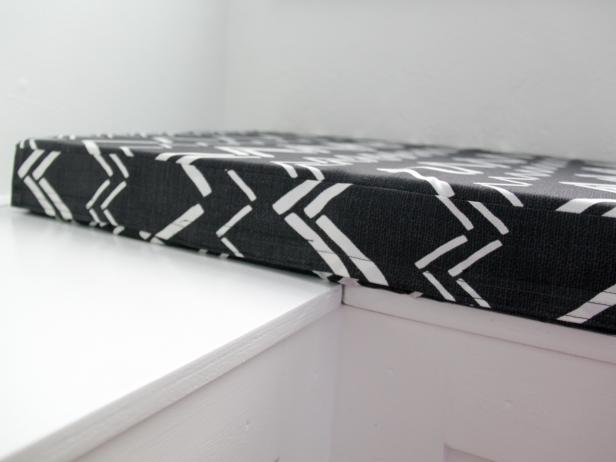
Step 4: Attach Top and Bottom Panels
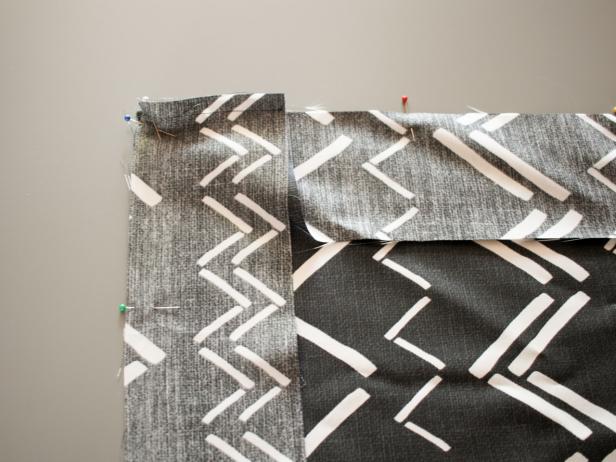
Carla Wiking
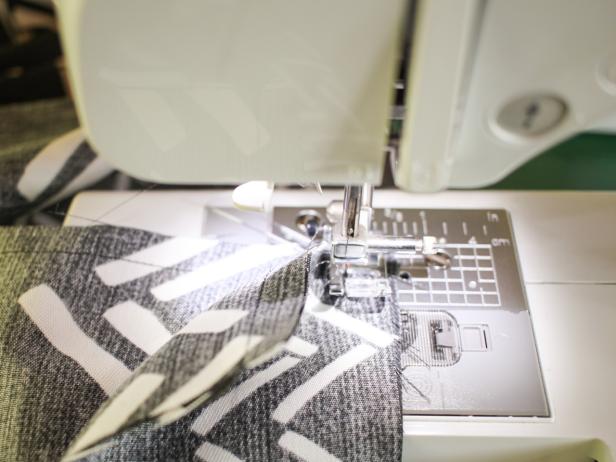
Carla Wiking
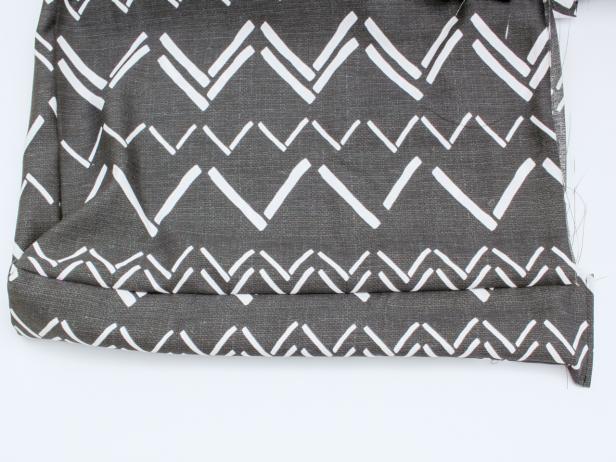
Carla Wiking
Lay the top panel right-side up. Align the long side piece along the edge, wrong-side up. Make sure the seams of your edge piece match up 1/2" from each corner. Pin the corners. Then add pins along the long front edge and down each side (Image 1). With a 1/2” seam allowance, sew down one short side until you reach the corner pin. With the needle in the down position, lift the presser foot, remove the pin and rotate the work 90 degrees to sew down the long edge (Image 2). Repeat these steps when you reach the other corner pin. Repeat this process to attach the bottom panel to the edge piece. Turn it right-side-out to check your seams (Image 3).
Step 5: Hem Back Flaps

Carla Wiking
Fold one long edge of your back flap up 1/2” on the wrong side and iron flat, then fold it up another 1/2” and iron; this should hide the raw edge. Sew along the folded edge to create a hem. Repeat on the other flap piece. Then repeat the process for the short sides of the back flaps. Your back flaps will now be hemmed on three sides. If you used the hem of a shower curtain you will only need to hem the short sides.
Step 6: Attach Back Flaps
Carla Wiking
Align the back edge of the top of the cushion cover with the raw edge of one of the back flaps, right-sides facing. Pin and sew with a 1/2” seam allowance. Repeat on the bottom edge.
Step 7: Finish Inside Seams

Carla Wiking
Turn the cover inside out and finish the raw seams with pinking shears, a zigzag stitch or a serger. Use this same technique on the side edge flaps or hem them for a more finished look.
Step 8: Add Velcro

Carla Wiking
Carla Wiking
Turn your cushion cover right-side out and slide the foam inside. Cut the Velcro into several 5” lengths. Starting in the center of the cushion cover, pin each side of Velcro onto the back flaps. Place one side of the Velcro on the outer side of the bottom flap, near the seam and place the other piece of Velcro on the backside of the top flap, near the hemmed edge. Repeat as needed depending on the length of your cushion cover. Carefully remove the foam and sew the Velcro onto the fabric.
Step 9: Cover and Enjoy
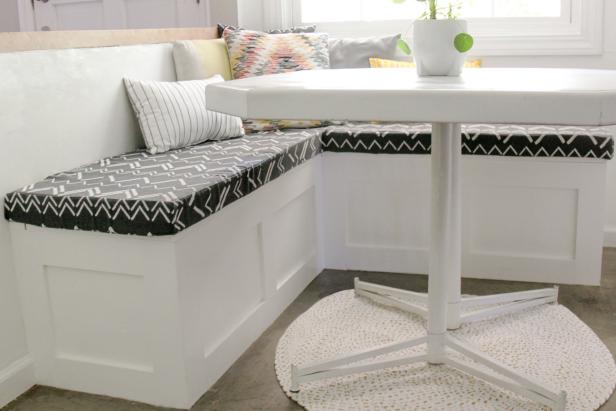
Iron the cushion cover for nice crisp edges. Slide the foam into the cover, wrap the side flaps toward the back edge and close the back flaps. Lay your cover on your bench and enjoy a comfy seat.


