


Wainscoting and Tiling a Half Bath

Tools and Materials:
finish nailer
construction adhesive and caulking gun
circular saw
jig saw
painting supplies
drywall screws and a screw gun
1/2-inch drywall
drywall jab saw
6-inch putty knife
drywall screws
joint compound (drywall mud)
drywall tape
1/2” concrete backer board
beadboard wainscoting panels
2-inch crown molding
wainscoting chair-rail molding
wainscoting baseboard
floor tile
tiling tools
Steps:
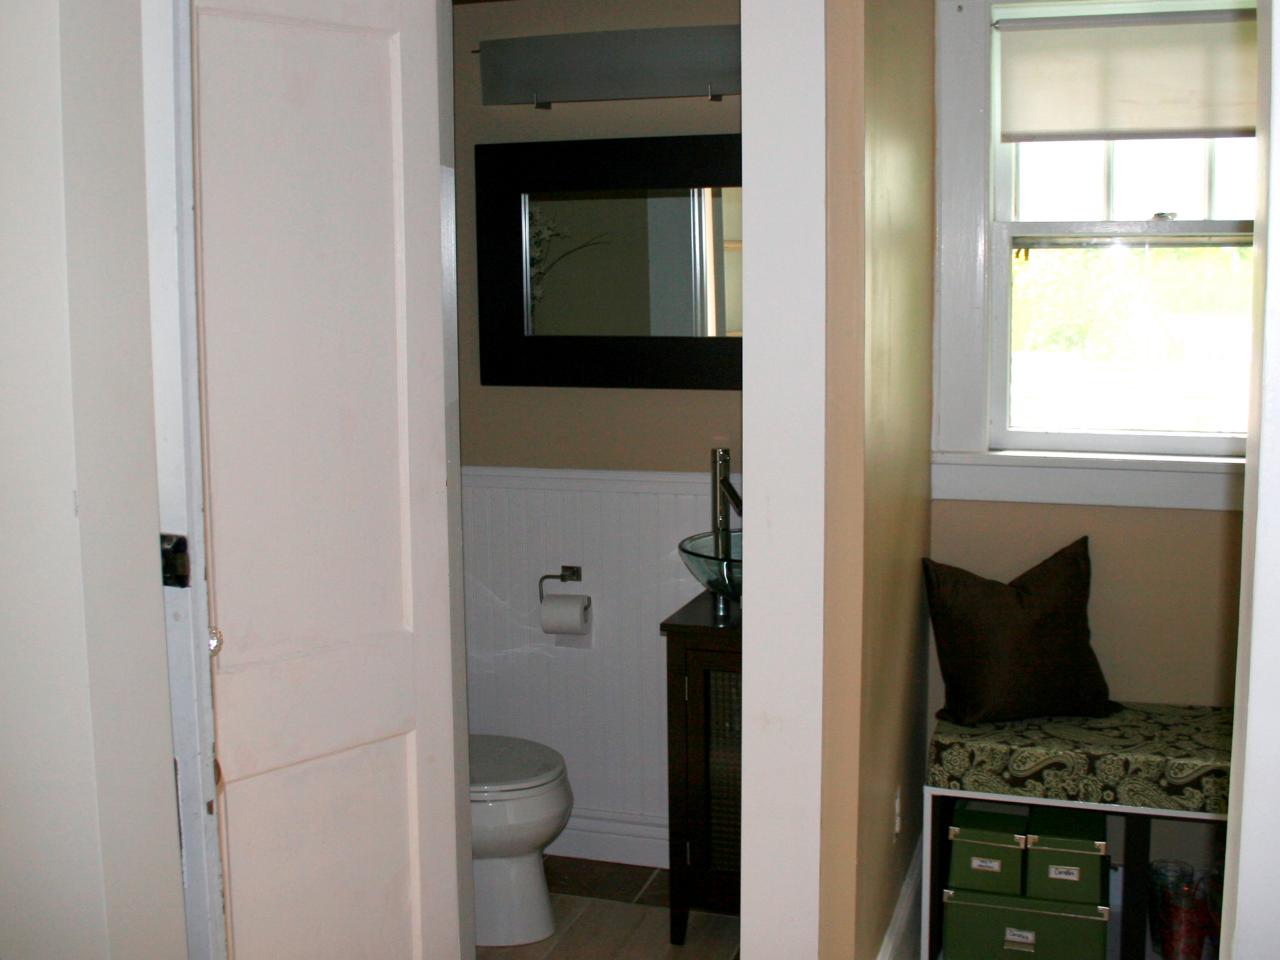
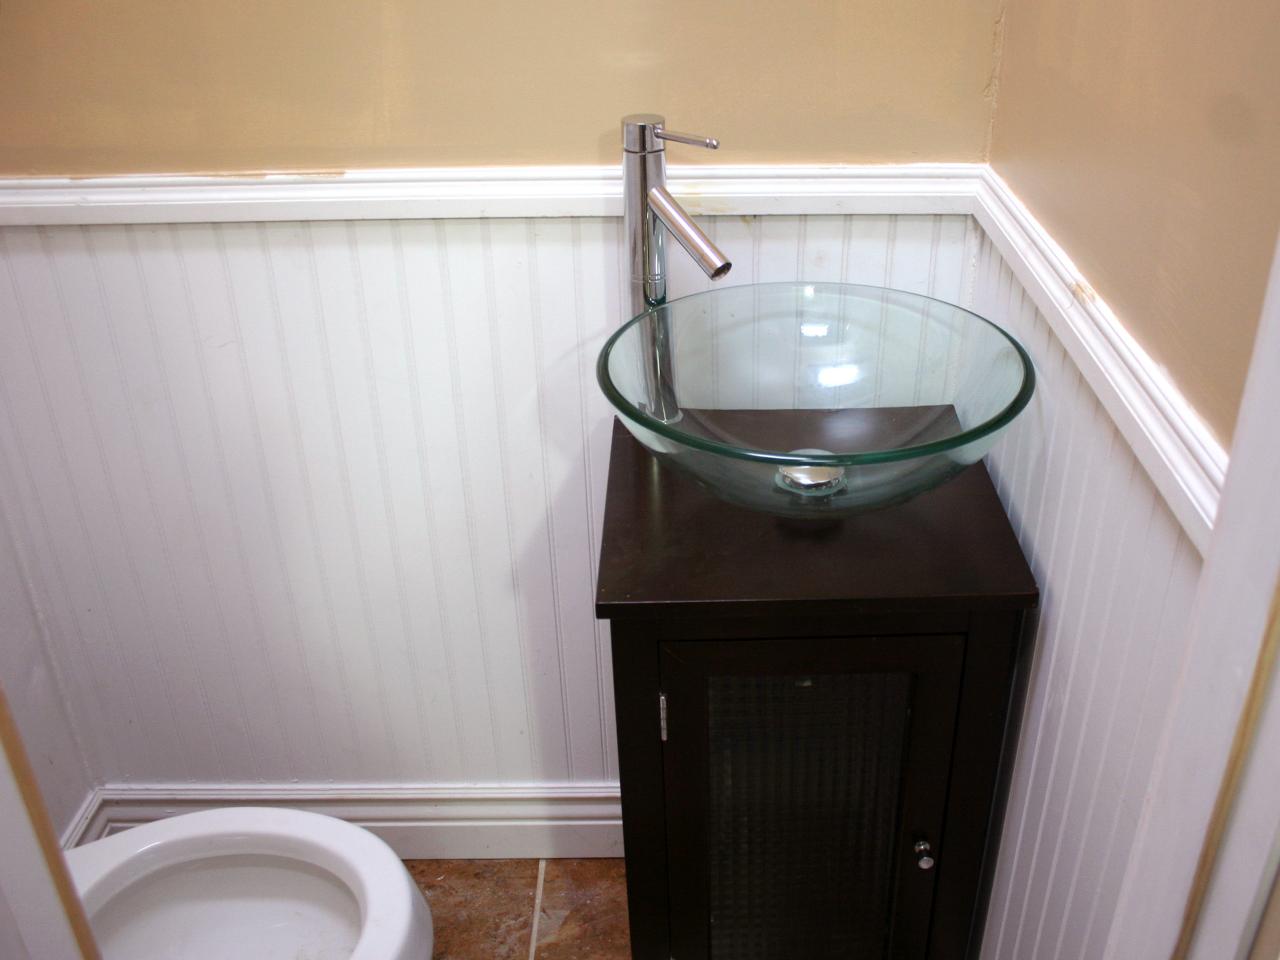
Our bathroom has already been framed with electrical and plumbing in place. We are finishing the walls with drywall and wainscoting then tiling the floor.
Drywall:

1. Cut drywall to size. Use a utility knife to score the paper carefully. Apply pressure by hitting in the middle of the score; the drywall should easily break. Finish the cut by running a knife down the paper to separate the pieces. Secure the drywall to the framing with screws. Countersink the screws; you’ll fill in the holes with joint compound later. Stagger the seams of the drywall.
2. Apply joint compound to the seams and screw holes spreading it evenly with a putty knife. Add mesh drywall tape to reinforce seams then cover with more joint compound. Allow the compound to dry completely then sand smooth. It will take at least three coats, allow the joint compound to dry completely in between each coat.
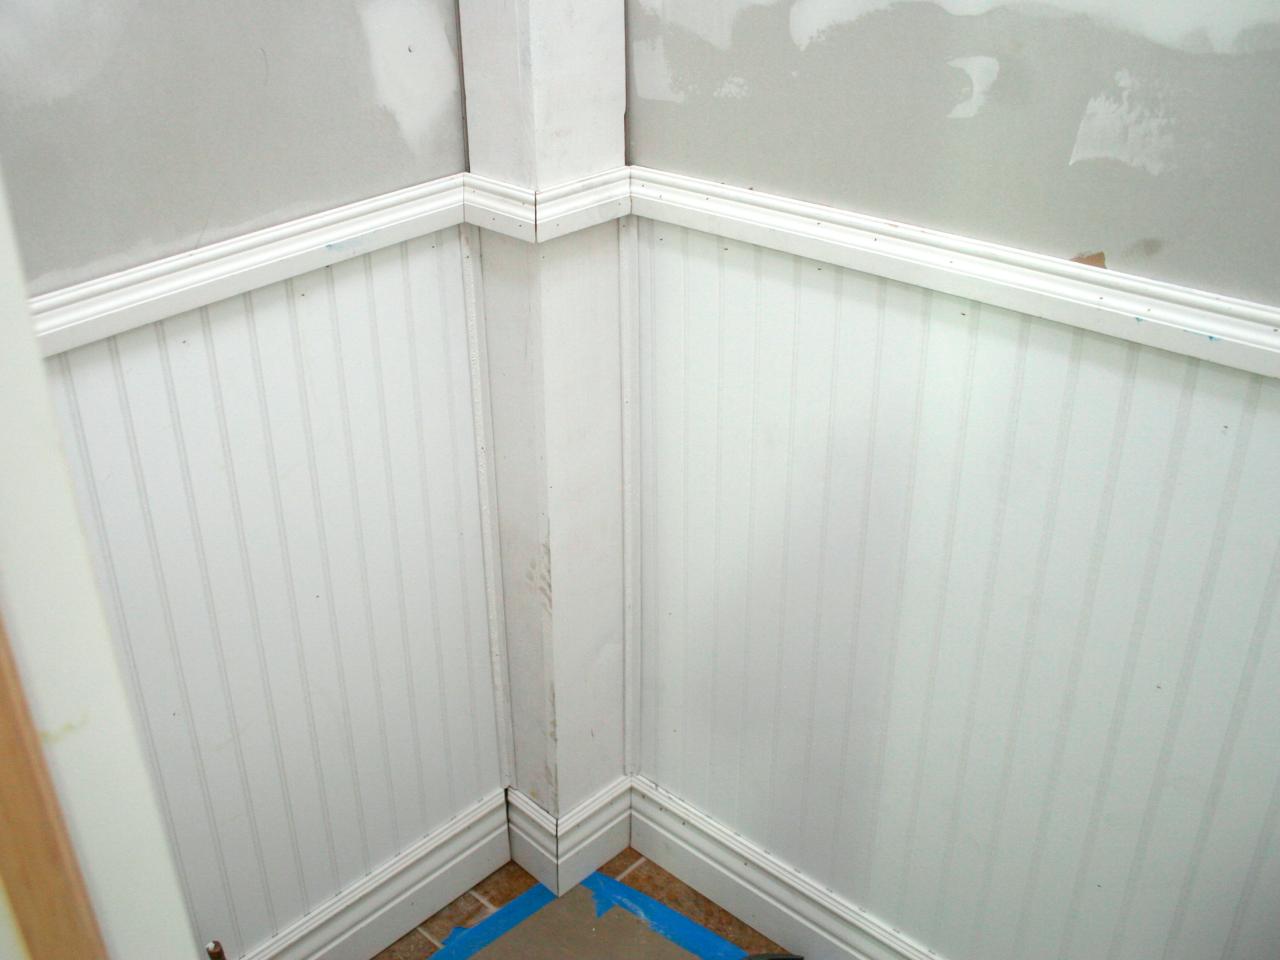
Wainscoting
1. Determine the height of the wainscoting. Allow room for the flooring and baseboard. Use a laser level or chalk line to mark where the top of the beadboard will sit. If your floor is uneven, start at the highest point in the room, you can cut down the panels for the low points. Measure from the laser line down to where the baseboard will fit based on the height of the wainscoting boards.
2. Liberally apply construction adhesive to the back of a wainscoting panel and hold up to the wall in place. Quickly pull the panel off the wall part of the way so the adhesive becomes stringy and covers more area on the back.

3. Nail the beadboard to studs using the finish nail gun.
4. Add the chair rail molding to the top of the wainscoting. Buying the molding with a notch already cut out of the back to fit over the beadboard saves time and effort. Secure the moldling to the wall with adhesive and nails.
5. Fill in nail holes with caulk and sand.
6. Leave the baseboard off until the flooring is complete.
7. Paint and walls and wainscoting.
Tile Flooring

1. Screw the 1/2” backer board to the floor to create an even, moisture-resistant subfloor.
2. Layout the tile and make any necessary cuts. Spread the mastic on the backer board and on the tile. Use spacers to make sure you’ve got the tiles evenly placed. We combined two different colors of tile in our room.
3. Let the tiles sit overnight so the mastic cures.

4. Use a grout float to add the grout. Spread the grout diagonally over the tile, this helps get it into the cracks. Wipe off the excess with a wet sponge.
5. Allow the grout to dry overnight then install your fixtures.


