


Make Your Own Monogrammed String Art


Materials Needed:
- 9 x 12-inch precut wood plaque
- acrylic craft paint
- foam paintbrush
- scissors
- small nails
- hammer
- tweezers
- heavy thread or string
- Download: String Art Letter Template
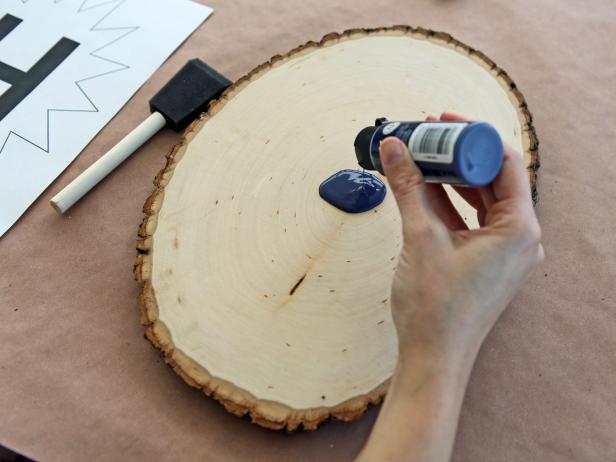
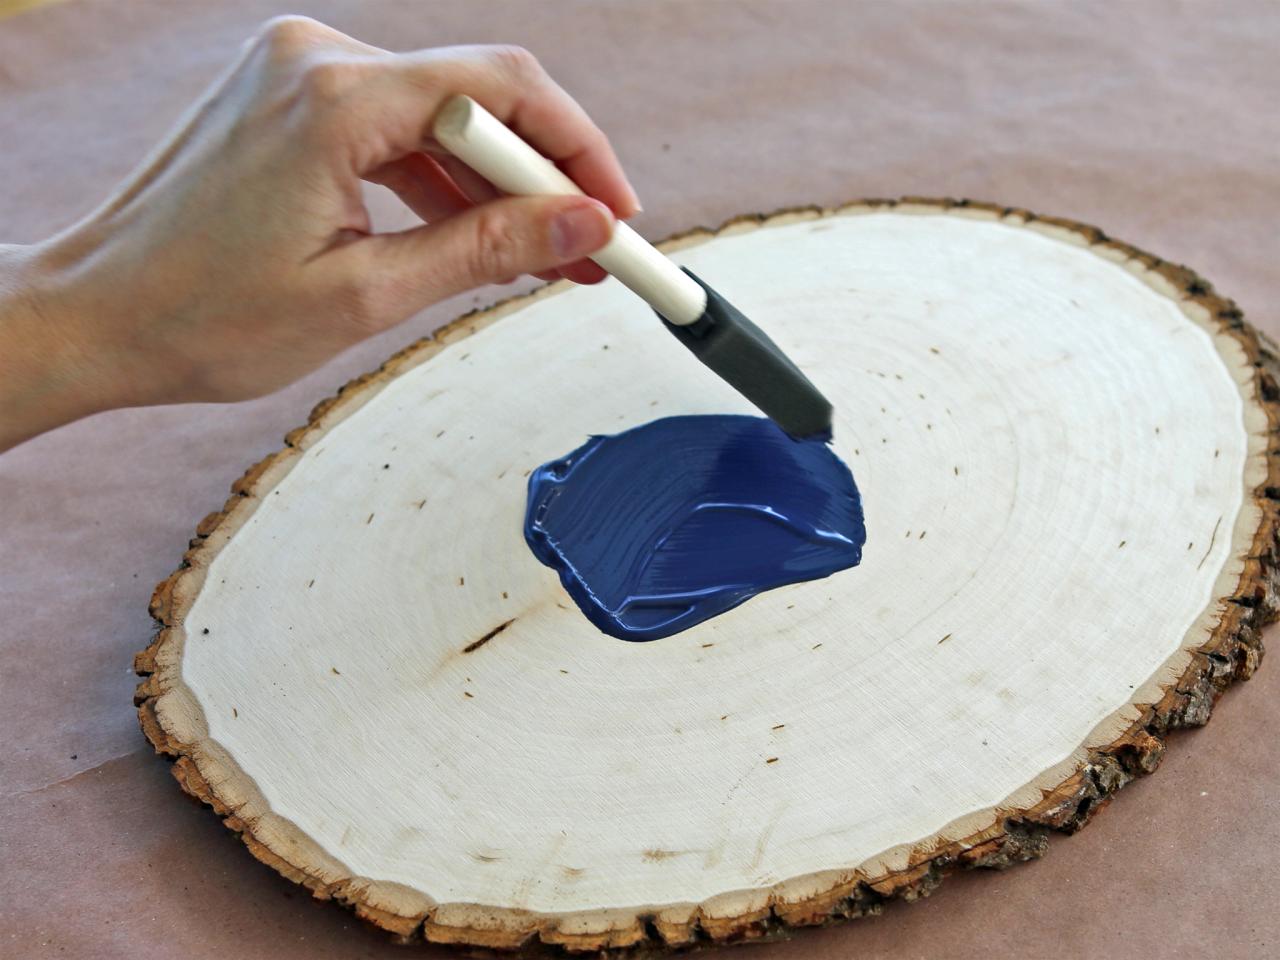
Paint Surface of Plaque
Use foam paintbrush to apply a thin coat of acrylic paint to wood plaque.


Cut Out Template
Download, print and cut out starburst monogram template so that it fits onto plaque. Note: You can make your own template using a word processing program and some clip art.

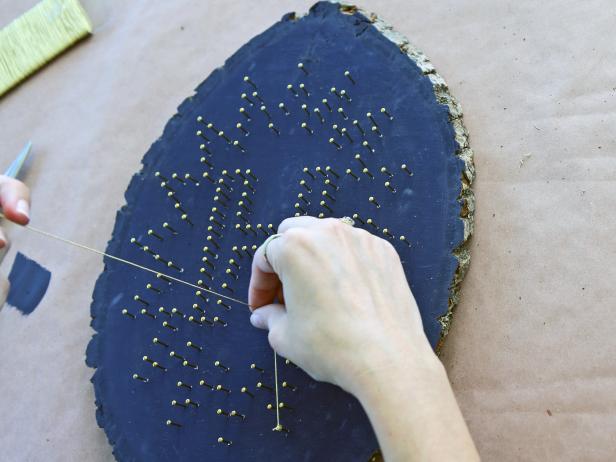
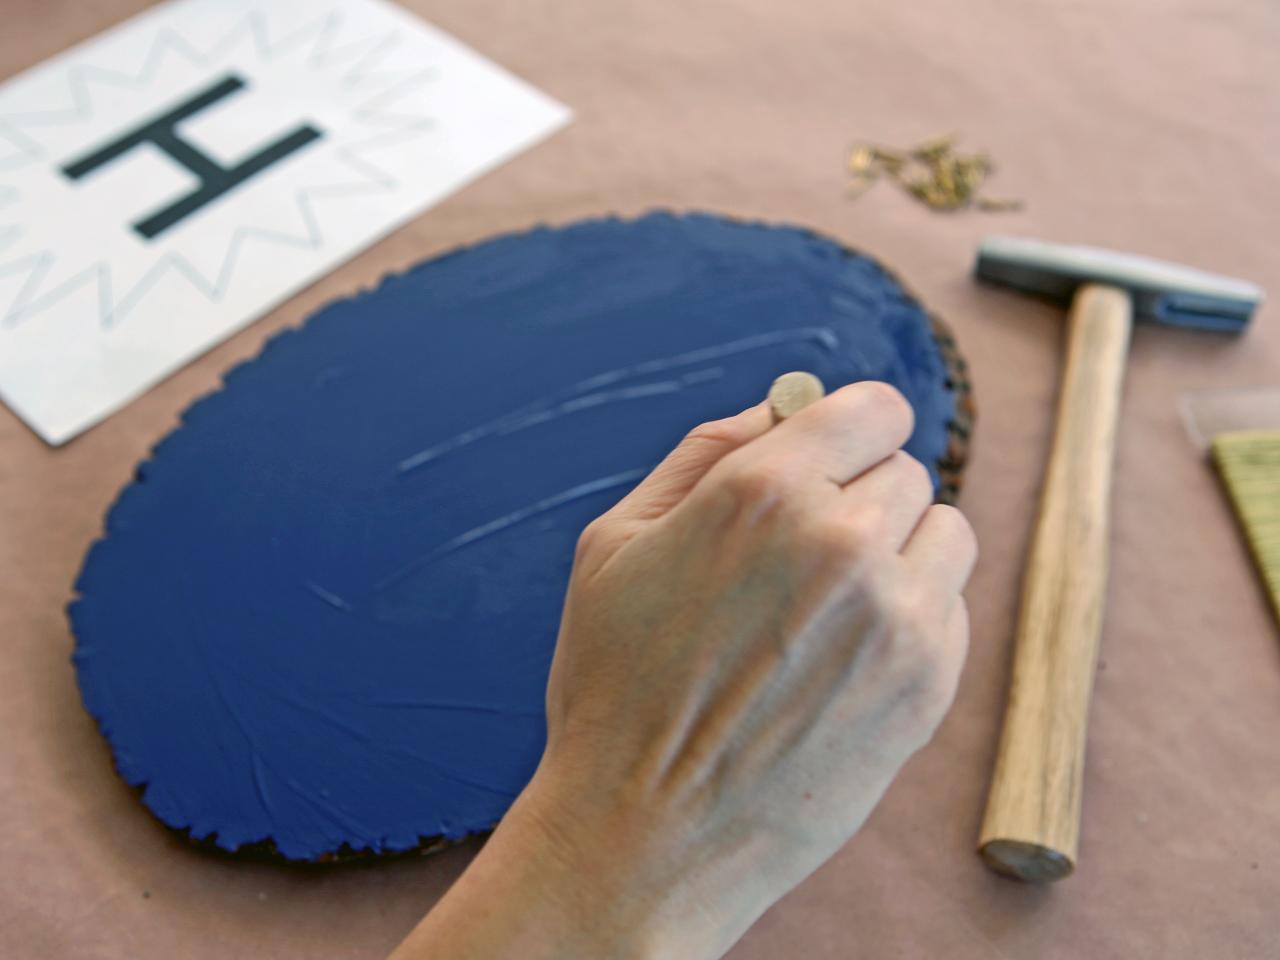
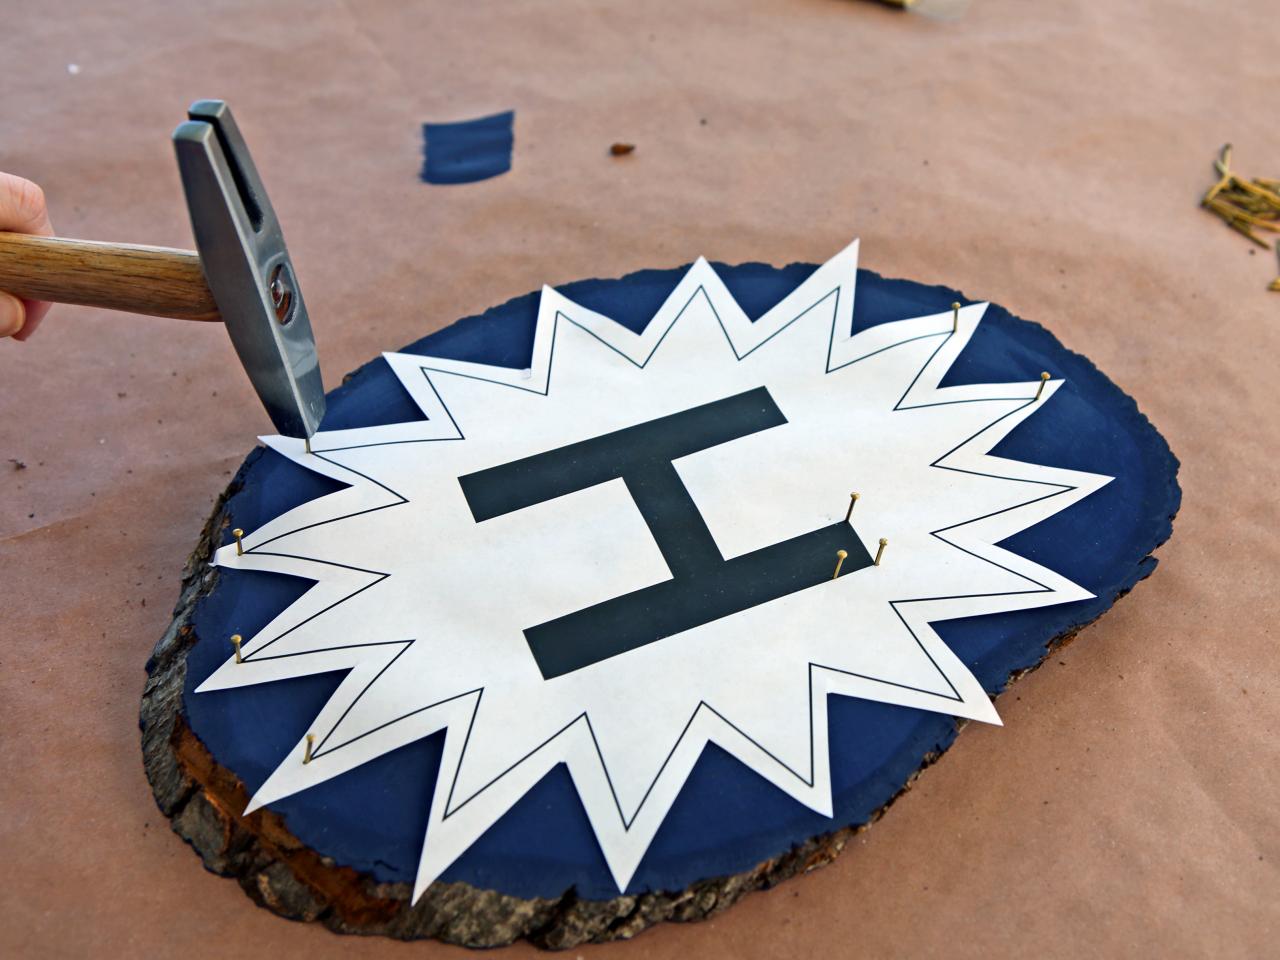
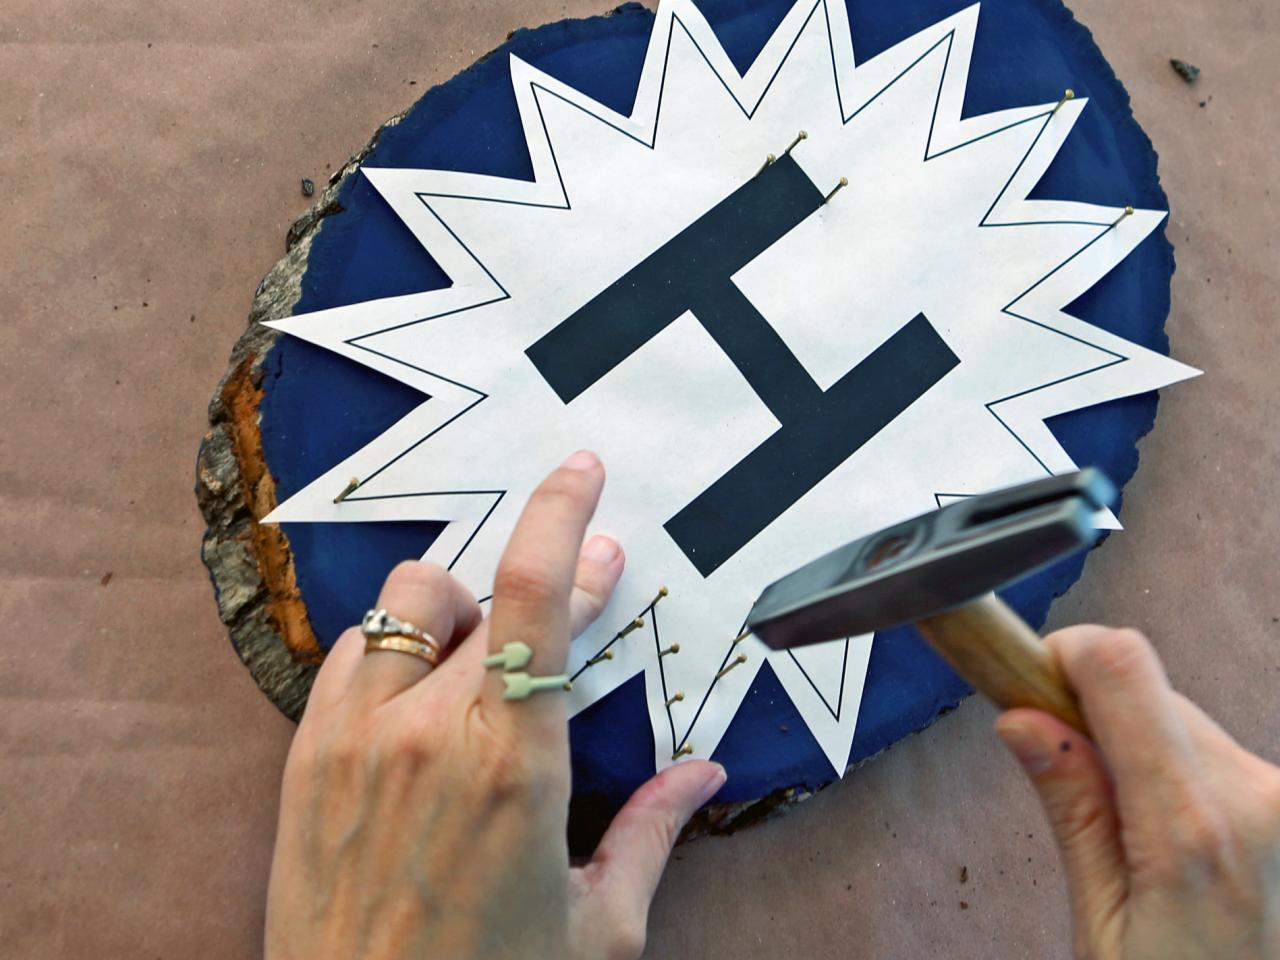
Attach Template to Plaque
Center template onto plaque. Keep paper taut and start hammering nails into alternating points of the starburst. Continue adding nails approximately half an inch apart all around the outer edges of the starburst and letter.


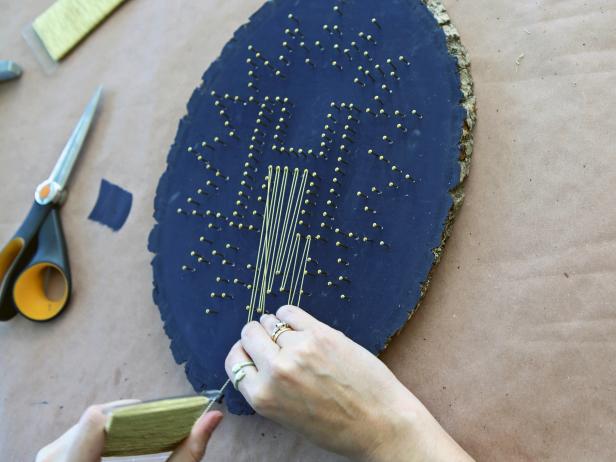
Remove Template
Use household tweezers to help remove paper template from plaque. The tweezers will help with any tiny paper scraps that are caught in between nails.

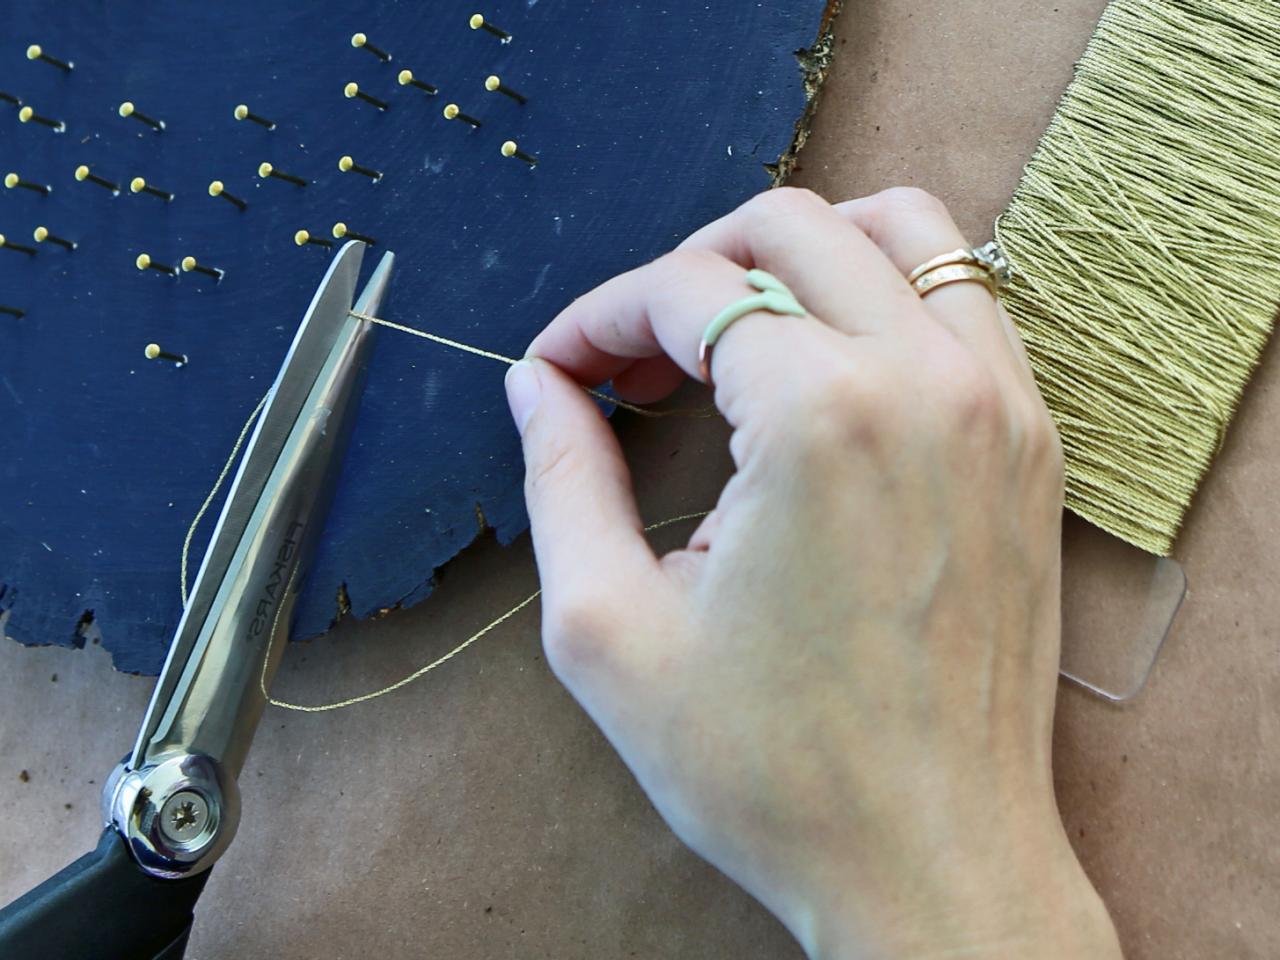
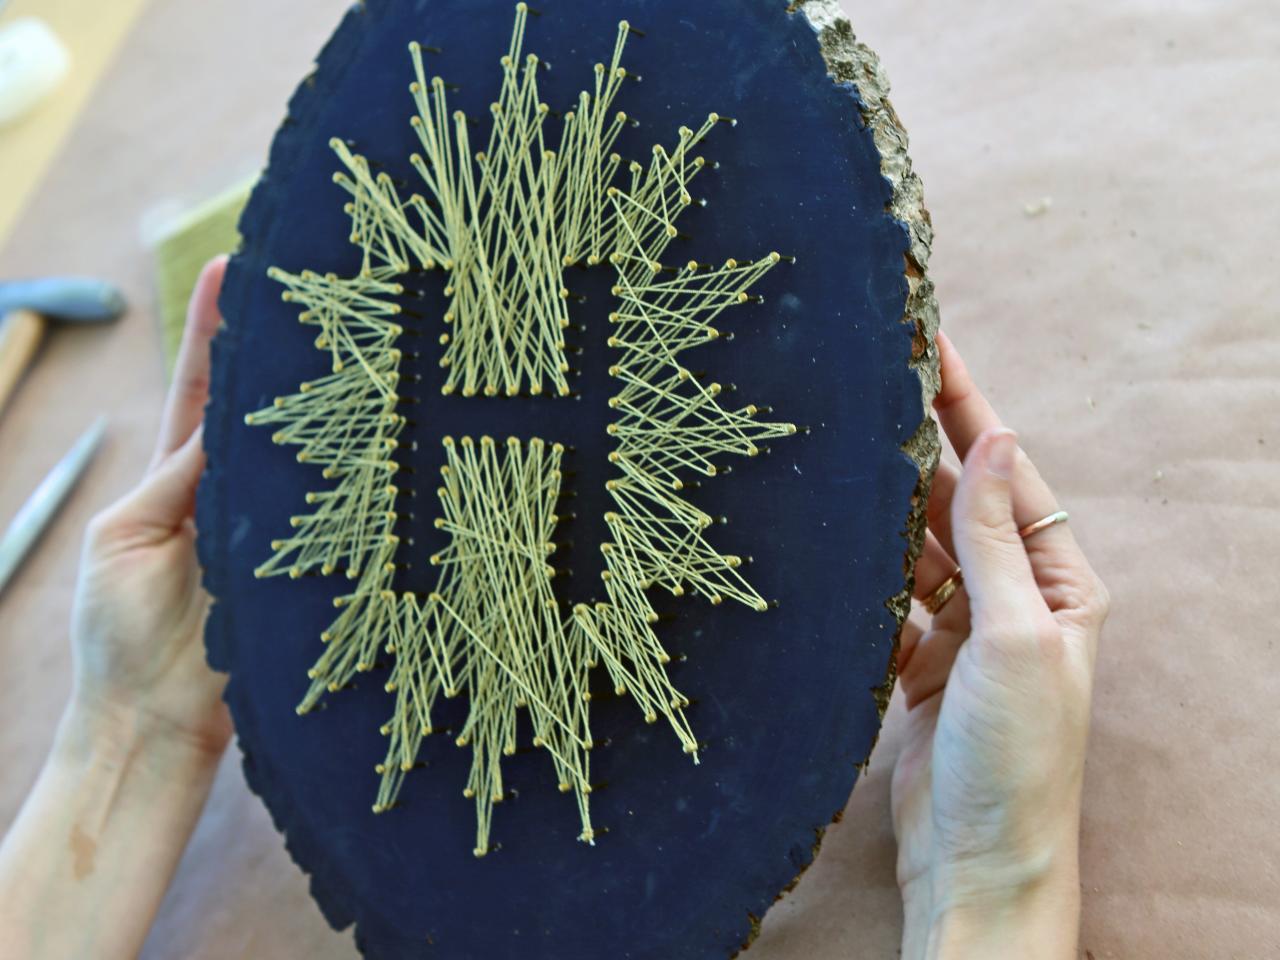
Apply String
To start, tie string in a double knot to the point of one nail. Trim excess string from the end. Keep string taut and start wrapping around nails, making sure to not cross over any negative space within the monogram.


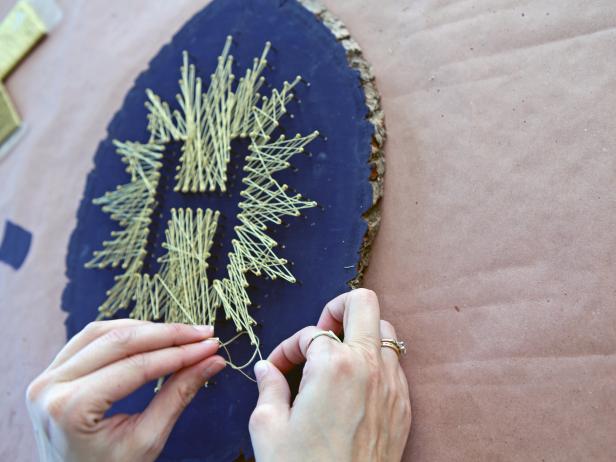
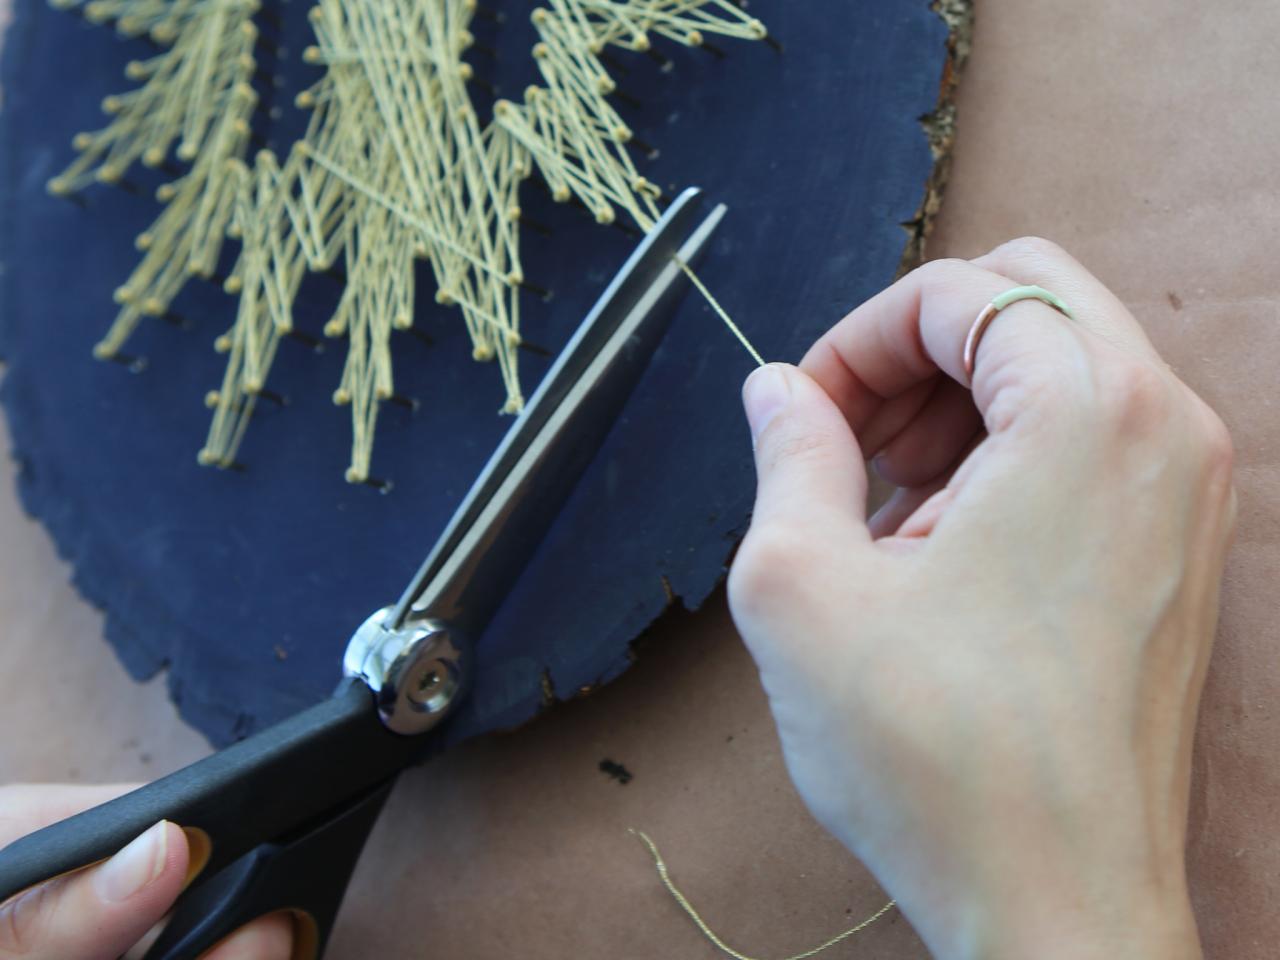
Finish String
Once you feel that you have covered the surface of your art with enough string so the letter is nicely defined, you're ready to finish. To do that, pick an end point, preferably one on the outside of the project, then tie a tight knot around the nail. Tip: Make sure it's tied nice and tight so your project doesn't come unraveled.


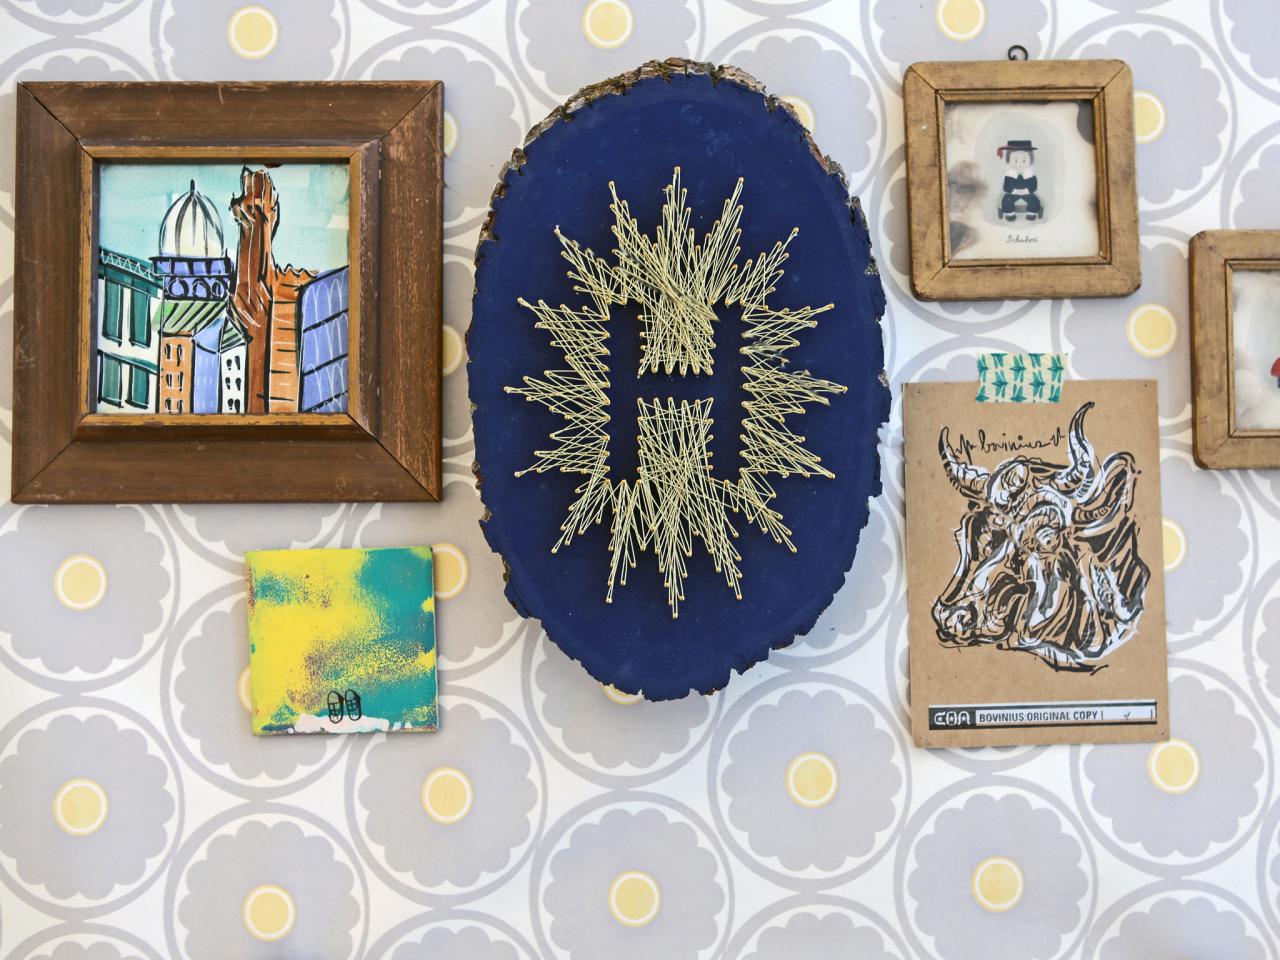
Display
Apply adhesive strips or a picture-hanging kit to the back of the plaque to hang it on the wall.


