


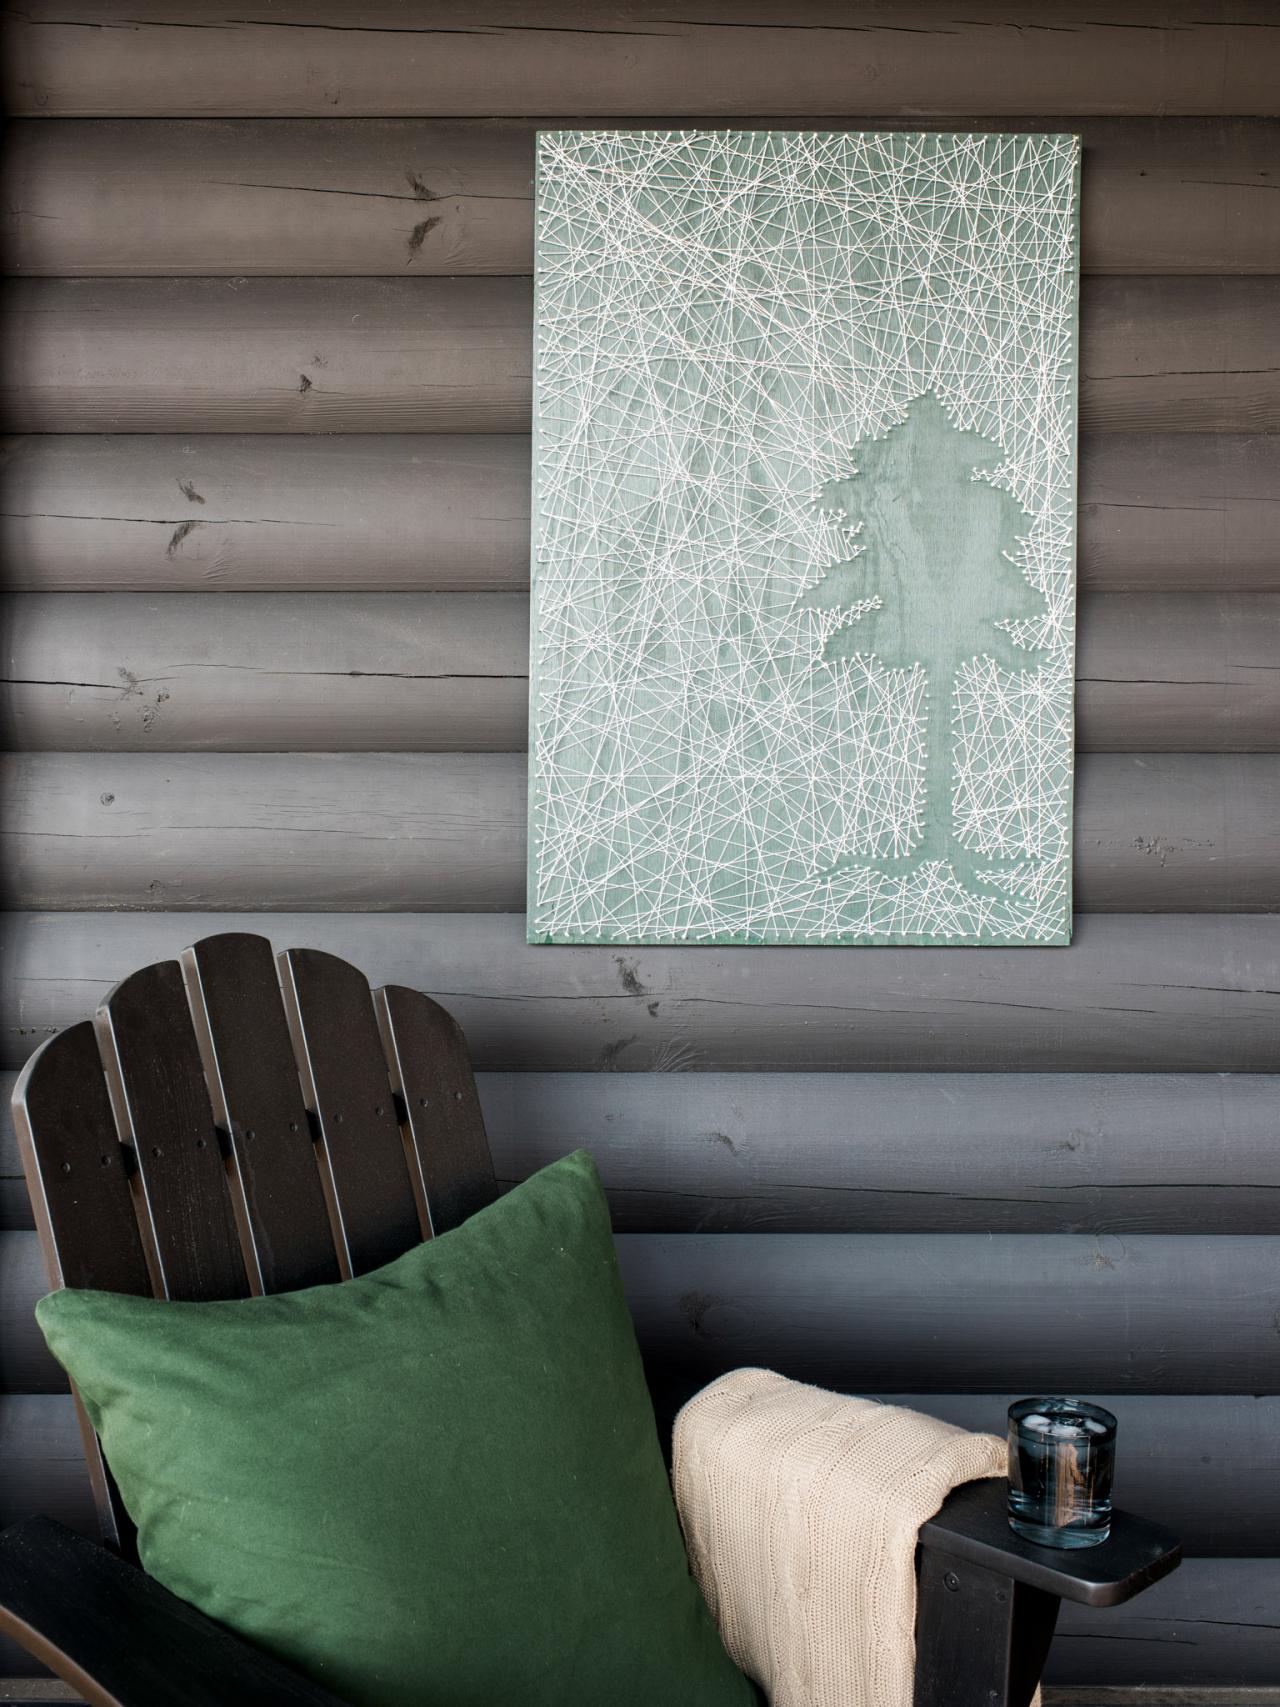
How to Make Negative-Space String Art
Most string art creates a picture or shape; this technique does the opposite by outlining a silhouette instead. Try this easy and inexpensive craft to add a punch of personality to your walls.


Rustic White Photography, LLC
Tools and Materials
- pre-cut 3/4” sheet of paint-grade plywood
- roll of white string
- hammer
- needle-nose pliers
- chalk
- painting essentials (roller handle, sleeve and paint tray)
- detail paintbrush
- quart of latex paint
- drop cloth
- 1" stainless-steel picture nails
- picture hanging hardware and wire
Step 1: Paint Plywood
Cut a piece of 3/4” paint-grade plywood to the size of your string art piece. If you don't have the tools to cut your own plywood, most home improvement and hardware stores will cut it for you or you can buy a pre-cut board at a craft supply store. Lay the plywood down on a flat, level surface on top of the drop cloth. Paint the front and the sides of the plywood with latex paint.

Step 2: Trace Silhouette
Use chalk to draw the image directly onto the painted plywood.

Step 3: Add Nails
Use needle-nose pliers to hold the 1” stainless-steel picture nails in place while you hammer in the nails along the chalked silhouette. Insert the nails about 1/3 of the way or until they are secure and not loose. Space the nails approximately 1/4” apart.

Step 4: Remove Chalk
When all the nails are added to the traced silhouette, use a small paintbrush or a damp rag to remove the chalk lines.

Step 5: Add Nails to Perimeter
Nails must also be placed around the perimeter of the board; you will run the string to and from these nails to the nails lining the silhouette. Use needle-nose pliers to hold the nails in place while you hammer them into the board. Again, space them 1/4” apart, use a ruler or a tape measure to help keep the spacing uniform.

Step 6: Wrap the String
Unfurl a spool of white string, then knot it in place on one perimeter nail. Then randomly move back and forth, wrapping the string around different nails between the perimeter and the silhouette. For proper balance, do this in sections, working your way from the bottom upward. Once the string is added and wrapped to and from the silhouette, the negative space will begin to take shape. Complete this until all nails have been wrapped.
Step 7: Add Hardware and Hang


Use a drill to attach picture hanging hardware to the back of the plywood.


Rustic White Photography, LLC


