How to Make a DIY Painted Wood-Accented Wall
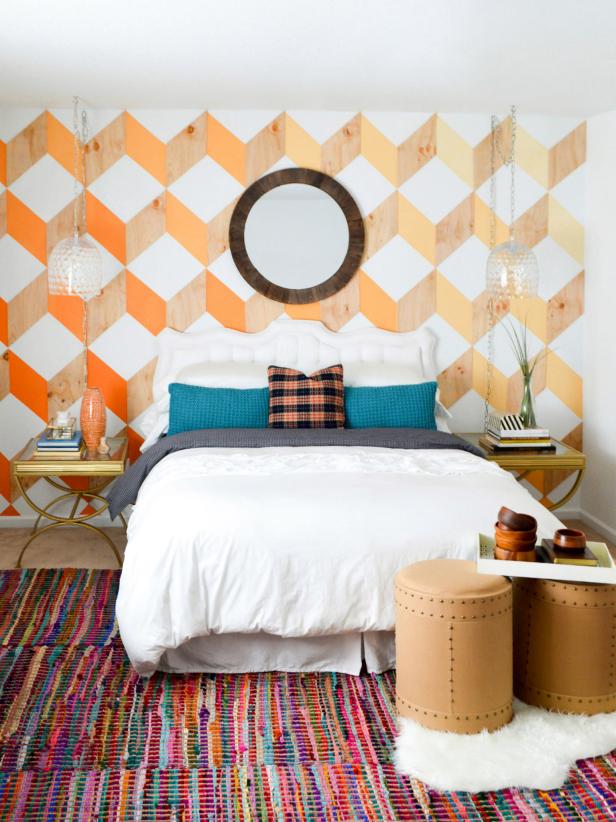
Follow the steps below to make this blogger DIY project featured in HGTV Magazine.
Courtesy of the blogger

Instructions
1. To make the template, use a protractor and a straight edge to draw a parallelogram on a piece of poster board. The parallelogram should measure 15 inches by 13 inches, with two 40° angles and two 140° angles, as shown above. Cut it out.
2. Place the template at the top center of a white wall, with one corner touching the ceiling. Use a pencil to trace the shape onto the wall.
3. Flip the template over. Align it with the right side of the penciled shape, and trace it onto the wall. Continue flipping the template to make a chevron design across the top of the entire wall.
4. Create the remaining rows of chevrons by flipping the template to create a mirror image of the row above. Repeat until all the rows are drawn.
5. Using painter’s tape, tape off every other shape in the top row. In four plastic containers, mix paint with increasing amounts of white to create four lighter shades. Paint every other shape, starting on the far left with the original shade of paint and finishing on the right with the lightest shade, creating an ombré effect. Remove the painter’s tape. Let dry. Repeat for each subsequent row.
6. Use the template to cut the same shape out of plywood, cutting as many pieces as you need to finish the wall. With a brad nailer, nail the pieces to the wall between each painted shape.
From Mandi Gubler, vintagerevivals.com.


