


How to Craft a Vanity Light Valance
If your current place has graced you with an aesthetically challenged vanity light, this DIY valance made from decorative sheet metal is about to come to the rescue.

Tomas Espinoza Photography

Materials Needed
- heavy duty scissors or wire snips
- decorative sheet metal (12”x 24” panels)
- black duct tape
- black spray paint
- bamboo craft sticks
- gloves
- drop cloth
- hot glue gun and glue sticks
- tape measure
- removable adhesive mounting strips
- marker
Measure Fixture
Measure the existing light (with the bulbs in) and make a note of the fixture’s width, height and depth. Now add three inches to all dimensions to ensure the existing fixture is thoroughly screened by the new metal valance.

Tomas Espinoza Photography
Measure and Mark Metal
Using the dimensions from step 1, determine how many 12”x 24” metal panels you’ll need to buy. A wide fixture may require joining two full panels together at the front of the valance. As you mark the individual sheets for the sides of the valance, go ahead and mark for two additional three-inch wide mounting panels. These two extra panels will be used to attach the valance to the wall.

Tomas Espinoza Photography
Cut Metal
Use heavy-duty scissors or tin snips to cut as neatly as possible along the guidelines you made in the previous step. You should now have all the pieces necessary to assemble your custom valance: two 3" wide mounting panels, two sides and however many panels are required to create the front of your valance.

Tomas Espinoza Photography
Assemble Metal Panels
To assemble the valance, join the panels together using slim pieces of duct tape. Apply the tape to create interior seams that are flexible and bend at 90-degree angles.

Tomas Espinoza Photography
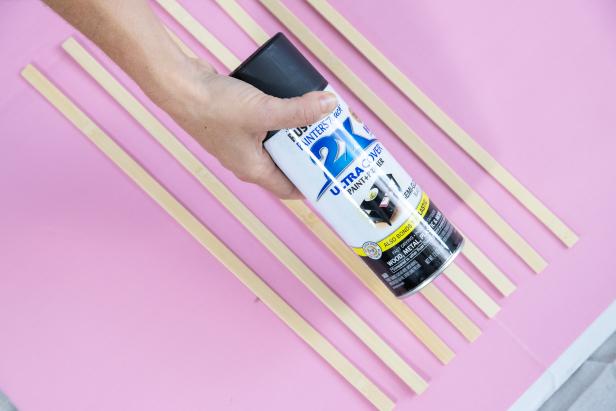
Paint Wood Accents
Next, spread out craft sticks on a drop cloth, then paint or stain them your desired color. Allow time for the sticks to thoroughly dry.
Tomas Espinoza Photography
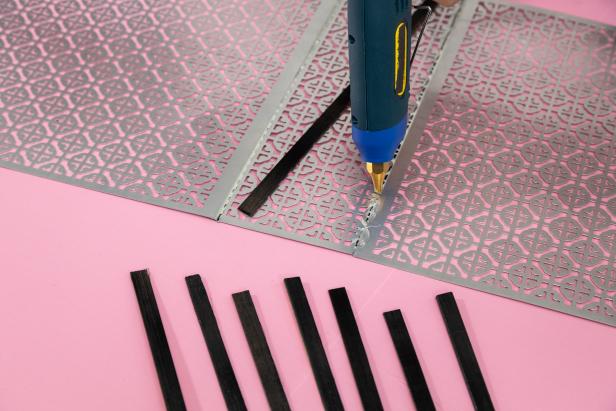
Add Wood Accents
With the metal panels connected but lying flat, hot glue painted craft sticks to any seams along the front of the valance and at the edges of each corner. Doing so will help hide seams and give the valance exterior a more structured look.
Tomas Espinoza Photography
Secure Valance
Place an adhesive strip on each of the 3" mounting panels. When you hang the valance in front of the fixture, these mounting panels will turn inward 90-degrees (back toward the fixture) where the valance meets the wall.

Tomas Espinoza Photography


