


DIY Storage Bench With Rustic Industrial Style
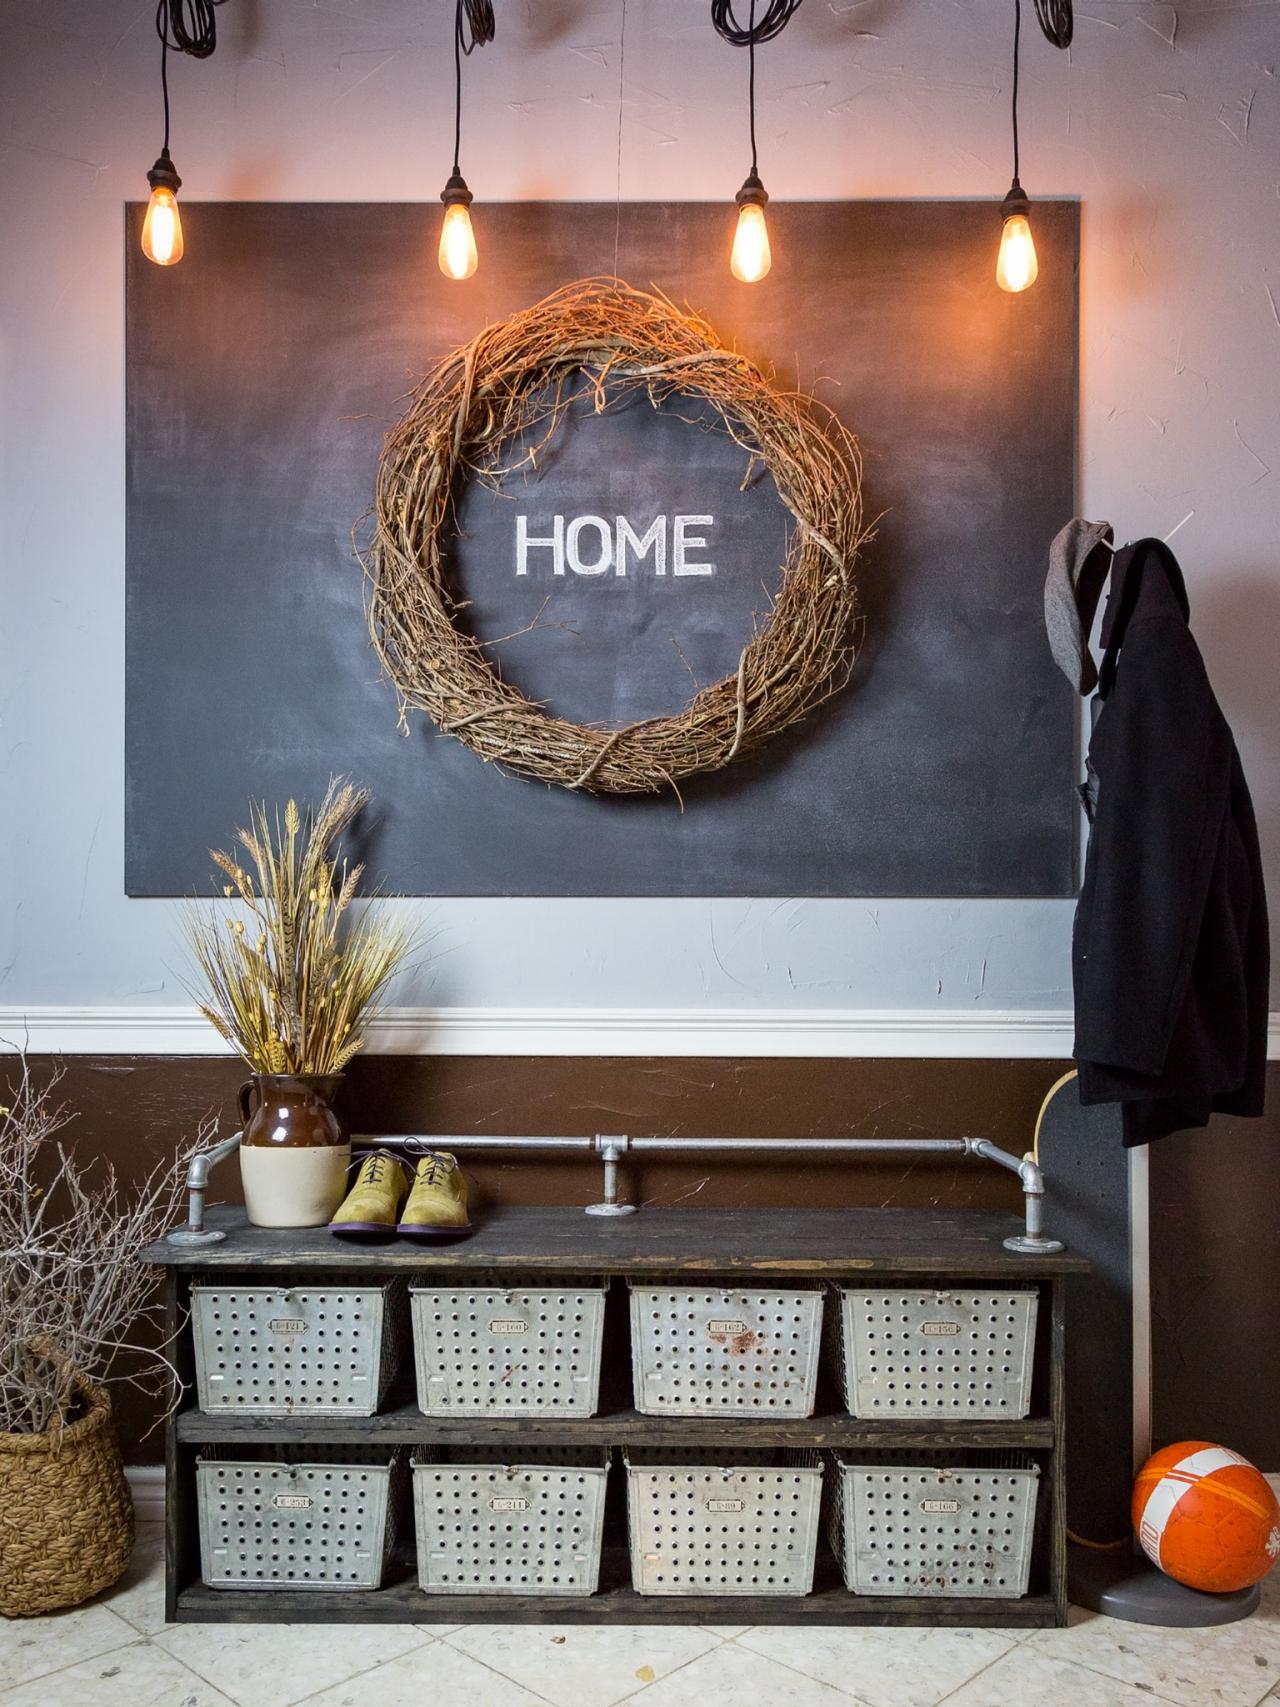
Boost your entryway’s style and function with this DIY storage bench. You can stash shoes and other on-the-go essentials in the baskets, while the seat is the perfect place to slip on footwear before you head out the door. Distressed wood sides and a galvanized pipe rail lend rustic industrial flair to this piece.

DIY Rustic-Industrial Shoe Storage Bench
Boost your entryway’s style and function with this DIY storage bench. You can stash shoes and other on-the-go essentials in the baskets, while the seat is the perfect place to slip on footwear before you head out the door. Distressed wood sides and a galvanized pipe rail lend rustic industrial flair to this piece.

Photo by: Sam Henderson
Sam Henderson
Materials Needed
- (6) 1” x 2” x 6’ pine
- (9) 1” x 4” x 6’ pine
- (3) 1” x 6” x 6’ pine
- (1) 1” x 6” x 8’ pine
- (1) sheet of plywood or bead board
- table saw or circular saw
- sandpaper
- chain
- flathead screwdriver
- hammer
- wood stain
- drill and drill bit
- 1¼” wood screws
- (12) #12 x 1” wood screws
- Phillips head screwdriver
- (3) ½” galvanized floor flanges
- (3) ½" galvanized pipes, 3” long
- (4) ½” 90˚ elbows
- (1) ½” galvanized T
- (2) ½” galvanized pipes, 10” long
- (2) ½” galvanized pipes, 24” long
- (8) vintage locker baskets, no larger than 8” tall, 12” wide
Cut Wood for Shelves
Measure, mark and cut the shelf pieces with a table saw or circular saw. You will need to cut (8) 1” x 4” x 52” pieces.

DIY Rustic-Industrial Shoe Storage Bench: Cut Wood for Shelves
Measure, mark and cut the shelf pieces with a table saw or circular saw. You will need to cut (8) 1” x 4” x 52” pieces.
Photo by: Sam Henderson
Sam Henderson
Cut Wood for Frame
Measure, mark and cut the frame pieces. You will need to cut (6) 1” x 2” x 52” pieces, (6) 1” x 2” x 11” pieces and (3) 1” x 4” x 11" pieces.

DIY Rustic-Industrial Shoe Storage Bench: Cut Wood for Frame
Measure, mark and cut the frame pieces. You will need to cut (6) 1” x 2” x 52” pieces, (6) 1” x 2” x 11” pieces and (3) 1” x 4” x 11" pieces.
Photo by: Sam Henderson
Sam Henderson
Cut Wood for Top, Sides and Back
Measure, mark and cut the top, side and back pieces. For the top you will need to cut (3) 1” x 6” x 55½” pieces. For the sides you will need to cut (4) 1” x 6” x 21¼” pieces and (2) 1” x 4” x 21¼” pieces. For the back, cut the sheet 21¼” x 52”. TIP: Ask to have the sheet cut at the hardware store. Remove rough cut edges from all boards with sandpaper.

DIY Rustic-Industrial Shoe Storage Bench: Cut Wood for Top, Sides and Back
Measure, mark and cut the top, side and back pieces. For the top you will need to cut (3) 1” x 6” x 55½” pieces. For the sides you will need to cut (4) 1” x 6” x 21¼” pieces and (2) 1” x 4” x 21¼” pieces. For the back, cut the sheet 21¼” x 52”. TIP: Ask to have the sheet cut at the hardware store. Remove rough cut edges from all boards with sandpaper.
Photo by: Sam Henderson
Sam Henderson
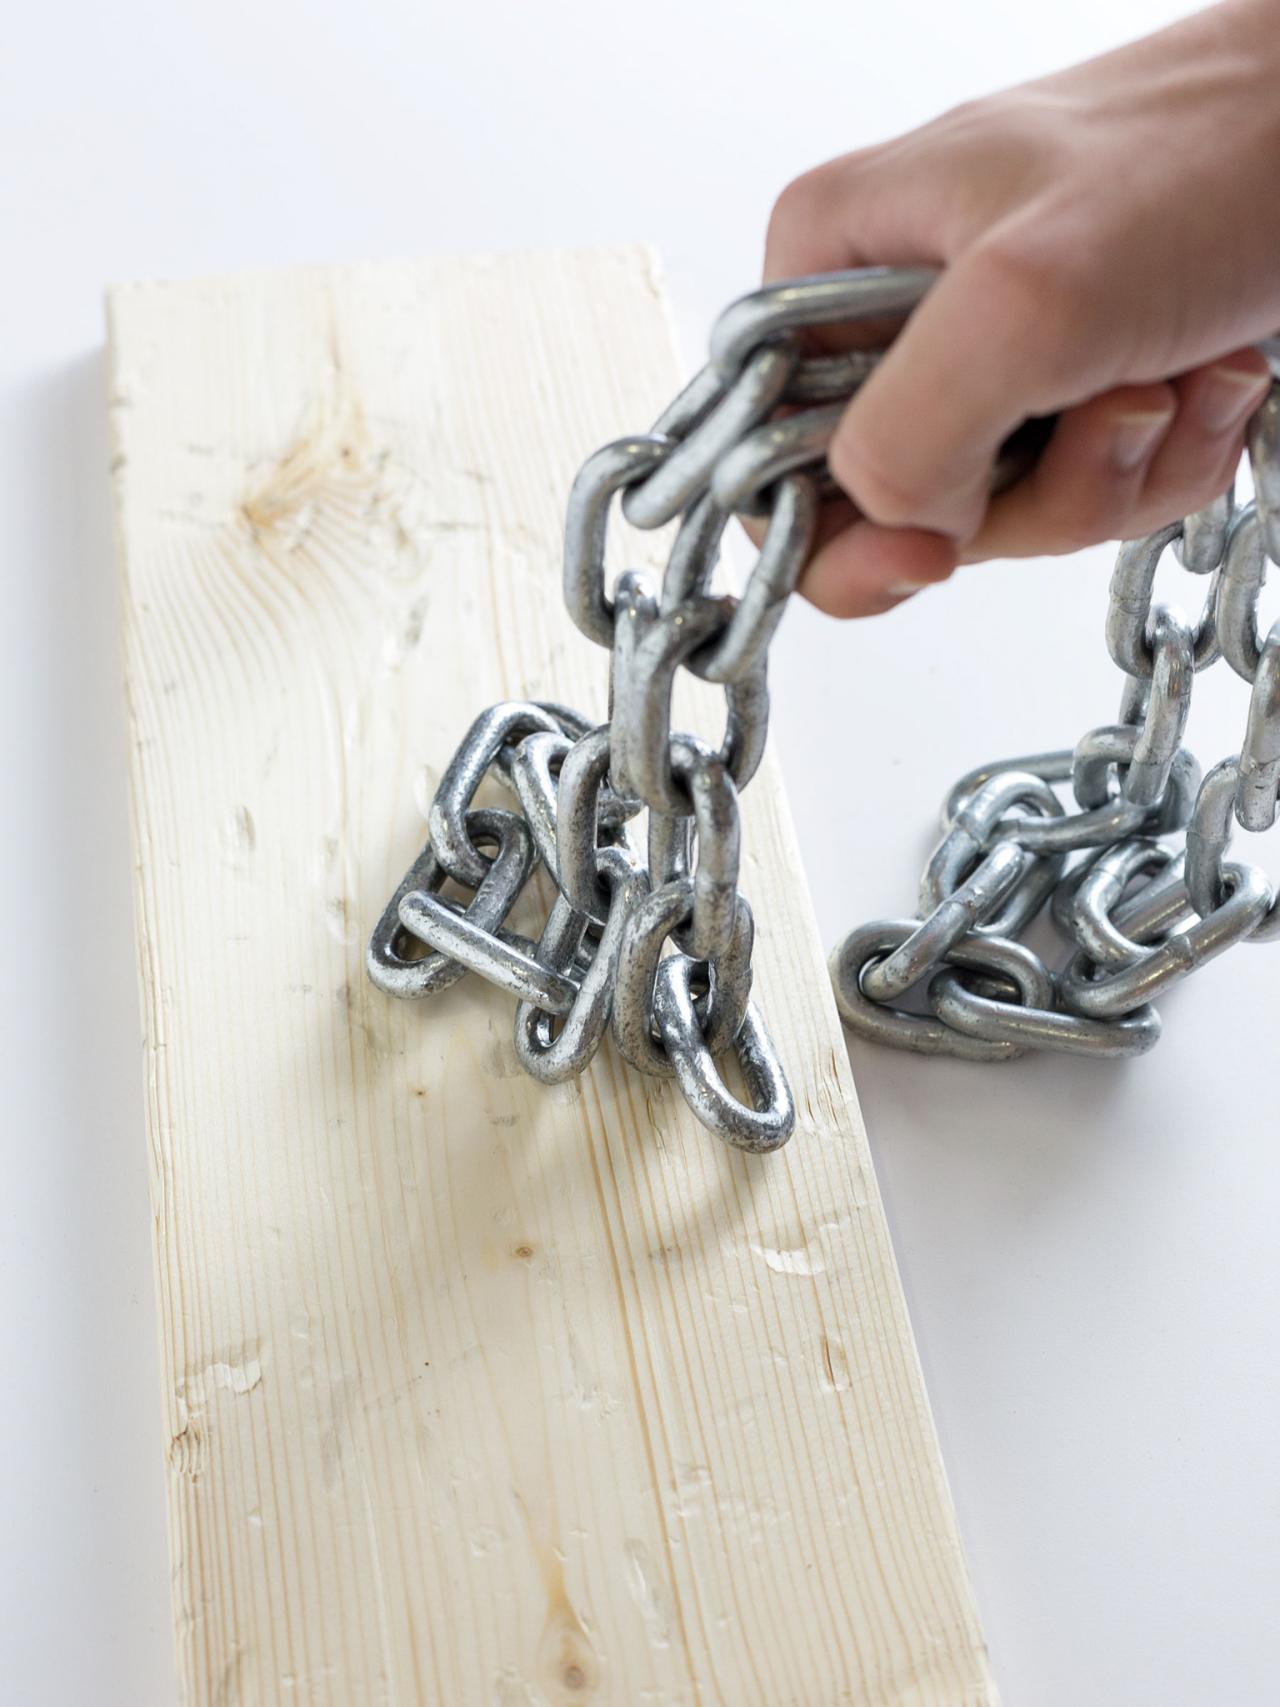
Distress Wood
Using a length of chain, beat indentations in the wood surfaces on all sides and edges. Use a flathead screwdriver to dig gouges in the wood, and further distress it with a hammer or other tools to achieve a worn look. Use sandpaper to smooth away any rough or sharp edges.

DIY Rustic-Industrial Shoe Storage Bench: Distress Wood
Using a length of chain, beat indentations in the wood surfaces on all sides and edges. Use a flathead screwdriver to dig gouges in the wood, and further distress it with a hammer or other tools to achieve a worn look. Use sandpaper to smooth away any rough or sharp edges.
Photo by: Sam Henderson
Sam Henderson
Stain Wood
Use wood stain to add to the aged look — darker stain will show the 'distressed' marks better. Use a rag to rub the stain into the recessed areas, then remove excess stain with the same rag, wiping in the direction of the wood grain. Allow to dry completely before proceeding.

DIY Rustic-Industrial Shoe Storage Bench: Stain Wood
Use wood stain to add to the aged look — darker stain will show the 'distressed' marks better. Use a rag to rub the stain into the recessed areas, then remove excess stain with the same rag, wiping in the direction of the wood grain. Allow to dry completely before proceeding.
Photo by: Sam Henderson
Sam Henderson
Assemble Shelves
Lay four of the shelf boards on a flat surface. Create a frame around the shelf boards with the 1” x 2” boards, laying the 52” boards on the long edges and the 11” boards on the short edges. Place a 1” x 4” x 11” board in the center of the frame for added stability. Pre-drill holes along the frame into the shelf boards below. On the short sides on the frame, there should be at least two holes per shelf board on each end and in the center. The long sides should be fastened in at least 5 or 6 spots. Add screws to the holes to secure the frame to the shelf boards. Repeat for the second shelf.

DIY Rustic-Industrial Shoe Storage Bench: Assemble Shelves
Lay four of the shelf boards on a flat surface. Create a frame around the shelf boards with the 1” x 2” boards, laying the 52” boards on the long edges and the 11” boards on the short edges. Place a 1” x 4” x 11” board in the center of the frame for added stability. Pre-drill holes along the frame into the shelf boards below. On the short sides on the frame, there should be at least two holes per shelf board on each end and in the center. The long sides should be fastened in at least 5 or 6 spots. Add screws to the holes to secure the frame to the shelf boards. Repeat for the second shelf.
Photo by: Sam Henderson
Sam Henderson
Assemble Top
Lay the three long top boards on a flat surface. Assemble the frame on top of the boards in the same manner as the shelf boards. However, the top boards should extend 1¾” beyond the frame on both ends and 1½” on the front edge.

DIY Rustic-Industrial Shoe Storage Bench: Assemble Top
Lay the three long top boards on a flat surface. Assemble the frame on top of the boards in the same manner as the shelf boards. However, the top boards should extend 1¾” beyond the frame on both ends and 1½” on the front edge.
Photo by: Sam Henderson
Sam Henderson
Attach Side and Top Pieces to Shelves
Attach the side pieces flush to the bottom of the bottom shelf by inserting 1¼” wood screws into pre-drilled holes (at least 2 per board). On one side of the shelf, secure the two 6” boards on the outside edges with the 4” board in between. Repeat for the other side. TIP: If you do not want the screws to show in the finished project, sink them slightly and cover them with wood putty and a light dab of stain.

DIY Rustic-Industrial Shoe Storage Bench: Attach Side Pieces
Attach the side pieces flush to the bottom of the bottom shelf by inserting 1¼” wood screws into pre-drilled holes (at least 2 per board). On one side of the shelf, secure the two 6” boards on the outside edges with the 4” board in between. Repeat for the other side. TIP: If you do not want the screws to show in the finished project, sink them slightly and cover them with wood putty and a light dab of stain. Make a mark on the inside of the side pieces, 9” above the top of the bottom shelf. Attach the second shelf in the same way, lining up the bottom of the shelf with the mark. Place the top on and secure in the same manner.
Photo by: Sam Henderson
Sam Henderson
Make a mark on the inside of the side pieces, 9” above the top of the bottom shelf. Attach the second shelf in the same way, lining up the bottom of the shelf with the mark. Place the top on and secure in the same manner.
Attach Back Piece
Put the back in place and secure it with 1¼” wood screws through pre-drilled holes. There should be 5 or 6 screws along each shelf and the top piece.

DIY Rustic-Industrial Shoe Storage Bench: Attach Back Piece
Put the back in place and secure it with 1¼” wood screws through pre-drilled holes. There should be 5 or 6 screws along each shelf and the top piece.
Photo by: Sam Henderson
Sam Henderson
Assemble Seat Rail
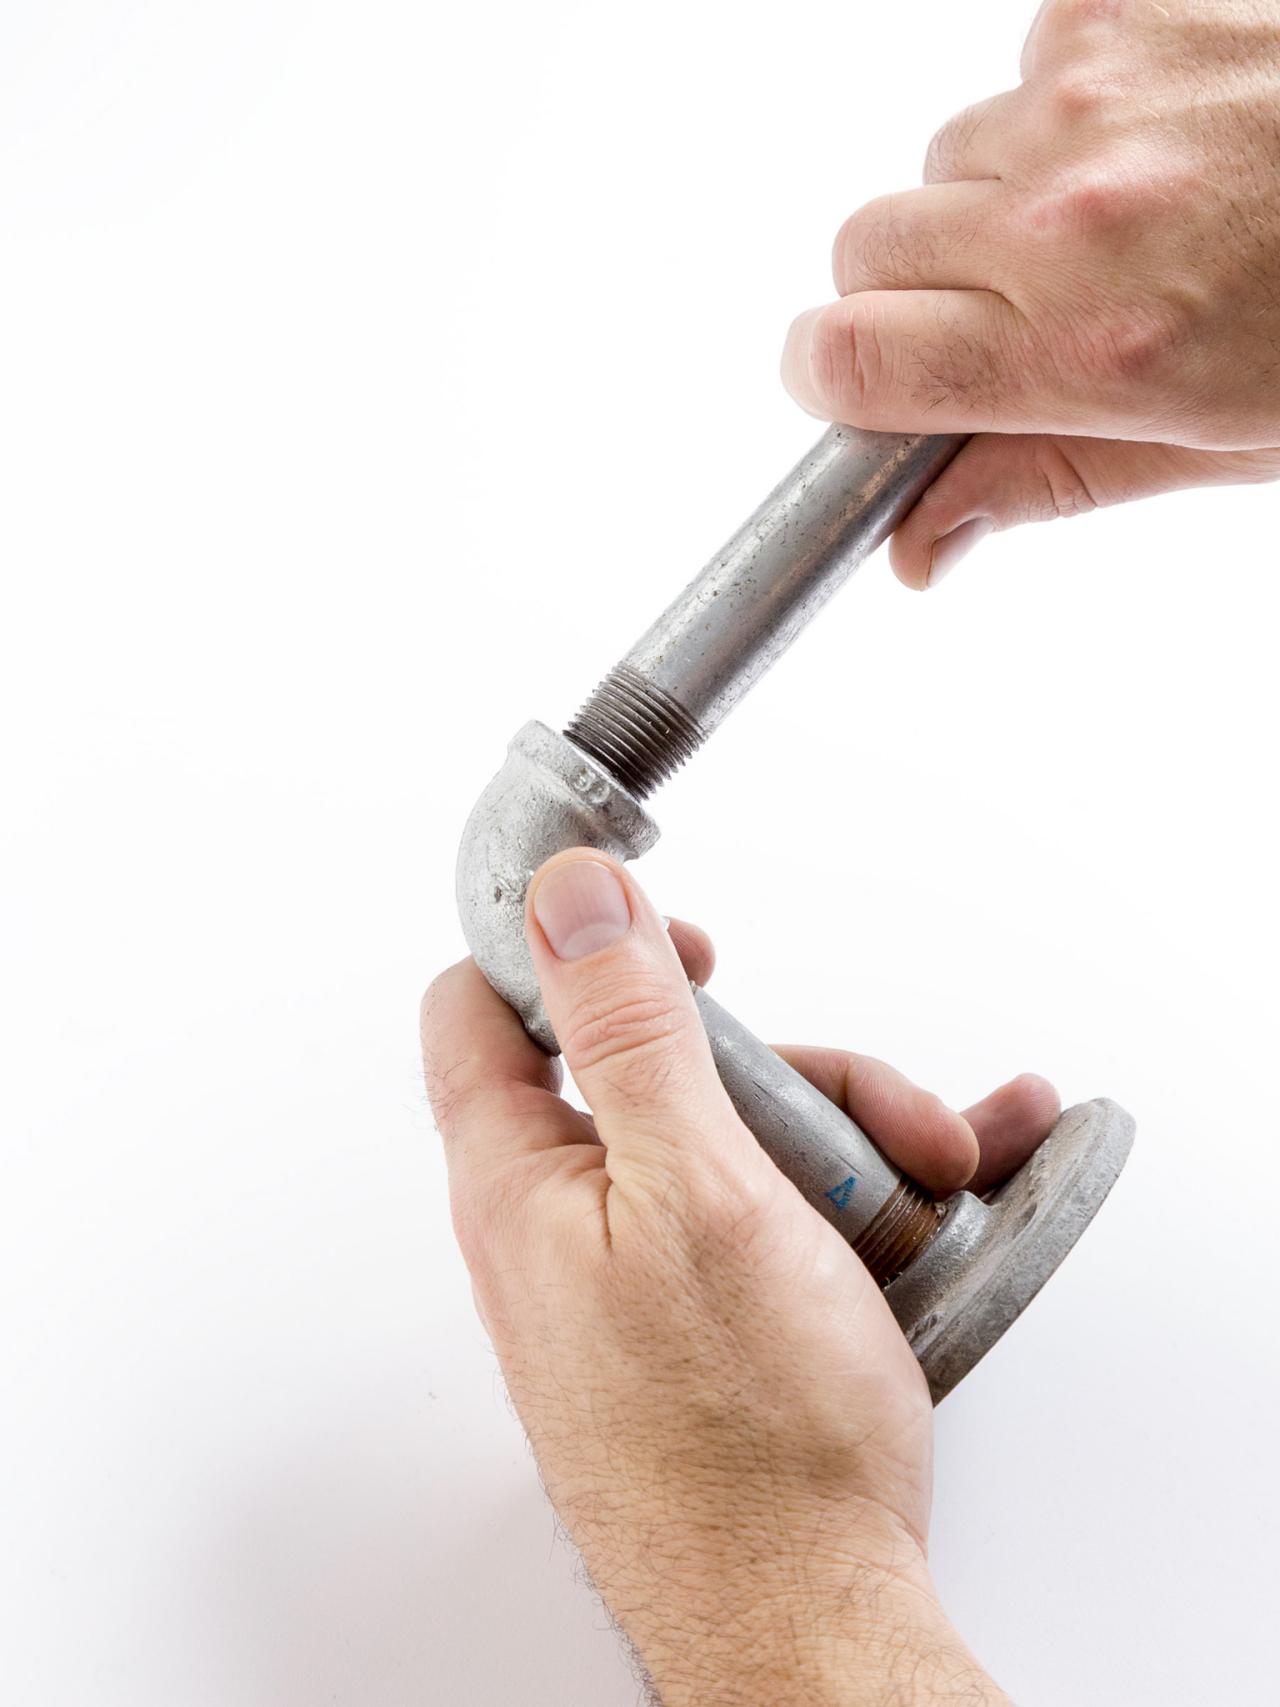
Attach a 3” pipe to a floor flange. Attach an elbow to the top of the 3” pipe. On the other end of the elbow attach a 10” pipe, followed by another elbow. Attach a 24” pipe to the opposite end of the elbow, and then the T. Fit the bottom of the T to another 3” pipe and floor flange. Attach the other 24” pipe to the open end of the T. Add an elbow to the end of the 24” pipe and then the other 10” pipe. Attach the remaining elbow, then the 3” pipe, then the floor flange to finish the seat rail.

DIY Rustic-Industrial Shoe Storage Bench: Assemble Seat Rail
Attach a 3” pipe to a floor flange. Attach an elbow to the top of the 3” pipe. On the other end of the elbow attach a 10” pipe, followed by another elbow. Attach a 24” pipe to the opposite end of the elbow, and then the T. Fit the bottom of the T to another 3” pipe and floor flange. Attach the other 24” pipe to the open end of the T. Add an elbow to the end of the 24” pipe and then the other 10” pipe. Attach the remaining elbow, then the 3” pipe, then the floor flange to finish the seat rail.
Photo by: Sam Henderson
Sam Henderson
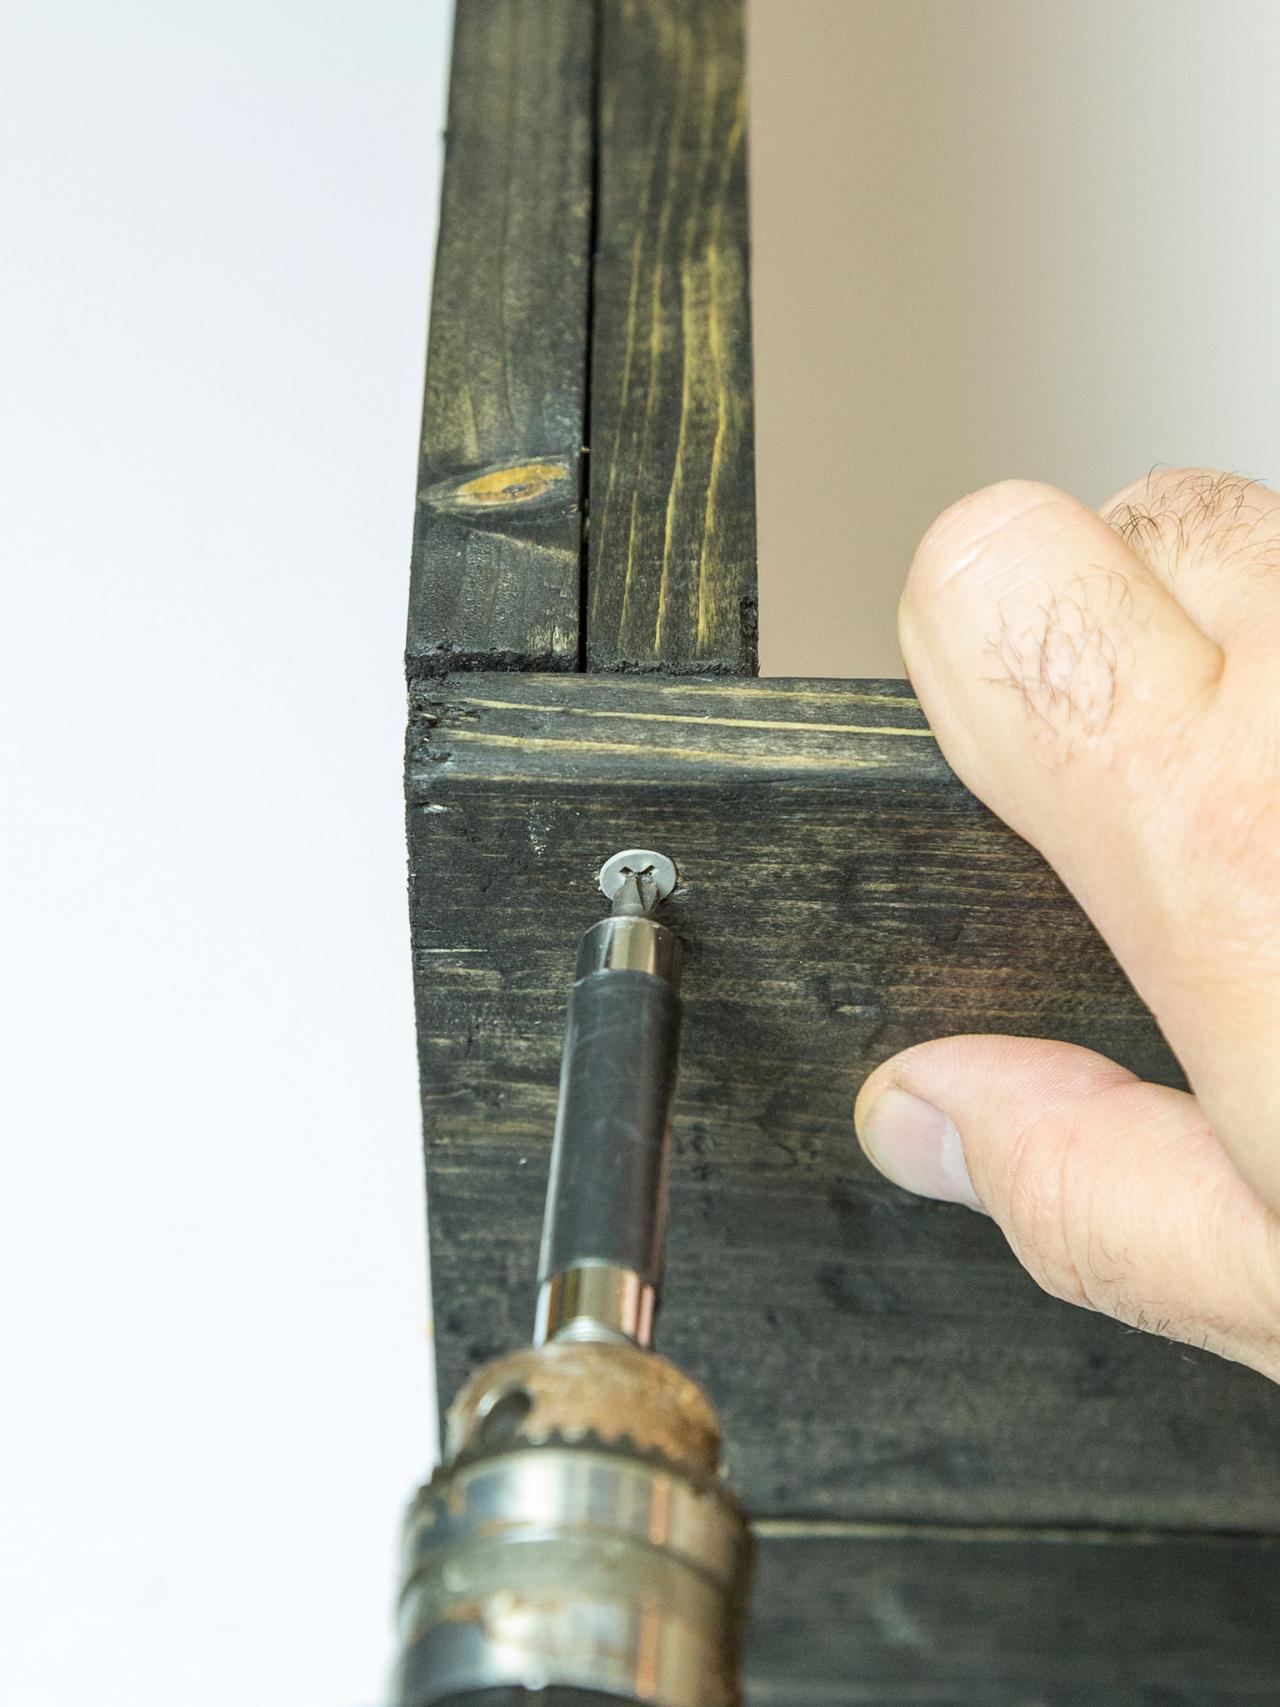
Place the rail on the seat top, centered, with the back floor flange about ½” from the edge of the wood. Screw the flanges in place with #12 x 1” wood screws.

DIY Rustic-Industrial Shoe Storage Bench: Attach Seat Rail
Place the rail on the seat top, centered, with the back floor flange about ½” from the edge of the wood. Screw the flanges in place with #12 x 1” wood screws.
Photo by: Sam Henderson
Sam Henderson
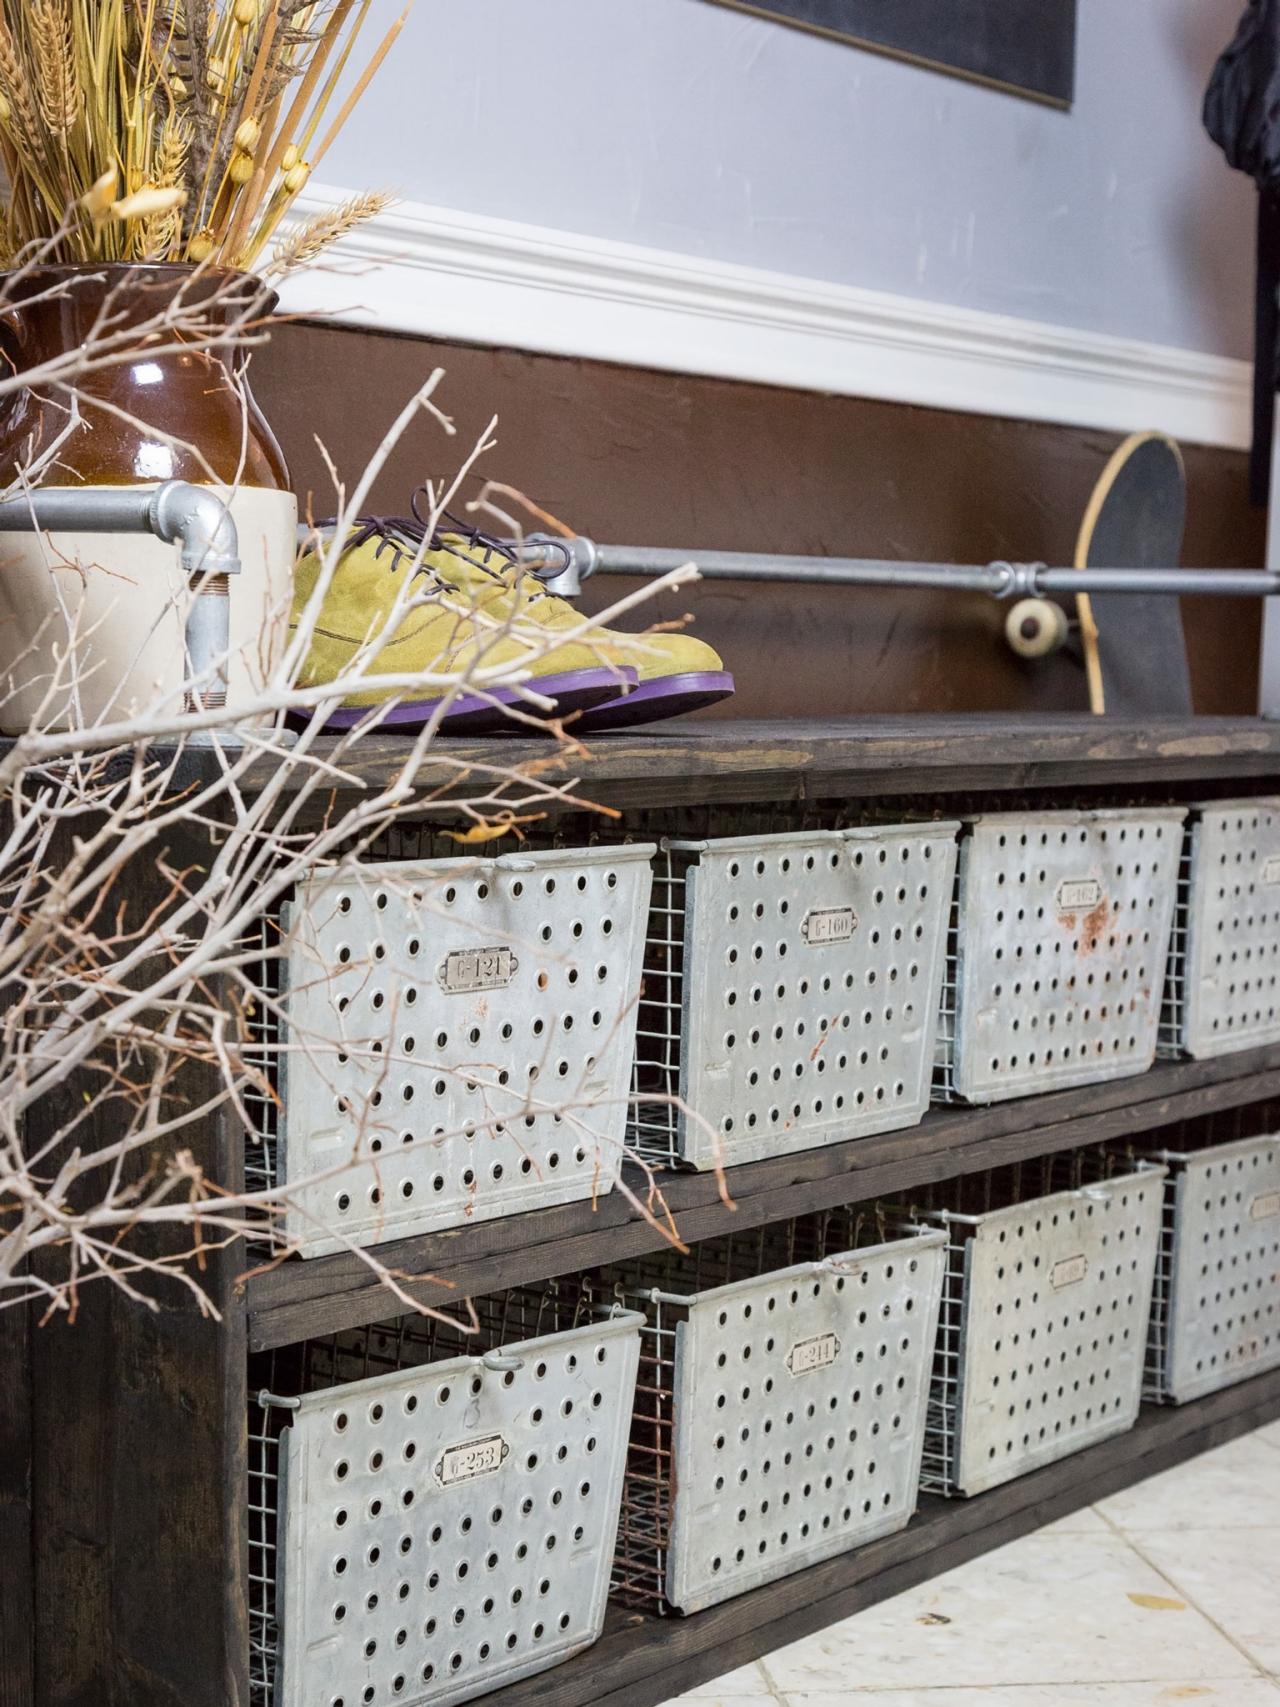
Add Finishing Touches
Coat the entire project with wood wax to seal and give a slight luster. Add locker baskets and fill with shoes.

DIY Rustic-Industrial Shoe Storage Bench
Boost your entryway’s style and function with this DIY storage bench. You can stash shoes and other on-the-go essentials in the baskets, while the seat is the perfect place to slip on footwear before you head out the door. Distressed wood sides and a galvanized pipe rail lend rustic industrial flair to this piece.
Photo by: Sam Henderson
Sam Henderson

DIY Rustic-Industrial Shoe Storage Bench: Add Finishing Touches
Coat the entire project with wood wax to seal and give a slight luster. Add locker baskets and fill with shoes.
Photo by: Sam Henderson
Sam Henderson

DIY Rustic-Industrial Shoe Storage Bench
Boost your entryway’s style and function with this DIY storage bench. You can stash shoes and other on-the-go essentials in the baskets, while the seat is the perfect place to slip on footwear before you head out the door. Distressed wood sides and a galvanized pipe rail lend rustic industrial flair to this piece.
Photo by: Sam Henderson
Sam Henderson


