


How to Make Cute Crochet Pumpkins for Fall
Follow our easy crochet pattern to craft a bushel of these adorable, autumnal DIY decorations.


Cute, cozy and fun to make, these crochet pumpkins are an easy needlecraft that both beginner and veteran crocheters can tackle with ease. The type of fiber, weight and gauge of the yarn does not matter, so this project is a great way to use up your yarn stash and dress up your fall mantel or dining table for (almost) free.
Materials Needed
- yarn (any weight, color or fiber)
- green yarn (for the leaves)
- crochet hook (that matches your yarn weight)
- 1/2" - 1" wood stems
- hot glue
- fiberfill

Debbie Wolfe
Abbreviations
ch: chain stitch
hdc: half double crochet
sc: single crochet
sl st: slip stitch
st: stitch
BLO: back loop only
FLO: front loop only
Make the Base
This pumpkin starts with a rectangular base in a ribbed pattern. To create a rib pattern in crochet, you will be inserting your hook through the back loop only on each row. Again, the gauge does not matter in this project, but I found that a minimum of 20 rows using worsted weight yarn made a 3-inch diameter pumpkin. When I used super bulky yarn with 20 rows, it made a 5-inch diameter pumpkin.
Pattern for the pumpkin base:
Make a slip knot with a 6-inch tail, then ch 17.
Row 1: Hdc in BLO in the second chain from hook. Hdc in BLO across. Ch 2, turn (15)
Row 2: Hdc in BLO across. Ch 2, turn (15). Repeat row two until you have 20 rows. Leave the working yarn attached. Set it aside for the moment.

Debbie Wolfe
Seam
Turn the work so the yarn tail is in the front. Fold the fabric in half. Insert the hook into the back loop of the side of the piece that is facing you, then into the front loop of the other side of the work. With the working yarn, yarn over and pull through all the loops on the hook. Repeat across all the stitches on the top of the fabric. When you get to the end of the row, cut a 6-inch tail and pull it through the last loop.

Debbie Wolfe
Gather
To close the bottom of the fabric, thread one end of the tail into a tapestry needle. Then, weave it through the top loops on the edge of the fabric. Insert the needle from top to bottom, making your way around the fabric. As you weave the yarn through the loops, give it a gentle tug, it will start to close the hole (Image 1). When you get back to where you started, pull the yarn snuggly to close the hole. Weave in the end and fasten off (Image 2).

Debbie Wolfe

Debbie Wolfe
Fill
Fill the pumpkin with fiberfill until it's full, but not overly stuffed.

Debbie Wolfe
Close the Top
Close the top of the piece in the same method use to close the bottom. Weave the end through the top to secure (Image 1). Insert the needle through the middle of the piece and push it through the middle of the other side. Pull it snug—it will cause the piece to curve in a bit. Insert the needle under a couple of the closing loops to secure, then fasten off (Image 2). Now your piece should resemble a pumpkin (Image 3).

Debbie Wolfe


Debbie Wolfe
Make the Leaves
For the leaves, ch 20. Sc across and fasten off.

Debbie Wolfe
Finishing
Hot glue a natural wood stem to the top (Image 1), then tie the crochet "leaves" around the stem (Image 2).


Debbie Wolfe
Display
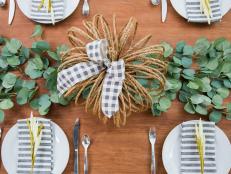
Make a whole patch-worth of pumpkins and display them in a basket, on your mantel or anywhere else you want to add a touch of fall color.

More to Love

Our Favorite Fall Decorating Ideas 85 Photos
Season's change; so should your decor. Welcome the arrival of fall and Thanksgiving with gorgeous decorations both indoors and out.


