


3 Stylish Painted Pumpkin Ideas for Fall
Ditch the gooey mess of carving and opt for painting your pumpkins, instead.

Sarah Busby
SHIBORI-INSPIRED
Supplies Needed
- pumpkin
- white craft paint
- foam brush
- bowl of cold water
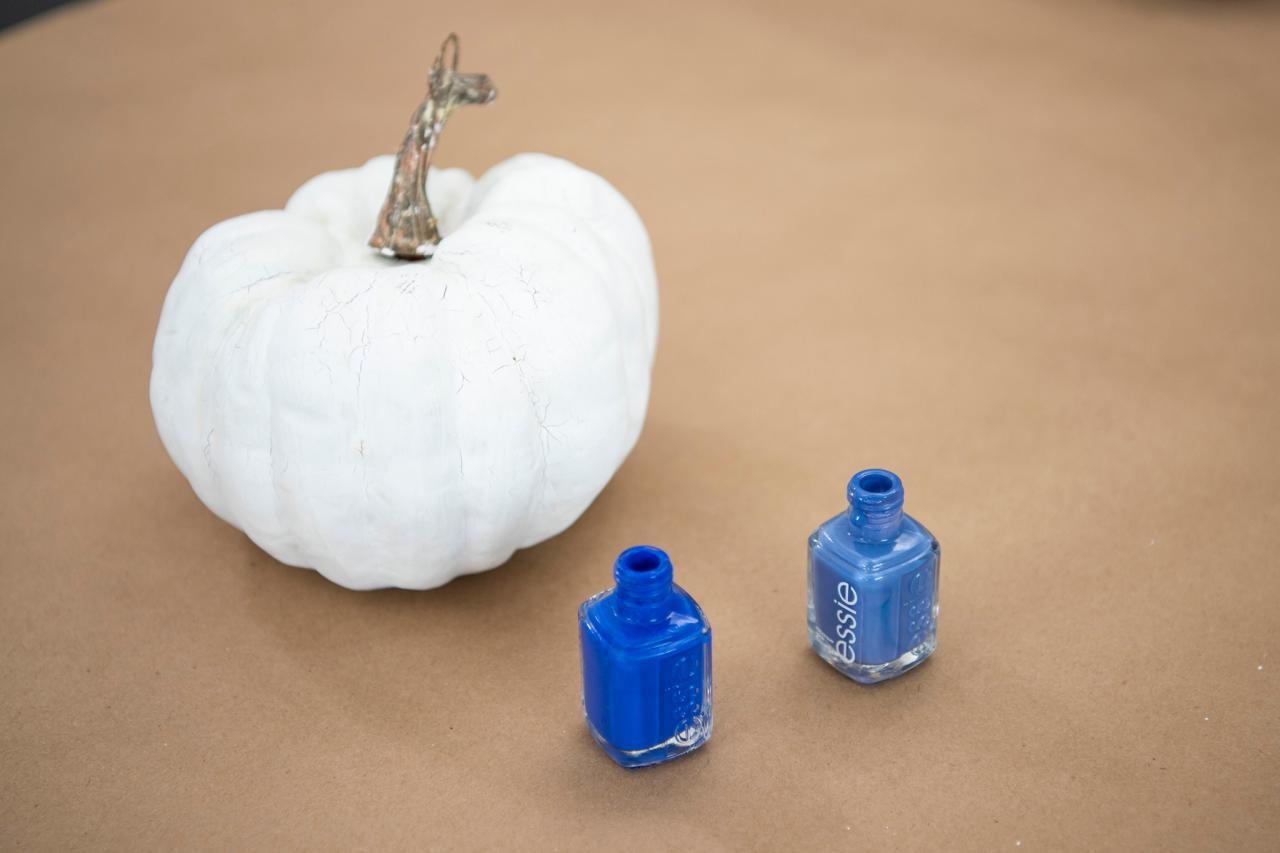
- fingernail polish
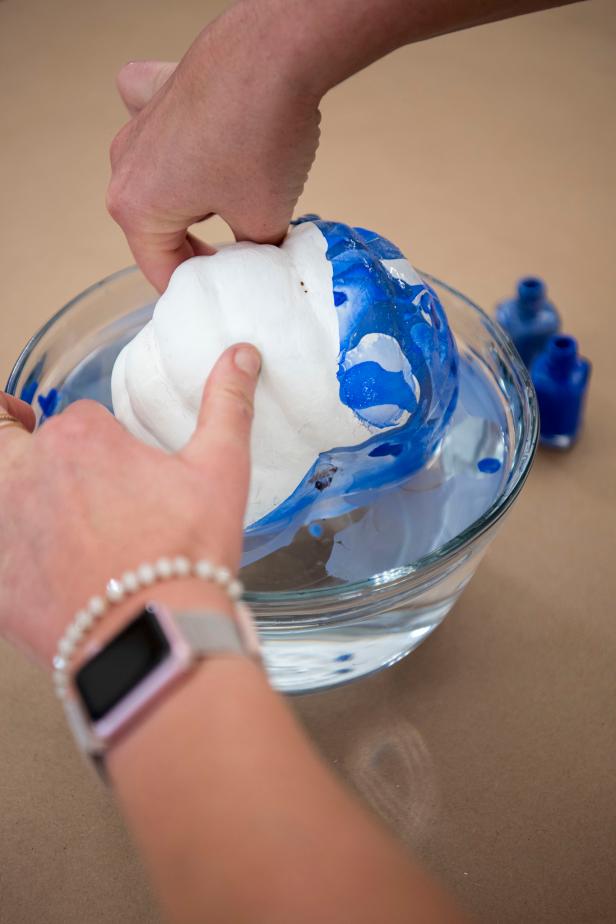
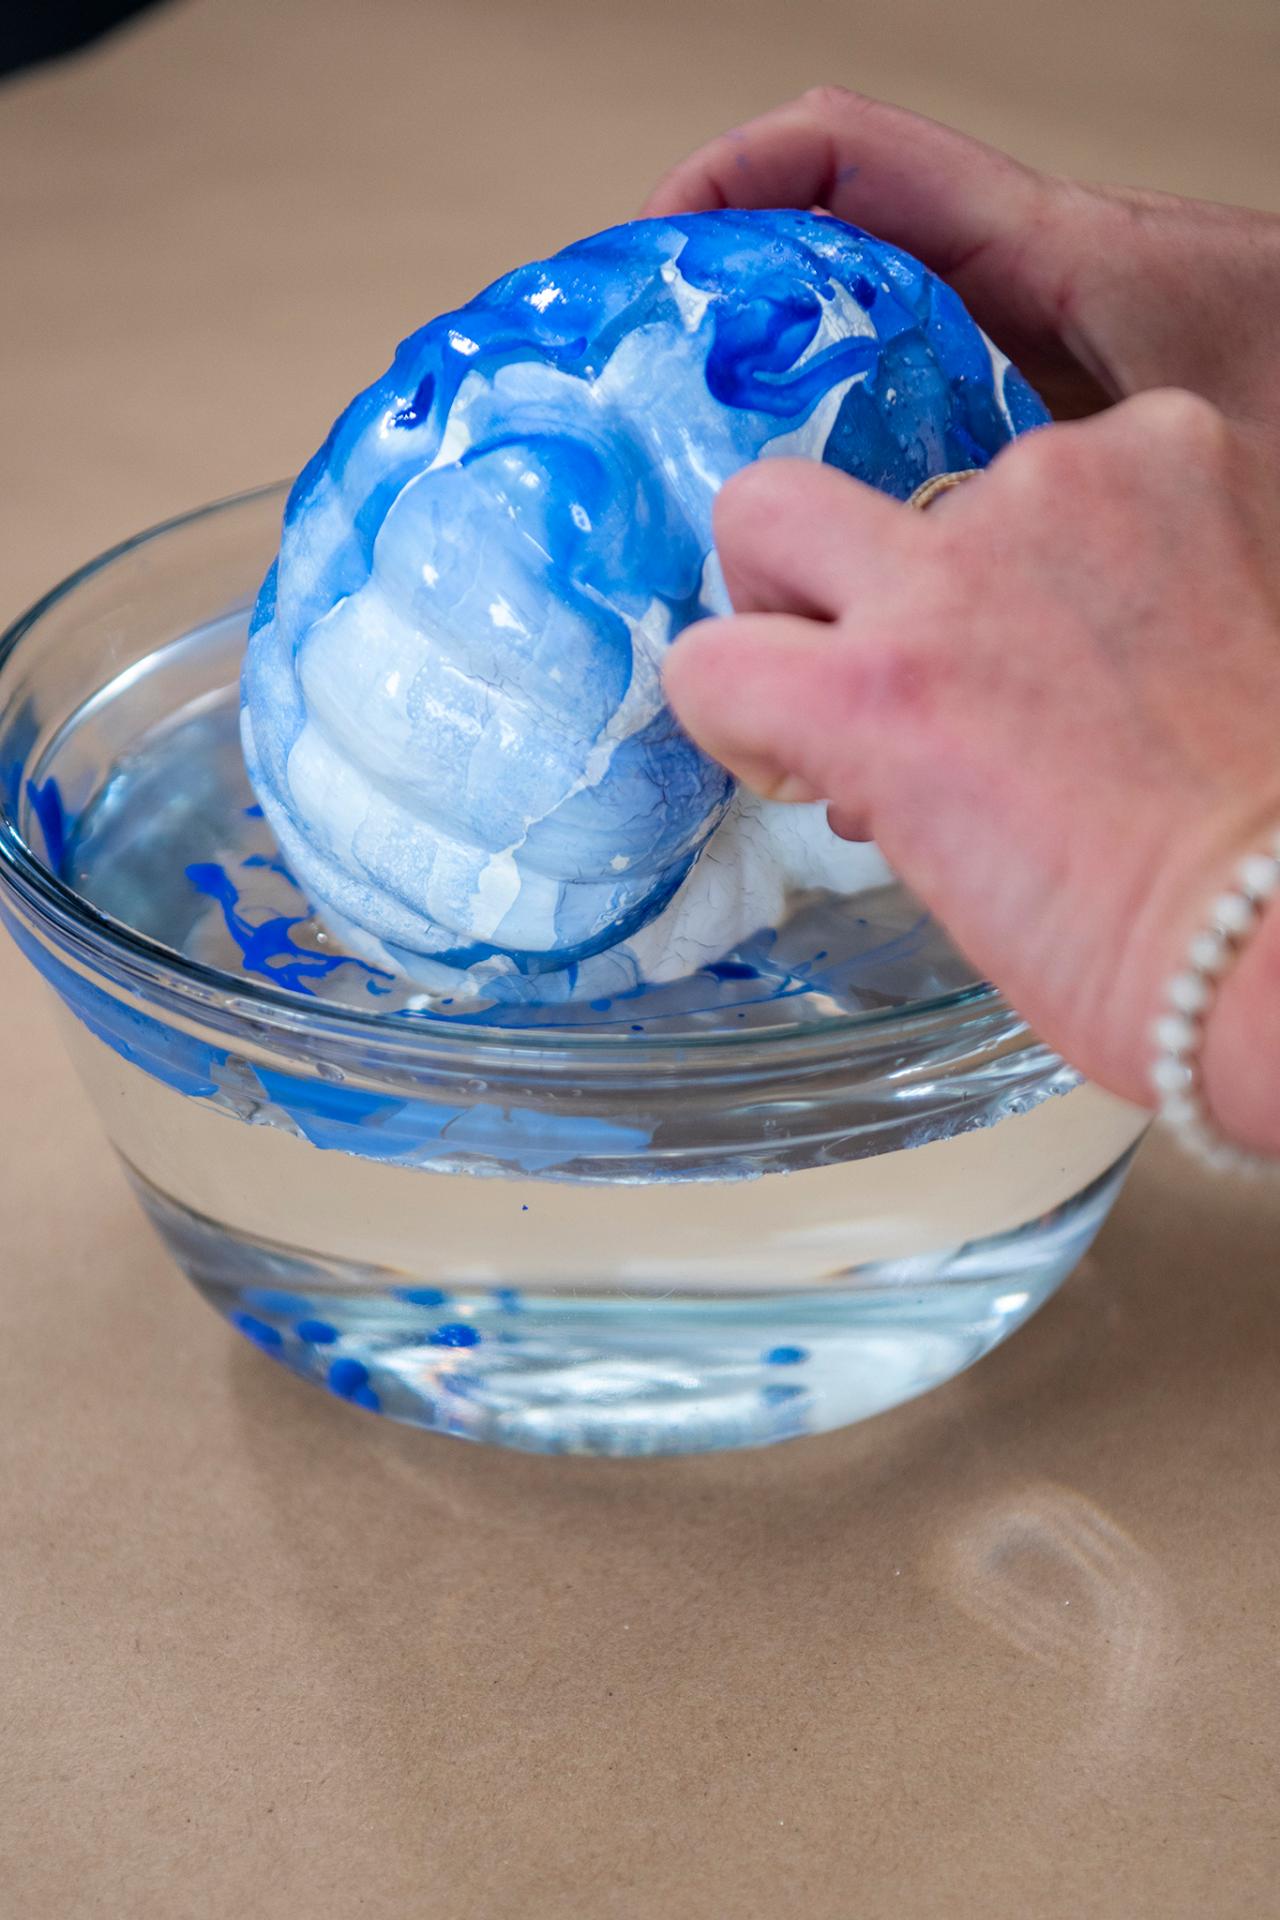
Start with a painted white pumpkin (Image 1). In a bowl of cold water, scatter in the fingernail polish (Image 2). Next, gently dip the pumpkin in the mixture, swirling it around to coat all sides. Work quickly so the polish doesn't have time to settle at the bottom of the bowl. (Images 3 & 4).

Sarah Busby

Sarah Busby
Sarah Busby

Sarah Busby
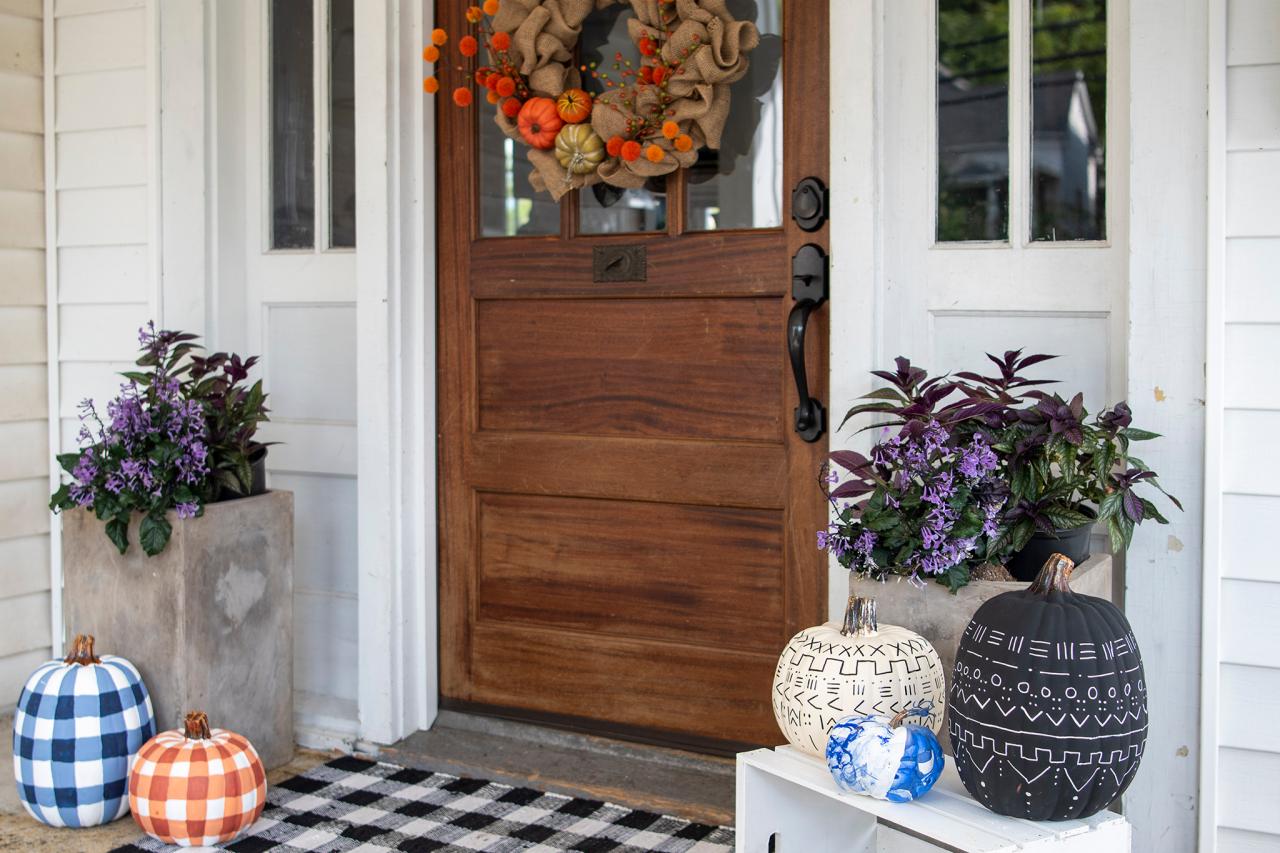
BUFFALO CHECK
Supplies Needed
- pumpkin
- white craft paint
- orange craft paint
- foam brush
- smaller paint brush
- masking tape
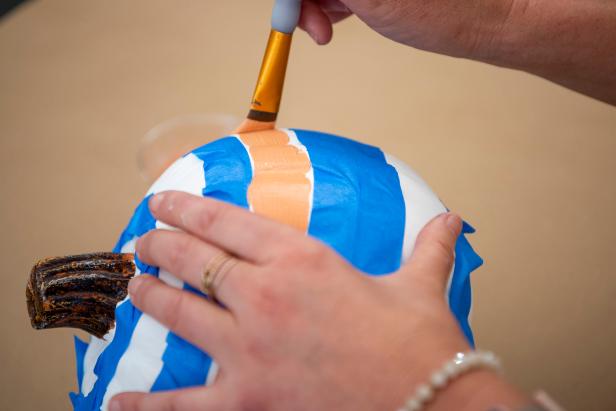
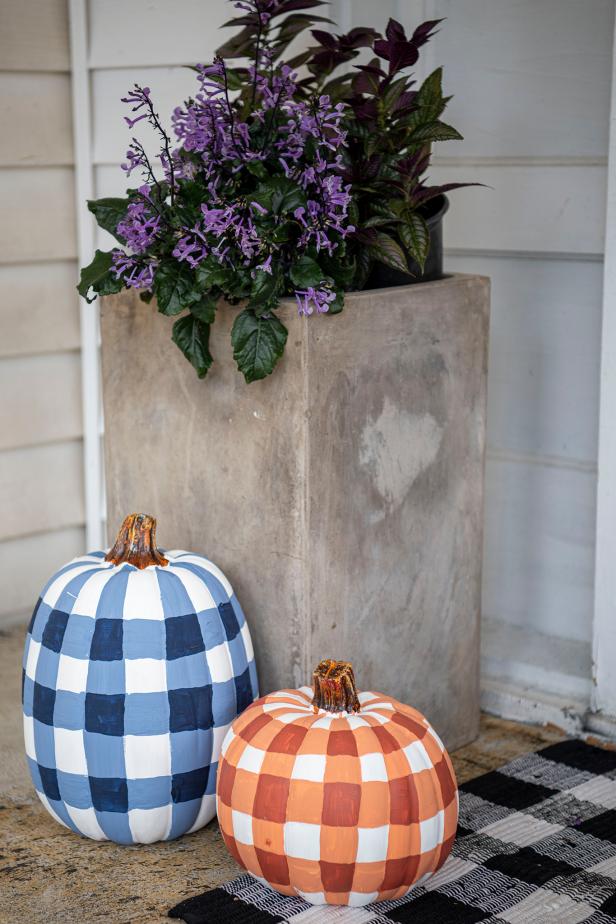
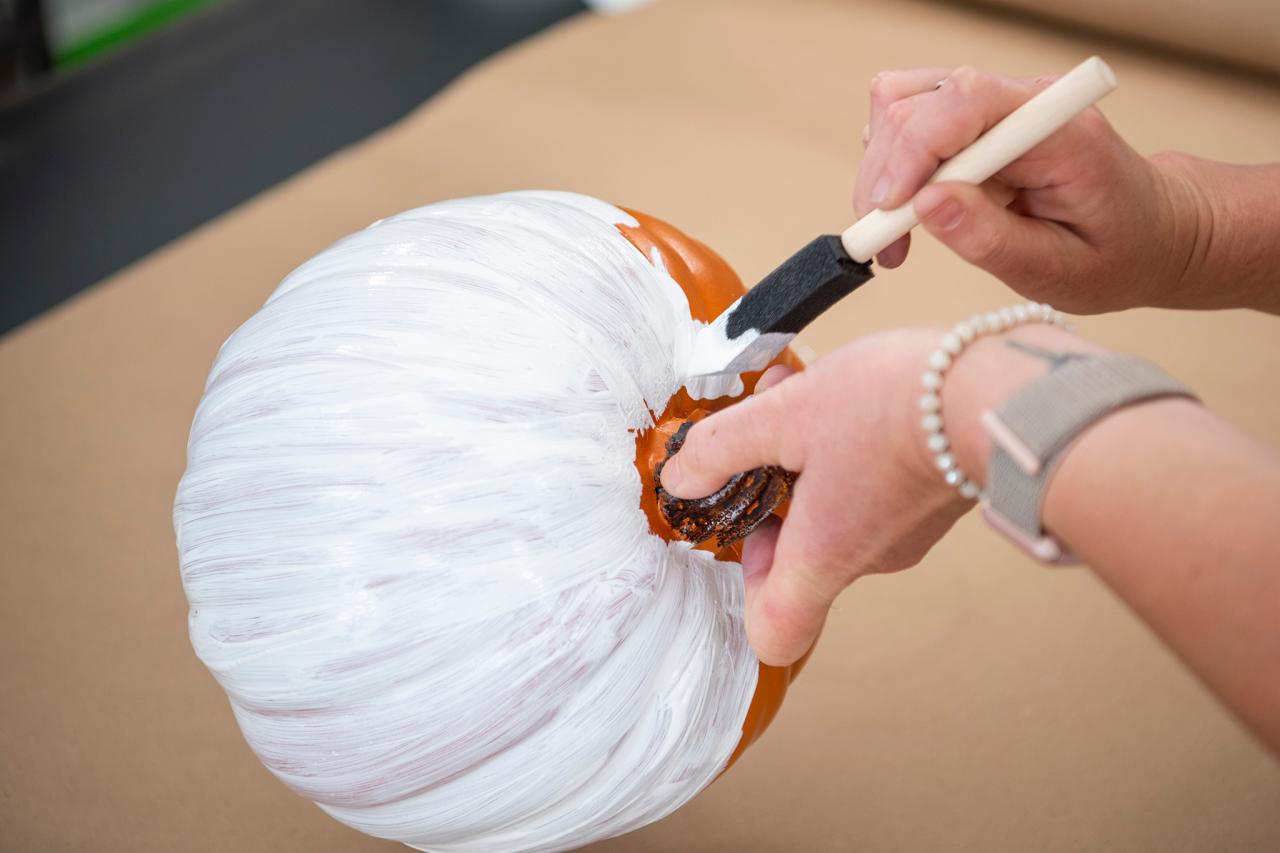
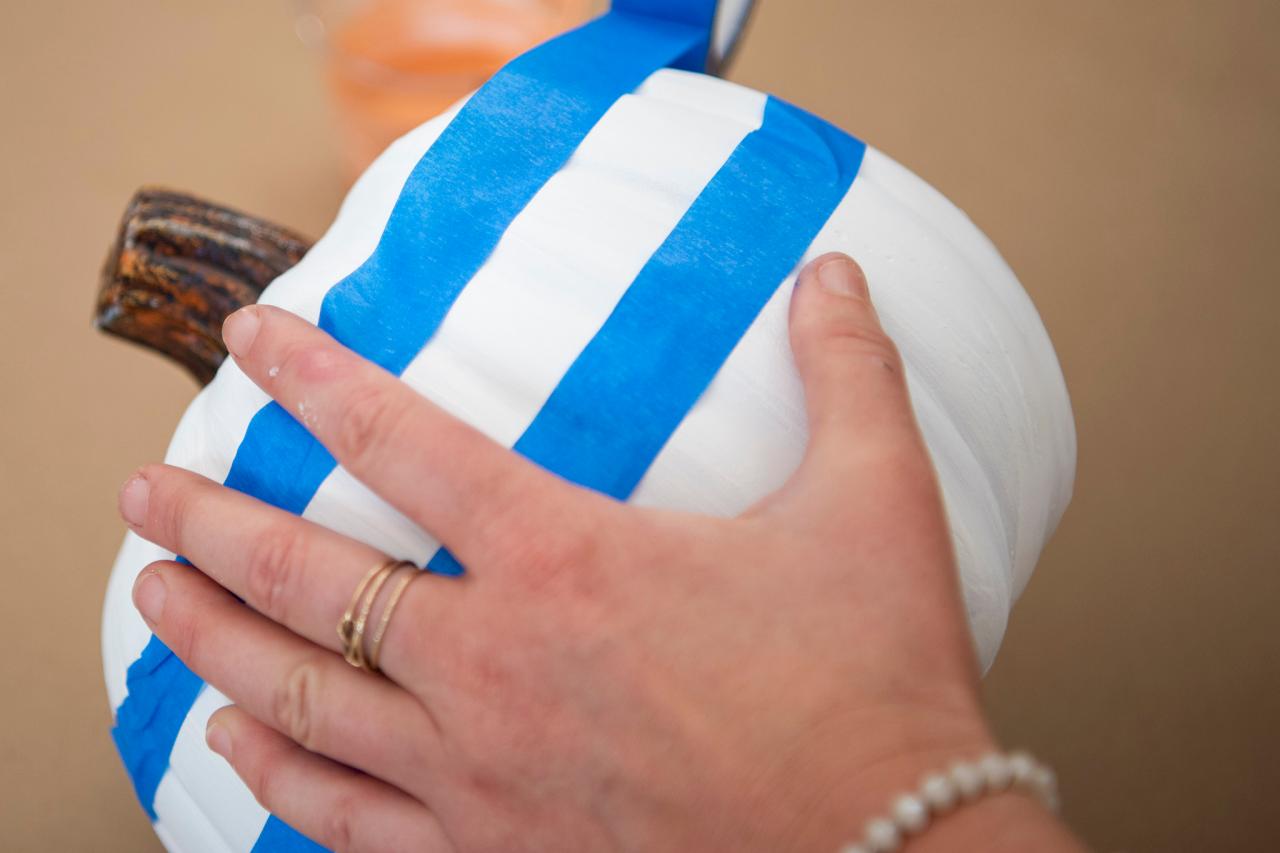
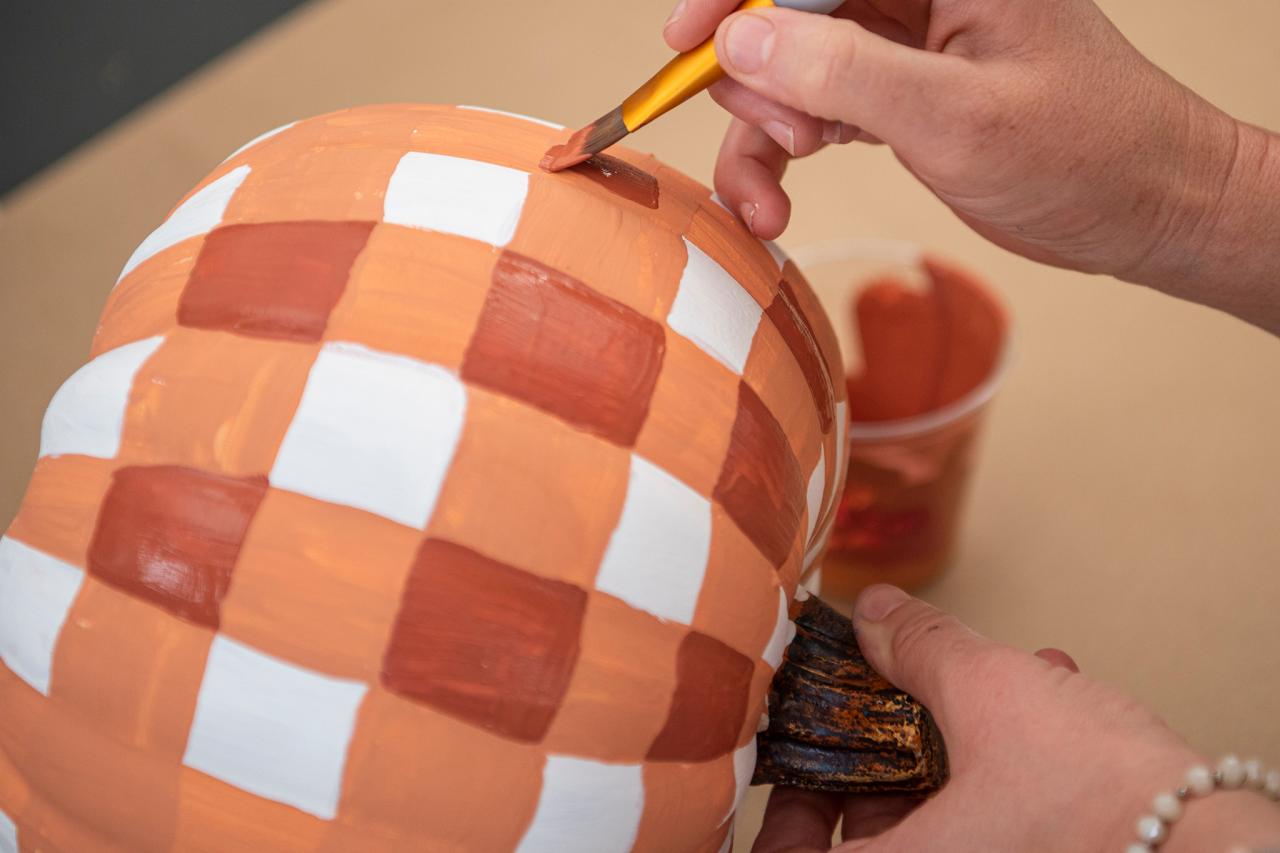
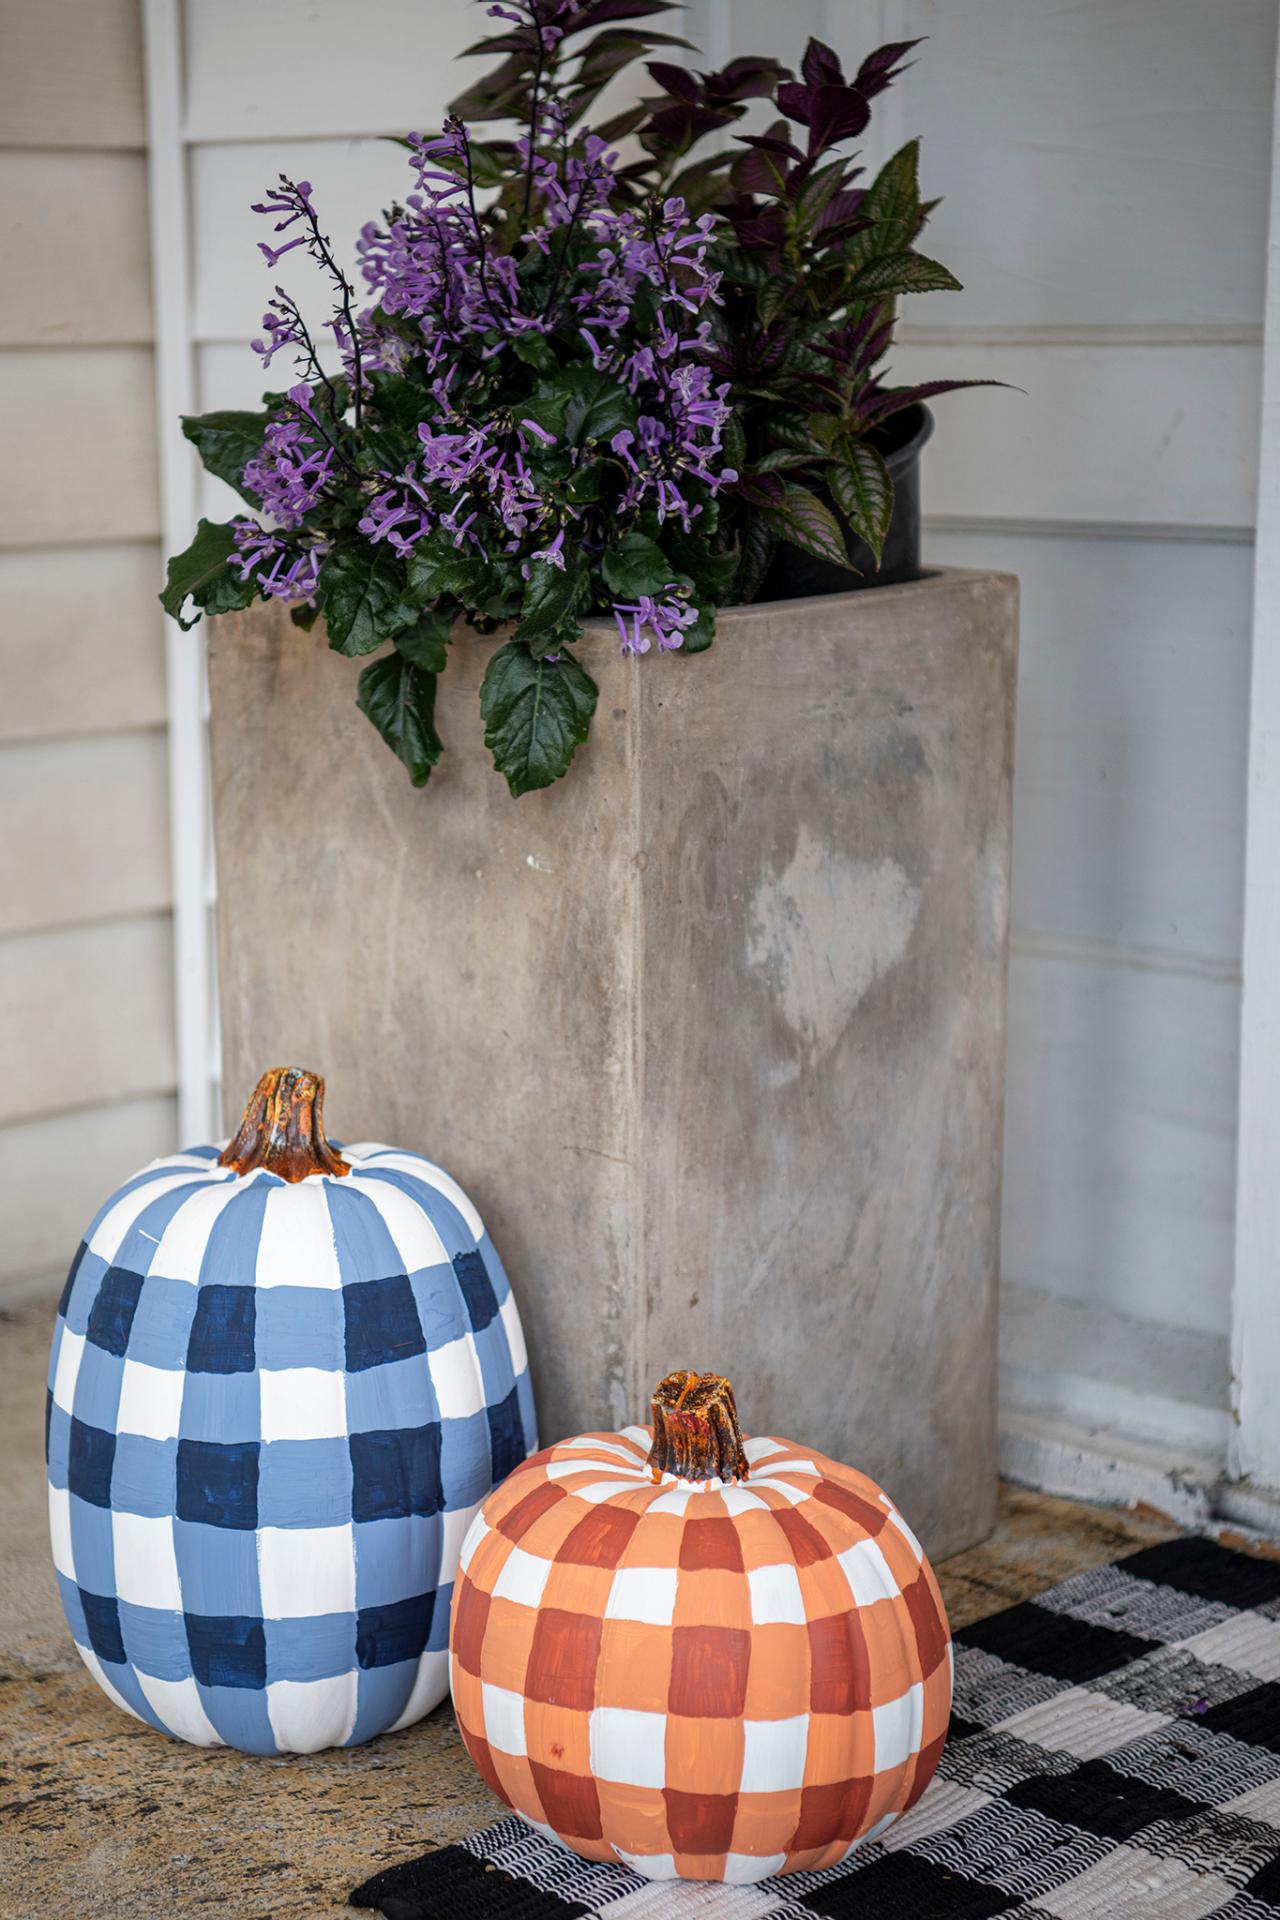
Use a foam brush to paint a pumpkin with white craft paint. (Image 1). Apply another coat of paint to get a solid white base. Once dry, tape off horizontal lines around the pumpkin using painter's tape (Image 2). Mix together orange and white craft paint to create a light orange hue. Paint between the tape (Image 3). Remove the tape to reveal horizontal lines, and touch up any uneven spots with additional paint. Paint along the ribs of the pumpkin to create the vertical lines. Once dry, paint a square with the original orange paint anywhere the vertical and horizontal lines overlap (Image 4). Let dry and display (Image 5).

Sarah Busby

Sarah Busby
Sarah Busby

Sarah Busby
Sarah Busby
MUDCLOTH
Supplies Needed
- pumpkin
- matte black craft paint
- foam brush
- paint marker
- painter's tape
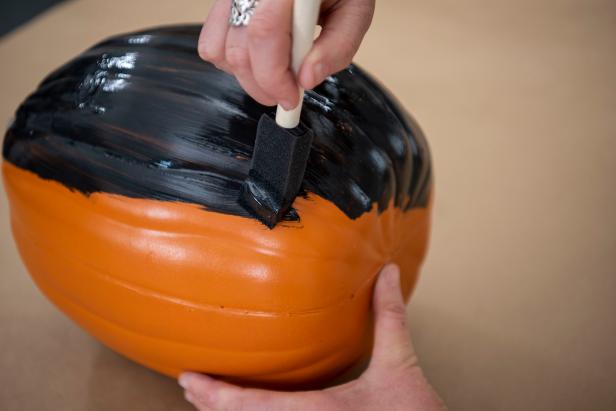
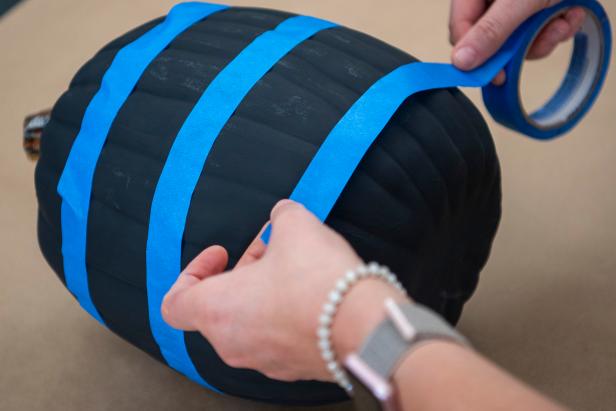
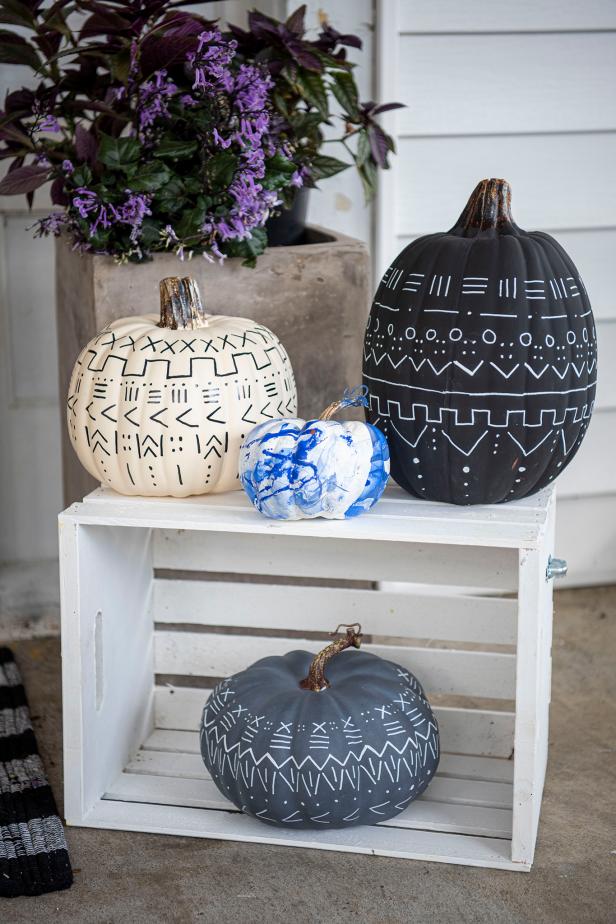
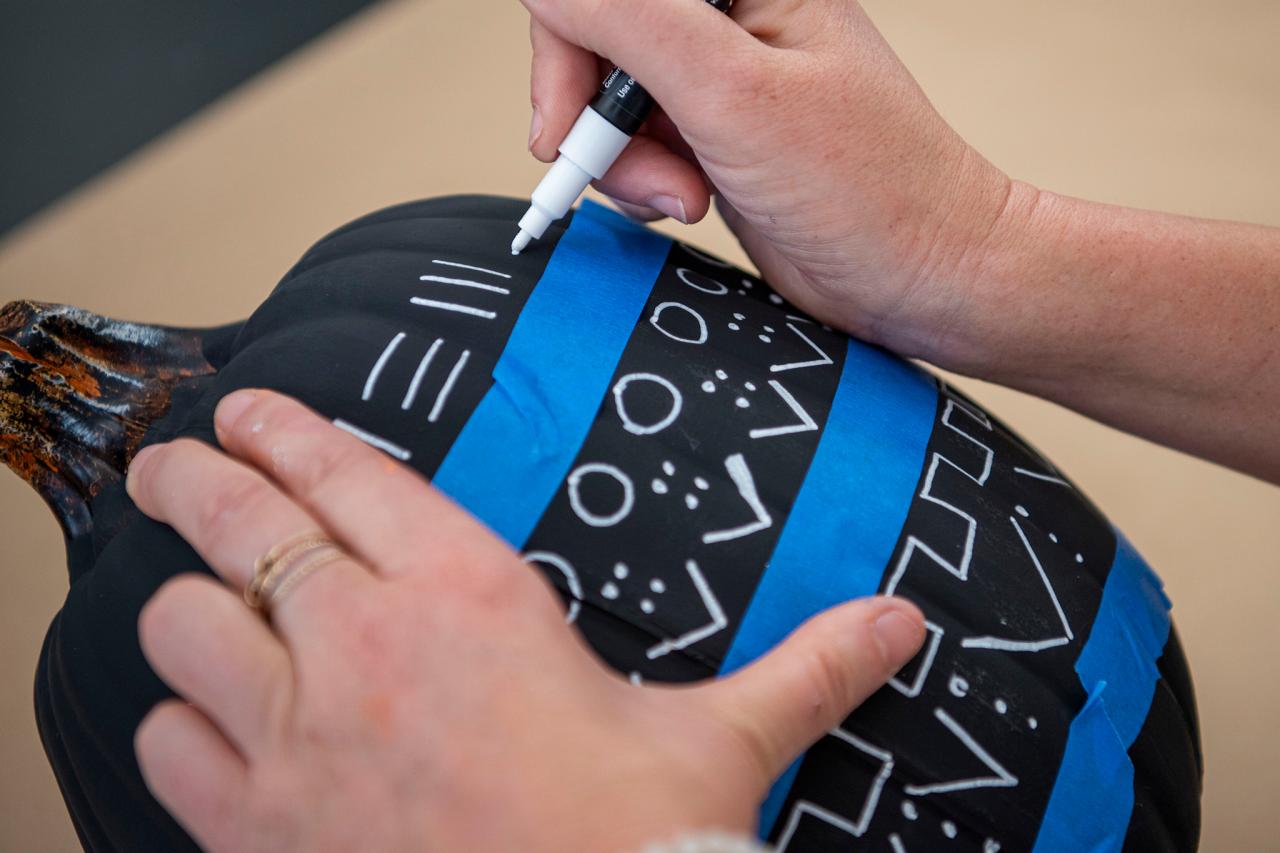
Begin by painting the pumpkin with black chalk paint and let dry completely (Image 1). Next, add horizontal lines of masking tape (Image 2). This will ensure your patterns are straight. Use a white paint pen to draw on mudcloth patterns for a trendy design (Image 3). Remove the masking tape and continue creating patterns between the designs.
Sarah Busby
Sarah Busby

Sarah Busby
Sarah Busby, Sarah Busby, Sarah Busby


