Build a Whimsical Cloud Bookshelf for a Kids' Bedroom

Organize and display your kids’ books and toys with style! Learn how to build this adorable cloud bookshelf with just a few supplies from the hardware store.

Bookshelf With Cloud Details

DIY Cloud Bookshelf for a Kid's Bedroom

Organize your kids’ books and toys in style with this DIY bookshelf featuring whimsical cloud-inspired details.

Photo by: Jen Woodhouse

Jen Woodhouse

Materials

  • (1) 1x10 x 8’ board
  • (1) 1x10 x 6’ board
  • (1) 1x8 x 6’ board
  • (1) 2’ x 4’ sheet of 1/4” plywood
  • veneer edge banding (optional)

NOTE: This plan assumes the boards are a nominal width, not actual width. Generally, a 1x10 board actually measures 9 1/4” wide, and a 1x8 board measures 7 1/4” wide. You can also use 3/4” plywood if you’d prefer.

Tools

  • tape measure
  • pencil
  • carpenter’s square
  • cordless drill/driver
  • table saw or circular saw
  • jigsaw
  • pocket hole jig
  • brad nailer or hammer
  • stapler
  • safety glasses
  • hearing protection
  • dust mask

Cut List

  • (2) 1x10 @ 35 1/4” (sides)
  • (1) 1x10 @ 24” (top)
  • (3) 1x10 @ 22 1/2” (shelves and bottom ripped to 8 1/2” wide)
  • (3) 1x8 @ 22 1/2” (cloud fronts)
  • (1) 1/4” plywood @ 36” x 24” (back panel)

For specific dimensions and 3D diagrams, download the PDF plans.

Measure and Cut the Pieces

Using the cut list above, measure, mark and cut the boards to length.

Cutting Wood Pieces

DIY Cloud Bookshelf: Measure and Cut the Pieces

Measure, mark and cut the boards to length.

Photo by: Jen Woodhouse

Jen Woodhouse

Drill the Pocket Holes

Pocket hole joinery involves drilling a pilot hole at a slight angle into one board, then joining it to a second board with a self-tapping screw. Pocket hole joinery is a fast and reliable way to join boards and create a strong joint.

Drilling Pocket Holes in Wood

DIY Cloud Bookshelf: Drill the Pocket Holes

Pocket hole joinery involves drilling a pilot hole at a slight angle into one board, then joining it to a second board with a self-tapping screw. Pocket hole joinery is a fast and reliable way to join boards and create a strong joint.

Photo by: Jen Woodhouse

Jen Woodhouse

Using a pocket hole jig, drill 3/4” pocket holes into the two sides of the bookshelf. Attach the sides to the top with 1 1/4” pocket screws and wood glue. Whenever possible, try to drill downward and use gravity to your advantage.

Drilling Pocket Holes in Wood

DIY Cloud Bookshelf: Pocket Hole Joinery

Using a pocket hole jig, drill ¾” pocket holes into the two sides of the bookshelf. Attach the sides to the top with 1 ¼” pocket screws and wood glue. Whenever possible, try to drill downward and use gravity to your advantage.

Photo by: Jen Woodhouse

Jen Woodhouse

Cut the Shelves

Measure, mark and cut the 6' 1x10 board to length for the shelves, then rip the shelves to 8 1/2” wide on a table saw or circular saw.

Cutting Wood Shelves With Table Saw

DIY Cloud Bookshelf: Cut the Shelves

Measure, mark and cut the 6’ 1x10 board to length for the shelves, then rip the shelves to 8 ½” wide on a table saw or circular saw.

Photo by: Jen Woodhouse

Jen Woodhouse

Attach the Shelves

Drill 3/4” pocket holes into the ends of the shelves and attach them to the sides with 1 1/4” pocket screws and wood glue. Notice that the shelves are flush to the back, to allow space for the cloud fronts.

Attaching Shelves for Bookshelf

DIY Cloud Bookshelf: Attach the Shelves

Drill ¾” pocket holes into the ends of the shelves and attach them to the sides with 1 ¼” pocket screws and wood glue. Notice that the shelves are flush to the back, to allow space for the cloud fronts.

Photo by: Jen Woodhouse

Jen Woodhouse

Bookshelf Carcass

DIY Cloud Bookshelf: Complete Carcass

Drill ¾” pocket holes into the ends of the shelves and attach them to the sides with 1 ¼” pocket screws and wood glue. Notice that the shelves are flush to the back, to allow space for the cloud fronts.

Photo by: Jen Woodhouse

Jen Woodhouse

Optional: Apply Edge Banding

If you’re using plywood, use iron-on adhesive edge banding to hide the raw plywood edges.

Ironing Edge Banding Onto Bookshelf

DIY Cloud Bookshelf: Add Edge Banding

If you’re using plywood, use iron-on adhesive edge banding to hide the raw plywood edges.

Photo by: Jen Woodhouse

Jen Woodhouse

Draw the Cloud Shape

Using a round pot or bucket as a guide, trace a cloud shape onto the boards. Don’t worry about perfection here – clouds are whimsical and organic!

Tracing Cloud Shapes Onto Wood

DIY Cloud Bookshelf: Draw the Cloud Shape

Using a round pot or bucket as a guide, trace a cloud shape onto the boards. Don’t worry about perfection here – clouds are whimsical and organic!

Cut Out the Cloud Shape

Use a jigsaw to cut the cloud shape out. Switch out a general purpose blade for a scroll blade on the jigsaw for more control, tighter curves and to minimize tear-out.

Cutting Cloud Shape Out of Wood With Jigsaw

DIY Cloud Bookshelf: Cut Out the Cloud Shape

Use a jigsaw to cut the cloud shape out. Switch out a general purpose blade for a scroll blade on the jigsaw for more control, tighter curves and to minimize tear-out.

Paint the Clouds

Feel free to personalize these shelves. I used my CNC machine to carve the kids’ names on the fronts. Use paint or stencils and get creative!
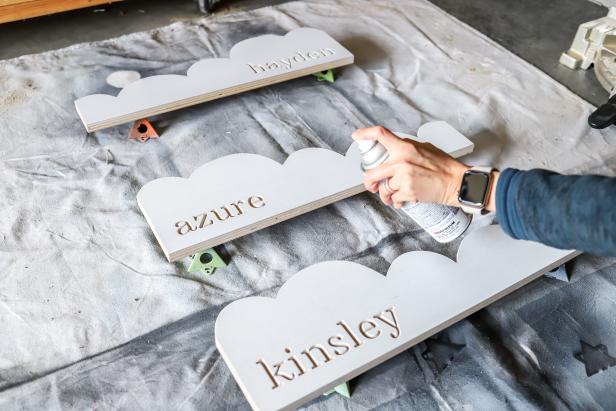
Spray Painting Cloud-Shaped Bookshelf Fronts

DIY Cloud Bookshelf: Paint and Personalize the Clouds

Feel free to personalize these shelves. I used my CNC machine to carve the kids’ names on the fronts. Use paint or stencils and get creative!

Photo by: Jen Woodhouse

Jen Woodhouse

Attach the Cloud Fronts

Apply glue to the edges of the shelves and attach the cloud fronts with 1 1/4” brad nails.

Attaching Cloud Fronts to Bookshelf

DIY Cloud Bookshelf: Attach the Cloud Fronts

Apply glue to the edges of the shelves and attach the cloud fronts with 1 ¼” brad nails.

Photo by: Jen Woodhouse

Jen Woodhouse

Attach the Back Panel

Measure, mark and cut 1/4” back panel to size. Attach it to the back of the bookshelf with 1” staples and wood glue.

Attaching Back Panel to Bookshelf

DIY Cloud Bookshelf: Attach the Back Panel

Measure, mark and cut ¼” back panel to size. Attach it to the back of the bookshelf with 1” staples and wood glue.

Photo by: Jen Woodhouse

Jen Woodhouse

Decorate It

Fill the finished bookshelf with your kids' favorite books, toys and other treasures.

DIY Cloud Bookshelf

DIY Bookshelf With Cloud-Inspired Details

This DIY kid's room bookshelf features whimsical cloud-inspired fronts, which can be personalized by carving or stenciling your kids' names into them.

Photo by: Jen Woodhouse

Jen Woodhouse

Next Up

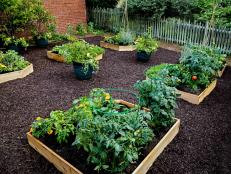
How to Build Raised Garden Beds From Cedar Boards

Ready to get your garden started? Follow our step-by-step instructions to construct these easy, unique raised beds for flowers, vegetables and more.

Easily Craft a Designer-Worthy Breakfast-in-Bed Tray

Give a basic tray a colorful makeover (on the cheap!) to create a beautiful, spill-proof surface that's perfect for enjoying a light snack while you snuggle under the covers bingeing your favorite show or curled up with a good book.

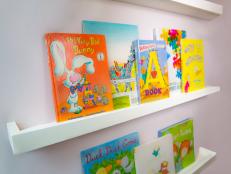
How to Build a Ledge Bookshelf

Learn how to build narrow floating shelves that are perfect for a kid’s room or living area, or any small space.

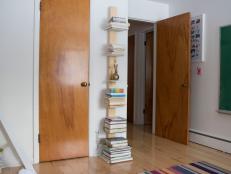
How to Build a Vertical Book Tower

Short on space to display your books? You’ll certainly be able to fit this DIY bookshelf into your life.

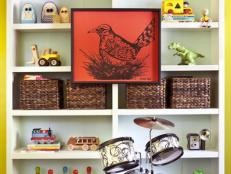
How to Upgrade Ready-to-Assemble Bookshelves

Give basic bookshelves the designer treatment with paint and added molding.

How to Build a Free Library Box With a Living Roof

Little free libraries are popping up in neighborhoods everywhere. Sharing your favorite books is a great way to connect with your neighbors and encourage kids to read.

How to Make an Adorable Light-Up Tutu Nightstand

Dress up a plain side table with an easy-to-make, no-sew tulle tutu. Add a built-in light, and it’s the perfect nightstand for a kid’s bedroom!

How to Divide a Shared Kids' Room

Use shelving and a creative paint technique to create an individual space for each kid in a shared room.

Build Tall Storage Shelves Step-By-Step

Carter Oosterhouse builds a wall of storage in a small dining room.

DIY Rainbow Headboard

This whimsical headboard is budget-friendly, renter-friendly and so incredibly cute.

What's New in Handmade

On TV

Follow Us Everywhere

Join the party! Don't miss HGTV in your favorite social media feeds.