


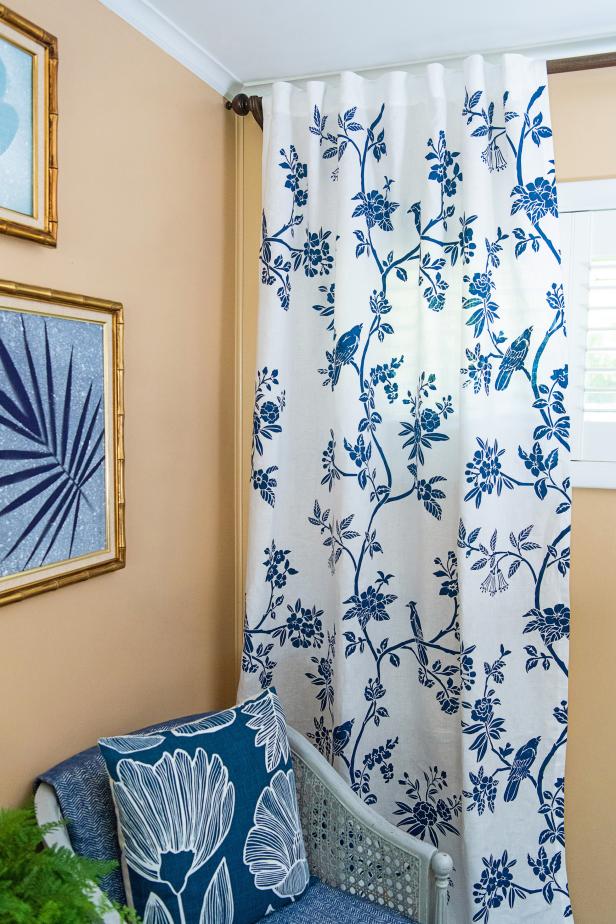
Blah to Bespoke: How to Stencil Drapery Panels for a Designer Look for Less
Give basic white drapery panels a not-so-basic makeover with an oversized stencil and budget-friendly acrylic craft paint for a look that says you splurged — when you really saved.
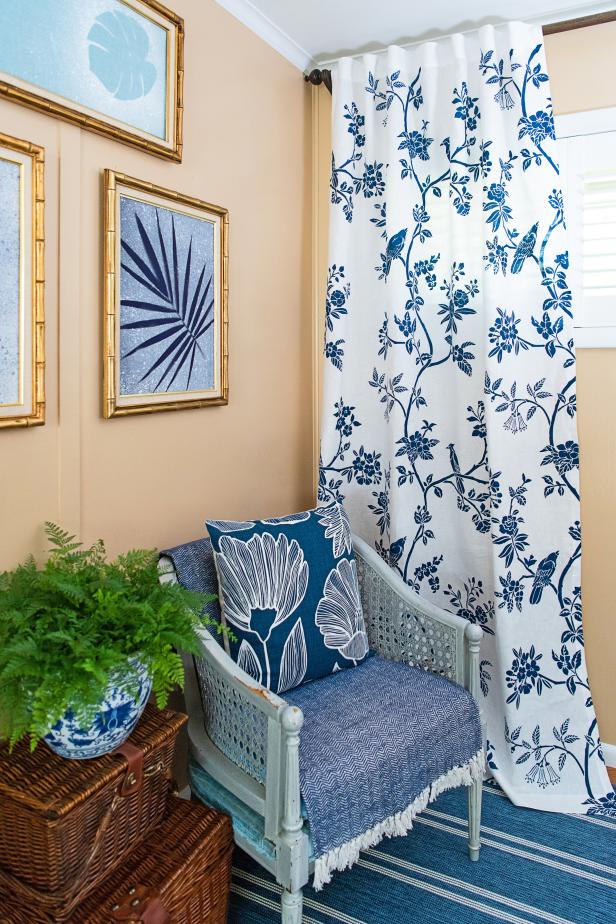

Photo by: Sarah Busby; Styling by H. Camille Smith
Sarah Busby; Styling by H. Camille Smith
Materials Needed
- textile medium
- acrylic craft paint in your chosen color
- paper plate or other disposable surface for mixing paint
- mini foam roller
- drop cloth, plastic or craft paper to protect work surface
- painter’s tape
- iron and ironing board
- spare bit of white fabric
- pencil
- tape measure or yardstick
Protect Work Surface
Cover your chosen work surface with a drop cloth or craft paper to catch paint bleed. Note: Paint bleed will be determined by your curtain’s thickness and, to some degree, how hard you push the paint into the fabric — but some paint will likely bleed through the fabric so a protected work surface is key.
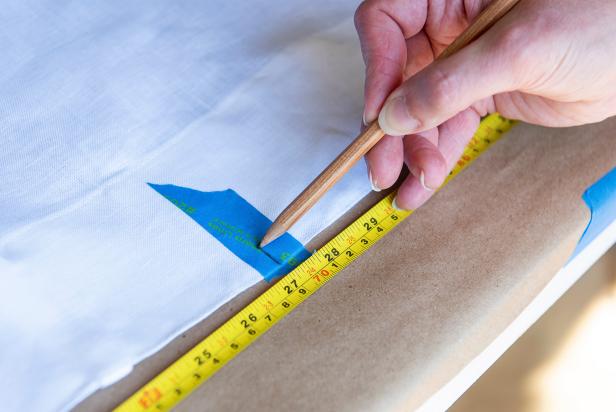
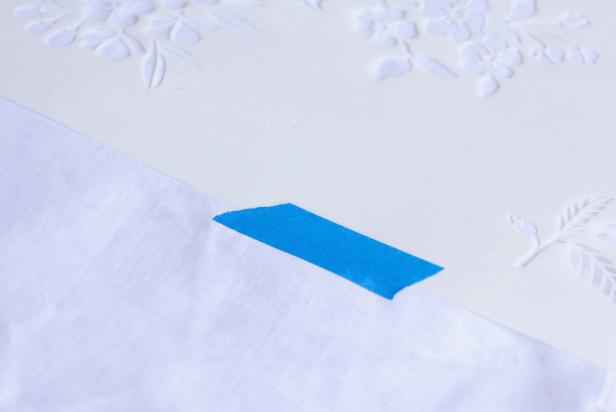
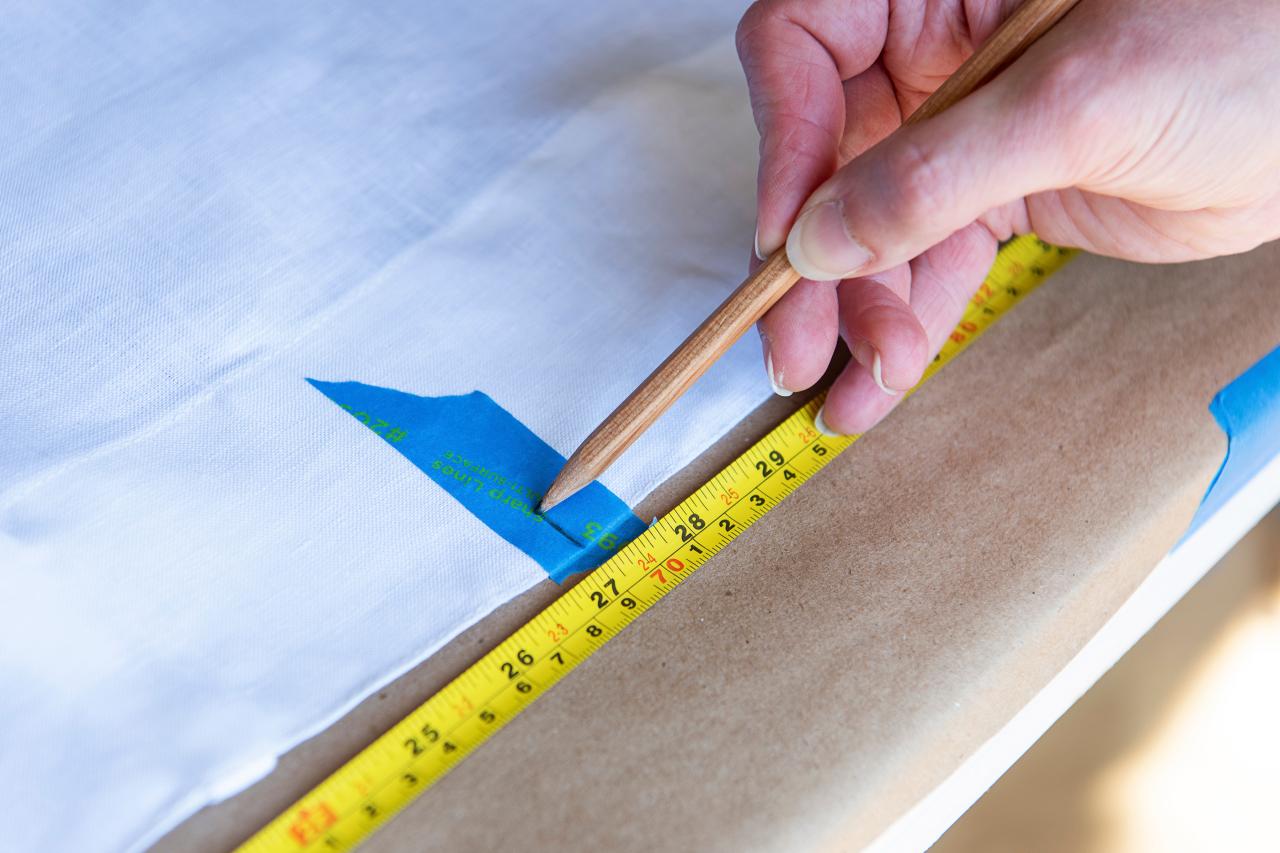
Find Curtain's Center + Position Stencil
Every good stenciling project begins by finding the center of the object you’re stenciling. This is important because when the curtains are closed, a centered, stenciled pattern will more accurately resemble screenprinted fabric and it prevents you from stenciling at an angle, unintentionally creating a crooked design. At the top of a drapery panel, use a tape measure or yardstick to find the center, then note it with a piece of painter’s tape and a pencil (Image 1). Line up the stencil's center with the drapery's center and tape down the stencil's edges using painter's tape (Image 2).
Sarah Busby
Sarah Busby
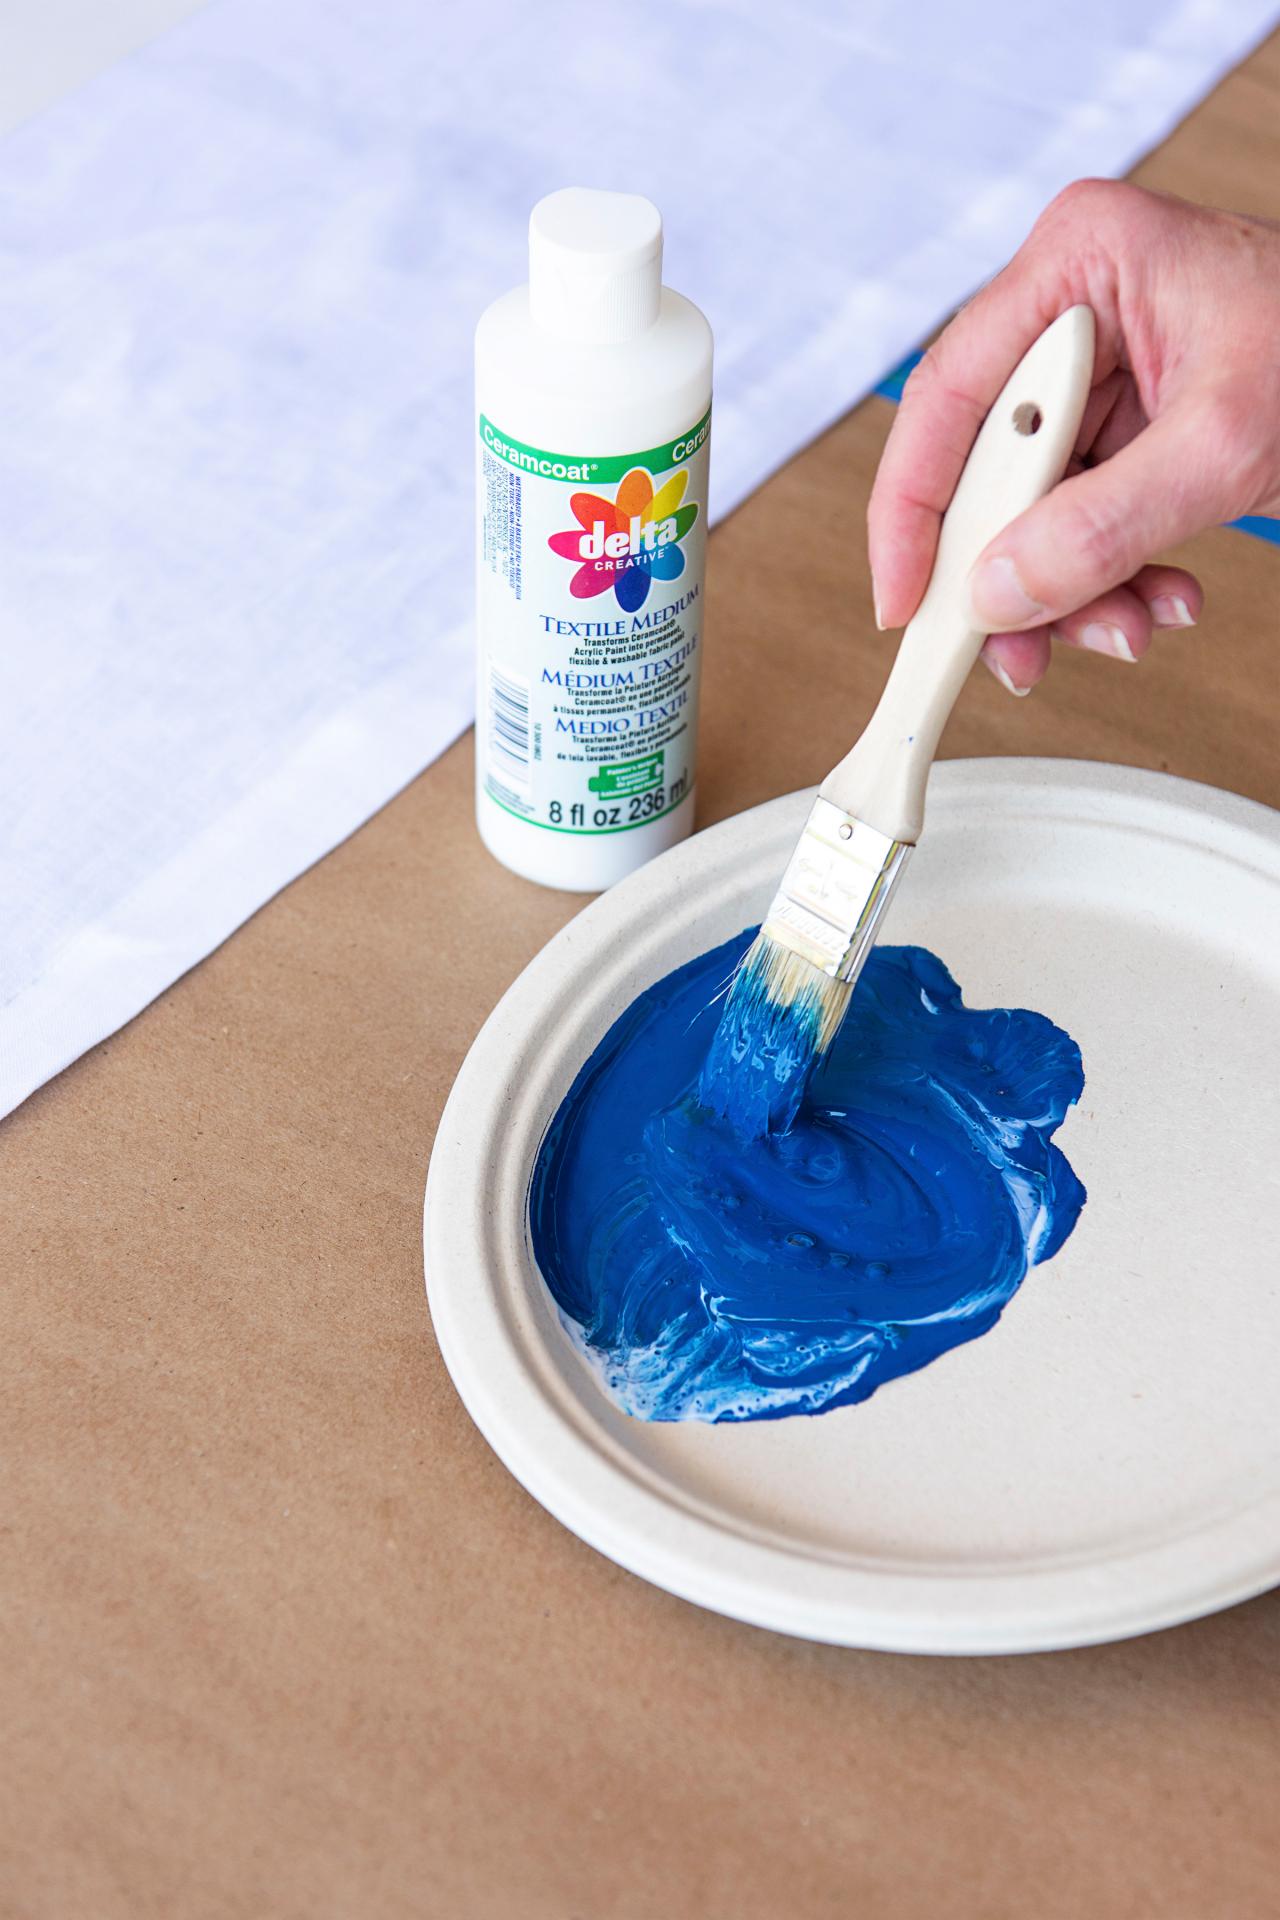
Mix Paint + Textile Medium
On a disposable surface, combine approximately 2/3 craft paint to 1/3 textile medium to create a smooth consistency for rolling. The textile medium helps the paint bond seamlessly with the fabric, aids in flexibility (no stiff painted bits) and limits paint bleed, under the stencil, when stenciling. Use a small chip brush to thoroughly mix the textile medium and craft paint together.

Sarah Busby
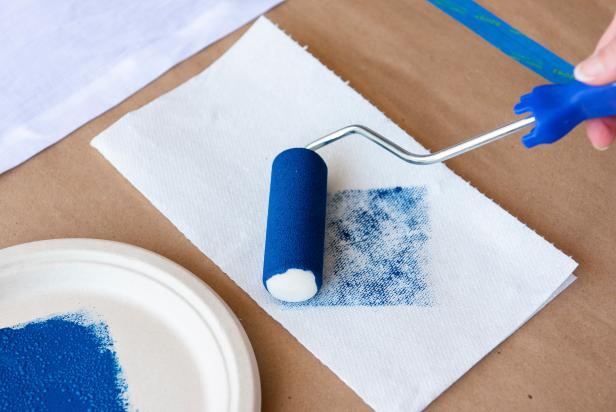
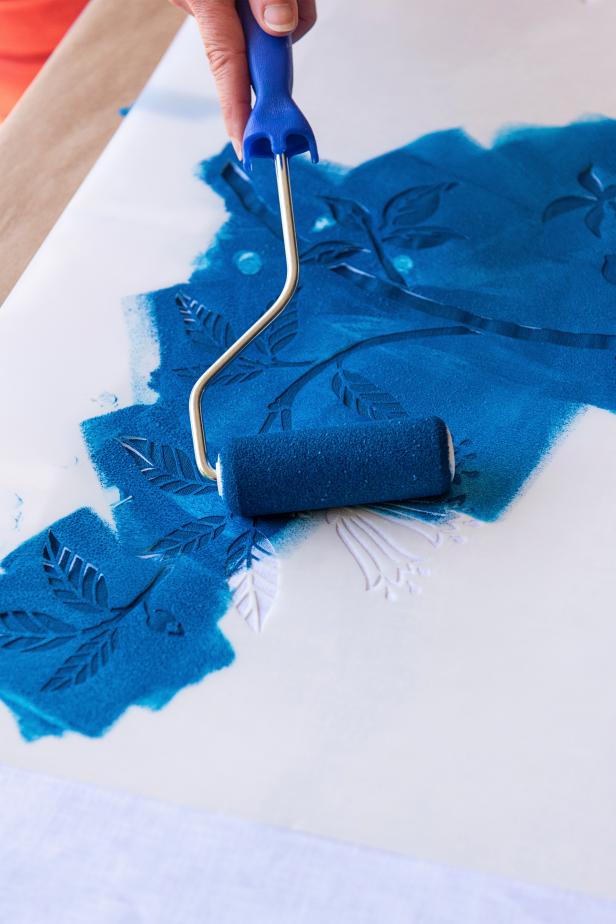
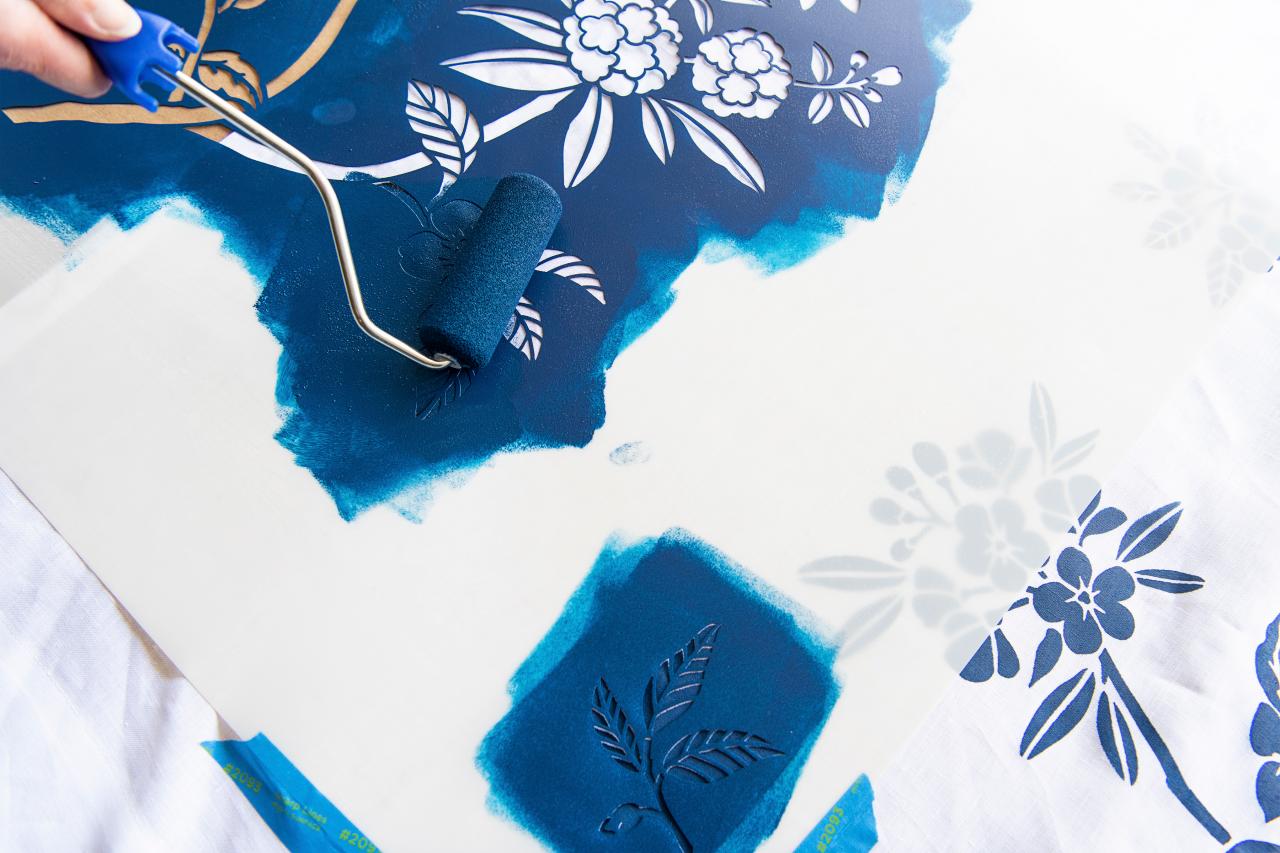
Begin Stenciling
Load up your roller evenly, then to ensure that you don’t start out with paint that’s too thick, roll a bit off onto a paper towel (Image 1). When stenciling, it’s important to never overload your brush or roller to prevent pushing paint under the stencil’s edges. Starting at the top of the stencil, roll an even coat over the stencil (Image 2). Continue stenciling till you've completed the first section, mixing up more paint/textile medium, if necessary (Image 3).
Sarah Busby
Sarah Busby
Sarah Busby
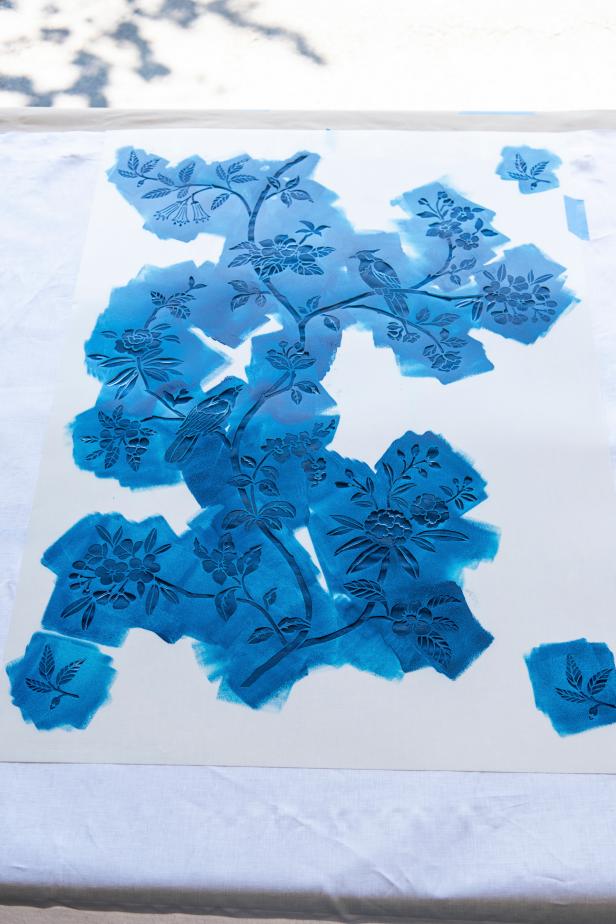
The Big Reveal
When you've completed stenciling the first section, remove the tape holding the stencil in place, then carefully lift the stencil to see your finished design (Images 1 and 2).
Sarah Busby

Sarah Busby
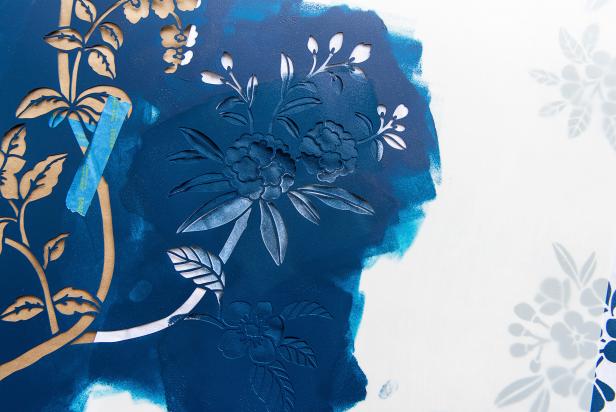
Tip: How Much Paint to Apply
You can lightly apply paint using a 'dry-brush' method (bottom) or you can roll on a solid coat of paint (top). Stenciling is great because it allows you to customize the finished effect based on how much paint you choose to apply.
Sarah Busby
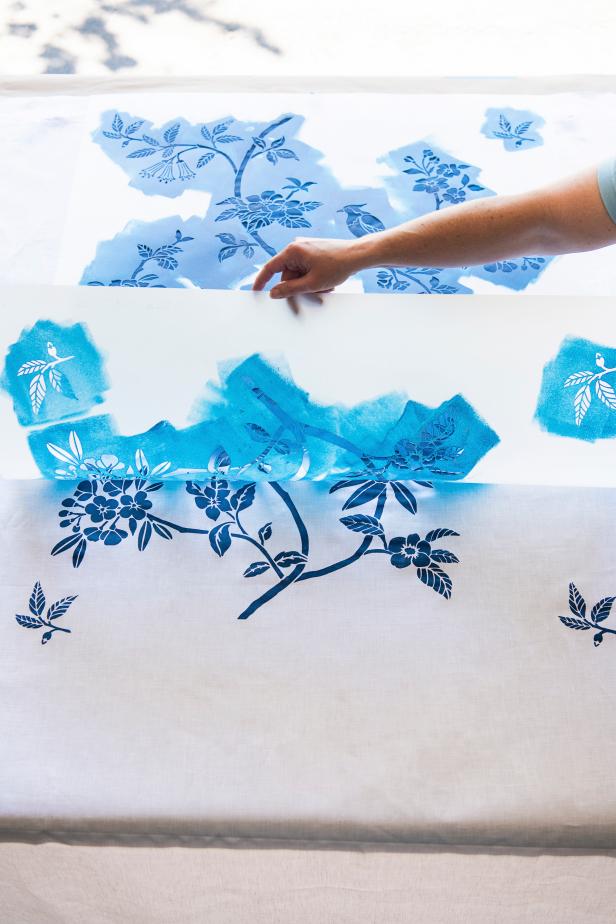
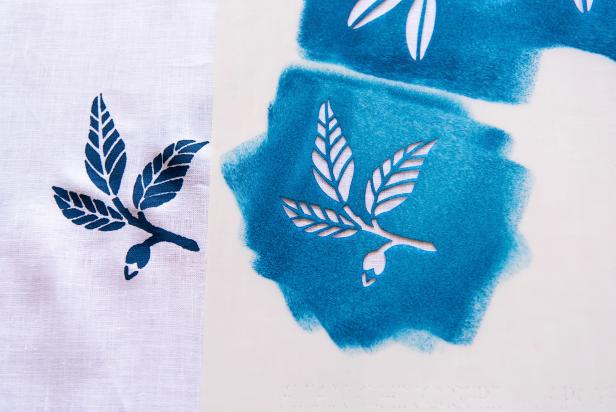
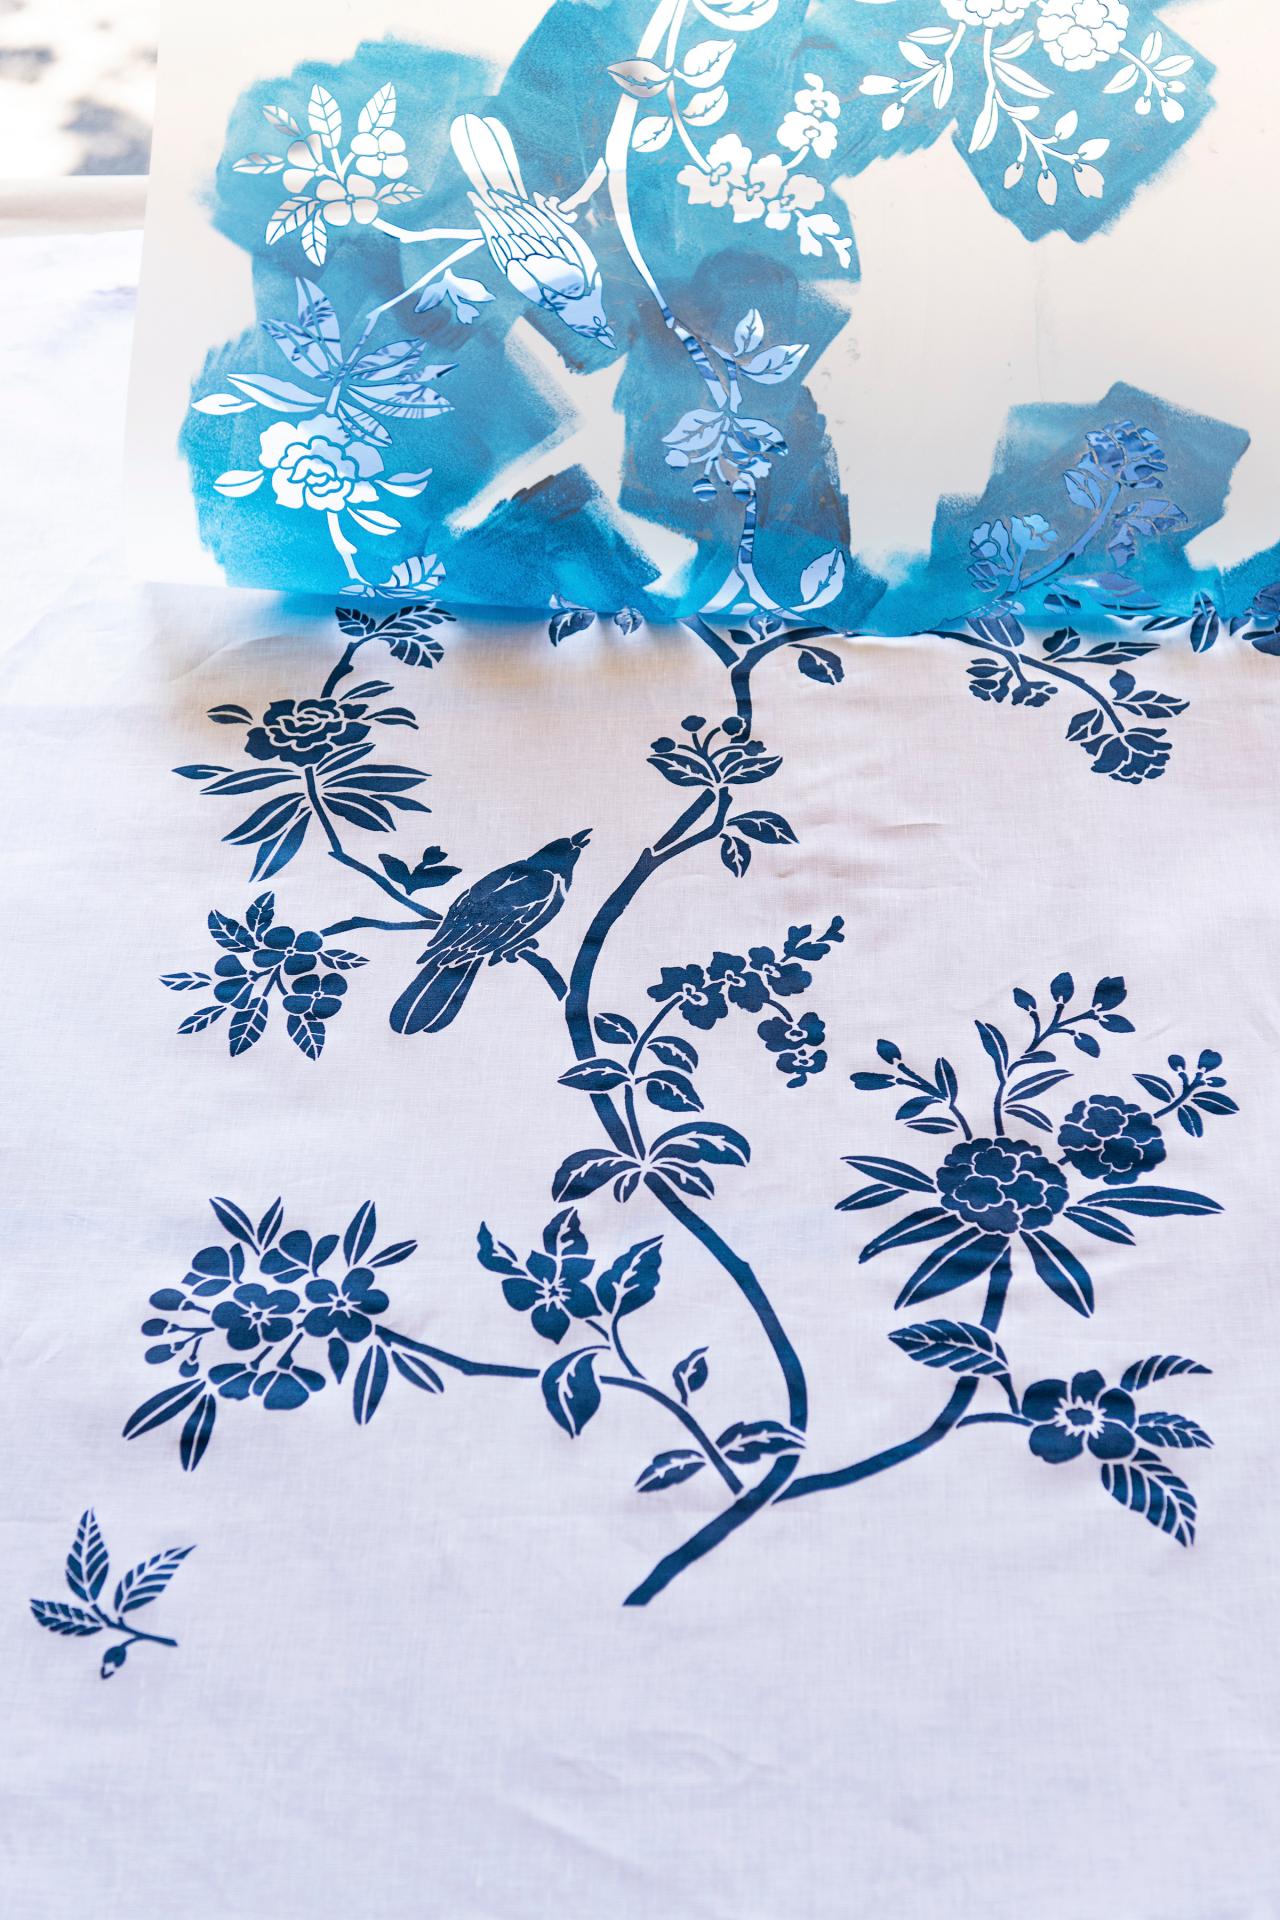
What Is the Repeat?
If you're new to stenciling, you're probably wondering what is this 'repeat' that everyone mentions. Basically, the repeat is an area of the stencil's pattern that quite literally repeats, allowing you to line up the stencil again and again to create a continuous finished design. Here, we've placed the repeat next to the area that was just stenciled as a demonstration. Every stencil uses a different element as the repeat but when you place the stencil next to the area you just painted, it's easy to see which areas should overlap (repeat) to line up the stencil for the next section.
Sarah Busby
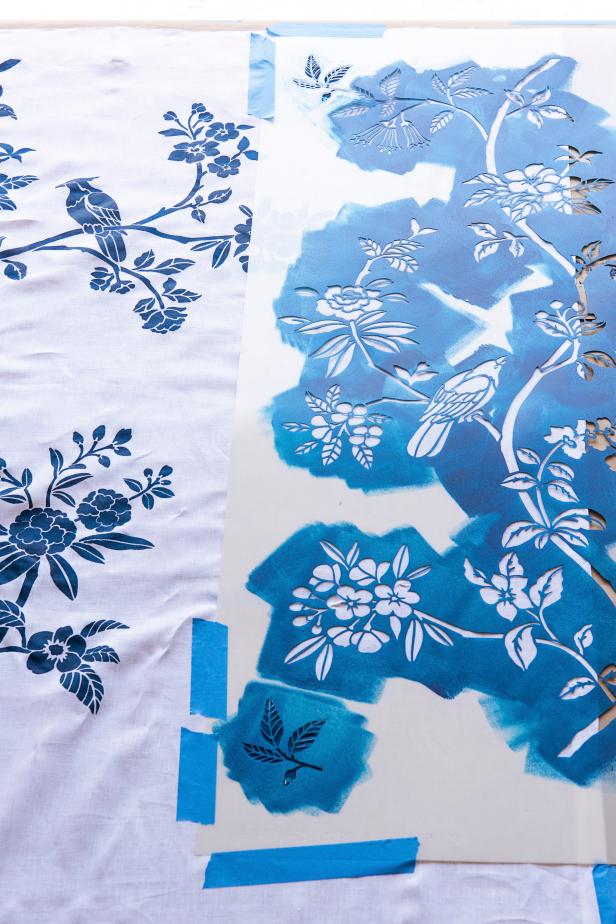
Line Up the Repeat
After the first stenciled area has dried (usually takes just a few minutes), carefully position the repeat (at both the top and bottom) to line up the stencil for the second section (Image 1). Note: With a stencil this large — and fabric this flexible — we found that it was easiest to line up one of the two repeats, tape that portion of the stencil into position, then maneuver the fabric to line up the second repeat before also taping it into place.
Sarah Busby
Continue Stenciling
When your stencil is in position, mix up more paint/textile medium and continue stenciling. Note: There's no need to paint over the repeat again — one coat of paint on all areas is all that's needed. As you complete sections, continue moving the stencil, mixing up more paint/textile medium and stenciling till your entire curtain is covered.

Sarah Busby
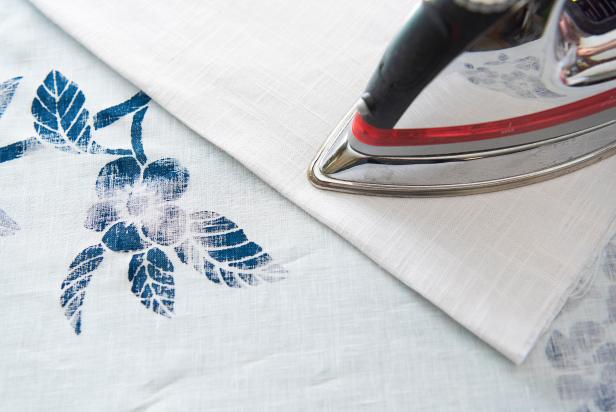
Heat-Set Stenciled Design
After allowing the stenciled curtain to thoroughly dry, ideally overnight, flip the curtain over, place a spare piece of fabric between the iron and the stenciled design and iron to heat-set the paint.Tip: Placing fabric between your iron's plate and the stenciled design is necessary to prevent paint from sticking to your iron.
Sarah Busby
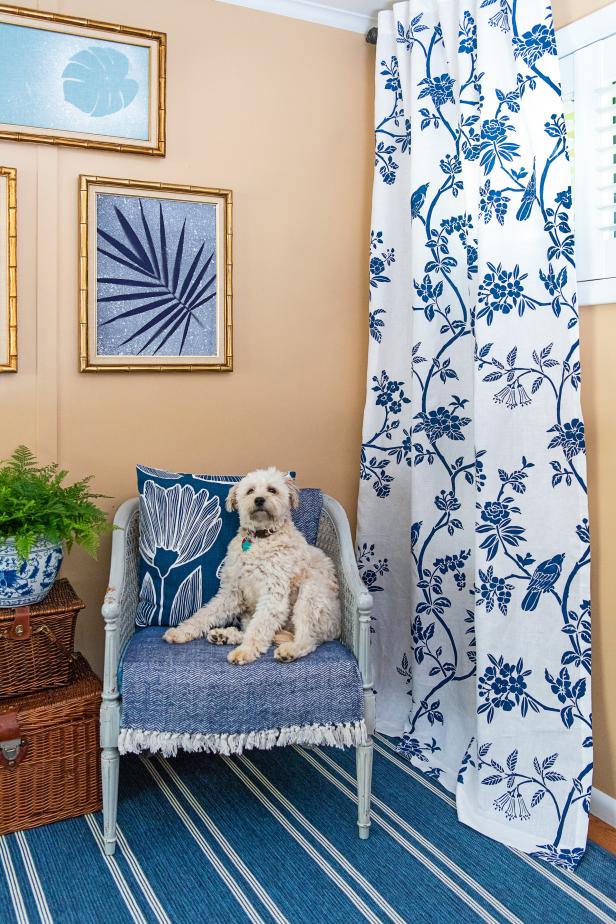
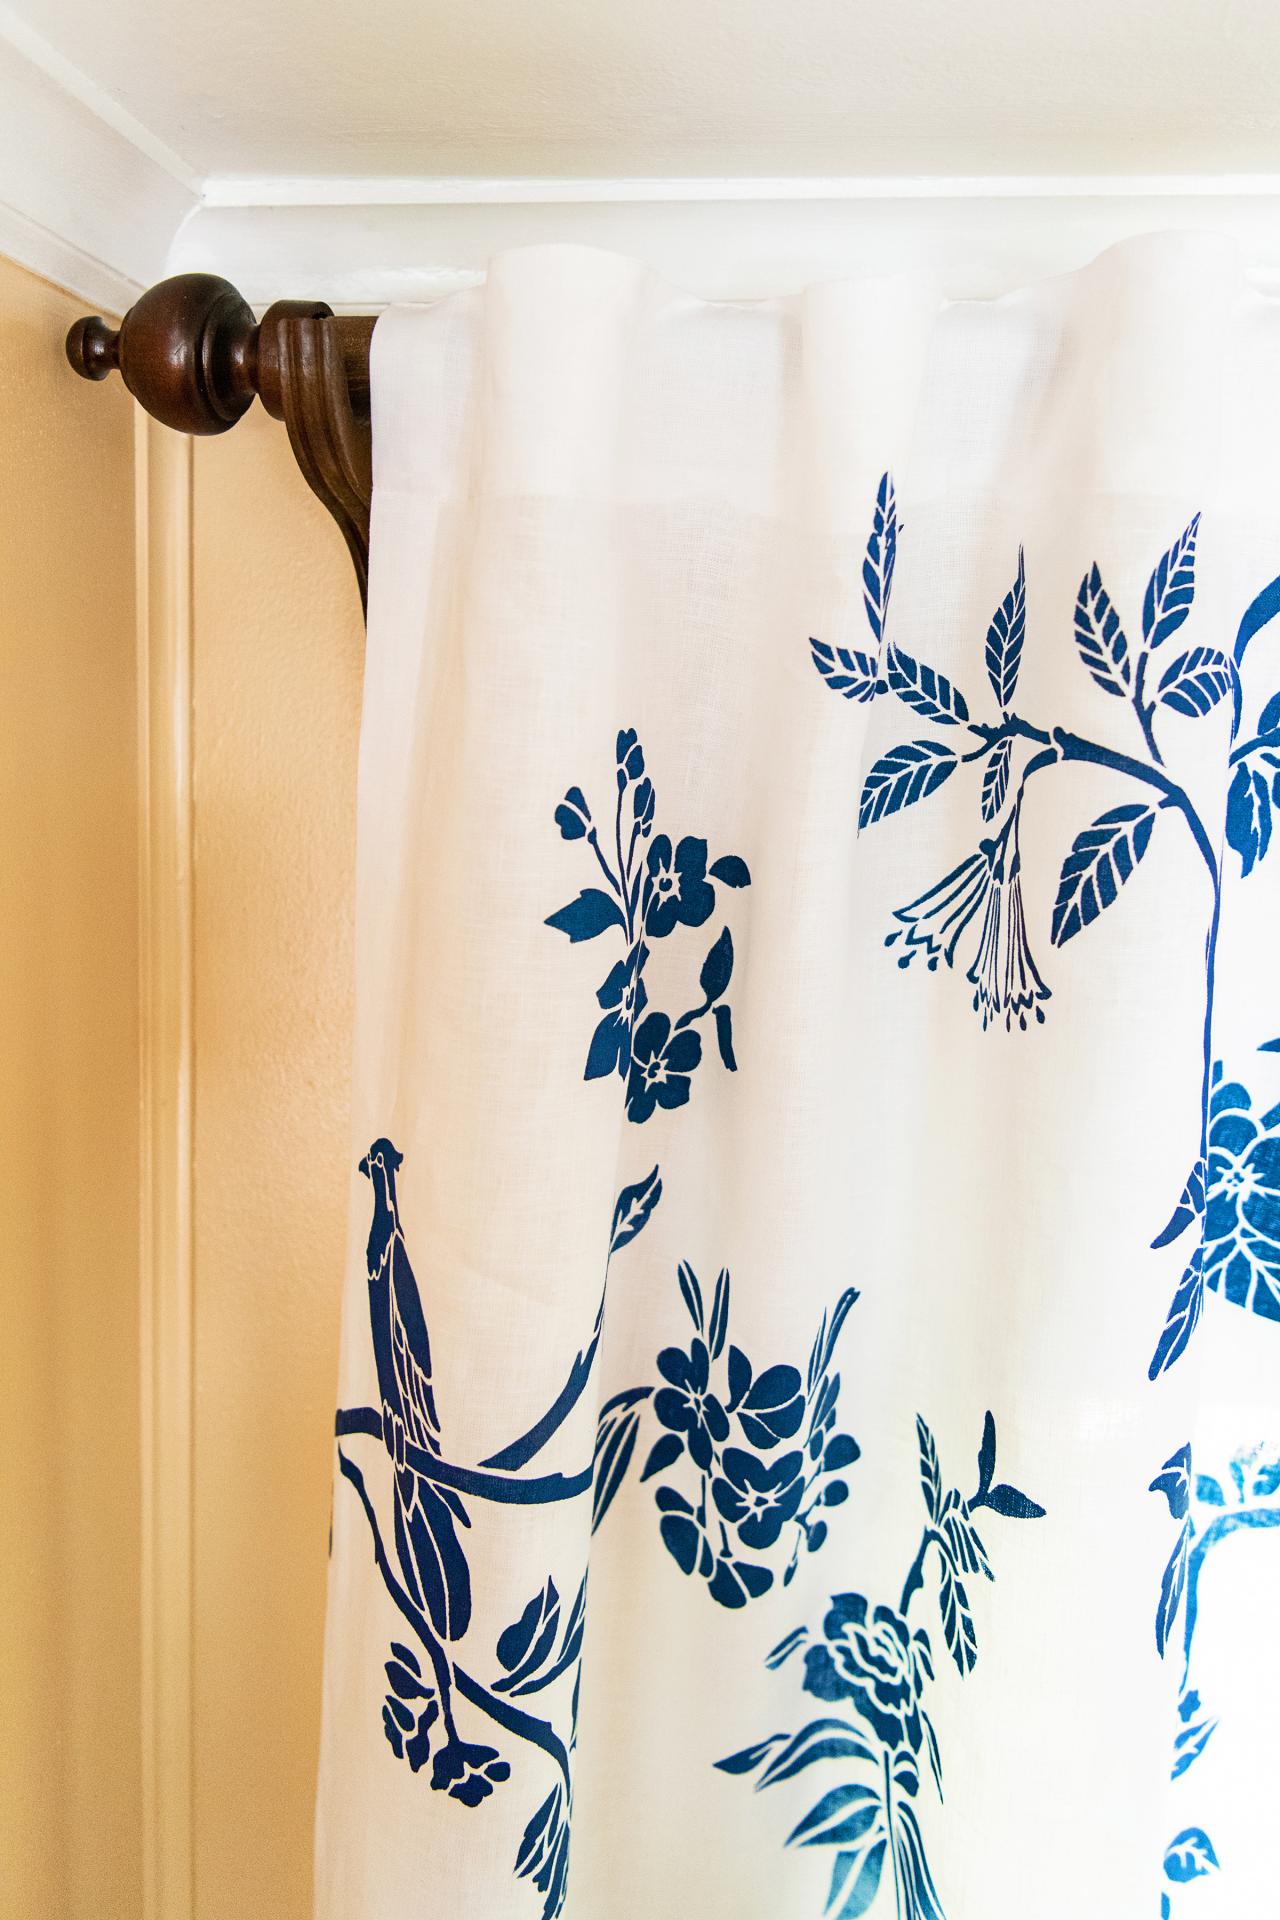
Hang and Admire Your Handiwork
Hang curtains however you prefer (from rings, tabs or on the rod itself) and prepare to bask in the compliments.
Sarah Busby; Styling by H. Camille Smith

Sarah Busby; Styling by H. Camille Smith
Sarah Busby; Styling by H. Camille Smith
Photo By: Sarah Busby; Styling by H. Camille Smith
Photo By: Sarah Busby; Styling by H. Camille Smith
Photo By: Sarah Busby; Styling by H. Camille Smith


