


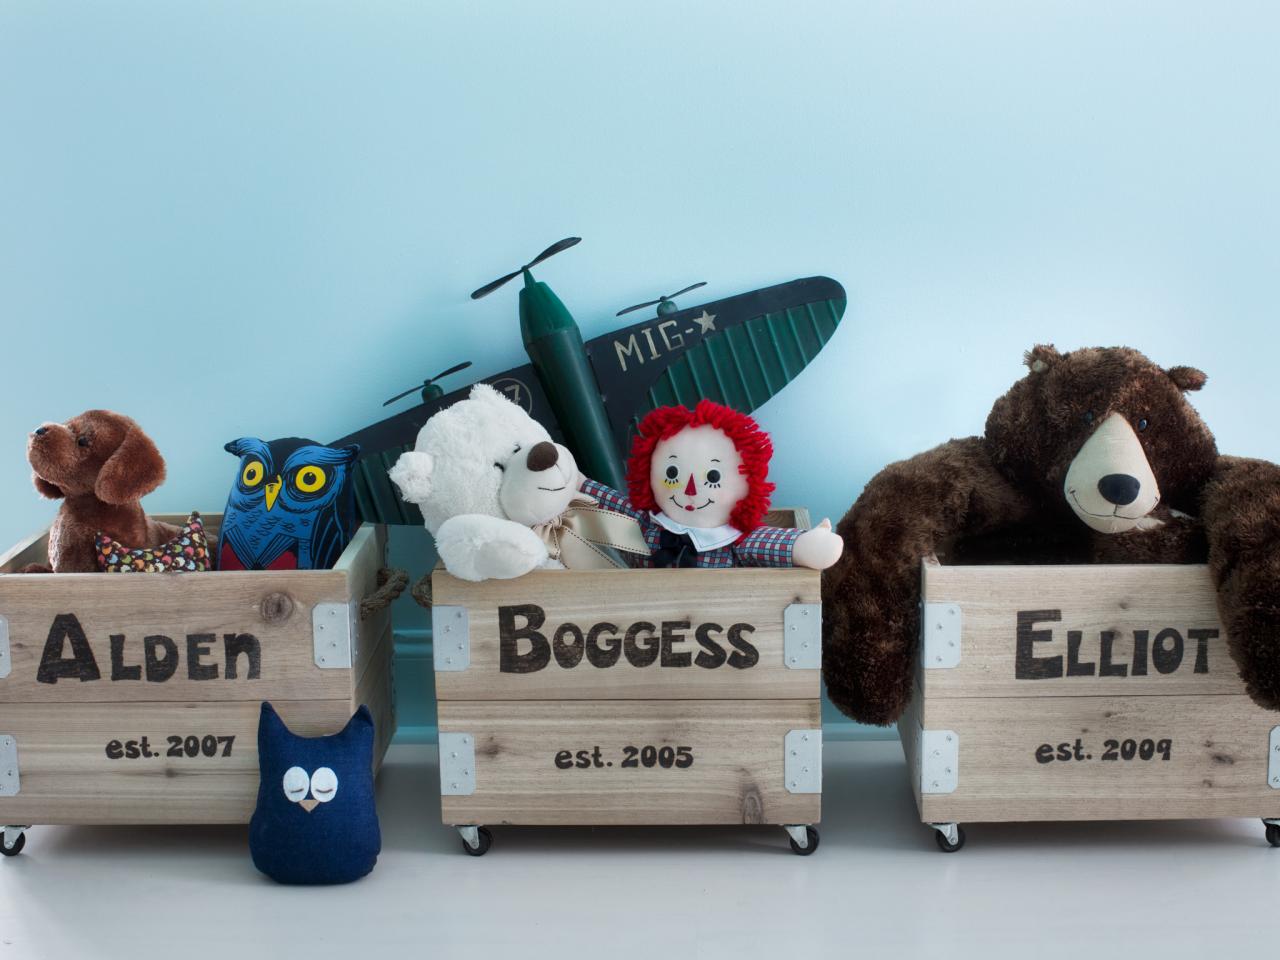
Mobile Wooden Crate Toy Storage
Put old crates to new use as personalized, easy-to-push children's room toy storage.


Materials Needed:
- wooden crates
- electric sander
- sanding pads
- letter and number stencil kit
- pencil
- wood-burning tool
- measuring tape
- drill
- rope
- 1-inch drill bit
- heavy-duty scissors
- utility knife
- 4 small- or medium-sized casters per crate
- 1/8-inch drill bit
- 16 1/2-inch wood screws
- screwdriver
Gather Crates
Gather wooden crates from local boutiques, flea markets, farmers' markets or wine shops. Tip: Many local shop owners will set used wooden crates aside for frequent customers who request them. Keep in mind that wine crates are usually the perfect size for holding toys, sports gear, games and books.

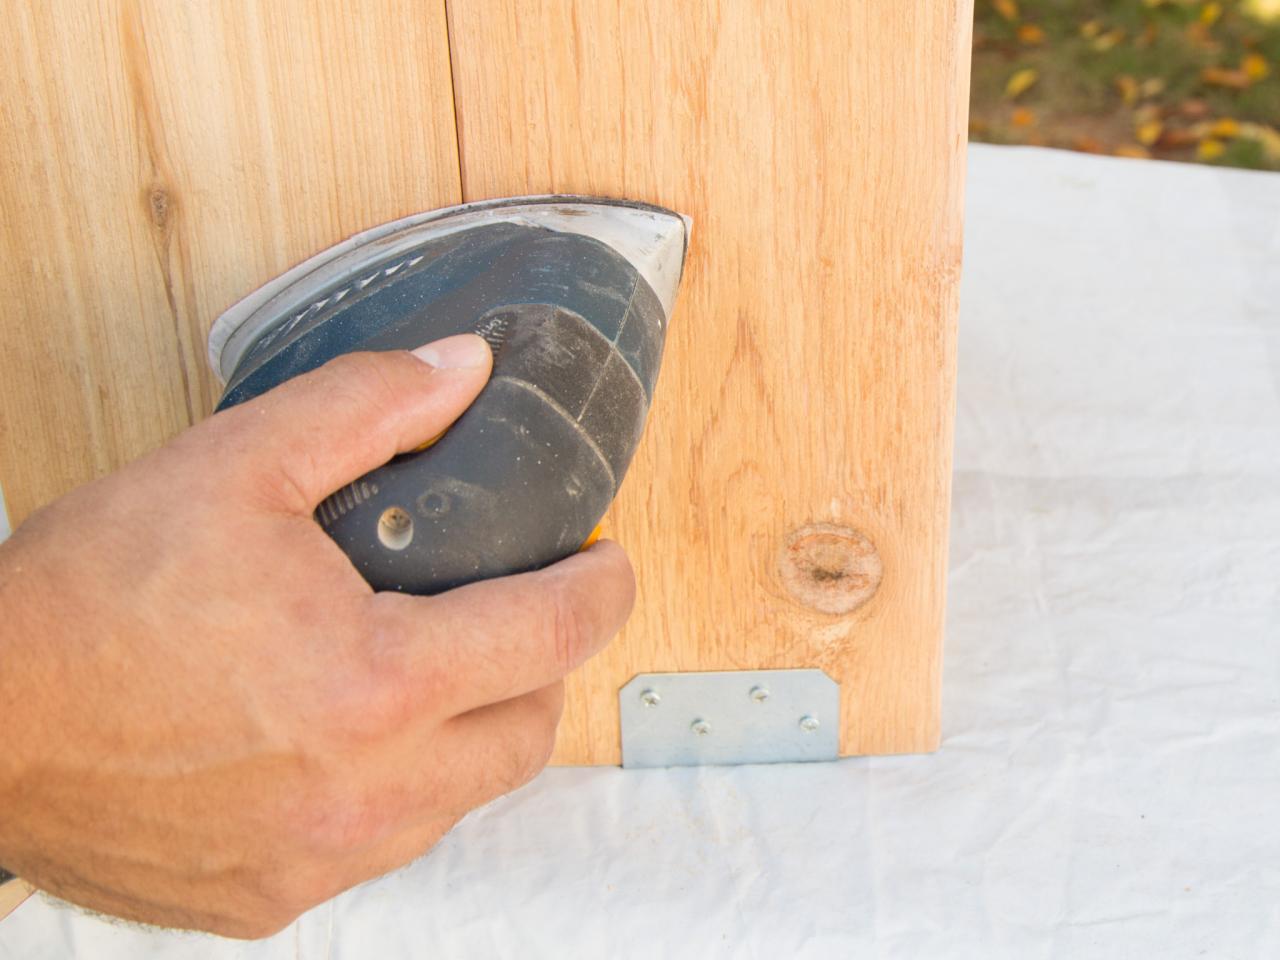
Sand Surface
Use electric sander and sanding pads to smooth down rough surfaces and corners.

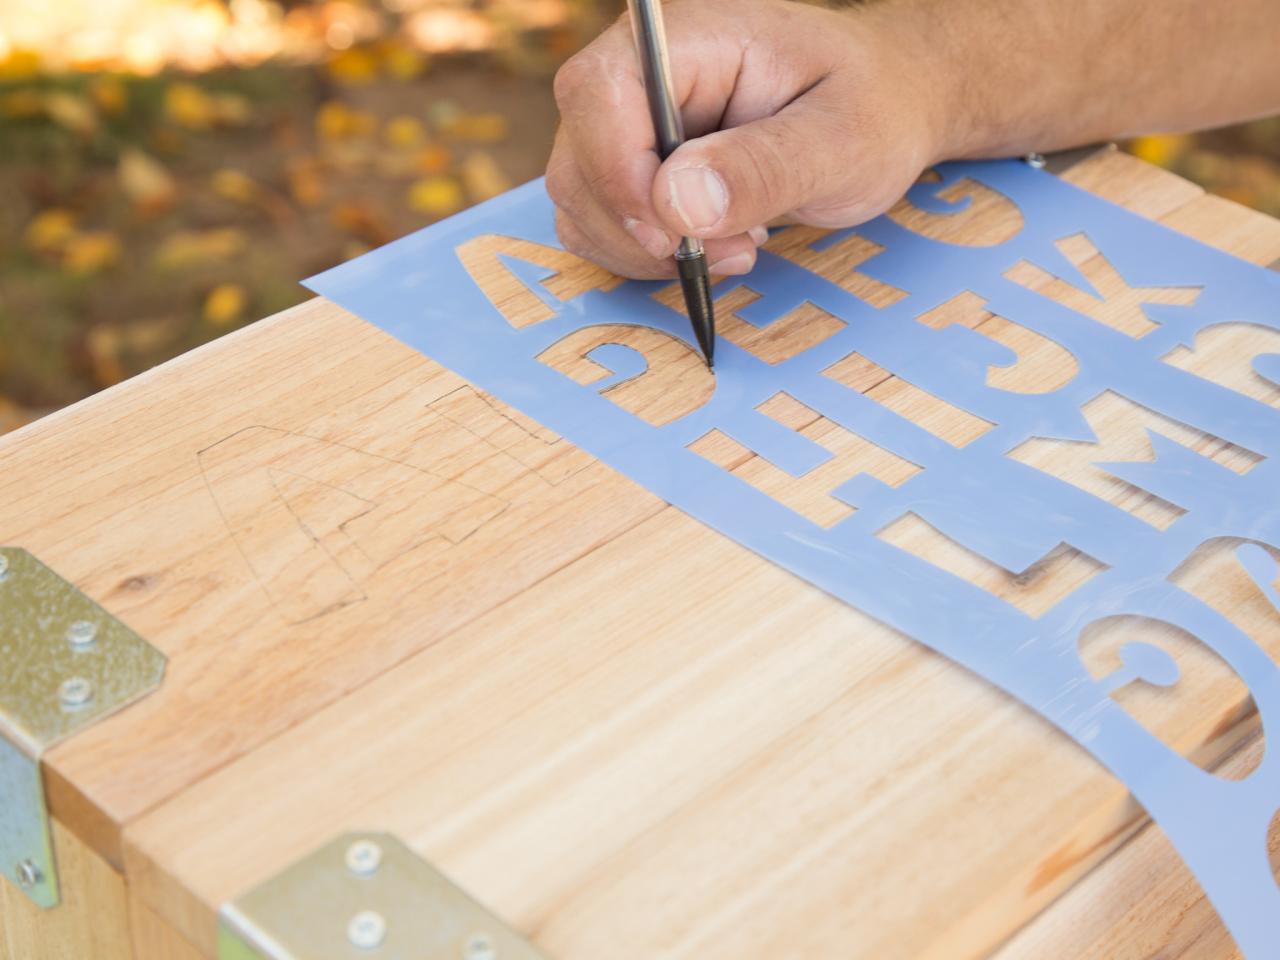
Stencil Name
Choose a side of the crate on which to stencil name. Using a stencil kit, draw the letters on the face of the crate with a pencil.

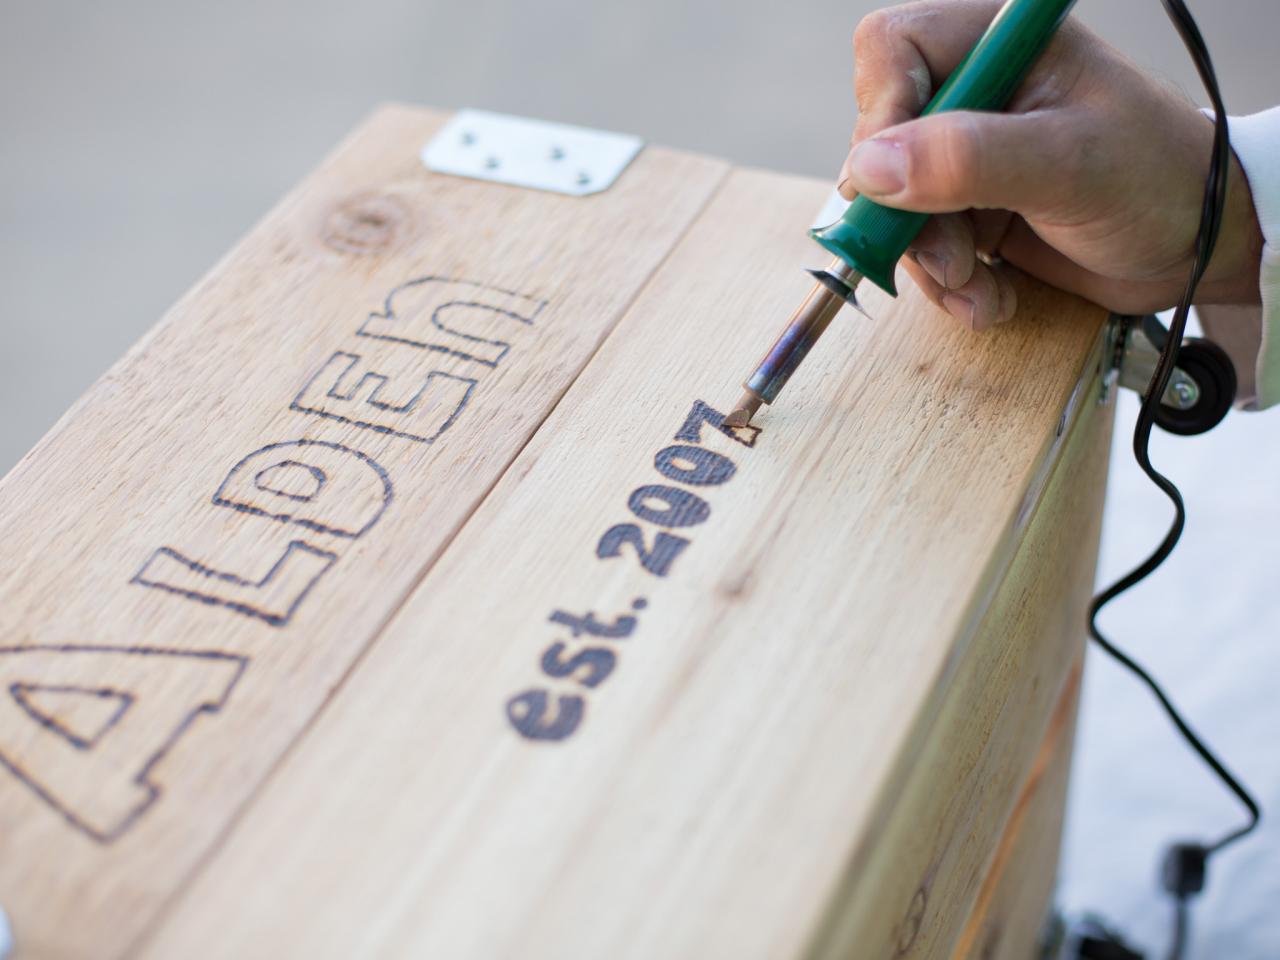
Fill In Letters With Wood-Burning Tool
Using wood-burning tool, carefully outline and fill in the stenciled lettering. Allow approximately 10 minutes for letters to cool.

Measure and Mark for Rope Handles
On the side panels of the crate, measure 4 inches in from each corner and 2 1/2 inches down to create two center points for drilling rope handle holes.

Drill Holes
Using drill with 1-inch drill bit, add two holes to each side of crate, centering the point of the bit on the marks made in step 5.

Tie Knots and Fasten Rope
Tie a knot in one end of a 16-inch length strand of 3/4-inch rope, then pull the opposite end of the rope through one of the holes from the inside of the crate. Pass the rope through the second hole; keep enough slack on the outside to put a hand through comfortably. Tie a knot on the end of the rope inside the crate.

Cut and Tie Rope
Cut any excess rope from the inside of the crate with heavy-duty scissors or utility knife. Repeat steps 7 and 8 to install a handle on the opposite side of the crate.

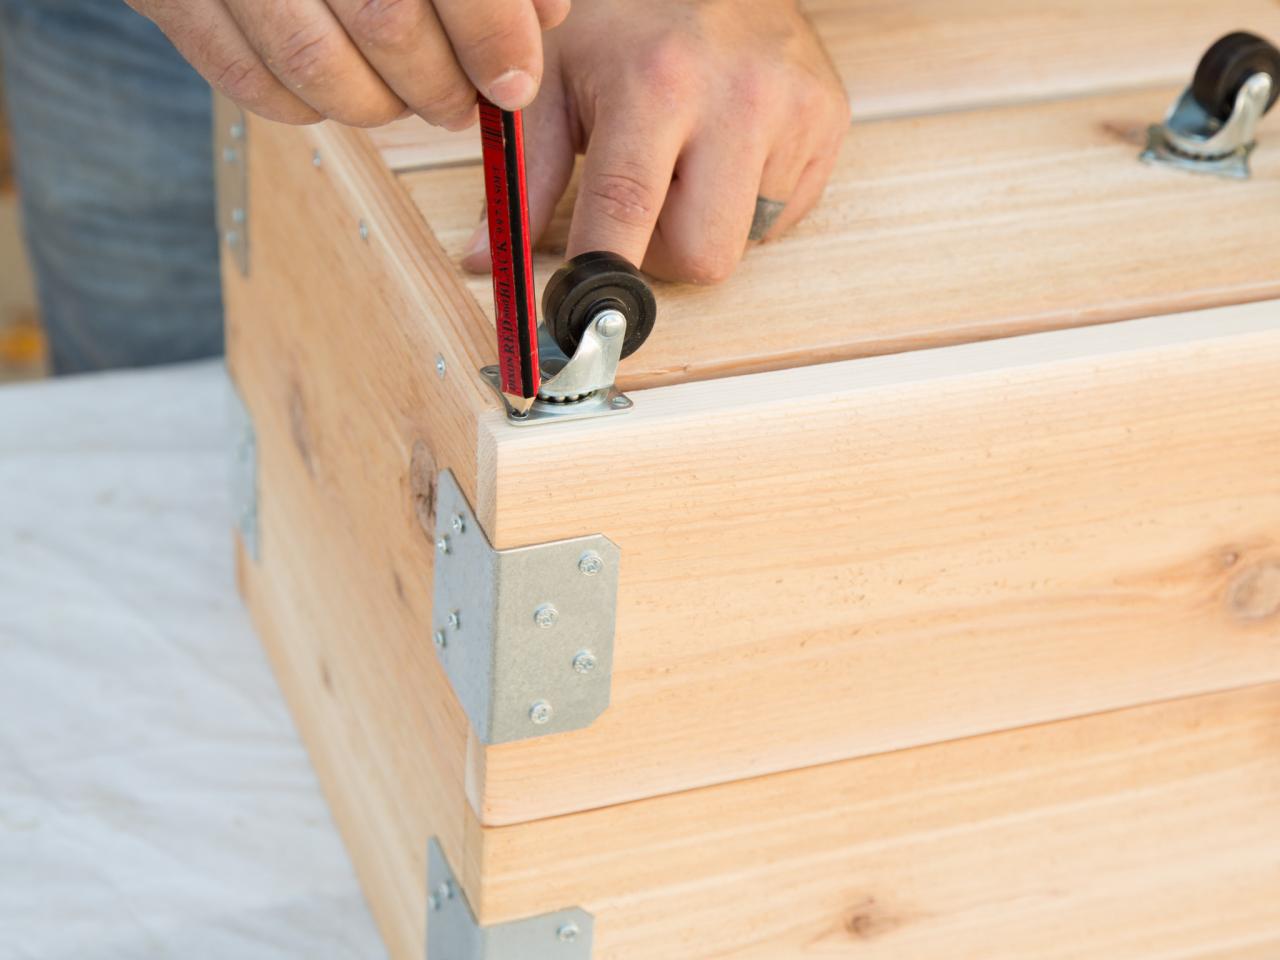
Position Casters
Turn the crate over so that the bottom is facing up, and then align one caster on each corner, marking the screw holes with a pencil. Be sure to keep the edges of the casters flush with the edges of the crate. Tip: For the best mobility, position the caster between 1/2 inch and 1 1/2 inches in from the corner of the crate.

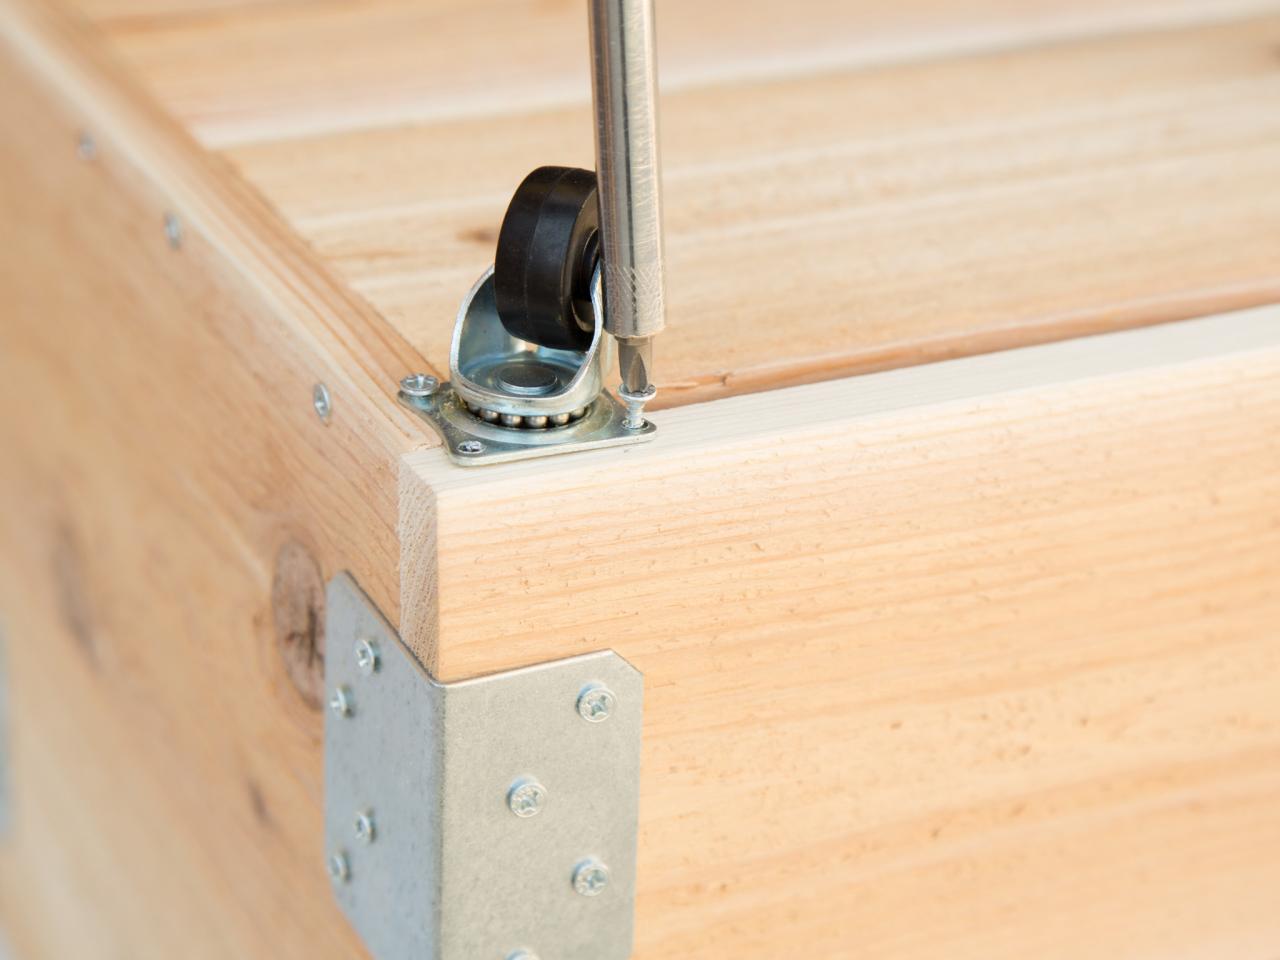
Drill Holes to Install Casters
Use a 1/8-inch drill bit to drill pilot holes about 1/4 inch deep on each pencil mark. Repeat on all four corners of crate.

Install Casters
Secure all four casters with 1/2-inch wood screws and a screwdriver.


