


How to Make a Rustic Bread Board
Antique bread boards are a popular collectible but they're often expensive. With basic woodworking skills, you can turn a piece of old or reclaimed wood into a great handmade gift for your favorite foodie or hostess.

Rustic Handmade Bread Board
Have a baker, chef or hostess on your gift list? Surprise them with this handy bread board that looks just like an expensive antique. Reclaimed lumber and basic woodworking skills are all you need. Make your own with our step-by-step instructions.

Materials Needed:
- piece of old or reclaimed wood
- chalk
- table saw or circular saw
- jig saw or band saw
- drill equipped with 3/8" drill bit
- protective eyewear
- palm sander
- medium- and fine-grit sanding discs for sander
- food-safe beeswax wood finish
- mineral spirits
- 2 lint-free cloths
Draw Bread Board Shape
Use chalk to draw desired outline onto wood (Image 1). Since old bread boards have a primitive shape, draw designs freehand without worrying too much about perfect symmetry. Scribble out areas that will be scraps to make sketches clear when cutting (Image 2).
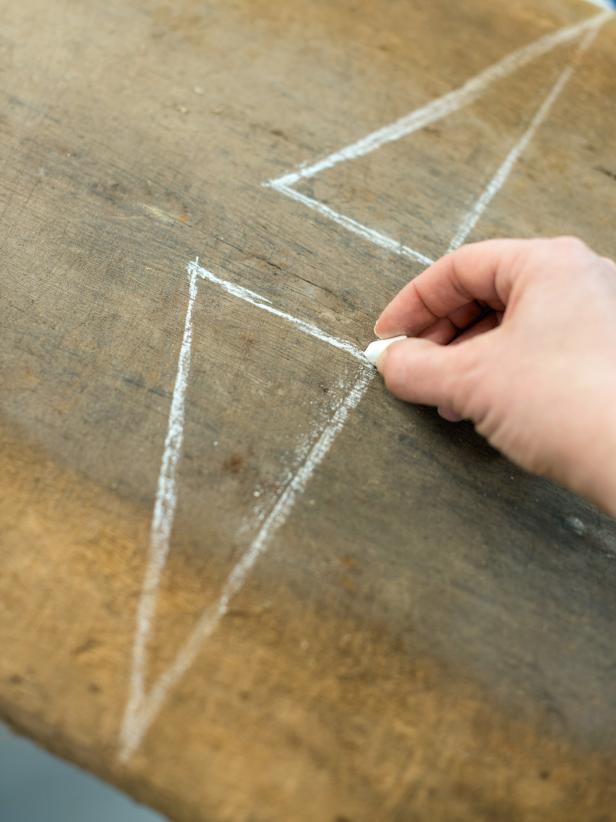
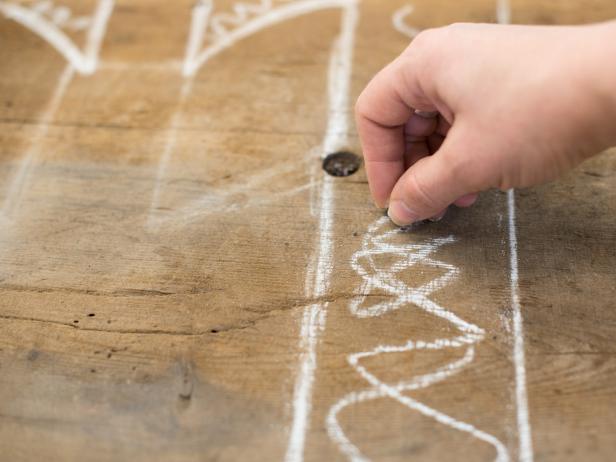
Draw Bread Board Shape With Chalk
Since old bread boards have a primitive shape, draw designs freehand without worrying too much about perfect symmetry. Scribble out areas that will be scraps to make sketches clear when cutting.
Cut Bread Board Down
While wearing protective eyewear, use a table saw or circular saw to cut along straight chalk marks to cut board down to size.

Cut Rustic Bread Board
While wearing protective eyewear, use a table saw or circular saw to cut along straight chalk marks to cut board down to size.
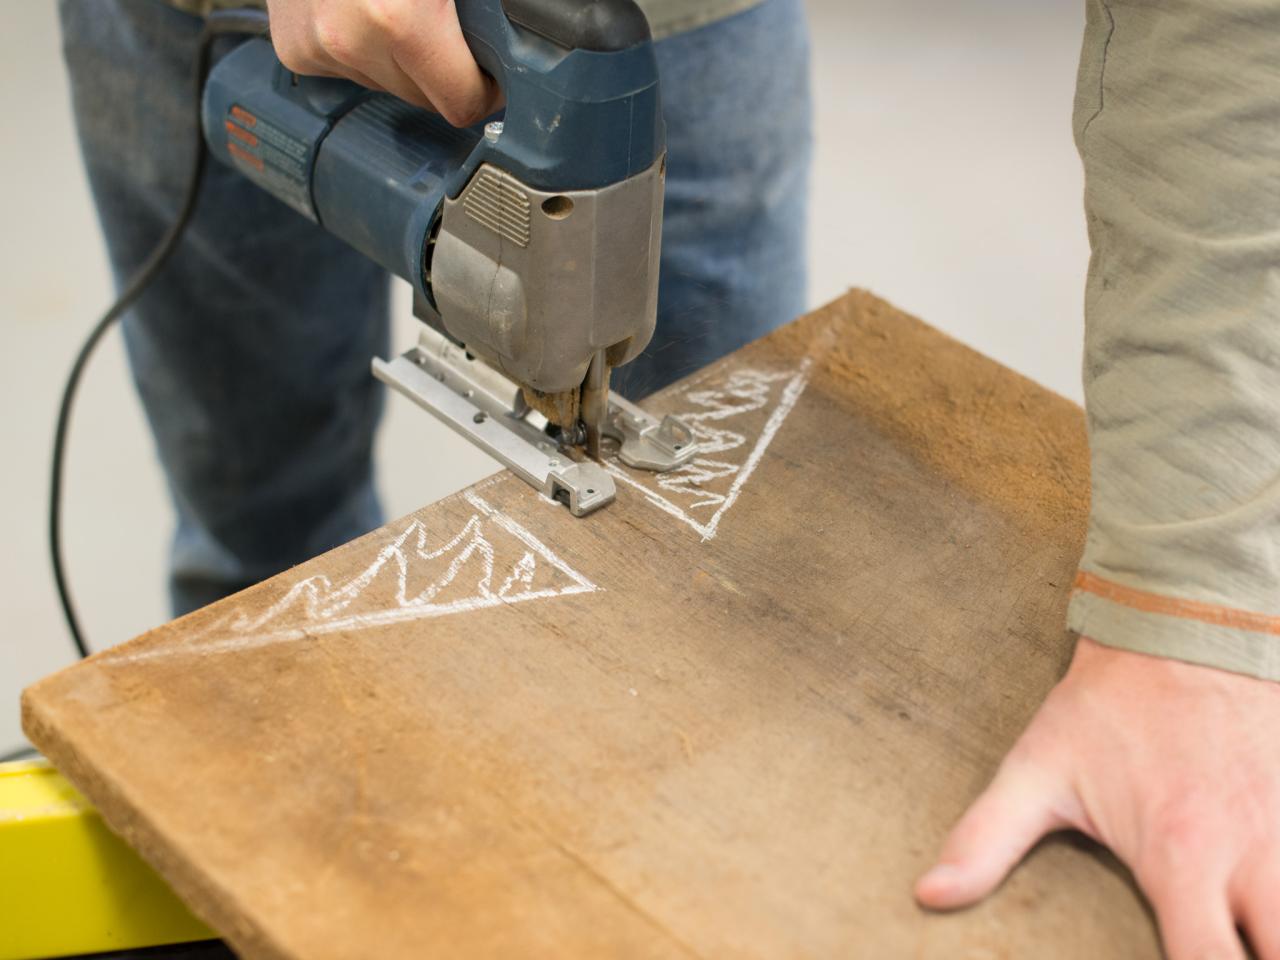
Cut Bread Board Shape
Use a jigsaw to cut out chalked shape. Wear eye protection and make sure board is on a stable surface. Tip: If an area is tricky to cut out, try cutting out some scrap wood until the line is easier to access with saw blade.

Cutting Out Rustic Bread Board
Use a jigsaw to cut out chalked shape. Wear eye protection and make sure board is on a stable surface. Tip: If an area is tricky to cut out, try cutting out some scrap wood until the line is easier to access with saw blade.
Drill Hole (Optional)
Many primitive bread boards have a hole in the handle so they could be hung for easy storage. To recreate this look, use a 3/8" sized drill bit to create a hole in the handle.

Drill Hole for Hanging Bread Board
Many primitive bread boards have a hole in the handle so they could be hung for easy storage. To recreate this look, use a 3/8" sized drill bit to create a hole in the handle.
Sand Bread Board
Use medium-grit sandpaper and orbital palm sander to smooth edges, sides and surface of bread board. Once edges are knocked down and surface is no longer rough, use fine-grit sandpaper to finish smoothing. Tip: When working with reclaimed wood, sand enough to smooth the surface to make it useable, but don't sand too much and remove the rustic character of the wood.

Sand Handmade Bread Board
Use medium-grit sandpaper and orbital palm sander to smooth edges, sides and surface of bread board. Once edges are knocked down and surface is no longer rough, use fine-grit sandpaper to finish smoothing. Tip: When working with reclaimed wood, sand enough to smooth the surface to make it useable, but don't sand too much and remove the rustic character of the wood.
Wax Bread Board
Clean board with cotton cloth and mineral spirits to remove any old residue and dust and allow board to completely dry. With another clean, lint-free cloth, apply food-safe beeswax wood finish to all surfaces of the board, working wax deep into the wood grain (Image 1). Buff wax with cloth until surface feels smooth. Allow wax to dry before using to serve food (Image 2).
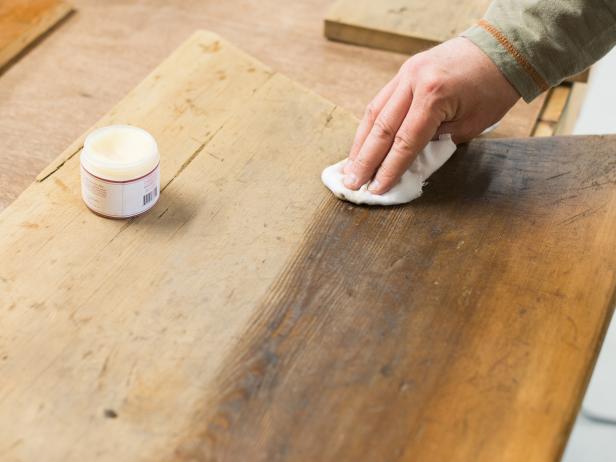
Applying Food-Safe Wax
Clean board with cotton cloth and mineral spirits to remove any old residue and dust and allow board to completely dry. With another clean, lint-free cloth, apply food-safe beeswax wood finish to all surfaces of the board, working wax deep into the wood grain.
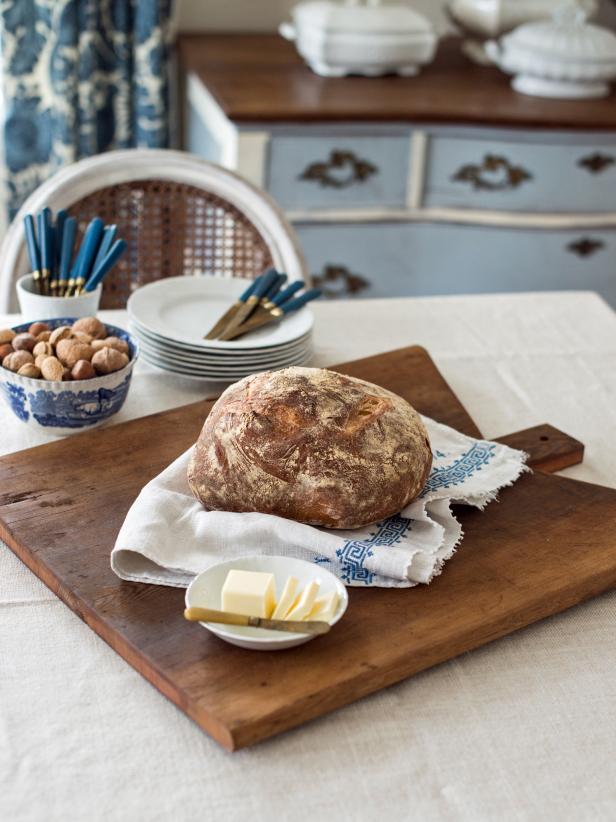
Rustic Bread Board
Buff wax with cloth until surface feels smooth. Allow wax to dry before using to serve food.


