


Upcycle an Old Cutlery Box Into a New Jewelry Box
Vintage cutlery boxes are a frequent fixture at estate and yard sales — usually in pretty worn condition. With just a little elbow grease, you can refinish and re-line them for a massive upcycled jewelry box.

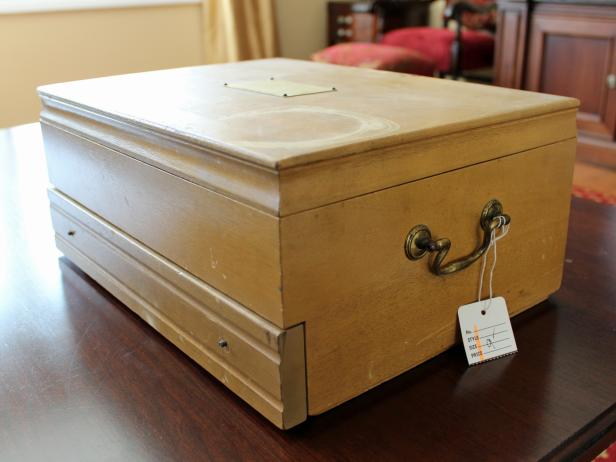
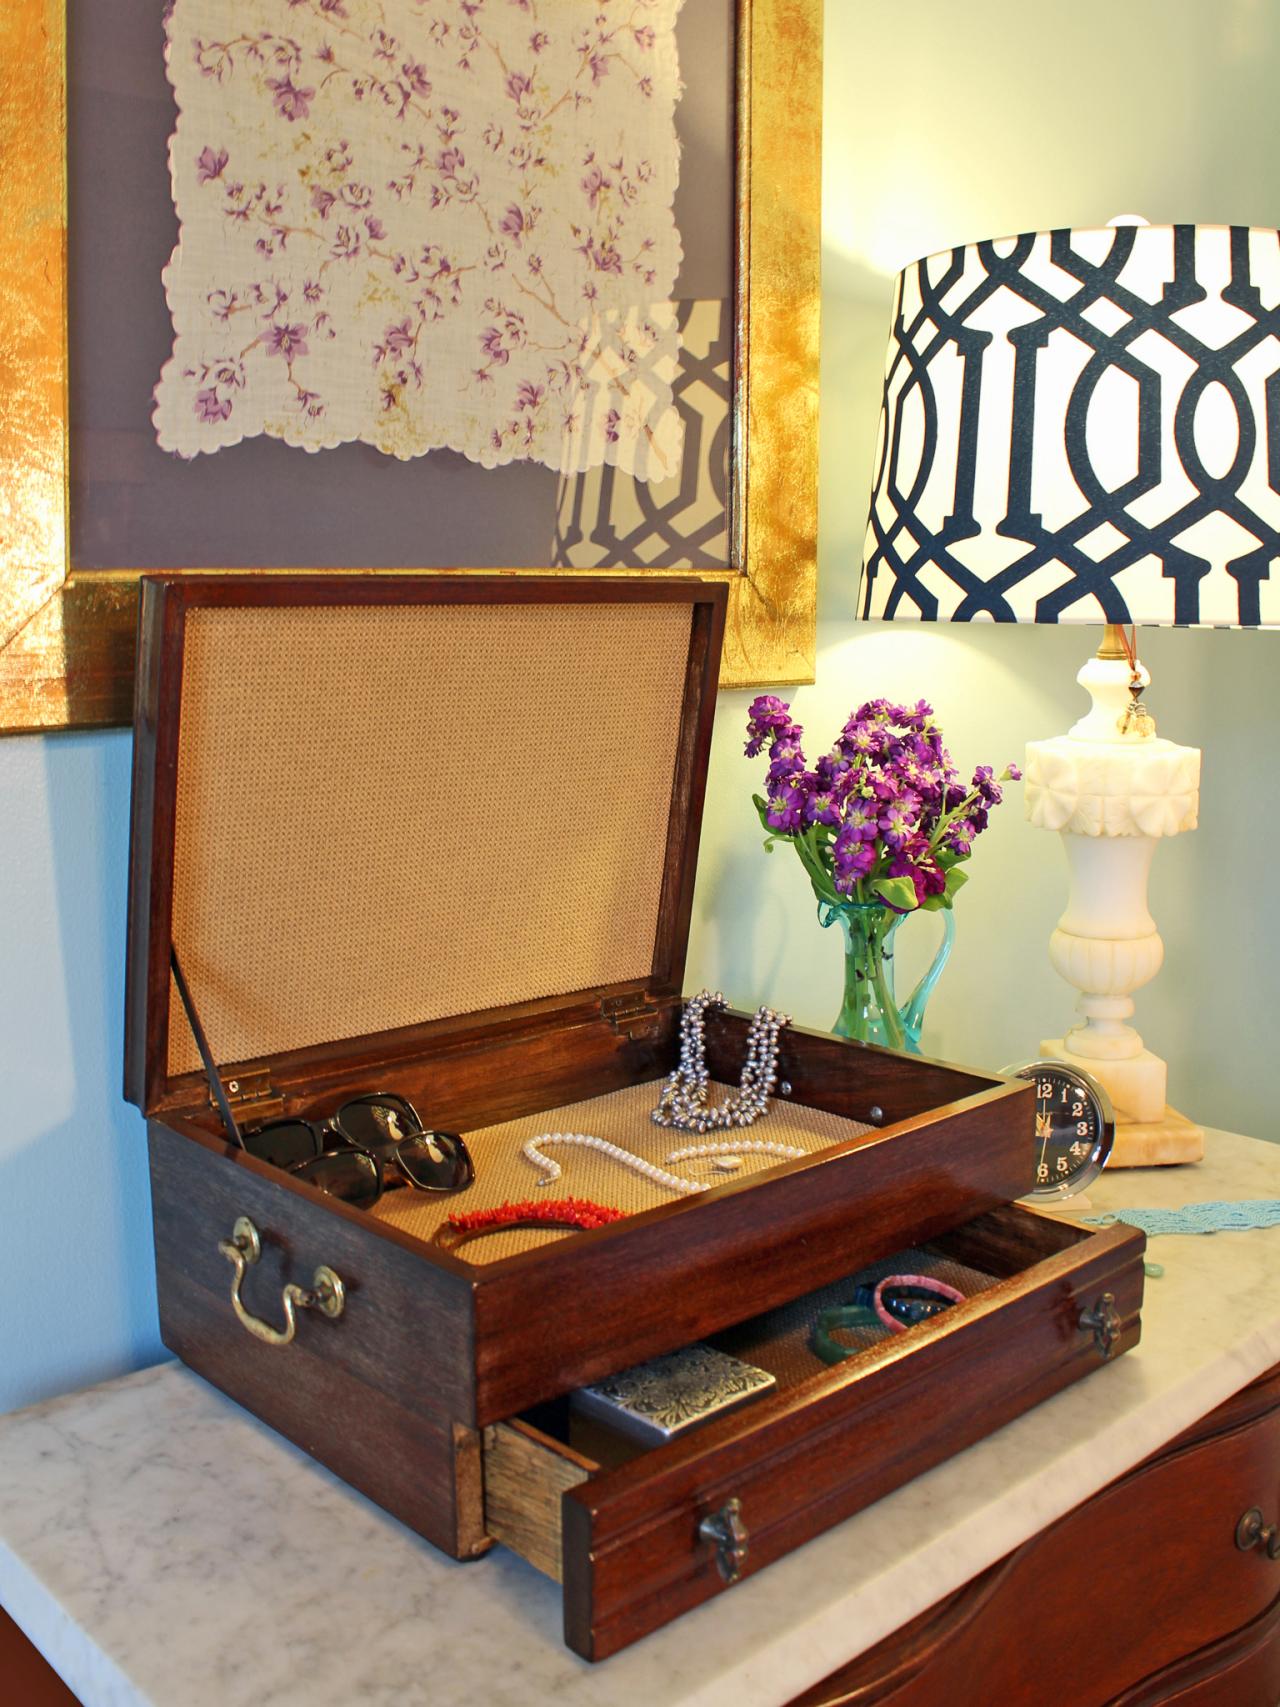
Upcycled Jewelry Box
This box started out its life as a cutlery box. A yard-sale find at $9, it was refurbished into a beautiful jewelry holder.

Photo by: H. Camille Smith
H. Camille Smith
Materials Needed:
- wooden cutlery box
- paint stripper
- chemical-resistant gloves
- metal paint scraper
- metal pan
- pliers
- screwdriver
- sandpaper (coarse-, medium- and fine-grits)
- oil-based wood stain
- oil-based polyurethane
- 3 disposible chip brushes
- spray adhesive
- scissors
- fabric or felt for relining box
- newspaper or dropcloth
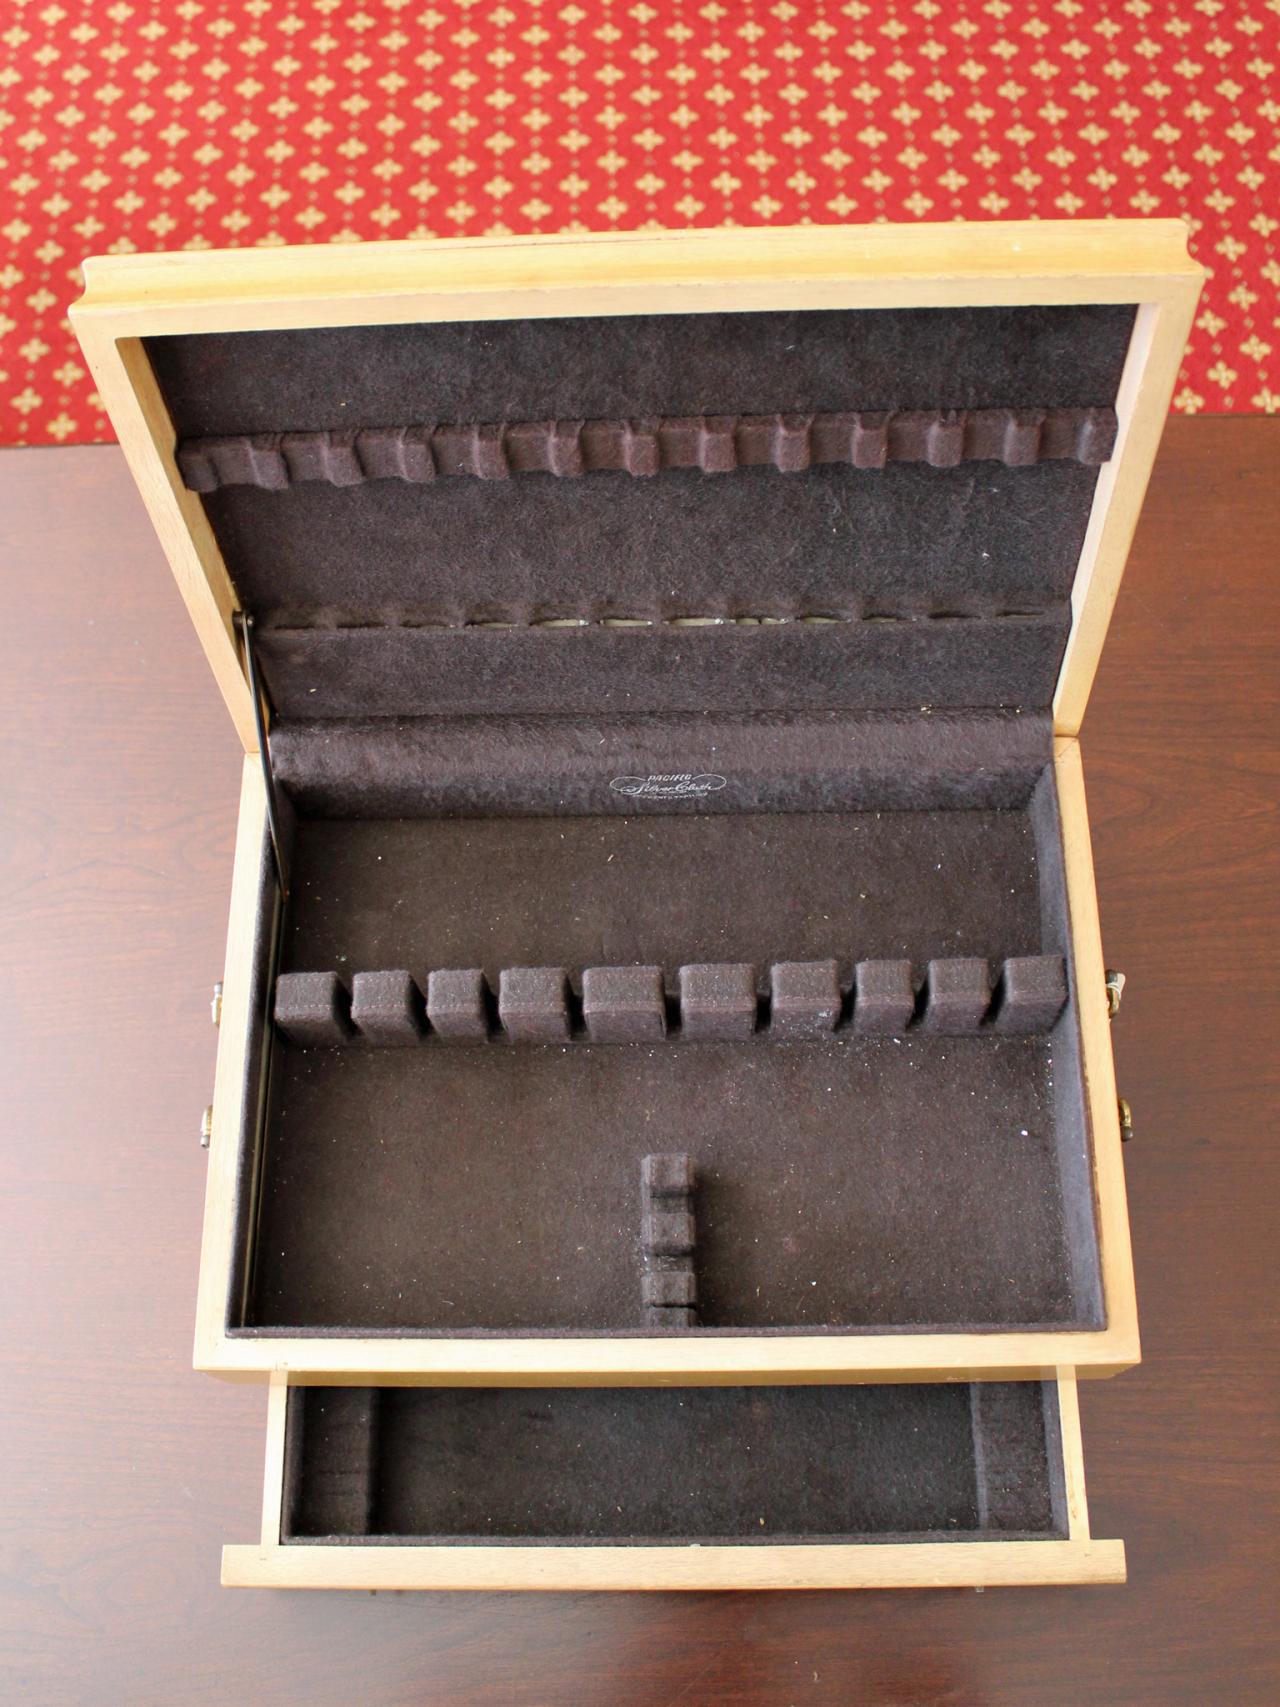
Cutlery Box Before
Before: The old cutlery box was a steal at just $9 but the decades-old blond finish and felt-lined interior were in poor condition (Images 1 and 2).
H. Camille Smith

H. Camille Smith
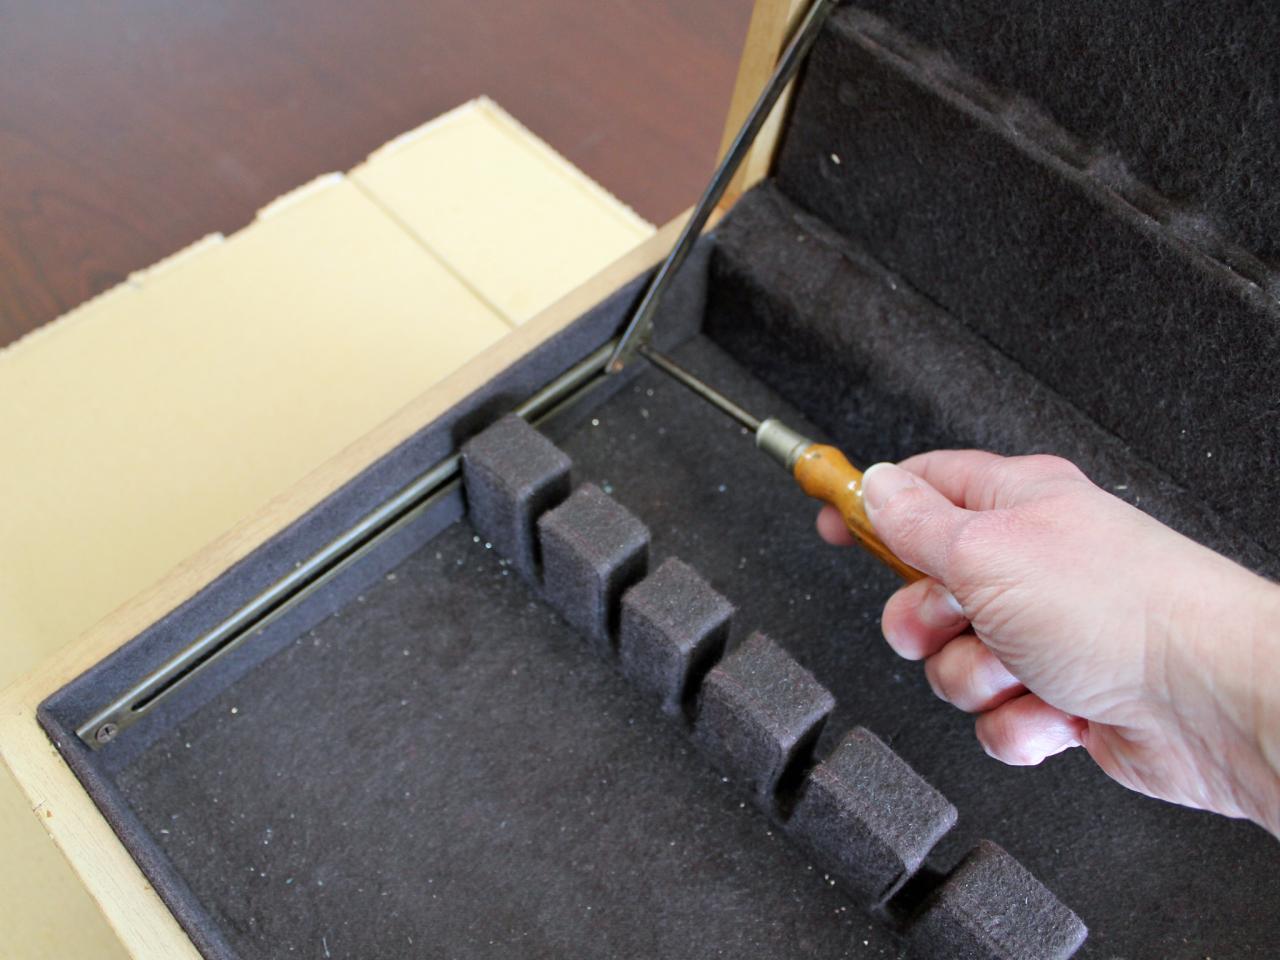
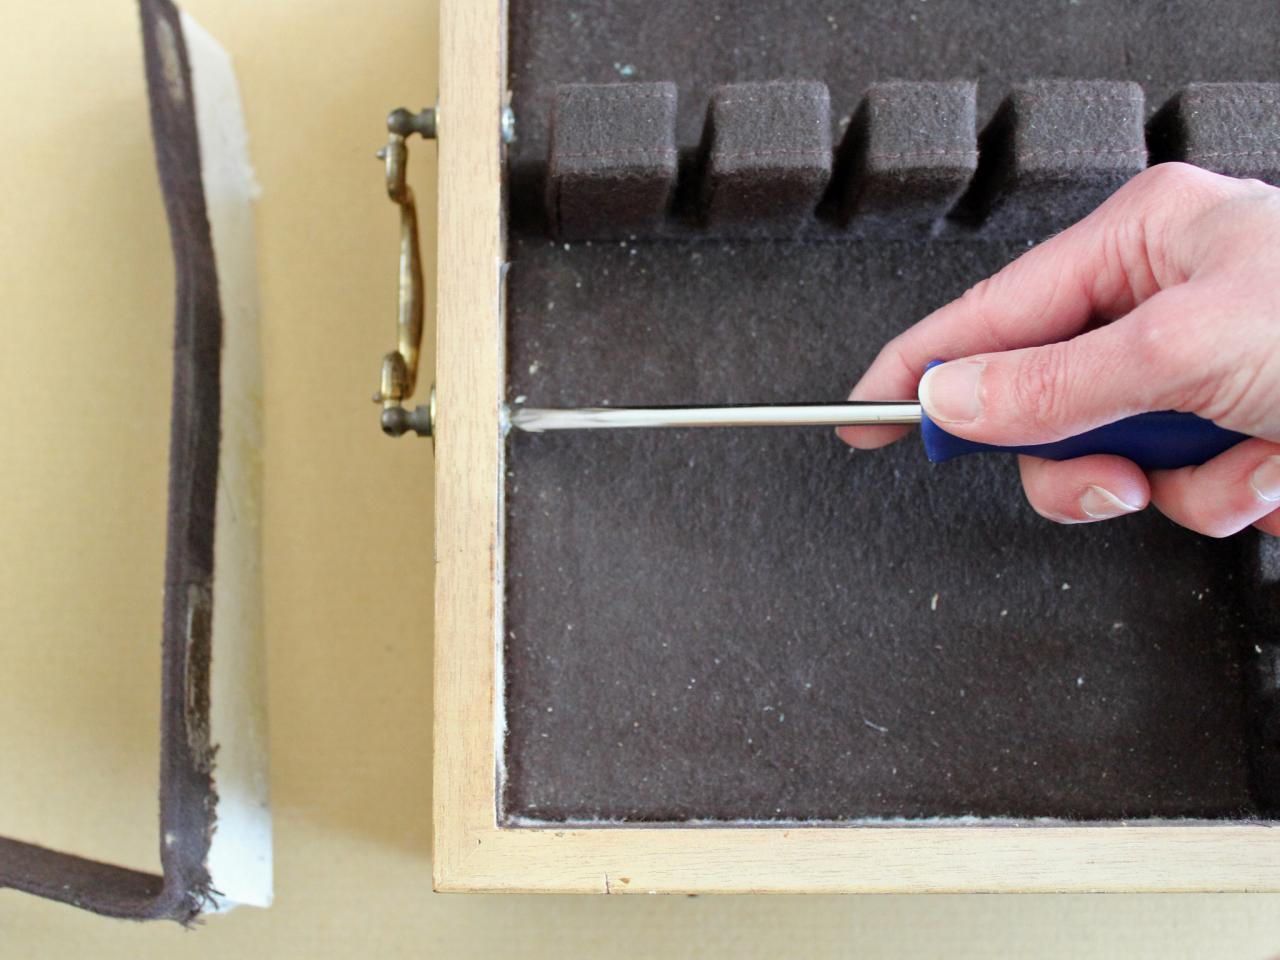
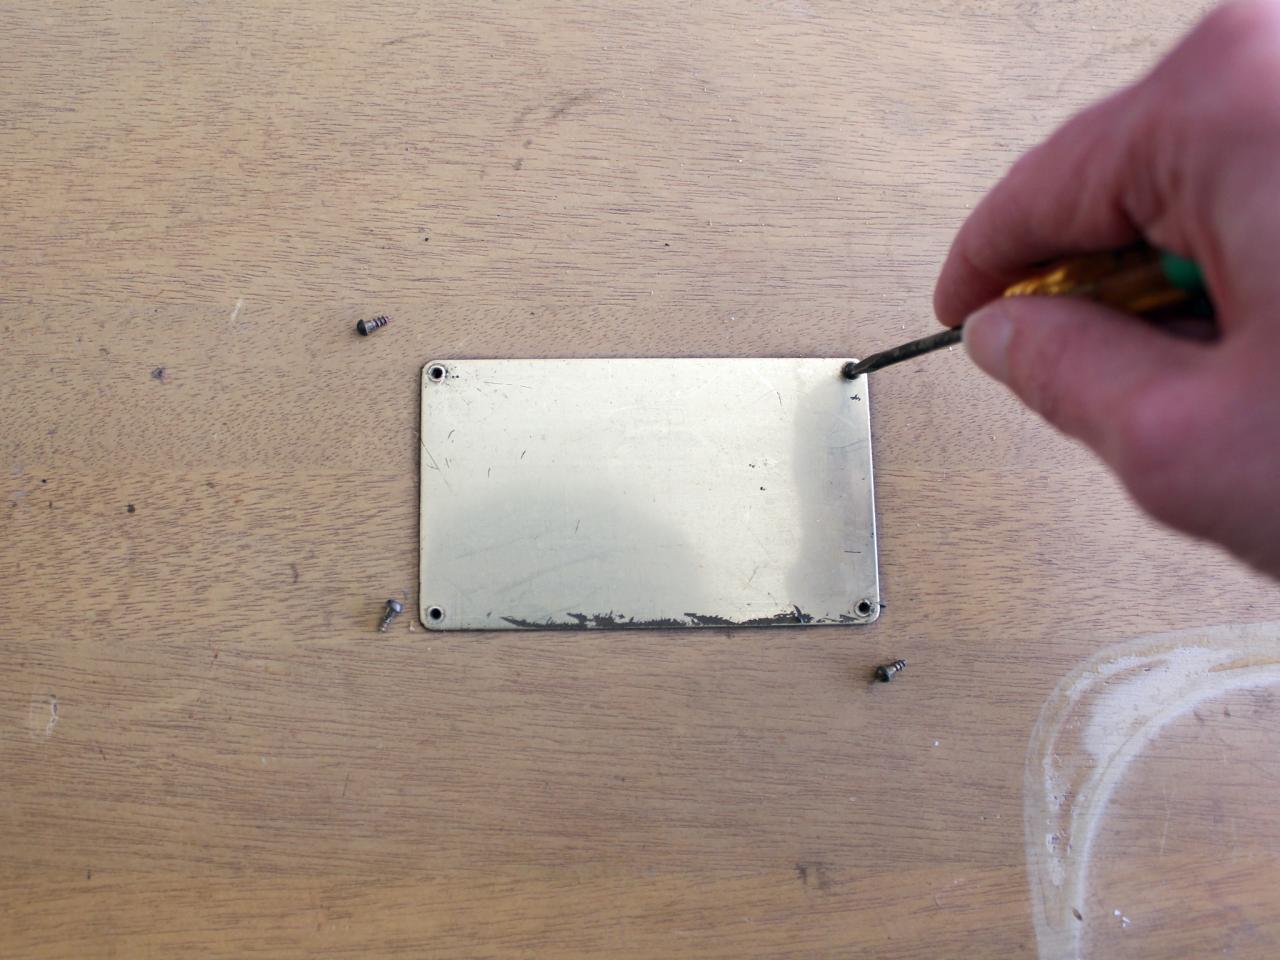
Remove Hardware
Using the correct screwdriver — either flat or Phillips head — remove the original hardware, being careful to keep the screws with the hardware by placing everything together in a plastic bag (Images 1 and 2). Tip: A miniature screwdriver, like those typically used for repairing eyeglasses, may come in handy if your cutlery box still has the original brass plate (Image 3).

H. Camille Smith

H. Camille Smith

H. Camille Smith
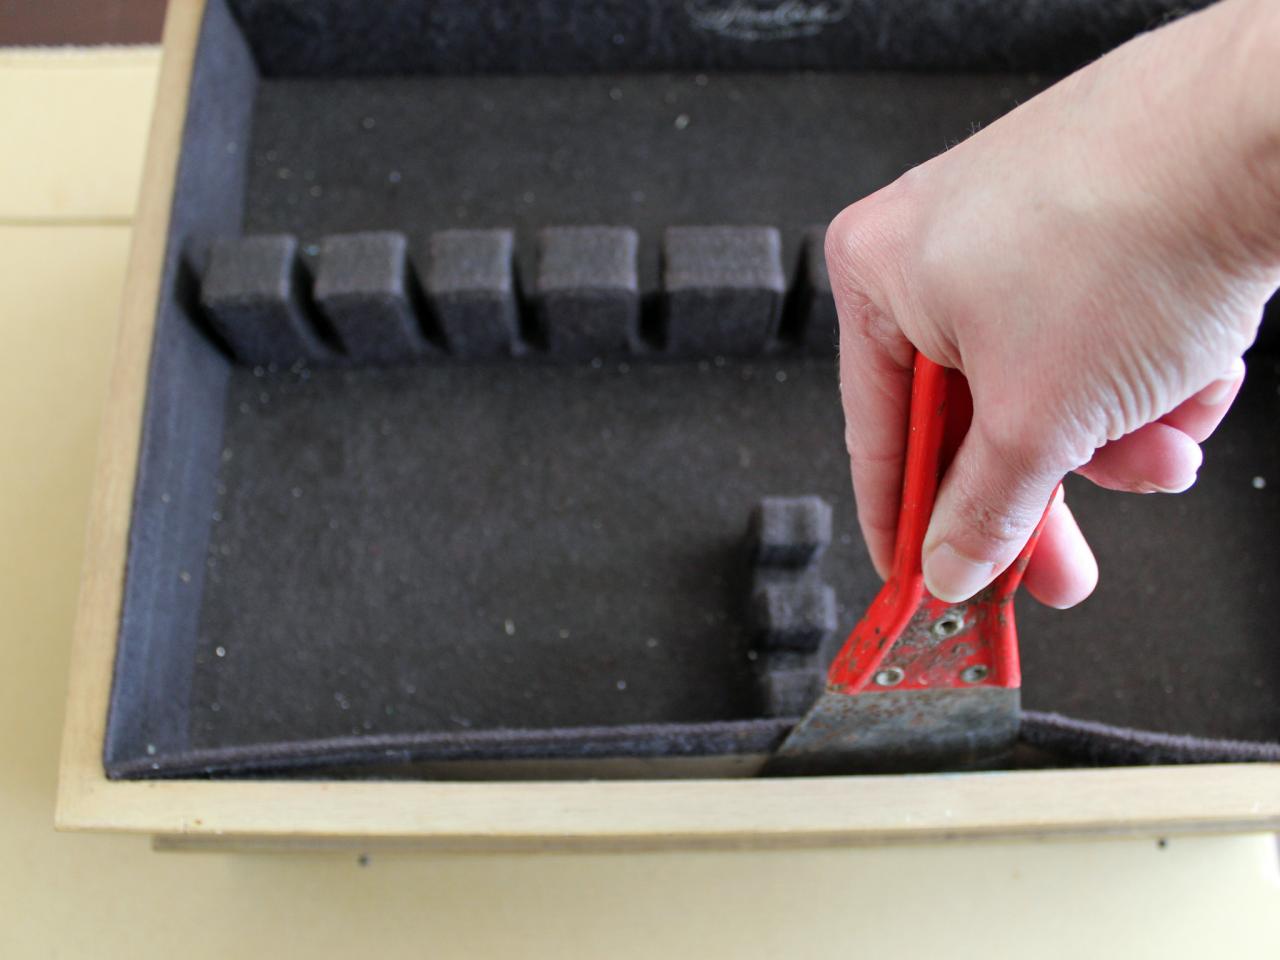
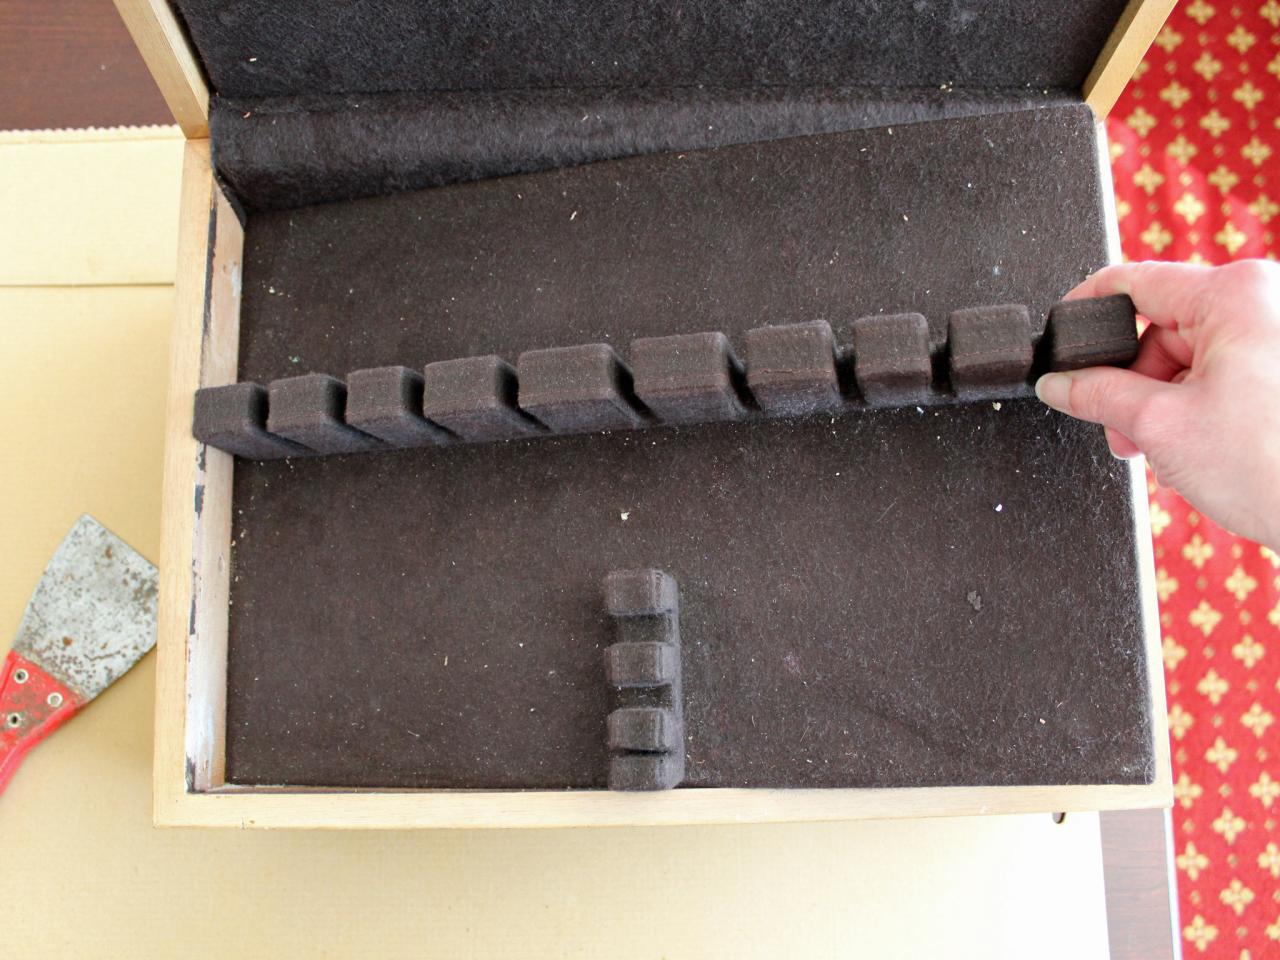
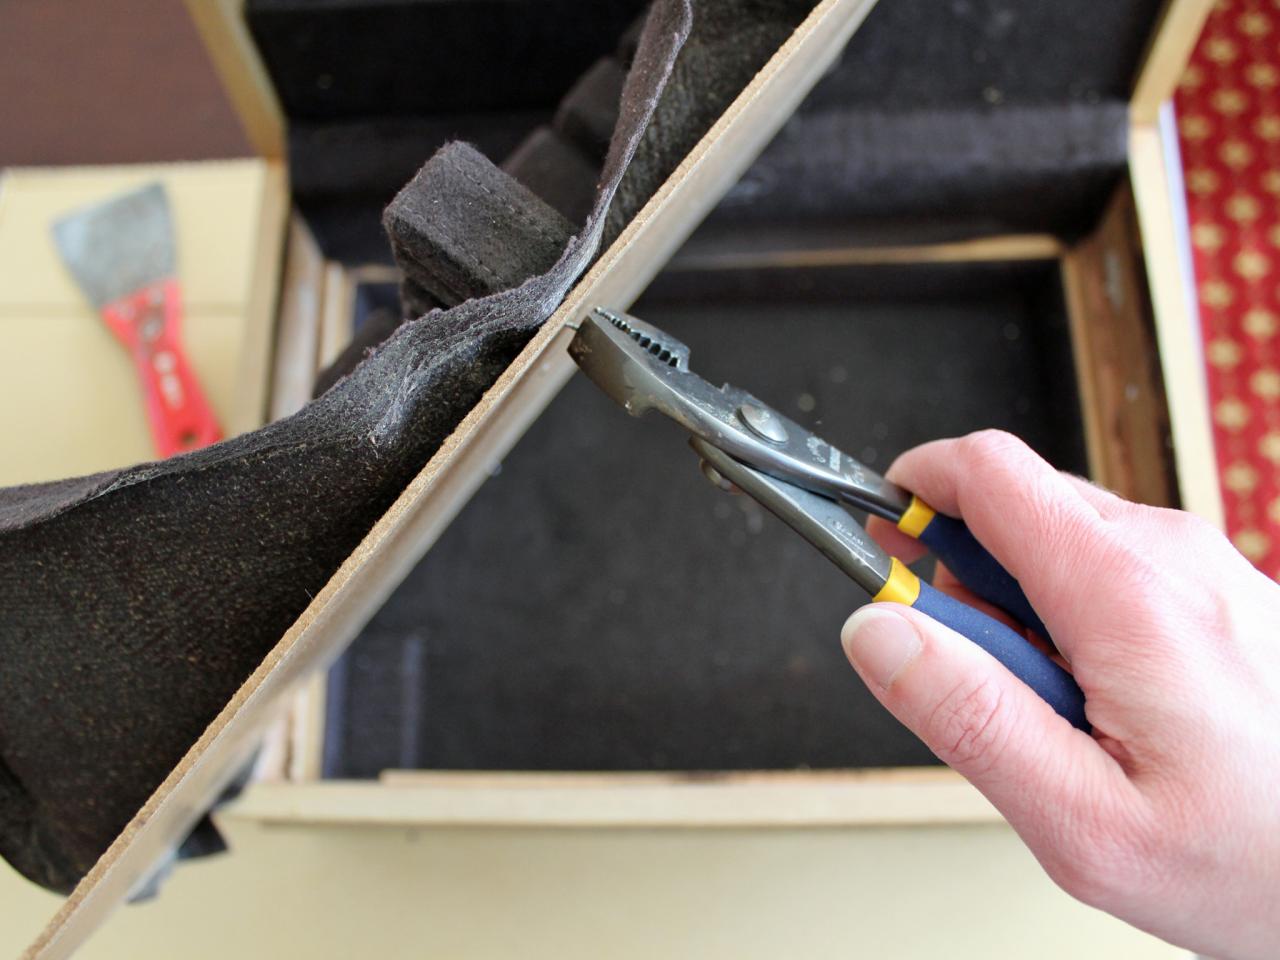
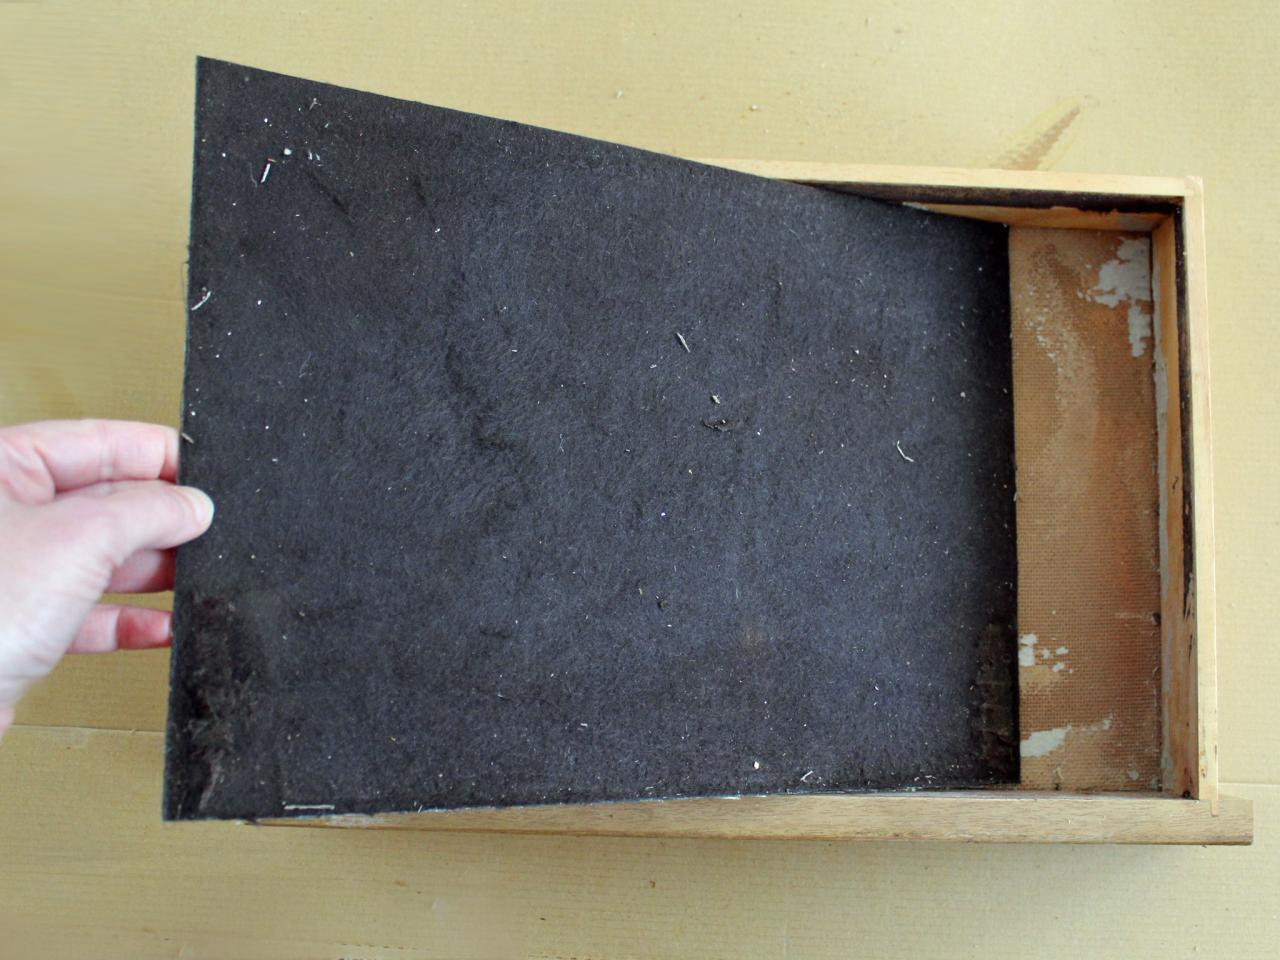
Remove Felt Liners
Using a metal paint scraper, pry the felt liner away from the sides of the box then lift out the upper tray (Images 1 and 2). Use pliers to remove the nails or staples securing the cutlery dividers to the top section's bottom which you'll need to save for re-covering in a later step (Image 3). If your box has a bottom drawer, remove its felt liner but don't discard (Image 4).

H. Camille Smith
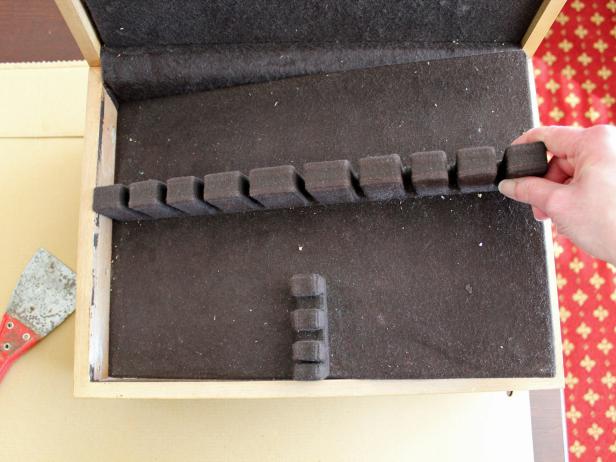
H. Camille Smith

H. Camille Smith

H. Camille Smith
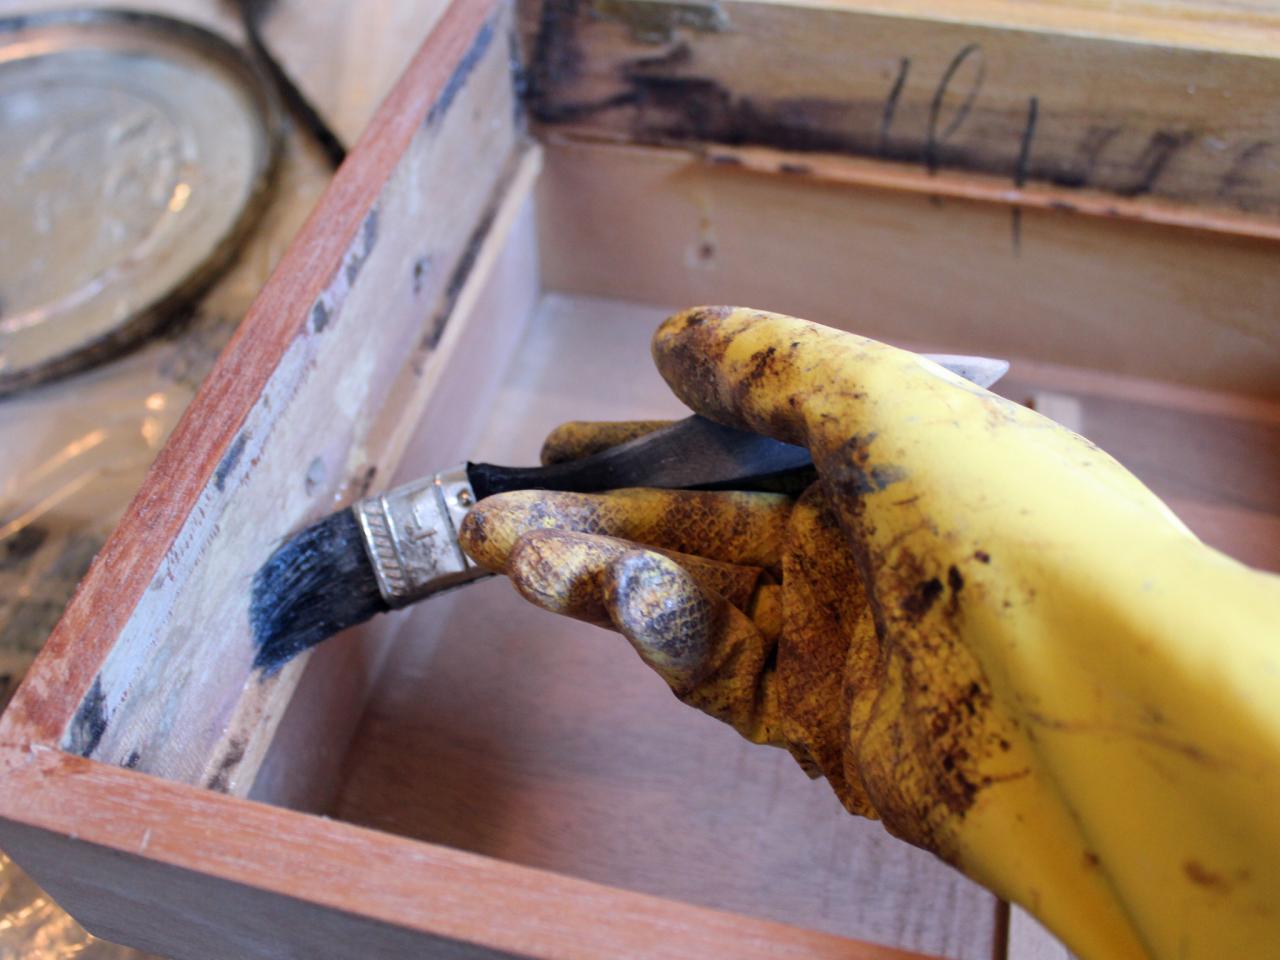
Strip Inside of Box
If the felt was held in place with glue, stripping is necessary to create a clean surface before restaining the wood. First, don chemical-resistant gloves, then pour stripper into a metal pan and use a disposable chip brush to apply a thick coat of the chemical to the glue-covered areas (Image 1). Read manufacturer's instructions to learn how long to let the stripper soften the glue (typically 15 minutes up to one hour) before removing with a metal scraper (Image 2).

H. Camille Smith
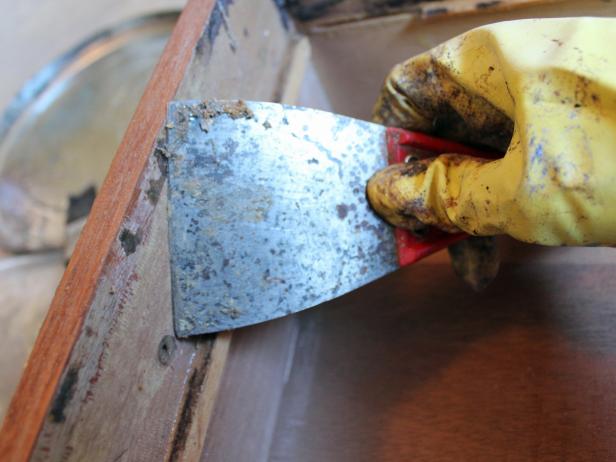
H. Camille Smith
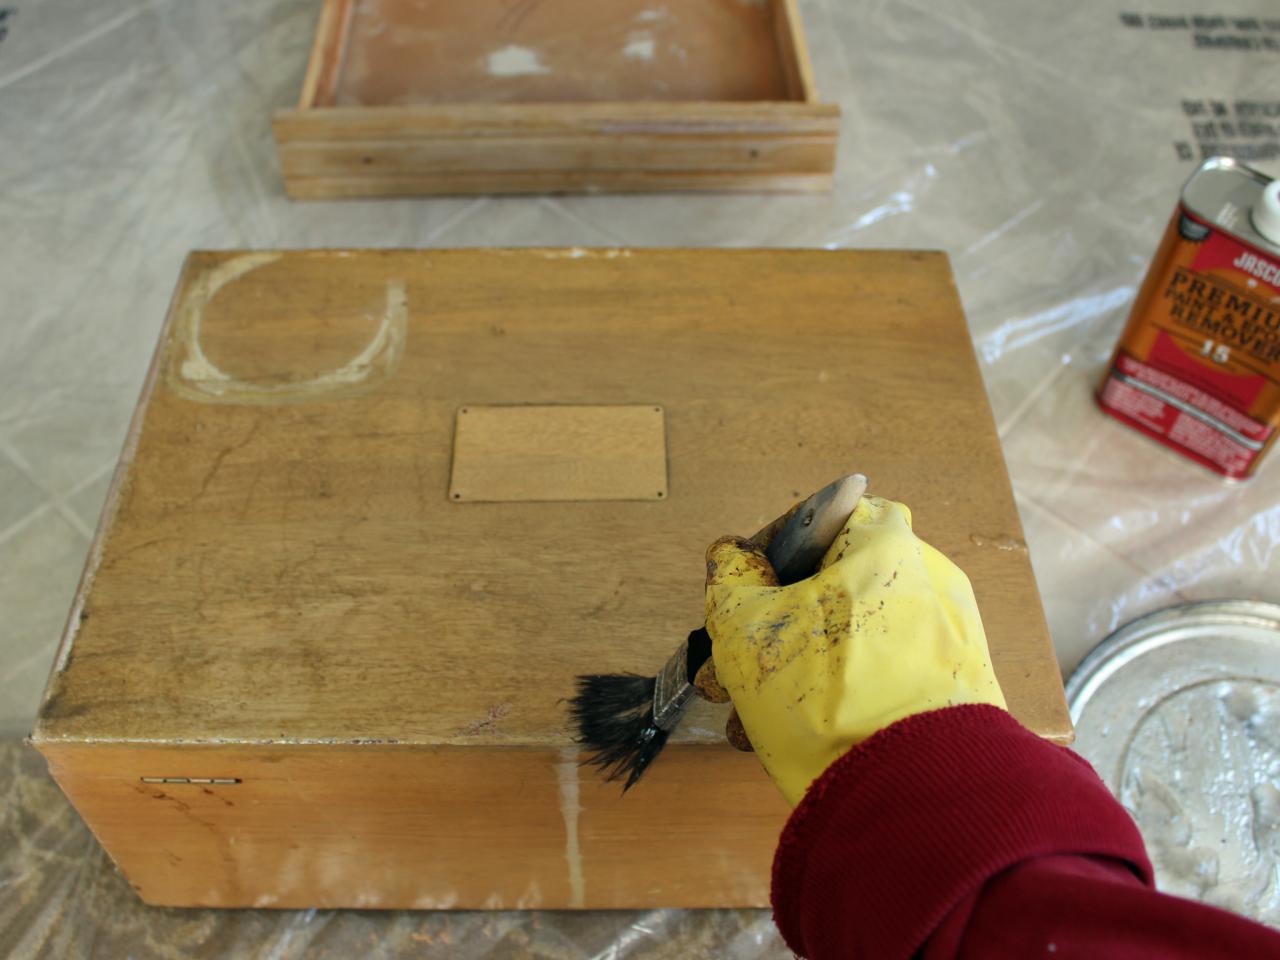
Strip Outside of Box
Following the same steps listed above — don protective gloves, brush on stripper, allow stripper to soften finish, then scrape off (Images 1 and 2) — remove existing finish. Tip: Multiple applications of stripper may be necessary to completely remove the existing finish.

H. Camille Smith
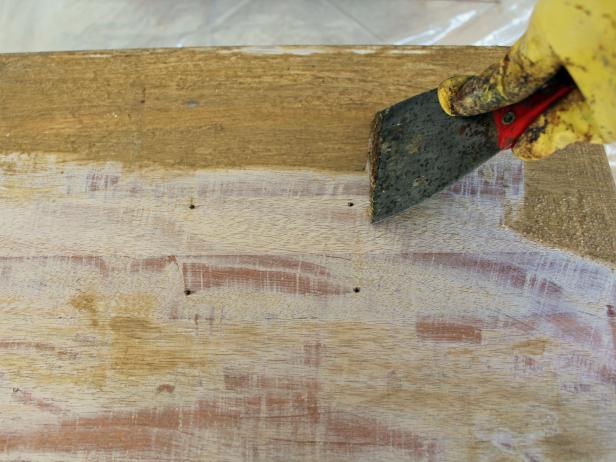
H. Camille Smith
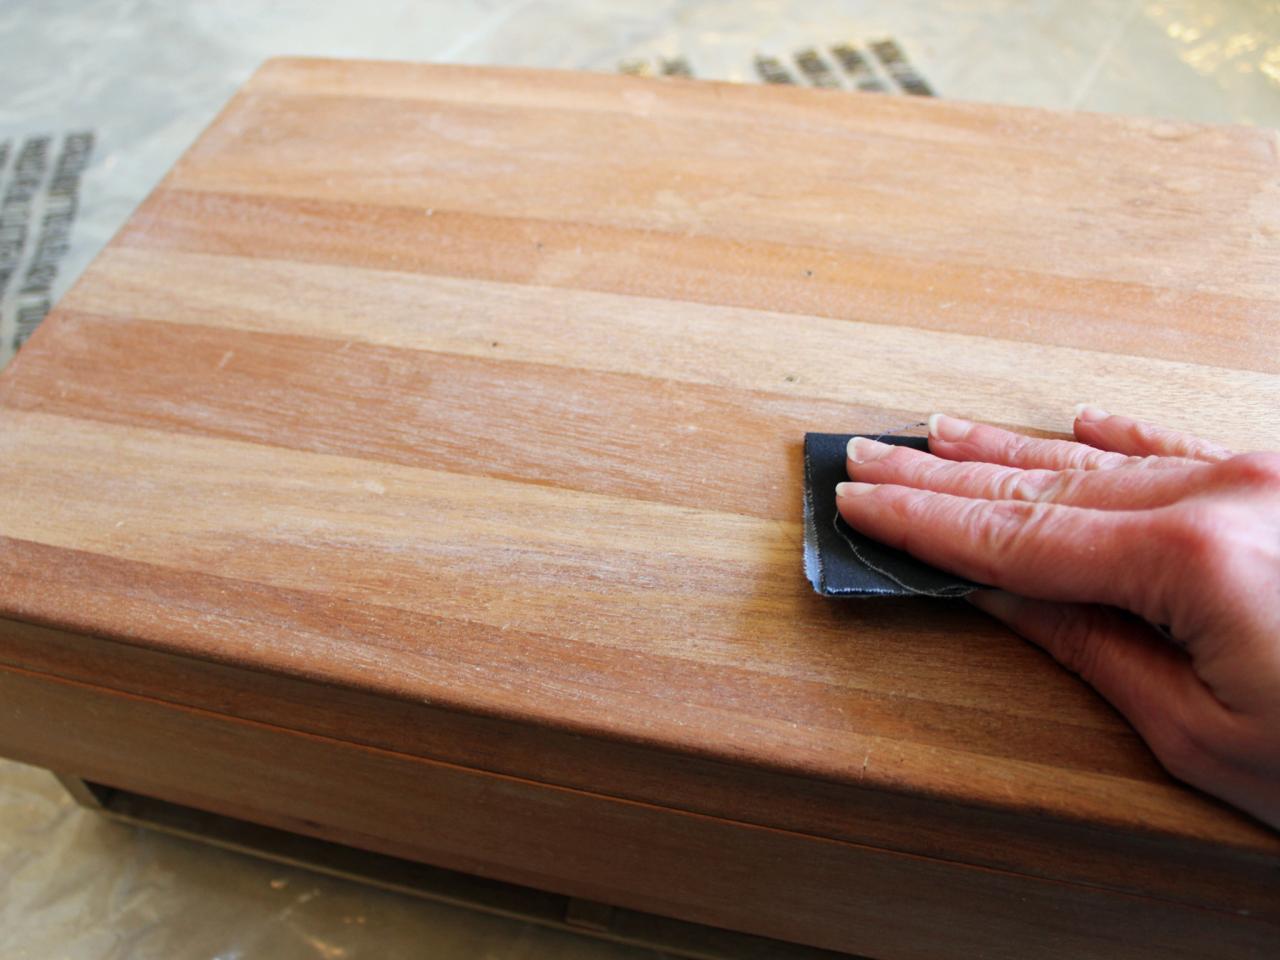
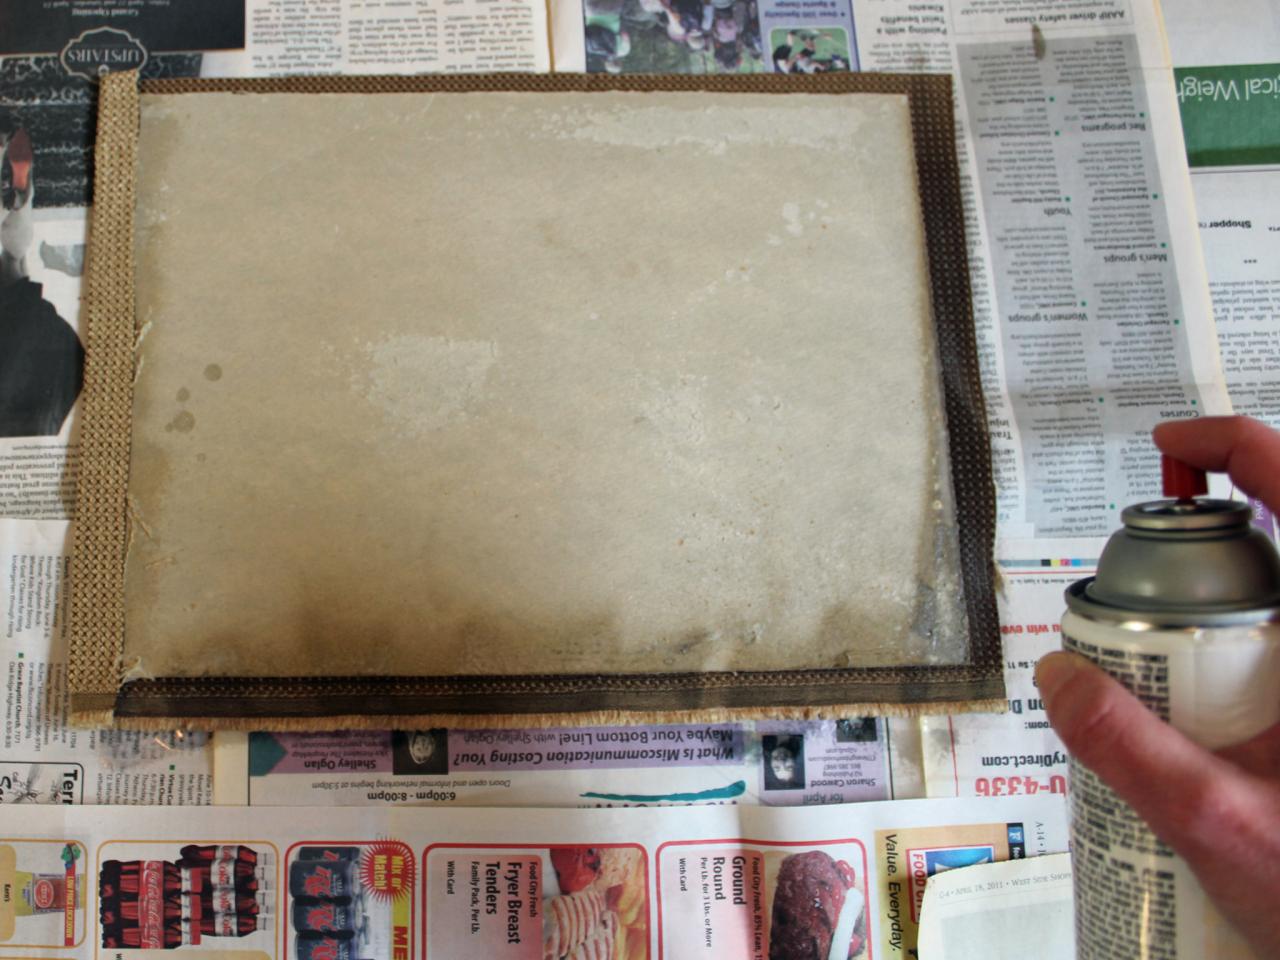
Sand, Stain and Apply Polyurethane
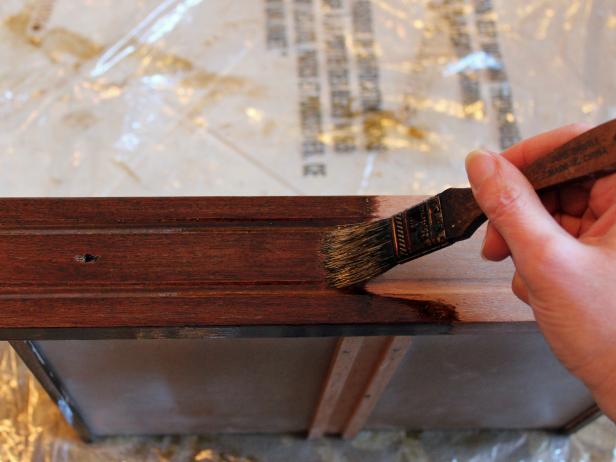
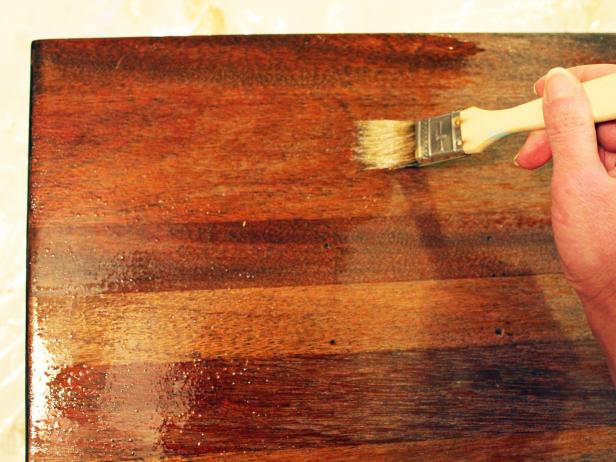
To remove any remaining bits of the previous finish and prepare the wood for the new stain, thoroughly sand the box starting with coarse-grit sandpaper then working your way down to medium- then finally fine-grit (Image 1). Using a chip brush, apply wood stain in the direction of the wood grain (Image 2). Allow stain to fully cure, following manufacturer's recommended dry time, then brush on a coat of polyurethane following the wood grain and consistently checking for drips or any lost brush bristles (Image 3).

H. Camille Smith
H. Camille Smith
H. Camille Smith
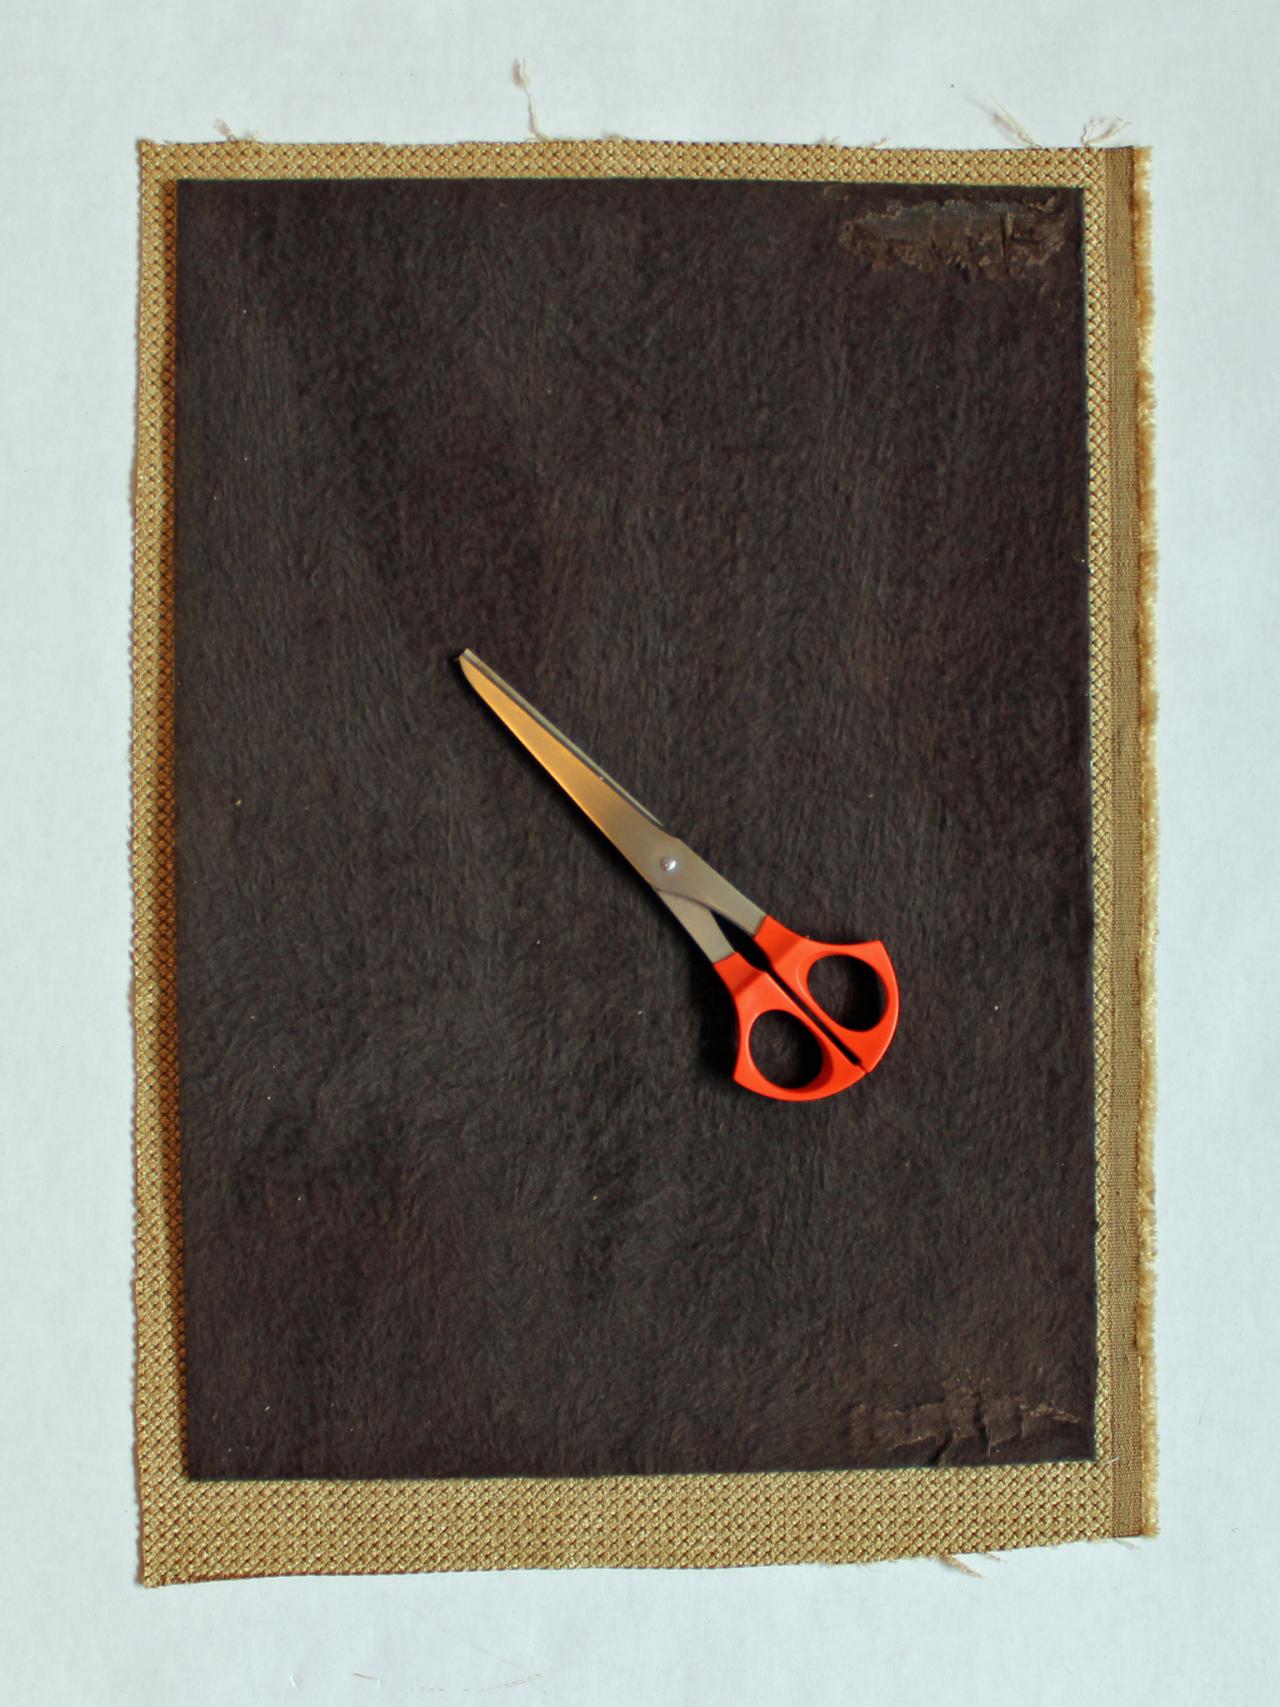
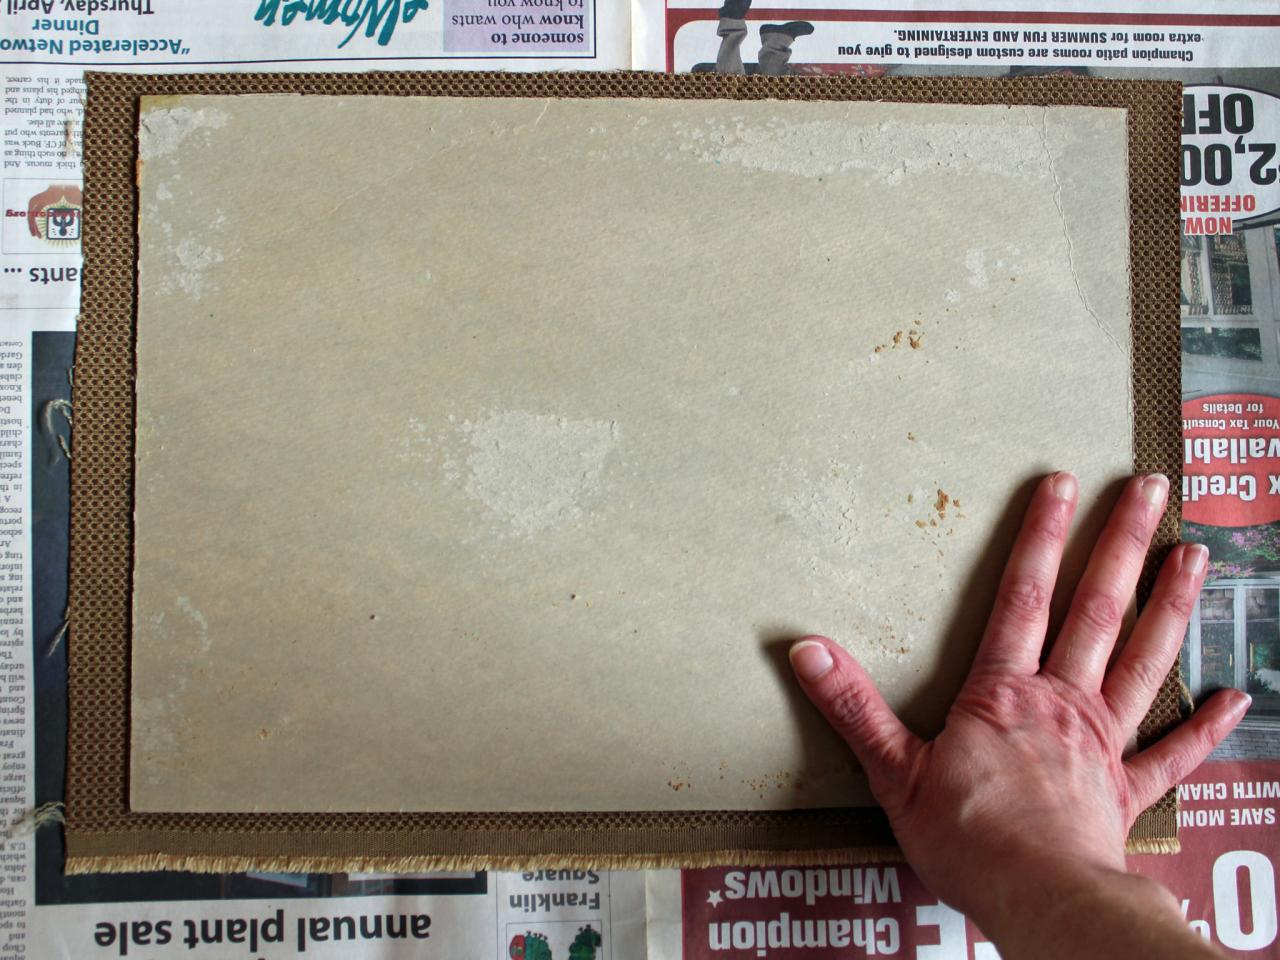
Cover Liners
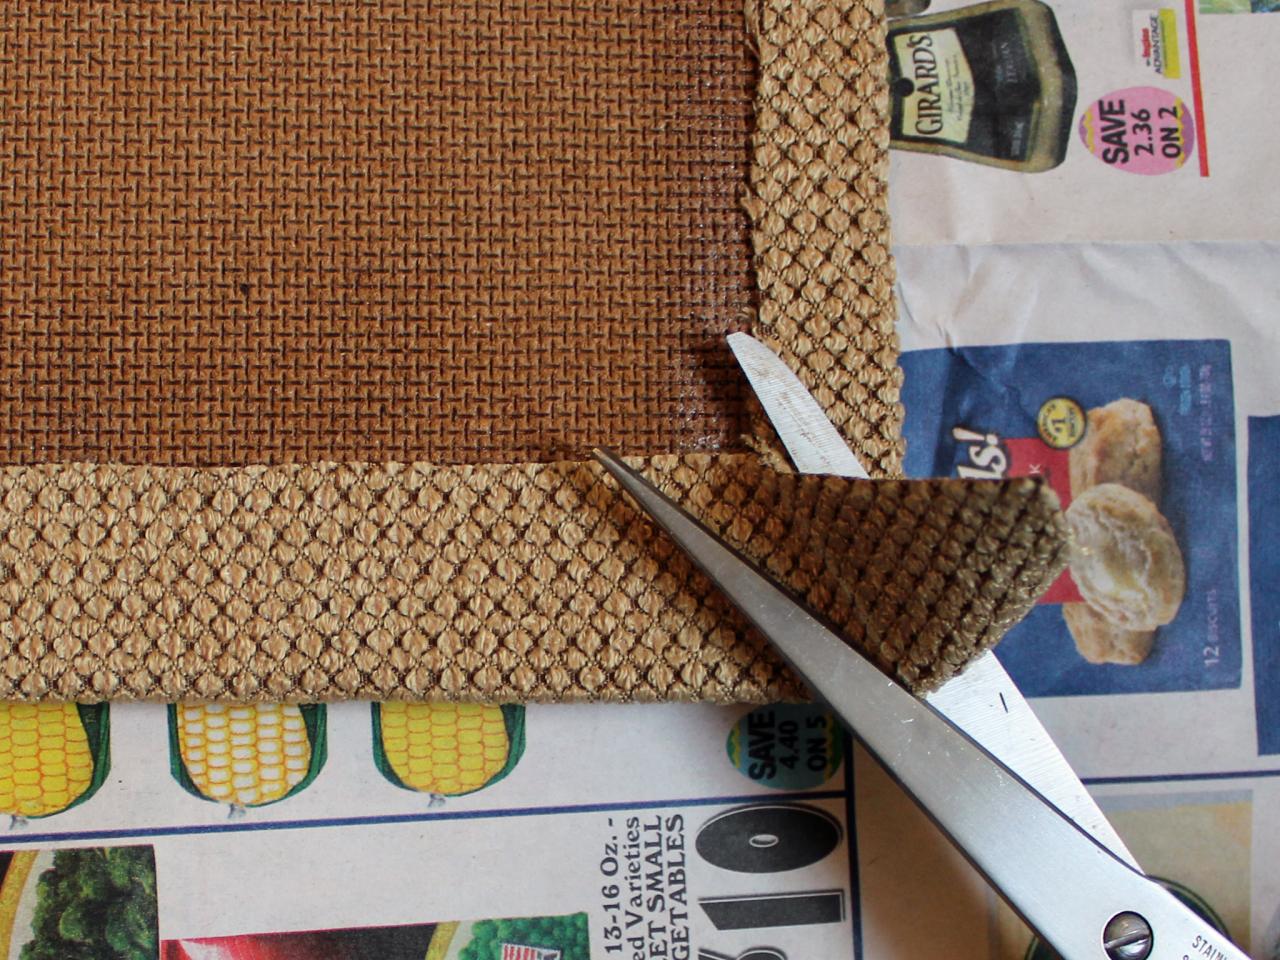
Use existing liners as a template to cut new fabric, leaving a 1/2 to 1 inch excess on all sides (Image 1). Place liner front-side-up on a dropcloth or newspaper-covered work surface; coat liner with an even layer of spray adhesive (Image 2). Lay new fabric face-down on a clean area of the work surface then center liner glue-side-down on fabric and press to secure (Image 3). Carefully spray just the edges of liner's back with adhesive (Image 4) then press edges of the fabric to secure. Cut off excess fabric with scissors to create a clean, mitred edge (Image 5).

H. Camille Smith

H. Camille Smith

H. Camille Smith

H. Camille Smith
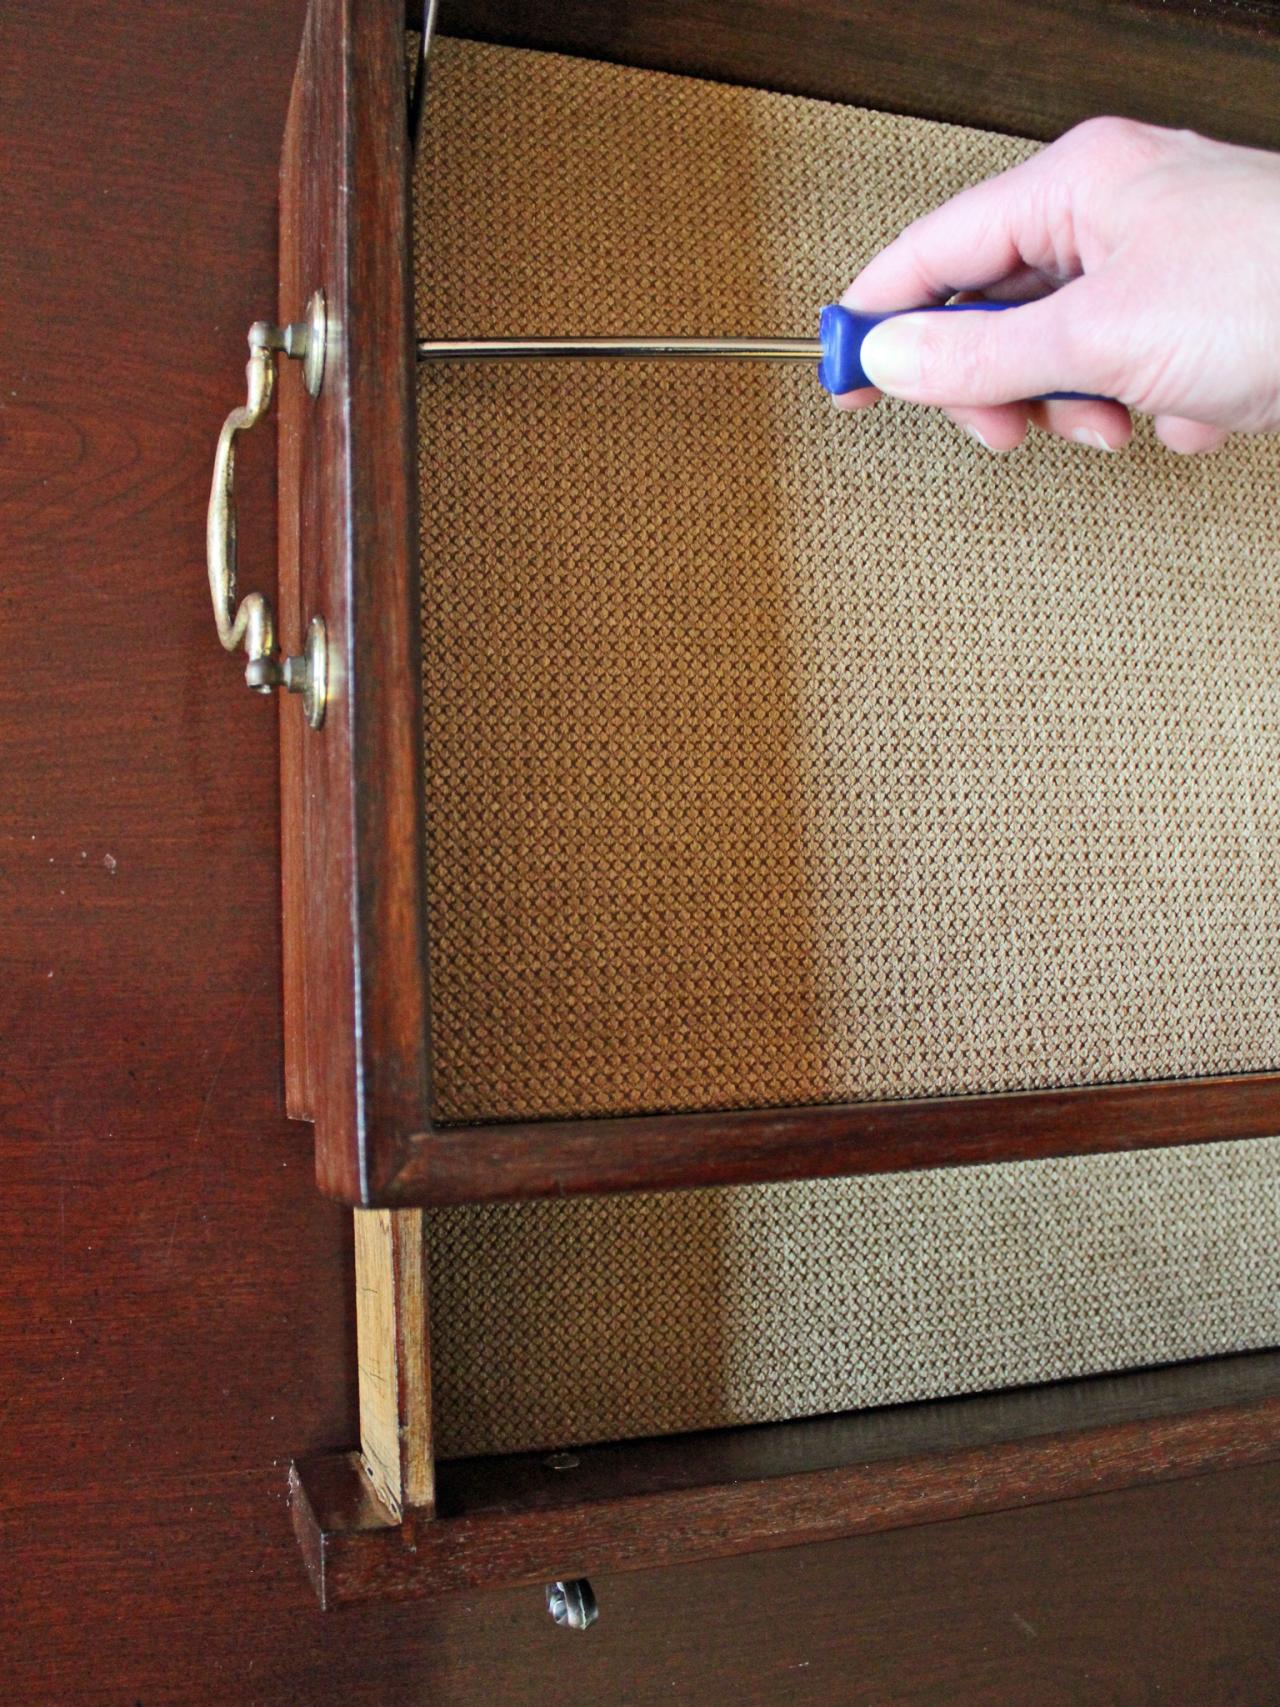
Attach Hardware
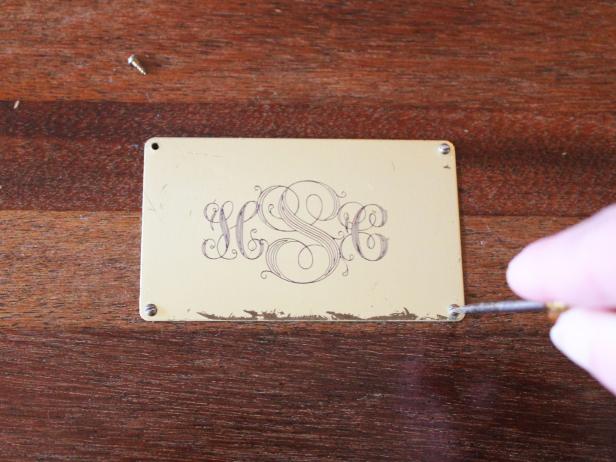
Pop re-covered liners into box then reattach hardware (Image 1). If cutlery box had an existing brass plate, have it engraved with the jewelry box owner's initials then reattach (Image 2). Tip: Trophy suppliers and jewelry stores often offer engraving for a small fee. Note: Instead of covering another piece of cardboard to line the inside lid of the box, as I have here, have a piece of mirror cut at a local glass or hardware store (Image 3).

H. Camille Smith
H. Camille Smith
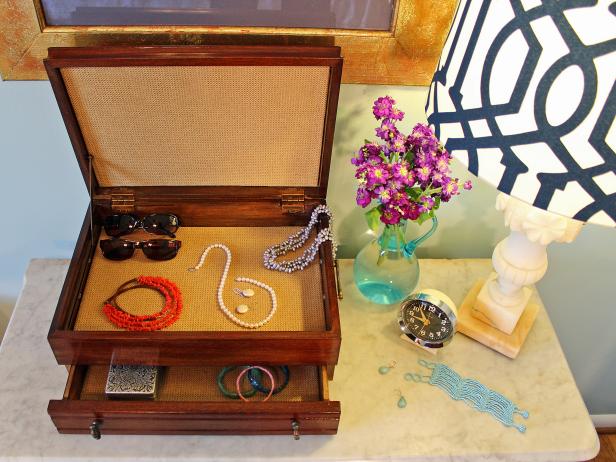
Upcycled Wooden Jewelry Box
Old cutlery boxes are easy to find at estate sales or in antique or thrift shops — usually at bottom-dollar prices. With just a little elbow grease, you can turn one of these bargain boxes into a massive jewelry box that any fashionista on your list will be thrilled to receive. Get upcycling with our step-by-step instructions.
Photo By: H. Camille Smith
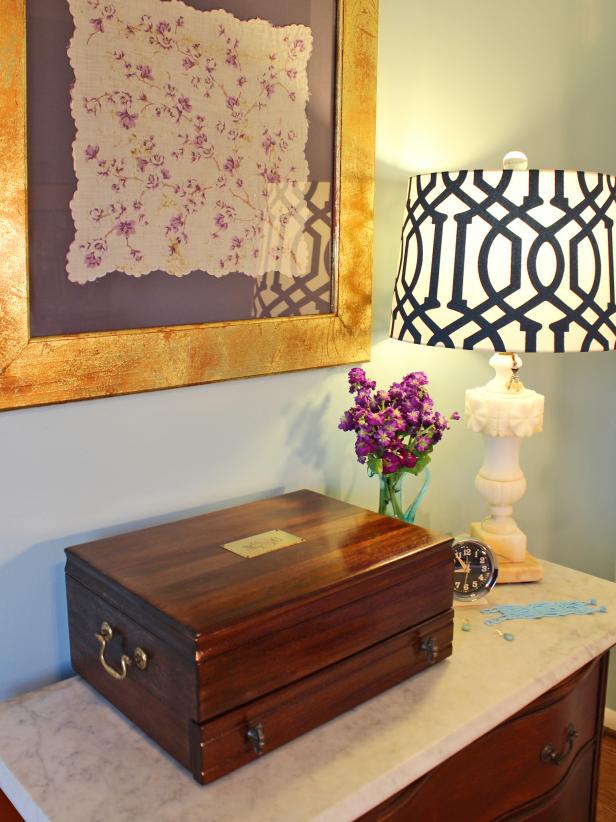
Cutlery Box After Upcycled Into a Jewelry Box
Vintage cutlery boxes are a frequent fixture at estate and yard sales — usually in pretty worn condition. With just a little elbow grease, you can refinish and re-line them for a massive upcycled jewelry box.
Photo By: H. Camille Smith


