


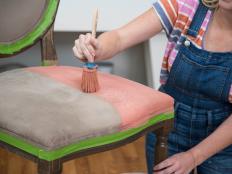
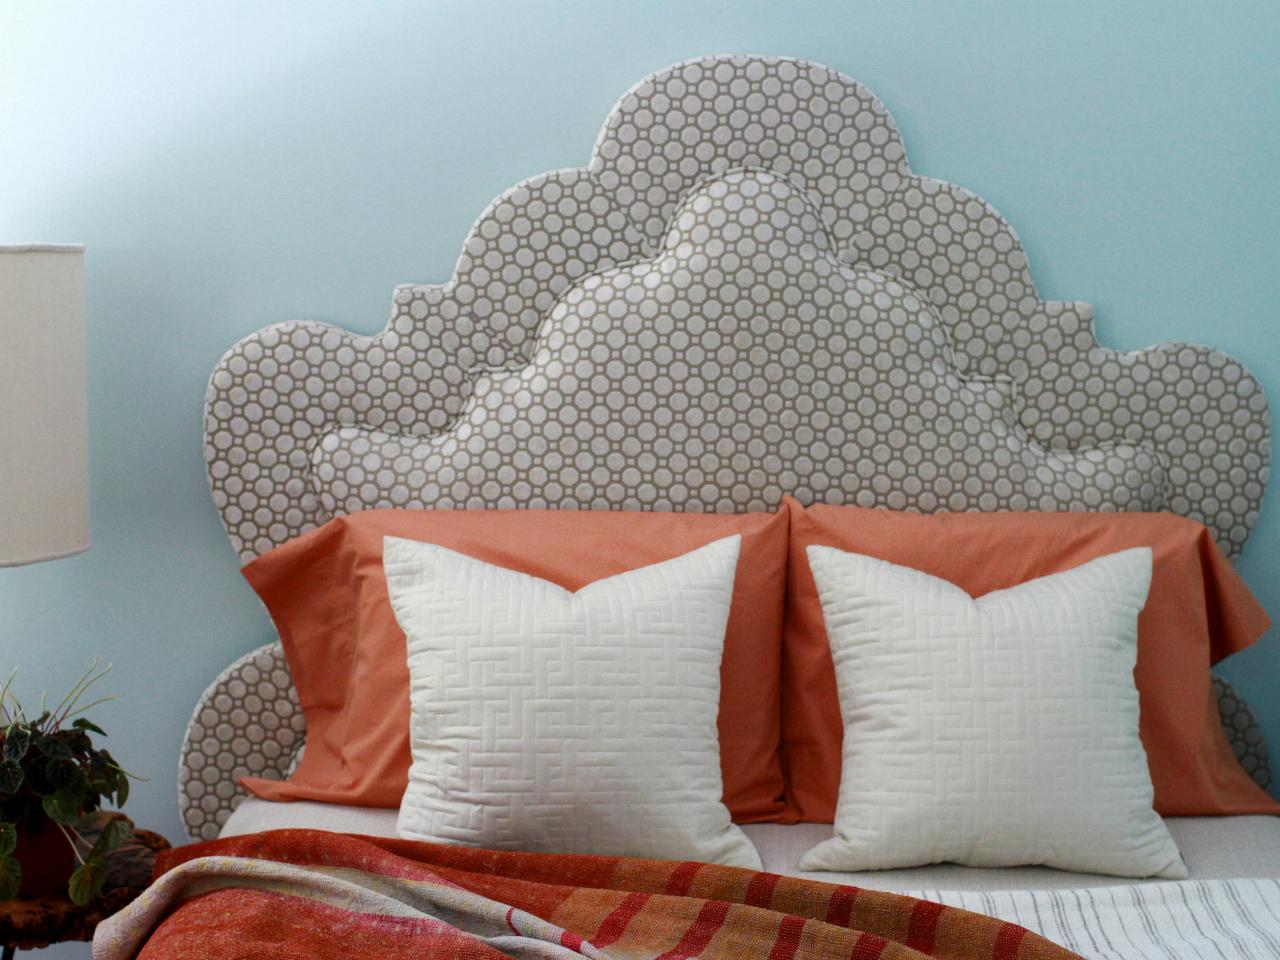
How to Make a Two-Layer 3D Upholstered Headboard
Add twice the style to your bedroom with a double-layer upholstered headboard.
Project Overview
- Cost: ⚫⚫⚪⚪
- Skill Level: ⚫⚫⚪⚪
- Time to Finish: About a Day
Tools
- paper template
- scissors
- permanent marker
- foam cutter or electric carving knife
- goggles
- staple gun and 3/8”-long staples
- white or yellow chalk
- yardstick
- measuring tape
- straight pins
- sewing machine
Materials
- plywood
- 2”-thick soft-density foam
- scrap burlap or fabric
- Dacron batting
- fabric (our white octagon fabric is Robert Allen Velvet Geo in Pearl)
- attachments and thread
- 5/32” fiber-flex welt cord
- cardboard tack strip
- furniture leg glides and dustcover
- foam and fabric spray adhesive

Cole Collective
A padded headboard can dress up your bedroom. Here's how to create your own two-layer upholstered headboard with a border.

Draw Shape and Cut Plywood
Start with a full sheet of 3/4”-thick plywood. Have the hardware store cut it two inches wider than the width of your bed. The height of the headboard can be adjusted by cutting legs to size. Be sure to save any plywood scraps for later use. If you’re upholstering an organically-shaped headboard, freehand the shape on a large piece of paper. Then trace the paper pattern onto the plywood. If the shape is symmetrical, draw half of the shape on paper and trace it onto the plywood and then flip the paper pattern over to trace the other half. Once the pattern is on the plywood, cut it to shape.

Attach Extra Pieces
Add the second layer by attaching scraps of plywood on the backside of the headboard frame around the edges. (Having the double-thick headboard frame makes it easy to conceal the mounting brackets and the attachment points of the legs.) As you screw pieces into the main headboard shape, it may be necessary to cut them so they fit end to end. Leave a 4”-square space at the bottom of the sides to attach the legs.

Make and Attach Legs
Determine the desired height of the headboard. Assuming your headboard shape is shorter than the desired height, cut two pieces of scrap plywood to construct each leg. One piece should be the exact height needed to achieve the desired overall headboard height, and the second piece should be that same height plus 4”. Both pieces should be 4” wide. Glue and screw the two leg pieces together so the bottom edges are flush. Then glue and screw the longer end to the bottom of the headboard on the backside.

Recut the Edge of the Plywood
Flip the headboard over and cut the scrap plywood to mimic the shape of the main headboard piece. Remove rough spots and splinters by sanding the edges.

Cole Collective

Cole Collective

Cole Collective

Cole Collective

Cole Collective
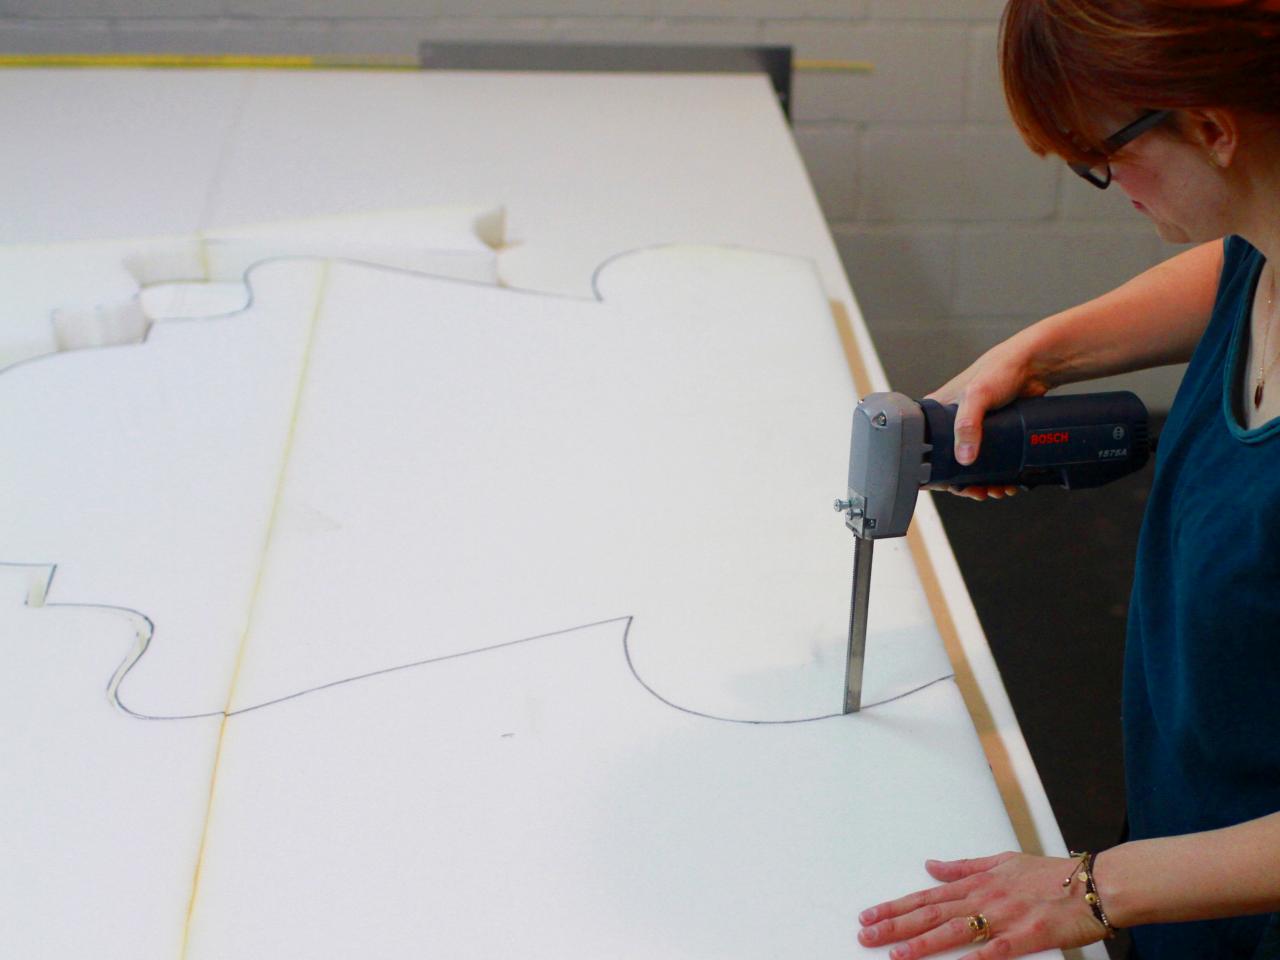
Prepare Interior Foam
Determine the thickness of your border and neatly remove that amount from the edge of your paper template. Glue multiple pieces of foam together to create a piece that is large enough to cover the headboard. Use the remaining shape to trace the interior shape of the headboard on foam.
Use a foam cutter or a meat carving knife to cut out the shape on the drawn line.
Glue scrap burlap or fabric over the seams on the front side of the foam. This will keep the separate pieces from coming apart over time.
Glue the foam to the headboard and glue a single layer of batting on top of the foam. Cut the excess batting from the edges of the foam.
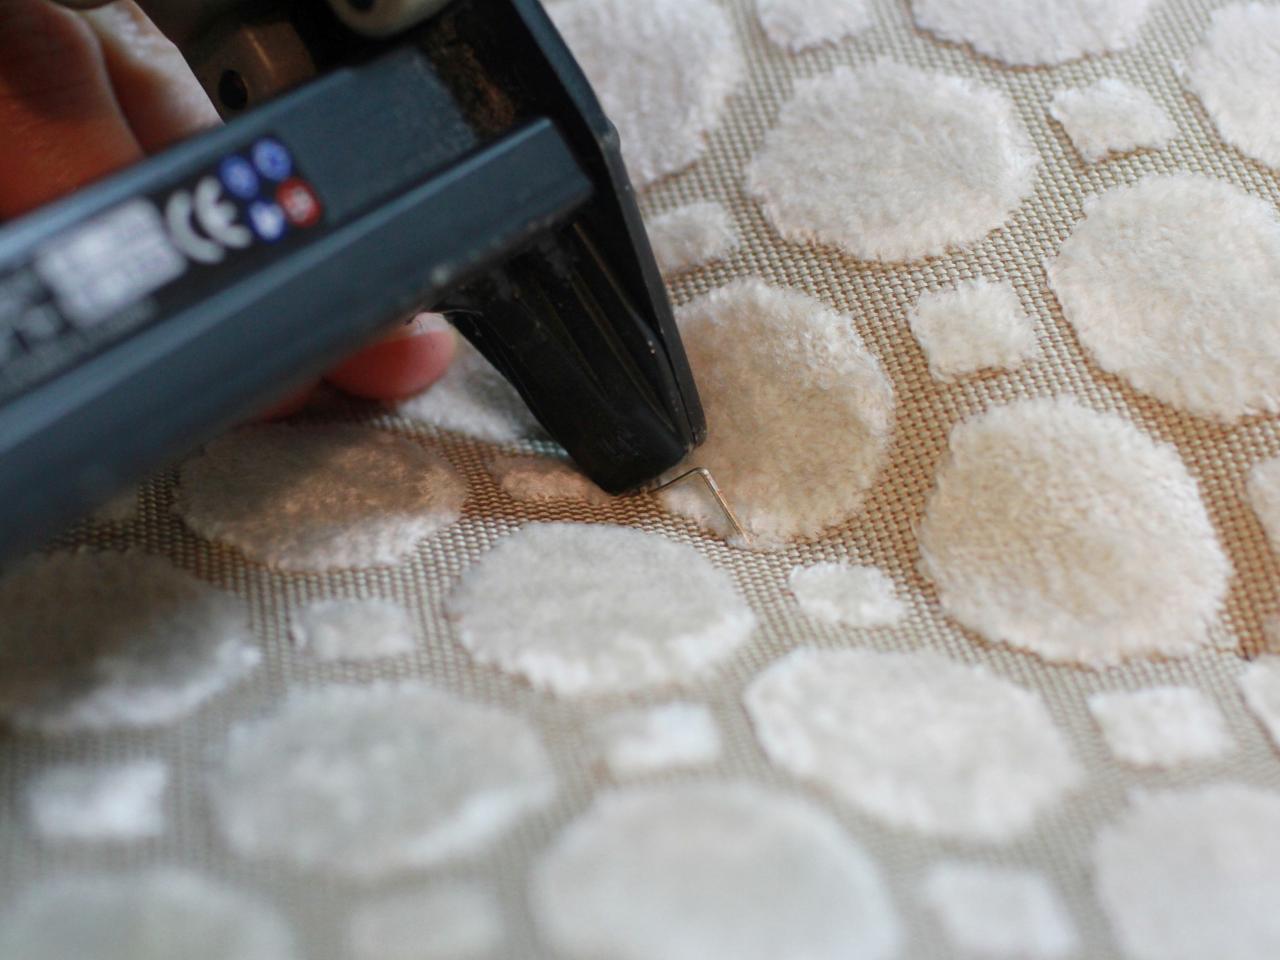
Staple through the edges of the foam and down into the headboard to help anchor the padding in place.

Cole Collective
Attach Fabric Over the Main Section of the Headboard
Cut out a piece of fabric large enough cover the padded portion of the headboard. Center the fabric over the main section of the headboard, smooth out wrinkles and staple in place. Be sure the fabric pattern is centered and straight on the headboard and use sub staples (see photo) to temporarily attach the fabric to the headboard. Try to staple the fabric just beyond the padding to minimize air pockets under the fabric. At the bottom of the headboard, wrap the fabric around the bottom edge and staple to the backside of the plywood. When the fabric is in the desired location, staple permanently and remove the sub staples.

Cole Collective

Cole Collective

Cole Collective

Cole Collective
Begin Creating the Border
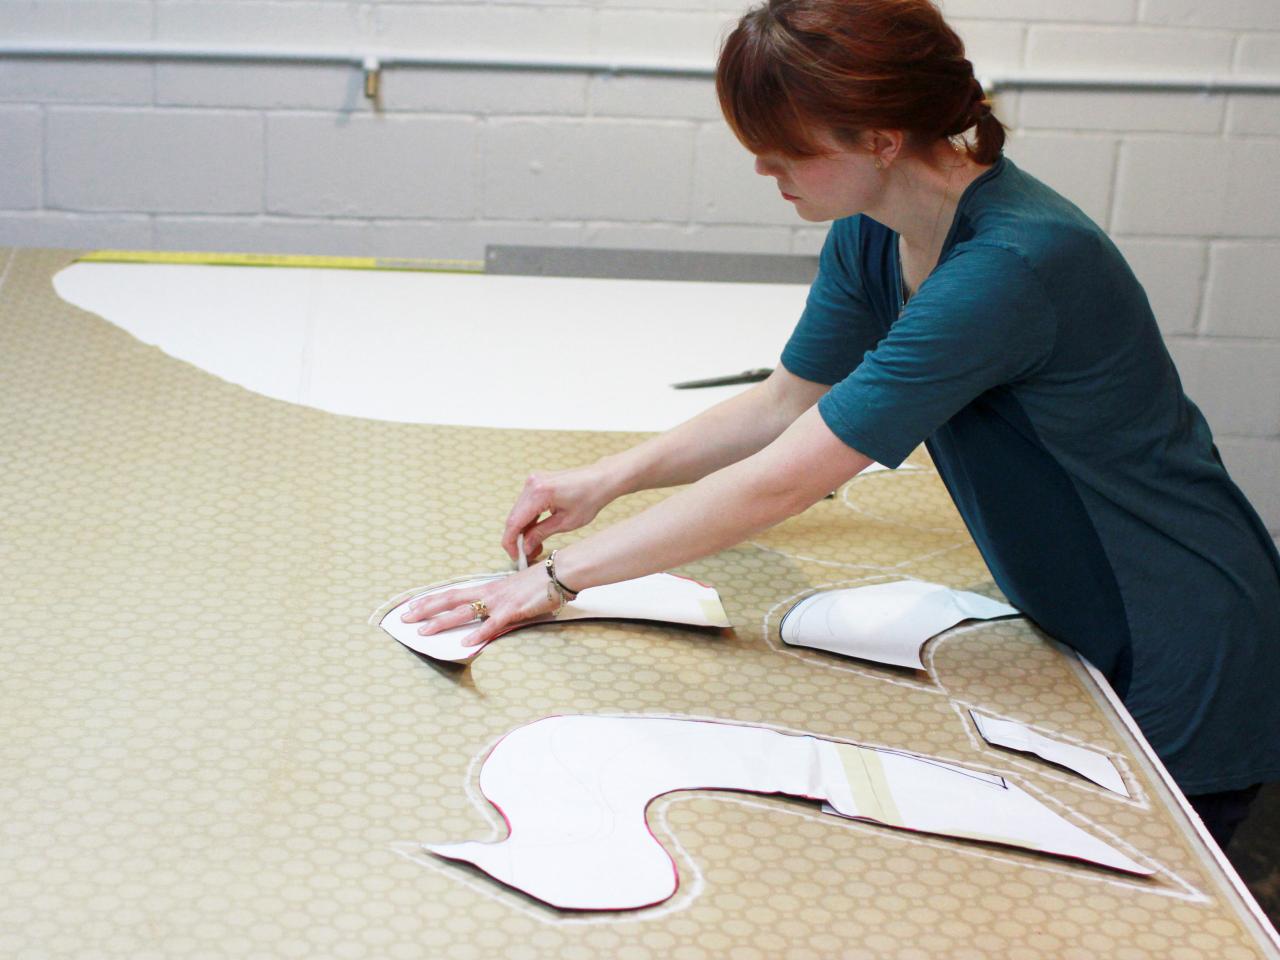
Use the excess removed from the paper template to trace the edge of the border on the fabric in chalk.
Trace the paper template border on the backside of the fabric, leaving a 1/2" seam allowance on all sides. If you have a large amount of fabric, feel free to trace the border as one whole piece, or cut the template into pieces if you’re working with limited fabric. Draw lengths of boxing long enough to go around the perimeter of the headboard plus a few inches for stapling. The boxing height should be 2” wider that the thickness of the headboard frame (approximately 3-1/2"). As you draw your fabric pieces, be conscious of pattern placement and direction. Cut out all pieces.
If you plan on using welt cord, draw long strips on the bias (at a 45-degree angle) that are 1-1/2" wide. We’ll connect these pieces end to end, but we’ll need enough total length to go around the perimeter of the headboard. Mark the bottom ends of all of the strips and cut them out.
If you cut your border into multiple pieces, sew them together with good sides facing.

Cole Collective

Cole Collective

Cole Collective

Cole Collective

Cole Collective
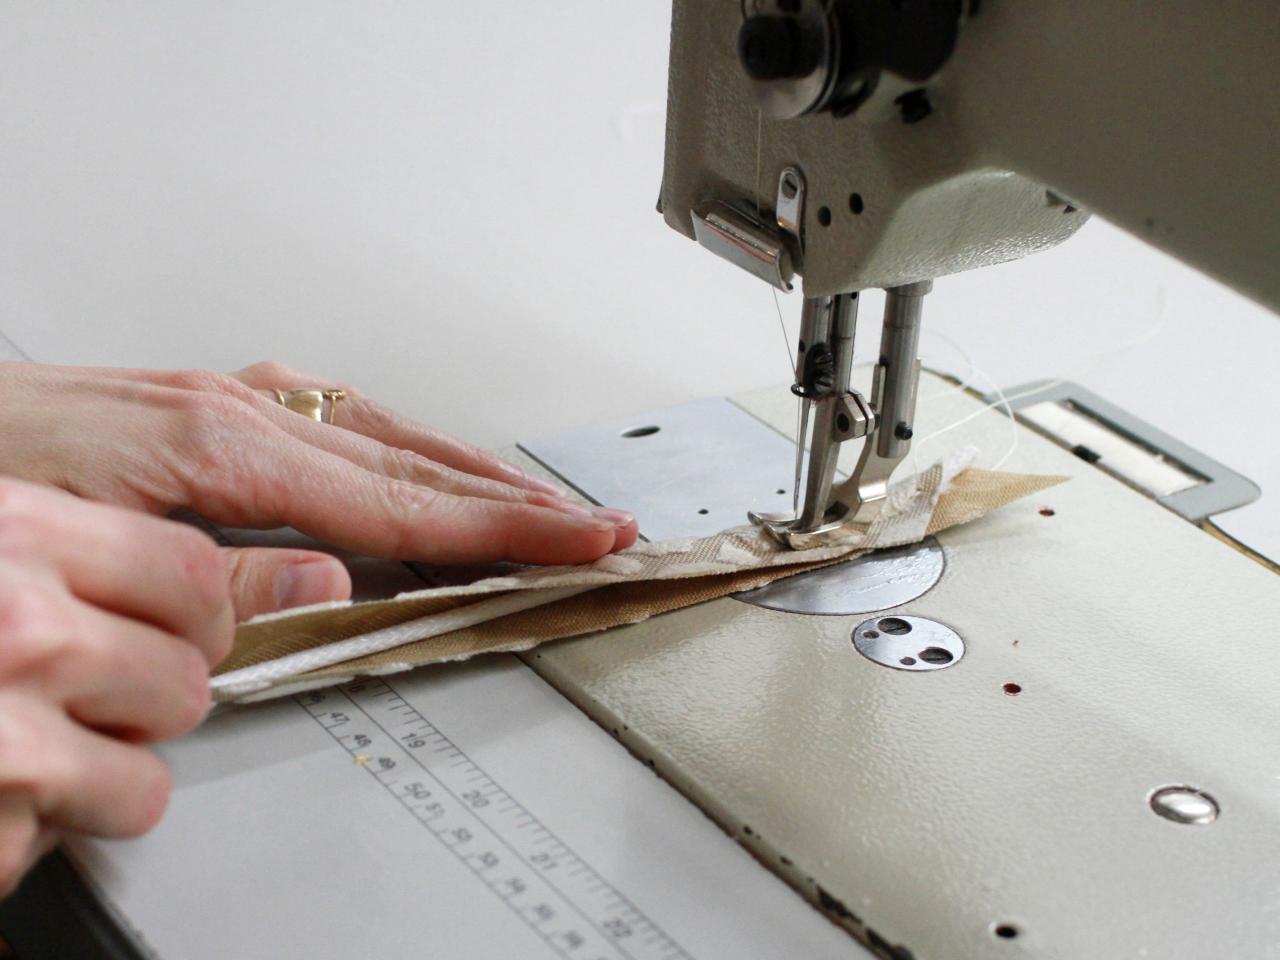
Begin Cording
Line up a marked end of welt cord next to an unmarked end and cut them at complementary angles.
With good sides facing, position two welt cord strips in the shape of a teepee. The ends should be slightly offset to leave a 1/2" seam allowance.
Sew across the ends of the fabric strips to connect them. Repeat until all of the fabric strips are seamed together.
Wrap the fabric around the cording and stitch along the right side. If you don’t have a single welt cord foot attachment for your sewing machine, you can use a zipper foot attachment. Open up and lay the seams flat as you sew across connections in the welt cord fabric.
Keep the tail of the welt cord aligned with the outside edge of the border while sewing the two together.

Cole Collective

Cole Collective
Attach Boxing
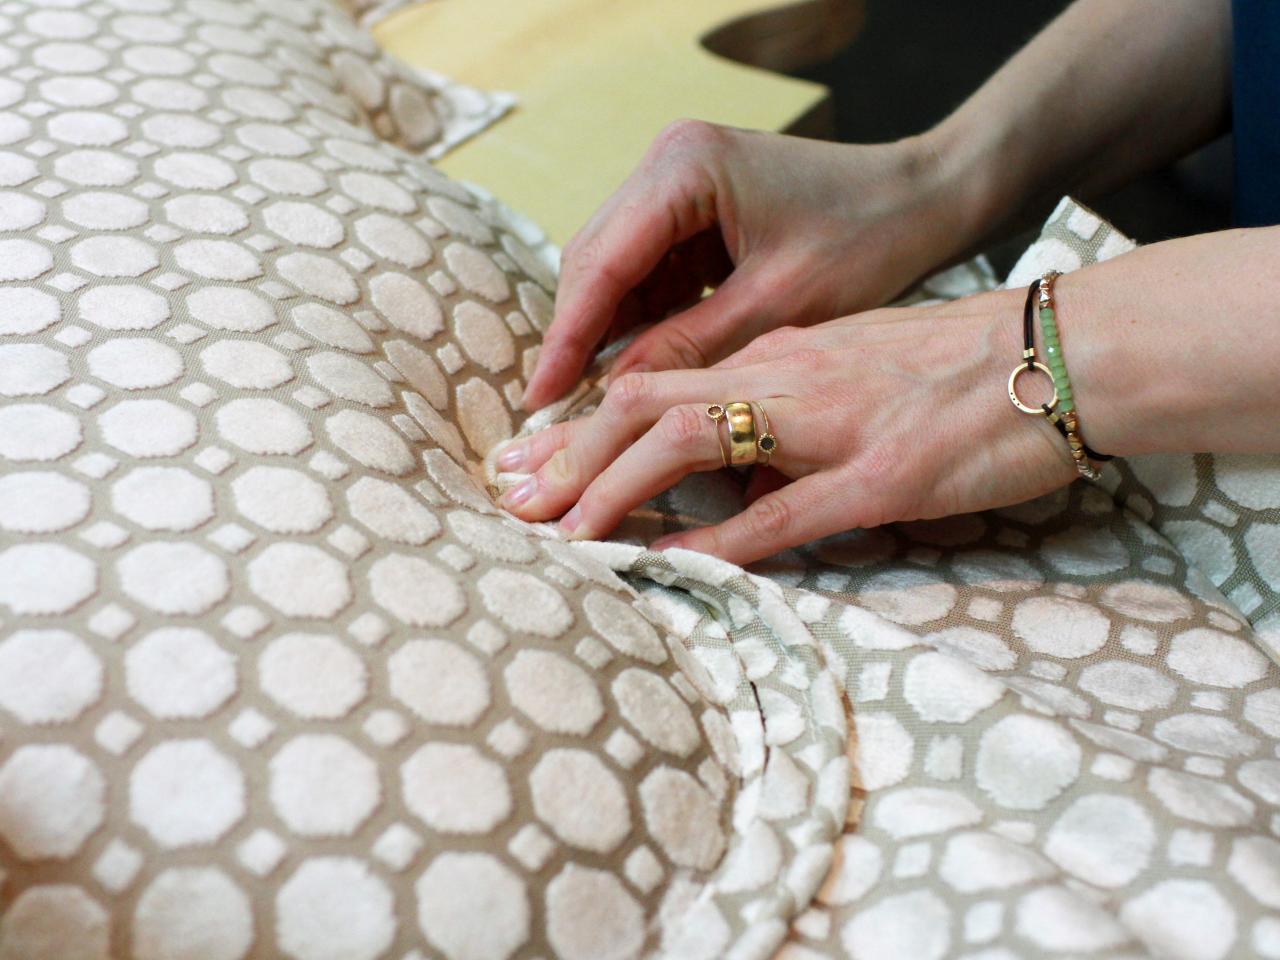
With good sides facing, seam the boxing to the outside edge of the border.
Once the border and boxing is complete, it's time to staple it to the headboard.


Cole Collective

Cole Collective

Cole Collective

Cole Collective
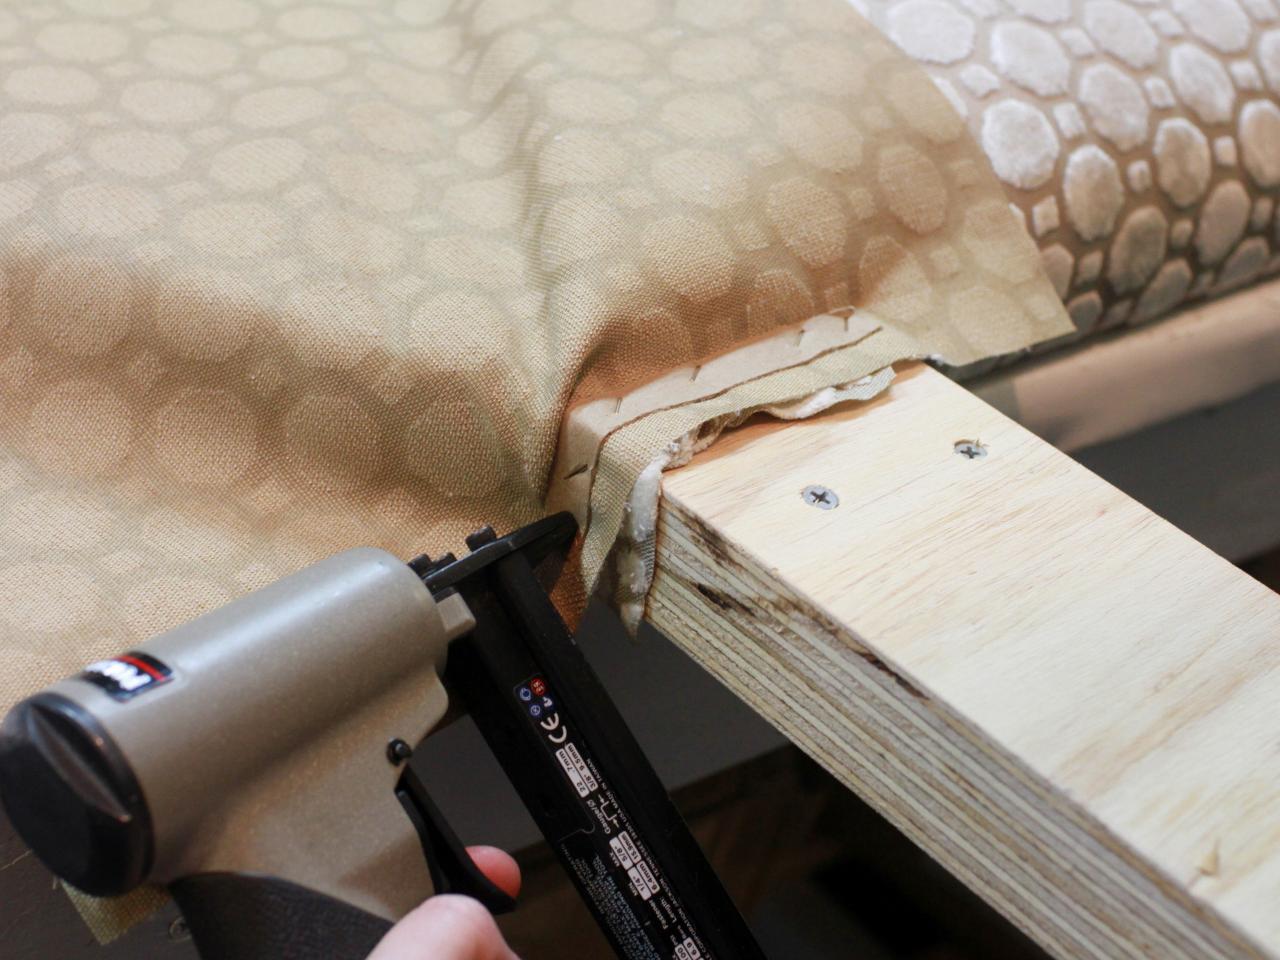
Staple and Reinforce Border
Determine the correct placement of the border along the chalked guideline we made earlier.
While holding the border in place, raise up the fabric and staple the seam allowance to the headboard. This is call blind tacking since the staples are hidden from sight behind the fabric. Continue stapling to border all the way around the headboard.
Staple cardboard tack strip over the seam allowance to strengthen the connection to the headboard.
Cut and attach Dacron to the border of the headboard. Split the sheet of Dacron in half and staple only the bottom layer to the wood. The top layer will cover the indentations made by the staples. Cut off the excess Dacron even with the back edge of the headboard.
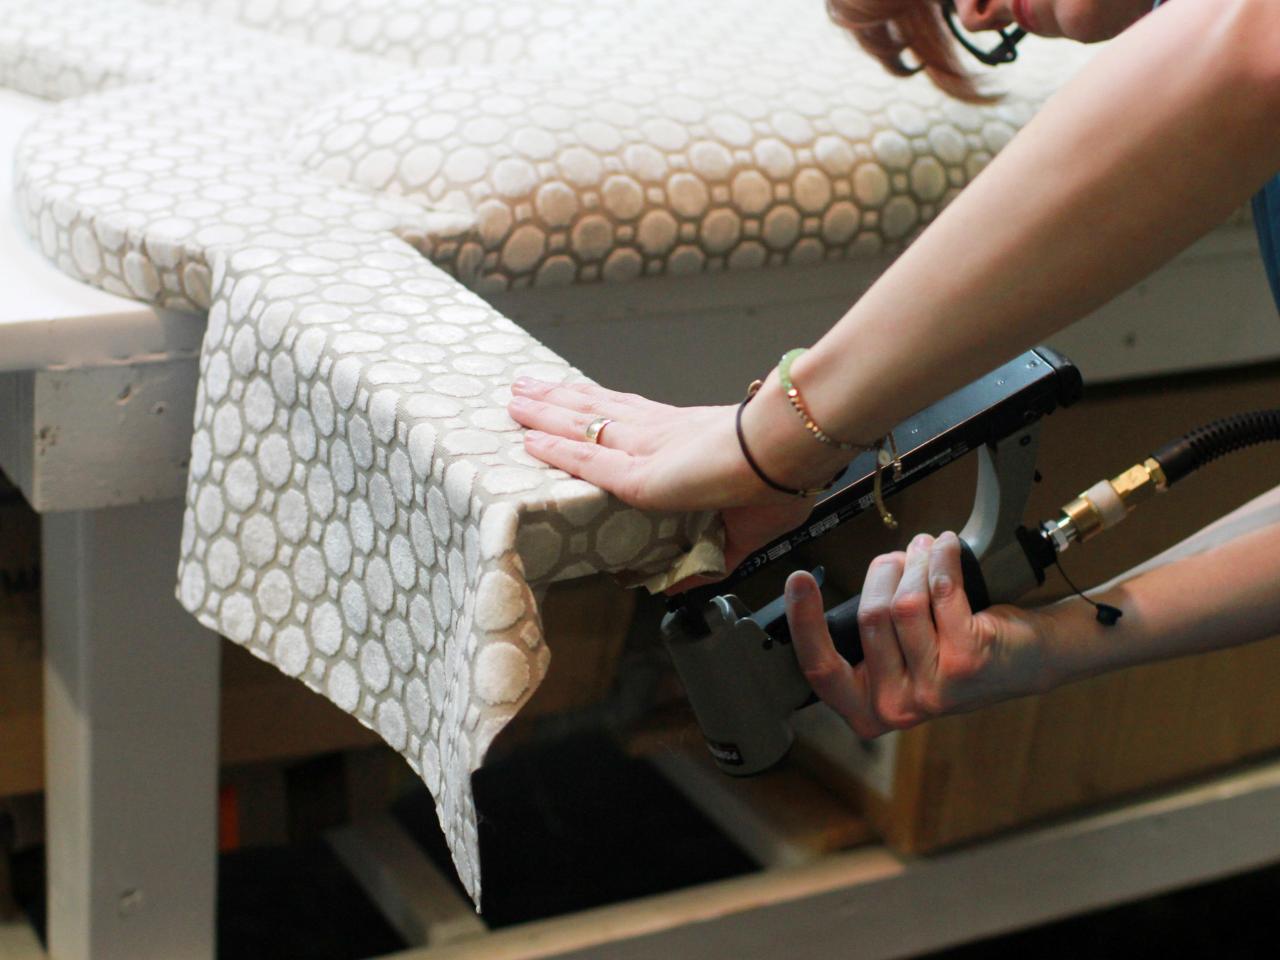
Pull the border fabric tightly around the edge of the headboard and staple to the backside. If you’re having trouble getting the fabric to lay flat around turns and in corners, it may be necessary to make cuts in the excess fabric to release it. Continue stapling until the fabric is secured all the way around the headboard. Staple excess fabric straight down and on top of the legs where the border meets the legs.

Cole Collective

Cole Collective

Cole Collective
Finish the Legs
Cut a piece of fabric large enough to cover the entire leg and blind tack the top edge to the top of the leg. Reinforce the staple line with cardboard tack strip. Repeat for the second leg.
Pull the fabric down and neatly staple it around the leg. Fold under excess fabric to create clean edges and staple on the backside of the leg. Repeat for the second leg.
Hammer glides into the bottom of the legs. This helps protect the fabric on the bottom of the legs.


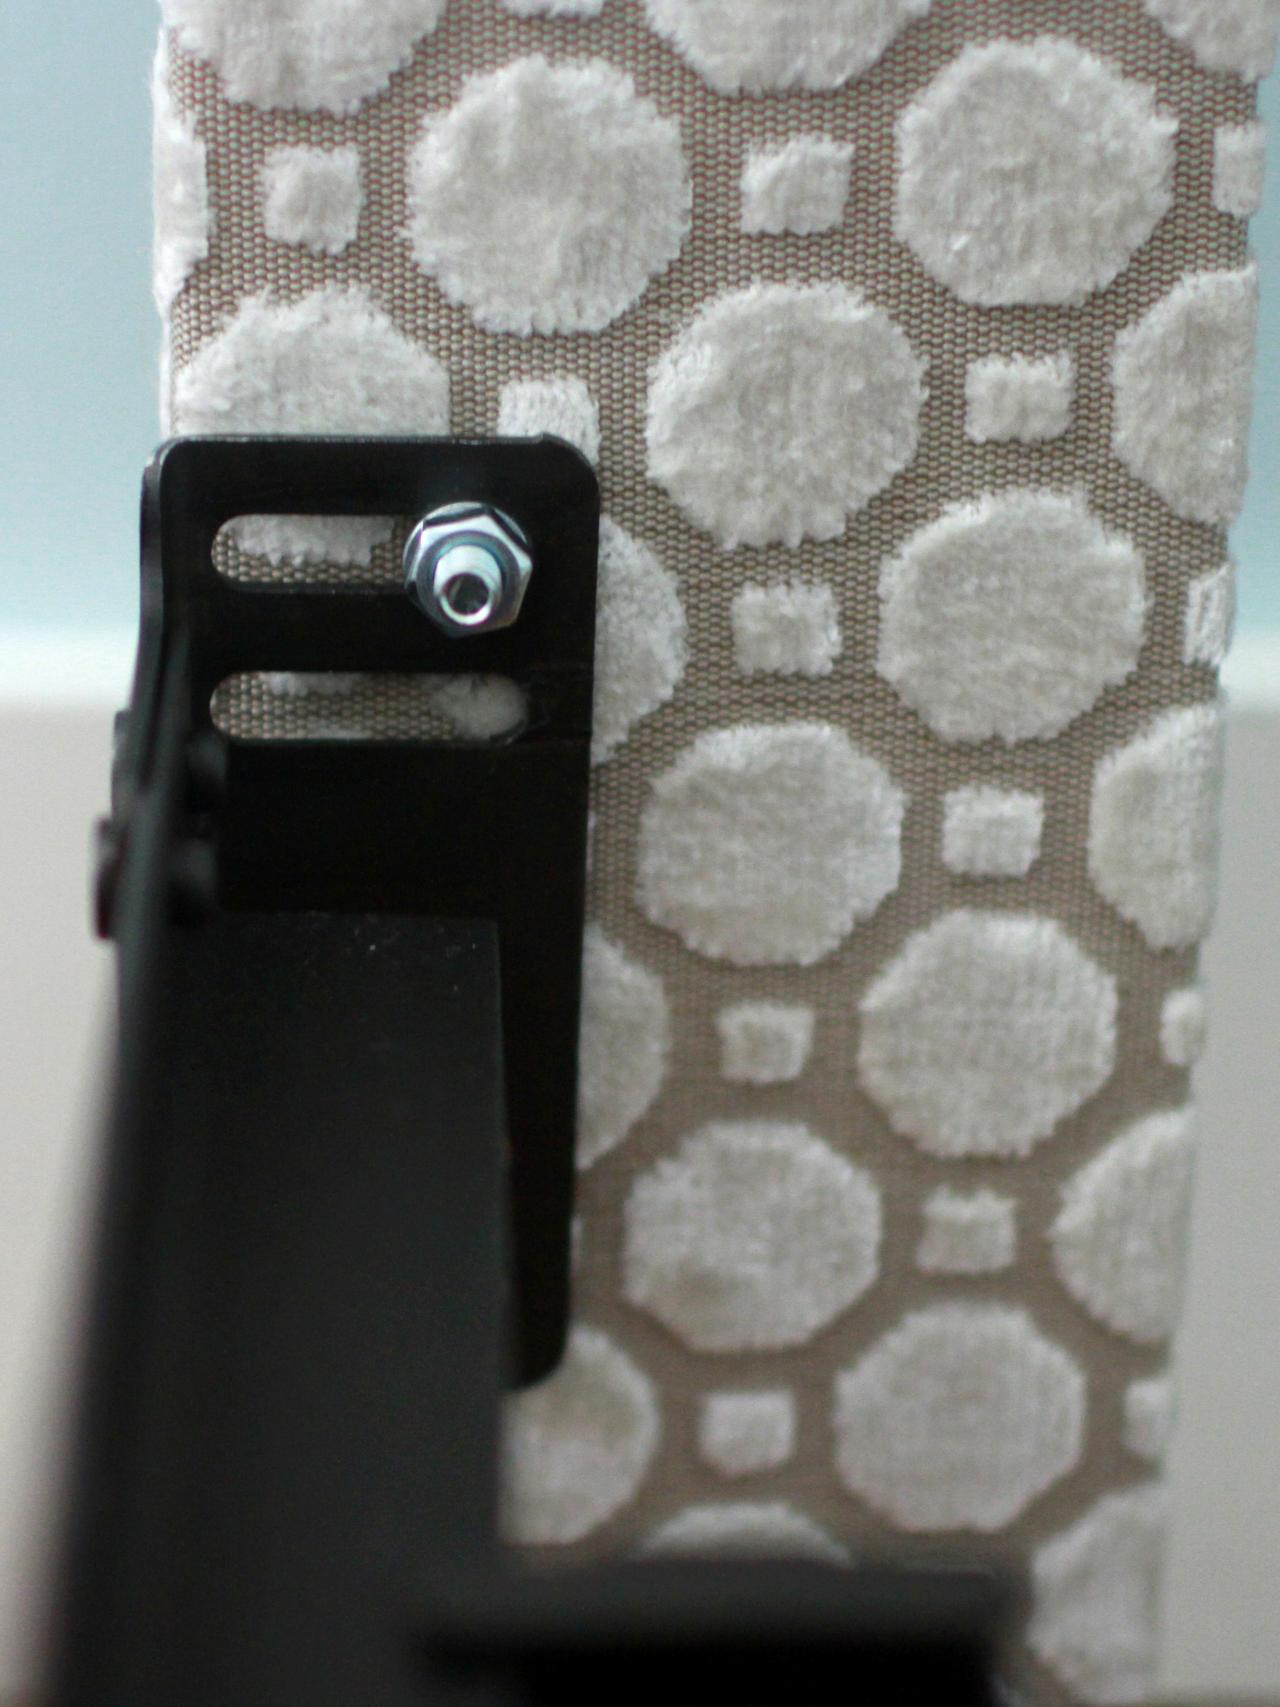
Staple Dustcover and Attach Bedframe
Conceal the raw frame on the backside of the headboard with dustcover. Sew two lengths of dustcover together to cover large headboards, fold under excess and staple around the perimeter of the backside.
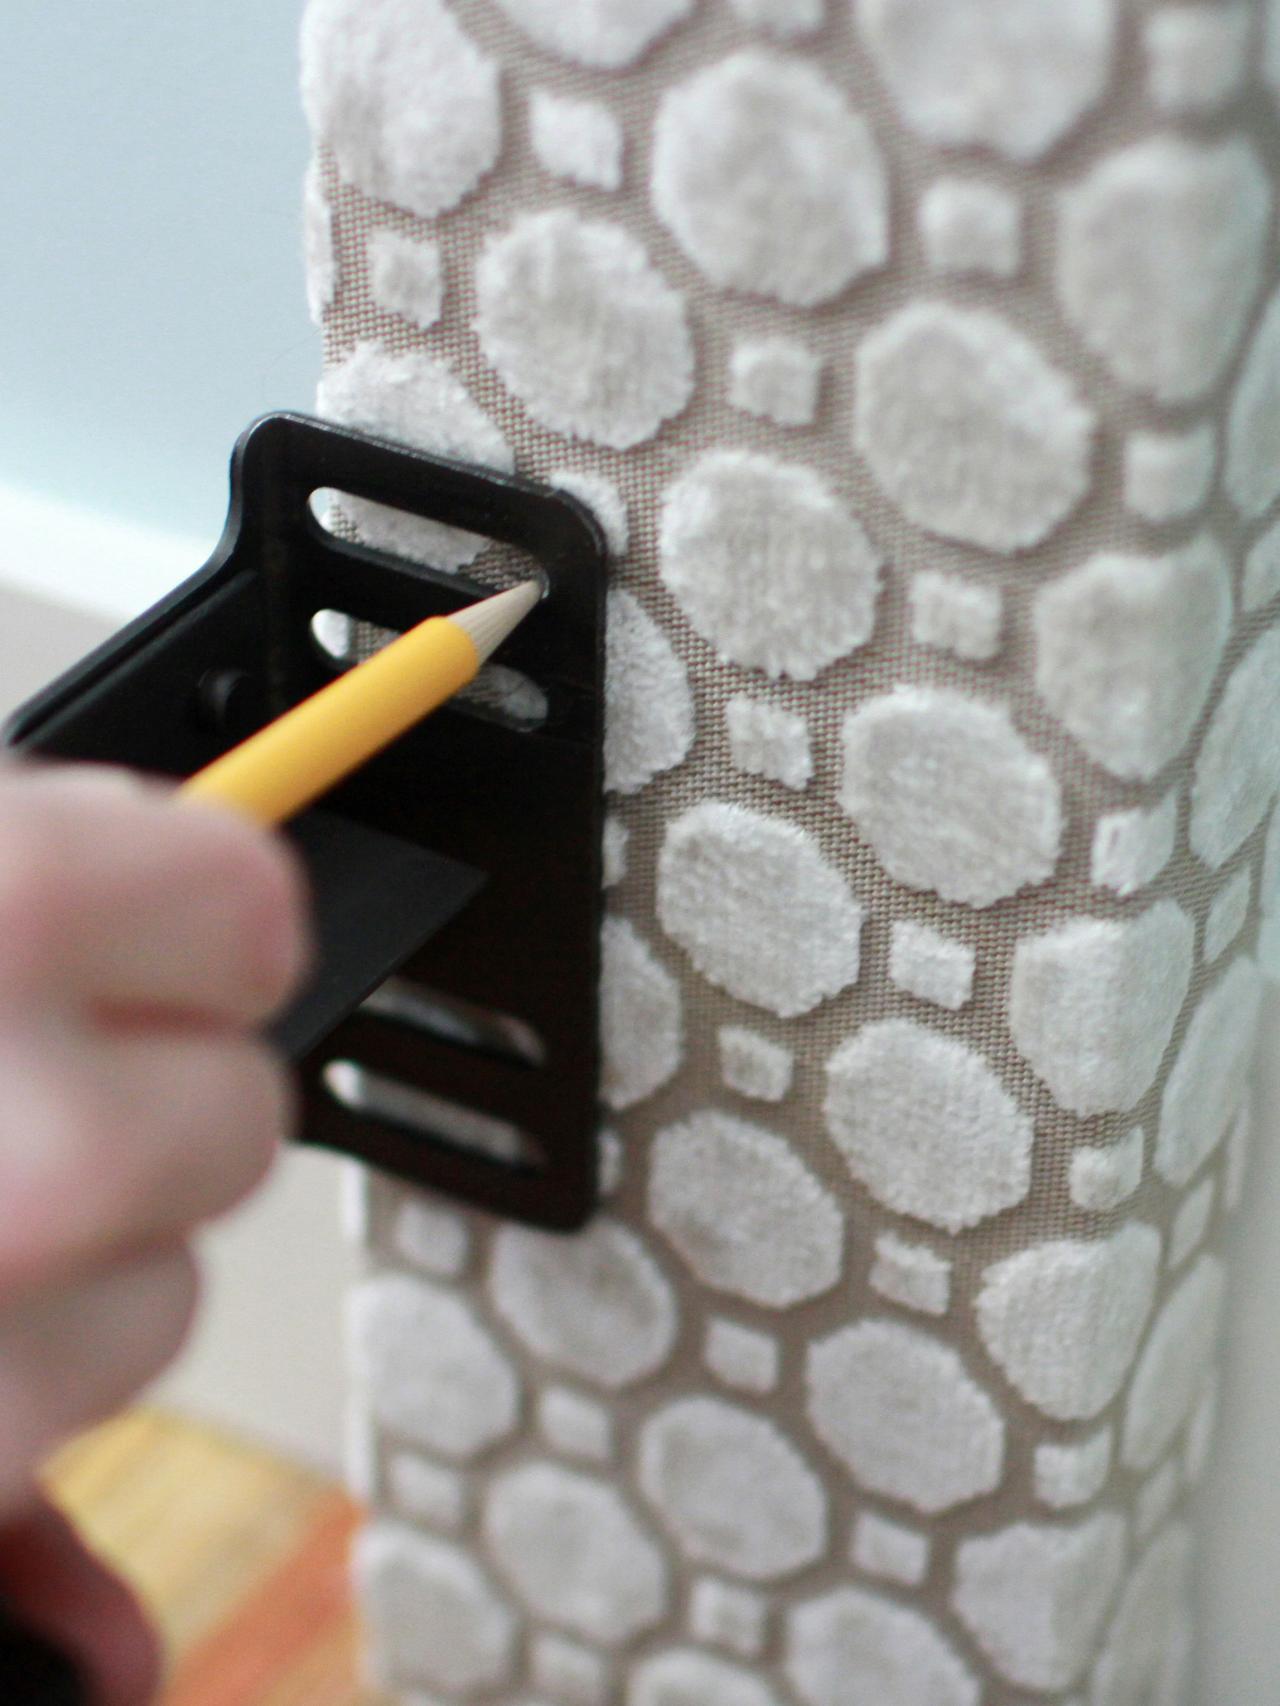
If you’re using a standard bed frame, line up the ends with the legs of the headboard and mark the placement of the bolts on the headboard legs.
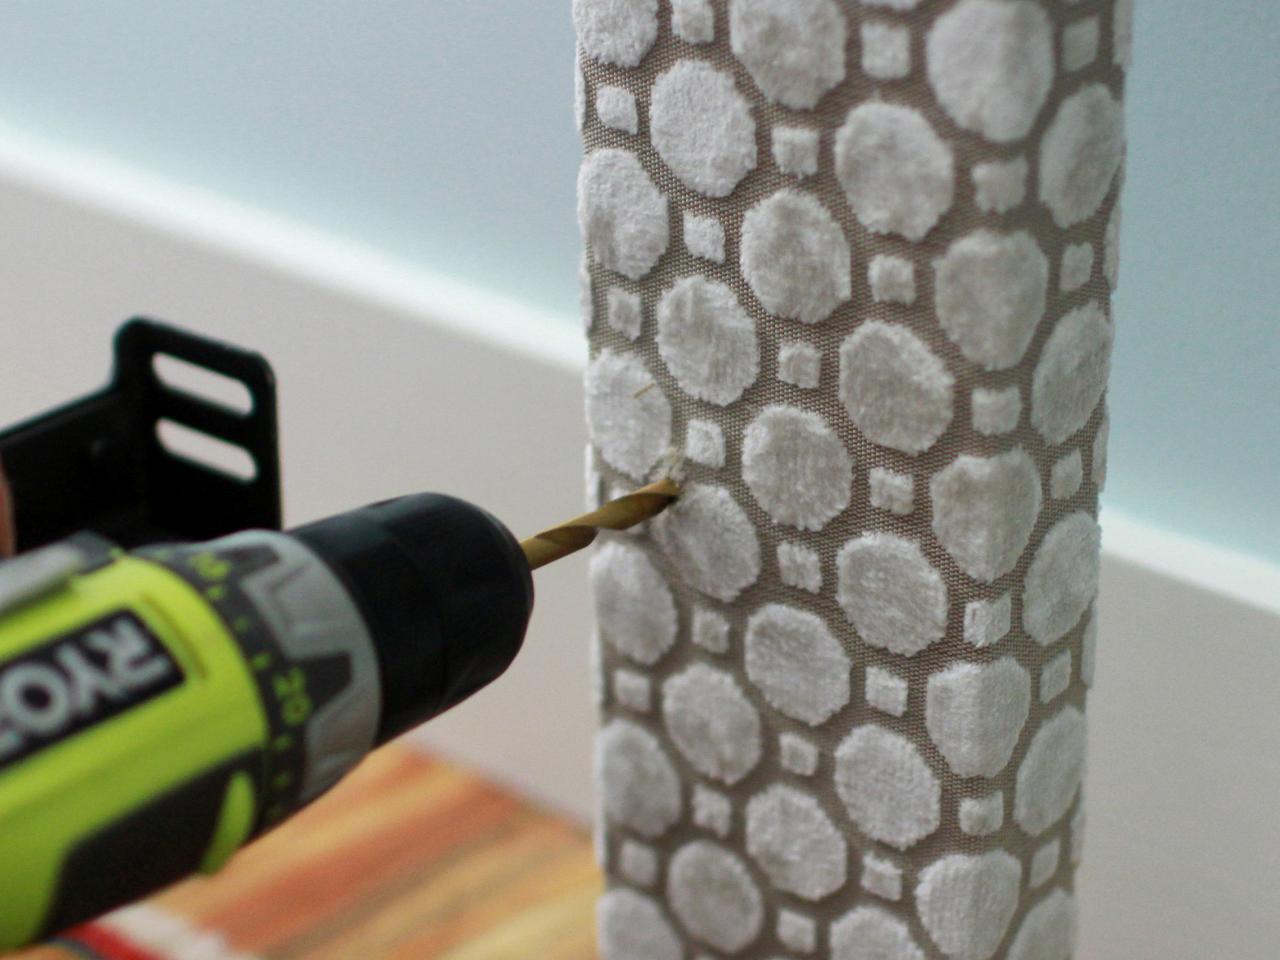
Clear the fabric from the bolt locations and drill holes through the legs at the same diameter as the bolts.
From the back to the front, place the bolts through the legs and bed frame and secure with washers and nuts.

Cole Collective
Finish Up
The final product will be a professional looking headboard, customized to fit your style, budget and space.


