How to Make a Giant Chalkboard Calendar
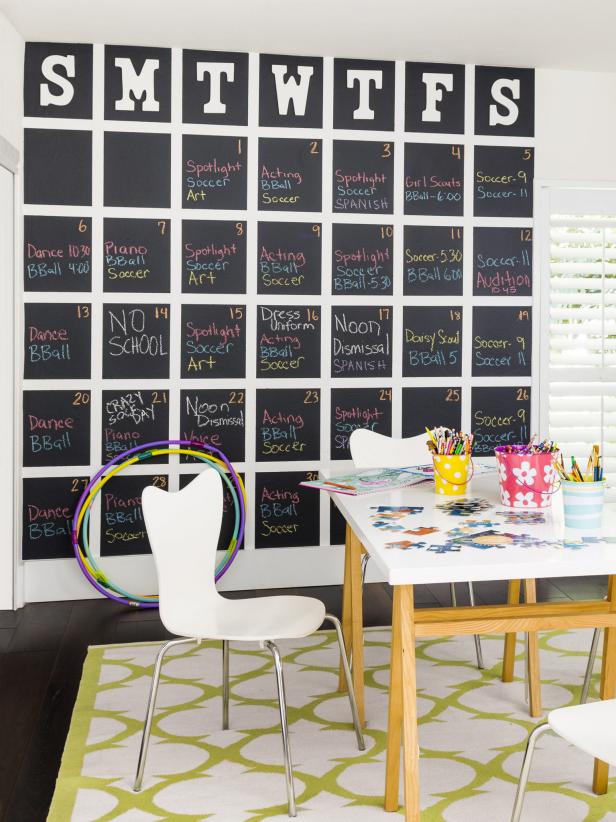
Follow the steps below to create this giant chalkboard calendar from the pages of HGTV Magazine.
Zach DeSart

Materials Needed:
- primer
- paint for base color
- chalkboard paint
- painter's tape to desired width
- wood letters
- paint for wood letters
- screws
- chalk
- plaster for drywall (if needed)
- trowel (if needed)
- pole sander (if needed)
- fine sandpaper (if needed)
- 42 pieces of paper (in the size you want the calendar squares to be)
Step 1
If necessary, fill any holes or imperfections in the wall with plaster and a trowel. Let dry, then use a sander and fine sandpaper to smooth the surface. Prime and paint the wall. Your base color will be the calendar lines. We used Super White by Benjamin Moore.
Step 2
Use the paper and a small piece of tape to divide the wall into six rows of seven squares across. This will be your temporary to-scale guide. You will have a total of 42 squares, with the top row used for days of the week. This wall is about 8 1/2 feet tall, and each square is about 10 inches by 10 inches. However, the calendar can be as small or big as you want, or as your space allows.
Step 3
Beginning with the center square, remove the paper and use painter’s tape to mark the square to be painted. Work from left to right, then from the center up, and finally from the center down to ensure the calendar is evenly spaced and level. Measure the distance between each square to use as a guide for the other rows and columns.
Step 4
Paint inside the squares using two to three coats of chalkboard paint. Let dry, then peel off tape.
Step 5
Paint the wood letters. Let dry, then affix the letters to the wall with screws. Update the dates with chalk as months pass.


