


How to Build a Raised Garden Bed Step-by-Step
Take your garden to the next level with this complete plan and step-by-step instructions for an easy raised garden bed DIY project. Your plants (and wallet) will thank you.

Mick Telkamp

Raised garden beds are a convenient way to make the most out of your garden. With good drainage, protection from weeds and many pests, plus well-aerated soil perfectly blended to encourage growth, raised beds are a great choice for those with limited space, soil or sunlight restrictions or just an appreciation for higher yields from less effort.
This DIY raised garden bed can be built in an afternoon and can be finished for less cost than many store-bought kits.

15 DIY Raised Bed Garden Ideas 15 Photos
All you need to build a stylish raised bed for your garden this year are some basic skills and tools. Check out these DIY raised garden bed projects with step-by-step instructions.
Editor's note: Though pressure-treated lumber in the past was treated with arsenic, today's pressure treated wood is instead preserved with MCA (micronized copper azole) or ACQ (alkaline copper quarternary), which contain copper compounds as wood preservatives. These pressure-treated woods are commonly considered safe to use around edibles. If you are still concerned about copper leaching into the soil, for your peace of mind, you can line your raised bed interior sides with heavy plastic sheeting or use redwood or cedar instead. Never use upcycled wood treated with creosote for any garden application. Creosote is a potential carcinogen commonly used in telephone poles and railroad ties, and can leach into soil.
Tools + Materials
- (3) 8-foot 2x12 planks
- 4-inch deck screws
- cardboard
- (9) 20-quart bags of garden soil
- measuring tape
- carpenter's square
- circular or hand saw
- drill with Phillips head bit
- shovel
- rake
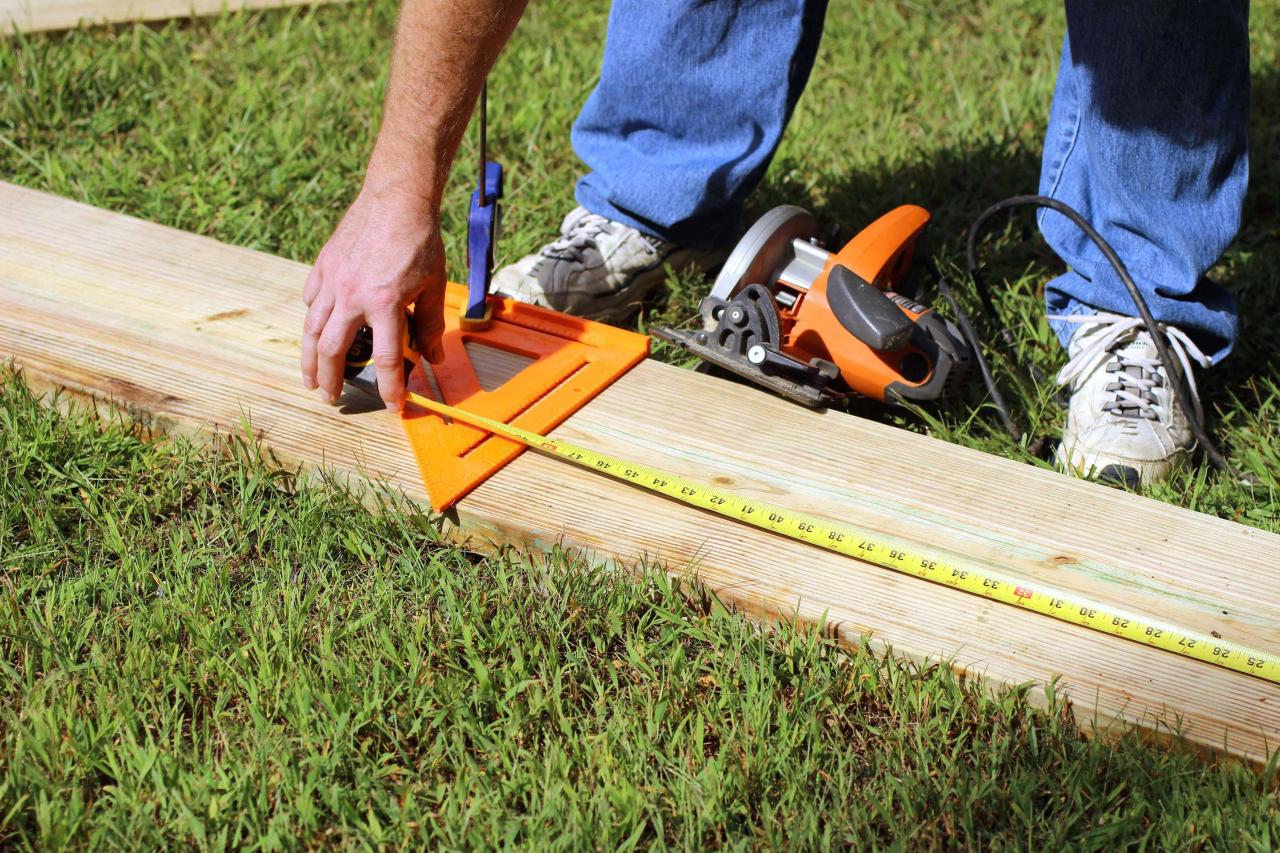
Measure, Mark & Cut
Locate the center point on one 8-foot plank and mark with a straight line (Image 1). This project can be adapted to make raised beds of varying sizes. If adapting to suit location or materials, raised bed should be at least 12 inches deep and — as a rule of thumb — width shouldn't exceed 4 feet so plants may be easily reached without disturbing the soil.
Use a circular or hand saw to cut along measured line to create two 4-foot planks (Image 2).
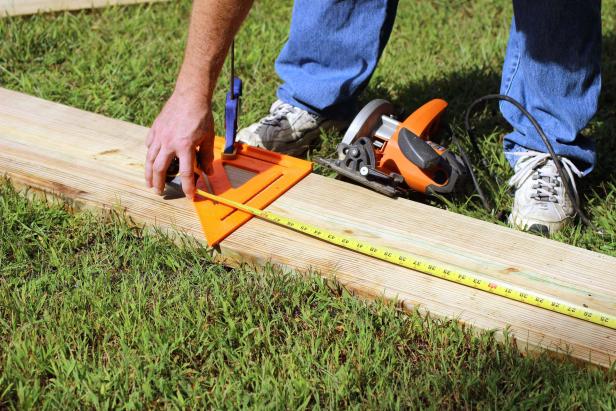
Photo by Mick Telkamp
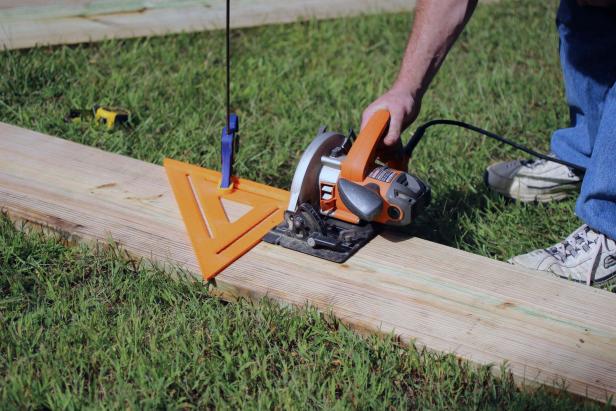
Photo by Mick Telkamp
Set Screws
Measure in 3/4 inches from each end of a 4-foot plank. Use a drill with a Phillips head bit to partially sink three screws into the broad side of each end of the plank, spaced evenly from the long edges (at approximately 3, 6 and 9 inches). Repeat the process with the other 4-foot plank. If using reclaimed lumber or wood that is especially dry, it may be necessary to drill pilot holes for the screws to avoid splitting.

Photo by Mick Telkamp
Attach Side
With a helper, hold an 8-foot plank on its side and line up the end of a four foot plank at a 90-degree angle with the screws facing the end of the long plank. Sink screws using drill with Phillips head bit to secure.

Photo by Mick Telkamp
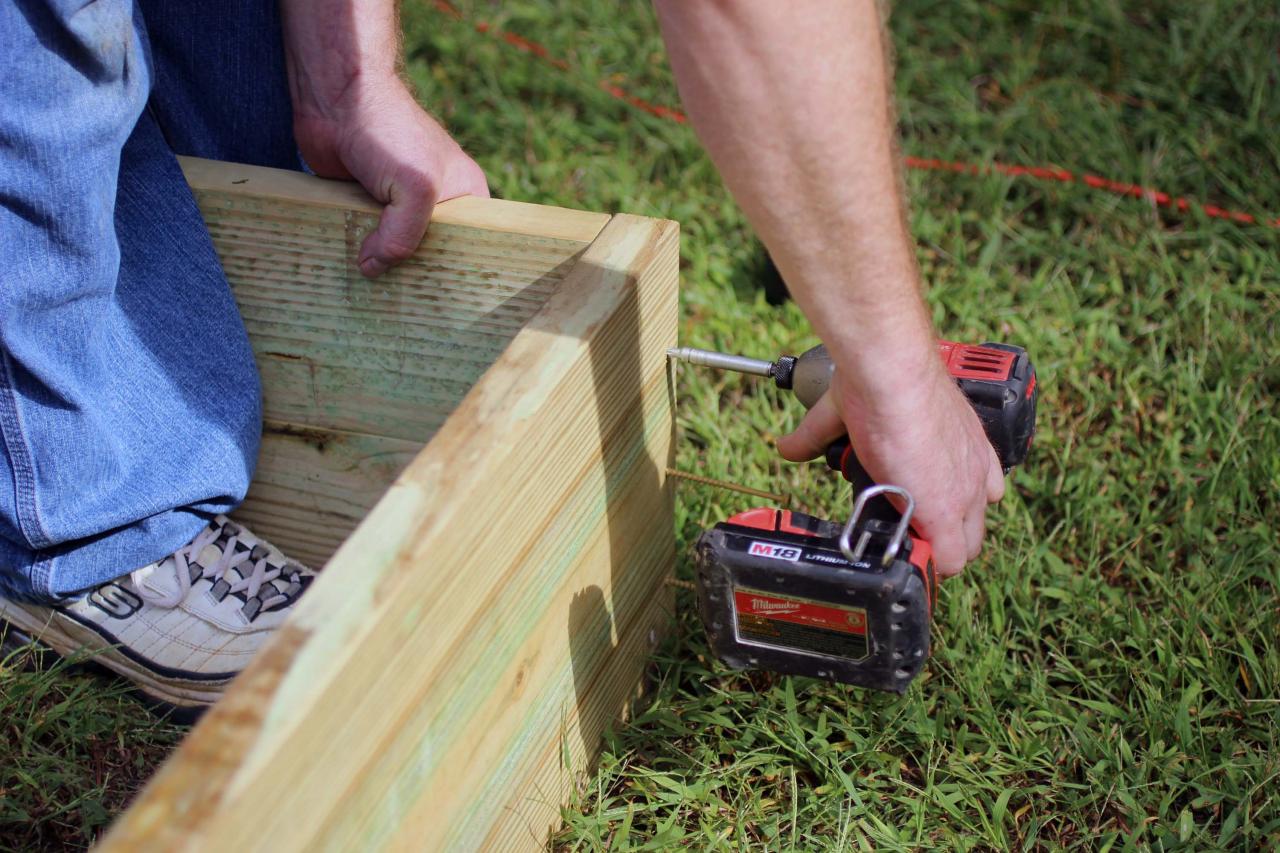
Square Corners & Complete Bed
Rest the other 8-foot plank perpendicular to the attached 4-foot plank at the free end. Use a carpenter's square to line up at 90 degrees and sink screws to attach (Image 1).
Repeat the assembly process at the other end, using a carpenter's square as you go to make sure angles are square. More elaborate raised beds may use braces at the corners to maintain shape, but the long screws used here will keep the bed intact until is it filled with soil to fortify the structure (Image 2).
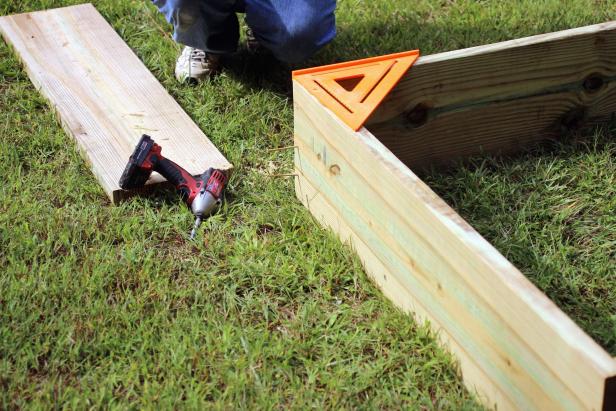
Photo by Mick Telkamp
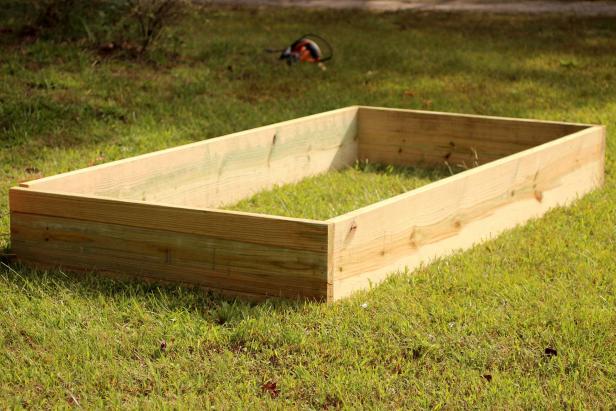
Photo by Mick Telkamp
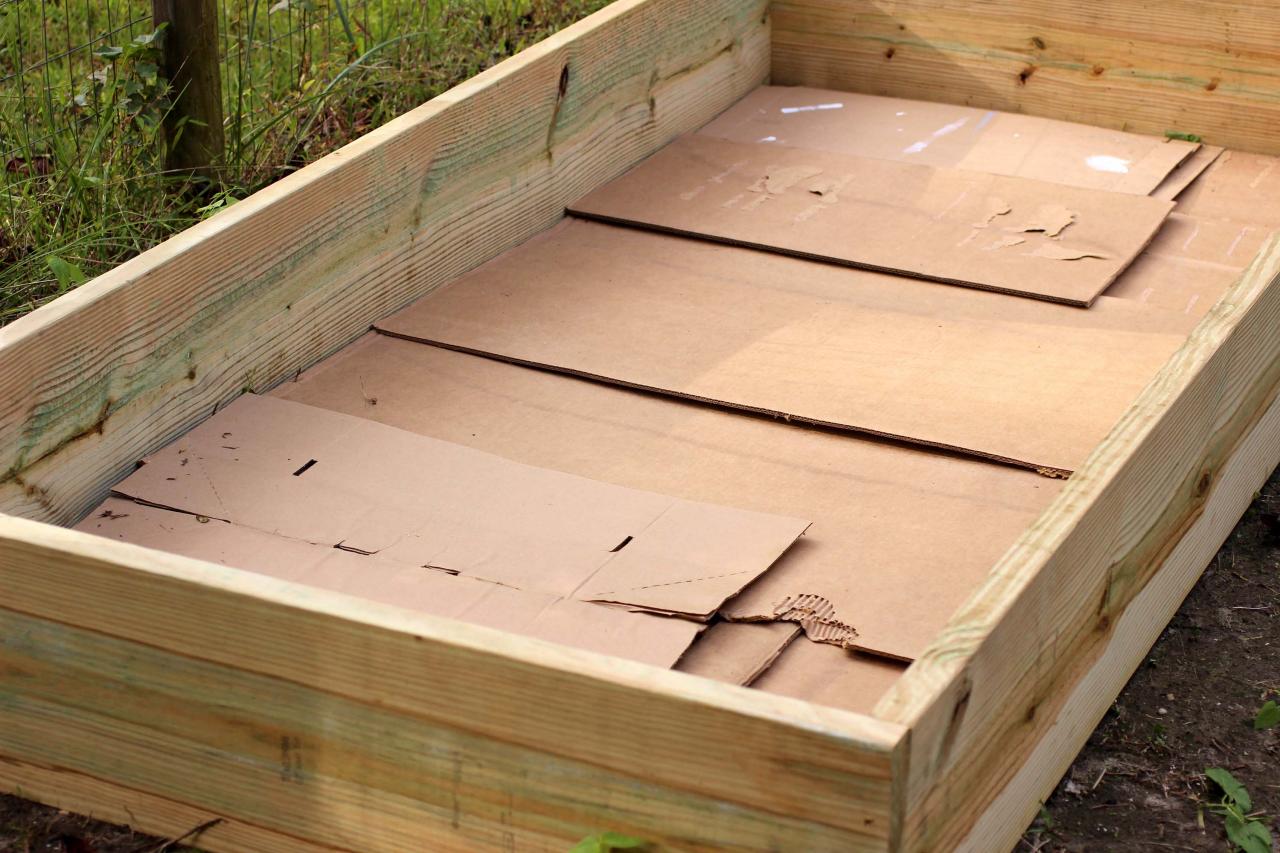
Position Bed and Add Cardboard
Find a flat location with good drainage and plenty of sun exposure. Rake out any rocks, sticks or yard debris and place bed. Press on sides to make sure bed rests evenly and there are no gaps between the ground and the bed (if gaps are detected, use a shovel to level the site). Place a layer of cardboard, newspaper or old carpeting to completely cover the ground inside the bed. This barrier reduces the possibility of weed growth in your raised bed.

Photo by Mick Telkamp
Fill Raised Bed
One of the biggest advantages of raised bed gardening is the certainty that your soil is ideal for growing. Buying an appropriate mix of soil, compost and organic amendments from a nursery can be expensive. Amending available soil on your property is a possibility, but loose, pre-mixed medium can be purchased from landscaping wholesalers for a fraction of the price of bagged garden soil. If you have access to a pickup truck or trailer, the savings can be astonishing.
Use shovels or a wheelbarrow to fill the raised bed with planting medium. Here, we used a short length of 2x4 to act as a ramp so we could dump soil directly from the wheelbarrow without damaging the wall of the bed.

Photo by Mick Telkamp
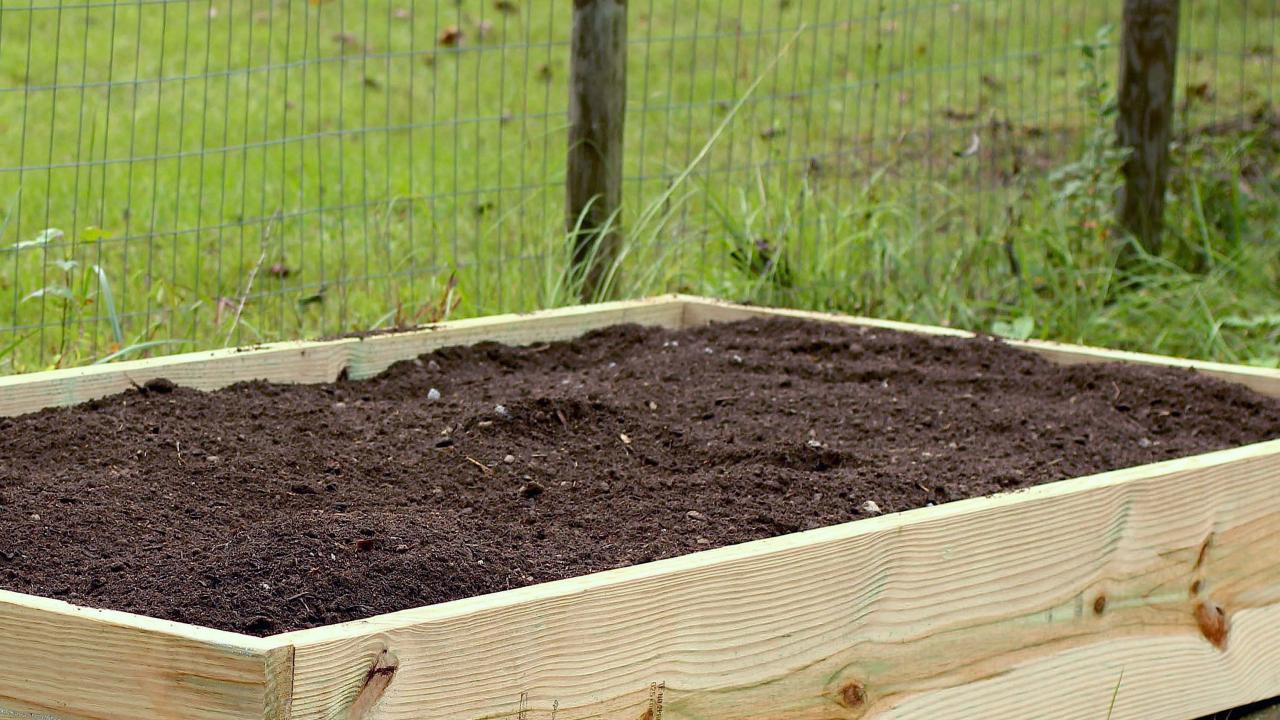
Level Soil
Use a rake to level the surface of the bed about a 1/2-inch from the top. If your plans include adding a drip hose or mulch, you may wish to leave a little extra space.

Photo by Mick Telkamp
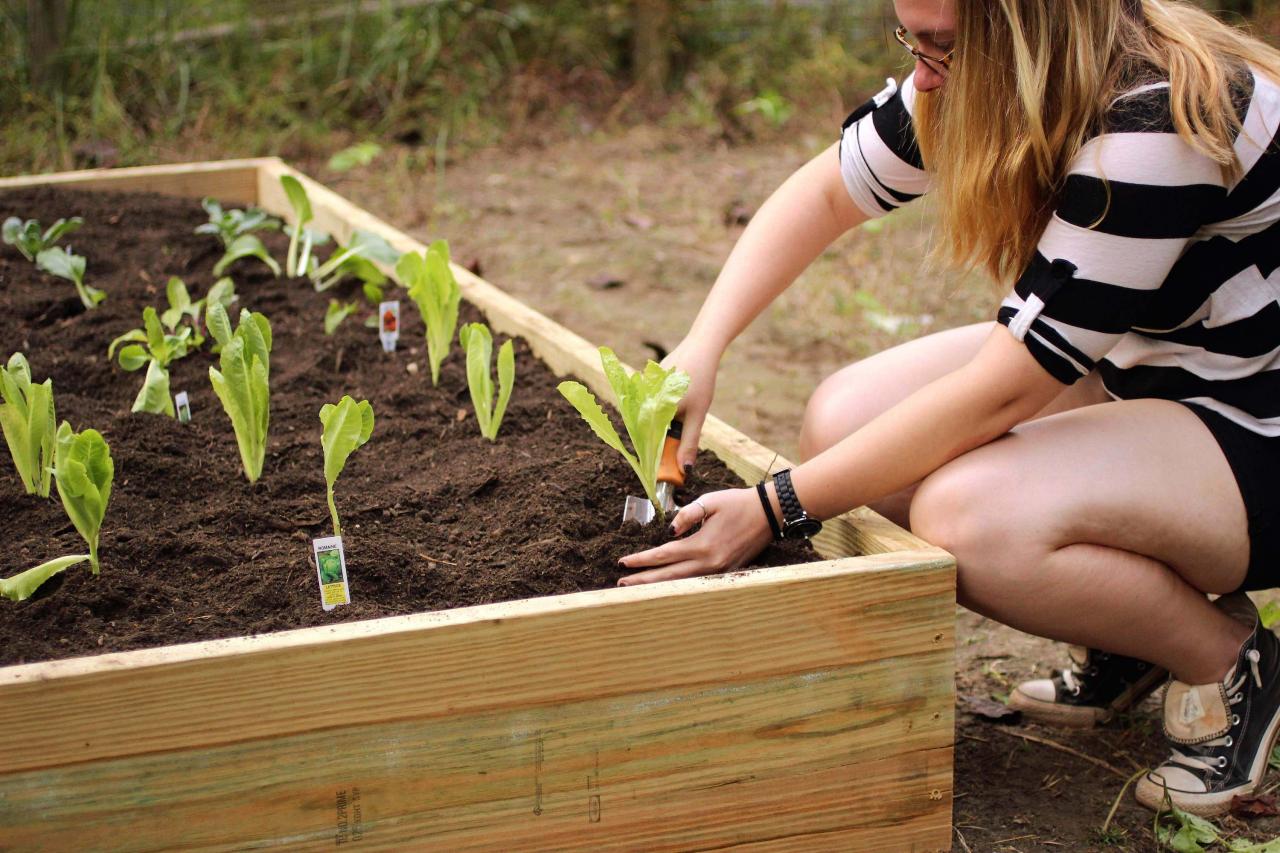
Add Plants
Drainage issues, poor soil conditions and crop-choking weeds are a thing of the past with this inexpensive and easy-to-build raised bed.

Photo by Mick Telkamp


")


