


How to Paint a Diamond Pattern on a Wood Floor

Tools and Materials:
primer and latex paint
painter’s tape
fine-grit sandpaper
chalk line
tape measure
paintbrush
roller cage
water-resistant paint roller
knee pads
water-based matte-finish polyurethane
Steps:
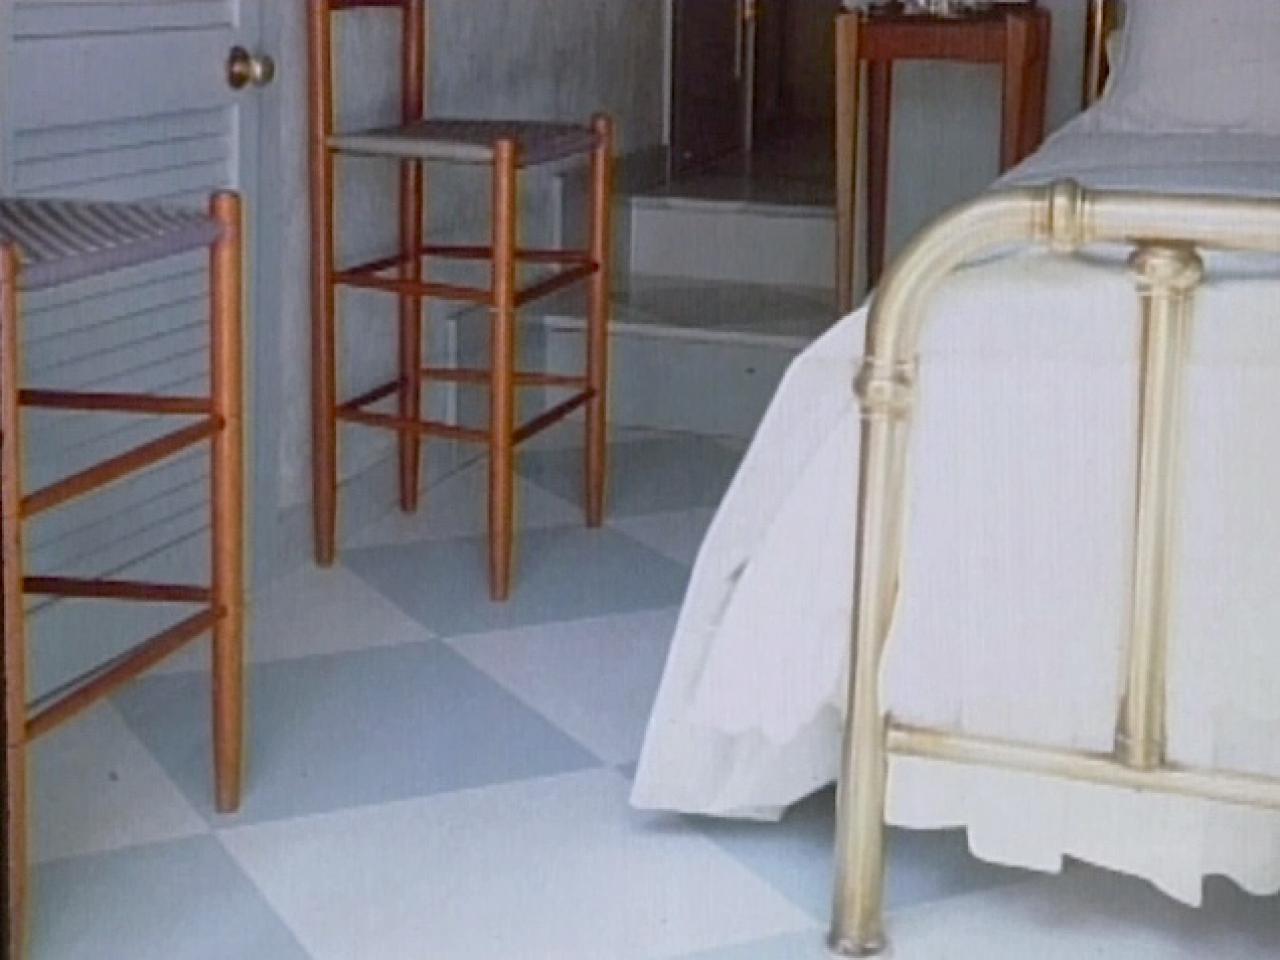
1. Prepare the floor for painting. Clean thoroughly, and prime the floor with primer suited to covering a finished floor.
2. You’ll need two paint colors for this project: a lighter base color and a darker color for the diamond pattern. Paint the entire floor with the base color using a paint roller. If one coat does not completely cover the floor, follow the manufacturer's instructions for multiple coats to the letter: including the length of time to allow for drying and sanding between coats if required. Use a roller with a short nap to give a smoother finish. Allow the paint to dry completely before marking the pattern on the floor.
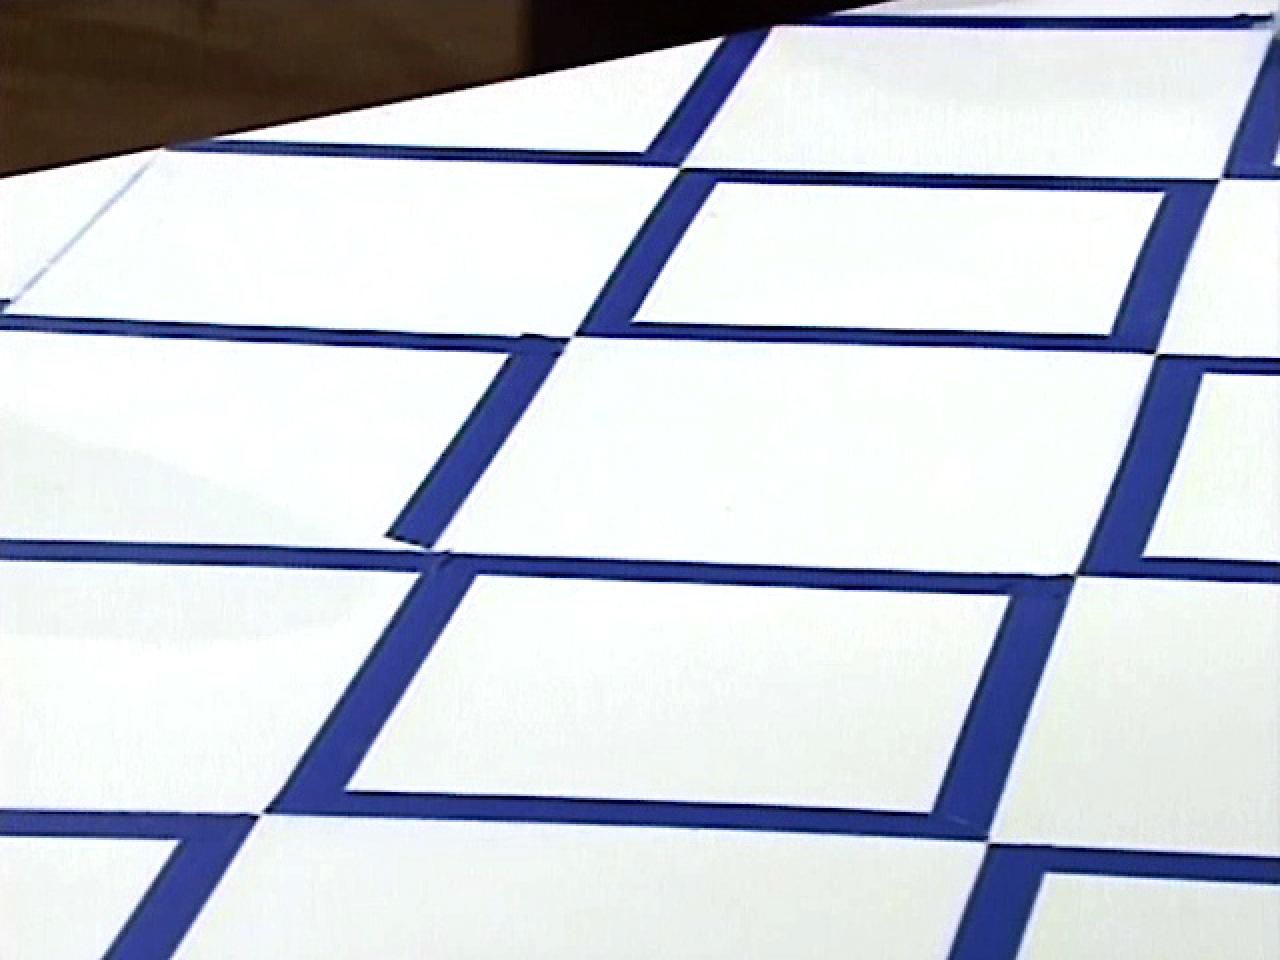
3. Lay out the diamond pattern. To design the diamond grid, first measure the length and width of the room and determine the number of diamonds to include in the pattern. For the purpose of illustration, a well-proportioned pattern for a floor 12' long by 10' wide would be four diamonds across and four diamonds lengthwise. Double the number of diamonds you would like on each side and divide the length and width of the floor by that number. In this example, 12' divided by 8 is 18", and 10' divided by 8 is 15". Make a pencil mark every 18" at the edge of the floor along the 12' side of the room and every 15" along the 10' side.
4. Mark the diamond design on the floor. Working with a partner will make this job go faster. Using a chalk line, start in one corner of the room, and locate the first mark out from the corner in each direction of the adjoining walls. Connect the first two marks with the chalk line, and snap a line on the floor. Skip the second mark, move out to the third mark in each direction, connect them with the chalk line, and snap a line on the floor. Continue to connect every other mark until the entire floor is marked out in parallel lines. Repeat the process starting in a corner adjacent to the one you started in thereby creating intersecting lines forming a diamond pattern.

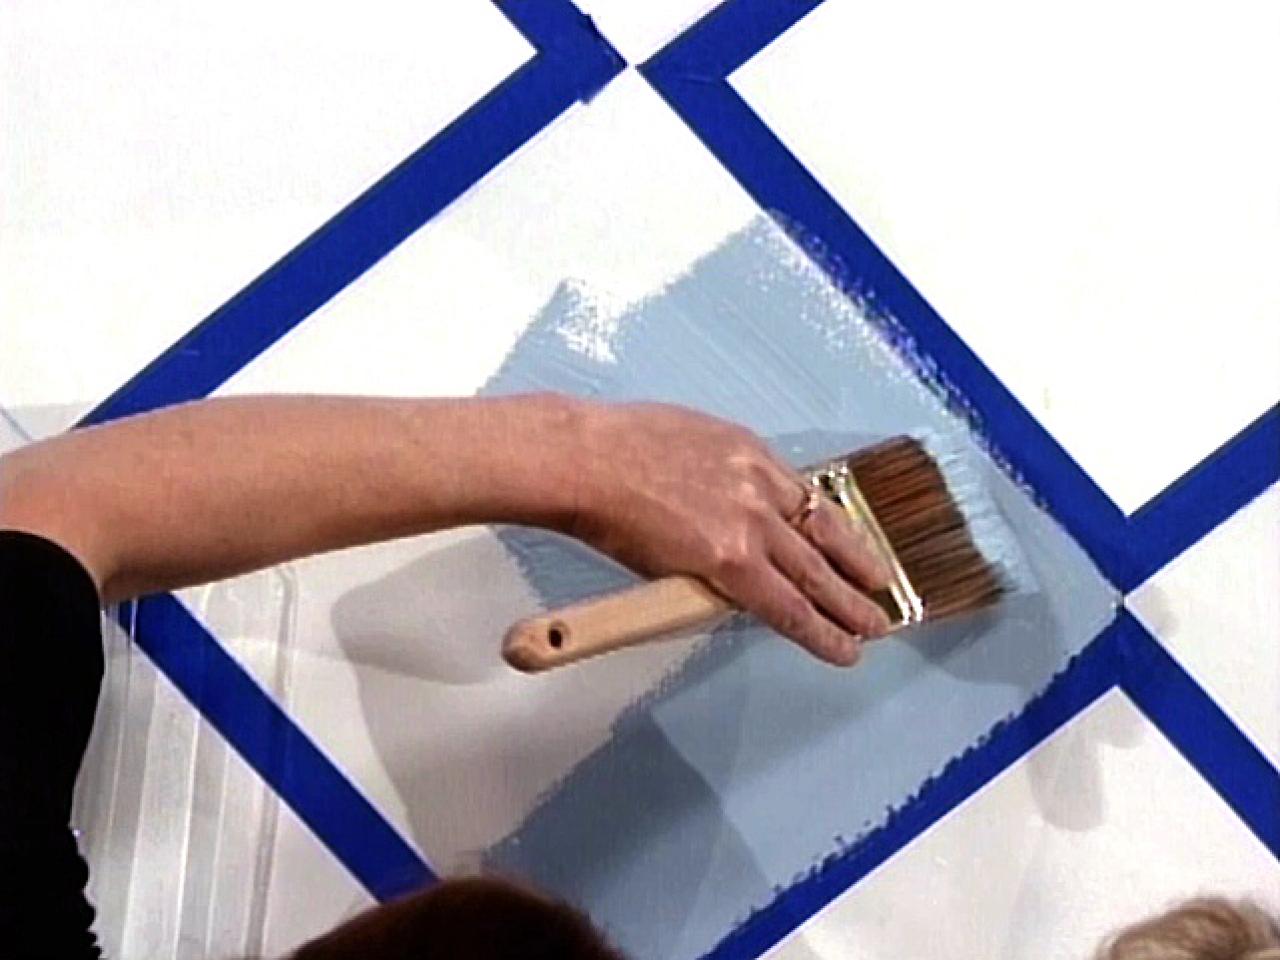
5. With painter's tape, tape off the outlines of the diamonds to be painted. Press the tape firmly to minimize the paint from bleeding under the edges. Tip: for razor sharp edges lightly paint the edge of the tape on the inside of each diamond you'll be painting with the cream colored paint so that if any bleeding does occur, it will be unnoticeable because it is the same color as the paint under the tape.

6. Paint the diamonds. Using a 4"-wide paint brush, work in the direction of the grain, and apply two coats of the darker paint to the inside of the diamond patterns. Don't skimp on the quality of brush you buy. Inexpensive brushes may shed bristles into the wet paint, making a high-quality brush well worth the expense. Allow the paint to dry according to the manufacturer's instructions between coats. Remove the tape carefully.
7. Finish the floor. If you want the floor to attain a weathered look, leave the painted finish unprotected so scuff marks will build up over time. For a protected finish, seal the painted floor with two coats of water-based matte-finish polyurethane.


