


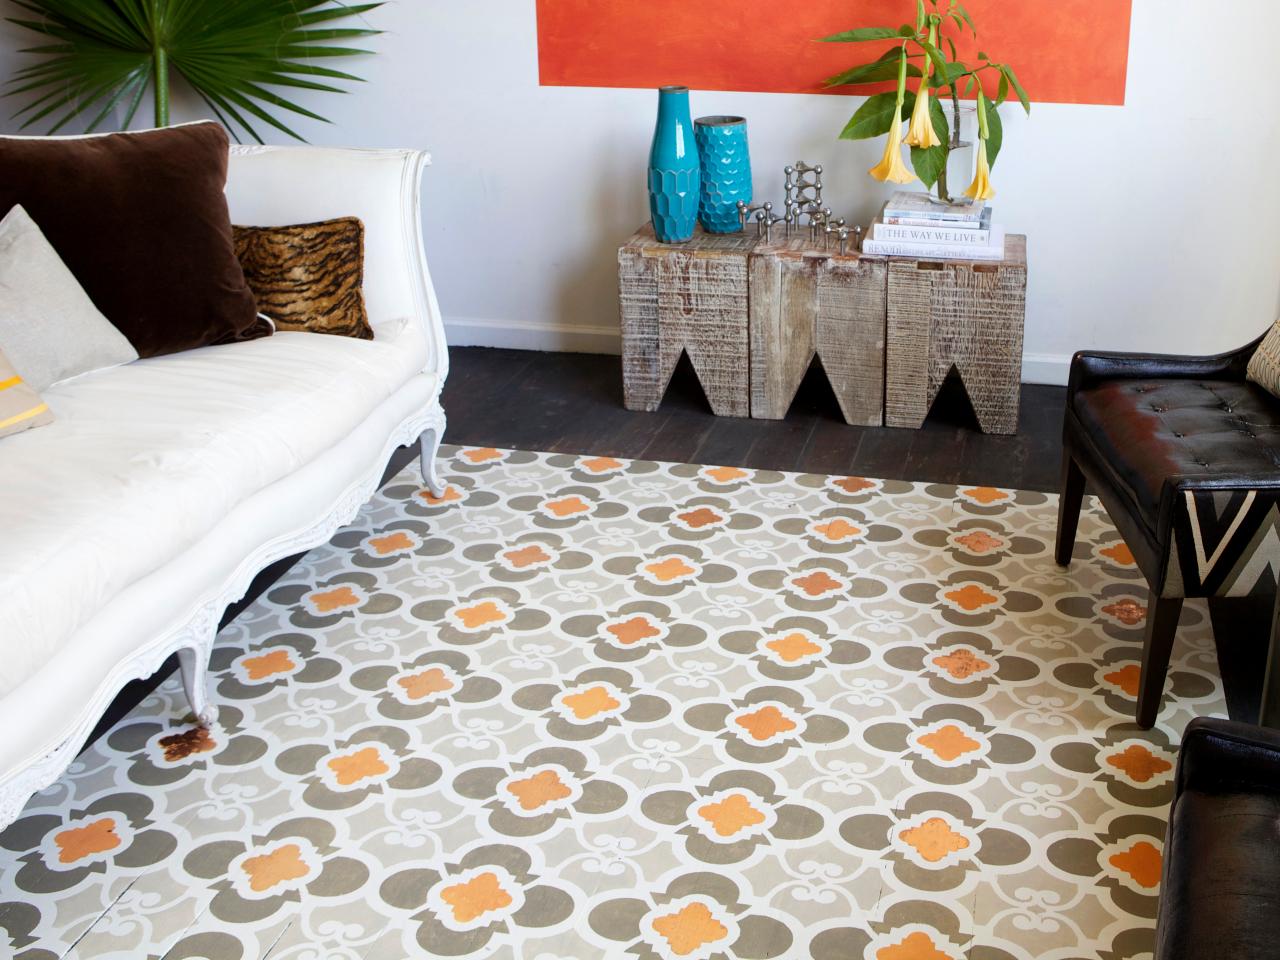
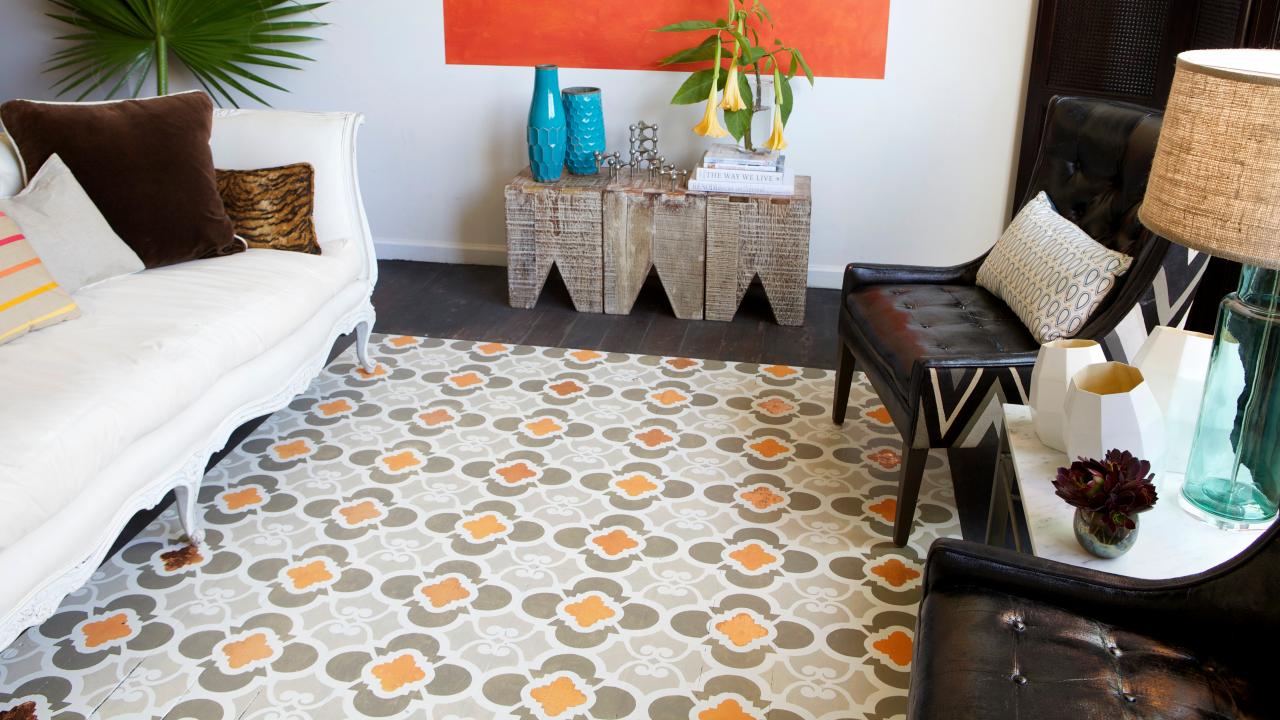
How to Paint a Faux Rug on a Hardwood Floor
Learn how to stencil a patterned faux rug to add personality to a room or disguise a worn-out floor.

Tools and Materials
- Sherwin-Williams Floor & Patio Paint - flat 7012 Creamy
- Sherwin-Williams Floor & Patio Paint - flat 7053 Adaptive Shade
- Sherwin-Williams Floor & Patio Paint - flat 7051 Analytical Gray
- Sherwin-Williams Floor & Patio Paint - flat 6356 Copper Mountain
- primer
- stencils
- sheets of gold and copper leaf
- gold leaf adhesive
- stippling paintbrushes
- tape measure
- chalk line
- painter's tape
- paper towels
- paint roller and tray
- dry brush
When painting high-use areas like this, it’s important to use the right paint. Look for a paint that is specifically made for floors or patios because it’s durable. Apply a coat of primer to the surface first for the best durability and coverage.
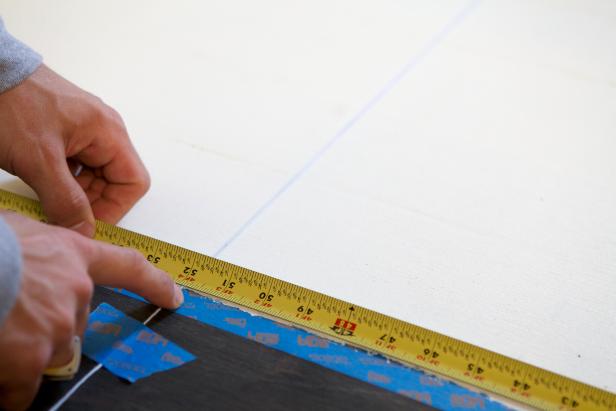
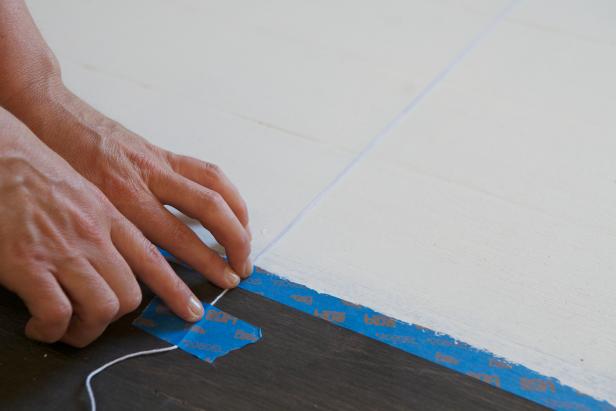
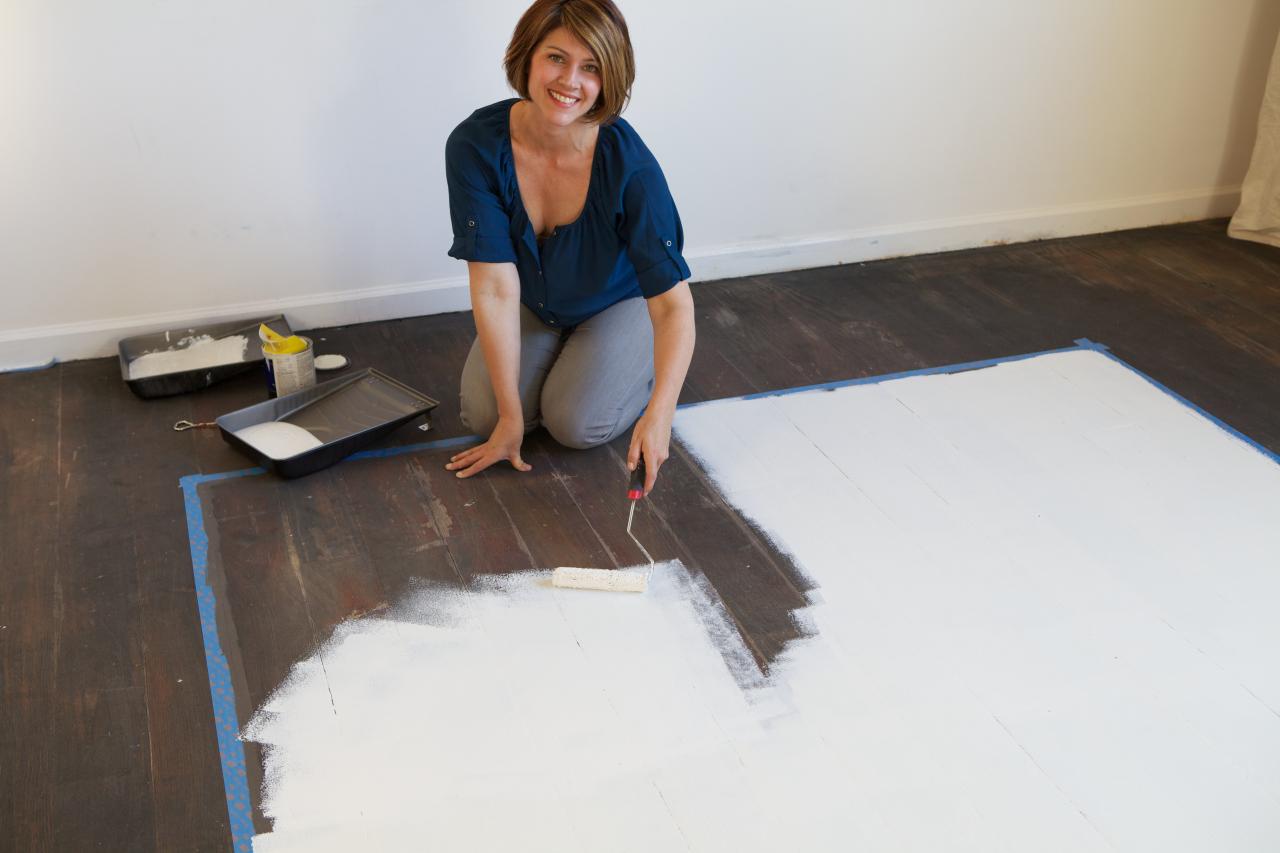
Step 1: Prep Your Workspace
Mark out and tape a rectangle shape on the floor. Use a roller to apply a coat of primer and let it dry. Then paint over the primer with your base color and let that fully dry.

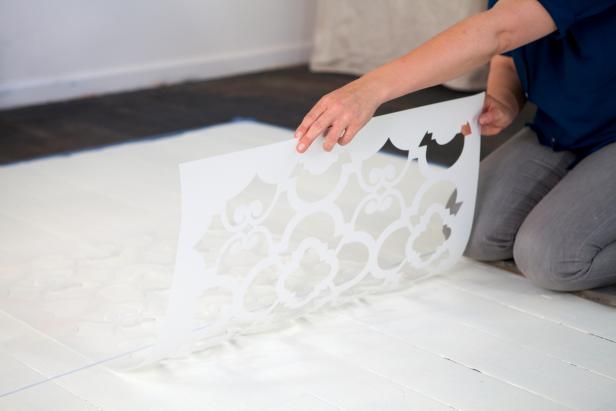
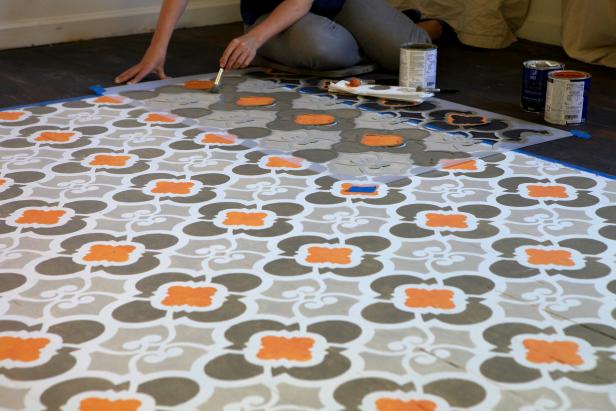
Step 2: Place Stencil
Stretch a string across the center of the rectangle to help line up the stencil. Place the stencil in the center, square to your rectangle. Secure the corners of the stencil with tape. If you can, use the floorboards as a guide to line up the stencils.
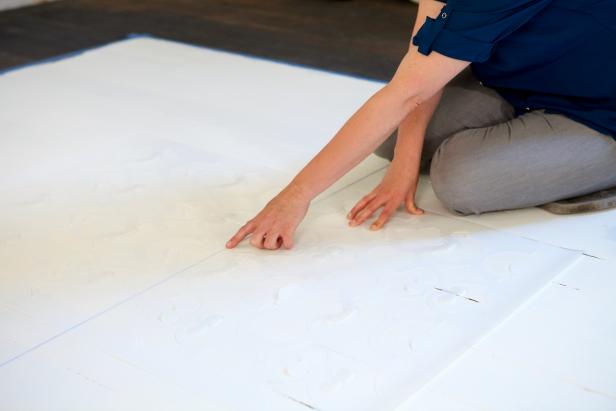
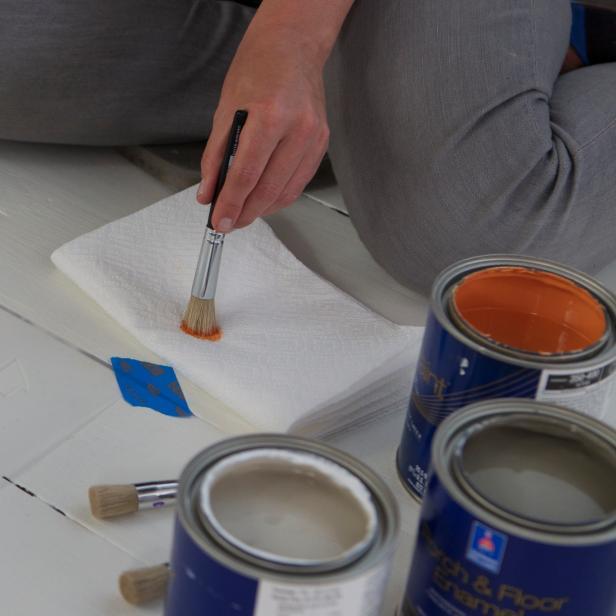
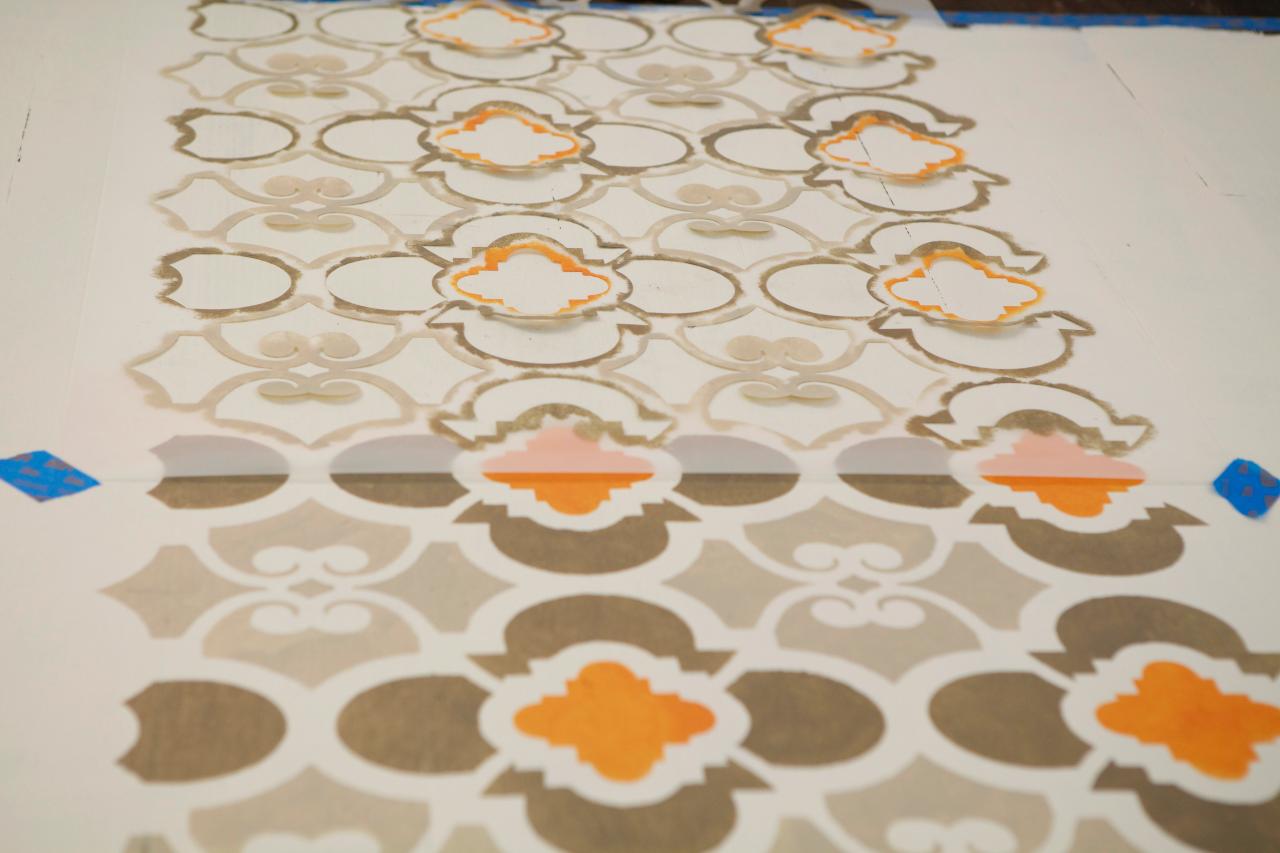
Step 3: Add Color
Decide which colors will be used for each shape of the stencil. With the first color, dip just the tips of the stippling brush in the paint, dab the excess off on a paper towel, then begin stippling (which means pounce the brush, not stroke). Start in the center to unload more paint as you work your way toward the edges to keep the stencil line as clean as possible.

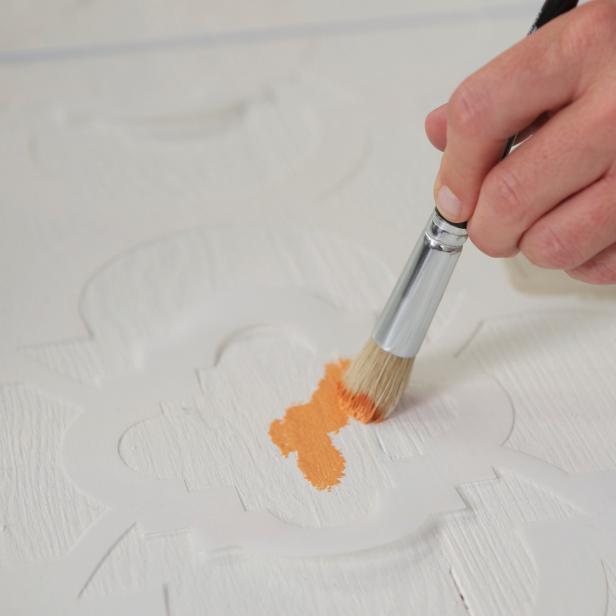
Step 4: Fill in Stencil
Repeat the steps filling in all colors and shapes before moving the stencil to the next section.

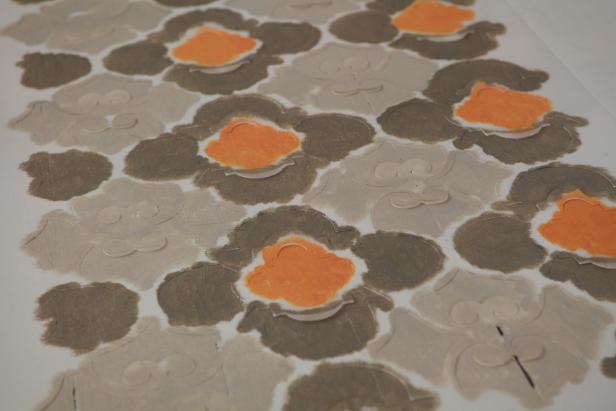

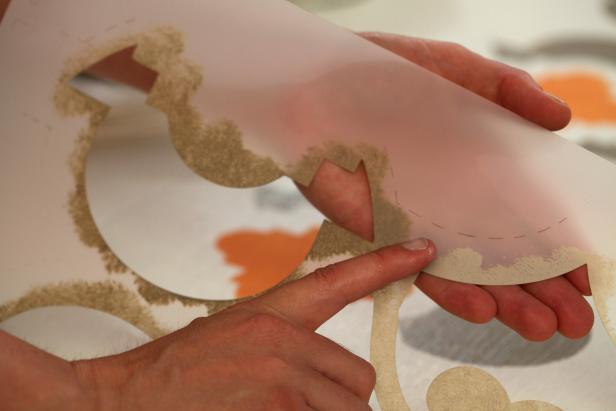
Step 5: Stencil Remaining Area
Use the registration marks to line up the stencil for the next section. When you’re finished, rather than sliding the stencil to the next adjacent section, move the stencil to the opposite area. This gives the paint time to dry while you continue stippling another section. Moving back and forth helps you keep the stencil square and make fast progress while allowing some drying time for each section for a tidy efficient project.


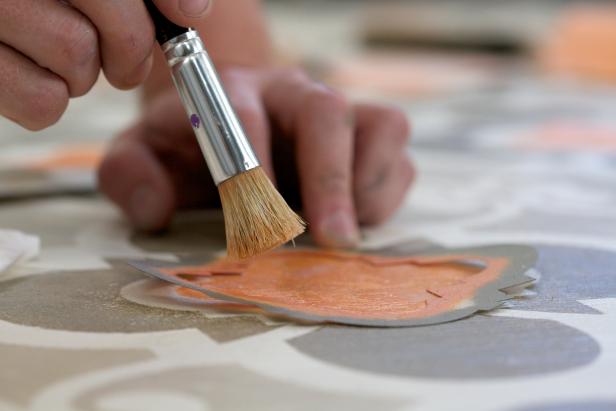
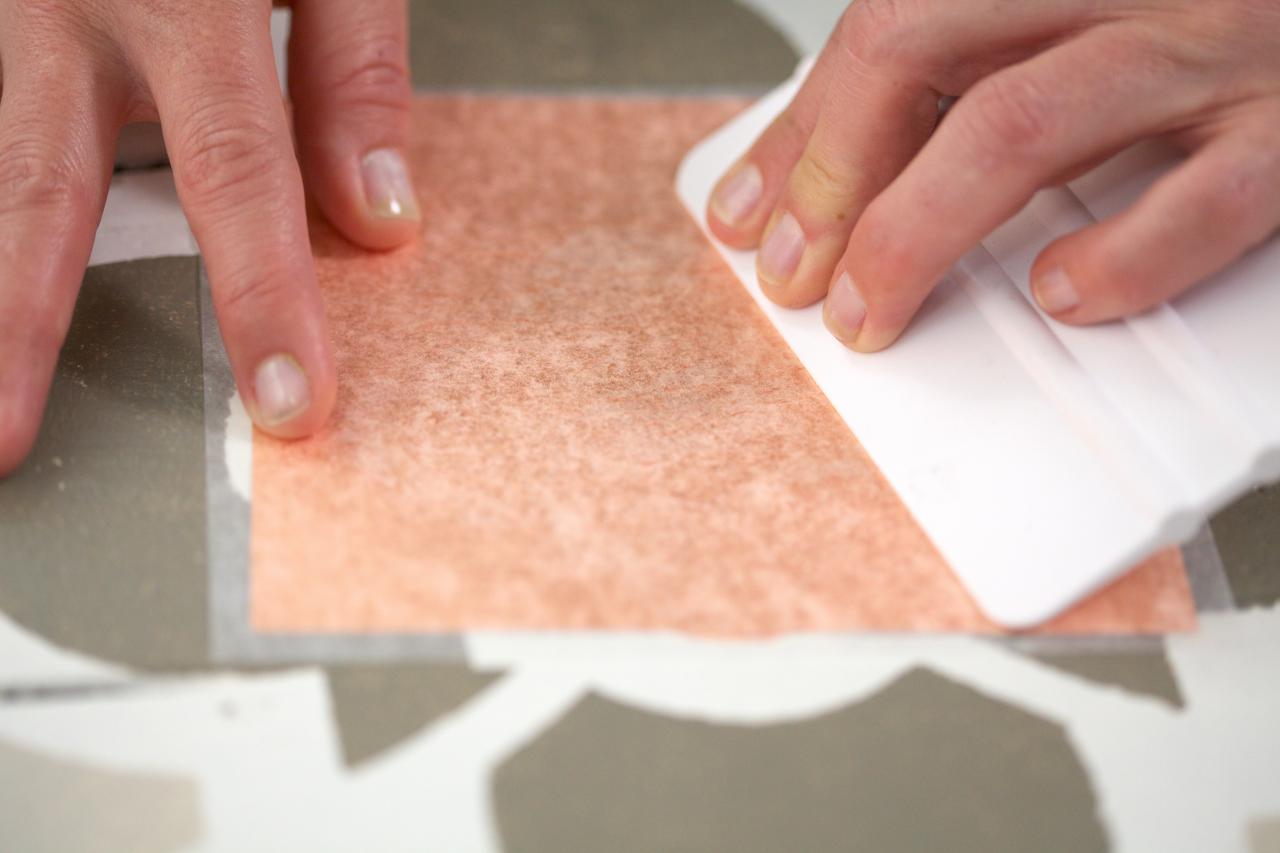
Step 6: Apply Gold Leaf Adhesive
We add gold leaf accents to our rug on every other medallion shape. To do this, wait until the paint is completely dry. Cut the shape you want to gold leaf out of the stencil. Place it on top of the area you want to gold leaf. Stipple the shape with gold leaf adhesive, lift the stencil, and let the adhesive dry for several minutes until the surface is almost dry and very tacky (this requires very little adhesive). To save time, stipple adhesive on all of the shapes you want to apply gold leaf. This gives all adhesive time to become tacky.


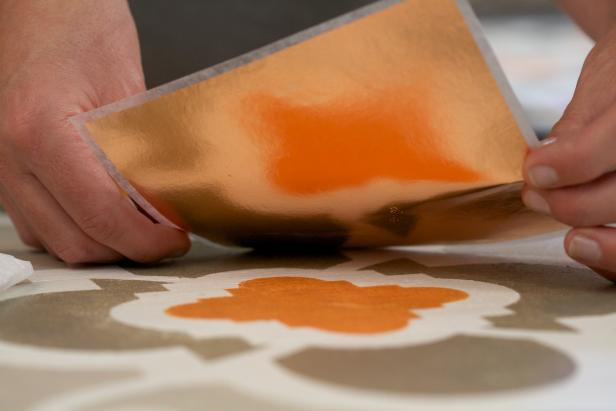
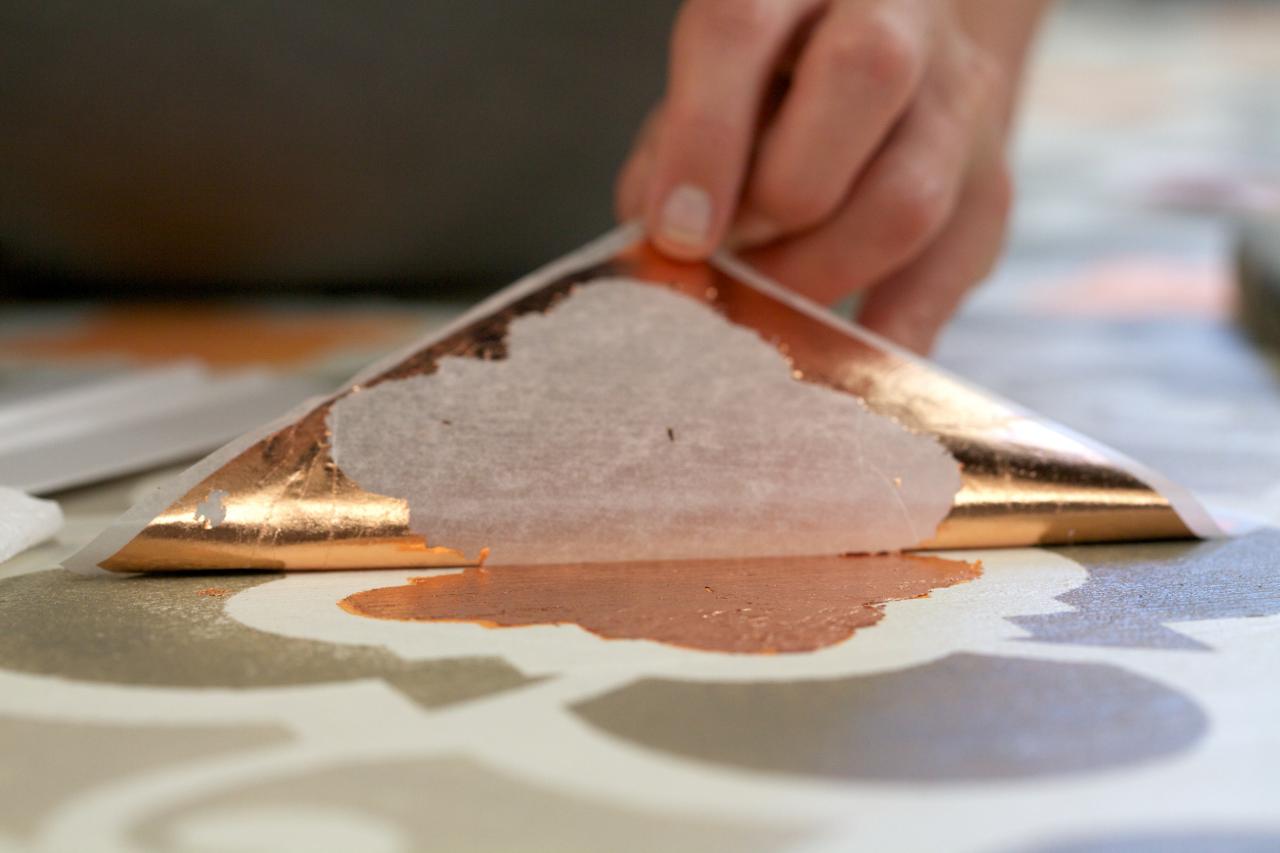
Step 7: Apply Gold Leaf
Place the gold leaf sheet on the shape where you want it and gently burnish the gold leaf sheet with a plastic putty knife or spreader. Use a soft bristle brush to gently remove the edges of the gold leaf and reveal the new color.


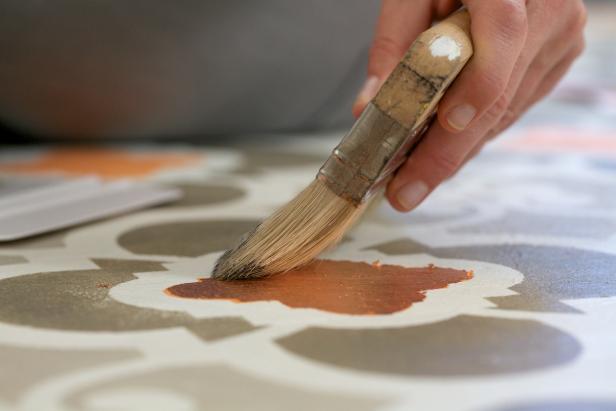
Step 8: Touch Up Gold Leaf and Add Copper
Let the gold leaf dry. Then with an artist brush, paint the gold-leaf adhesive in the areas that aren’t filled. Let the adhesive become tacky, then fill the sections with scraps of copper leaf.


