


What is German Smear? How to German Smear a Brick Fireplace
Give your fireplace a faux finish that mimics what you'd find in old European cottages with a German smear mortar wash.

The fireplace can be the star of your home — the center of attention that sets the tone for the style of a room, or even the whole house. Updating an old fireplace can have a huge impact on the look and feel of your space. For most people, however, completely replacing an outdated brick fireplace is just too difficult and too expensive. But there is another option: give your fireplace a faux finish that mimics the look of old European cottages.

Jennie Andrews
The technique goes by a few names — mortar wash, German smear, or German schmear (isn’t that what you do to a bagel?). But no matter what you call it, this simple project will transform a basic brick fireplace into a cozy and bright centerpiece.
To mimic the look of old European cottages, white mortar is applied to create heavy grout lines, with the excess mortar smeared across the surface to create the illusion of imperfectly shaped bricks. You won’t believe how quickly, easily and affordably you can make over that unsightly brick fireplace.

Jennie Andrews
German smear has a similar look to whitewashed brick, but is more forgiving to execute. The technique adds texture and "visual weight" for a more distressed finish that draws the eye to a feature.
Materials + Tools
- pre-mixed mortar
- shop vacuum
- plastic sheeting or brown construction (builder's) paper
- painter's tape
- dish soap and water
- cloth rag
- sponge roller
- brick sealant
- piping bag (or heavy-duty zip-top freezer bag)
- putty knife
- sponge
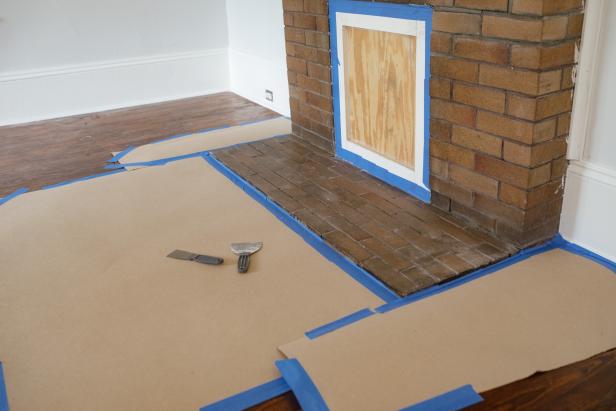
Step 1: Prep the Space
As with nearly any DIY project, prep work is vital. Working with mortar can be a bit messy, so you will want to assure that your floors and walls are well protected before you start refinishing the fireplace (Image 1). Remove any trim around the brick (Image 2). Position your plastic sheeting or brown paper along the brick (Image 3) and tape edges (Image 4).

Jennie Andrews

Jennie Andrews
Jennie Andrews

Jennie Andrews
Step 2: Prep the Brick
Starting with clean brick is absolutely imperative to a perfect, white finish. Any oily residue (like soot or dust) on the surface of the brick can soak through and stain the mortar, making the finish gray or brown. First, vacuum the entire brick face with a shop vacuum. Then, using a solution of dish soap and water, clean the bricks thoroughly with a cloth rag. Be certain to get into all cracks and crevices. Repeat this process until a clean, damp rag is no longer picking up residue. To further ensure a bright, white finish, seal the brick using a sponge roller and brick sealant. Let dry overnight.
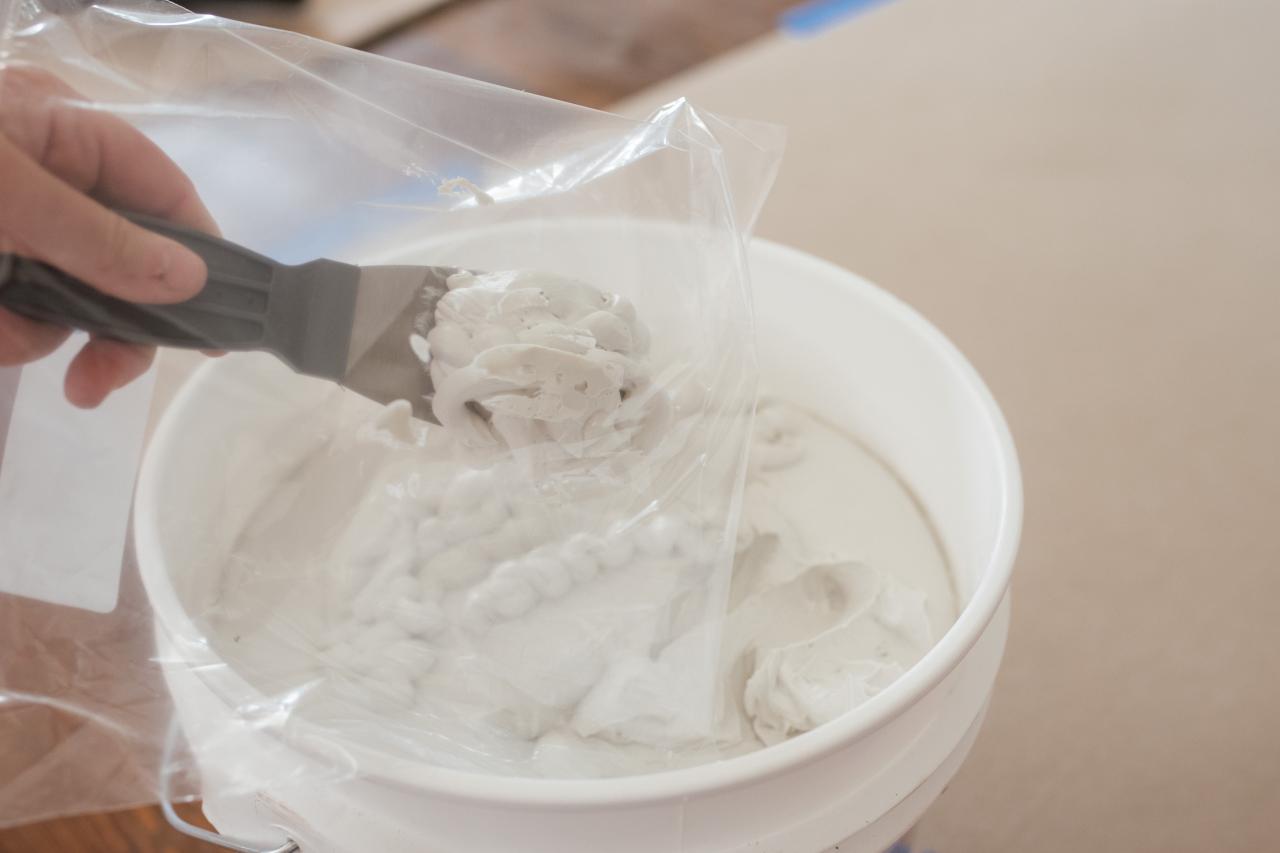
Step 3: Prep the Mortar
If dry mortar isn’t mixed in a precise ratio, it will crumble when dry, so instead of trying to mix it yourself, simply start with a bucket of pre-mixed mortar. Prepare a piping bag for your mortar. You can buy mortar bags or cupcake piping bags. But the easiest and least expensive option is likely already in your kitchen. Cut one small corner from a heavy-duty zip-top freezer bag (Image 1) and fill with pre-mixed mortar (Images 2 and 3). Zip the top of the bag to prevent a big mess.

Jennie Andrews

Jennie Andrews

Jennie Andrews
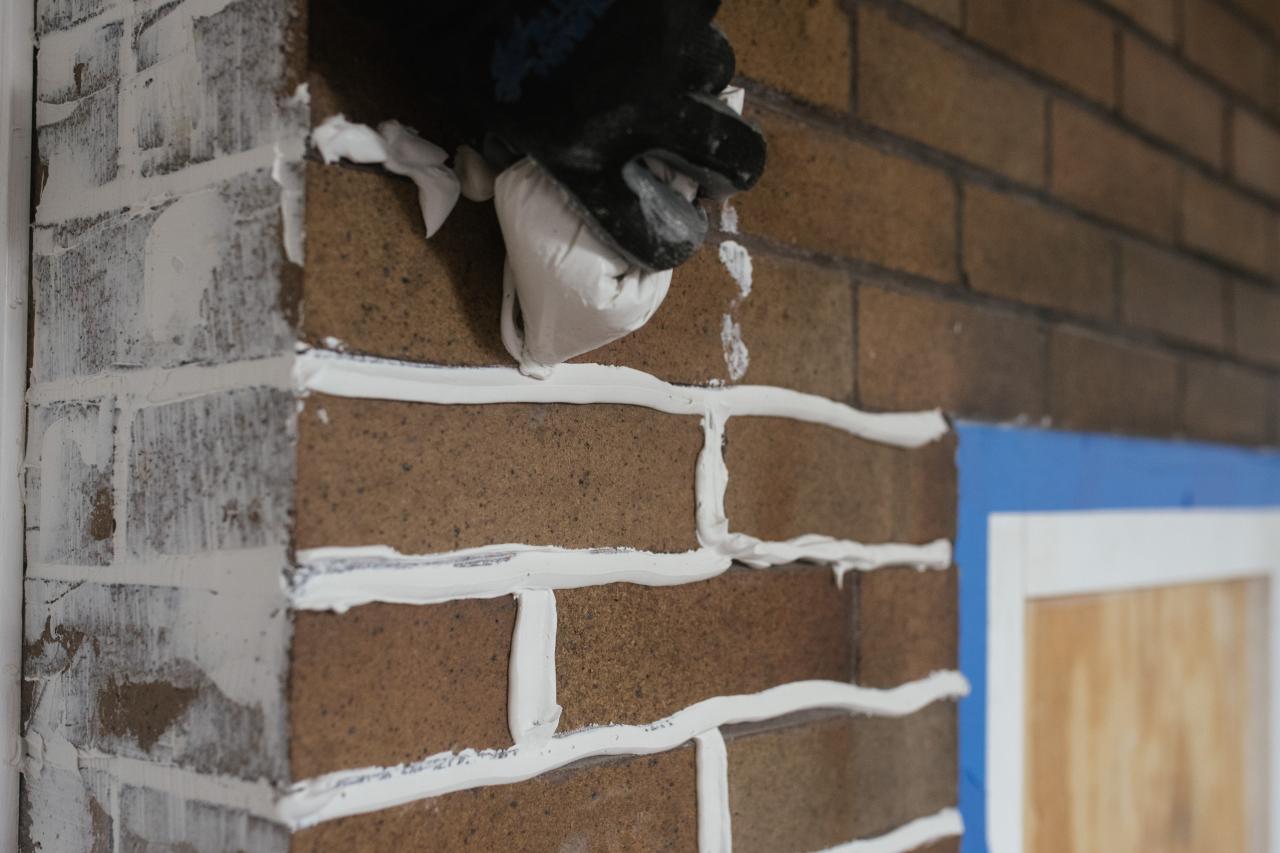
Step 4: Fill Grout Lines
Start working in an inconspicuous area first to give yourself time to practice the technique. Gently squeeze the bag to run a bead of mortar inside a grout line (Image 1). The deeper your grout lines, the more mortar you will require. It's easier to fill all the cracks with the piping bag instead of the putty knife alone (Image 2).

Jennie Andrews

Jennie Andrews
Step 5: Smear the Schmear
Take your putty knife and, with the blade at a 45-degree angle, wipe the excess mortar from the joint across the neighboring bricks (Image 1). Continue the process over the surface of the brick, working in 1-foot sections. There is no need to be precise. Actually, the technique looks better if you smear in multiple directions. Cover some bricks completely with a thin amount of mortar; cover some thickly and leave some spots with no mortar at all (Image 2). This job doesn't demand perfection. An irregular finish with some heavy and some lighter sections of mortar will look even more authentic. Some sections may require additional mortar. You can either pipe more onto the wall or use your putty knife to scoop and smear. On some sections, you might prefer less mortar. Scrape away any excess with the blade of your knife and then scrape it back into the bucket. As you work across the entire surface, step back occasionally to check your progress (Image 3). Be sure you are happy with the amount of brick peeking through and the thickness of your mortar. Err on the lighter side. Even after the mortar dries, you can easily go back and add more mortar.

Jennie Andrews

Jennie Andrews

Jennie Andrews
Step 6: Clean Up Mistakes
Don’t worry if you think you've made a mistake or used too much mortar. At any time, you can wipe away almost every bit of mortar with a damp sponge. Then, simply start over. You can also use the sponge to wipe away small portions of mortar, revealing hints of brick.

Jennie Andrews
Step 7: Care for Your Transformed Fireplace
Let the fireplace dry overnight. Mortar adheres to brick very well and will not crumble over time. Once dry, you will be able to enjoy your newly transformed fireplace for a lifetime. There is no need to seal the mortar. Clean any soot or dust with a mix of vinegar and water, a typical household cleaner or a cleaner specially designed to clean soot from surfaces. For heavy-duty cleanings, scrub with a nylon, stiff-bristled brush.
Final Step: Enjoy!
No instruction necessary. Happy fire-gazing.

Jennie Andrews

How to Paint a Brick Fireplace White
If your brick fireplace is looking dated or has stains and discoloration, it’s time to freshen it up with a quick coat of paint.


