


How to Build a Privacy Wall With Fence Panels
Instead of putting up an entire fence, build a unique barrier with freestanding wood panels that will add curb appeal and style.
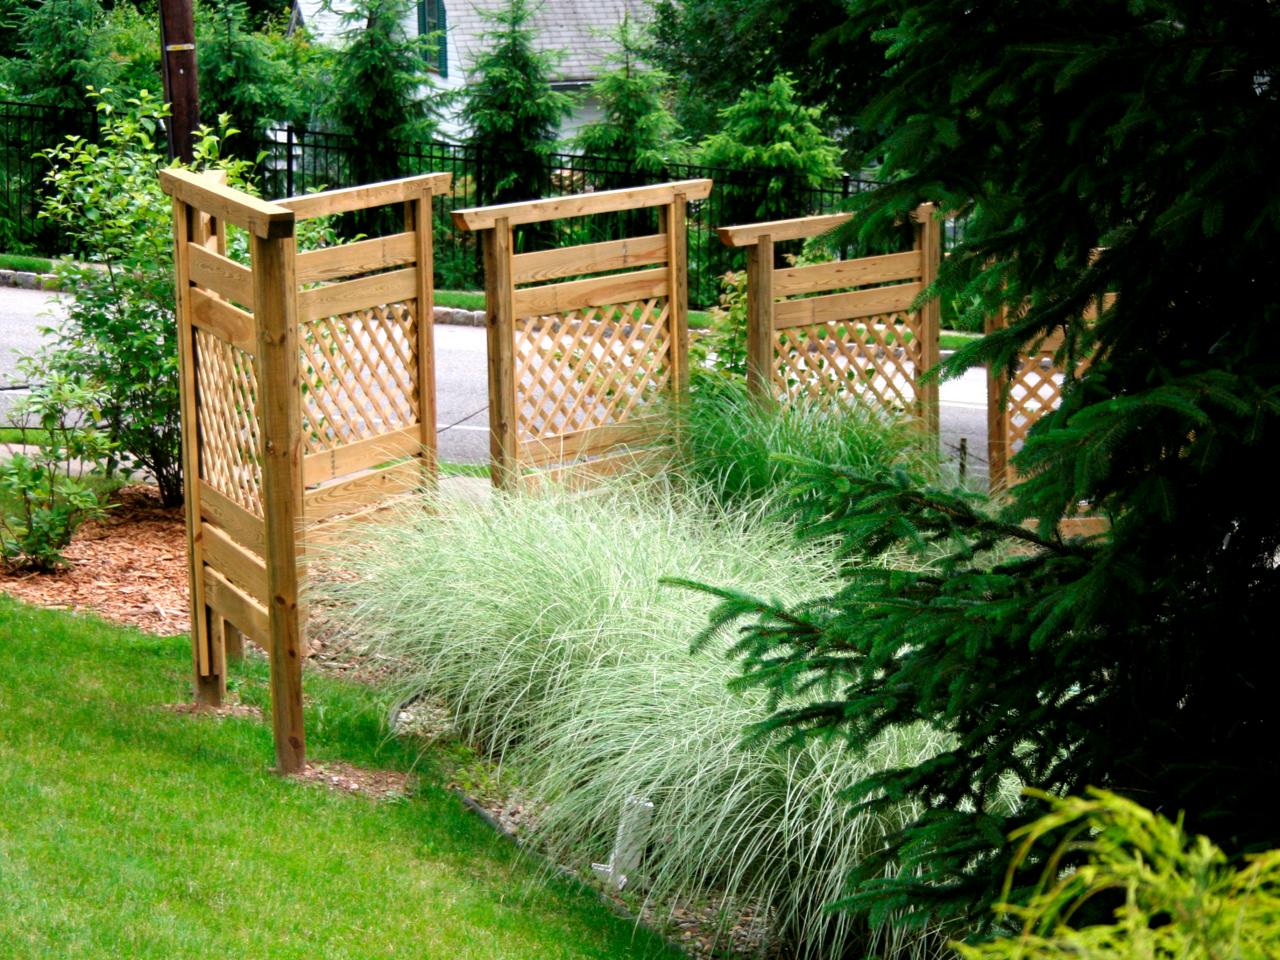
Instead of a standard stockade fence, we built a privacy screen using standard dimensional lumber and sheets of lattice. The freestanding panels add architectural interest and help conceal the yard from the adjacent street.

Tools and Materials:
The lumber listed below is for making one 4'7” wide by 6' tall panel.
- power auger or a post-hole digger
- framing nail gun with galvanized nails
- decking screws
- circular saw
- drill
- router
- miter saw
- jigsaw
- level and a tape measure
- fast-setting concrete mix
- (3) 4x4 pressure-treated posts
- (5) 1/2" pressure-treated decking planks
- (1) 24” x 48” pressure-treated lattice panel
- (4) 1x2 x 6' pressure-treated boards
Build the Frames:
1. For the top (horizontal) beam, measure and mark a line 12 inches from both ends of one 4x4 post. Mark a second line 8-1/2 inches in from both ends of the same post to create a 3-1/2-inch area in between each line. This area is where the vertical posts will notch into the top beam.
2. Lay the top of another post next to the 3-1/2-inch area. The thickness of the post should match exactly. Use a jigsaw to notch out the marked area two inches deep, thus giving you a 2” x 3-1/2” notch. Test fit one of the vertical posts into the notch; make any necessary adjustments. Repeat the process for the notch on the other side of the top post.
3. Using a circular saw, cut a chamfer (angle cut) on the top beam on the same side as the notches (the underside).
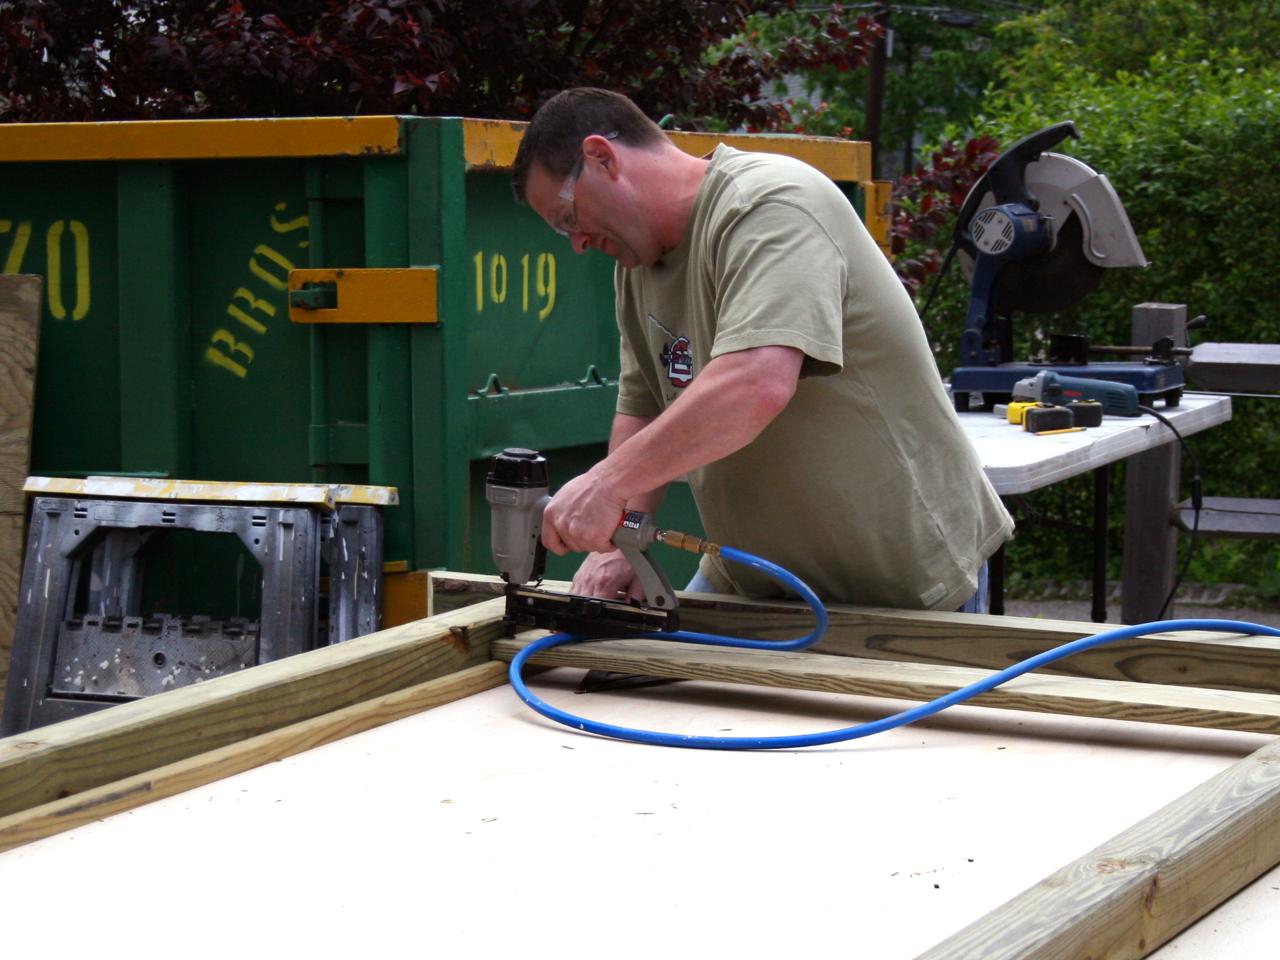
4. Assemble the structure with the top beam lying flat. Fit the two vertical posts into the notches. Attach the beam to the posts using long framing nails or decking screws.

Create the Inner Design:
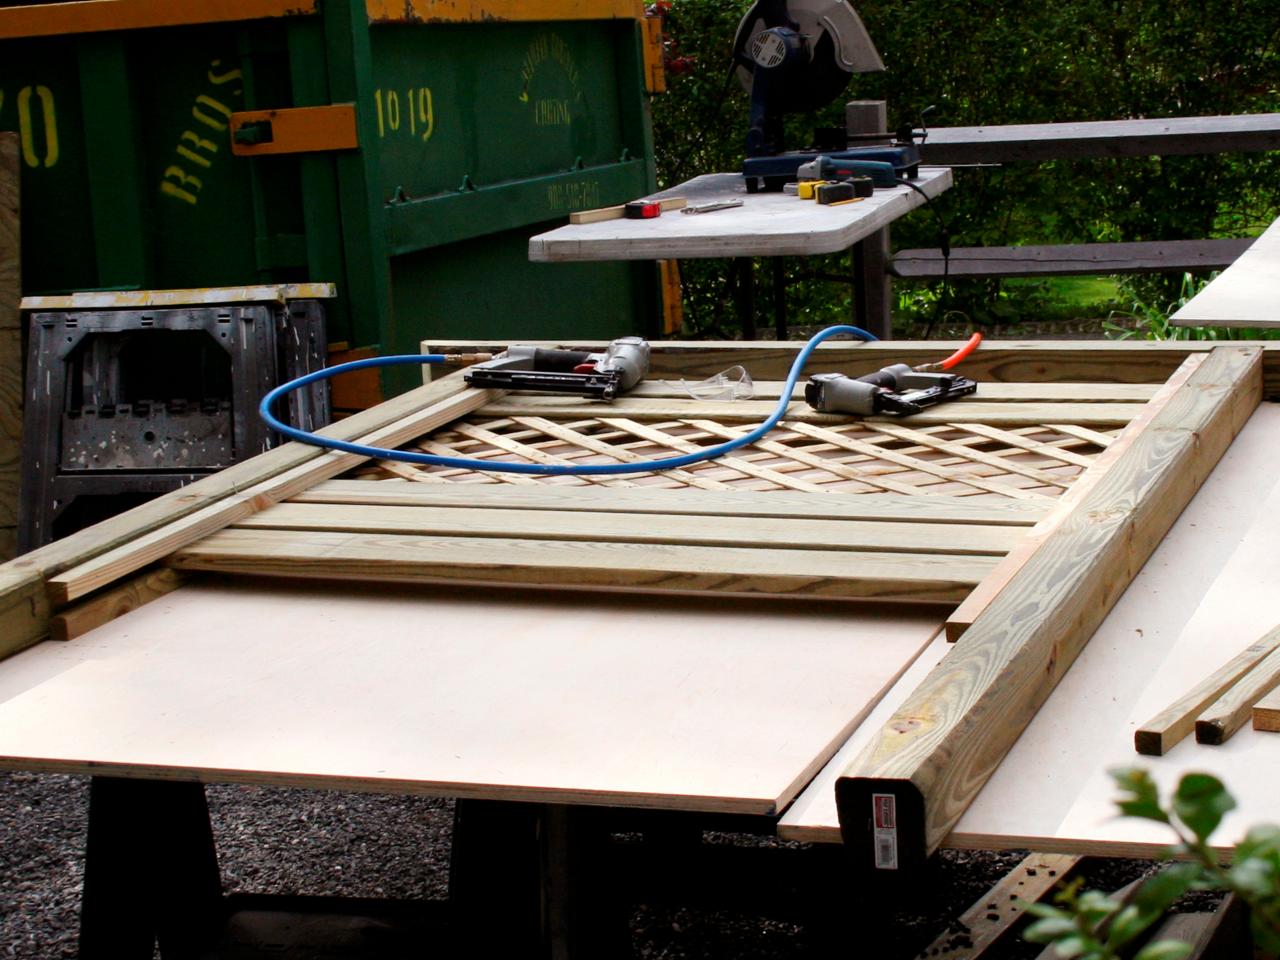
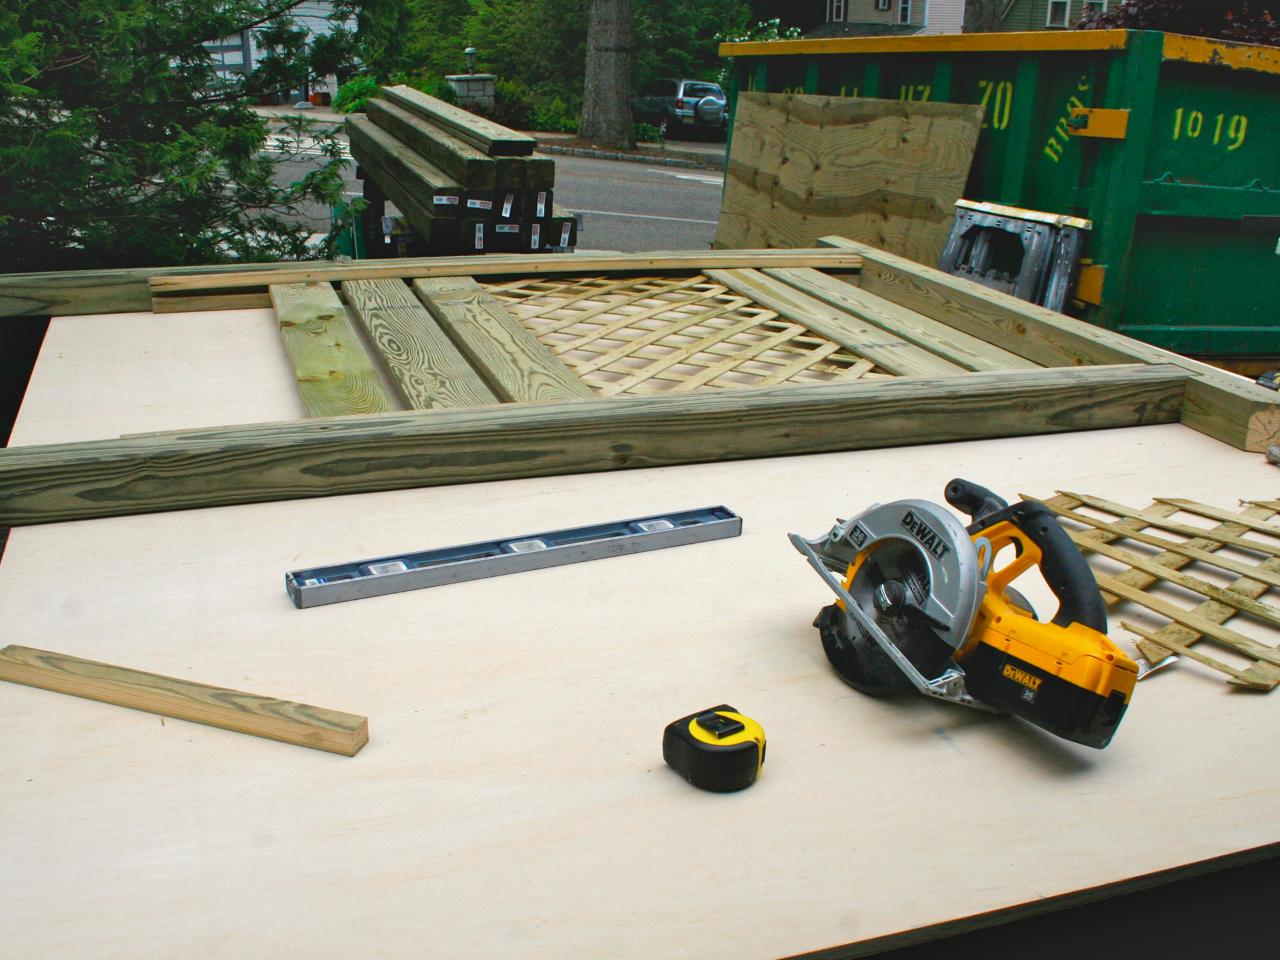
5. There are many patterns you can make for the center of the panels. We combined lattice and a six-inch bullnose decking. To make this pattern, you’ll need vertical pieces nailed to the inside of the posts to sandwich the decking and lattice in place. To do this, cut four 1x2s five feet long. You’ll only attach two at first. With the post and beam frame laid out flat, nail one 1x2 to the bottom inside edge of one of the vertical posts. Make sure that butts up against the top beam. Repeat on the inside of the other vertical post.
6. Start laying out the slats of the panel resting on the 1x2s you just fastened to the vertical beams. Using a miter saw, cut a piece of the decking material to fit inside the panel’s frame, ours is four feet wide. Lay the board so it rests on both 1x2s, about 6 inches below the top beam. Nail into place.
7. On two of the decking pieces, use a router to make a 1/4-inch notch the length of each piece. The lattice will fit into these notches.

8. Place one of the notched boards on the 1x2s about one inch below the previously attached piece of decking. Make sure the notched edge is facing the bottom of the panel. Nail into the 1x2 boards.
9. Using a circular saw, cut a piece of lattice 24” x 48” (or to your correct width). Fit the lattice into the notch of the previously attached piece of decking.
10. Fit the other notched piece of decking into the bottom edge of the lattice. Secure the lattice to the two decking pieces and the 1x2 boards.

11. Add two more pieces of decking below the lattice, leaving one inch in between each piece. Nail into the 1x2 boards.
12. To finish sandwiching the panels, lay the remaining two 1x2 boards flush with the inside edges of each vertical post and top beam. Line it up evenly with the lower 1x2 boards. The top 1x2 will cover the nail holes on the decking material and lattice, plus add extra support.
13. Repeat the steps to create as many fence panels as desired.

Dig Holes and Install Panels:
14. Check with local building codes for regulations on the depth of fence post holes, and be sure to check with local utility companies before digging to avoid damaging buried cables.
15. Determine where you would like your fence panels to start and where you would like them to end. Mark for your first panel. Our panels are 4’ 7” wide and we spaced them four feet apart.
16. To dig the holes, use a post-hole digger or rent an auger from a supply center. If you want to vary the height of the panels, vary the depth of the holes, the minimum depth being your area's frost line.
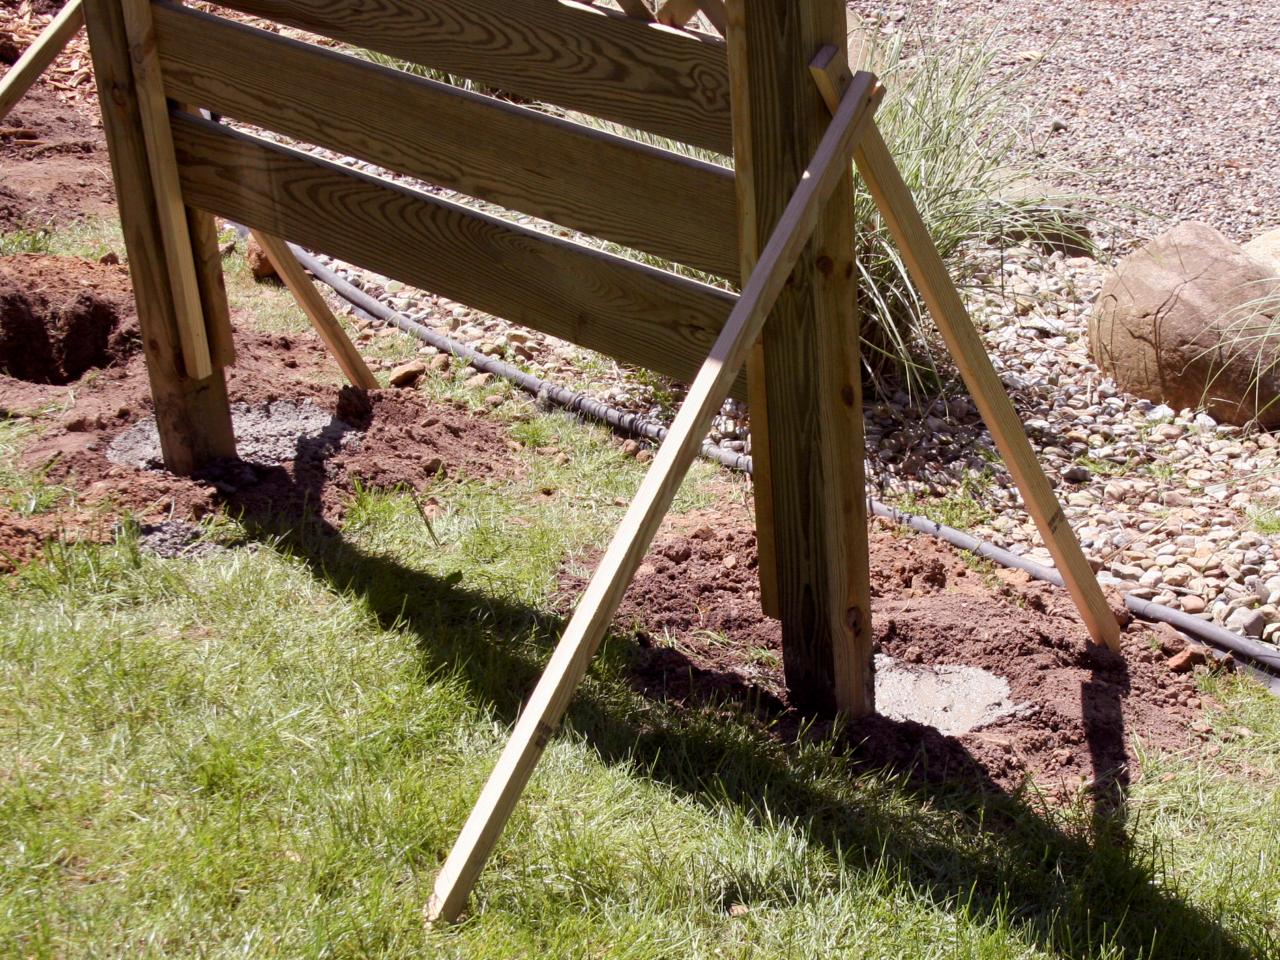
17. Make sure your holes are spaced out properly by test-placing the panels as you go along.
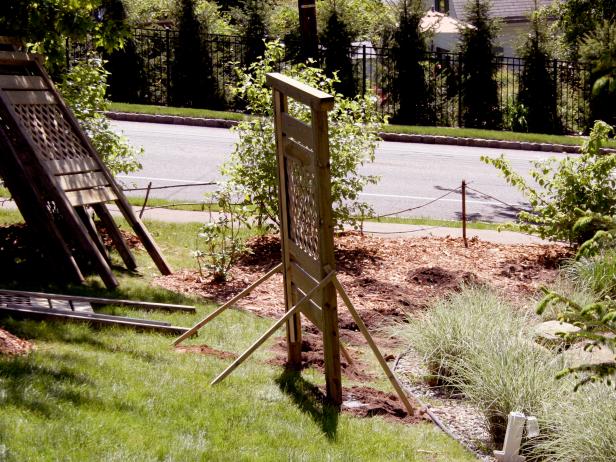
18. When all the panels are in the desired places, use a level to make sure they’re straight and plumb. Mix the concrete to the manufacturer’s specifications and pour it into the holes. Use leftover lumber to make supports for each panel. The tripod structure will help keep the panels level while the concrete dries.


Design Ideas for Wooden Privacy Fences 54 Photos
Whether you’re looking to spruce up your yard, keep your pet from wandering off or need more privacy, check out these innovative wooden fence designs.


