


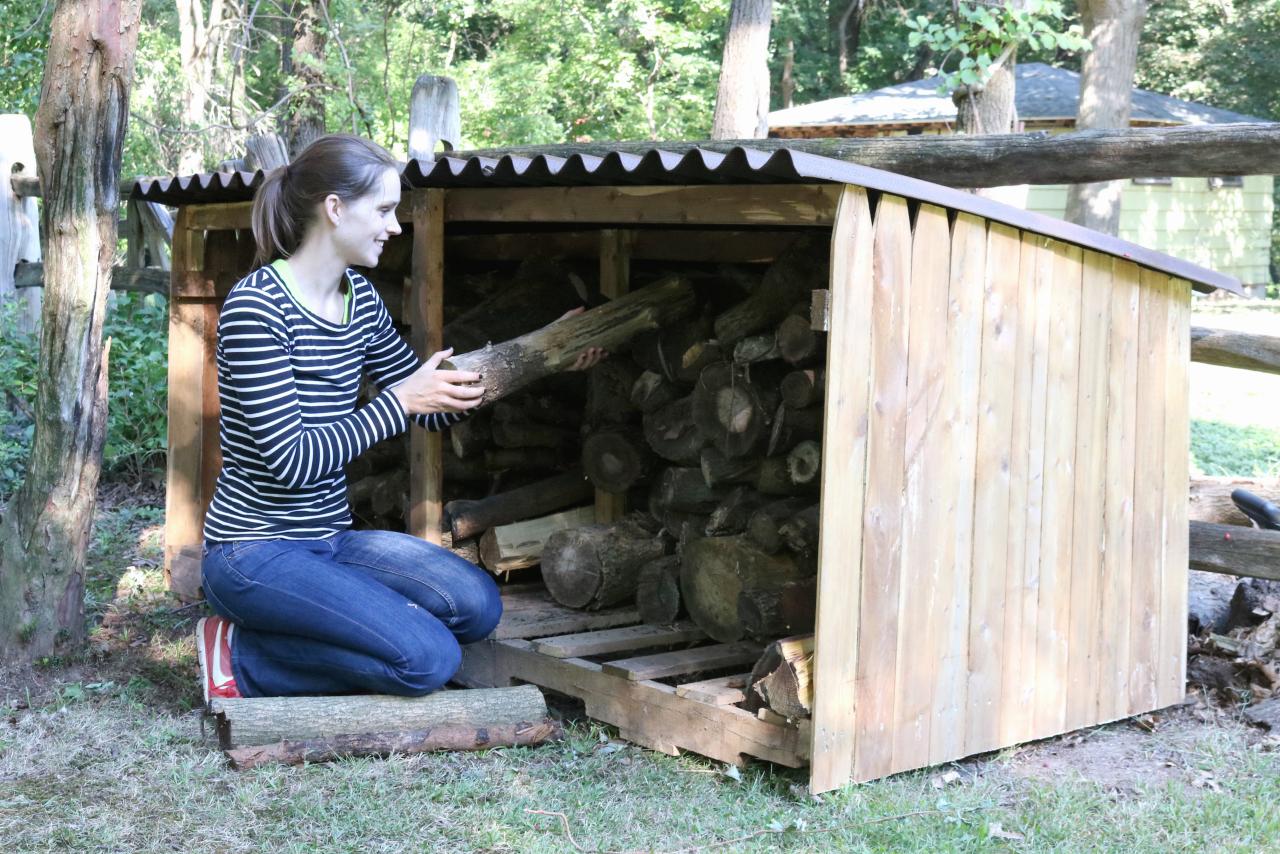
How to Build an Outdoor Firewood Storage Shed
Keep your firewood dry and rot-free by building a simple, budget-friendly shelter using a fence panel, shipping pallets and corrugated roofing.

Two recycled shipping pallets are used for the floor of the structure to keep the firewood off the ground. The sides and back are made from a single fence panel, and the cover is corrugated plastic roofing.

Emily Fazio
Tools and Materials
- circular saw
- pneumatic nail gun with 1" to 2” nails or framing
- measuring tape
- level
- cordless drill
- 8' length of pressure-treated fencing
- (1) 2x4 x 8’ board
- (3) 2x3 x 8’ boards
- (2) shipping pallets
- 4 cups of apple cider vinegar
- fine-steel wool
- sponge
- corrugated roofing panels
- roof fasteners with polycarbonate washers
Step 1: Stain Fence Pieces
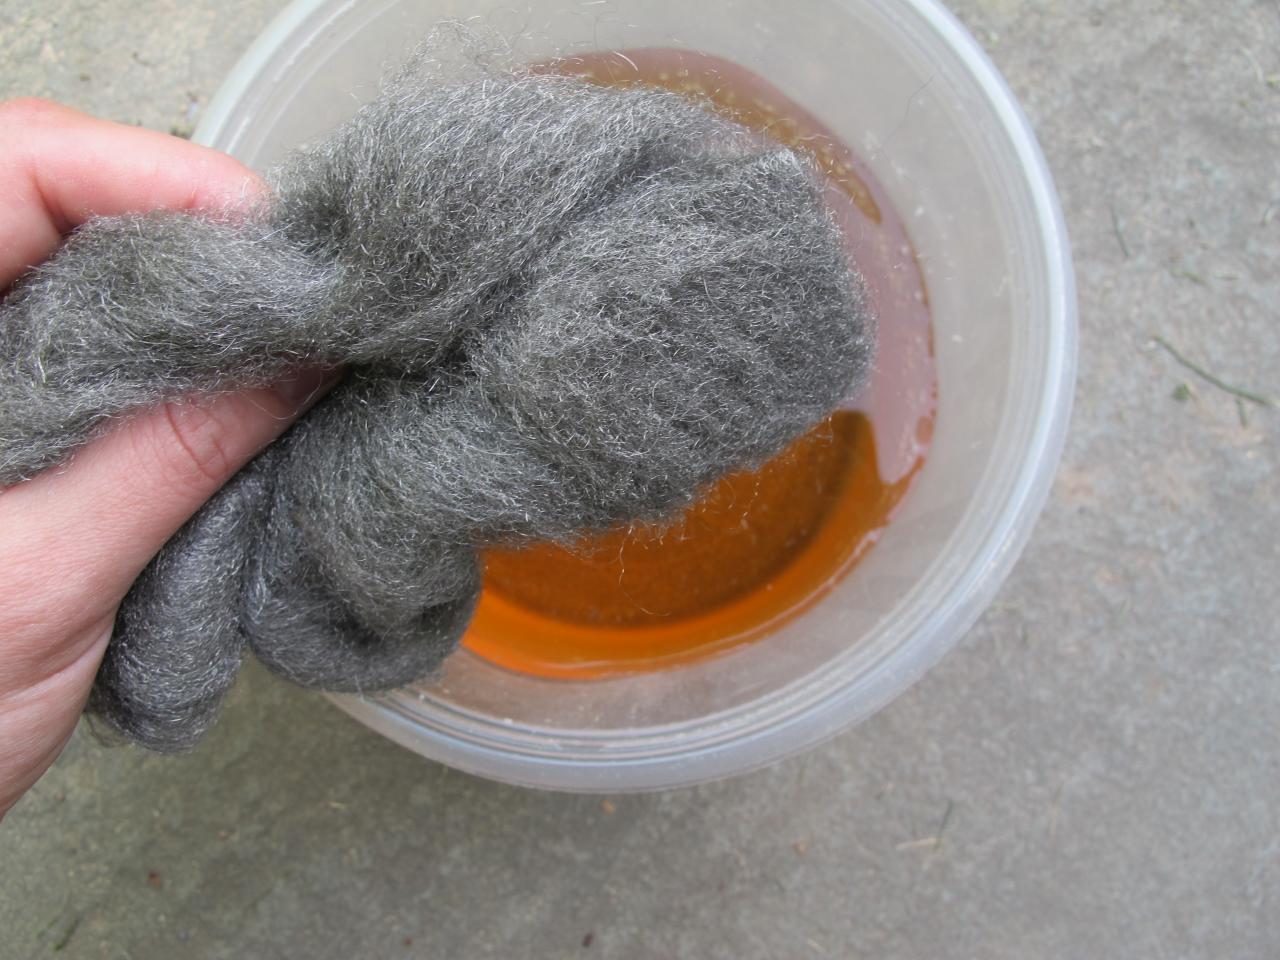
Before building, we chose to stain the new pressure-treated fencing. Instead of using oil-based stains, we made a natural stain using steel wool soaked in apple cider vinegar (Image 1). The chemical reaction dissolves the steel wool leaving a rich brown solution that ages wood beautifully as it dries. Take note that the steel wool needs to soak in the solution for several weeks to reach maturity, so make it well in advance (Image 2). Use a sponge to apply the stain to the wood (Image 3).


Step 2: Measure and Mark Cuts
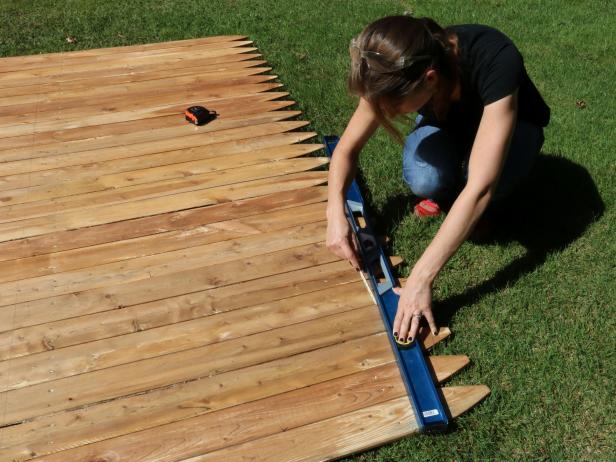
The single piece of fence will be cut into three sections to form the back and two side walls of the storage structure. From the bottom upwards, measure 31-1/2 inches and mark a line across the width of the fencing (Image 1).
The two side walls will be formed by cutting the top of the fence panel in half. The roofline on the side walls will be angled to help water runoff. Measure 8 inches down from the top corners of the fence panel and make a mark on each side. The 8-inch measurement on our panel fell where the horizontal board on the back of the fence was attached. If you can, leave that horizontal board intact for stability. Measure 4 feet inward to mark the center point on the panel, and from that point, align a straight edge to connect the two points (Image 2). Repeat on the other side of the fence panel.

Step 3: Cut Fence Panel
Use a circular saw set to depth and cut the fence along the marked lines. You should have one 96” x 31-1/2” rectangle (the back of the storage unit) and two wall pieces.


Step 4: Set Up Pallet Floor
A breathable structure is important for an outdoor wood storage unit. Keeping the wood off the ground helps air circulate and keeps the wood dry. Pallets are perfect for this and they can be easy to come by although they can vary in size. Paired side-by-side, this set is 90” x 42” (Image 1). Set up the pallets near where you intend your finished structure to sit because it will be heavy when you’re done. For added reinforcement, you may find it helpful to connect the two pallets so they sit level and move as a single unit.
If you need to trim the wall panels to fit your pallet size, now is the time to make that adjustment. We decided to trim the wall panels so that each side panel is the same depth as the pallet (Image 2). Three vertical fence strips were also cut from the back wall to match the length of the joined pallets.


Step 5: Reinforce Walls and Attach
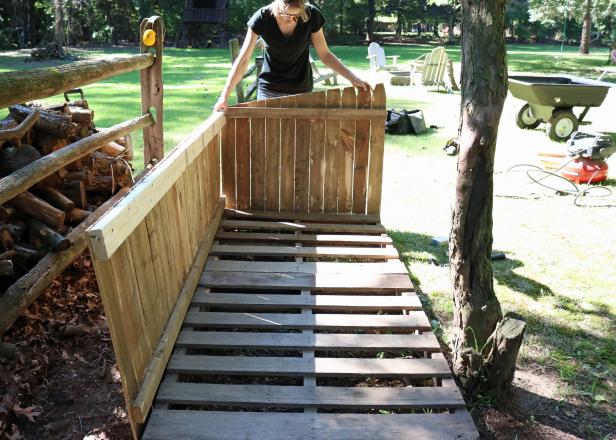
It’s likely that you too will have cut the back wall in such a way that the fence boards are reinforced by a horizontal cross brace on one end, but are a little floppy on the other end. On the floppy end, nail a 2x4 board the entire length to provide extra support to the back wall. Attach it flush to ends of the fence strips because this 2x4 will also serve as a roof joist (Image 1).
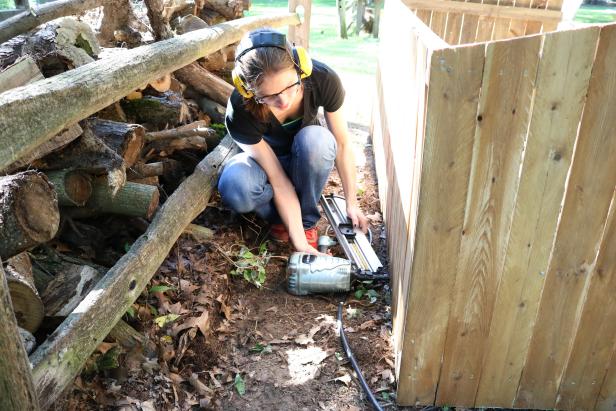
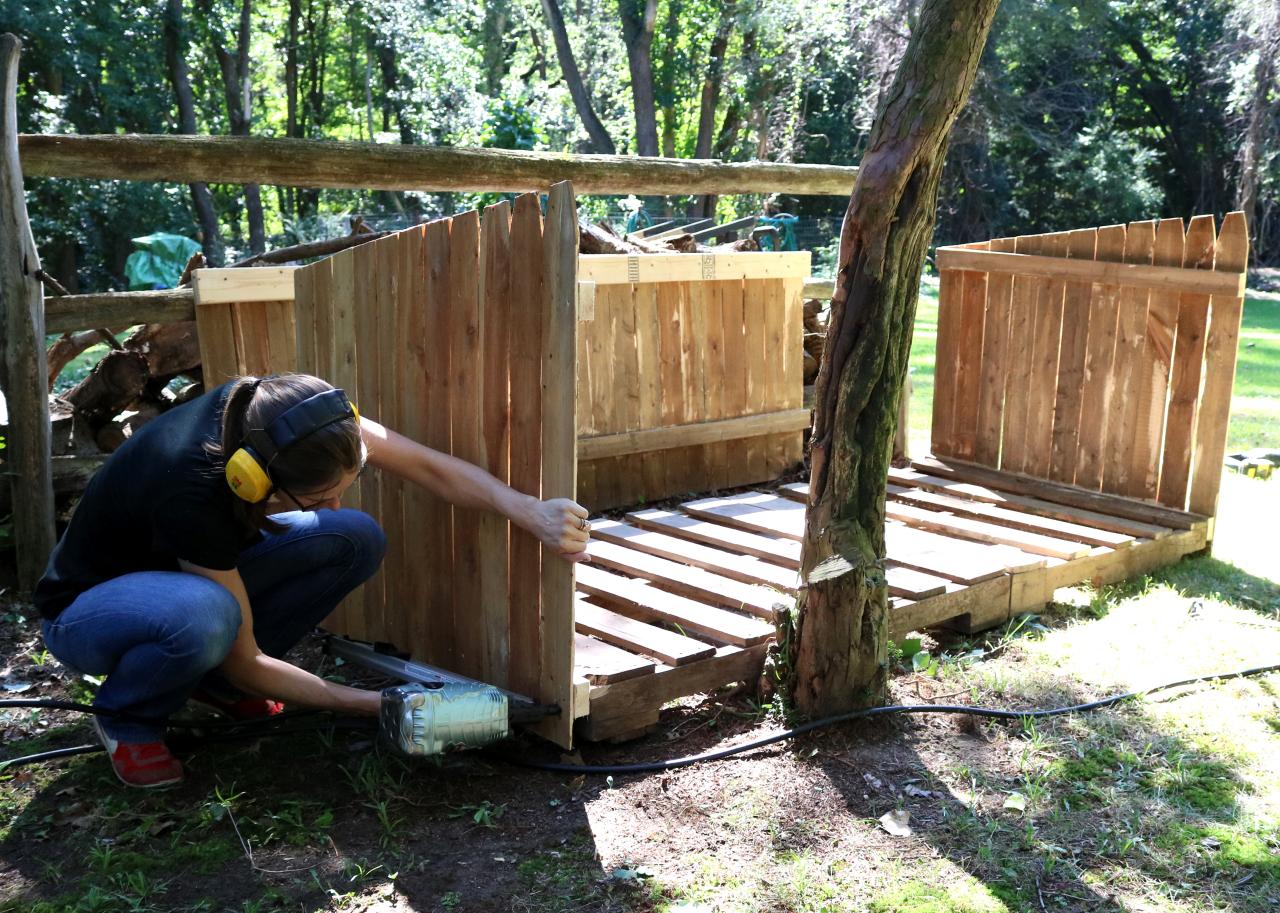
Use a nail gun to attach the fence panels directly to the pallet base on all three sides, begin with the walls. Lap the corners of the fencing to connect the walls together (Images 2, 3 and 4).


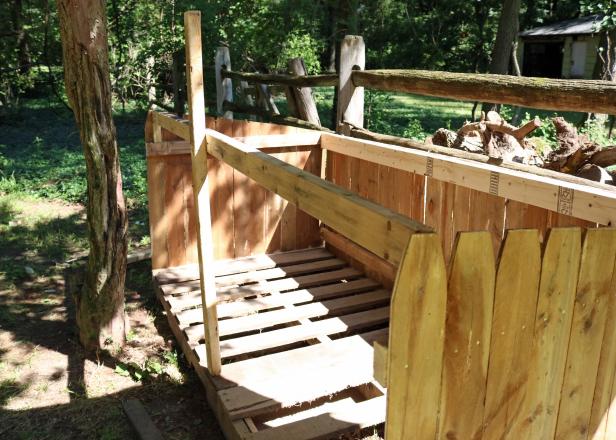
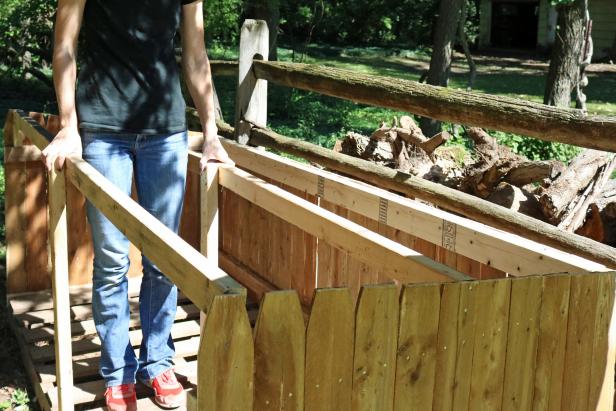
Step 6: Build Framing to Support Roof
A simple framework with center braces will be strong enough to support the weight of the corrugated roof. To make the roof joists, cut two 2x3 boards to size and install to span the length of the unit (Image 1). Create vertical supports for the roofline by measuring the distance from the top of the pallet to the top of the roof joist. Cut the last 2x3 to match those lengths (we used two). Attach the vertical supports using a nail gun (Image 2). The vertical supports will reinforce the structure and prevent the roof from bowing under the weight of itself and snowfall.
The 2x4 that was previously installed on the top of the back wall serves as the third joist, holding part of the weight of the roof. The wall itself provides enough roof support.
Step 7: Cut the Roof
The cellulose fiber/asphalt roof panels we used are sold in 48” x 79” sheets. Two sheets were enough to cover the width of our storage unit. The ridges in the roof panels should be positioned to let rainwater easily flow off of it.
To decide how much overhang should exist on your storage unit, position the panels on top of the joists. Be sure to account for one to two ridges overlapping in the center where the panels meet. Mark your desired cuts with a pencil. On our roof, the overhang was reduced to one ridge (about 2 inches) while the front and back have a 4-inch overhang. Use a circular saw to cut the roofing.


Step 8: Attach Roofing Panels
Invest in special roof fasteners with polycarbonate washers to install the corrugated roofing. The screws are self-tapping and, connected to the weatherproof washer, will help keep the storage unit free from water dripping in from above. Install a screw at each second or third ridge interval, along each of the three ceiling joists.


