


How to Build a Stone Accent Wall

Accent walls are a great way to emphasize function and provide flair in almost any backyard. If it's built with decorative stone or other attractive materials, it can create a dramatic focal point.

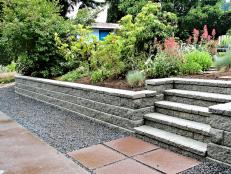
Landscape designer Roberta Walker has a space with a table and chairs that's too cramped, and it's closed off from the rest of the yard. The square tiles and geometry hinder the flow in this limited space. By adding flagstone and natural shapes, it will connect in a more natural, free-flowing way with the rest of the yard. She also wants to add a stone accent wall that will fit in with the scale of the area while also providing vertical interest. A flagstone patio will complement the new wall.
In order to start with a manageable work area, Walker removes the table, chairs and teak tiles. The tiles will be saved for a future garden project while the table and chairs are set to the side until the project is complete.
Once the area is cleared, she digs out about two inches of soil where the tiles used to be. The soil surface is flat and smooth so as to safely accommodate a sturdy accent wall and even flagstone patio.

Using a measuring tape, Roberta measures a nine-foot length for the footing of the wall. Because it will be a sitting wall, the base needs to be wider at the bottom and taper slightly towards the top. She uses spray paint to draw the footing.

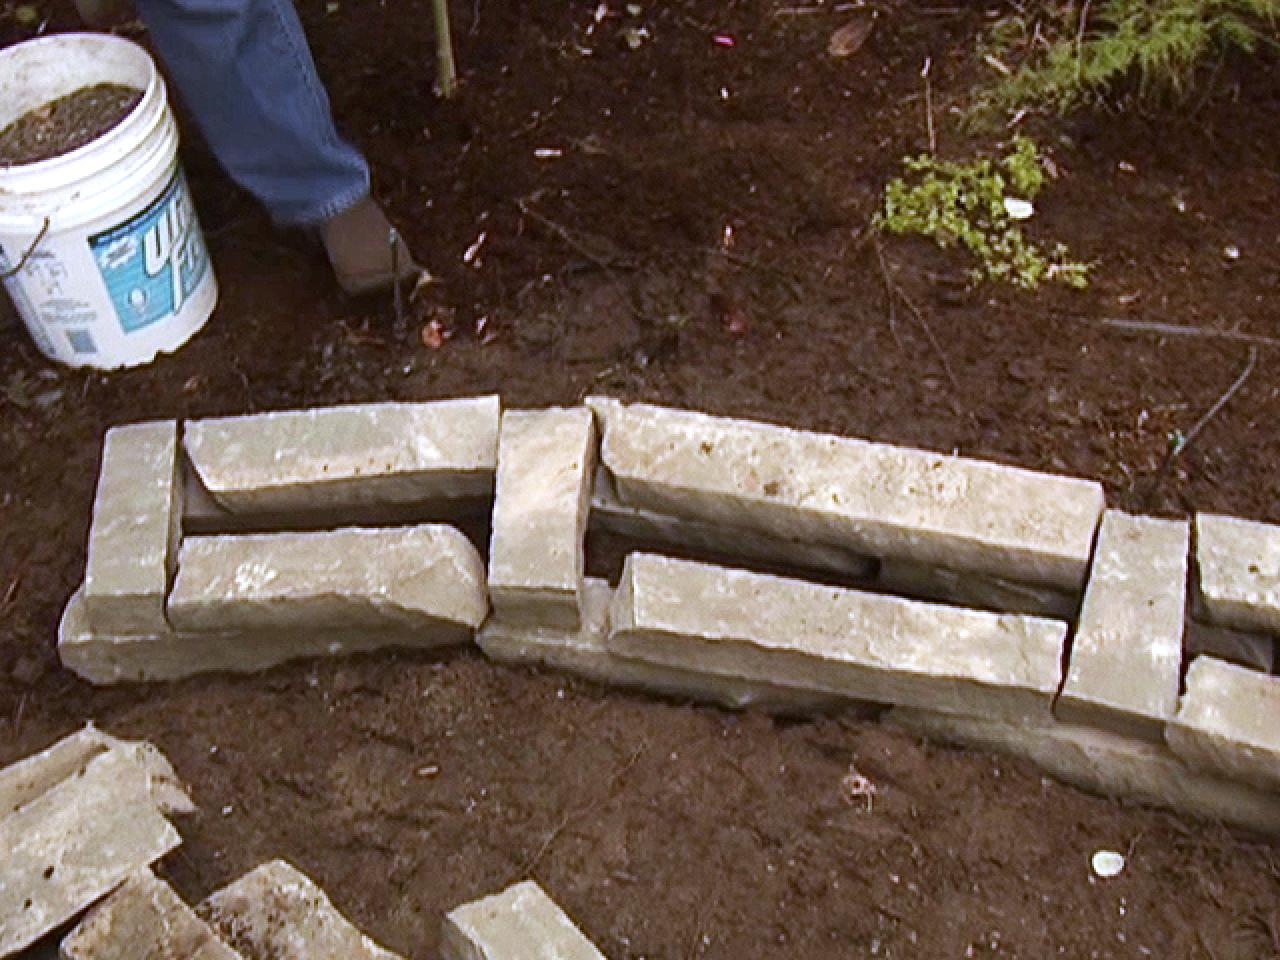
To add stability to the wall, she digs a footing about three inches below grade. This is where the first row of stone will sit. Although there are several options of stone to use on this wall, Roberta uses snap stone to build a rustic wall that won't overpower the small area. This type of stone is long, rectangular and about two inches wide and deep. It fits in with the small scale of the wall but is also practical for her to be able to move without the use of additional equipment.

On each side of the footing, she wedges a row of snap stone. Although the rock isn't a uniform thickness, Walker doesn't worry about leveling the wall until she gets closer to the top. She then takes some smaller pieces to do cross-pieces that form a 90-degree angle with the joints of the lower layer, making the wall more stable. This style of wall construction is called dry stack. Mortar doesn't hold it together, but the stacking method does. She staggers the ends of the stones and the cross-pieces so that one never lines up directly on top of another.

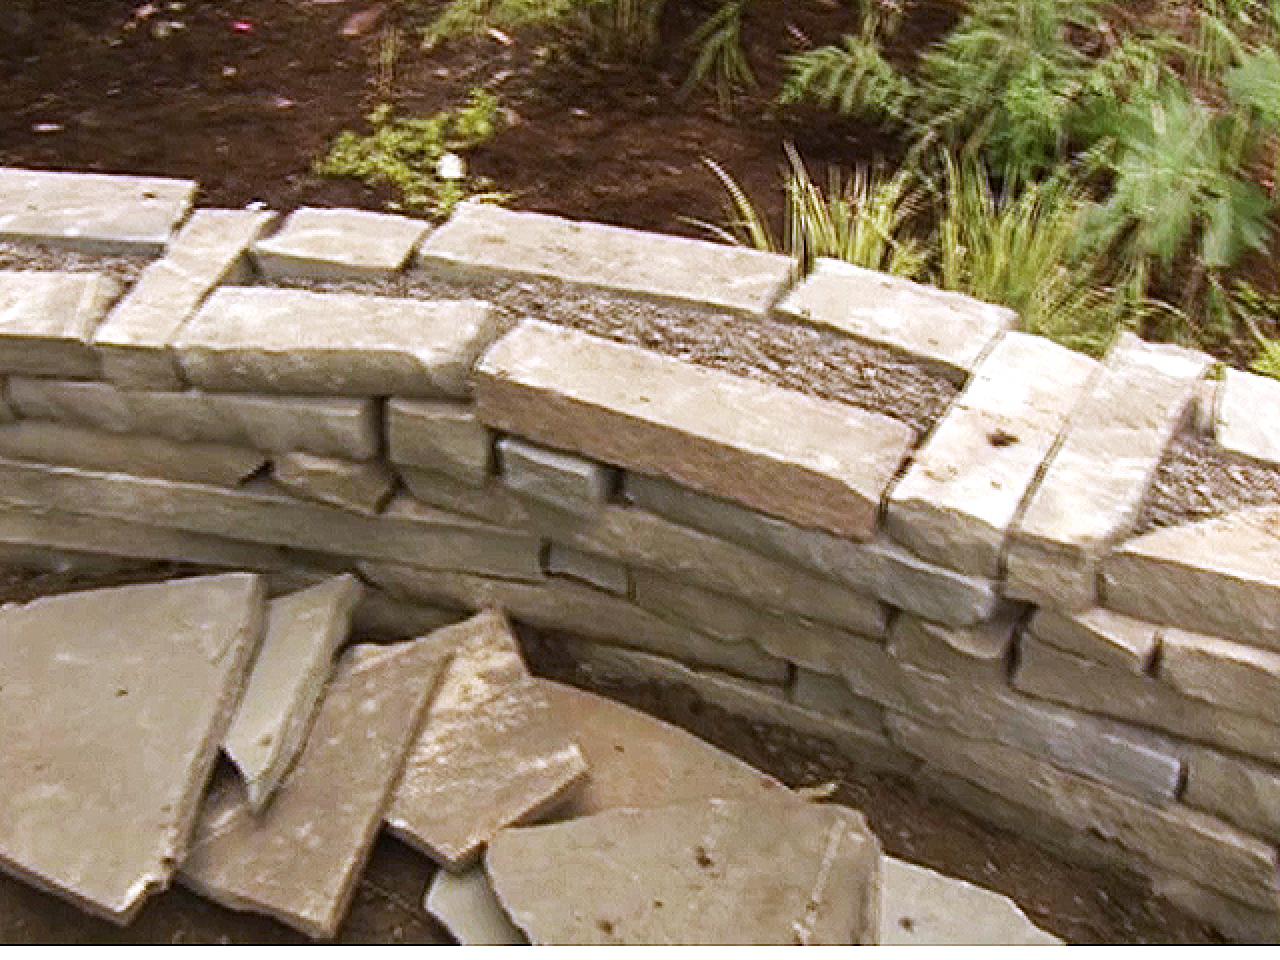
Walker backfills the empty spaces in the wall with pea gravel, which will make the wall more sturdy. If the stones do shift a bit, the pea gravel keeps everything in place. She continues to add snap stone roughly equal sized in length on each side, then a couple of cross-pieces, filling the center with pea gravel and repeating until the wall is the desired height.

When the wall is complete and backfilled with pea gravel, it needs a flagstone cap, or flat rock on top that will serve as the seating for the wall. She uses shims to get the cap somewhat level. Although the wall is dry stacked, the cap needs to be secured for safety reasons. Roberta uses an F-type mortar mix to secure the cap in place.

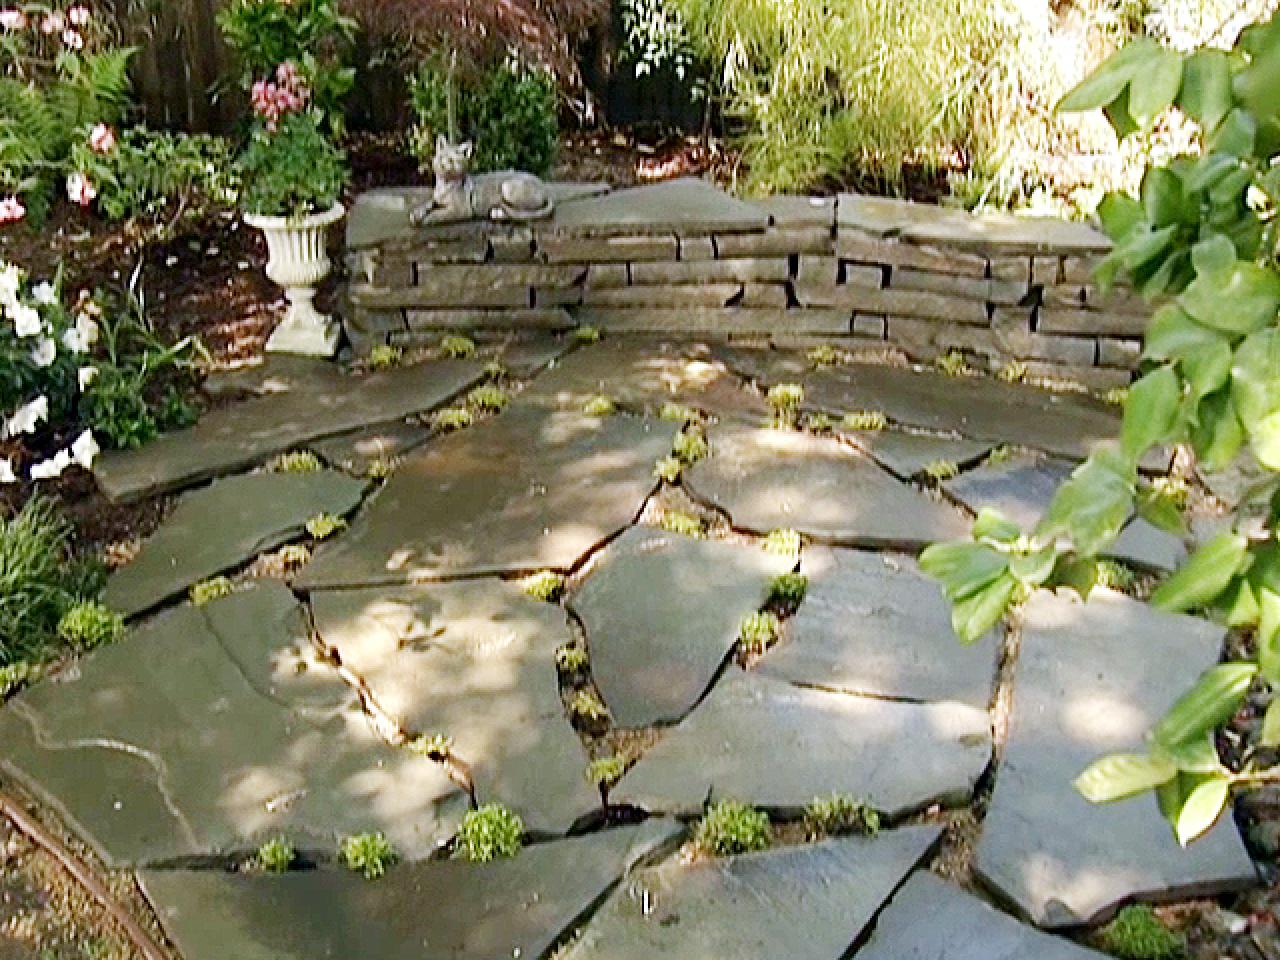
Since one of Walker's initial goals was to create a more inviting patio space, a coordinating flagstone walkway will do the trick. Decomposed granite, which is a mixture of fine pumice stone and clay, will serve as the base for the flagstone. It works well because it goes down easily and provides a level area where the flagstone can easily rest. Water it and it compacts, making it a perfect medium for flagstone. Roberta lays down the decomposed granite and rakes it smooth. She lays the flagstone pieces on top of the granite base so the pieces don't butt up against each other but are close enough together to fit like a loose puzzle. She waters the pavers and decomposed granite with a garden hose. Once the table and chairs are back in place, she incorporate a few accessories, like potted plants or sculpture, to add a personal touch.


