


How to Install a Wood-Slat Feature Wall
Transform an ordinary wall into a distinctive design feature using this simple and inexpensive slat-wall technique that adds depth, warmth and visual interest to an interior space.

Sometimes the simplest materials make the biggest impact. This deceptively easy project transforms a blank wall into a stunning focal point using little more than trim boards and paint. For spaces begging for a bit of added personality, a wood slat wall is a modern and affordable alternative to traditional paneling or wainscoting. While wood slat walls can work in a variety of applications, they especially shine in a den or library needing an added bit of warmth.

Jennie Andrews
Tools and Materials:
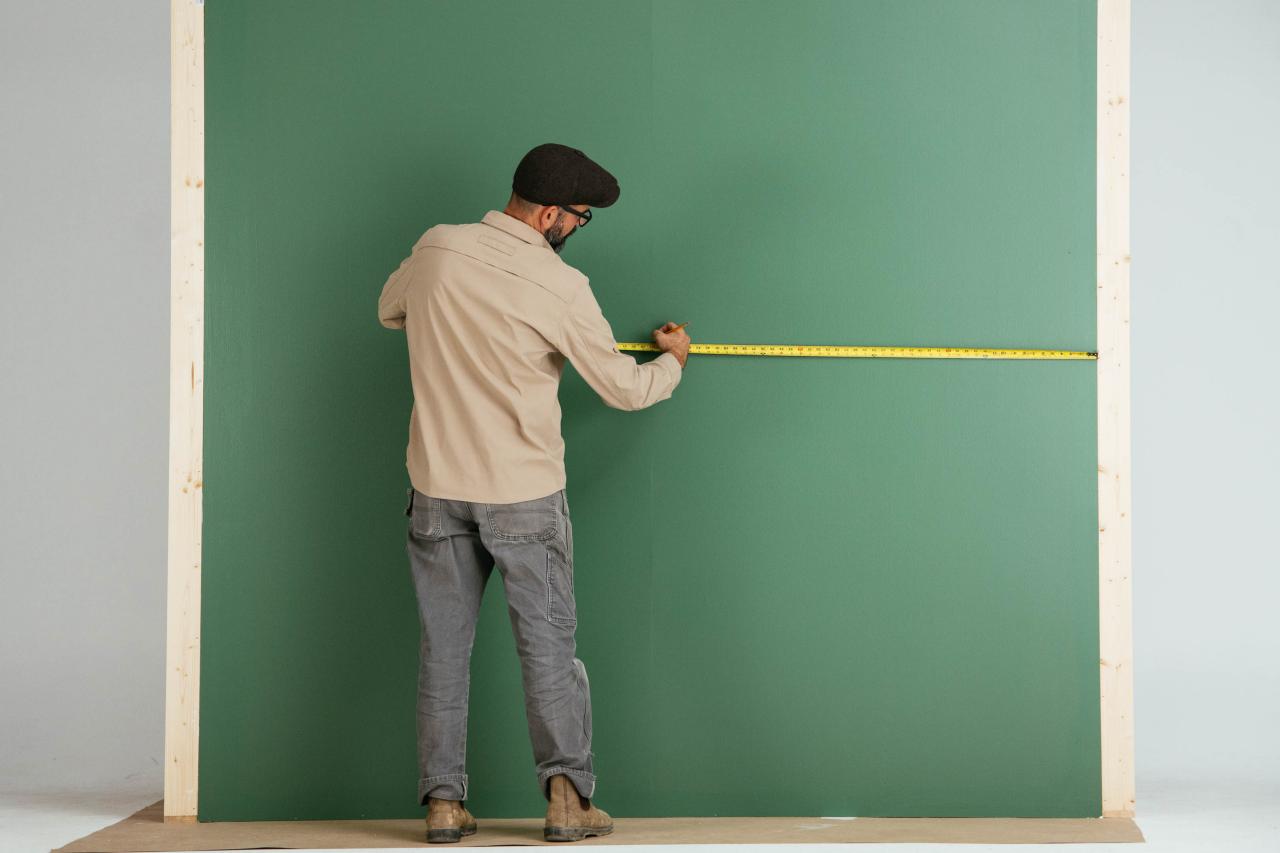
1. Determine Layout
Begin with a pre-painted wall. Because the slats will be quite close together, this will save a lot of time and effort. Measure the length of your wall to determine the spacing of your wood slats. When figuring the number of slats, factor in a 3/4” gap between each slat. Additionally, note that a 1x2 trim board actually measures 1-3/4” wide. Measure the height of the wall to determine the length of your slats. In our design, the layout of the slats is staggered and overlaps in the middle by 6 inches. So, for an 8-foot wall, the length of each slat will be 4-1/2 feet.

Jennie Andrews
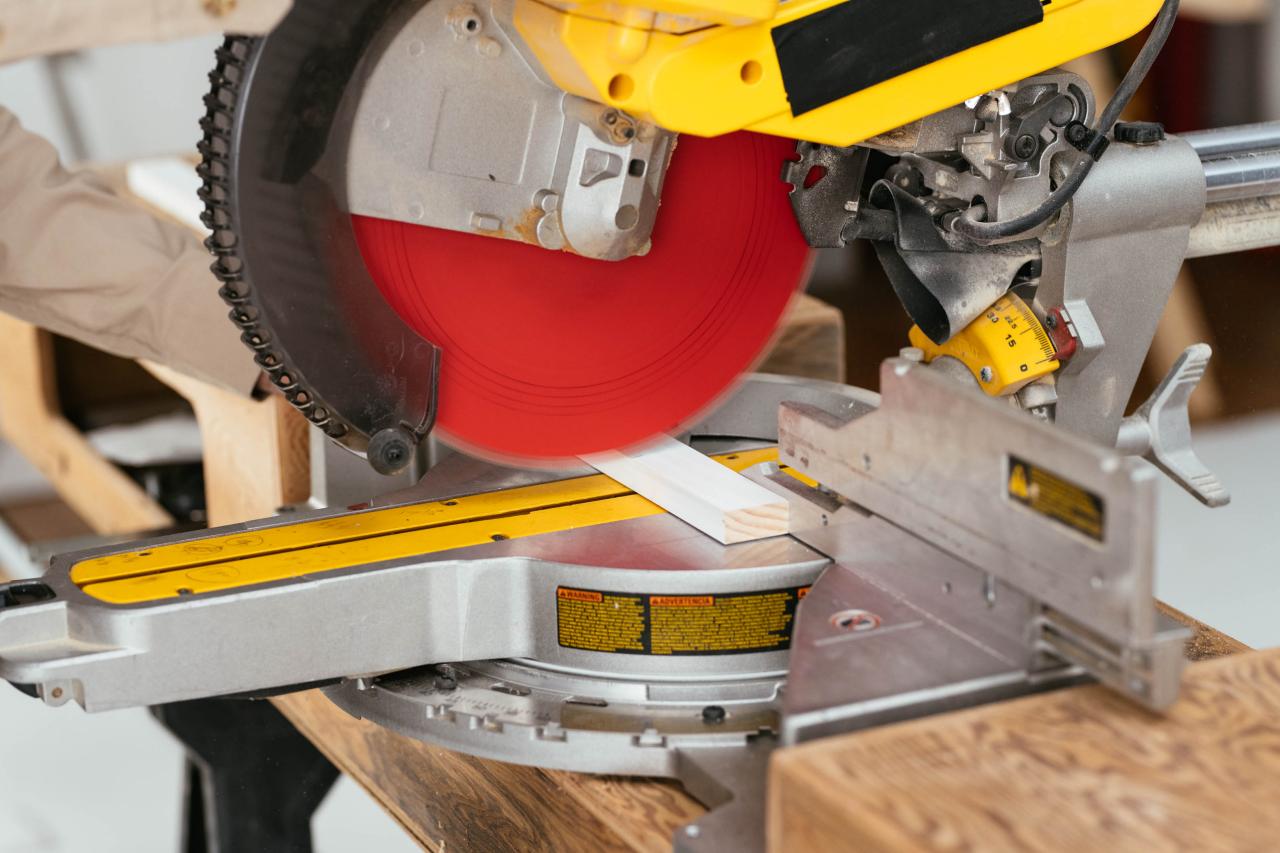
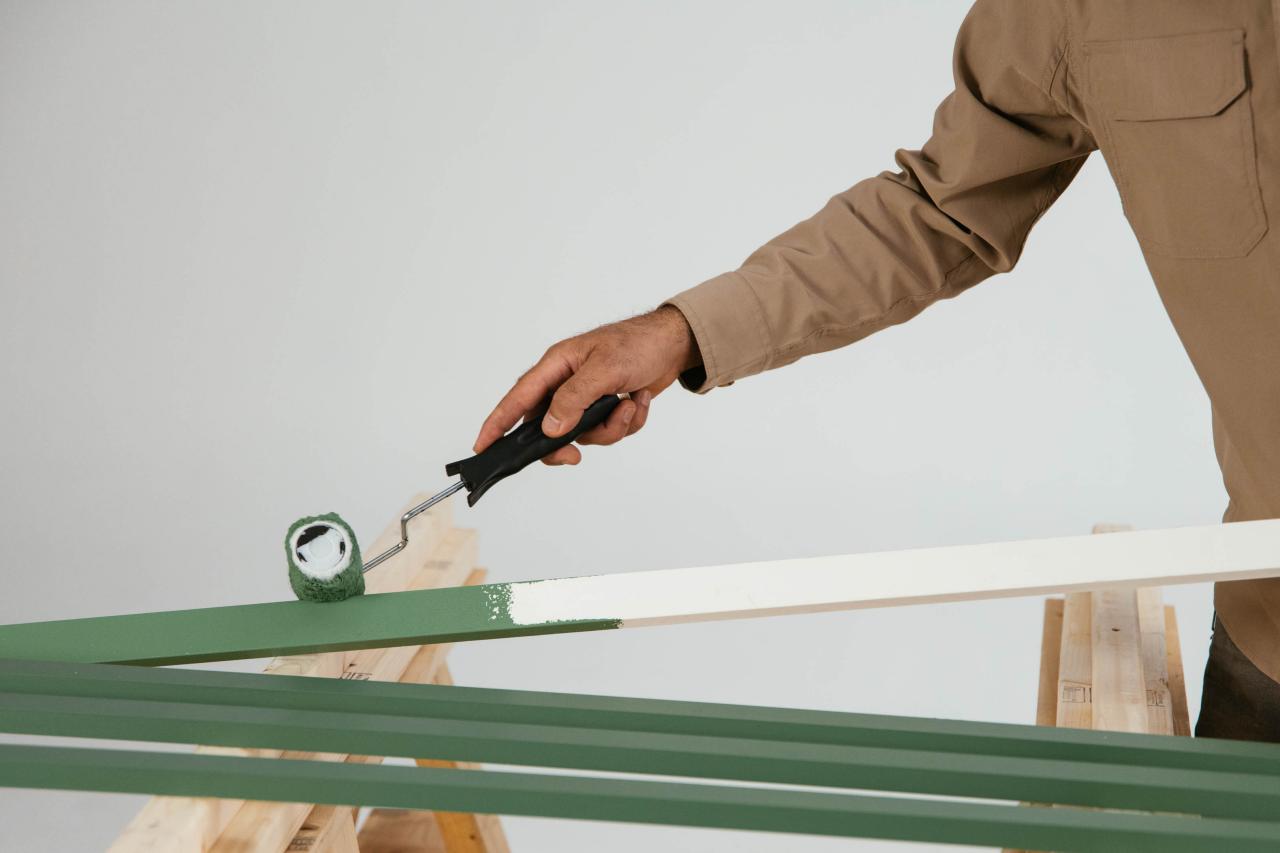
2. Cut Boards + Paint
Use a miter saw to cut the slats for the wall. Prime and paint slats to match the wall color. Let dry.

Jennie Andrews

Jennie Andrews

Jennie Andrews
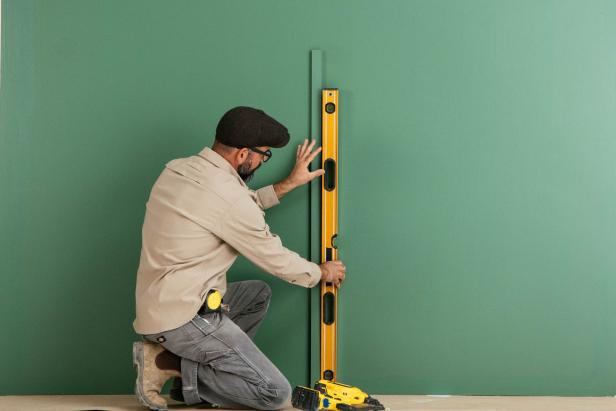
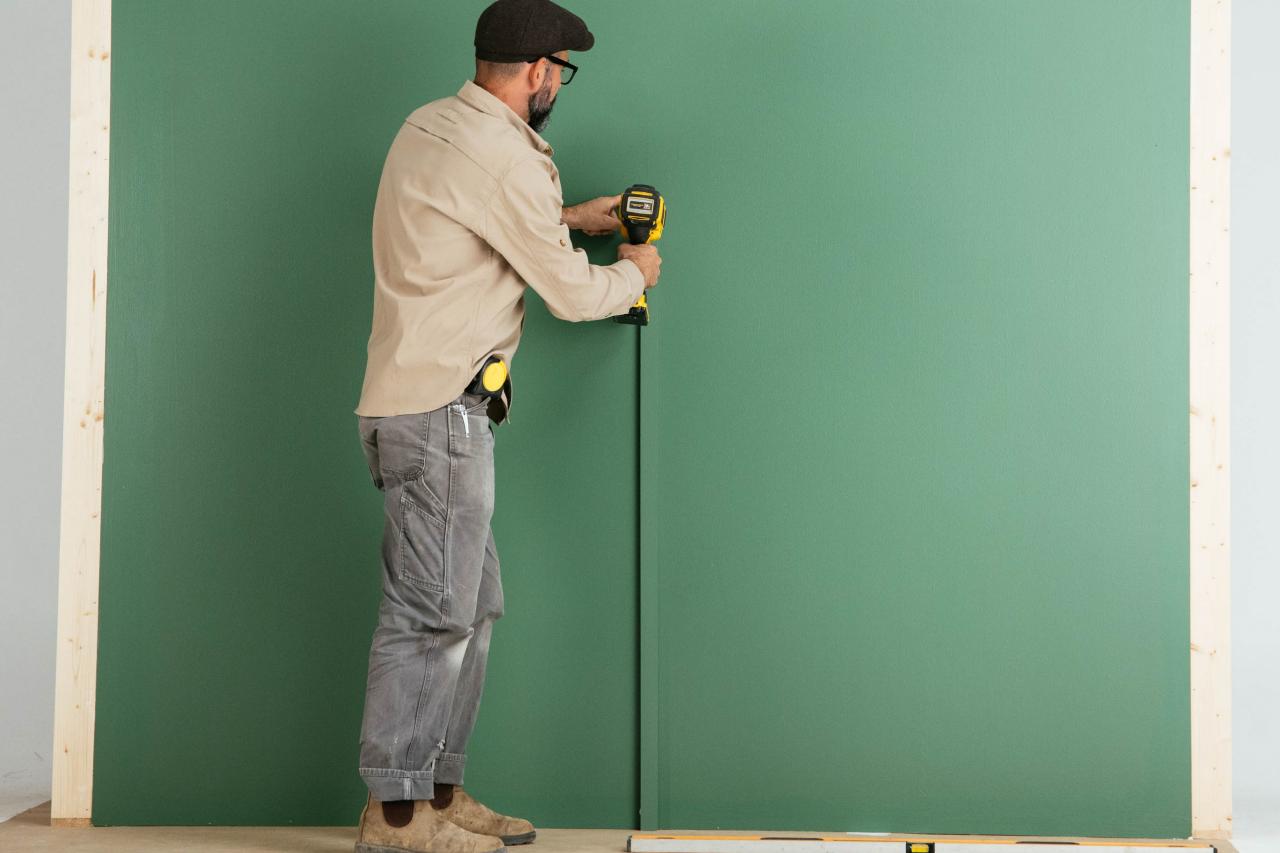
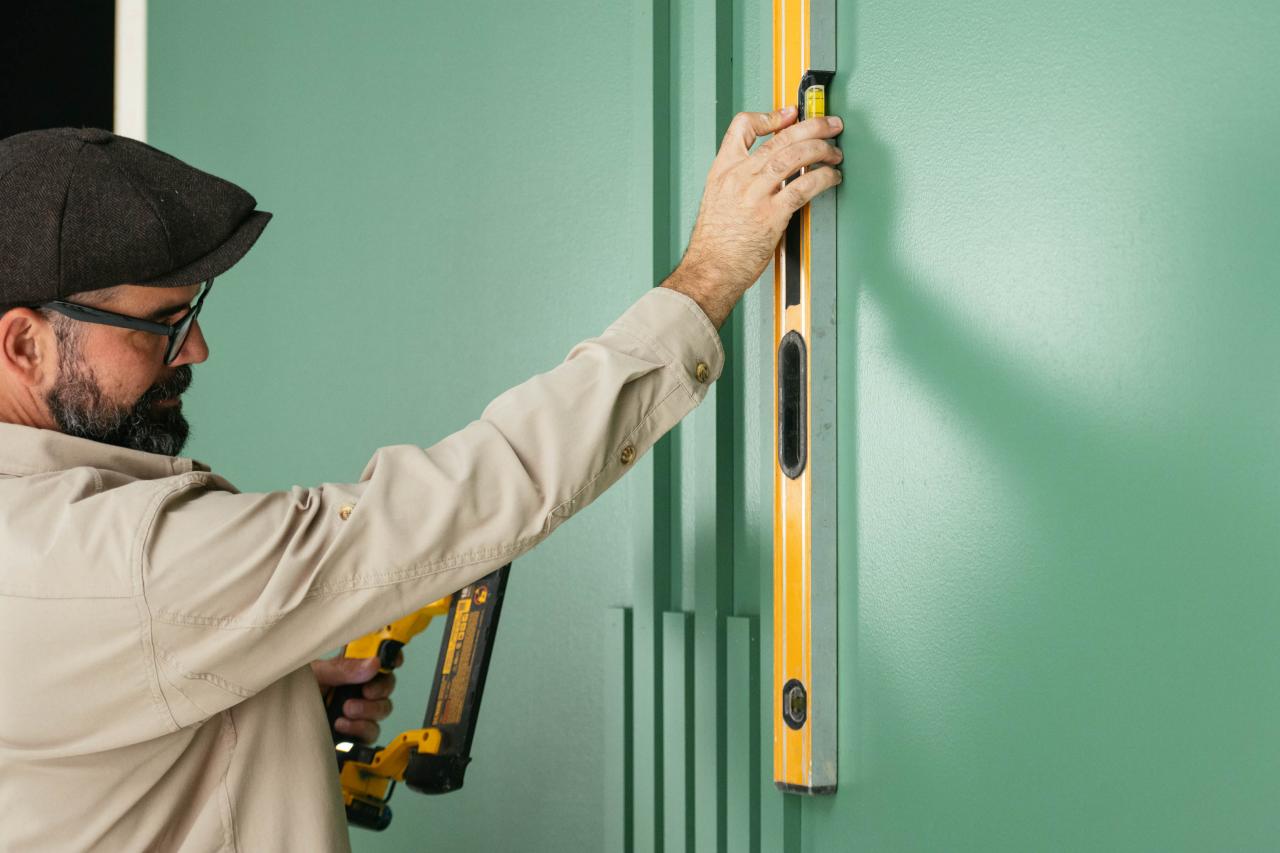
3. Attach the First Lower Slat
Install the first lower slat along the bottom edge of the wall in the exact center of the wall. Use a level to ensure that the slat is perfectly plumb. Apply construction adhesive to the back of the slat and nail it to the wall using a trim nail gun.

Jennie Andrews
Jennie Andrews
4. Attach the First Upper Slat
Use another slat for a spacer but stand it on its side (3/4” wide). Install an upper slat to the right of the original slat. Use a level to ensure the slat is plumb before nailing. Repeat this step, but to the left of the first slat.

Jennie Andrews
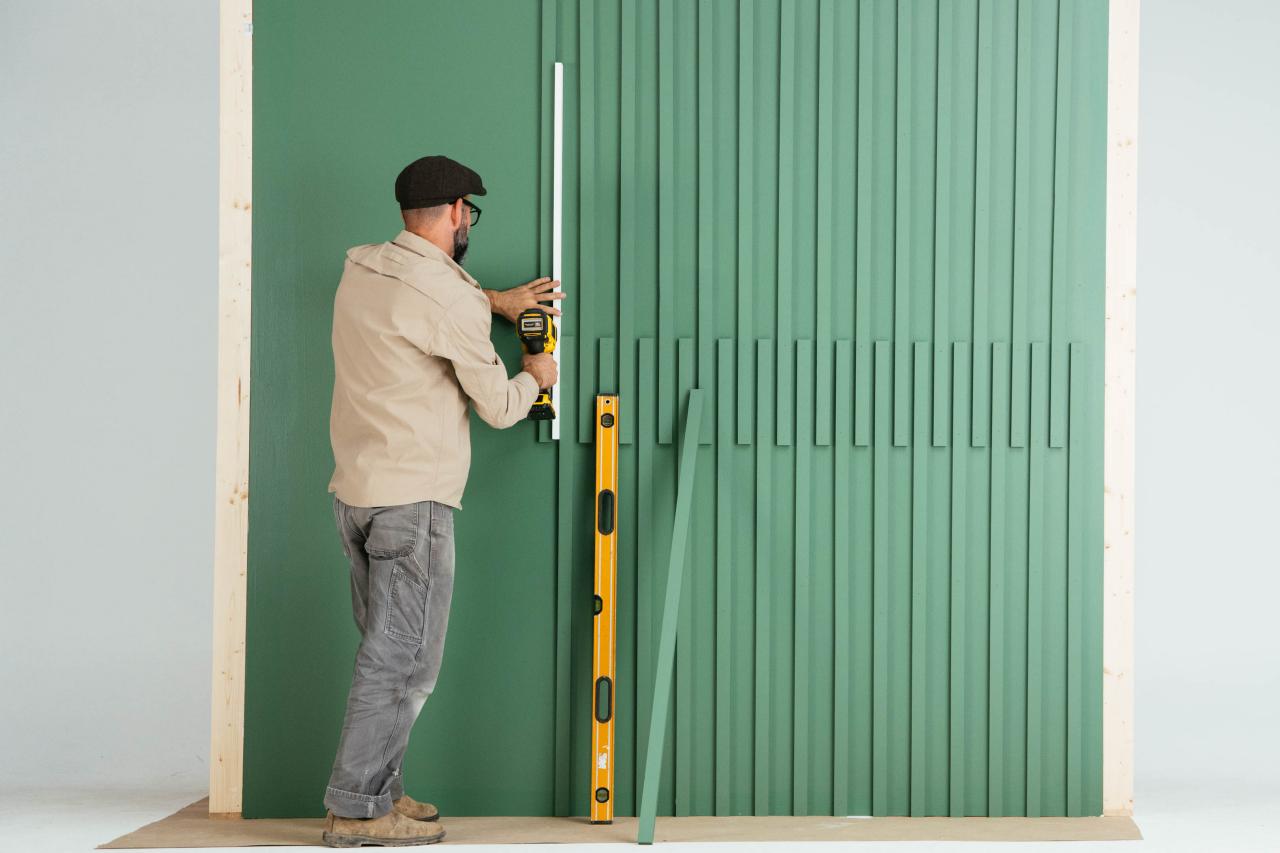
5. Install Remaining Slats
Continue to alternate between installing upper and lower slats until you reach the edges of the wall. Keep the slats plumb by checking each with the level as you work.

Jennie Andrews

Jennie Andrews

Jennie Andrews
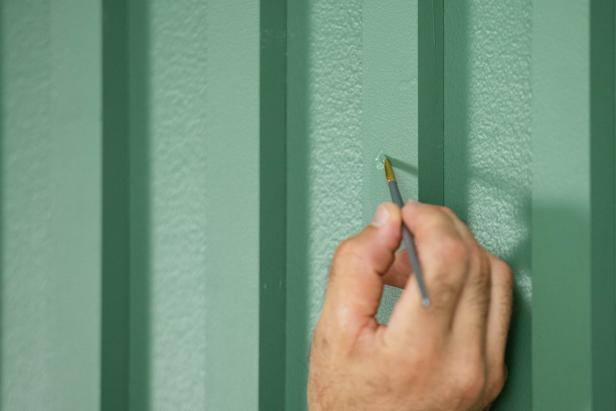
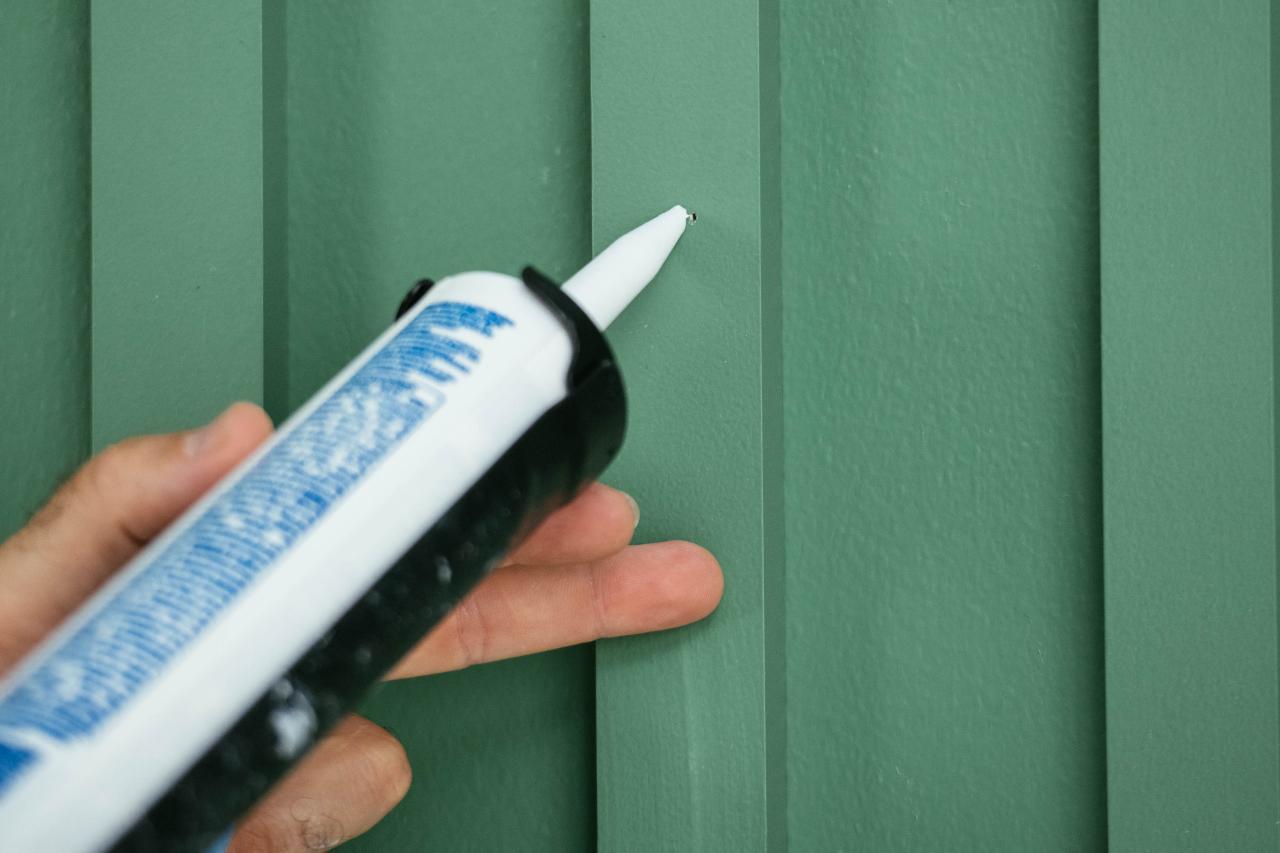
6. Caulk and Touch Up Paint
Caulk nail holes, wiping each smooth with a damp rag. As needed, touch up paint with a small paintbrush.

Jennie Andrews
Jennie Andrews
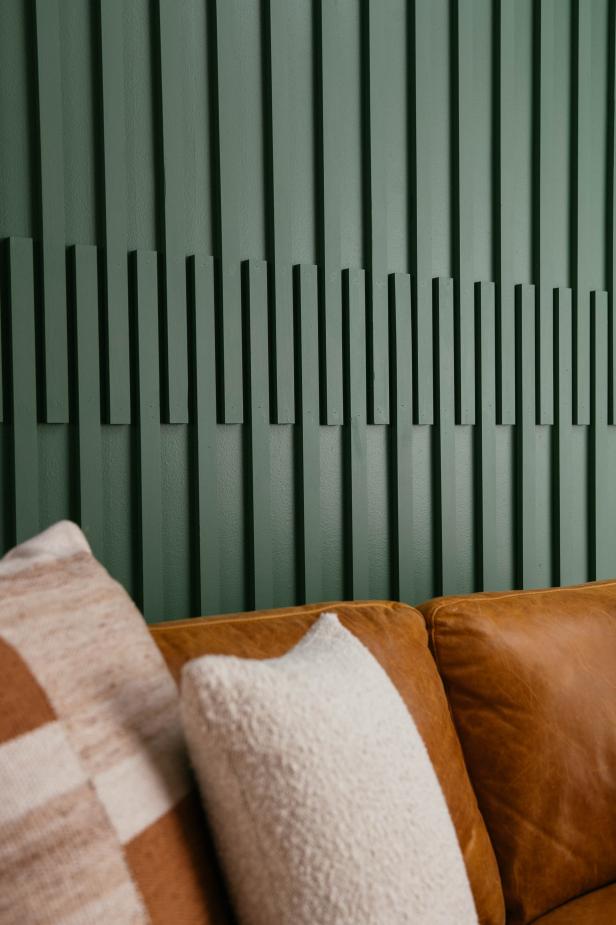
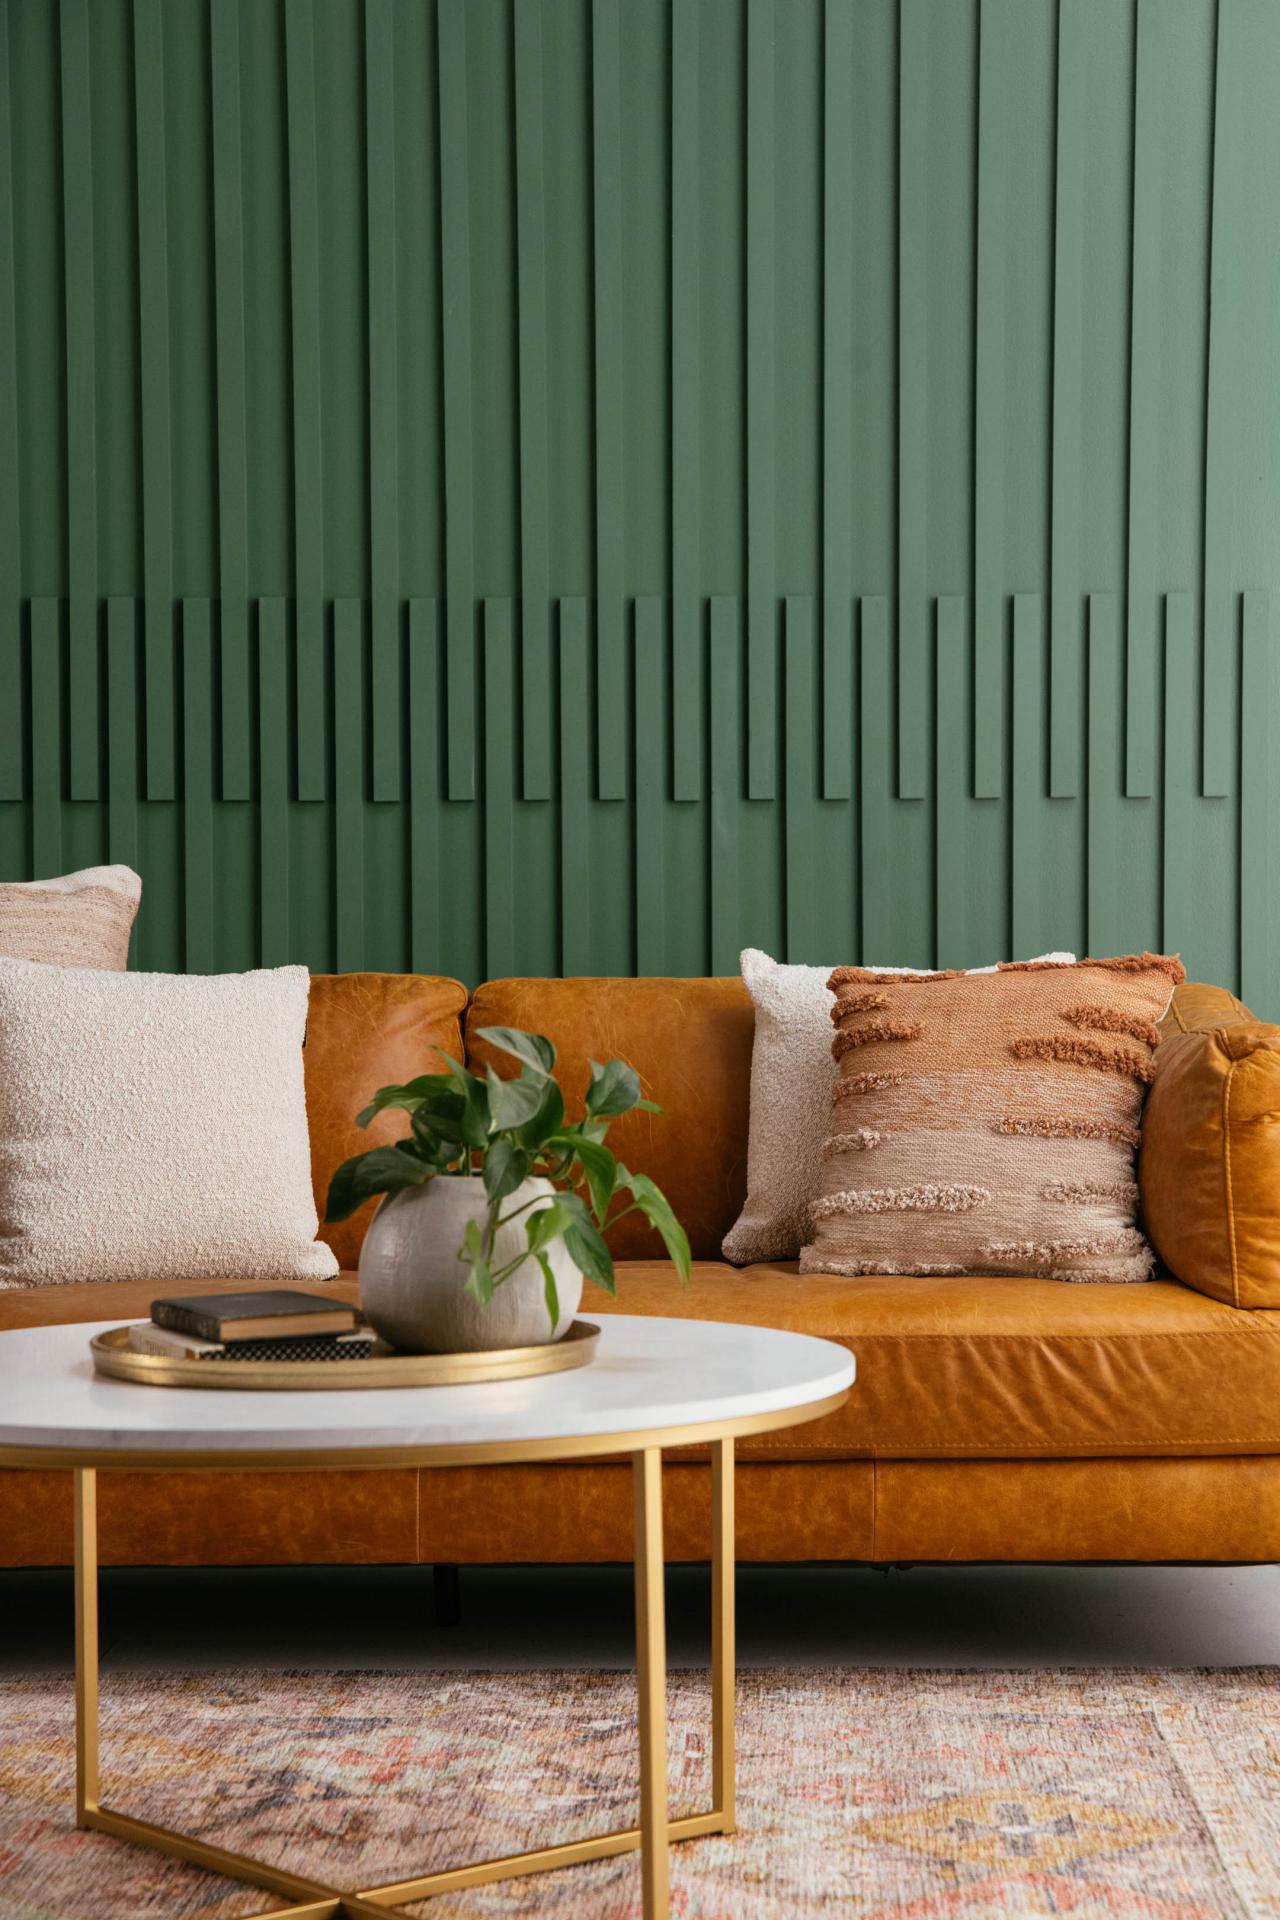
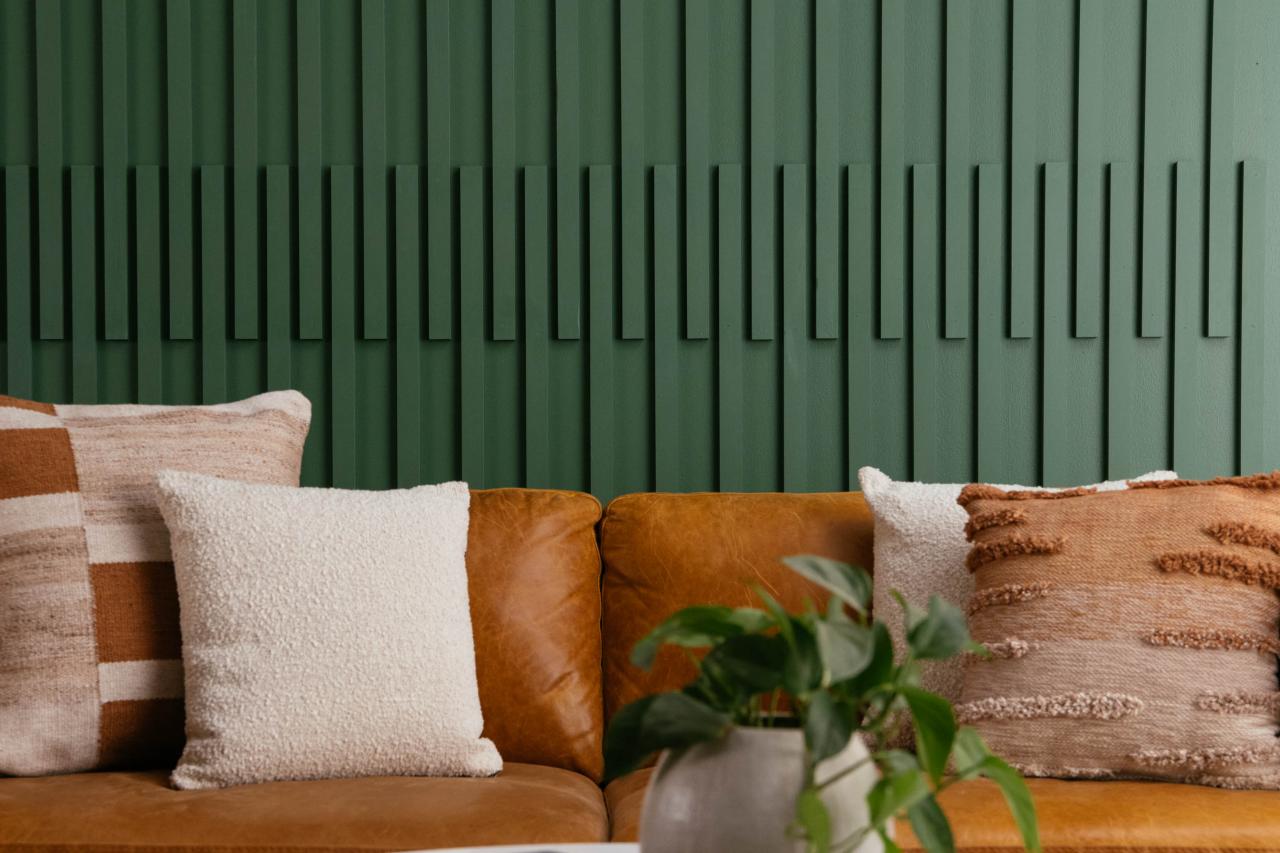
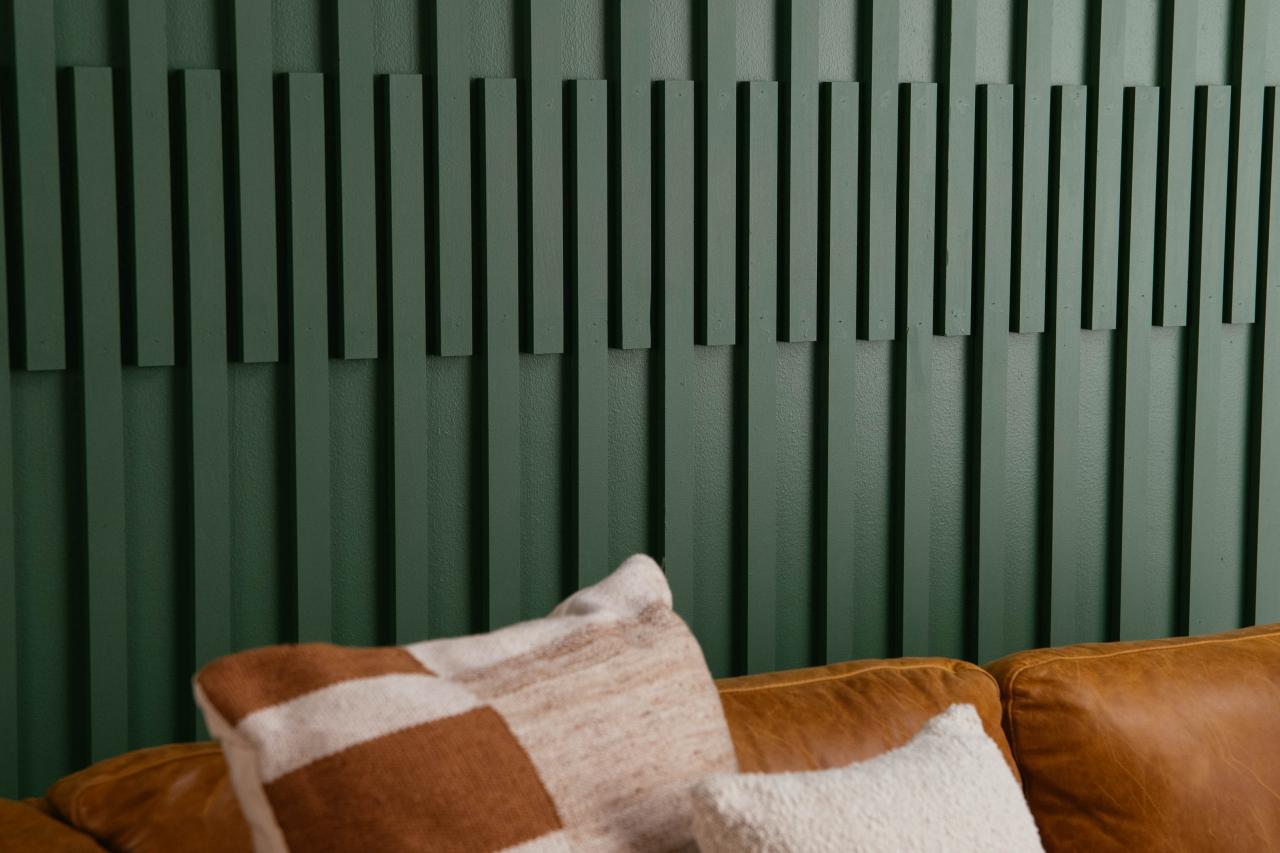
7. Enjoy
A wood slat wall really shines when painted in rich, darker colors, which create shadows and depth. There’s no need to hang extra decor when your wall itself is a work of art.

Jennie Andrews
Jennie Andrews

Jennie Andrews


