


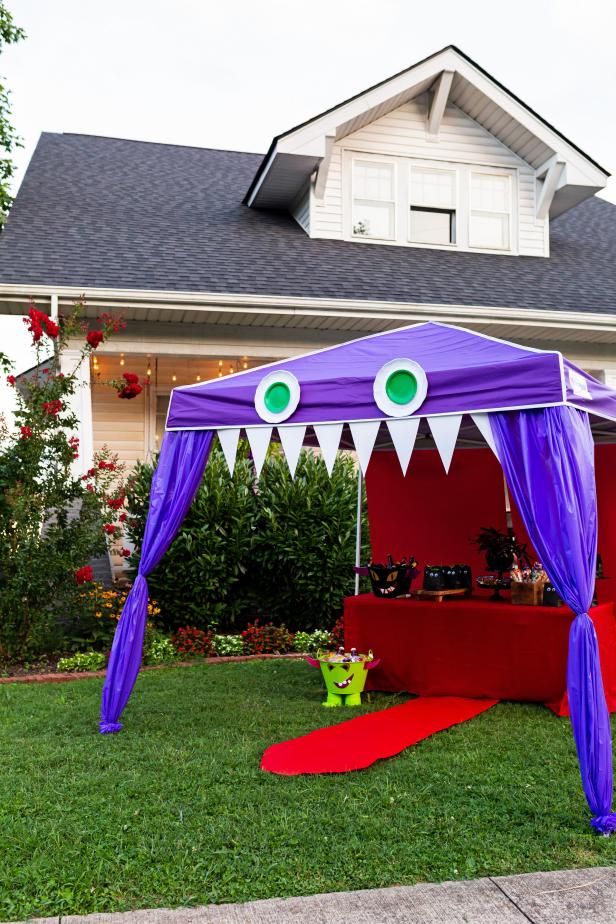
Monster Up a Pop-Up Canopy for Outdoor Halloween Fun
Be the coolest house on the block this Halloween by using dollar store scores to turn a pop-up canopy into a friendly monster that's stocked with grab-and-go snacks and beverages for both adults and the littlest trick-or-treaters.
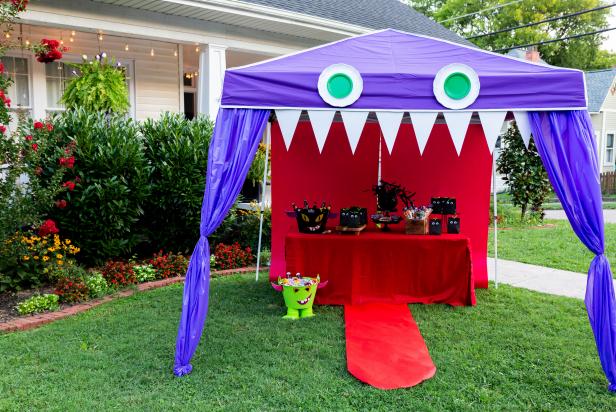

Photo by: Cassidy Garcia, Styling by H. Camille Smith
Cassidy Garcia, Styling by H. Camille Smith
Materials Needed
- purple pop-up canopy
- 2 purple, rectangular plastic table covers
- 2 rolls red bulletin board paper
- 2 white plastic platters
- 2 green paper plates
- double-sided tape
- scissors
- red tablecloth (we used a Tablevogue 6' Fitted Red Table Cover)
- folding table
- white paper pennant-style banner
- duct tape or heavy-duty outdoor tape
- baker's twine
- large binder clips
Assemble Canopy
Following manufacturer's instructions, assemble canopy and securely anchor the corner support poles.
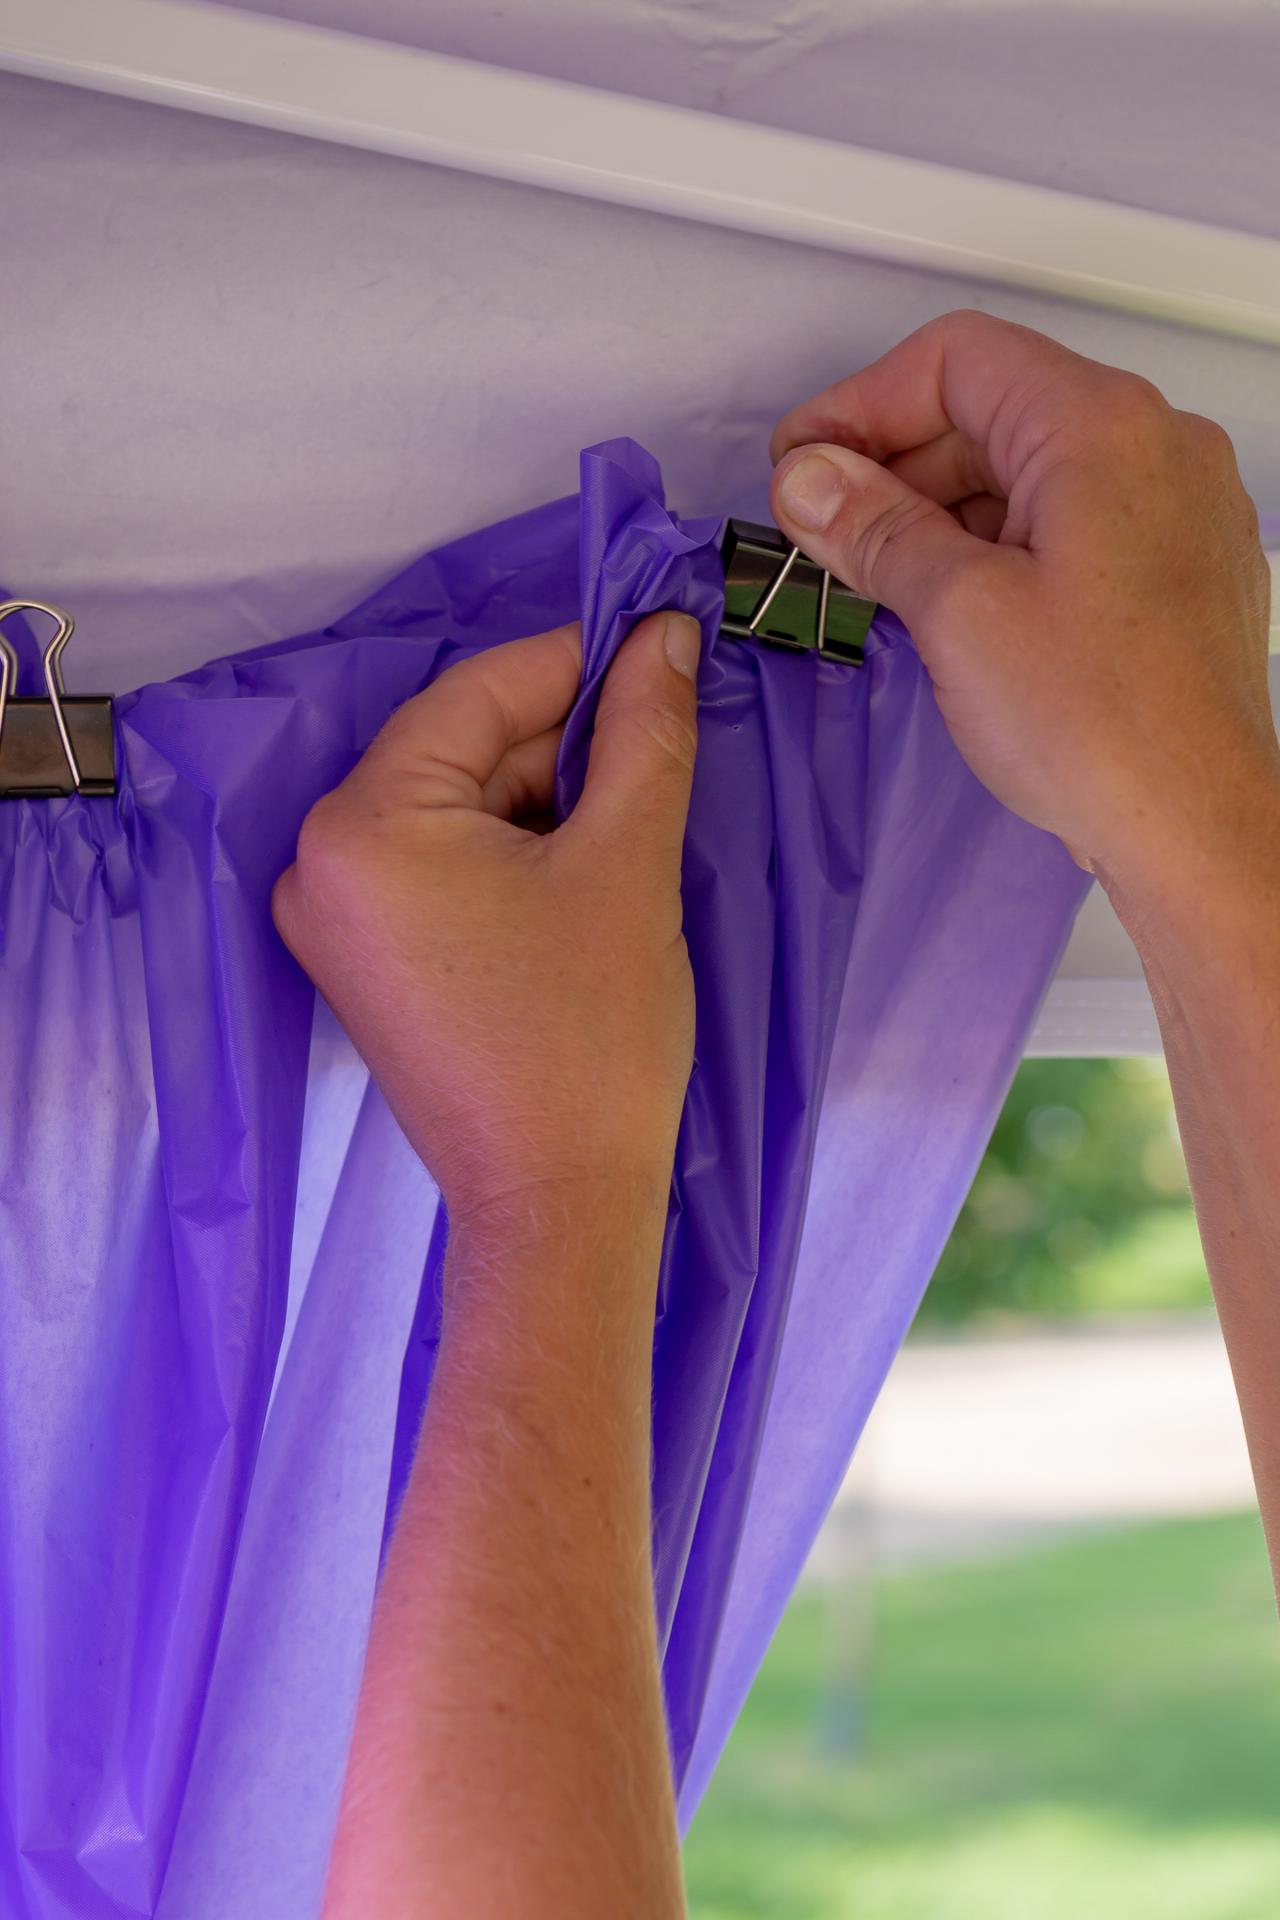
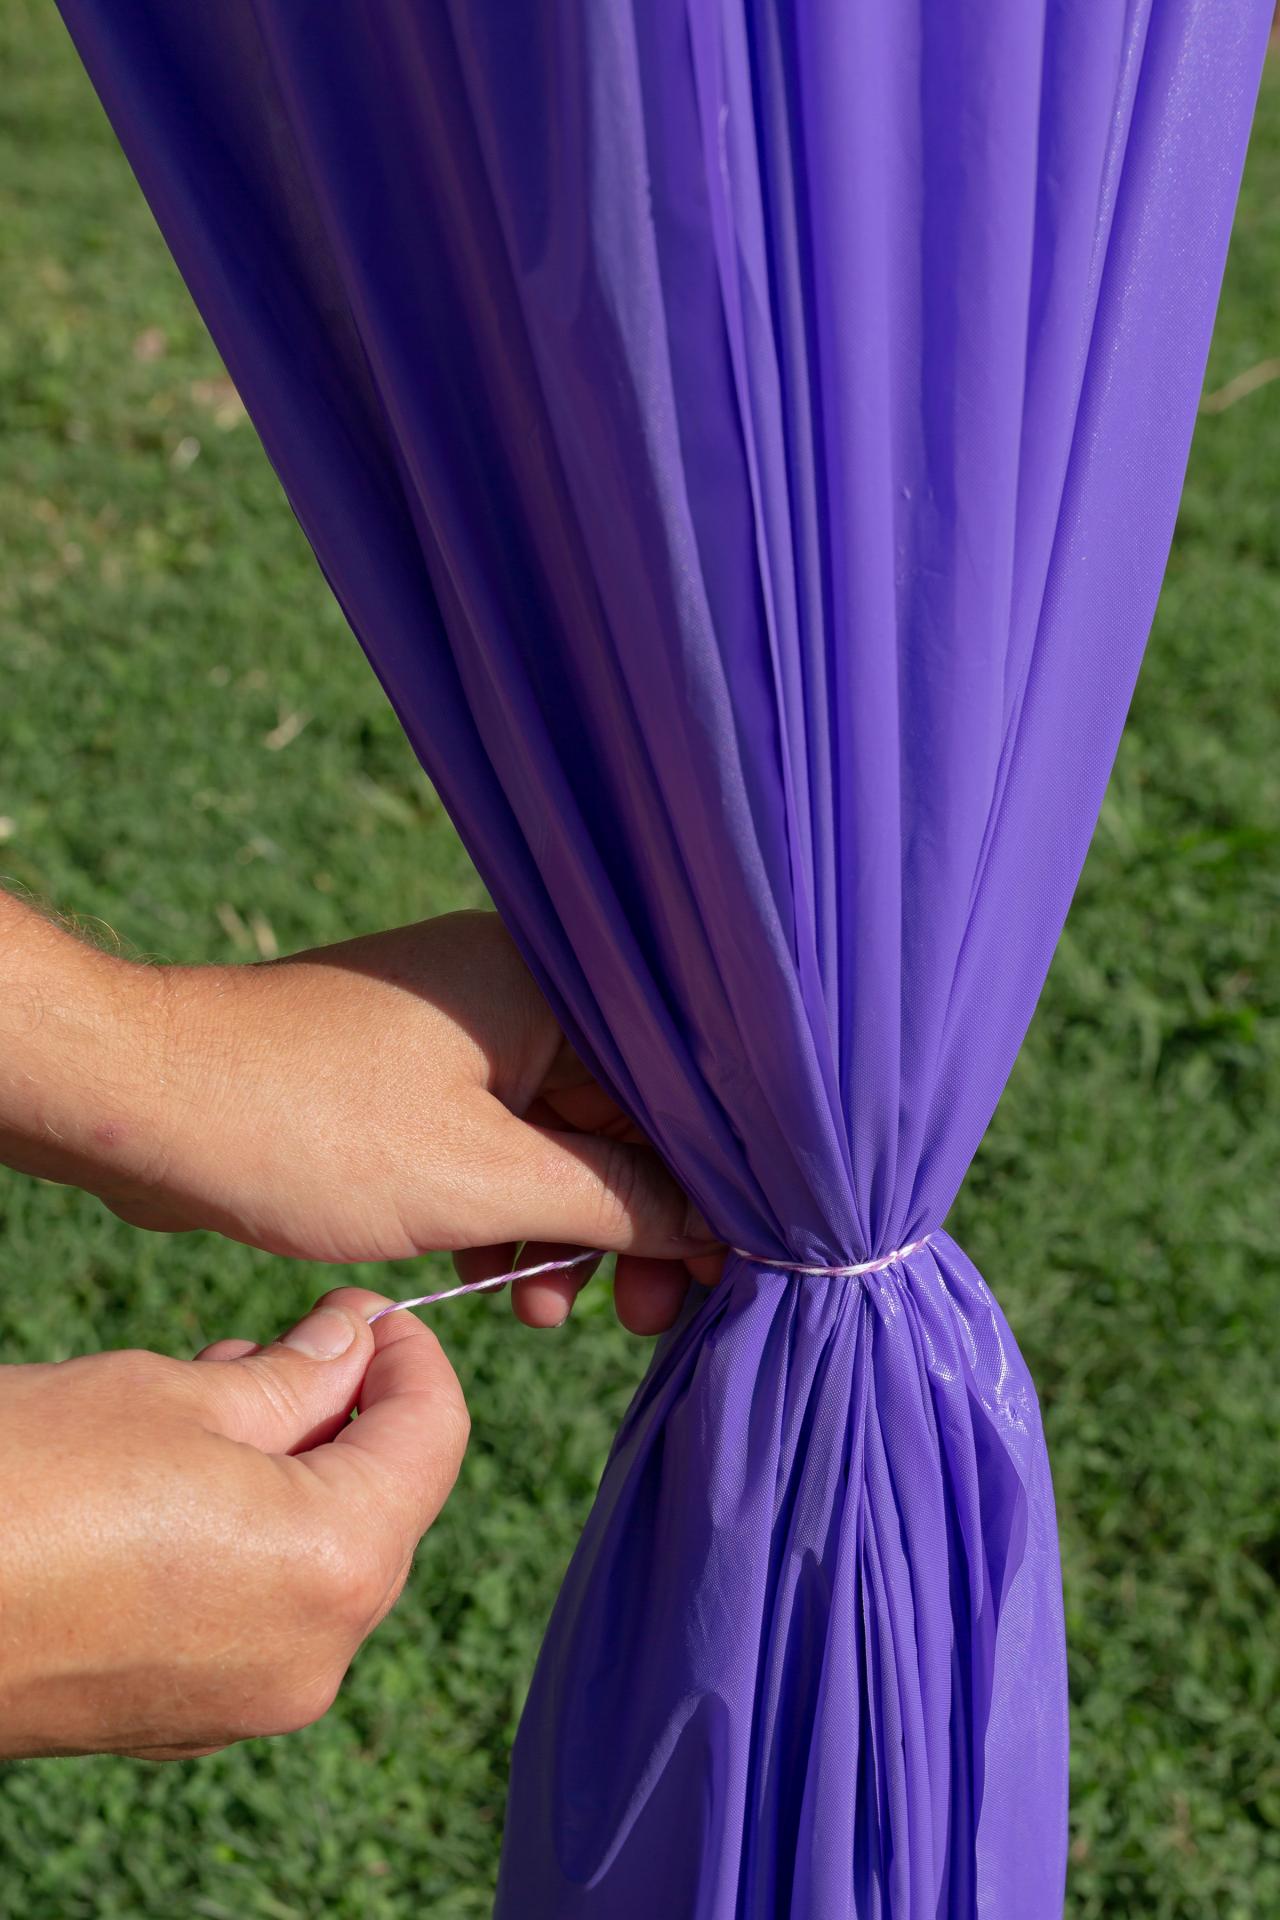
Add the Sides of the Monster's Face
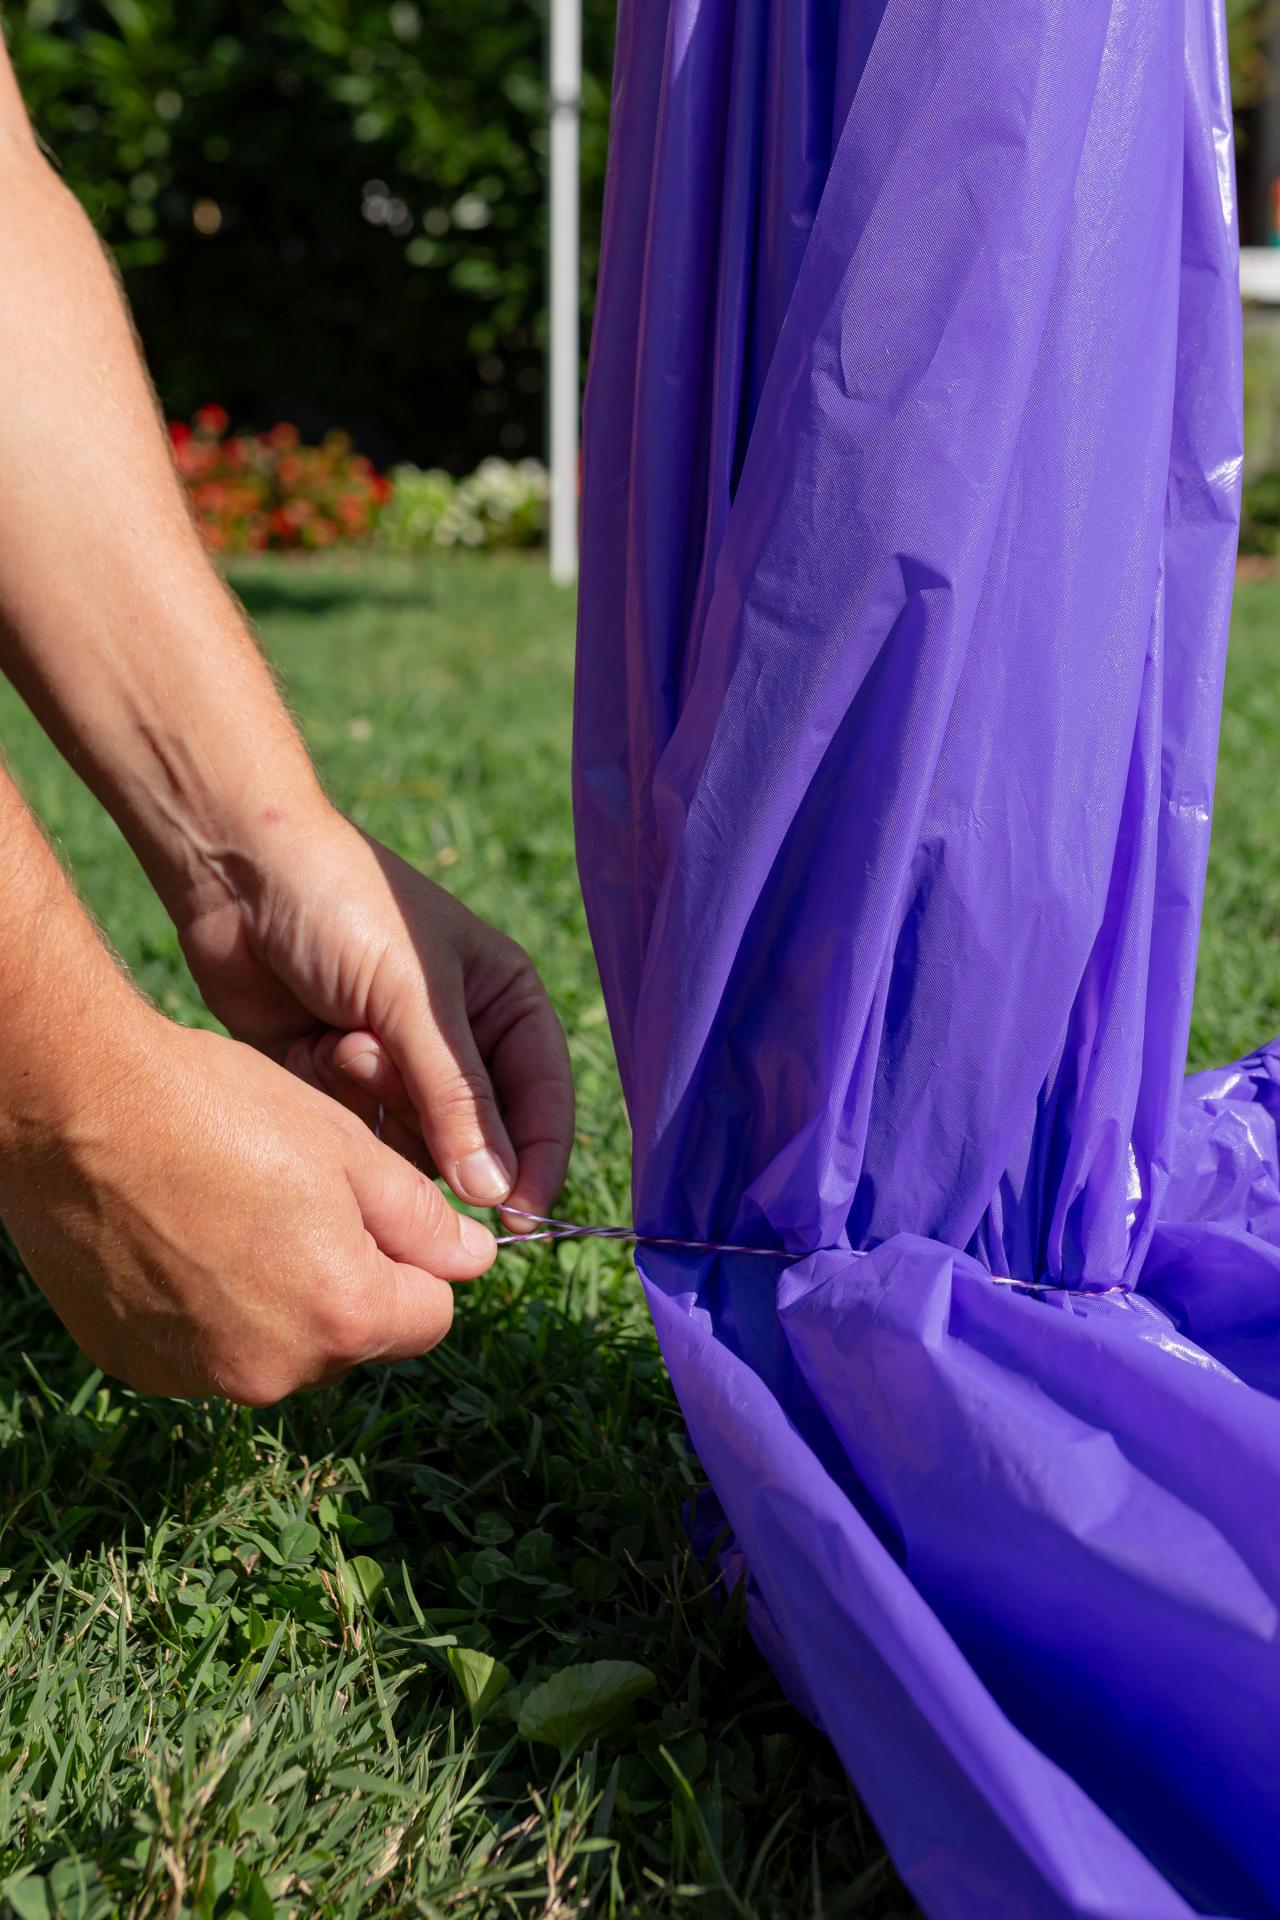
Create the sides of the monster's face by attaching a purple table cover to each of the canopy's front support poles. Use binder clips to secure the plastic material to the inner metal rail of the canopy's top (Image 1). To prevent the plastic from blowing around and to more accurately resemble the sides of an open mouth, gather together the material about halfway down each canopy's front stake with baker's twine (Image 2). Gather the bottom, tie with twine (Image 3), and cut off the excess material.

Cassidy Garcia, Styling by H. Camille Smith
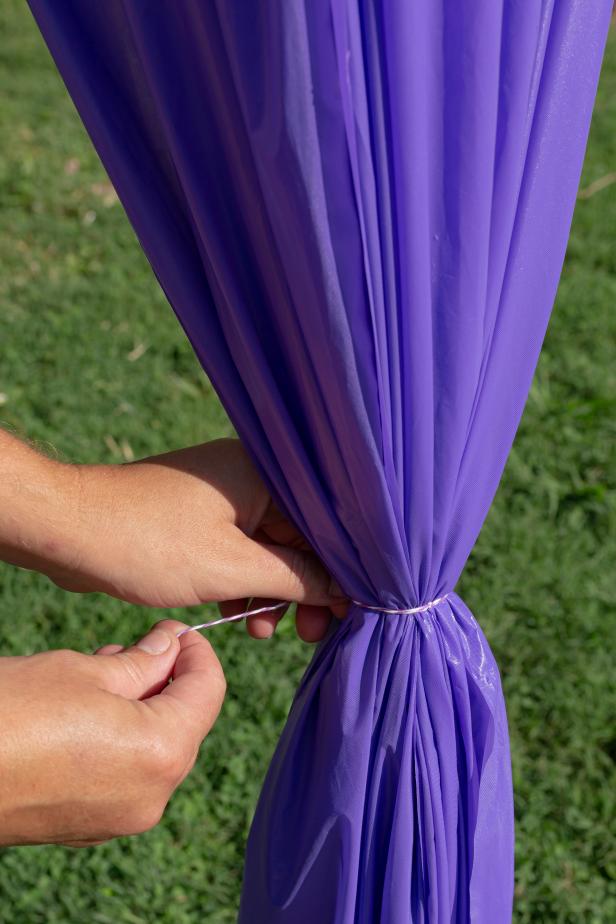
Cassidy Garcia, Styling by H. Camille Smith

Cassidy Garcia, Styling by H. Camille Smith
Add Monster's Teeth
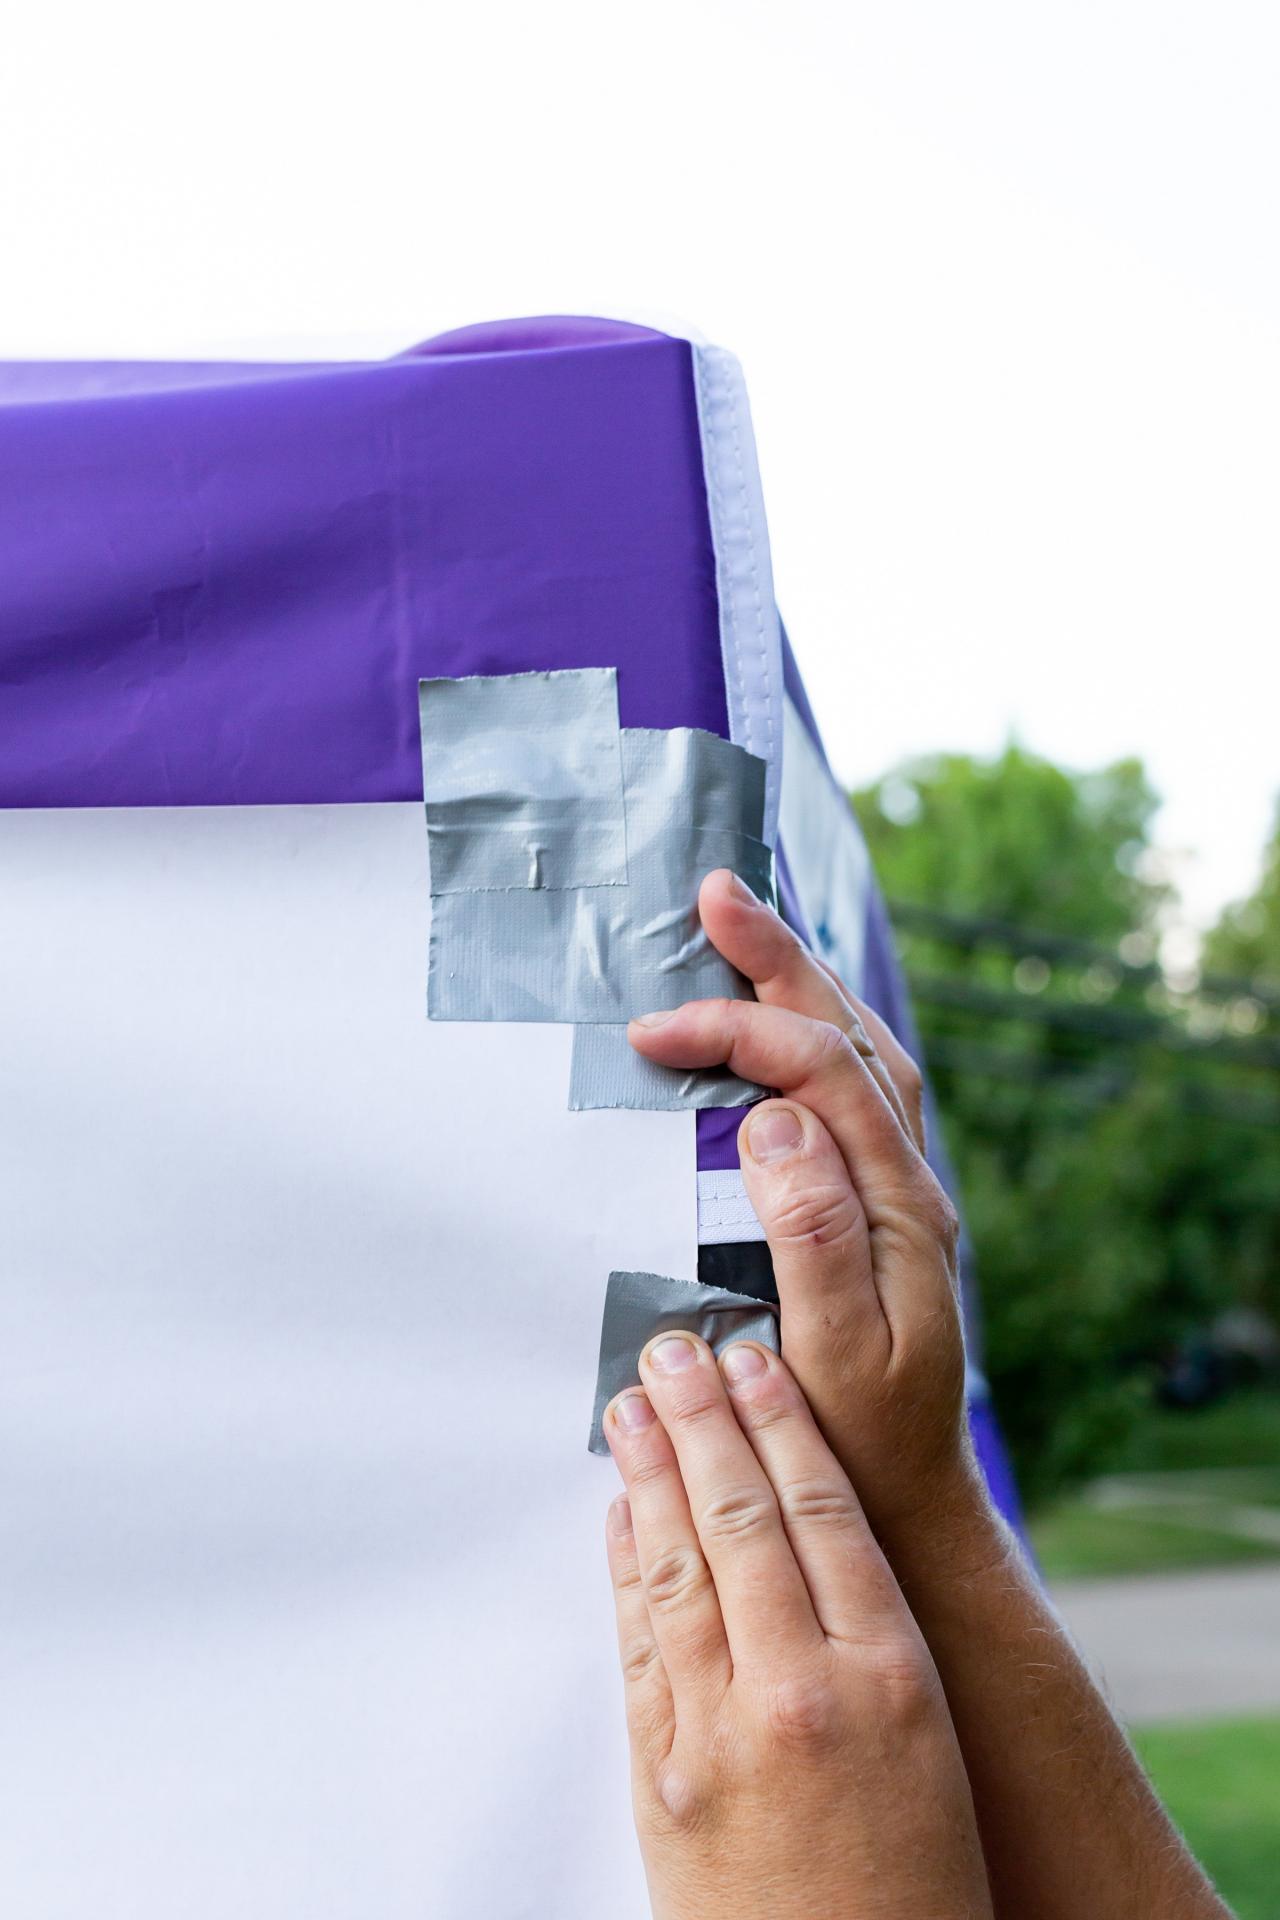
String white paper pennants along the canopy's front metal rail, securing with binder clips or duct tape.
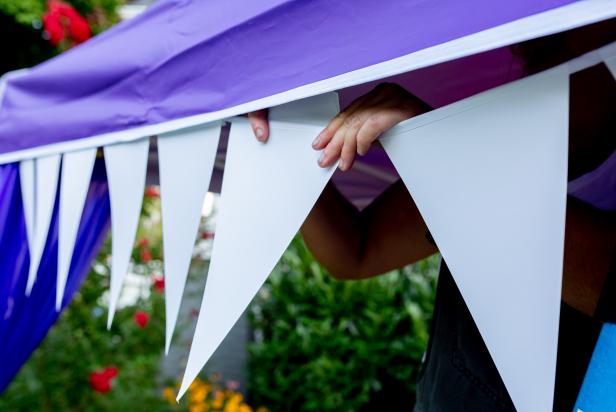
Cassidy Garcia, Styling by H. Camille Smith
Add Monster's Eyes
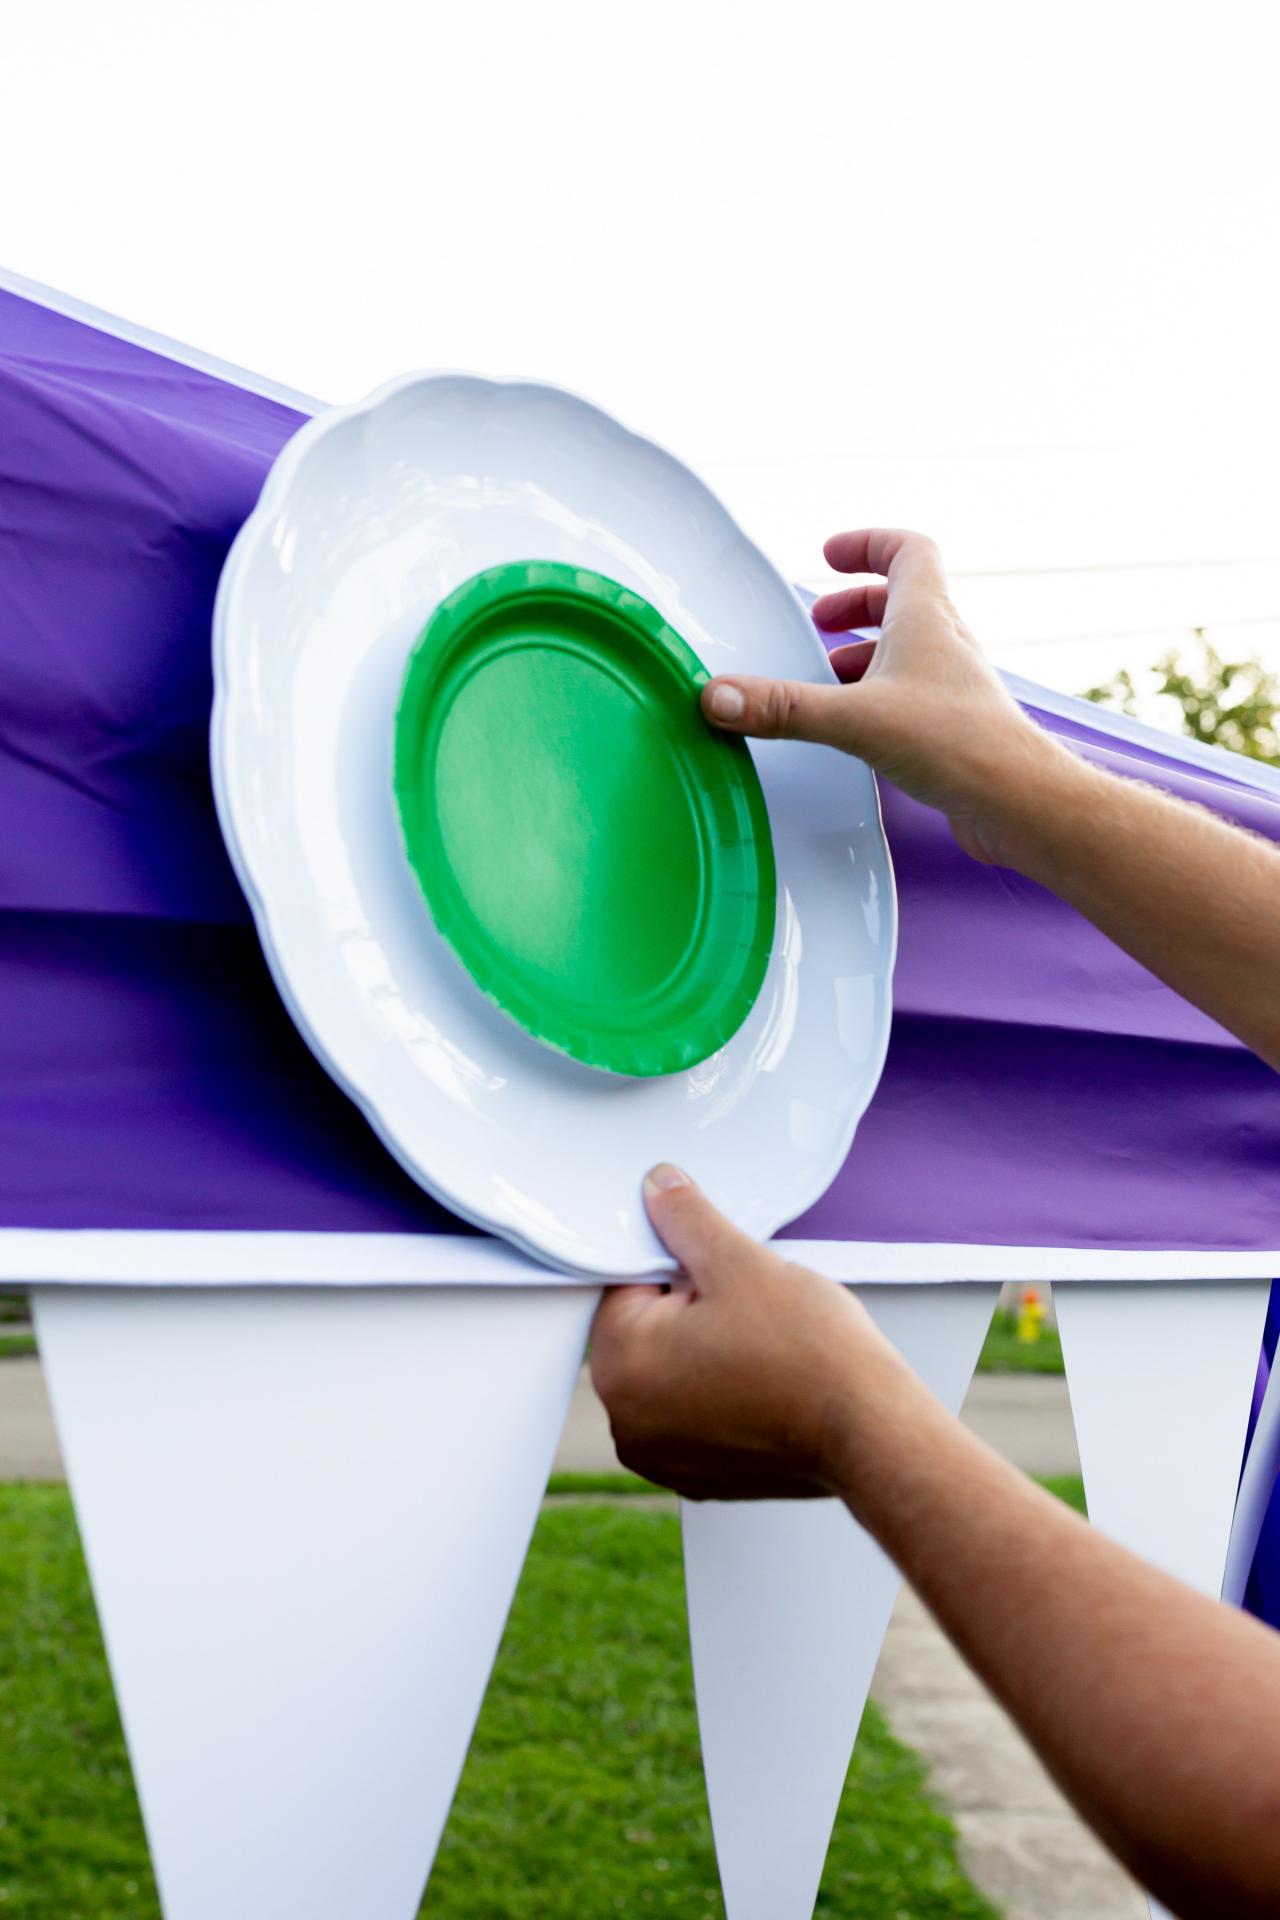
Using double-sided tape, attach a green paper plate to the center of each of the plastic platters, then attach the finished eyes to the front of the canopy's awning, just above the teeth.

Cassidy Garcia, Styling by H. Camille Smith
Create the Back of the Monster's Mouth
Unroll red bulletin board paper and attach two sheets, side-by-side, to the back of the tent, red-side-facing-forward, with duct tape along the top and sides of the tent's back support pole.

Cassidy Garcia, Styling by H. Camille Smith
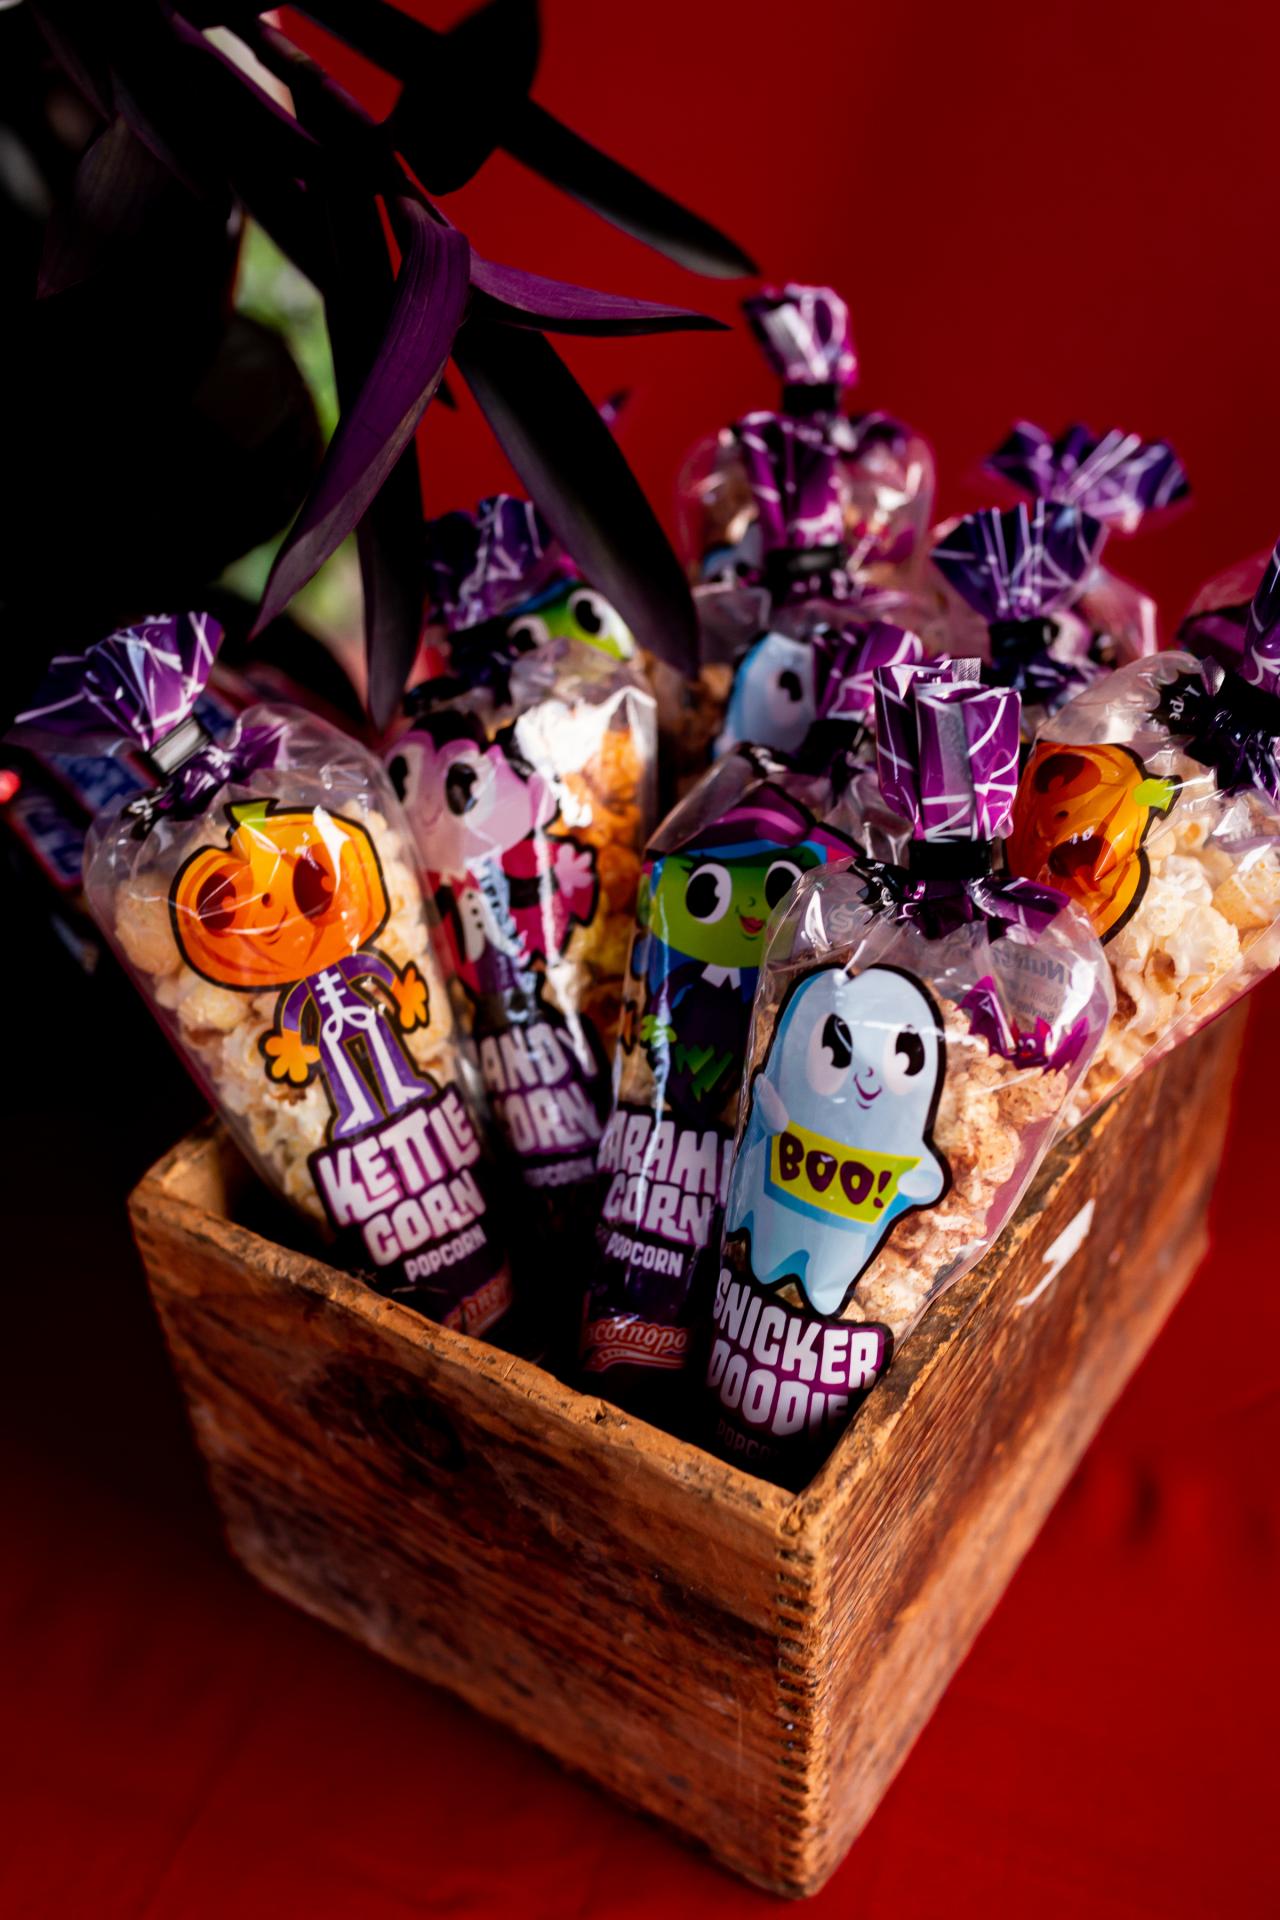
Set Up a Treat Table
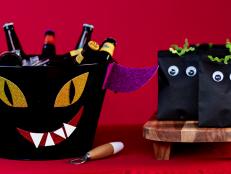
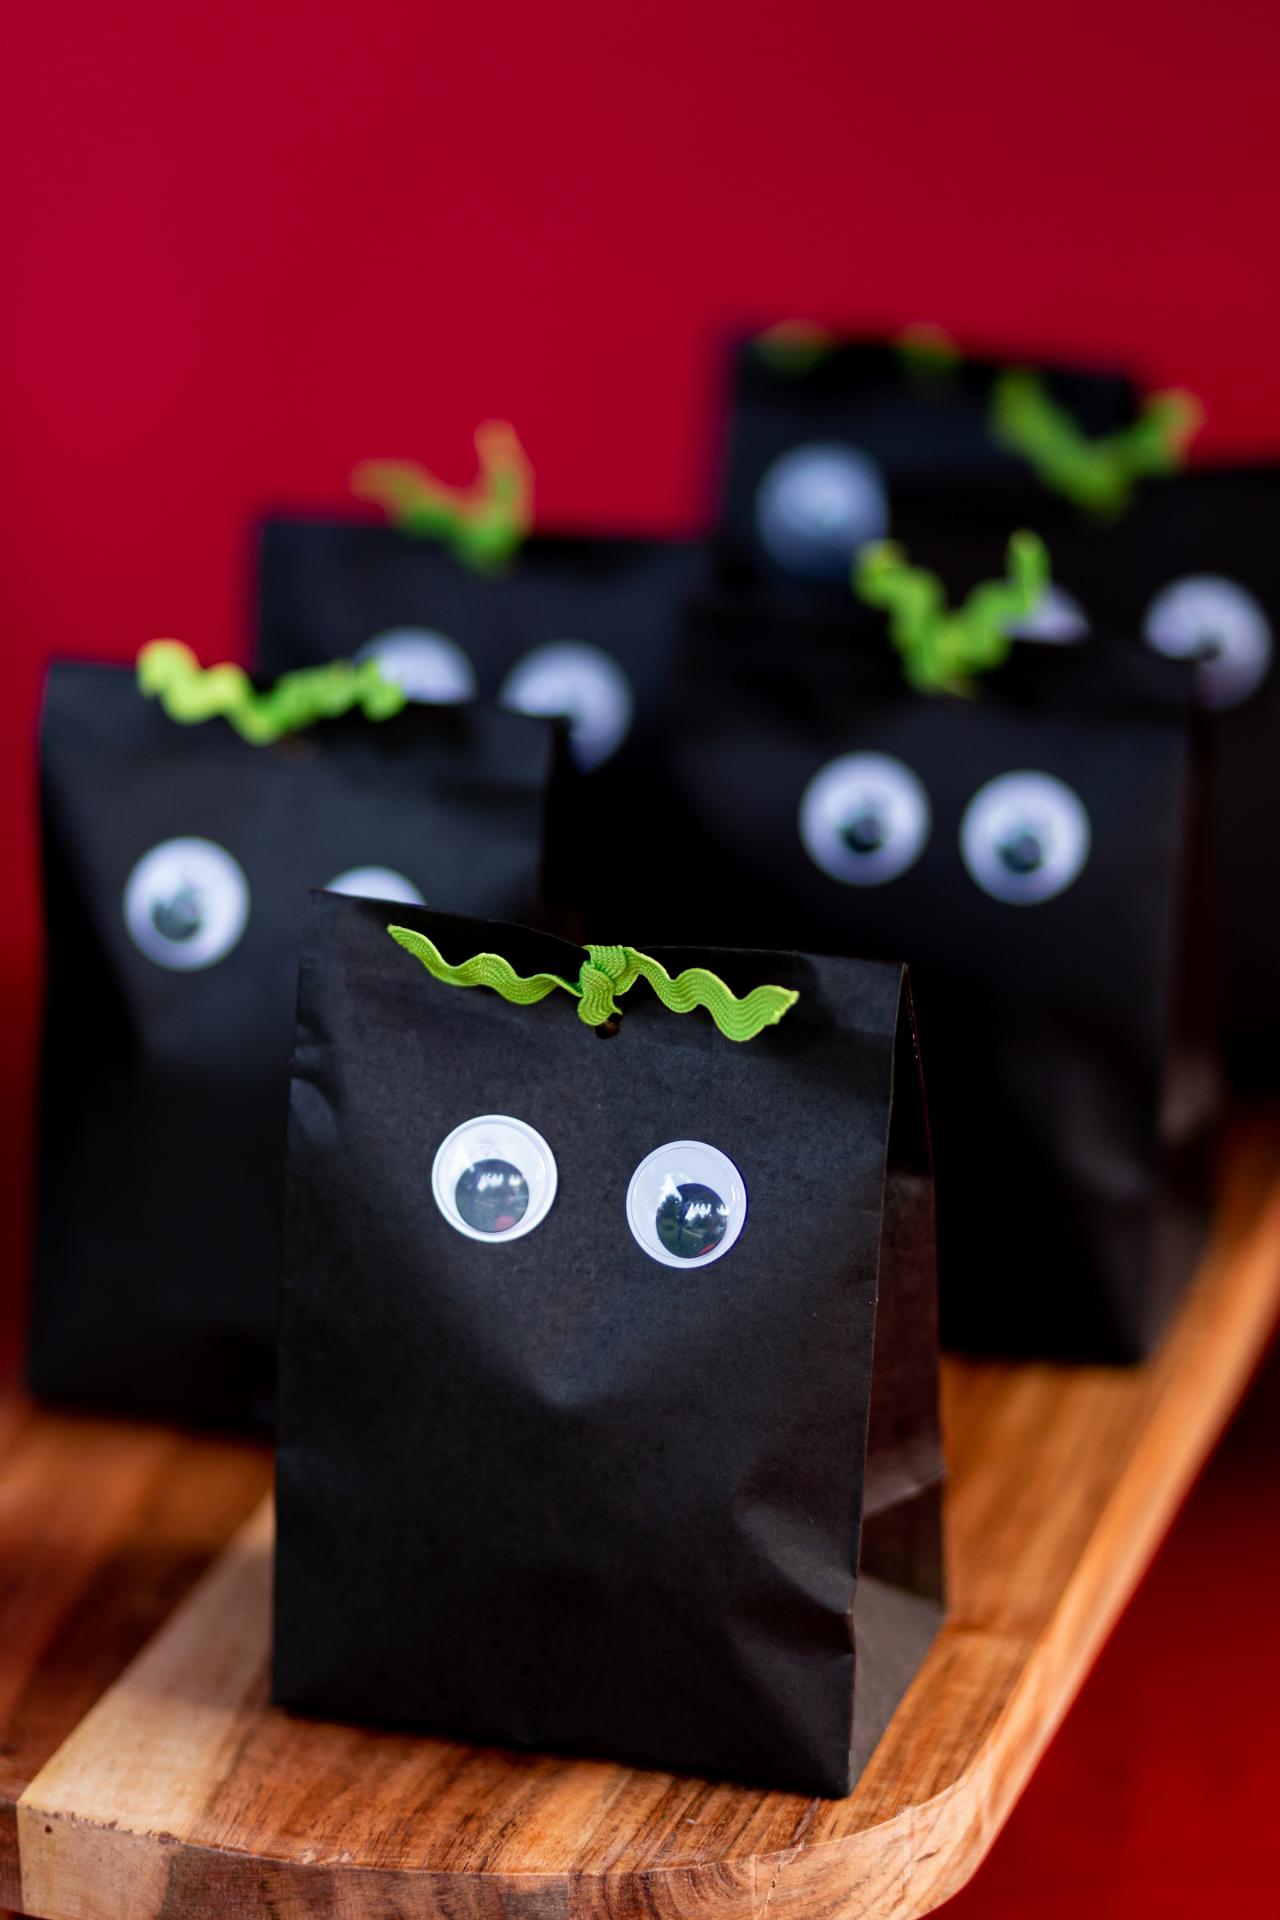
Cover a folding table with a red tablecloth (again to resemble the interior of the monster's mouth) then stock the table with an assortment of grab-and-go goodies, like googly-eyed paper treat bags (Image 1), candy corn cones (Image 2) and full-size candy bars (Image 3).

Cassidy Garcia, Styling by H. Camille Smith

Cassidy Garcia, Styling by H. Camille Smith

Cassidy Garcia, Styling by H. Camille Smith
Photo By: Cassidy Garcia, Styling by H. Camille Smith
Photo By: Cassidy Garcia, Styling by H. Camille Smith
Photo By: Cassidy Garcia, Styling by H. Camille Smith
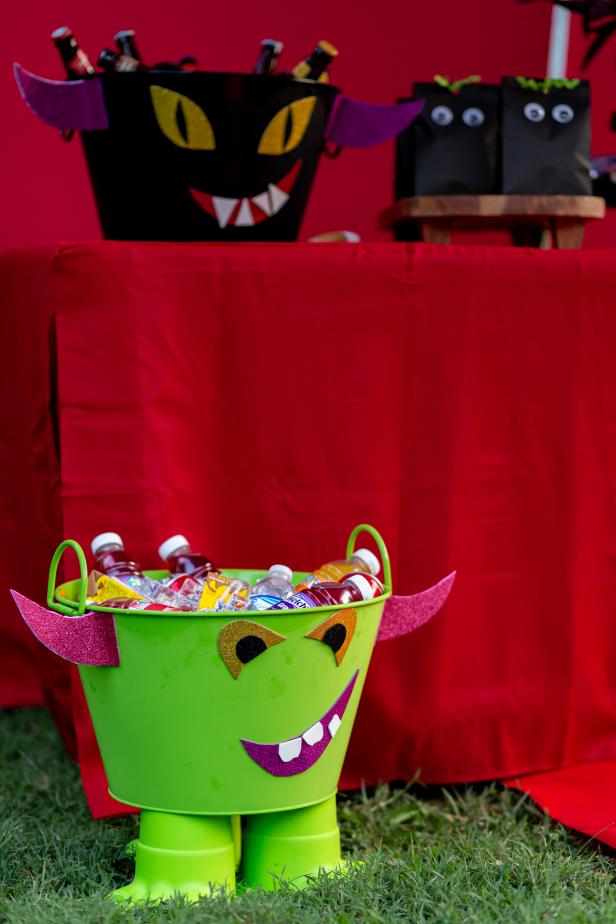
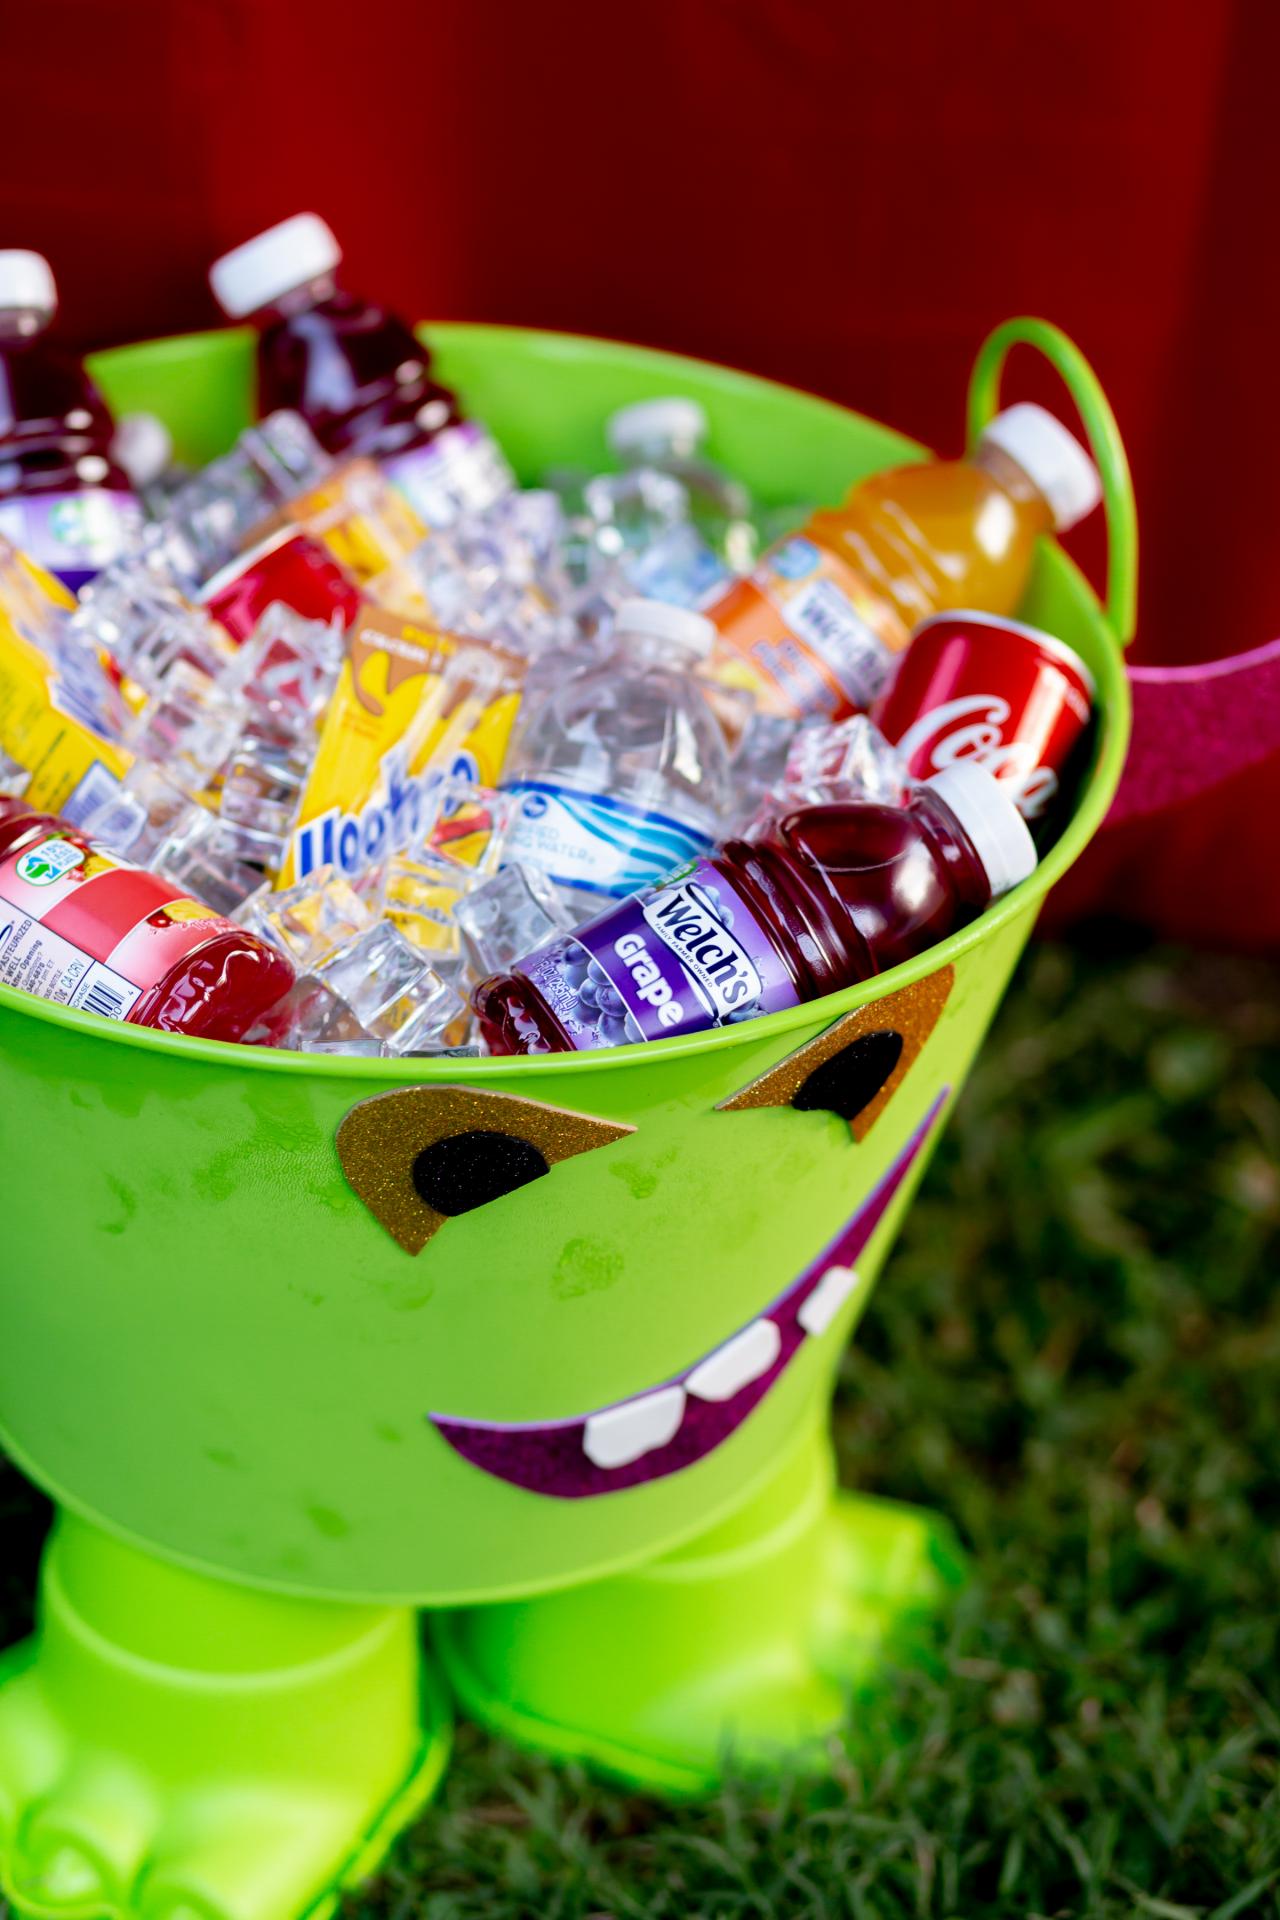
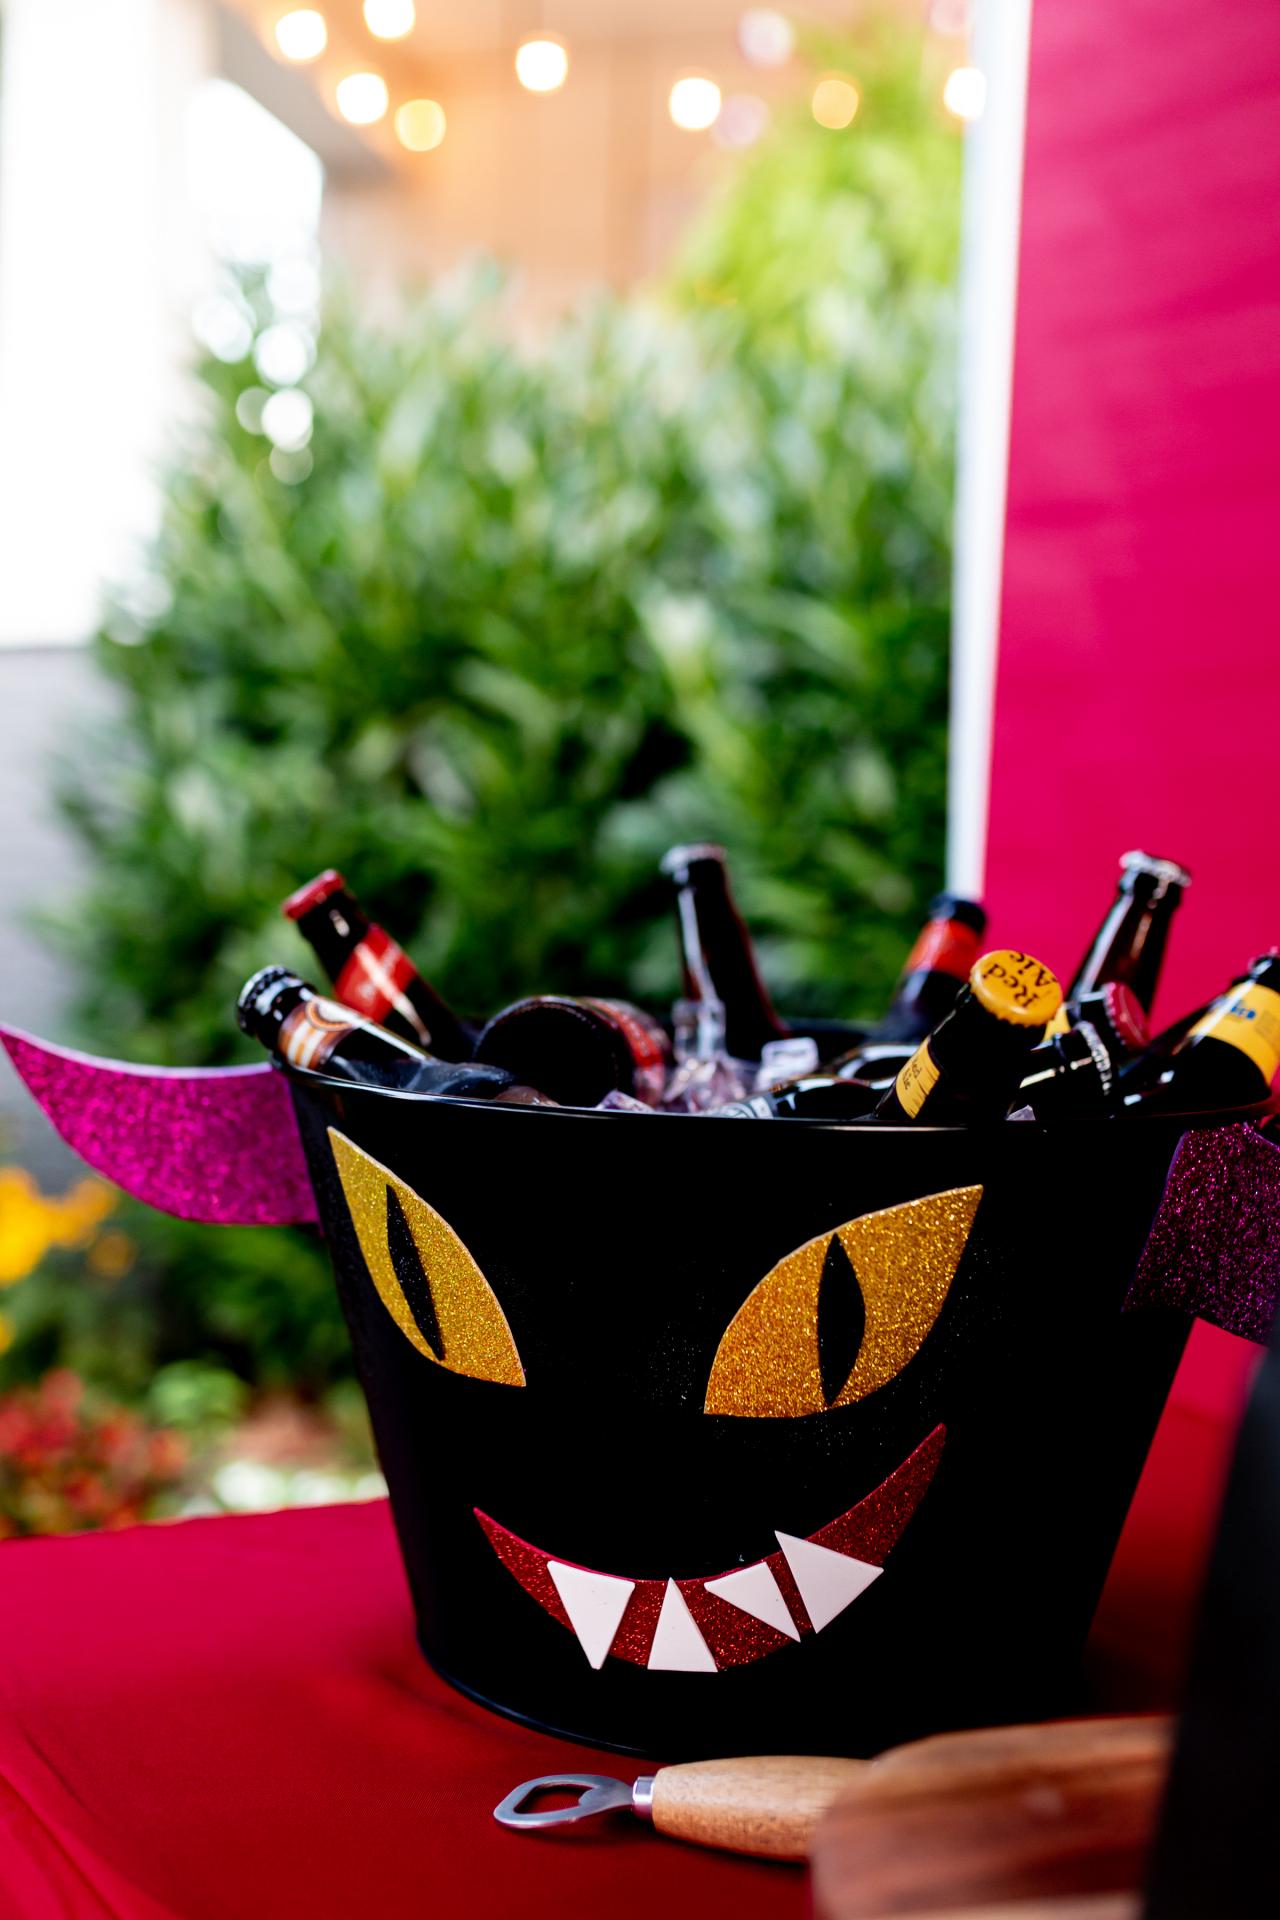
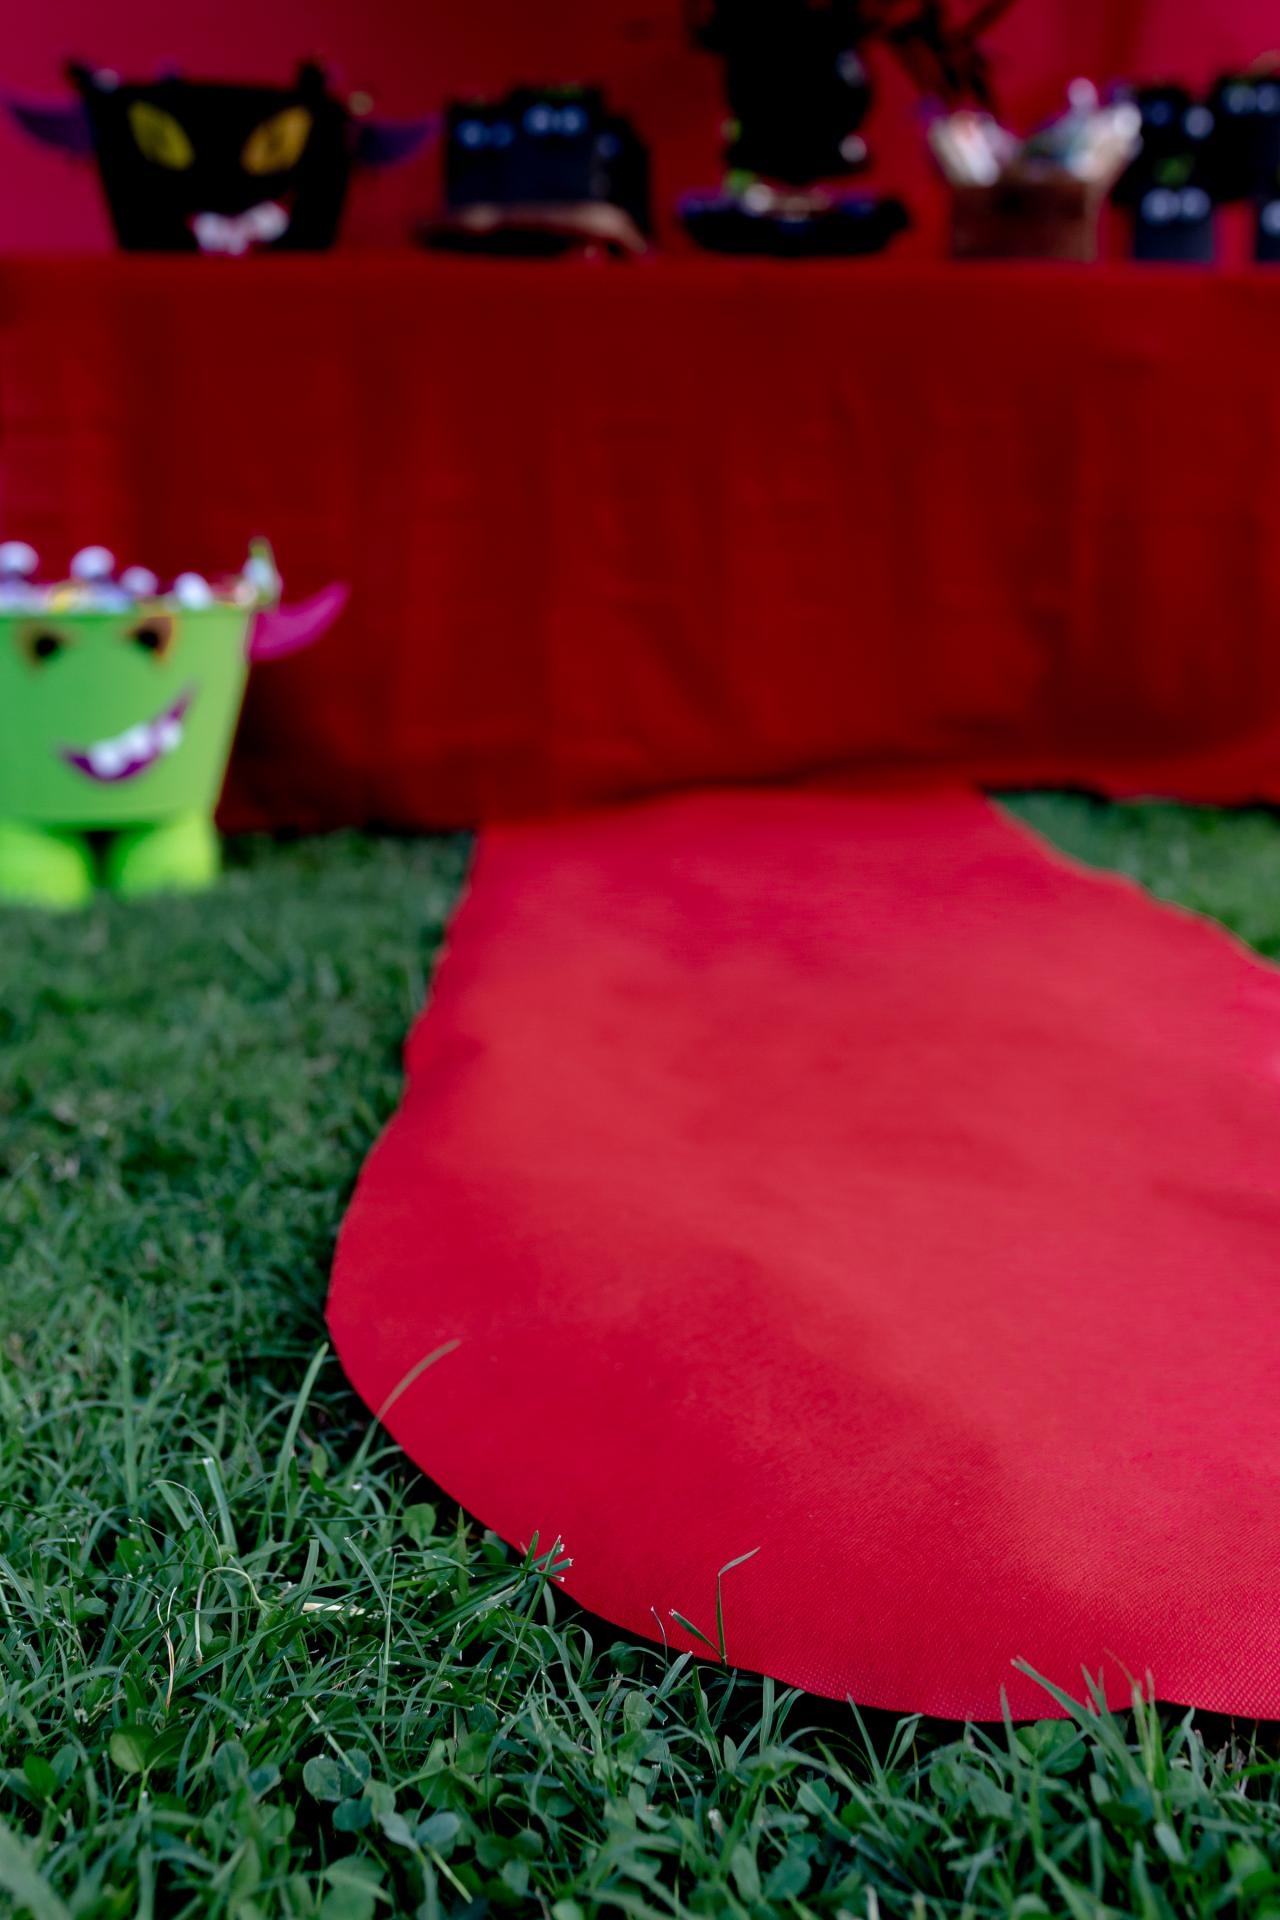
Add Beverage Tubs
Self-adhesive craft foam and some sand forms are all you need to give basic beverage tubs a monsterrific makeover into either a friendly monster filled with kids' beverages (Image 1) or an adults-only monster filled with sinister sips (Image 2). Tip: Place the kid-friendly beverages on the ground so they're within easy reach of the kiddos, and place the alcoholic beverage tub up on the treat table (Image 3).

Cassidy Garcia, Styling by H. Camille Smith

Cassidy Garcia, Styling by H. Camille Smith
Cassidy Garcia, Styling by H. Camille Smith
Photo By: Cassidy Garcia, Styling by H. Camille Smith
Photo By: Cassidy Garcia, Styling by H. Camille Smith
Photo By: Cassidy Garcia, Styling by H. Camille Smith
Add the Monster's Tongue
Finally, roll out the remaining red banner paper and cut the end of the paper so it resembles a curved tongue.

Cassidy Garcia, Styling by H. Camille Smith
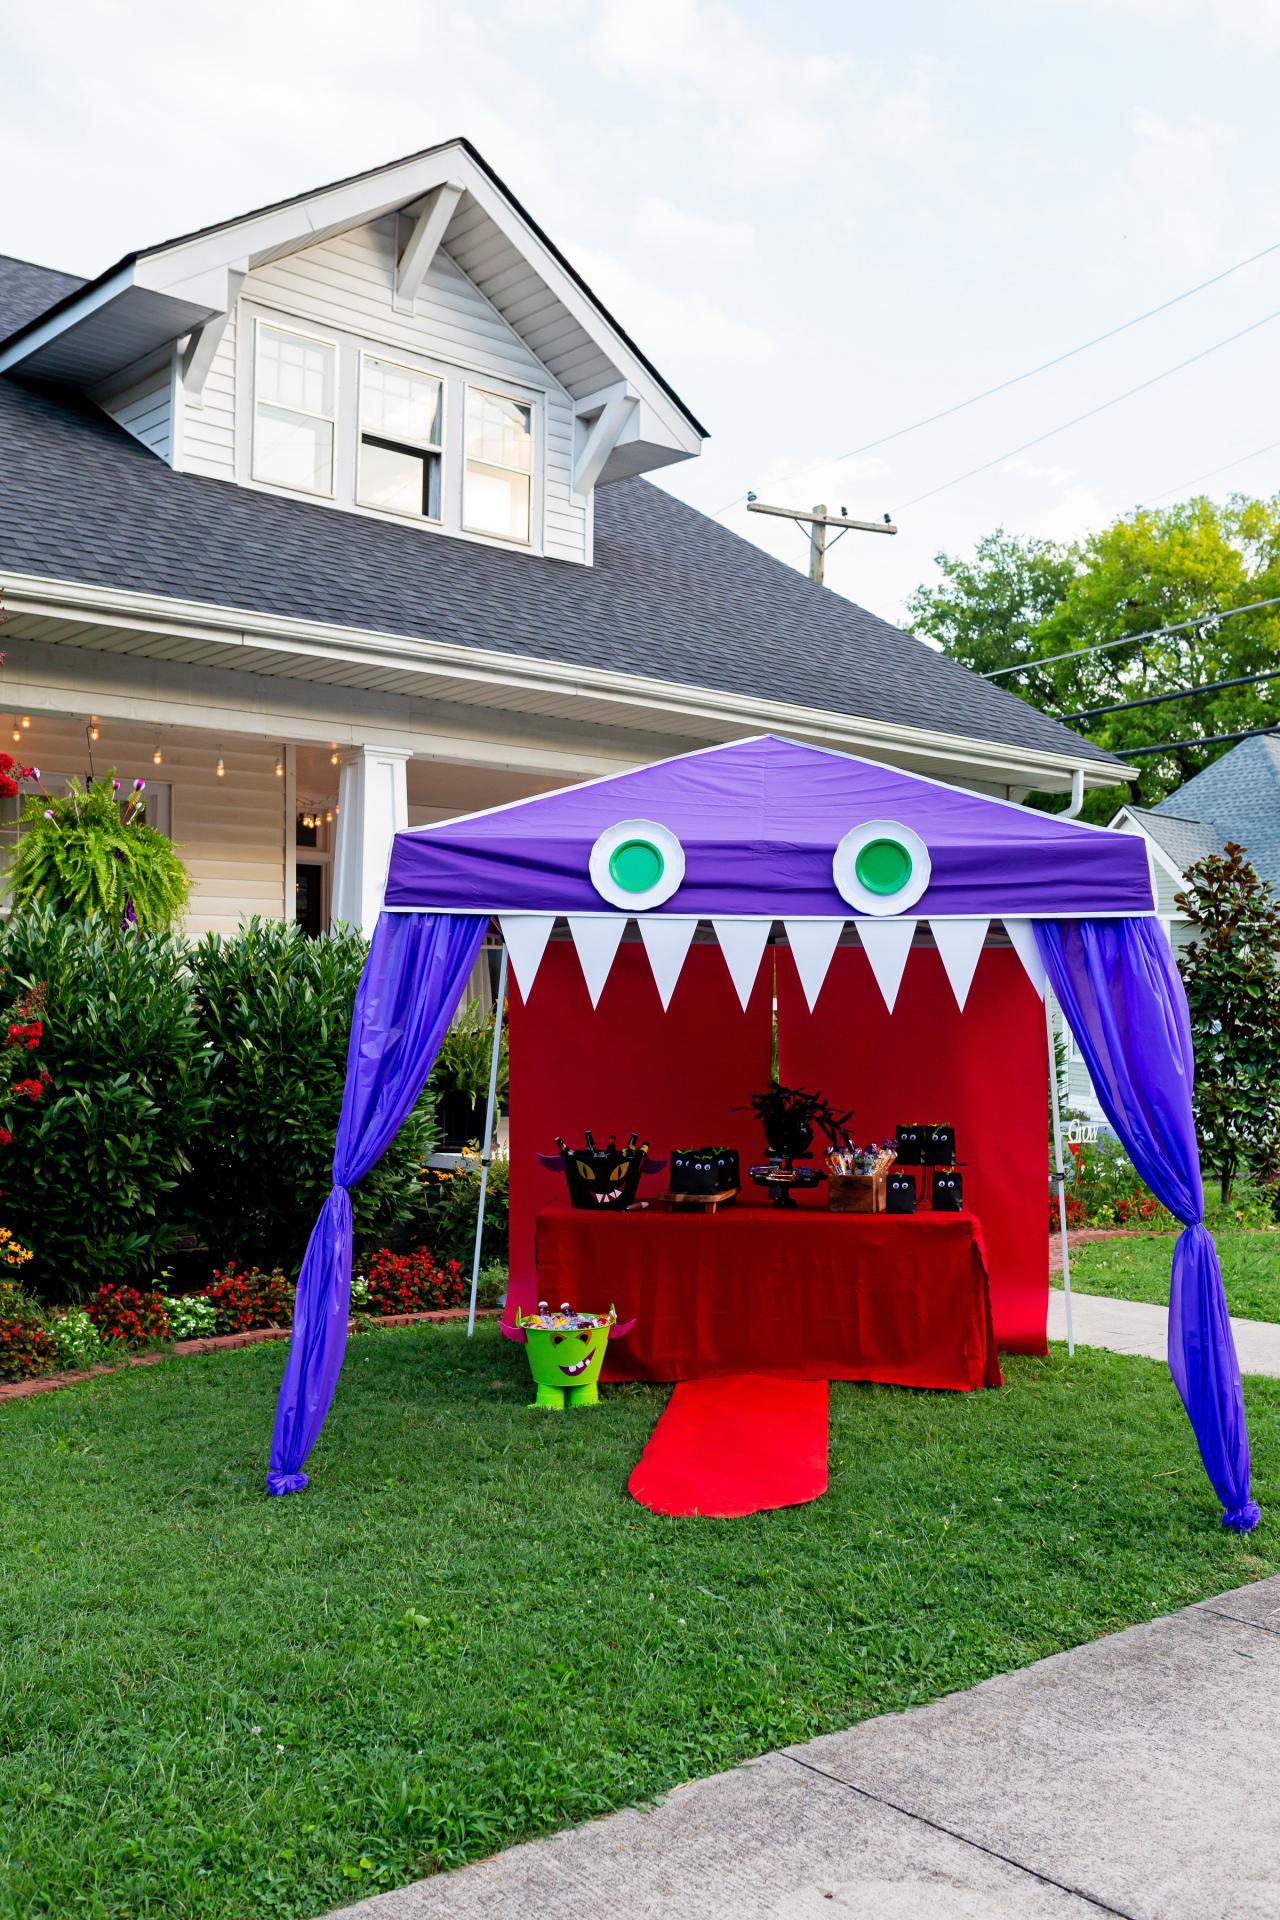
Monstrously Welcome Guests
Step back and admire your handiwork! Gather the ghouls and enjoy celebrating Halloween outdoors with the best trick-or-treat setup on the block.

Cassidy Garcia, Styling by H. Camille Smith
Cassidy Garcia, Styling by H. Camille Smith
Photo By: Cassidy Garcia, Styling by H. Camille Smith
Photo By: Cassidy Garcia, Styling by H. Camille Smith


