


5 DIY Dollar Store Halloween Decor Ideas
Make Halloween decor on the cheap using items from the dollar store.
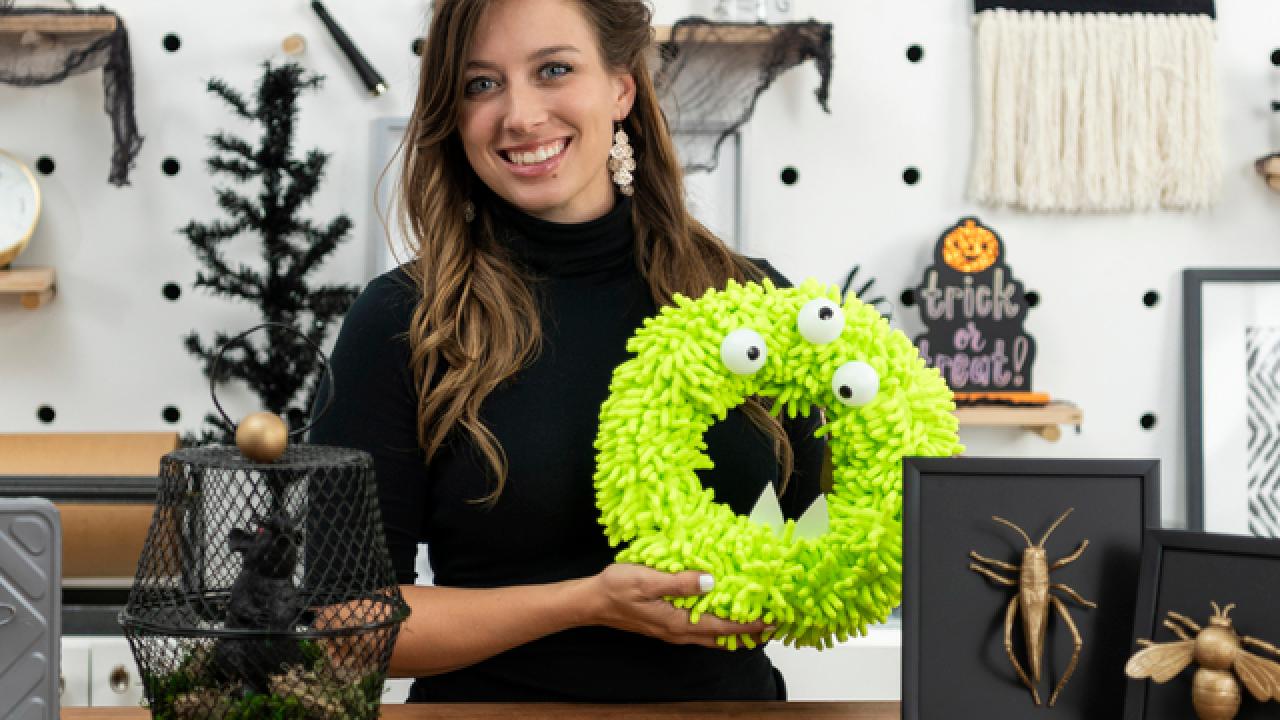
MONSTER WREATH

What You'll Need:
- (7) dollar-store car washing mitts
- small foam wreath form
- T-pins
- black paint marker
- (3) ping-pong balls
- white card stock
- hot glue gun and sticks
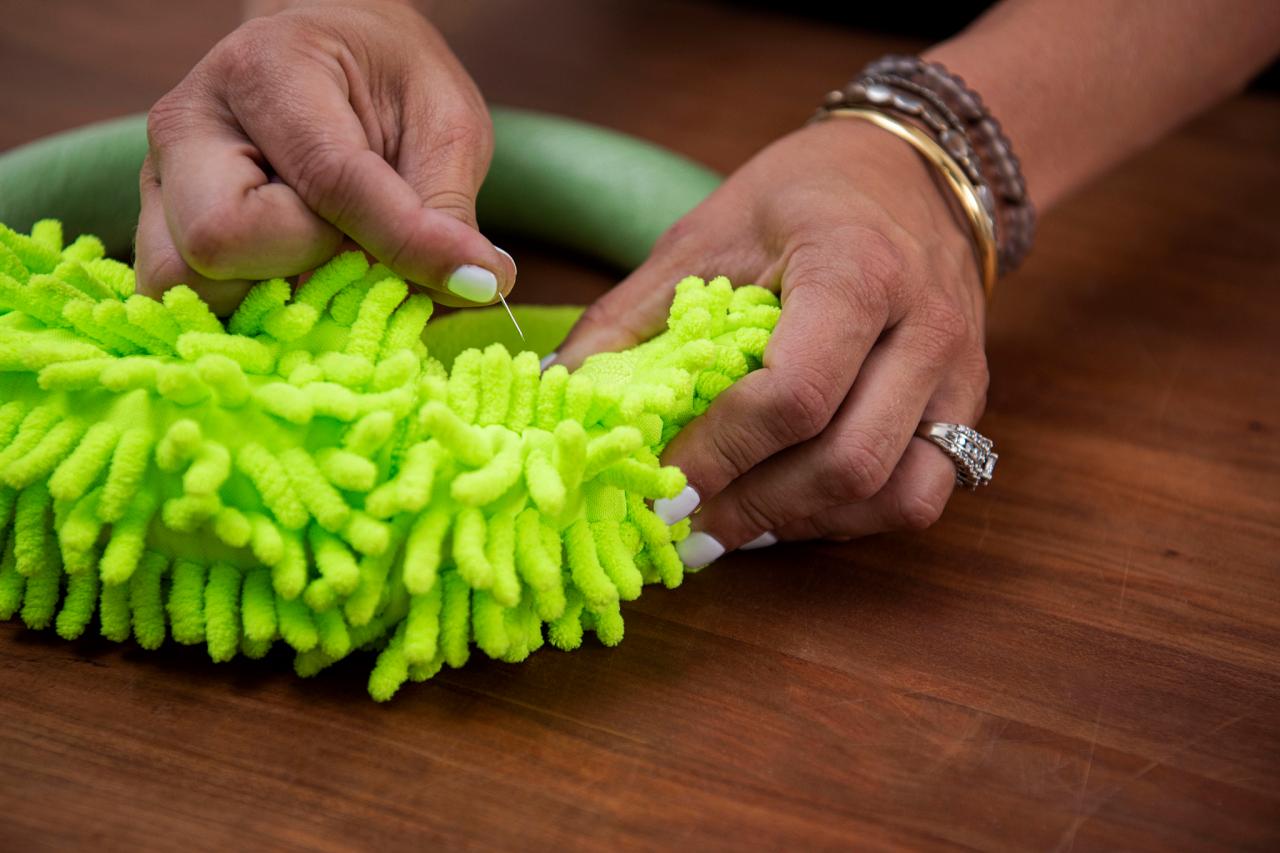
Attach the Mitts
Wrap the first mitt around the wreath form, and attach using T-pins. Repeat until the form is completely covered.

Sarah Busby

Sarah Busby
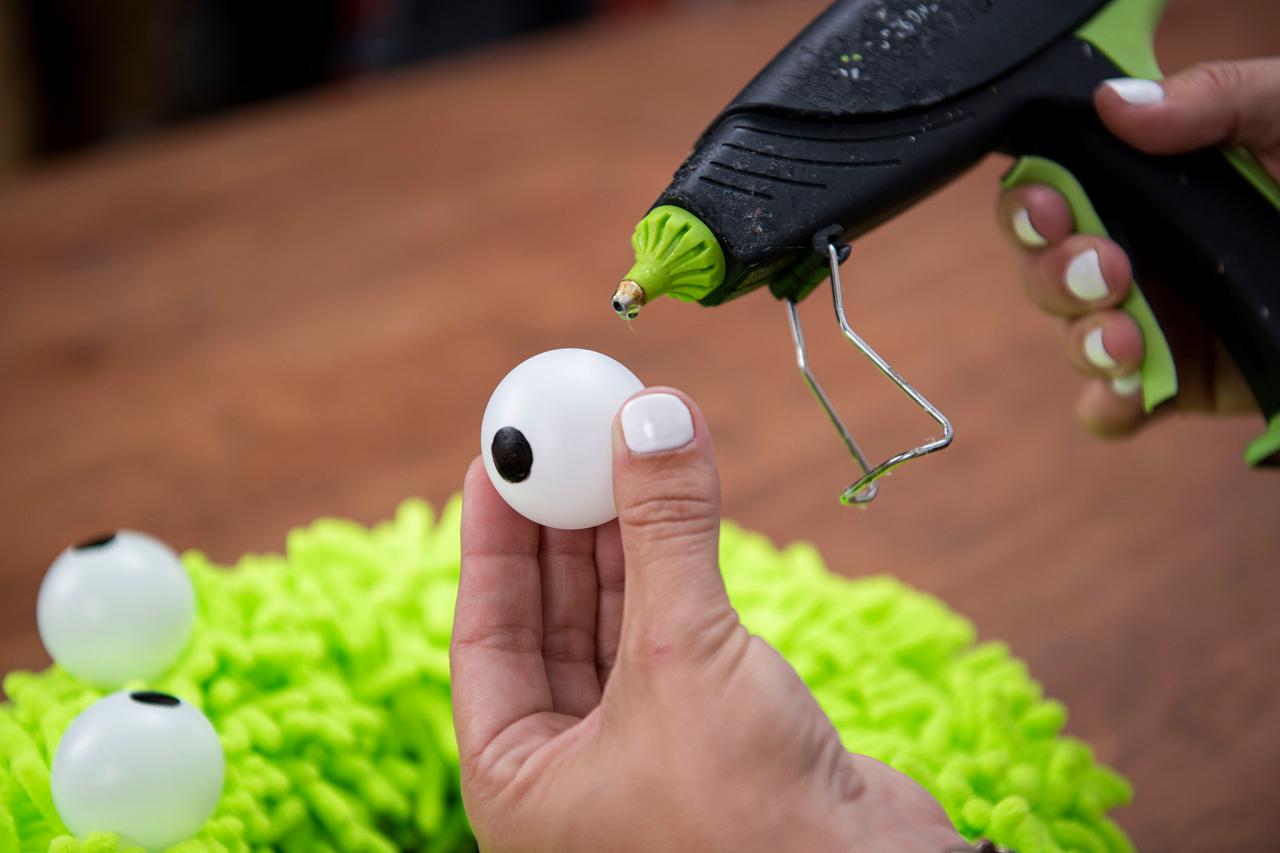
Attach the Eyes
Draw a black circle on each ping-pong ball using a paint marker (Image 1 below), and attach to the wreath using hot glue (Image 2 below).

Sarah Busby

Sarah Busby
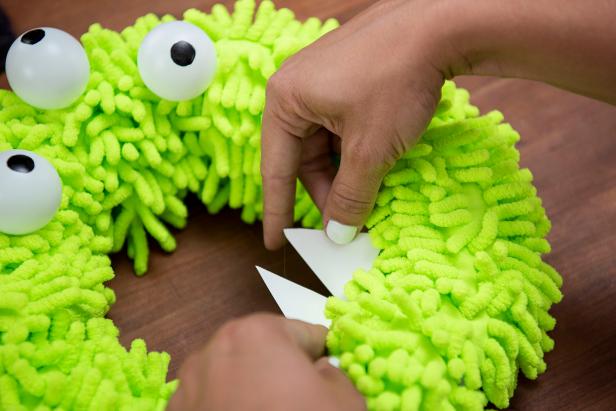
Attach the Teeth
Cut two triangular shapes from the card stock to resemble pointy teeth. Attach to the wreath using hot glue.

Sarah Busby
Sarah Busby

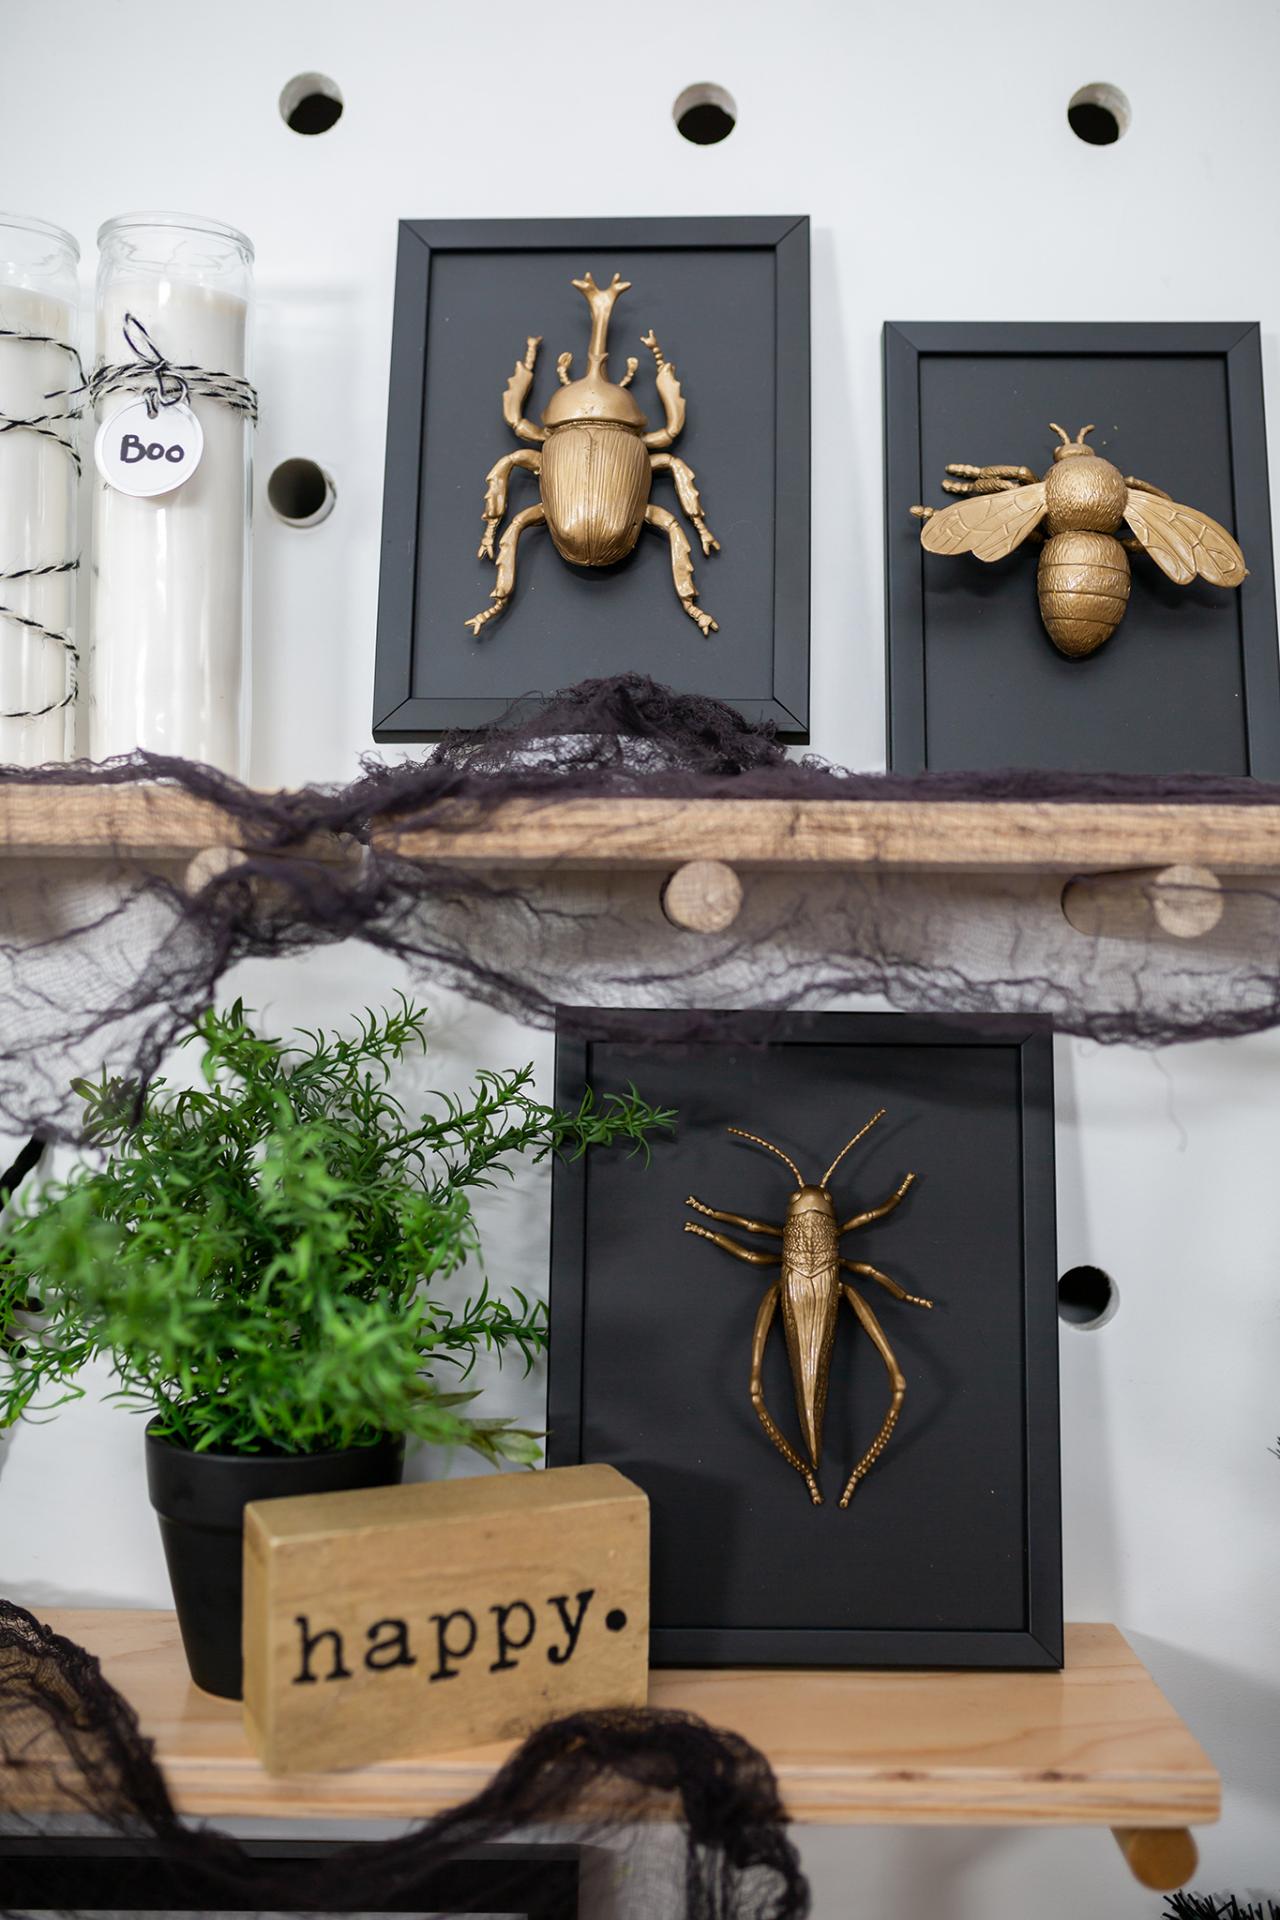
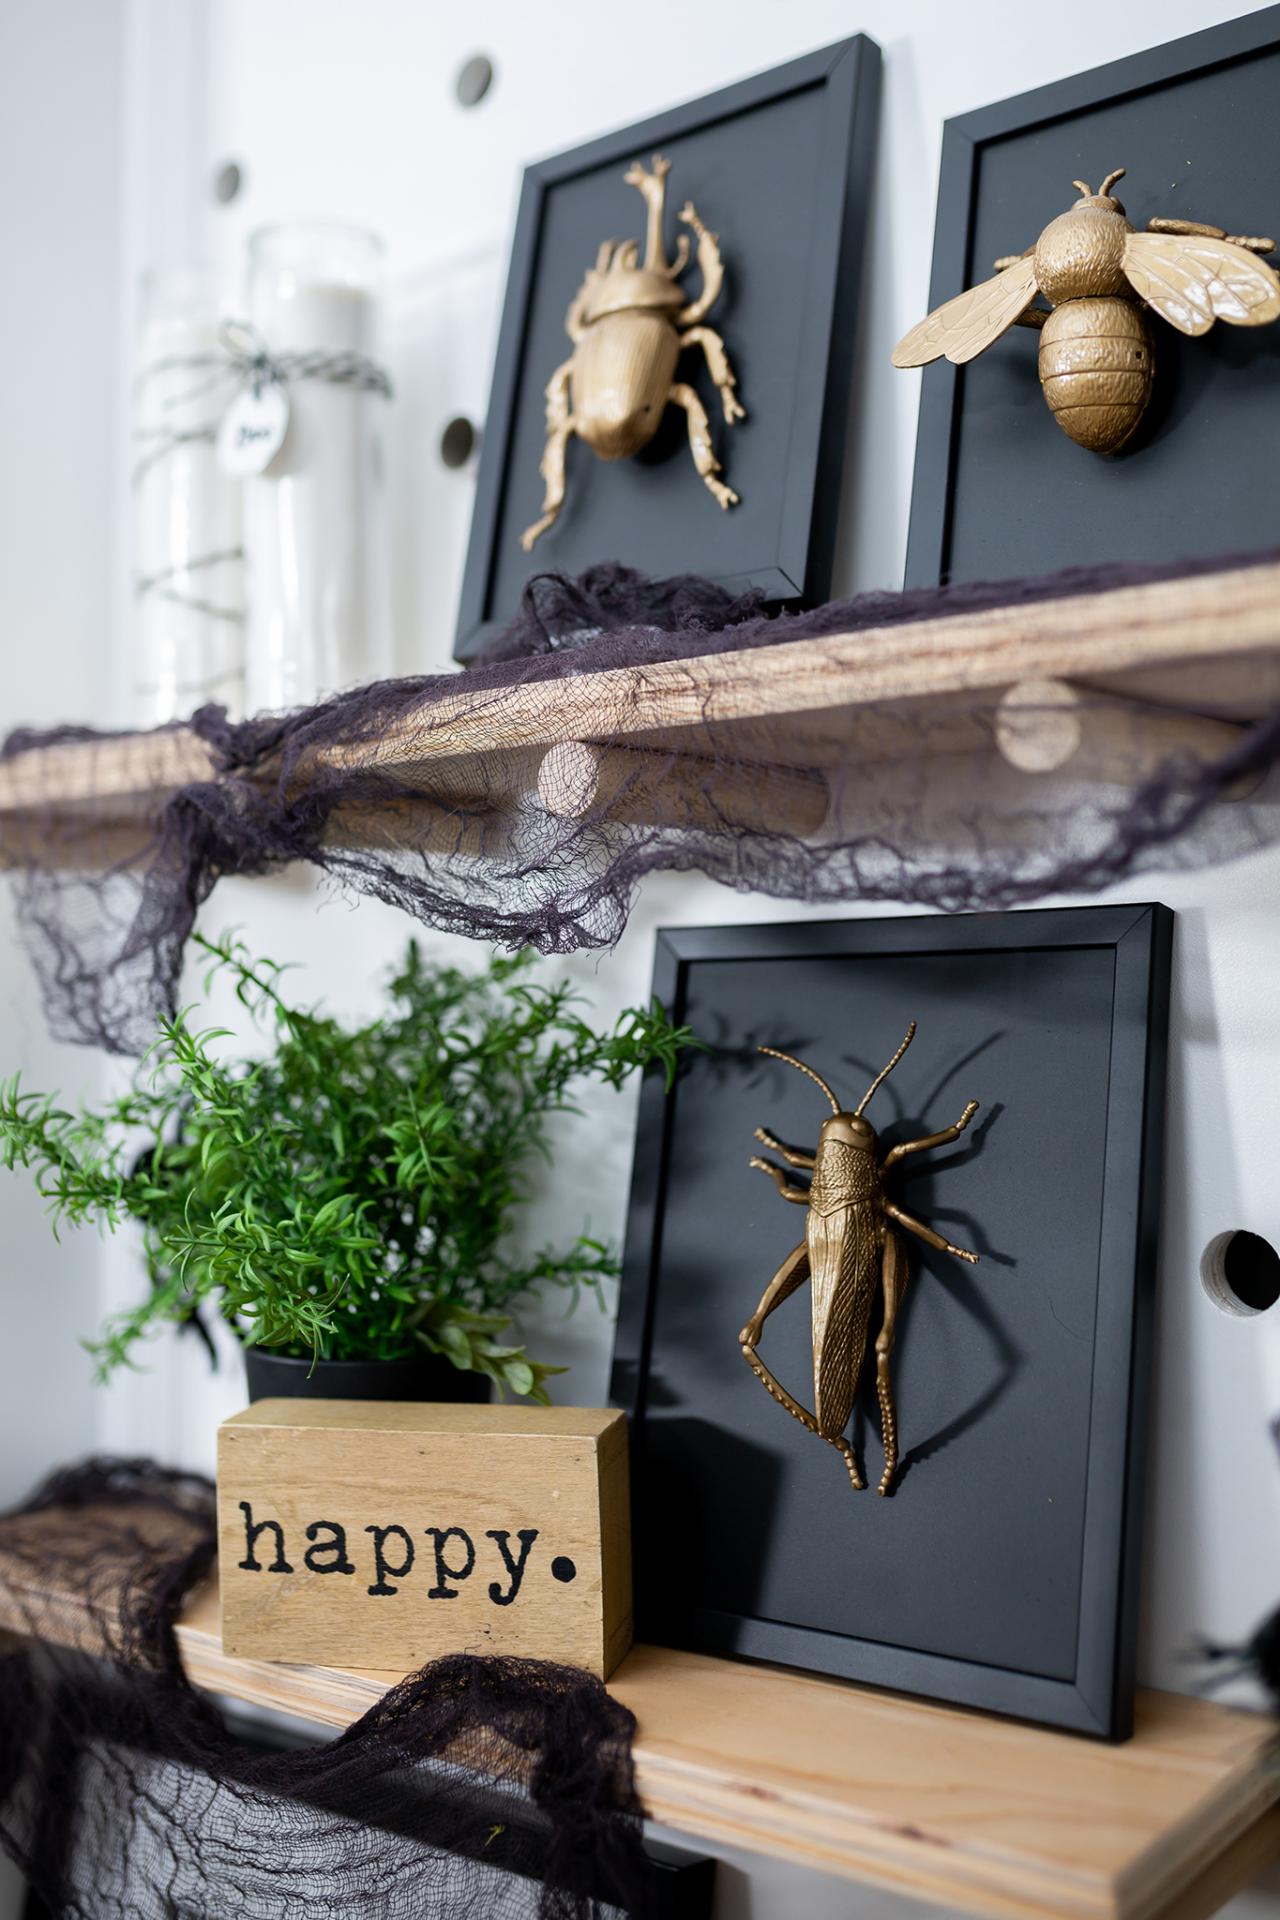
CREEPY BUG FRAME

What You'll Need:
- dollar-store picture frame
- dollar-store plastic bug
- metallic gold spray paint
- matte black spray paint
- hot glue gun and sticks
Spray Paint the Frame
Spray paint the entire frame, including the glass, in matte black. Let dry.

Sarah Busby
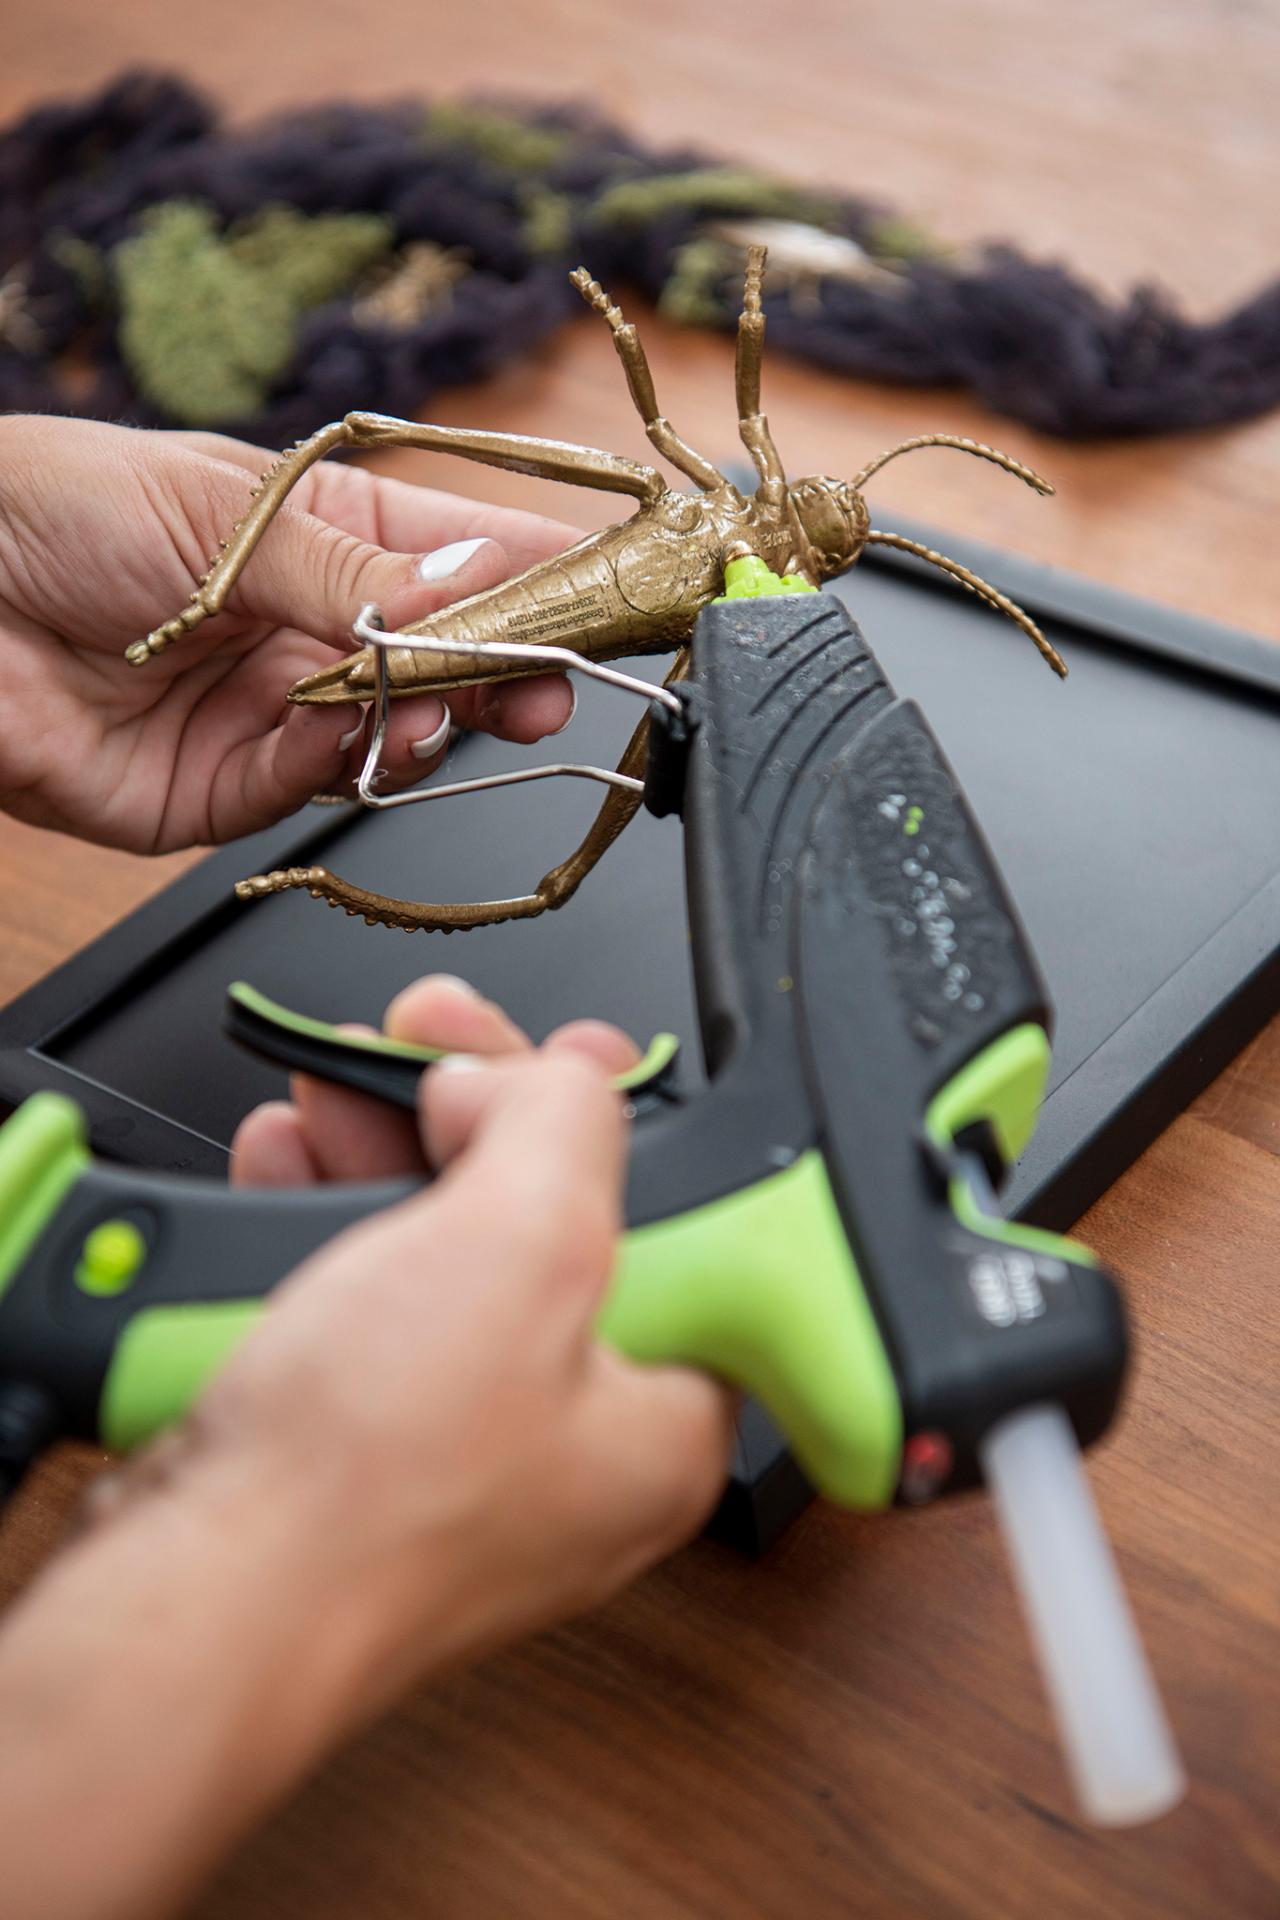
Spray Paint the Bugs
Spray paint the bug in gold, and let dry.

Sarah Busby
Attach the Bug
Attach the bug to the center of the frame using hot glue on the lowest setting.

Sarah Busby

Sarah Busby

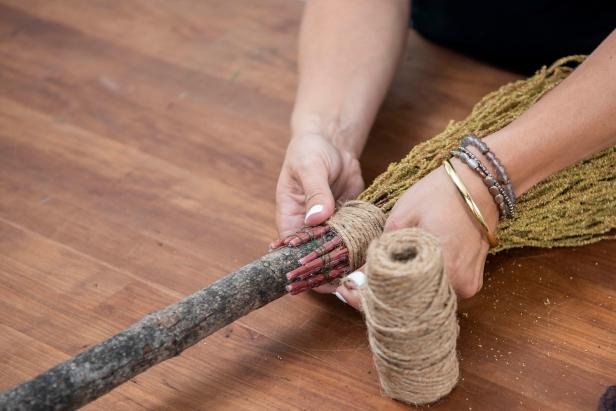
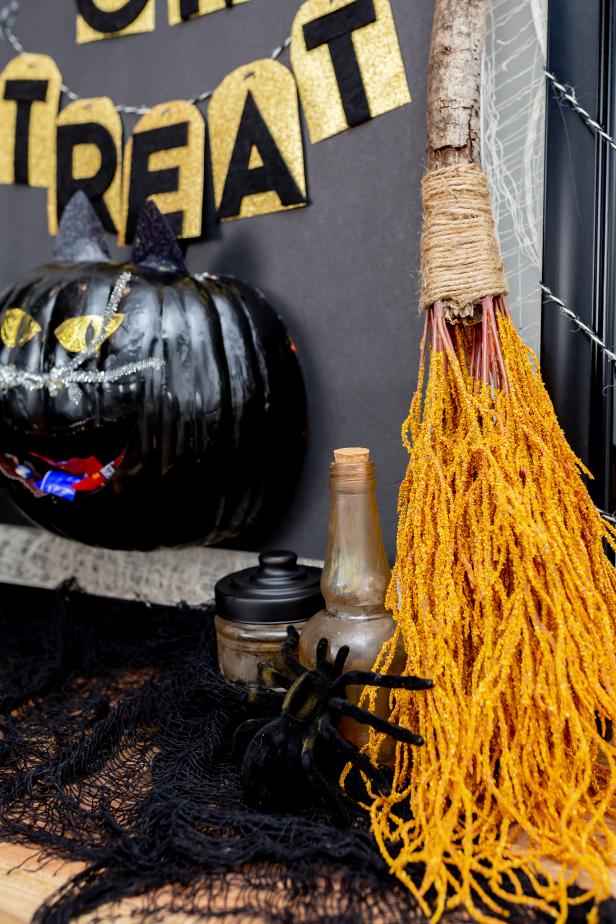
WITCH'S BROOM

What You'll Need:
- dollar-store floral filler
- jute twine
- floral wire
- a branch or stick from your yard
- hot glue gun and sticks
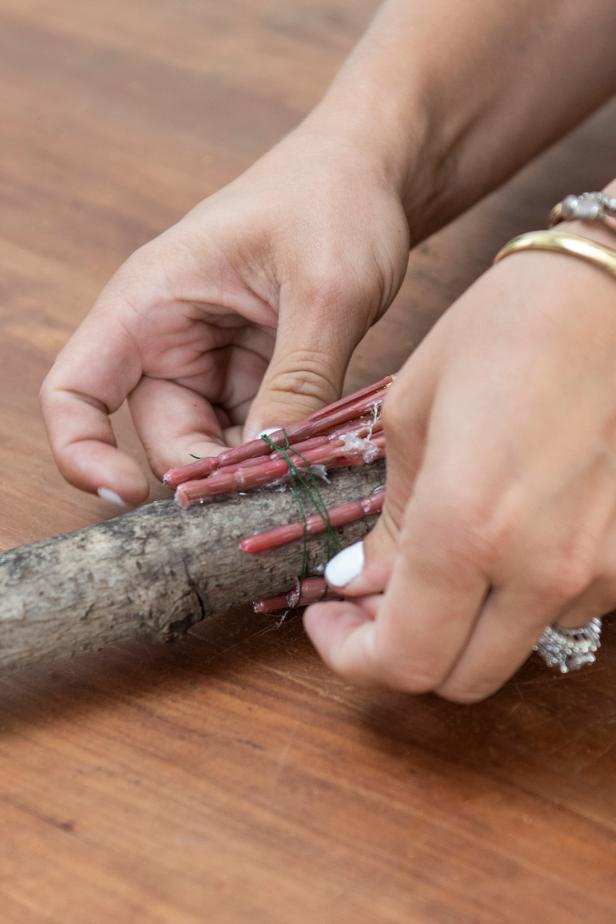
Attach the Floral Filler
Attach the floral filler around one end of the branch using hot glue (Images 1 and 2 below). Attach a second layer of filler using floral wire to make it more full (Images 3 and 4).

Sarah Busby

Sarah Busby
Sarah Busby

Sarah Busby
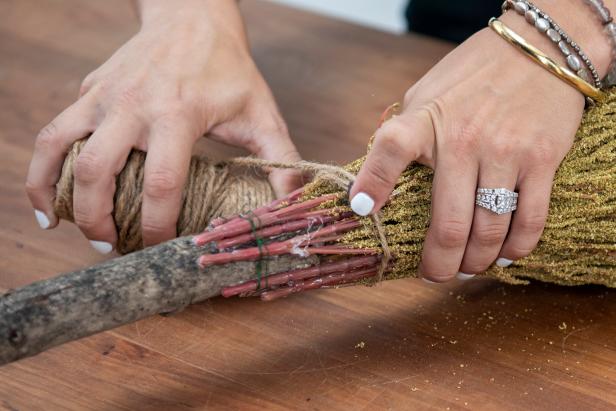
Attach the Twine
Wrap the twine around the filler to hide the stems, hot gluing as you wrap.
Sarah Busby
Sarah Busby
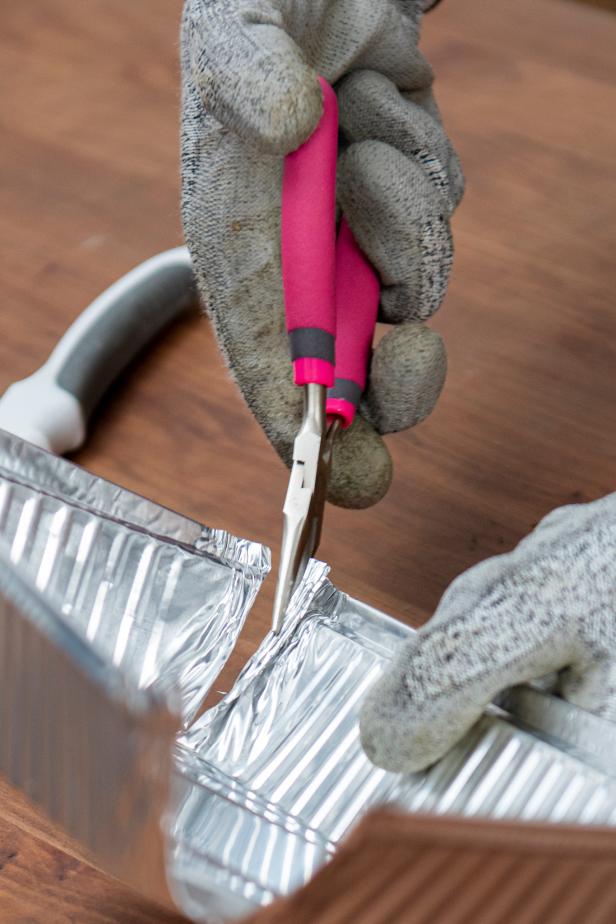
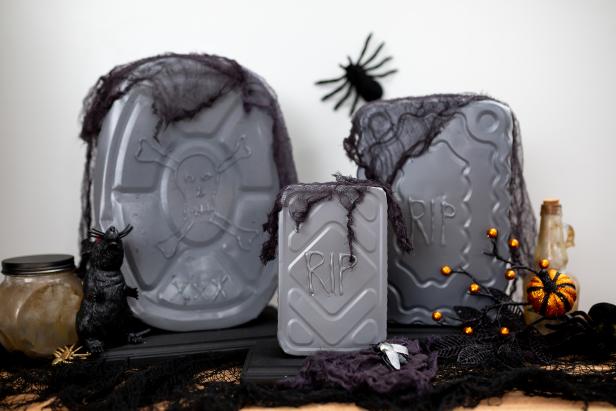
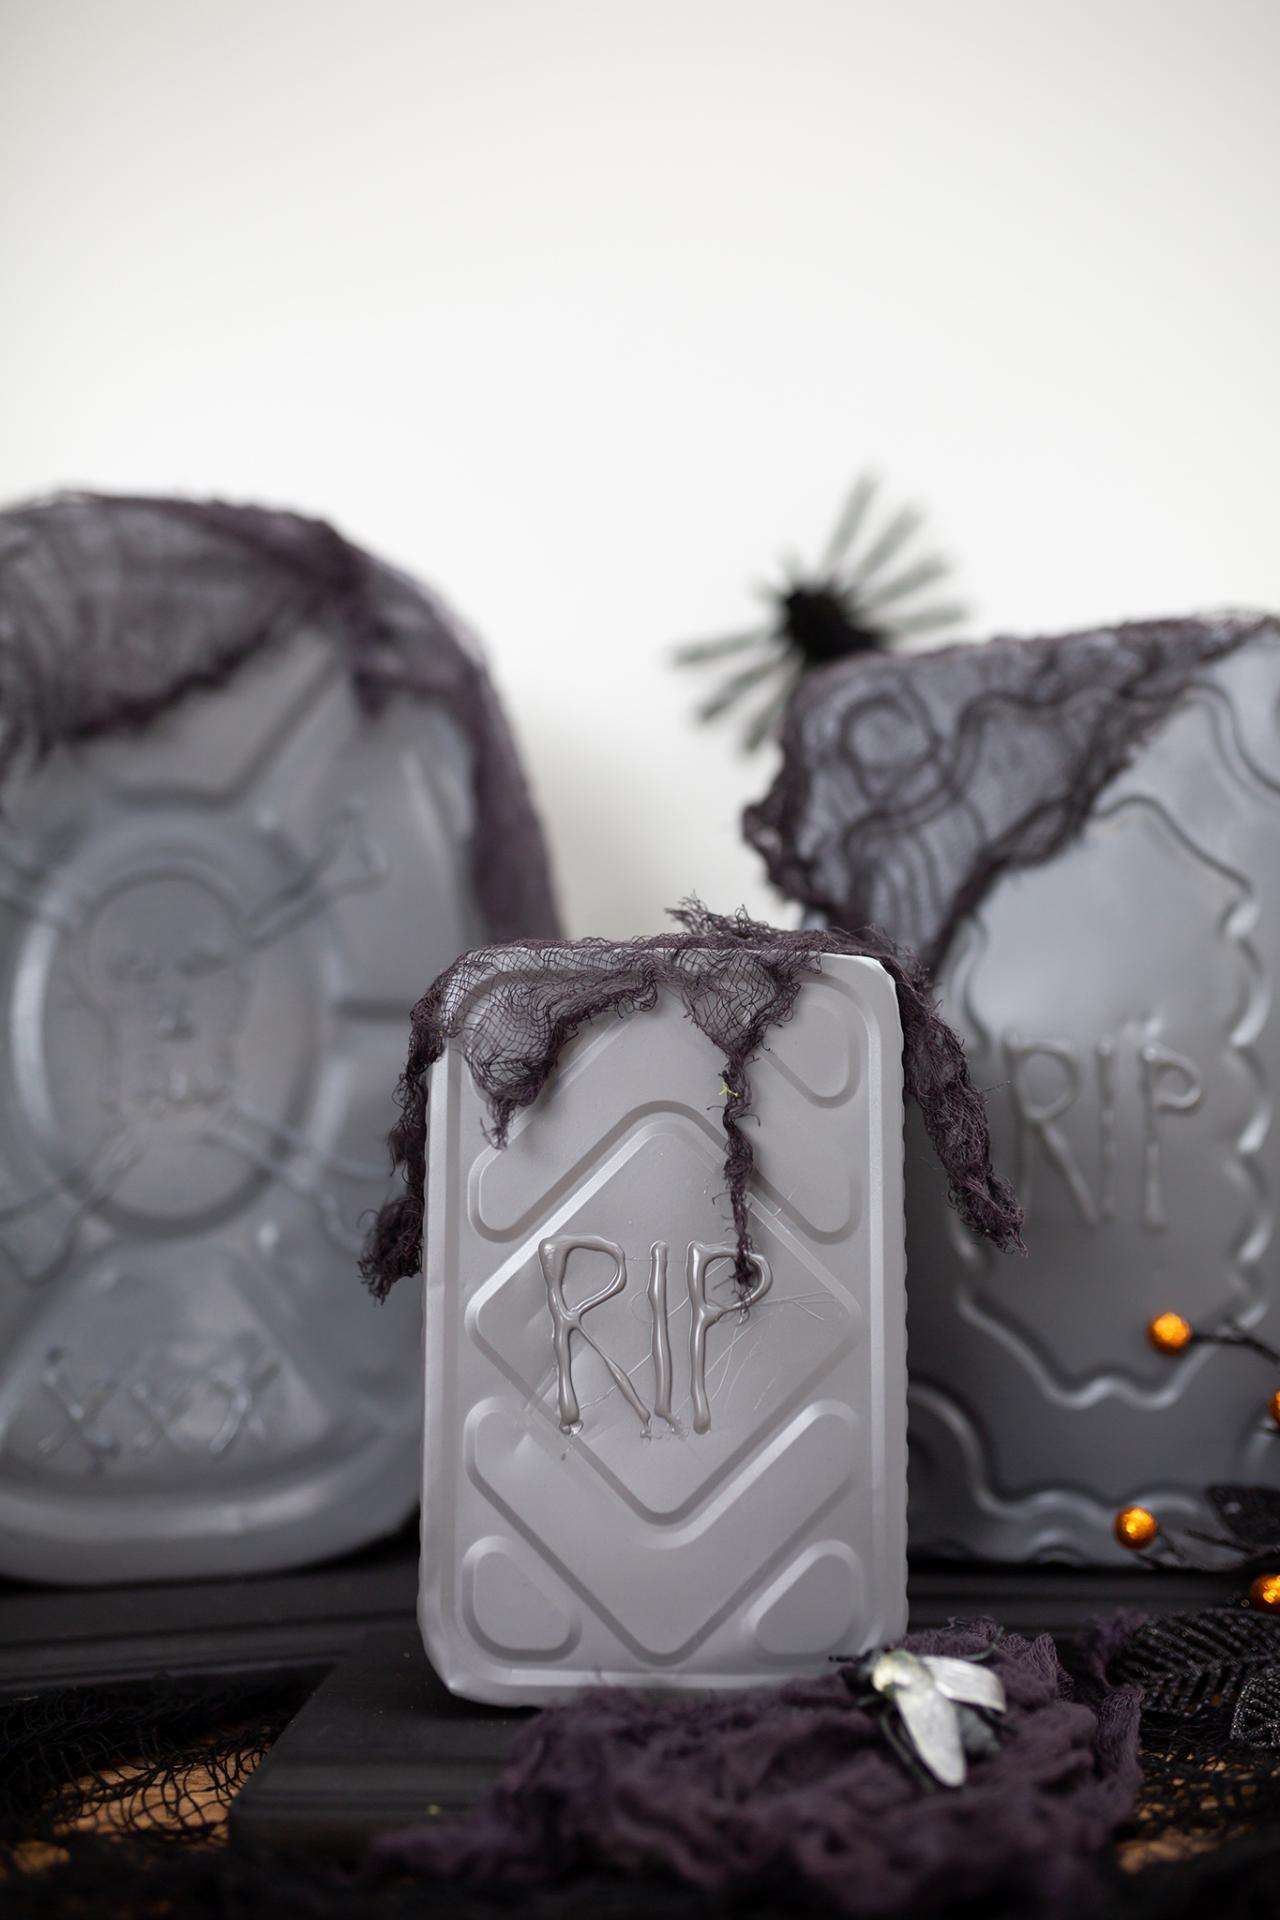
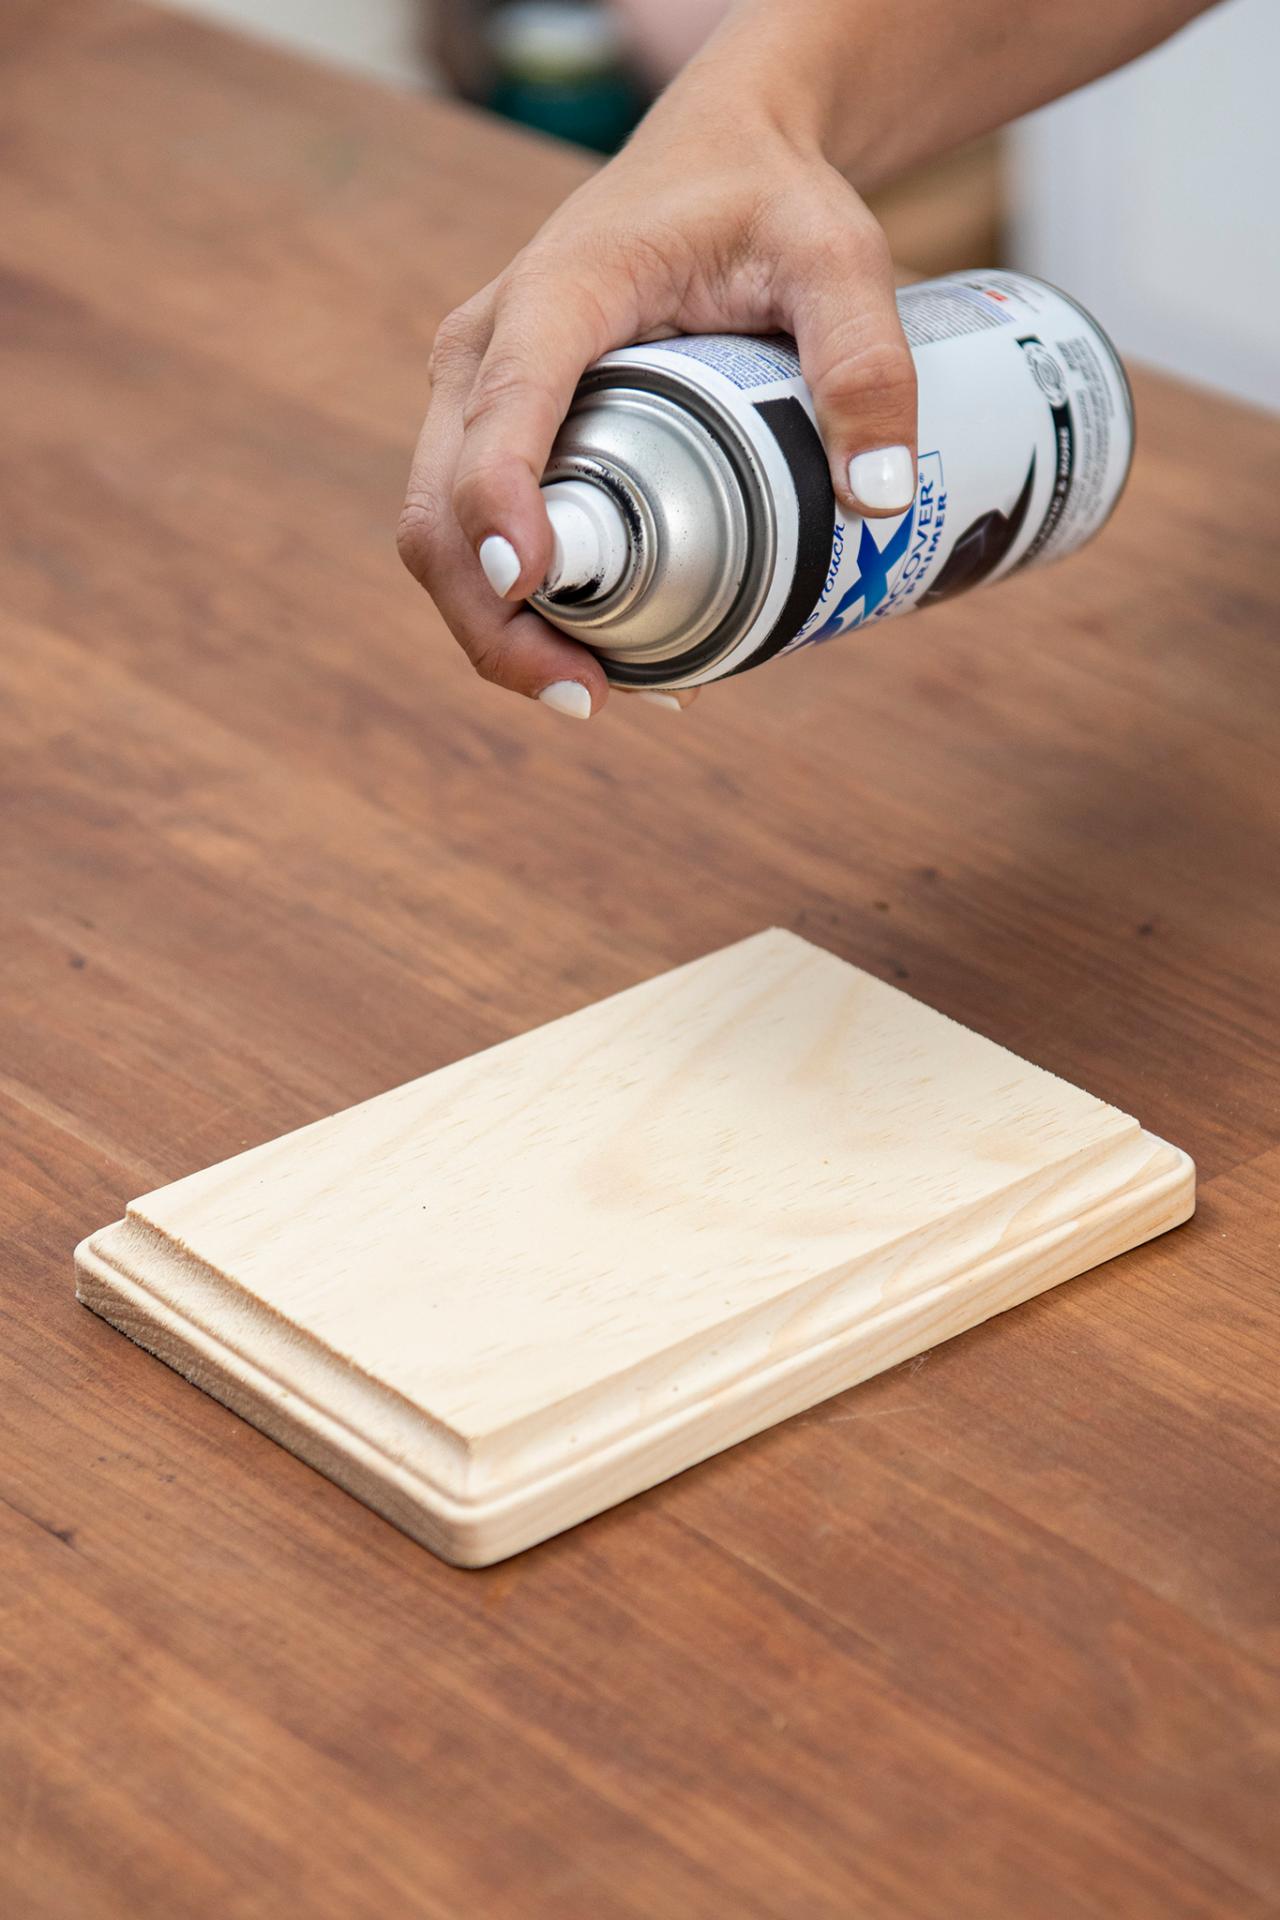
TOMBSTONE
What You'll Need:
- wood plaque
- dollar-store aluminum baking pan
- black spray paint
- gray spray paint
- aluminum shears
- needle-nose pliers
- protective gloves
- hot glue gun and sticks
Spray Paint the Plaque
Spray paint the plaque in black. Let dry.

Sarah Busby
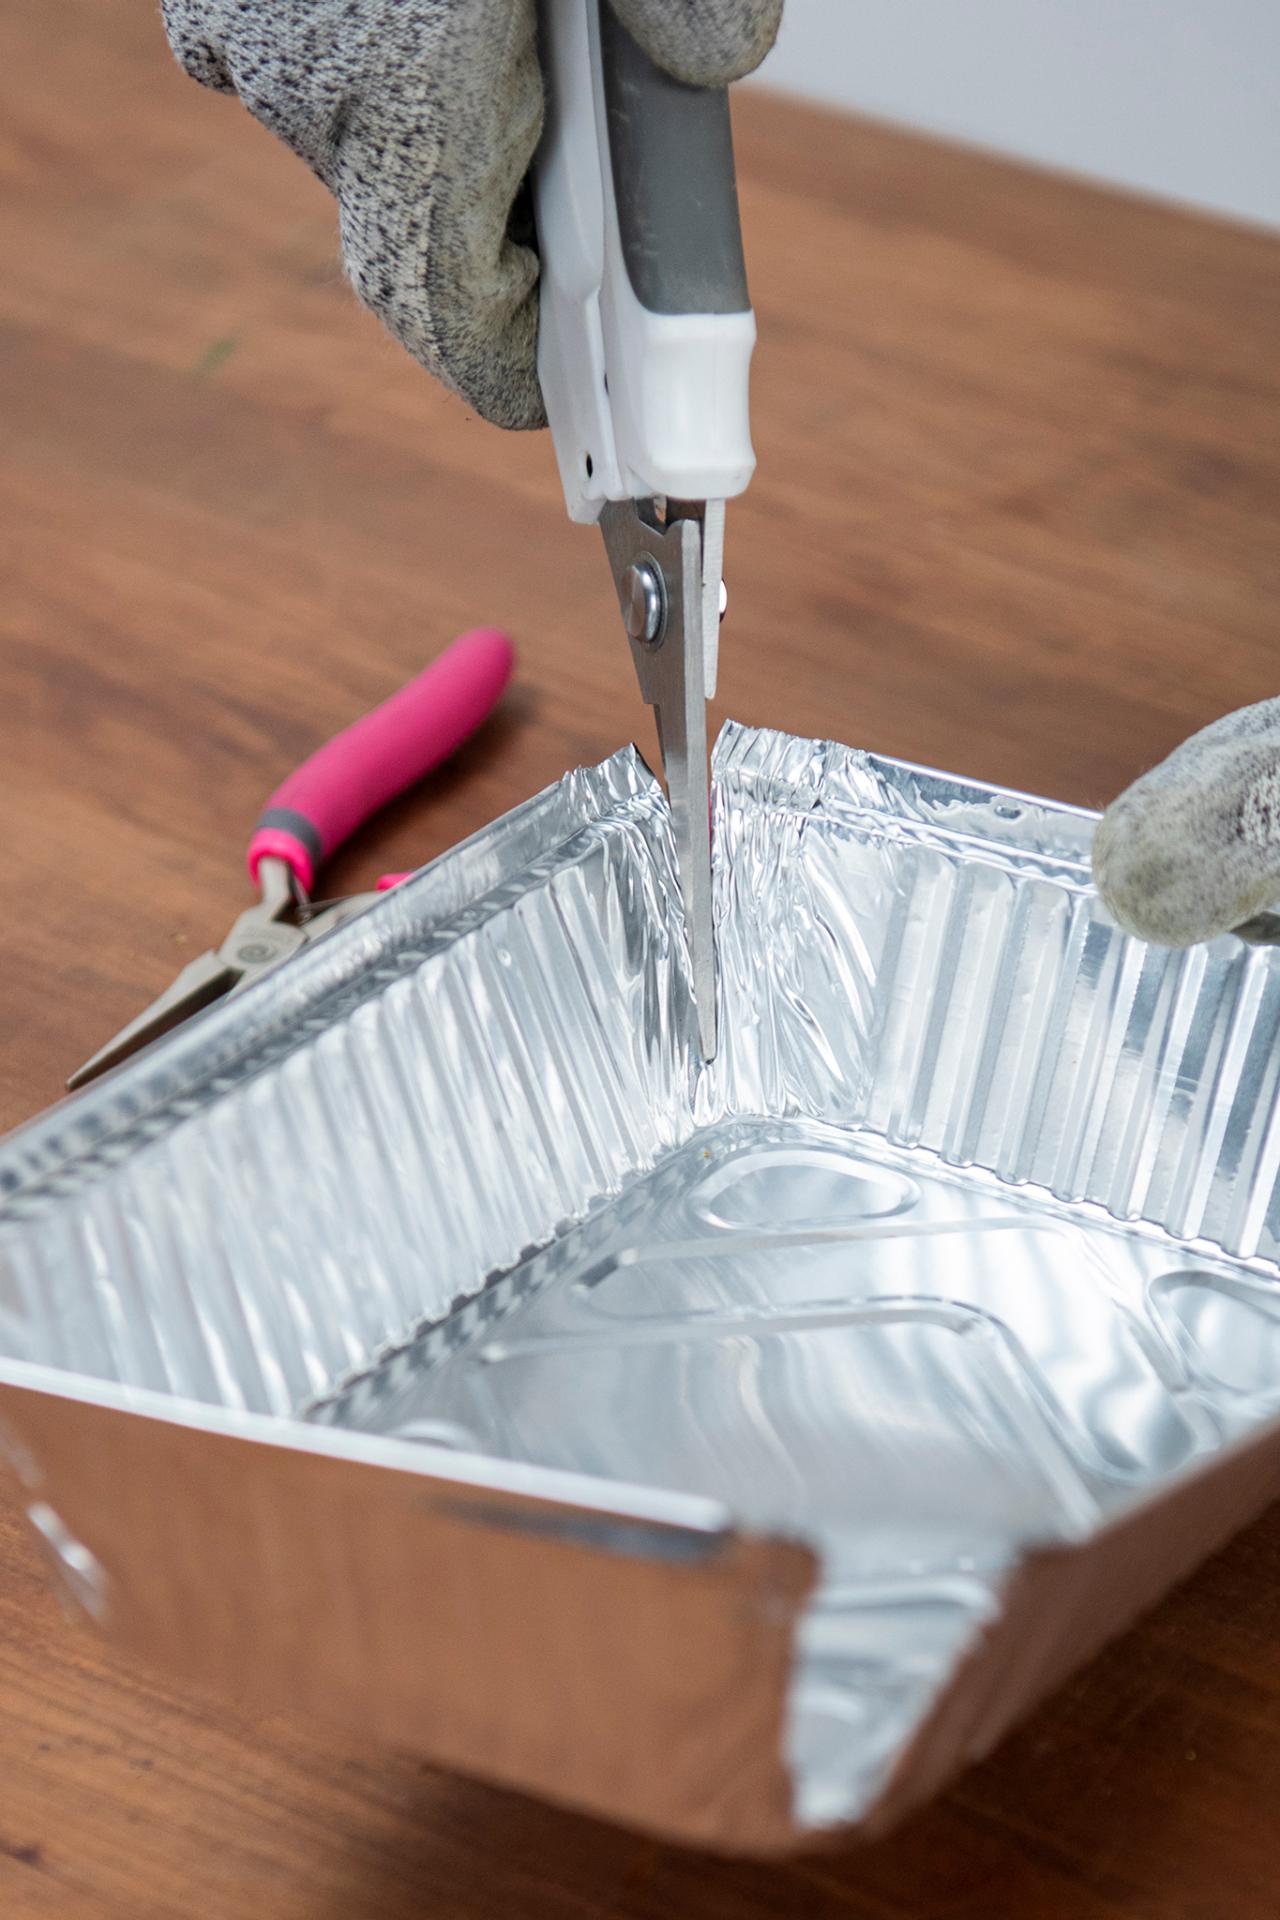
Form the Pan Into a Square Shape
Wearing your protective gloves, cut each corner of the pan using shears (Image 1 below). Fold in the cut edges with needle-nose pliers (Image 2 below). Attach the cut corners with hot glue (Image 3 below).

Sarah Busby
Sarah Busby
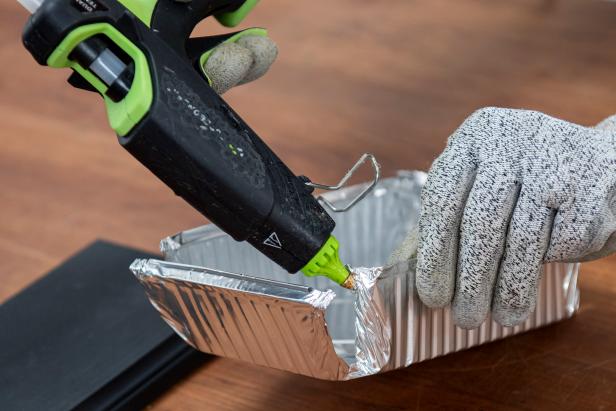
Sarah Busby
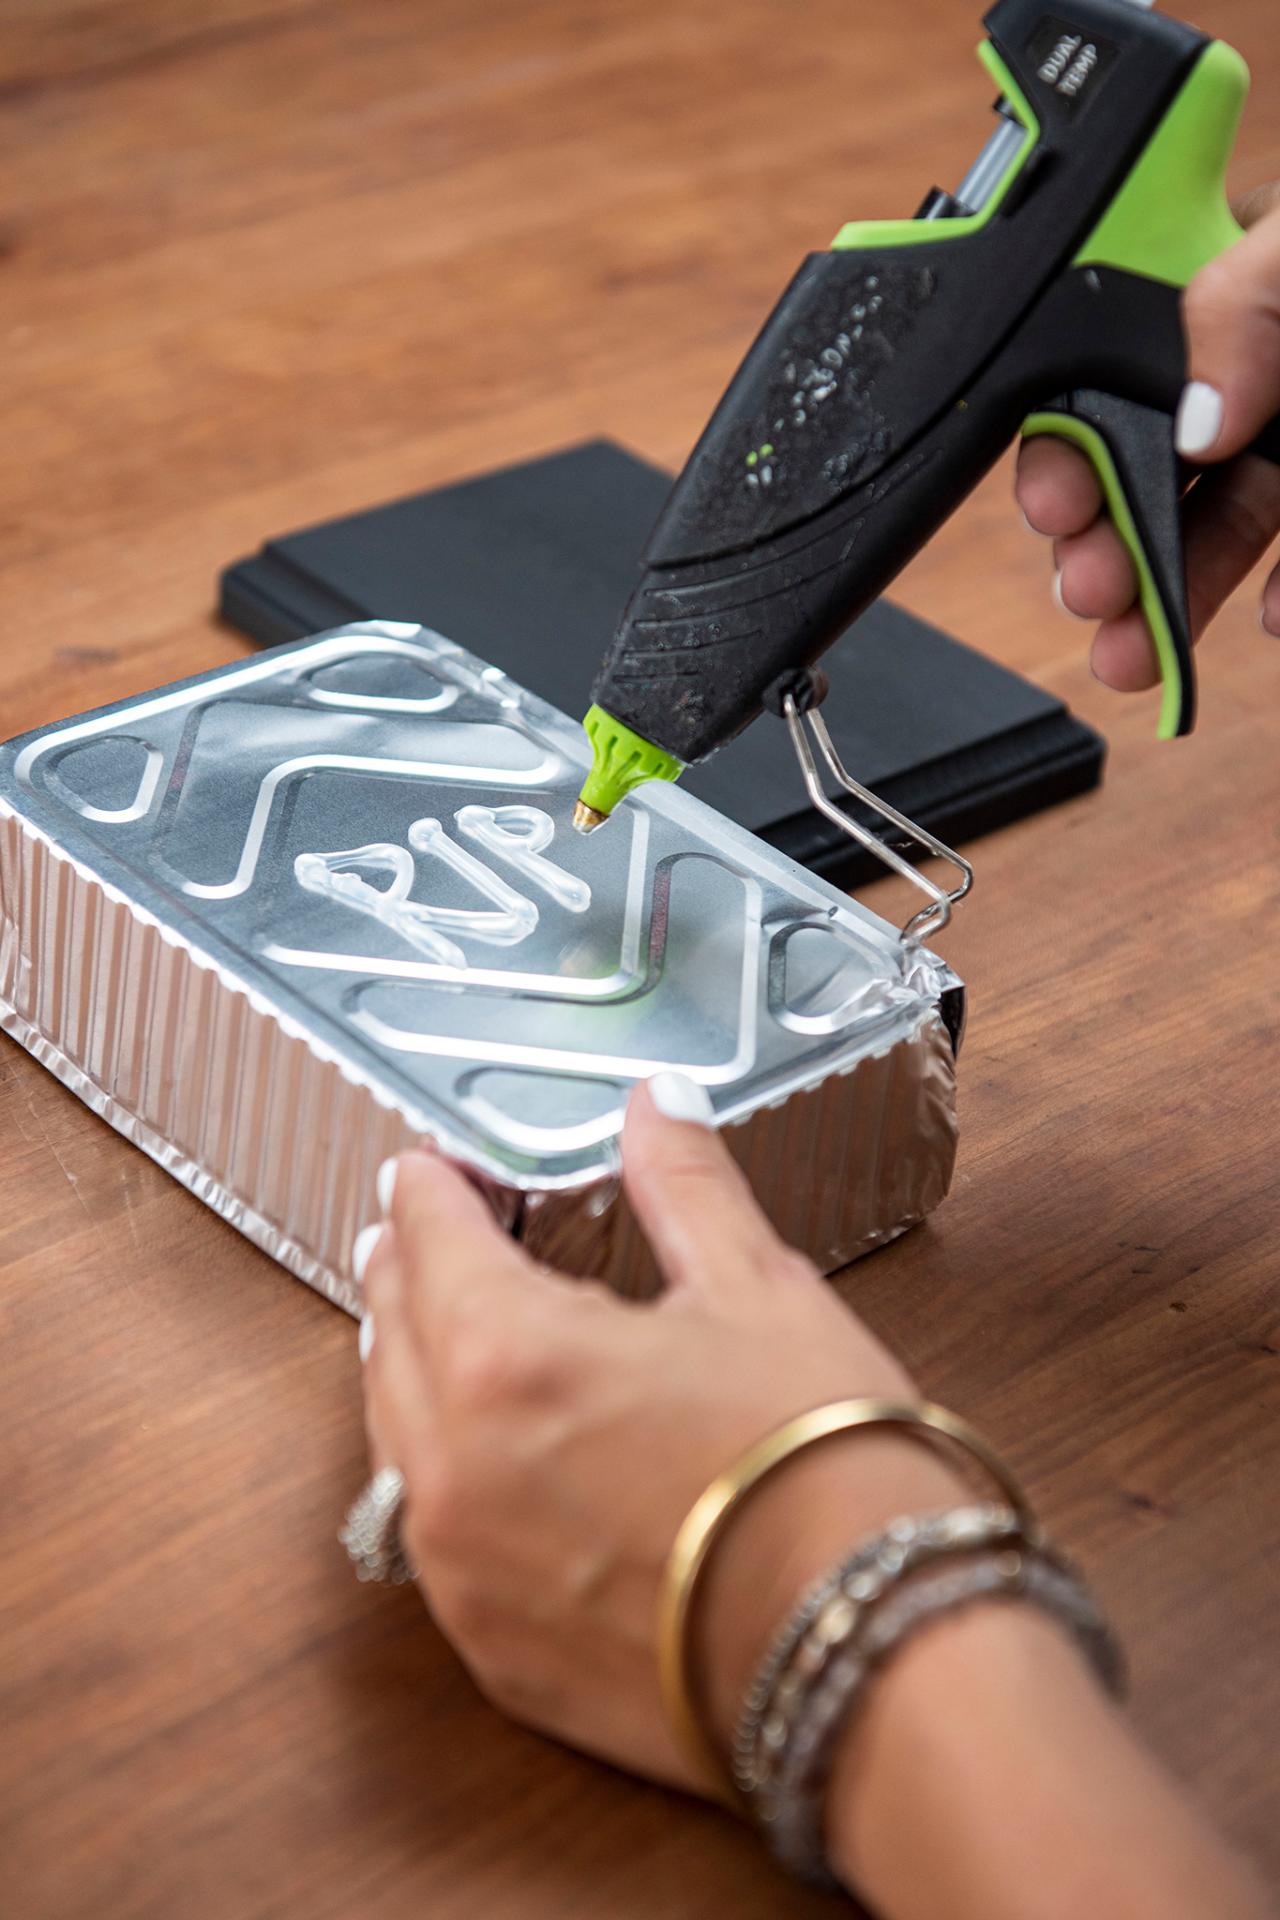
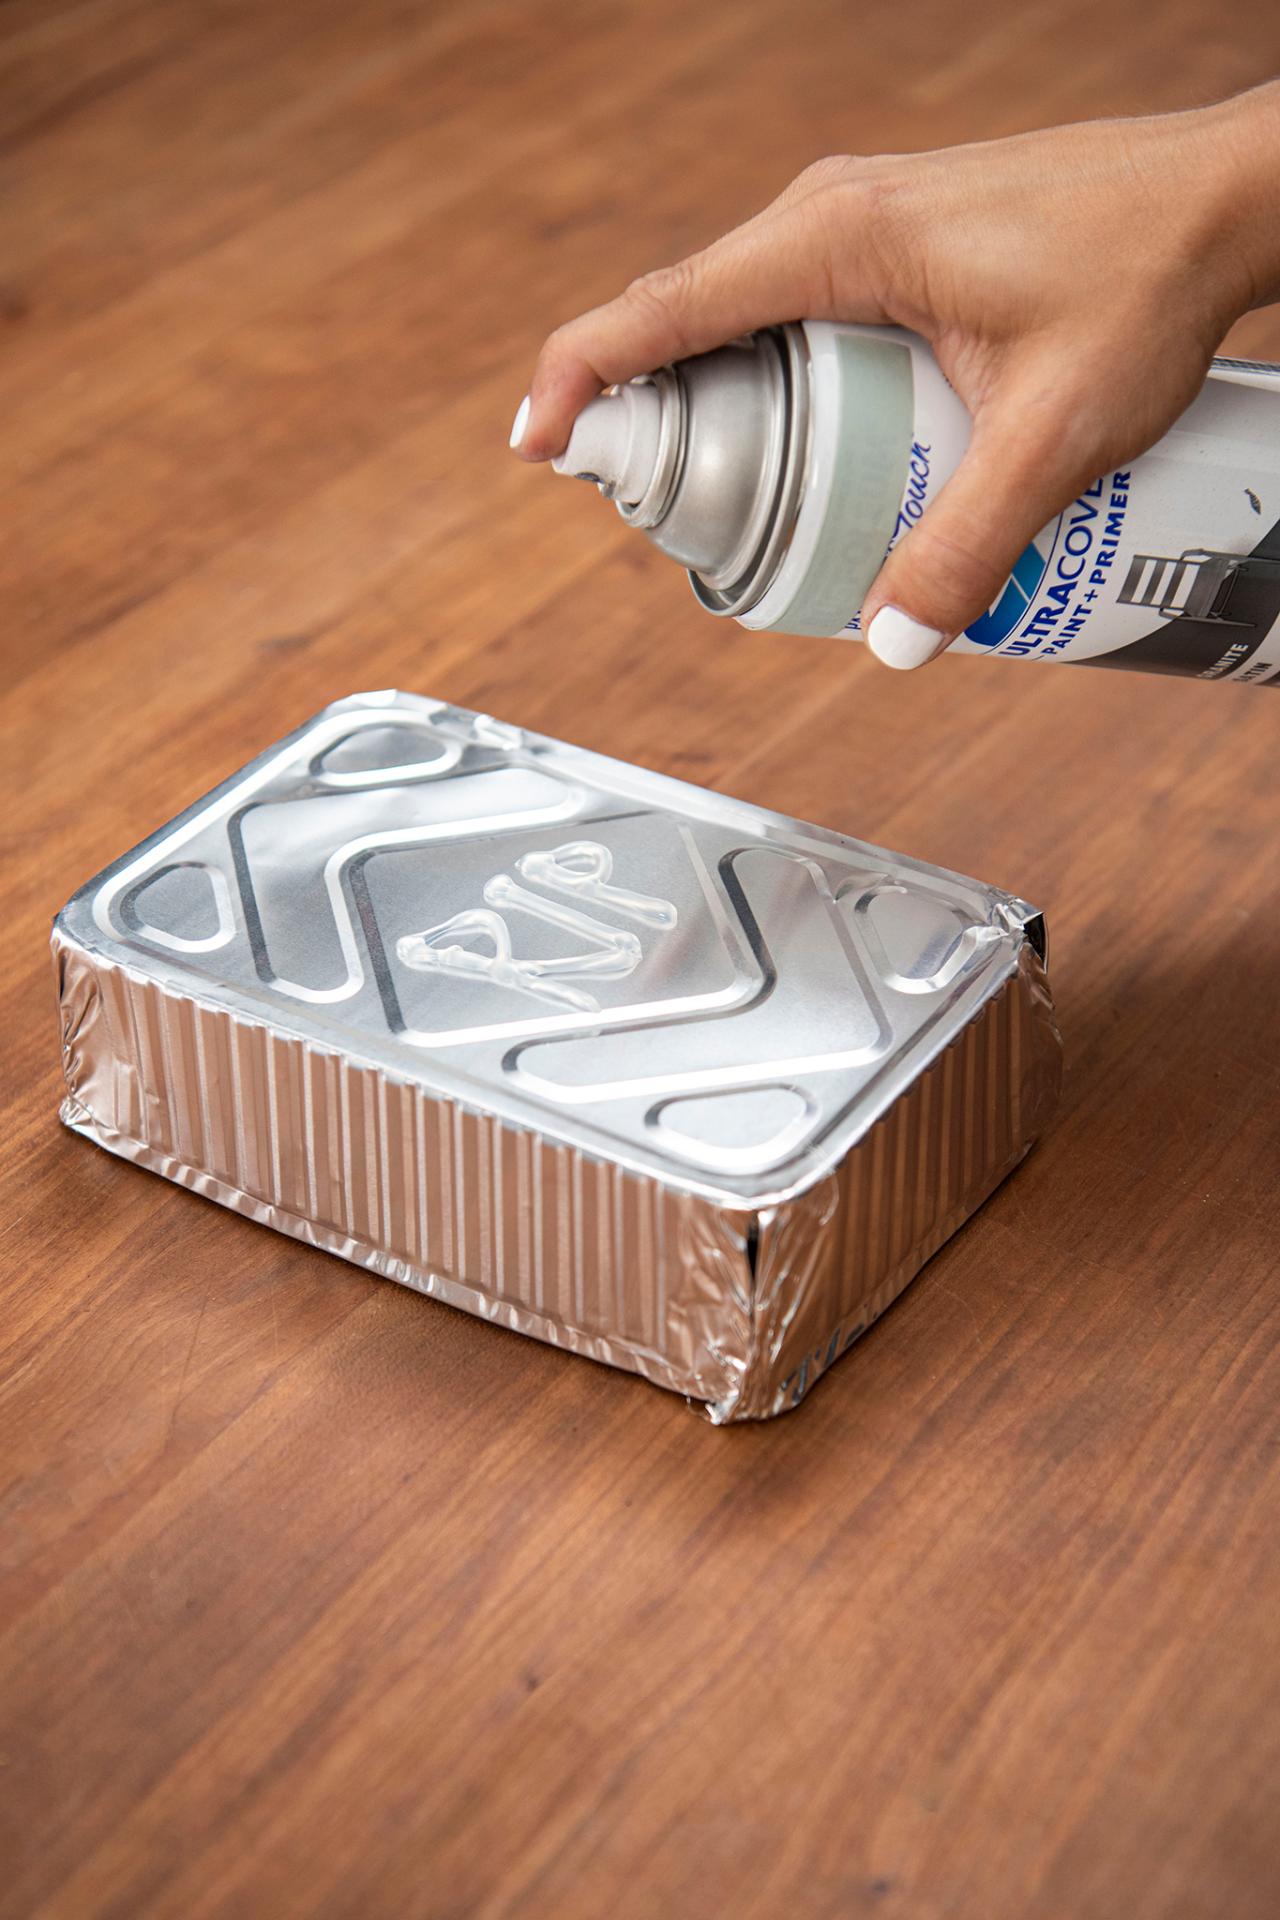
Add a Design
Add a design to the bottom of the pan using hot glue, and let dry. (Image 1 below). We went with RIP. Next, spray paint the pan gray, and let dry (Image 2 below).

Sarah Busby

Sarah Busby
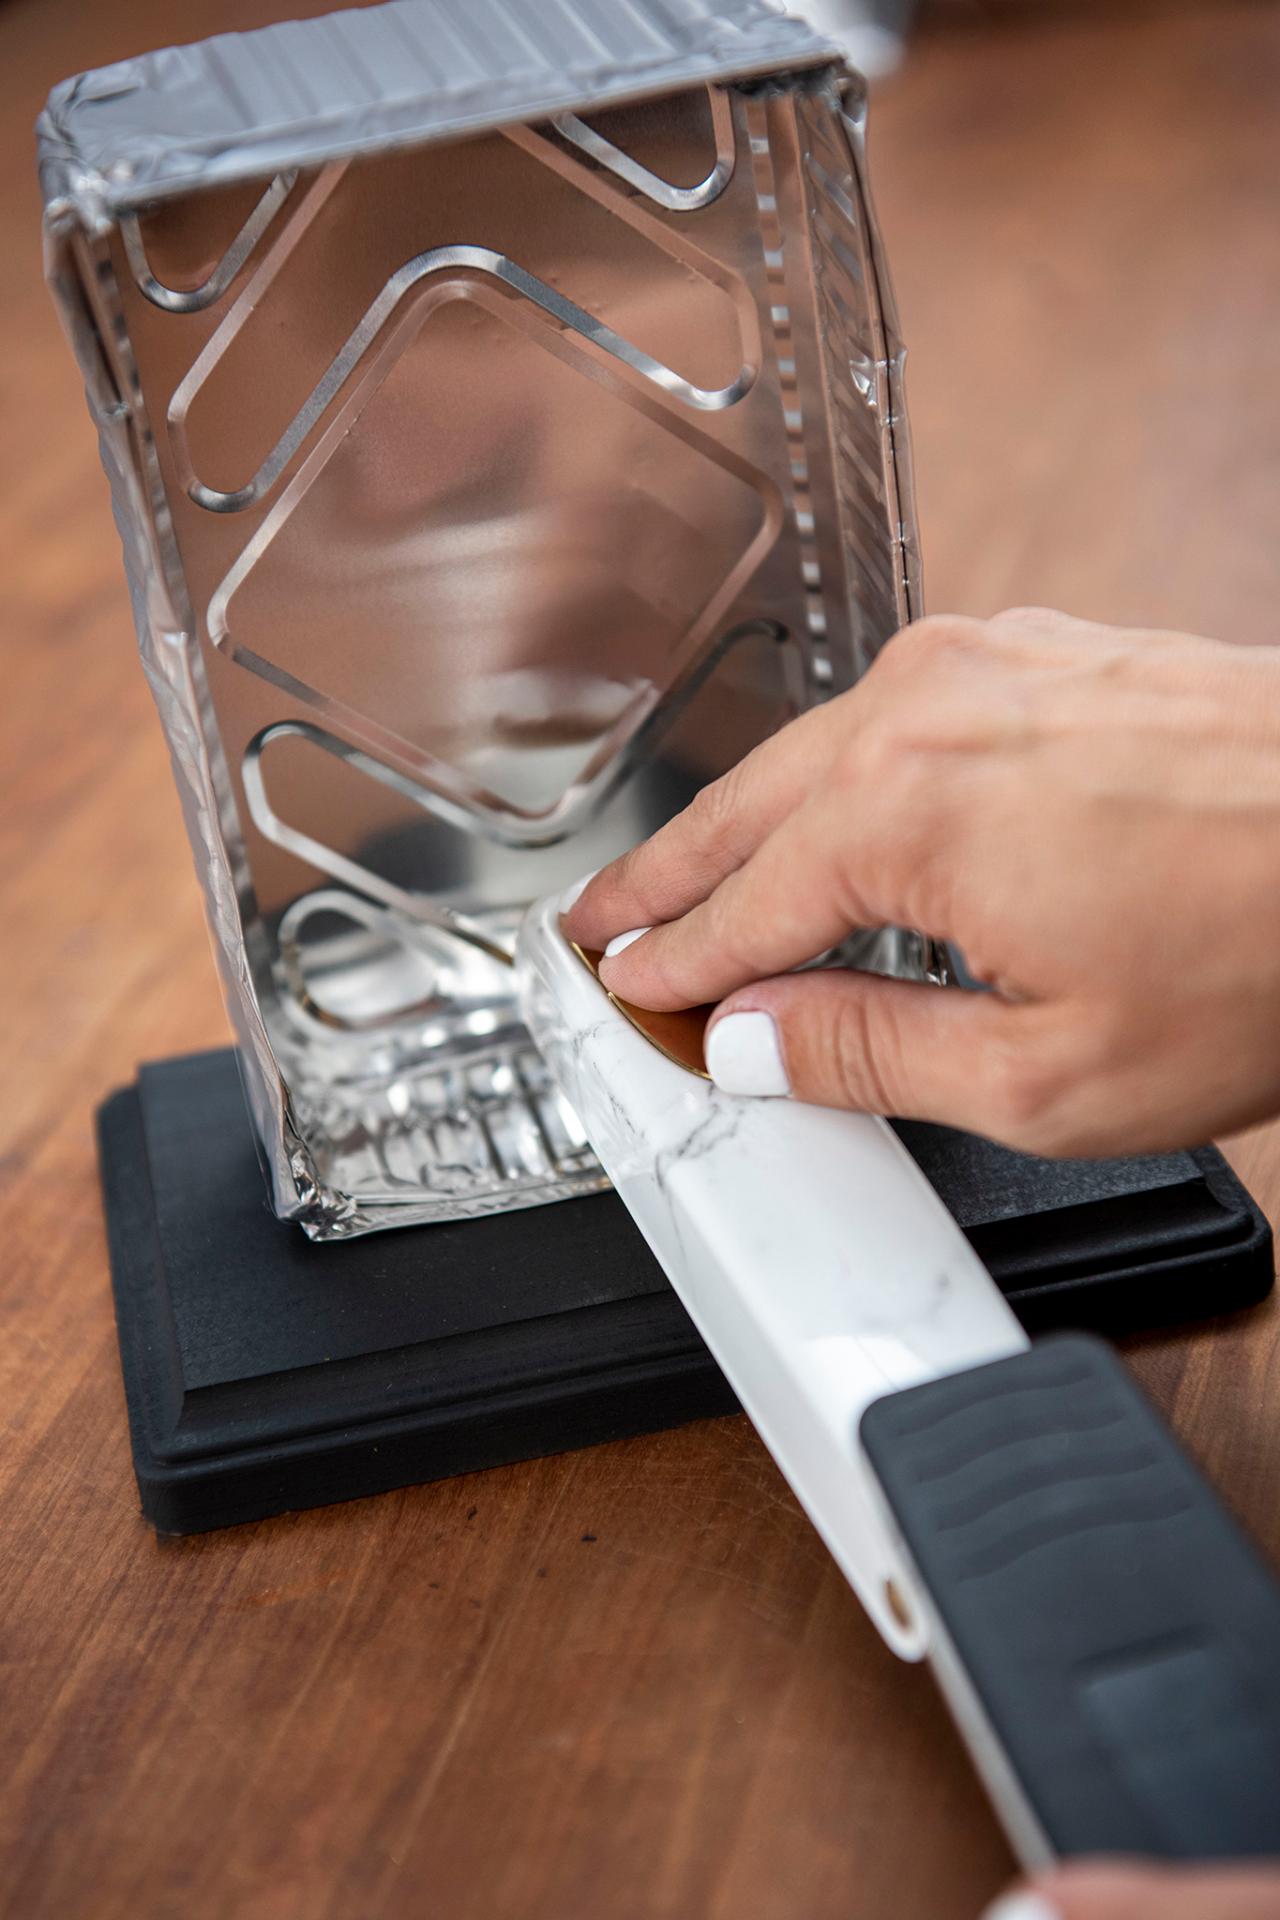
Attach the Pan
Attach the pan to the plaque using a stapler.

Sarah Busby
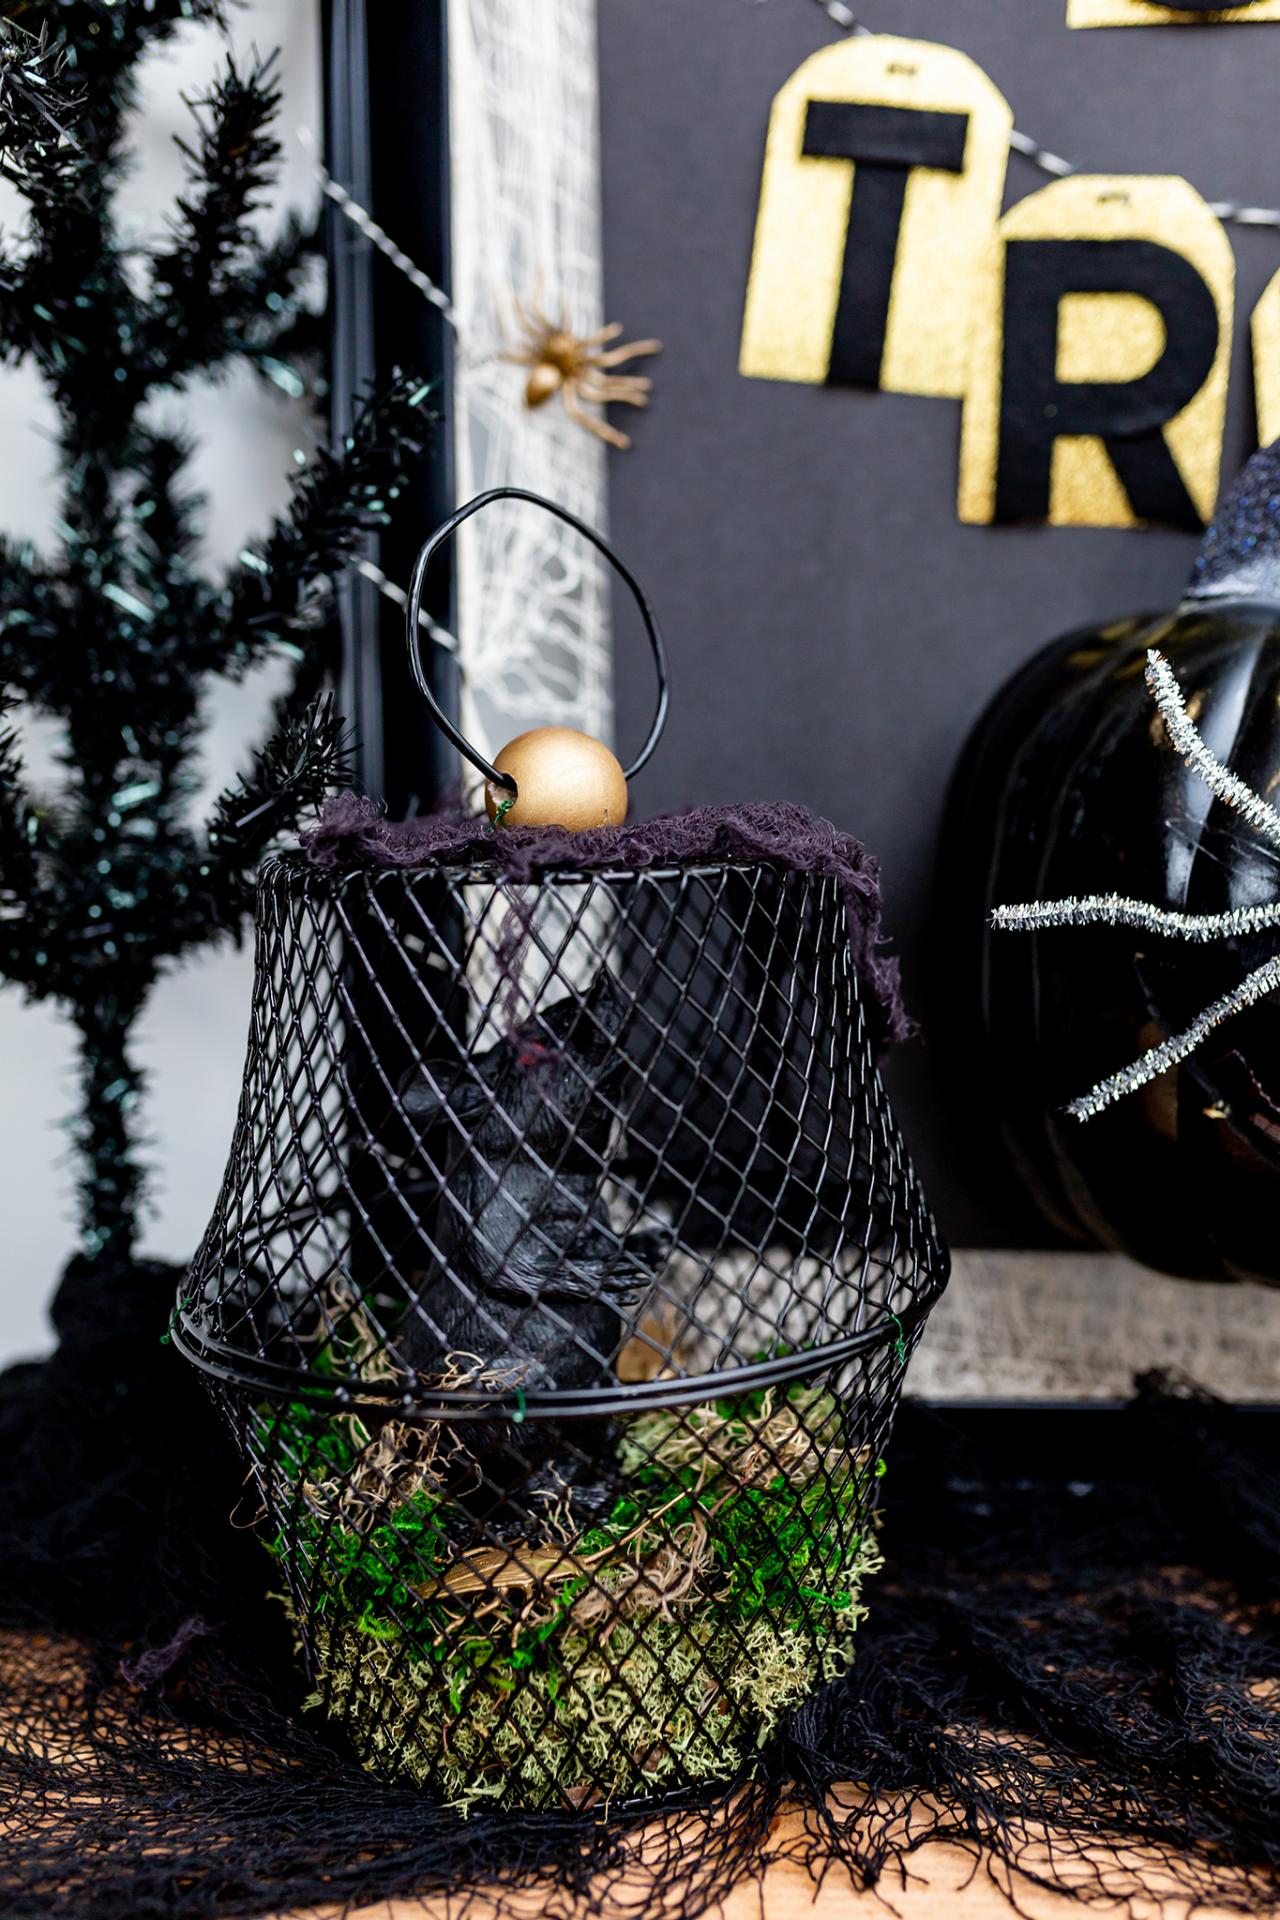
RAT CAGE

What You'll Need:
- floral wire
- wooden bead
- dollar-store toy rat
- faux moss
- floral foam
- black spray paint
- red nail polish
- (2) dollar-store wire baskets
- wire cutter
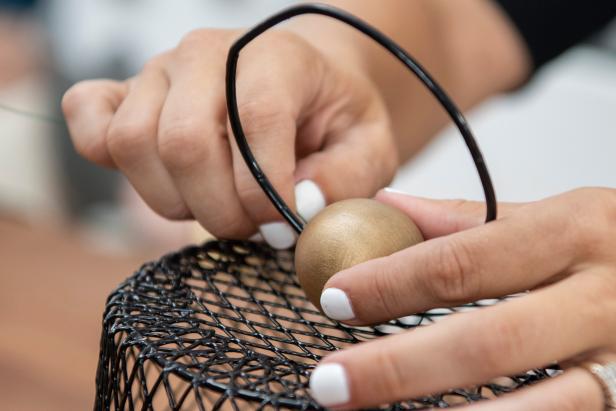
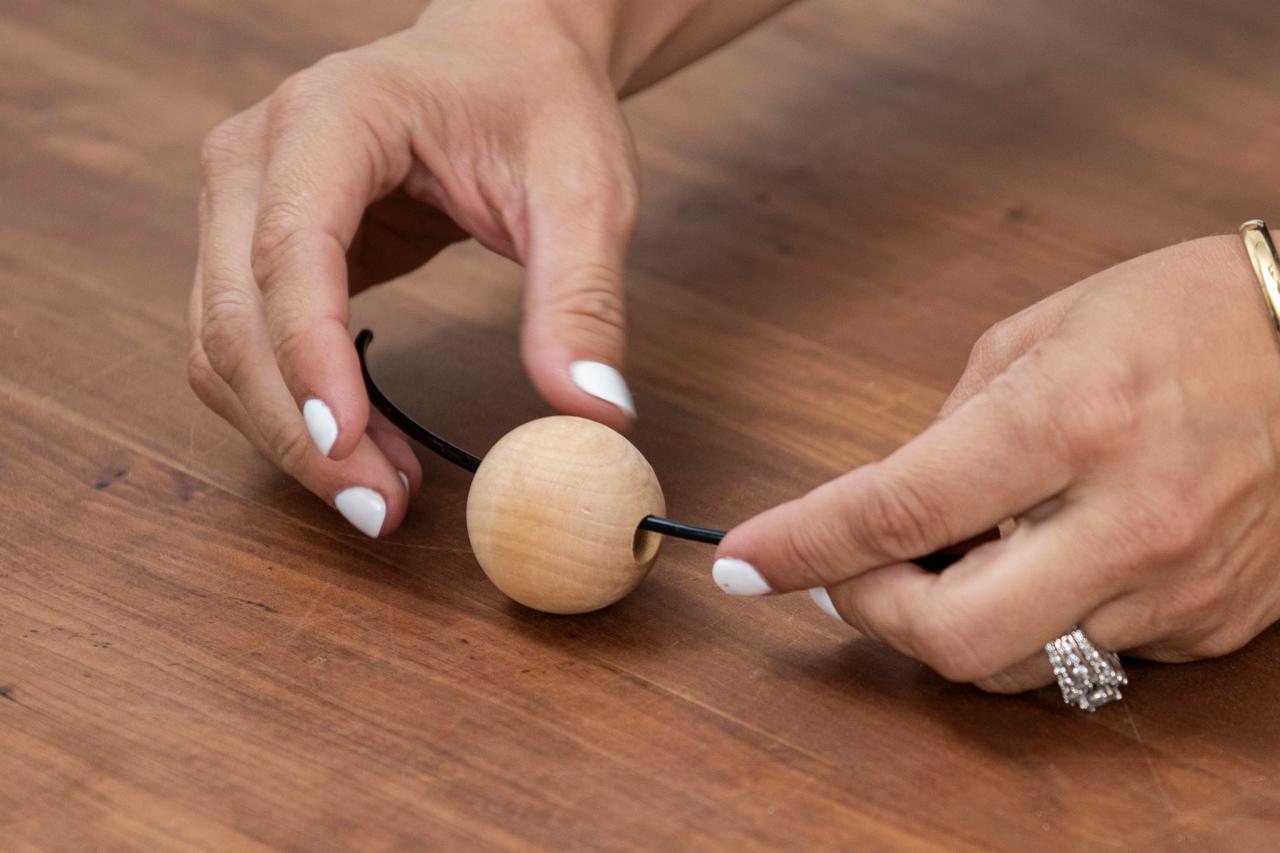
Make a Cage Handle
Remove the handles from the baskets, and set aside. Remove the handle hoops from the basket using wire cutters (Image 1 below). Spray paint the wooden bead gold, and thread onto one of the handle (Image 2 below). Bend the handle to form a circle (cut with the wire cutter if necessary). Secure the ends with hot glue (Image 3 below), and hide the ends in the wooden bead. Set aside.

Sarah Busby

Sarah Busby

Sarah Busby
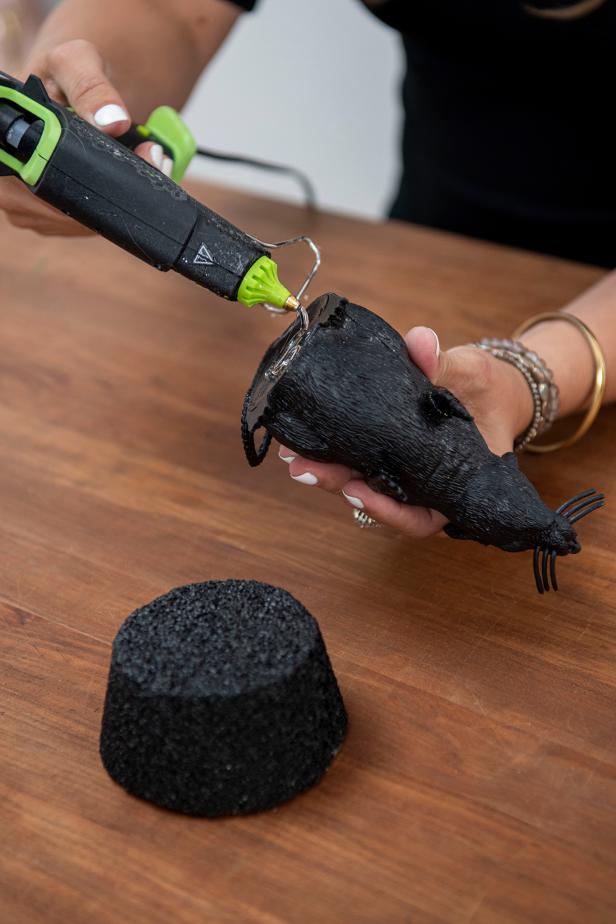
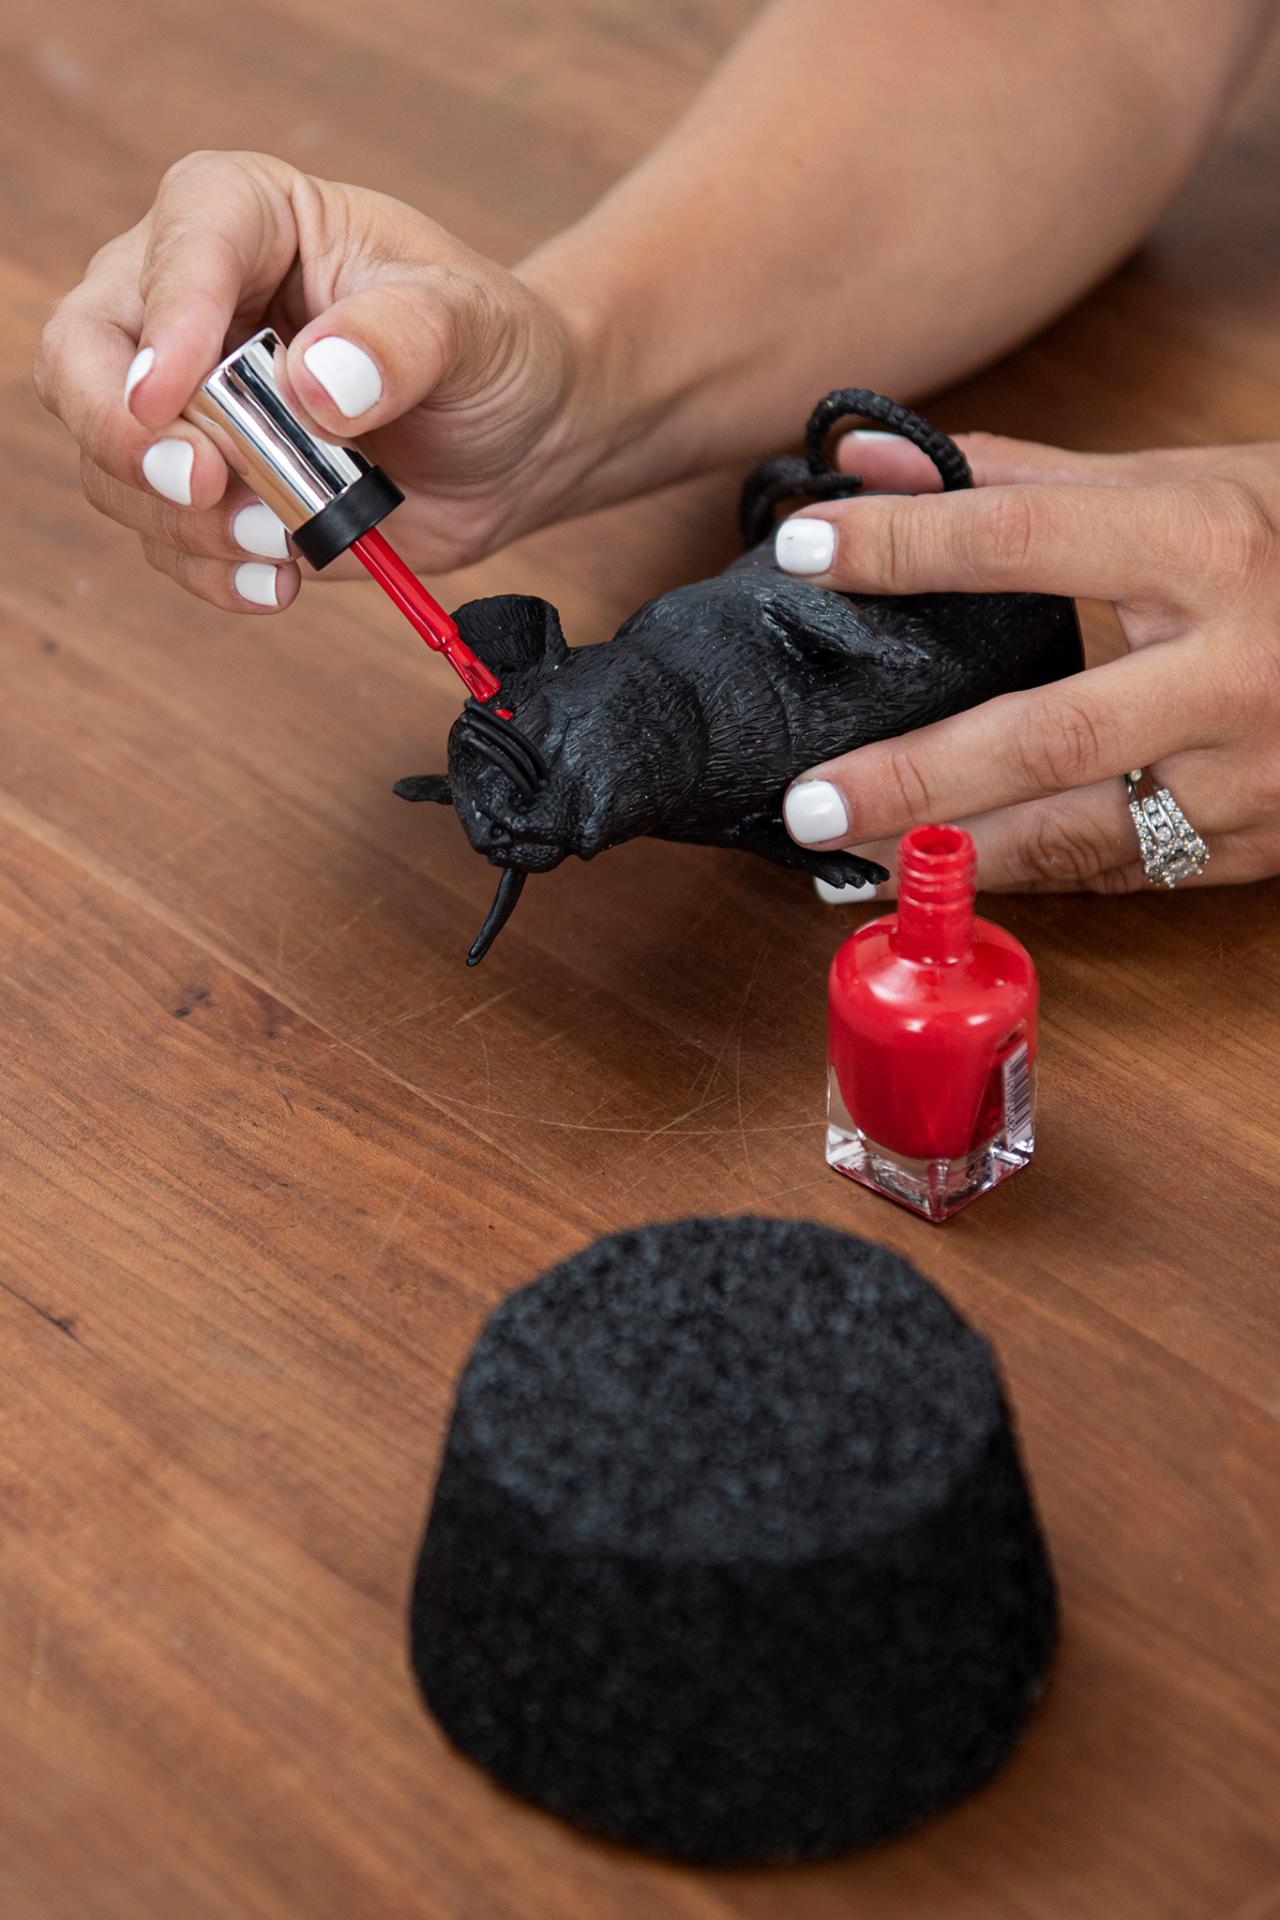
Prep the Rat
Paint the floral foam black, and let dry. Apply red nail polish to the rat's eyes for a creepy effect (Image 1 below). Let dry. Attach the rat to the floral foam using hot glue on the lowest setting (Images 2 and 3 below).

Sarah Busby
Sarah Busby

Sarah Busby
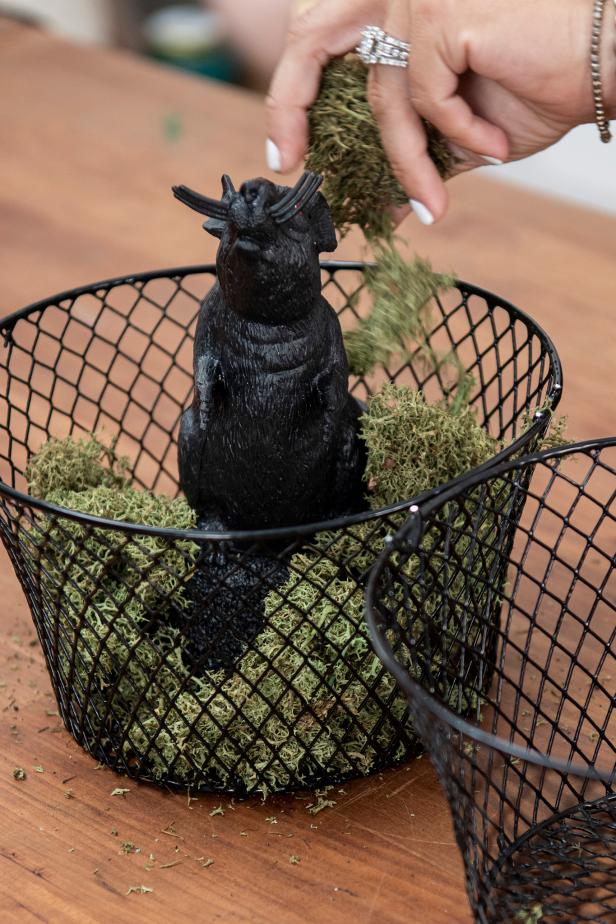
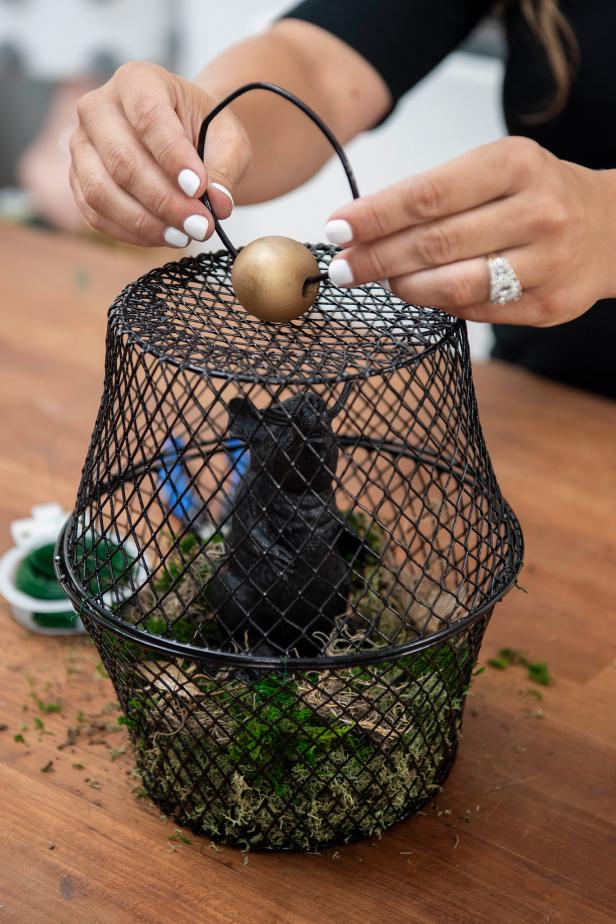
Make the Cage
Place the rat in one of the baskets, and fill with faux moss (Image 1 below). Place the other basket on top, and attach the two baskets using floral wire (Image 2 below).
Sarah Busby

Sarah Busby
Attach the Handle
Attach the handle you made in the first step to the top by looping floral ribbon through the basket and handle.
Sarah Busby
Sarah Busby


