Deck the Halls With This Vintage-Inspired Bulb Wreath
Craft the look of a C9 light bulb wreath your neighbors will adore. All you need is a little paint, some clear bulbs and a good Christmas playlist.

Liz Gray

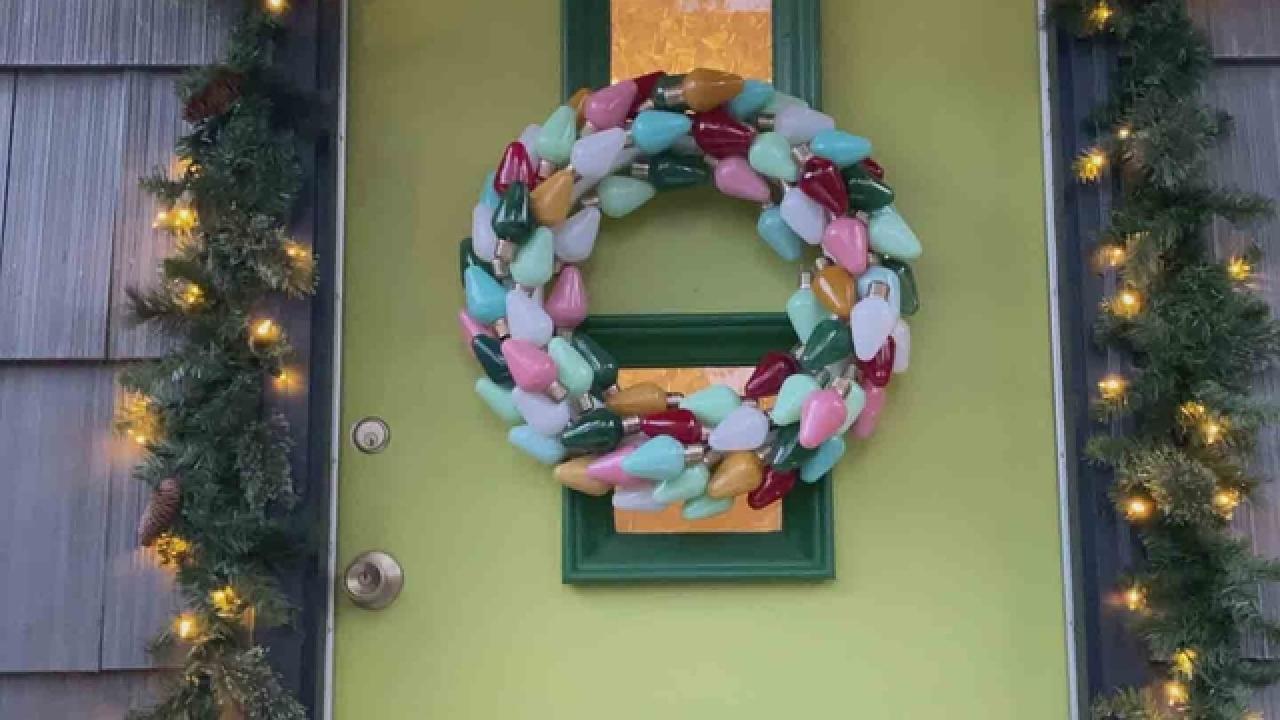
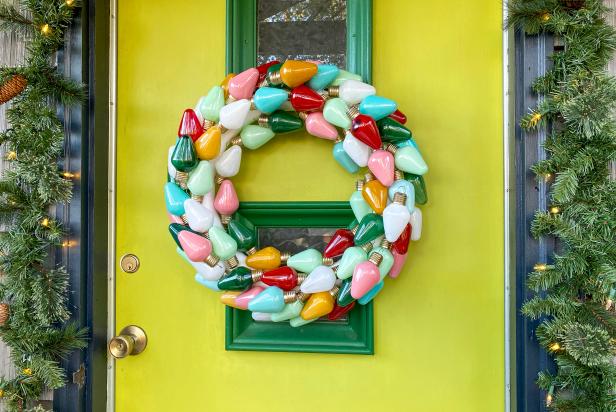
Craving a little vintage holiday curb appeal? HGTV Handmade’s Liz Gray creates a colorful, retro wreath that looks just like a big bundle of old-fashioned Christmas lights. Hark back to the days of C9 bulb-wrapped trees and make your very own classic door decor with this easy step-by-step guide.
Materials + Tools
- low-temp hot glue gun + glue sticks
- plastic cups
- scrap paper
Prep Bulbs for Paint
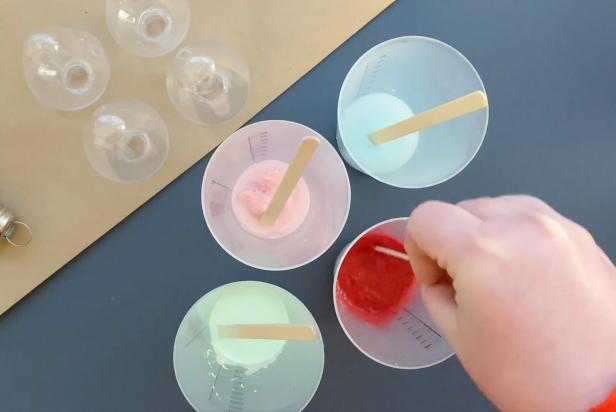
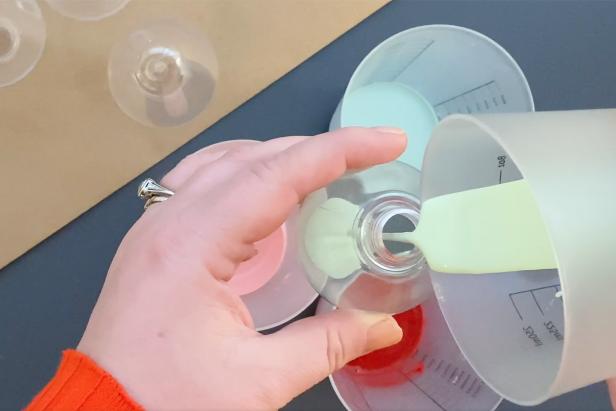
First, remove the ornament tops from the clear bulbs and set aside for later (Image 1). Next, add four different acrylic paint colors into individual prep cups and add a bit of water to each cup to make the paint pourable (Image 2). Tip: Use a 2:1 paint-to-water ratio so the mixture is thick enough to remain opaque, but thin enough to pour (Image 3). Paint the inside of each bulb by pouring the mixture into the bulb top and swirling the paint around to evenly coat the sides (Image 4). Then dump the remaining paint back into the prep cup while tapping the sides to coat the top (Image 5). Place the painted bulb on scrap paper and let dry overnight. Repeat above steps to make more bulb colors.

Liz Gray

Liz Gray
Liz Gray
Liz Gray

Liz Gray
Make Gold Tops
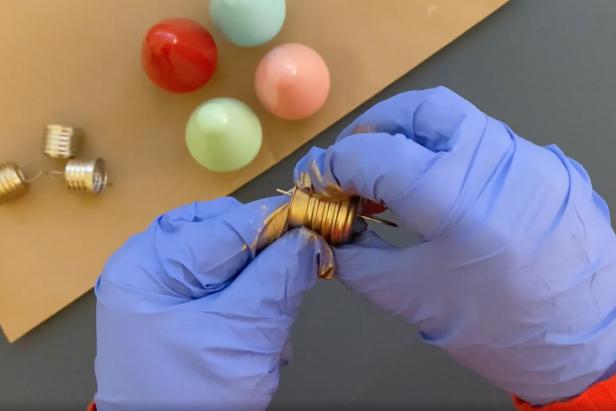
While the painted bulbs are drying, prepare the ornament tops. Apply a dab of gilding wax to the ornament top (Image 1) and work the paste around the creases. Tip: Wear rubber gloves to apply the gilding wax evenly with your fingertips (Image 2). Let them dry overnight.

Liz Gray
Liz Gray
Assemble Wreath
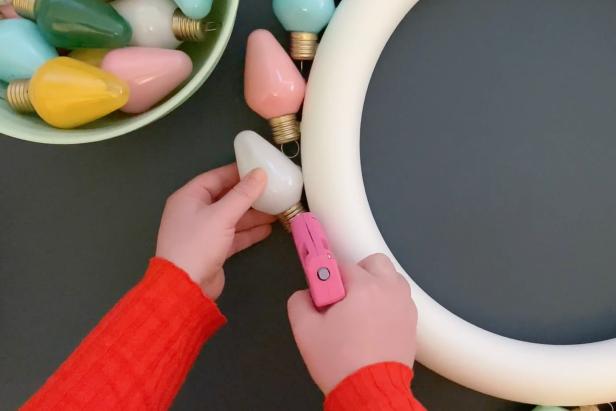
Add the first bulb to the foam wreath form by using a low-temp hot glue gun (Image 1). Tip: Add two dots of glue to each bulb to ensure a firm bond and hold in place until set (Image 2). Continue to add the first layer of bulbs around the foam form (Image 3). Then, secure the second row of bulbs by adding a dab of hot glue directly to the form and the first layer of bulbs (Image 4). Continue adding layers until the wreath is complete. Hang this retro wreath on your front door and spread some vintage holiday cheer (Image 5).

Liz Gray

Liz Gray
Liz Gray

Liz Gray
Liz Gray
20 DIY Wreaths You'll Love 20 Photos
We’ve rounded up 20 cool, clever and beautiful wreaths that are perfect to set the stage for the holidays but look stylish all winter long.
Vintage Holiday Decorating Ideas
Cozy Up Your Christmas Decor With Vintage and Antique Finds 62 Photos
Have yourself a vintage little Christmas this year with our suggestions for antique holiday items that'll give your seasonal decor a big boost of heart-warming family history and a collected-over-time charm.
14 Easy Ways to Add Classic Christmas Charm to Your Home 14 Photos
Deck the halls in a timeless way with a seasonal flair that will never go out of style. We've got stunning ways to add decorative holiday touches to (almost!) every room in the house.
15 Vintage Holiday Gift Ideas 15 Photos
Skip the mall this year, and give creative gifts with a little history and time-worn charm. Fill vintage containers with thoughtful suprises for useful gifts where the wrap is part of the present.


