


Replacing a Fluorescent Light Fixture
Let there be a new light with these step-by-step instructions.
Replacing a fluorescent light fixture doesn’t require an electrician. Just follow these steps.
Materials and Tools:
medium and large flat-head screwdrivers
circuit tester
needle-nose pliers to bend and shape wires
drill and bit
tape measure
pencil
wire nuts
toggle bolts or wood screws
safety glasses
Steps:
Remove existing light fixture
- Turn off power at circuit-breaker box.
- Remove lens or diffuser panel from light.
- Remove lamps or bulbs.
- Remove ballast cover. Observe how wires are connected for future reference.
- Uncap black and white wires and test to ensure that power is off.
- Separate wires from existing fixture.
- Remove fixture base from ceiling.
Install new fixture
- Remove ballast cover from new fixture base.
- Remove center knock-out to allow wires to go through the base.
- Position the base of the fixture at the desired point on the ceiling.
- Use the tape measure to ensure that the base is parallel to the wall, and then mark the position of the mounting holes.
- Wearing safety glasses, take the fixture back down and, using marks for reference, drill holes for fastening the fixture to the ceiling. If you encounter resistance when drilling past the ceiling drywall, a joist is present and wood screws are required. If no joist is available, use toggle bolts. If toggle bolts are required, use a screwdriver to widen the mounting hole enough to allow the toggle bolt to pass through.
- Place bolts in mounting holes and attach toggles on the back side.
- Push toggles through mounting holes and secure by screwing into place.
- Make electrical connections by connecting the black supply wire to the black fixture wire and the white supply wire to the white fixture wire. Cap the connections with wire nuts, and attach the ground (bare) wire to the base of the fixture.
- Attach the ballast cover.
- Install lamps or bulbs.
- Install fixture cover.
- Turn power back on at circuit-breaker box.
Next Up

DIY Hanging Cookie Tin Planters
Houseplants have never been more in style. Create a living wall art display with this simple planter project made from upcycled cookie tins.

How to Choose the Best Indoor Lighting for Plants
Whether it's for your full-grown houseplants or starter seedlings, check out these grow light options for your indoor plants.
The Two Best Homemade Soap Bubble Recipes
Soap bubble solutions, are generally little more than dish soap and water, but we’re taking it to the next level with our "mile-high" and "dura-bubble" solutions.

How to Water Houseplants
Learn the art of watering houseplants and show off the green thumb you always knew you had.

How to Make DIY Beard Balm
Plus, craft up a stenciled pouch and give this grooming kit as the perfect DIY gift for men.

Make an Easy-to-Sew Lined Tote Bag
Custom tote bags can add to a fun personal fashion statement. Learn how to make a lined fabric tote bag that's perfect for work and play in this straightforward home sewing project for tweens, teens or anyone new to sewing.
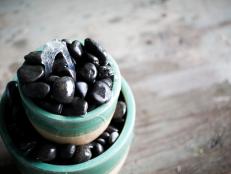
DIY Water Fountain Made From Flowerpots
Craft a beautiful bubbling water feature for your garden, deck or patio with this simple tutorial.
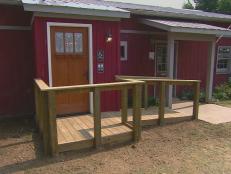
How to Build a Wheelchair Ramp and Landing
Make your home more accessible with this project. Learn how to build a wooden ramp and landing to accommodate wheelchair users and others with mobility issues.

10 Questions We Have for Mercury Stardust, TikTok's Famous 'Trans Handy Ma'am'
Mercury Stardust is a popular TikTok creator, author, speaker, LGBTQIA+ advocate and burlesque performer who wants renters and homeowners alike to feel empowered wherever they call home. Order her new book, Safe and Sound: A Renter-Friendly Guide to Home Repair, and find out what to keep in your tool kit and see which HGTV personality she would invite to perform in a burlesque show.

Make These DIY Specimen Jars to Liven Up Your Creepy Halloween Decor
Be your own Frankenstein and create this spine-tingling decor with water, calcium chloride, sodium-alginate powder and food coloring.


