


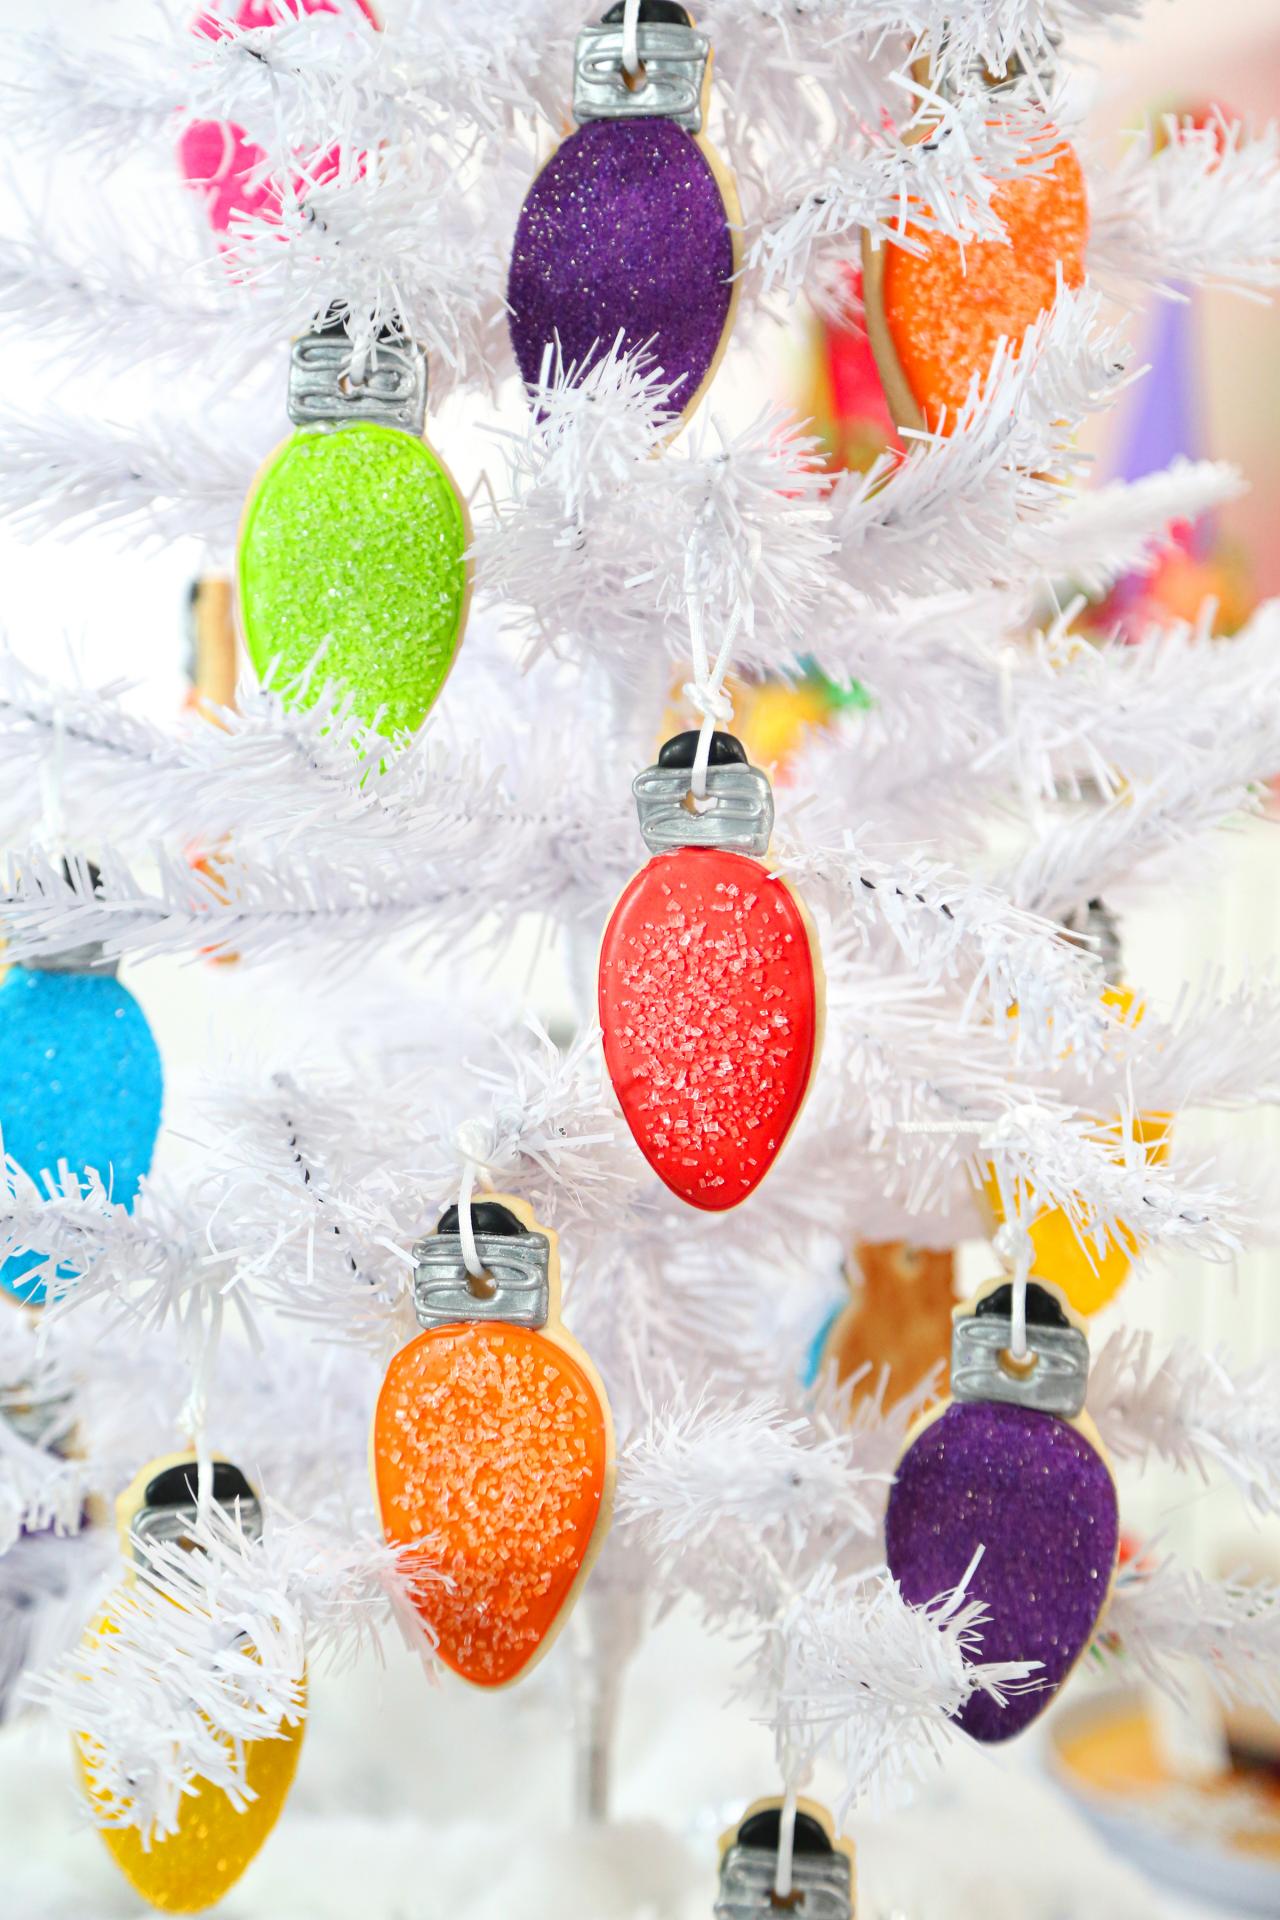
Edible C9 Christmas Bulb Cookie Ornaments
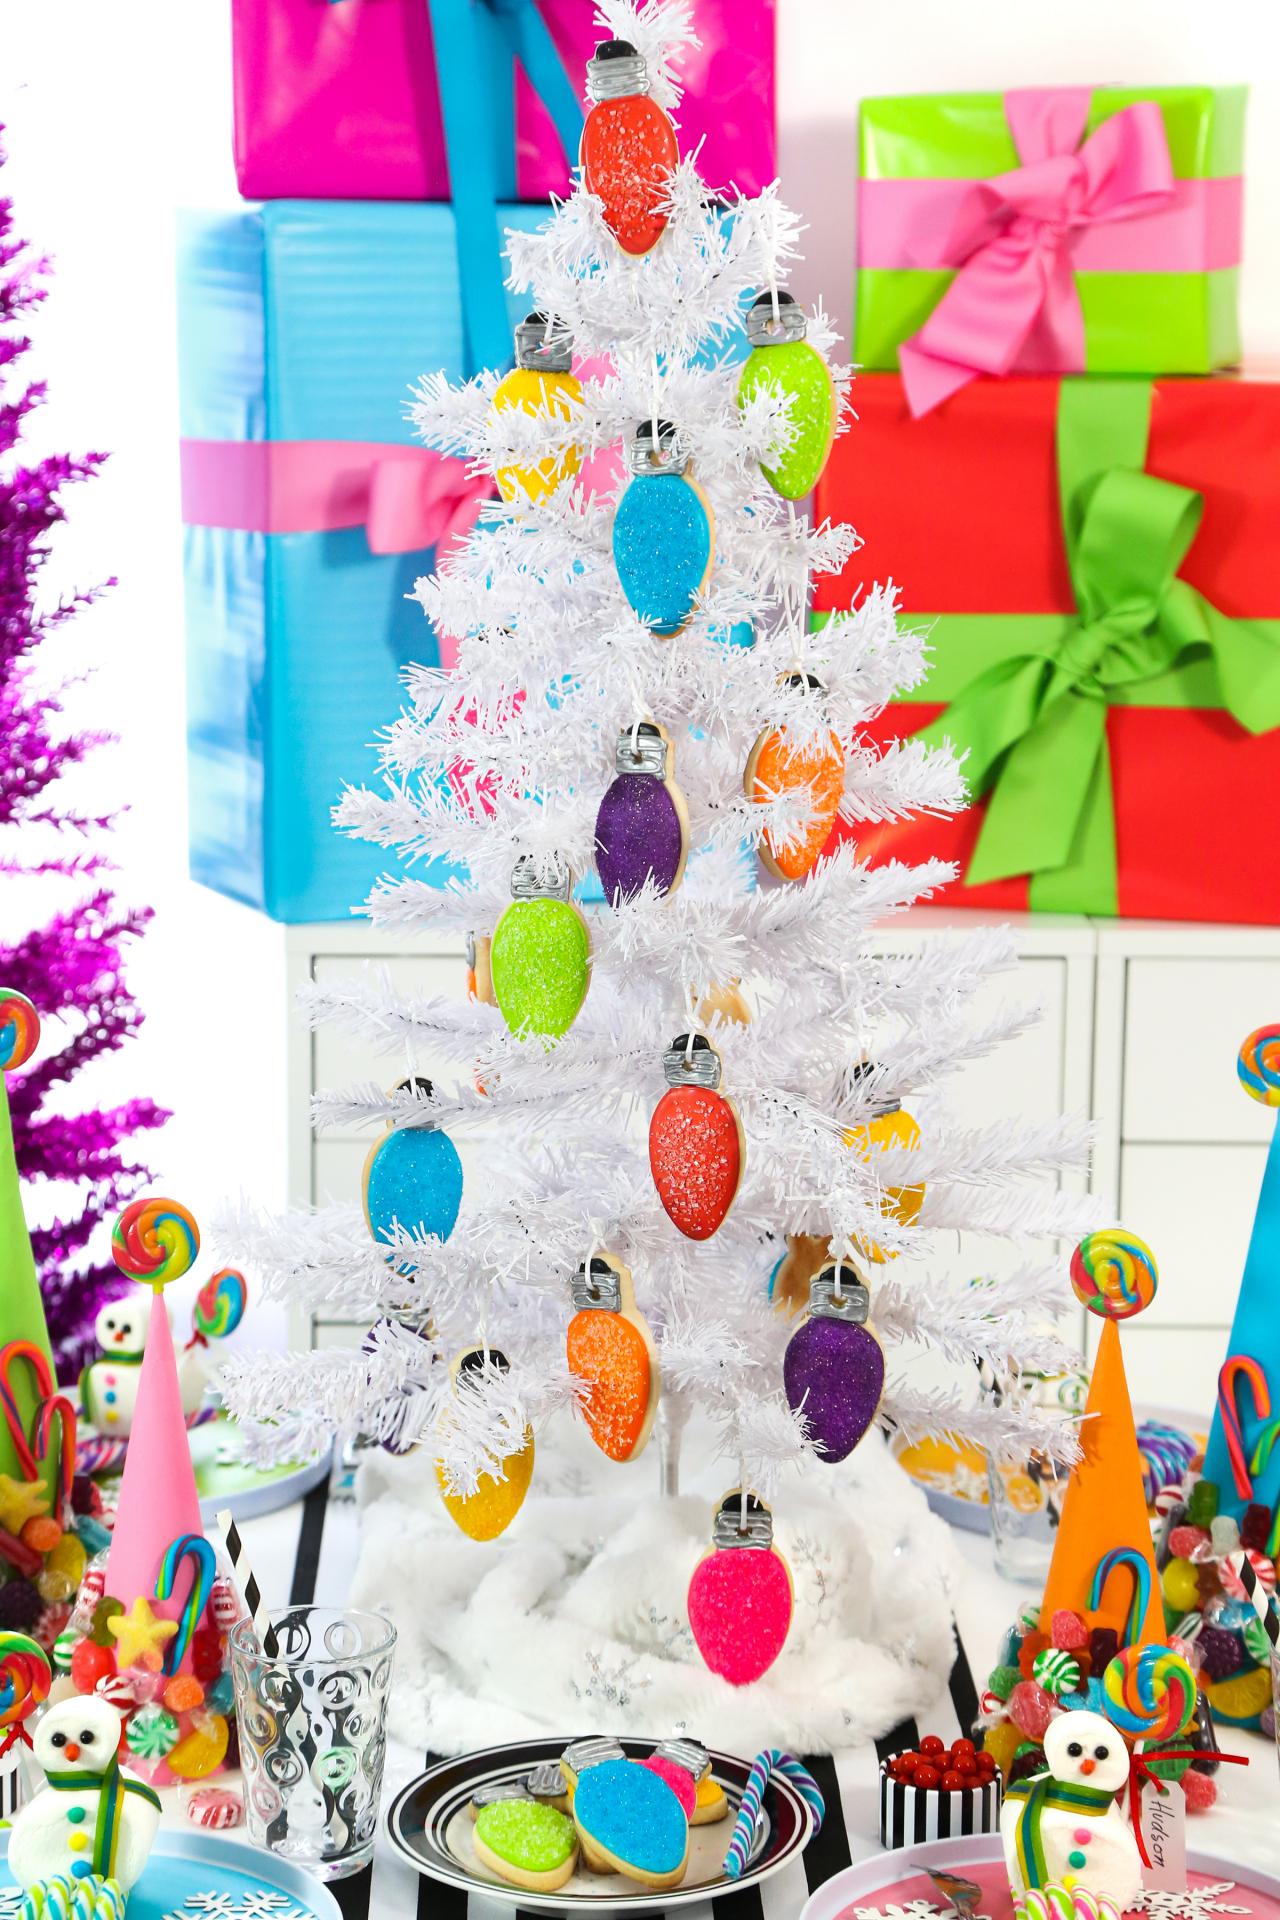
Celebrate the holidays in retro style with a delicious cookie that doubles as a Christmas tree ornament, a party favor or a fun, homemade food gift. C9 bulb-shaped cookies are decorated in a rainbow of royal icing colors, with twinkling sanding sugars to match.

Heather Baird SprinkleBakes.com

Butter Cookie Ingredients
- 1-1/2 cups (3 sticks) unsalted butter, softened
- 2 cups granulated sugar
- 4 eggs
- 1 tablespoon vanilla extract
- 5 cups all-purpose flour
- 2 teaspoons baking powder
- 1 teaspoon fine-grain sea salt
- YIELD: about 7 dozen cookies
Royal Icing and Decor Ingredients
- 8 cups confectioners' sugar, sifted
- 6 tablespoons meringue powder
- 1/2 cup warm water, plus more for thinning to soft peak or flood consistency
- 1/2 teaspoon lemon, orange or almond extract
- gel food colors in black, pink, red, orange, yellow, lime green, teal and purple
- 1/2 cup each sanding sugar colors: pink, red, orange, yellow, green, teal and purple
- Tip: Clear coarse-crystal sugar can also be used if you don’t have every color of sanding sugar.
- silver luster dust, optional
- 1 teaspoon lemon extract
- narrow ribbon or baker's twine for hanging
- Note: You’ll need a C9 bulb cookie cutter for this recipe. Find it for purchase online. To make these cookies in all the hues pictured, you’ll need nine #2 plain round decorator piping tips, with couplers and piping bags.
Cookie Instructions
In the bowl of an electric mixer fitted with the paddle attachment, cream butter and sugar together until smooth. Beat in eggs, one at a time, until thoroughly combined. Add the vanilla. Combine flour, baking powder and sea salt in a separate bowl.
On low speed, gradually add dry mixture to wet mixture. Dough will be very stiff. Refrigerate for 30 minutes.

Heather Baird SprinkleBakes.com
Preheat the oven to 400°F. Cover two or more large cookie sheets with parchment paper.
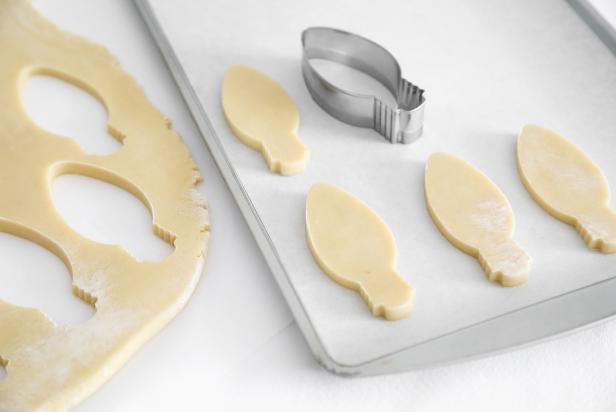
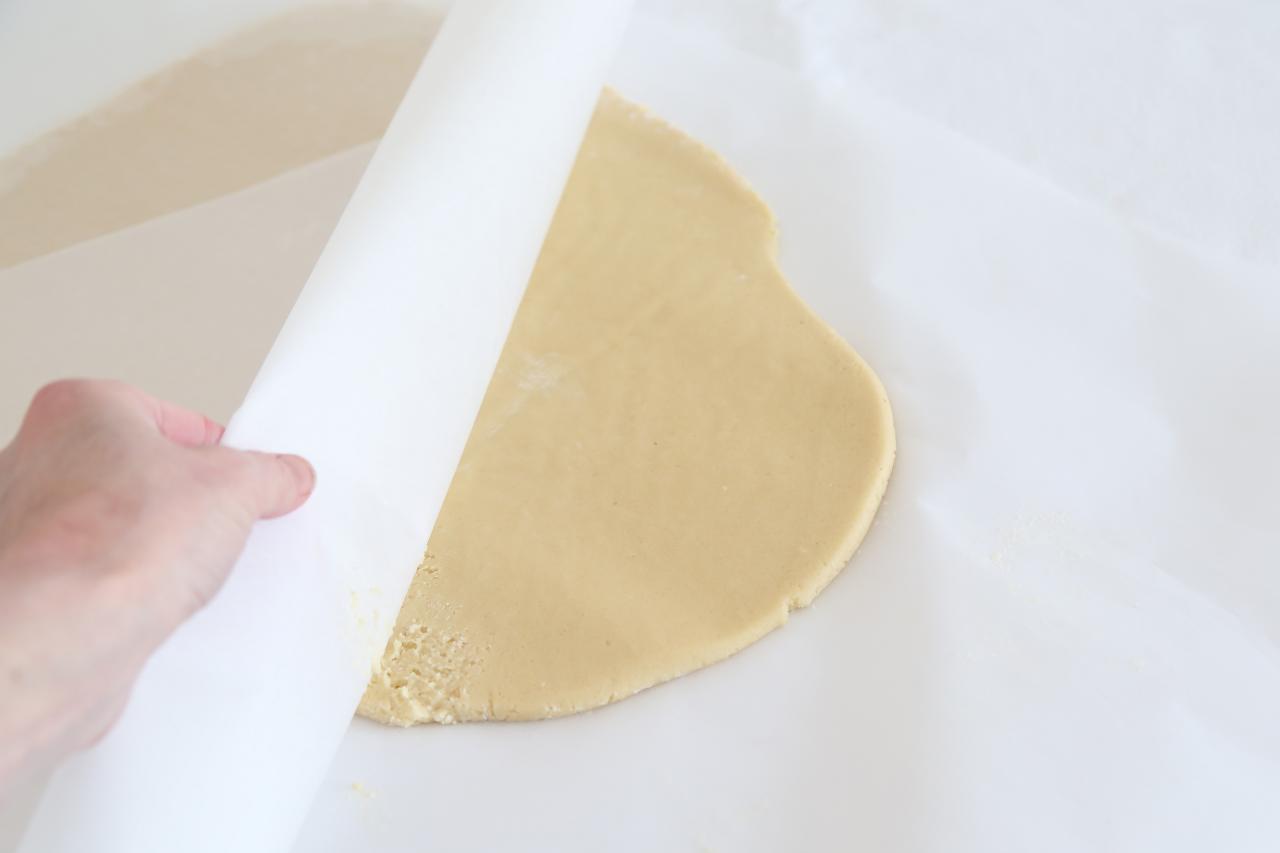
Roll half of the dough between sheets of parchment paper to 1/4-inch thickness (Image 1). Repeat with the remaining dough half. Transfer the dough, stacked, to a large baking sheet and refrigerate until firm, about 1 hour. This will help cutouts keep their shape while baking. Remove the dough from the refrigerator and stamp out bulb shapes (Image 2). Re-roll dough scraps, chill and cut out more shapes. You should have about 7 dozen cookies.

Heather Baird SprinkleBakes.com
Heather Baird SprinkleBakes.com
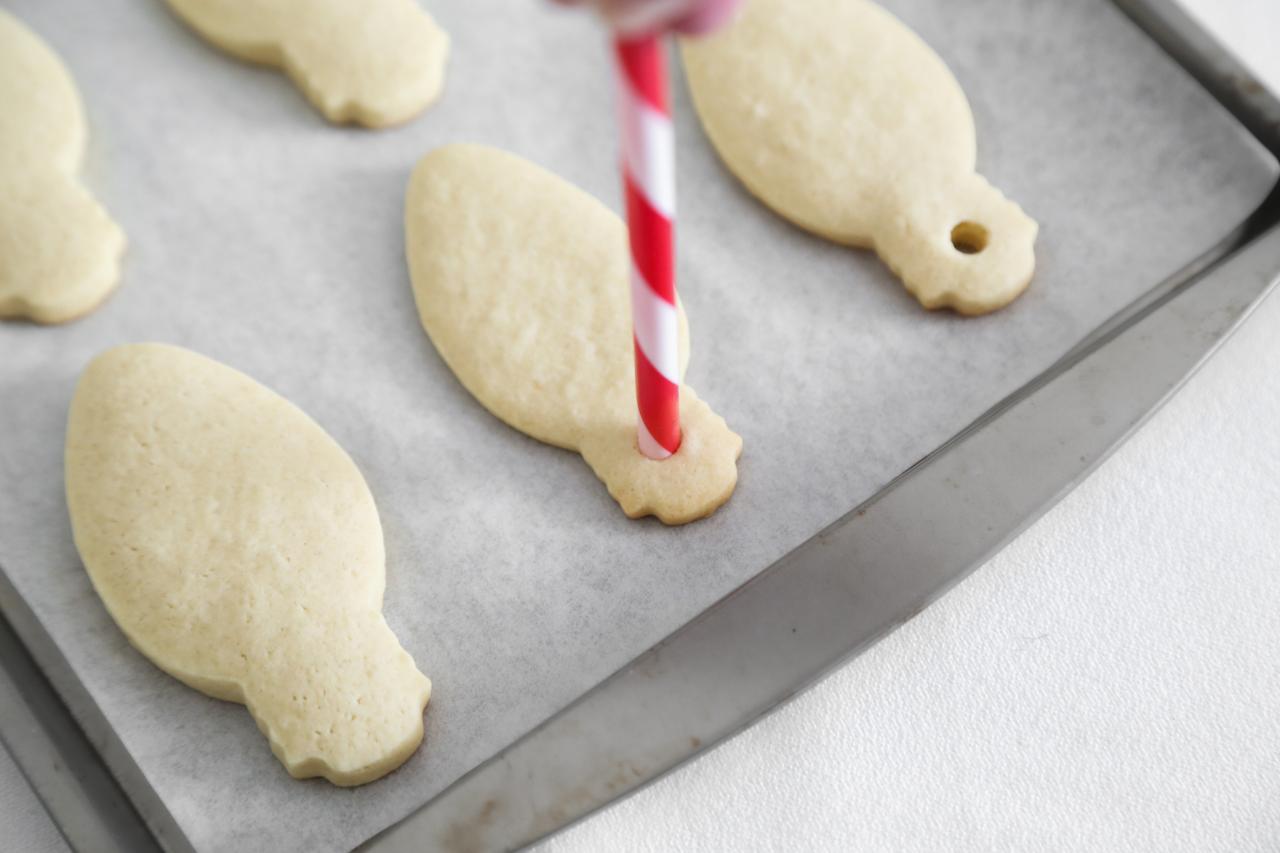
Bake the cookies for 20 minutes, or until the cookies are lightly golden around the edges. Remove from the oven and use a drinking straw to stamp holes into the tops (plug end) of each cookie. Or, if you don’t plan to hang the cookies as ornaments, omit this step.

Heather Baird SprinkleBakes.com
Royal Icing Instructions
In the bowl of an electric mixer fitted with a whisk attachment, stir the confectioners' sugar and meringue powder on low speed until combined. Add the water and beat on medium-high speed until very stiff peaks form, about 5 to 7 minutes. Add flavoring and beat on low until combined. Bring to flood consistency by adding additional water a little at a time. Use the icing immediately or drape a damp tea towel over the mixing bowl or bowls to prevent the icing from drying out.
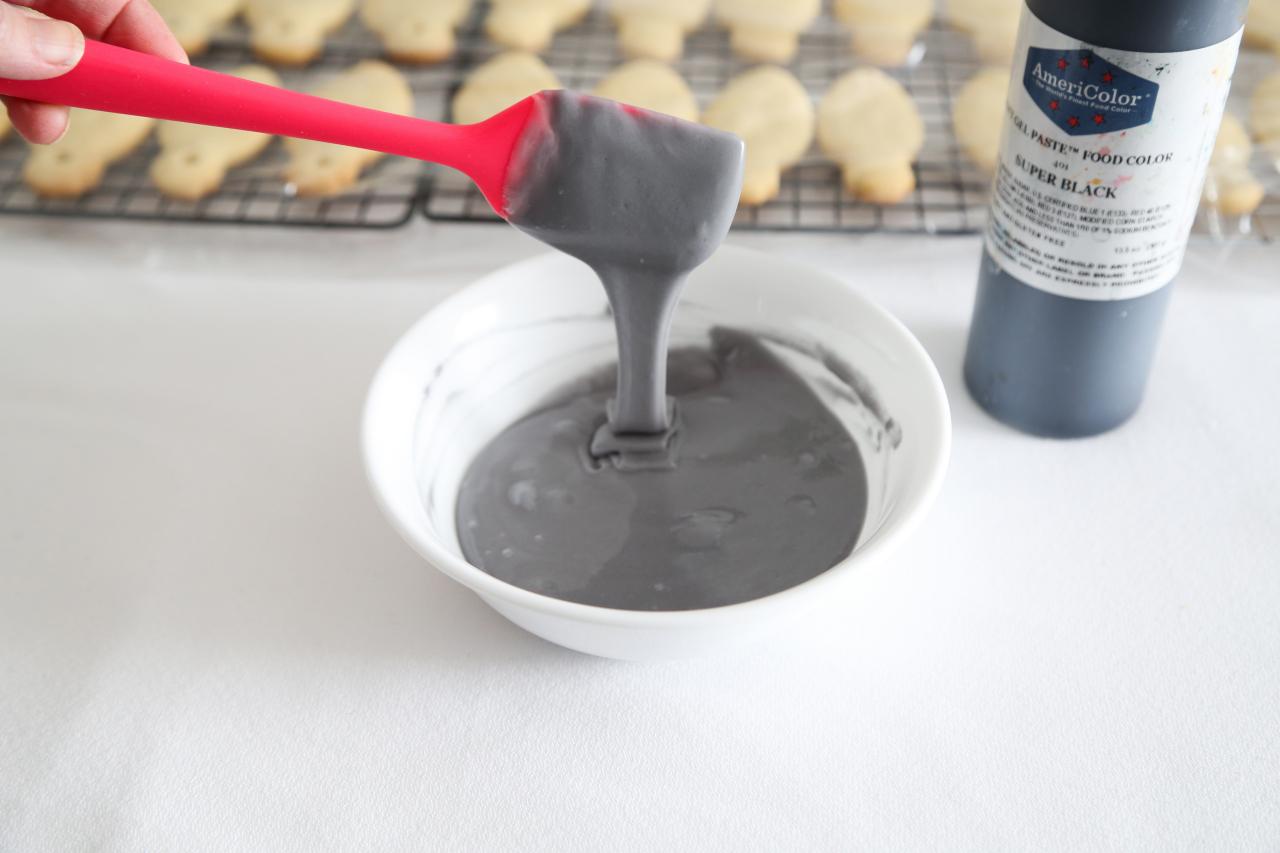
Divide the icing into 9 bowls. Use just a drop of black gel food color to tint one of the bowls gray (Image 1). Tint the remaining 8 bowls each with one of the gel food colors until vibrant hues are achieved. You should have a bowl of each of these colors: gray, black, pink, red, orange, yellow, green, teal and purple.

Heather Baird SprinkleBakes.com
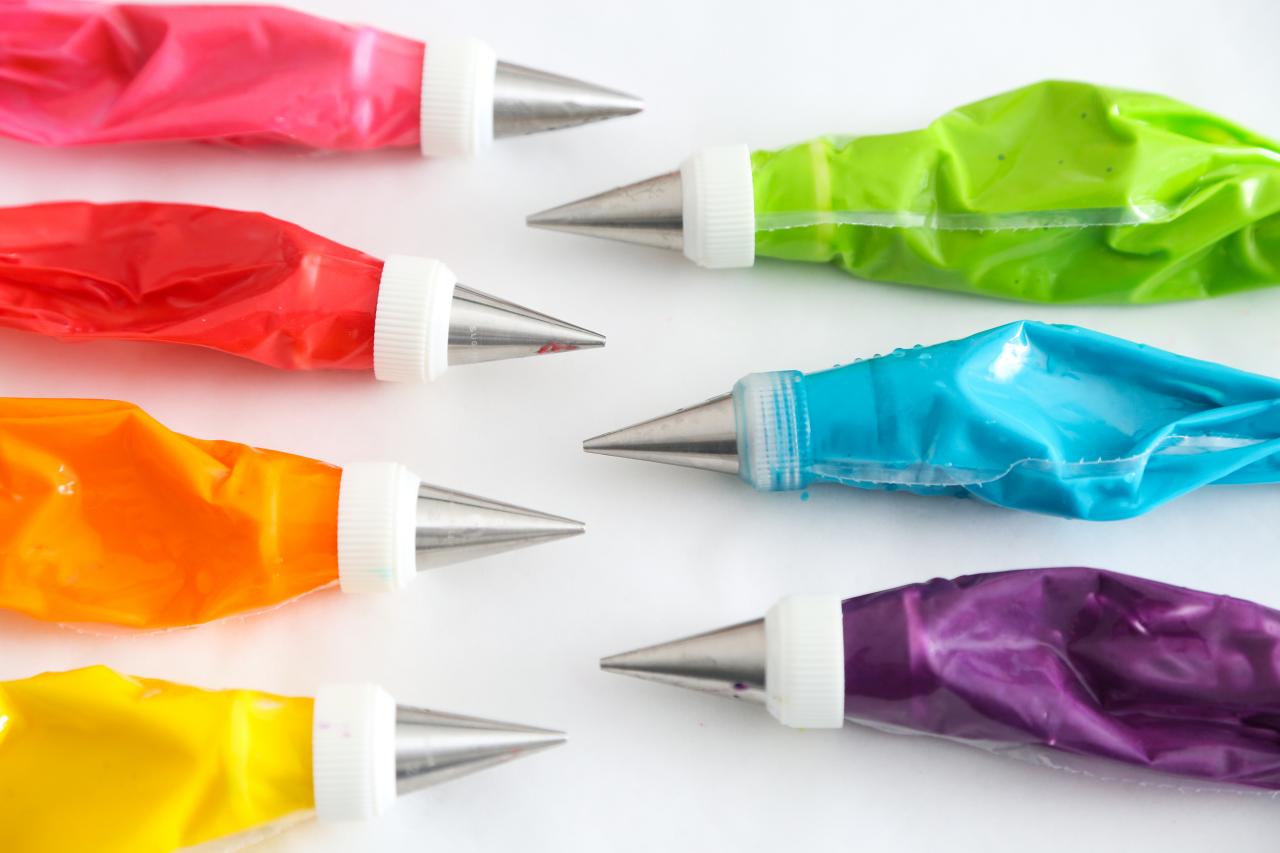
Place a small #2 round piping tip into the bottom of each of 9 small piping bags; snip off plastic on the end of the piping bags. Fill each piping bag with an icing color and seal the open end with a rubber band.

Heather Baird SprinkleBakes.com
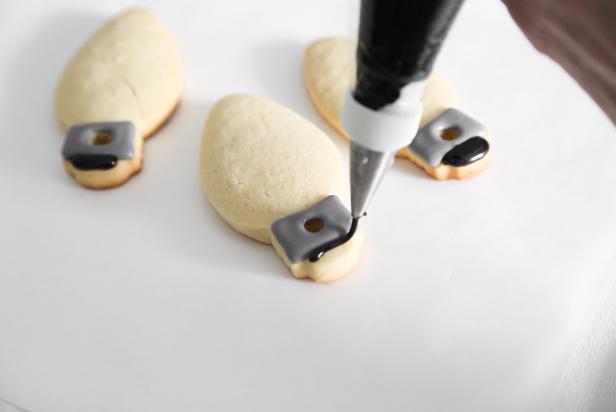
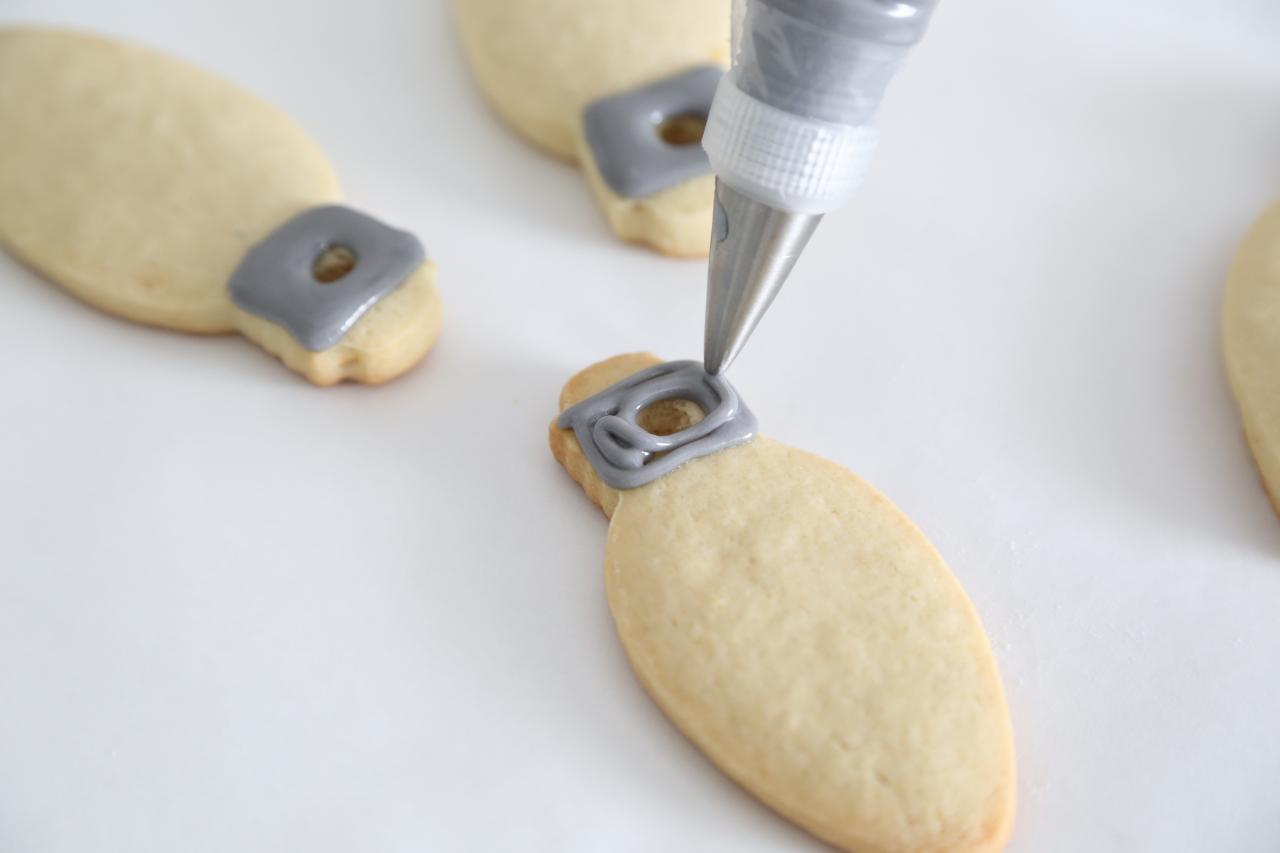
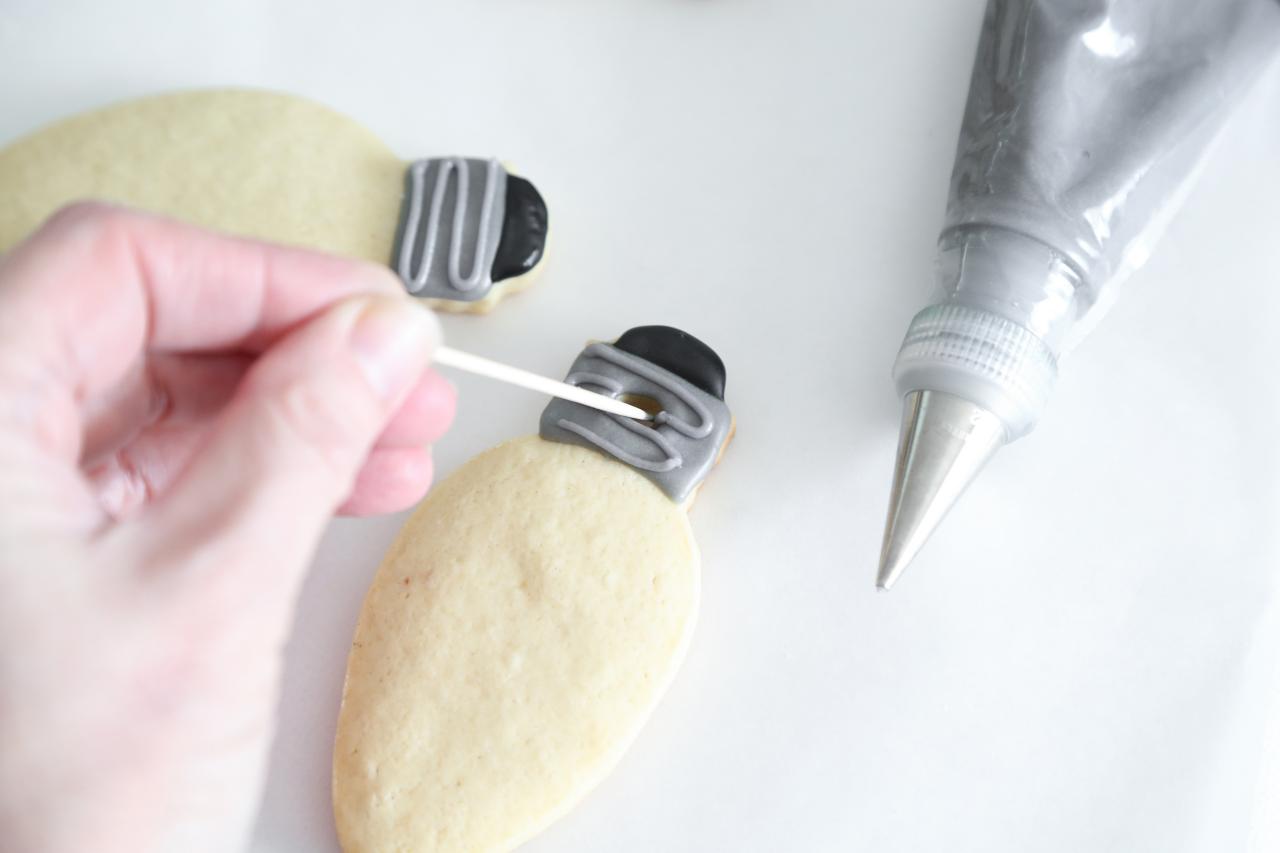
Pipe a square line of gray icing around the stamped hole in each cookie; let stand for 1 minute. Flood the shape with more royal icing (Image 1). Pipe a half circle of black icing, following the shape of the cookie’s edge. Let stand for 1 minute. Fill in the shape with more black icing (Image 2). Let stand until the shapes are semi-hardened, about 30 minutes. Pipe a continuous line of gray icing back and forth on the gray square, creating the "threads" of the bulb. Let stand until set, about 1 hour. Note: Use a toothpick to break away the icing over the hanging hole when it is dry (Image 3).

Heather Baird SprinkleBakes.com
Heather Baird SprinkleBakes.com

Heather Baird SprinkleBakes.com
Place each color of sanding sugar in separate bowls. Or, if using the clear crystal sugar instead of colored sugar, place it in a bowl.
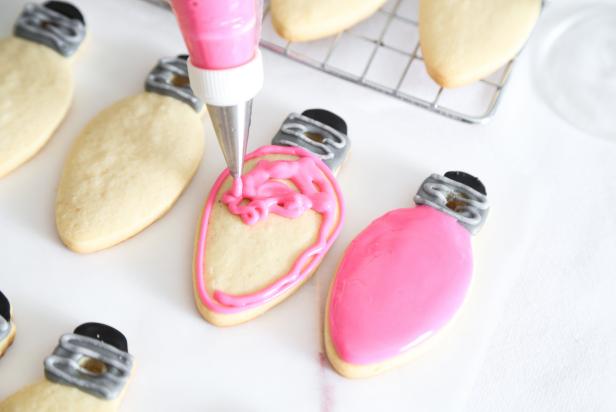
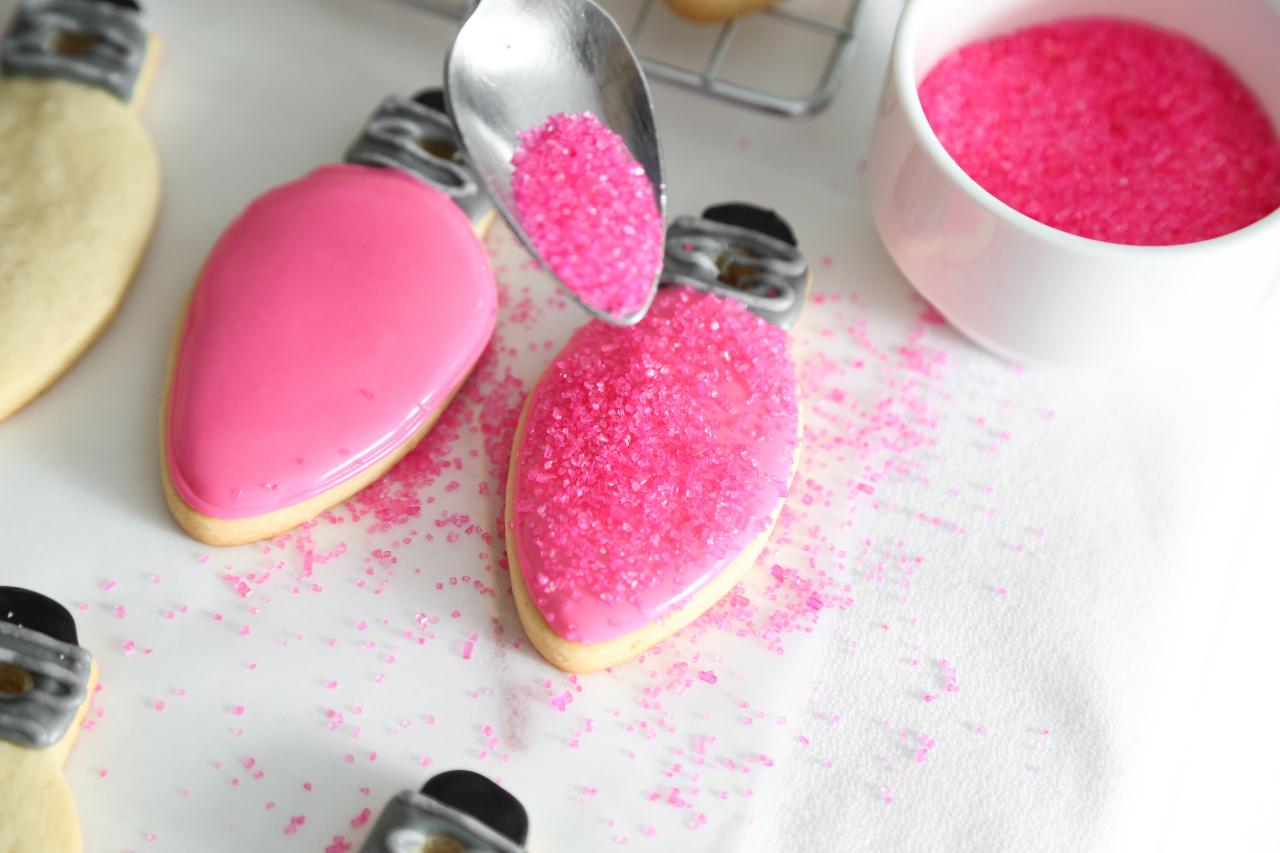
Pipe a line of pink icing around the bulb end of 12 cookies. Let it stand for 1 minute. Flood the shapes using more of the pink icing (Image 1). While the icing is still wet, hold a cookie over the bowl and lightly sprinkle on the pink sanding sugar (or clear sugar) over the bulb portion (Image 2). Tip the cookie so that the excess falls back into the bowl. Repeat with remaining cookies.
Heather Baird SprinkleBakes.com

Heather Baird SprinkleBakes.com
Repeat this process using the remaining colors of royal icing and sanding sugars. At the end you should have one dozen of each color cookie. Allow the cookies to stand, uncovered, overnight to cure.

Heather Baird SprinkleBakes.com
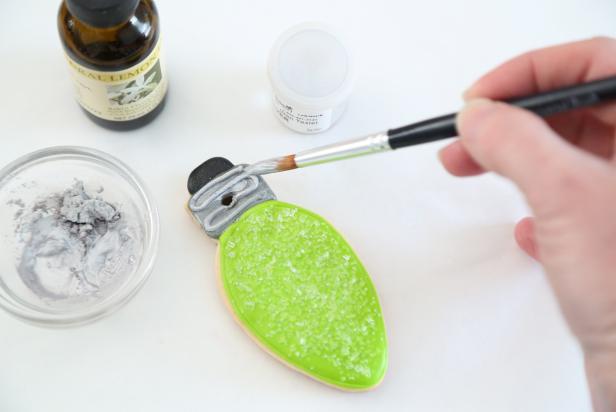
If desired, combine silver luster dust and lemon extract in a small condiment cup. Stir, adding more luster dust until a medium-bodied metallic paint is formed. Brush the paint lightly over the gray threaded bulb portion of each cookie. Let dry for 10 minutes.
Heather Baird SprinkleBakes.com
Thread ribbon or baker's twine through the holes to hang the cookies on your tree.

Heather Baird SprinkleBakes.com


