


How to Simply Paint a Room
Learn how to paint both walls and molding like a pro with these simple steps.

One of the simplest and most effective ways to completely change the style or mood of any space in your home is with a fresh coat of paint. Painting a room is an easy DIY project nearly anyone can tackle but taking the extra step of painting the trim can create an even more dramatic result. While painting contrasting trim adds to the workload, a few readily available tools keep it within reach of the most inexperienced DIYer.

Jennie Andrews
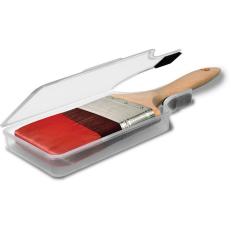
Tools and Materials
- wall paint (flat, eggshell or satin)
- trim paint (semi-gloss or gloss)
- drop cloth
- paint trays and liners
- paint stir sticks
- 9-inch roller with roller cover
- 4-inch roller with roller cover
- painter's tape
- angled 2-inch paintbrush
- rags
- 220-grit foam sanding block
- pre-mixed spackle
- spackle knife
- ball peen hammer

Jennie Andrews
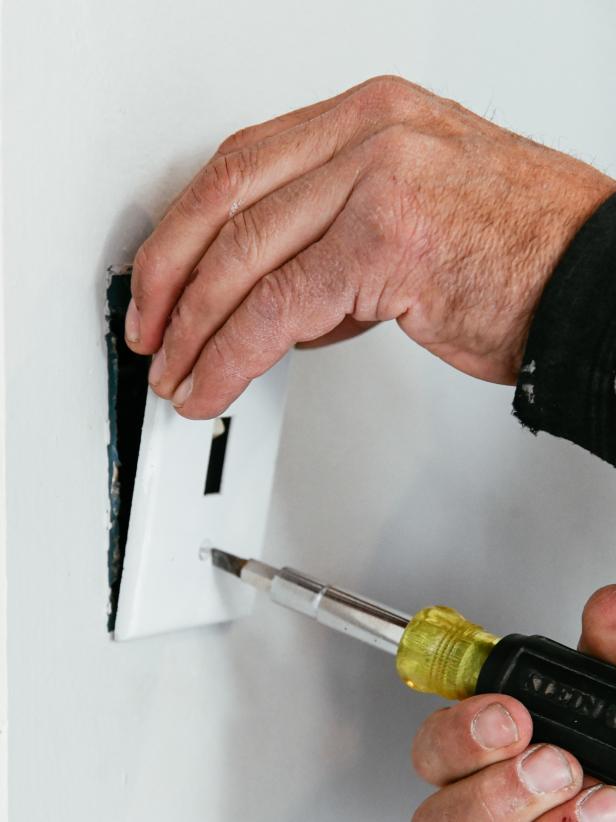
1. Prep the Space
Always begin any painting project by moving furniture away from the walls and covering the floor with a drop cloth. If using a lightweight cloth or plastic sheeting, you may need to tape down the edges to keep them from shifting. Remove all outlet and light switch covers.

Jennie Andrews
Jennie Andrews
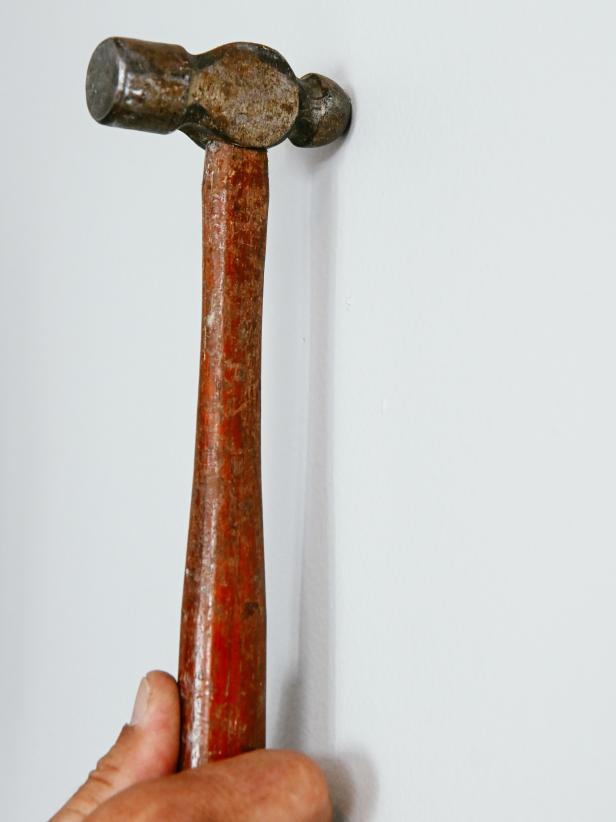
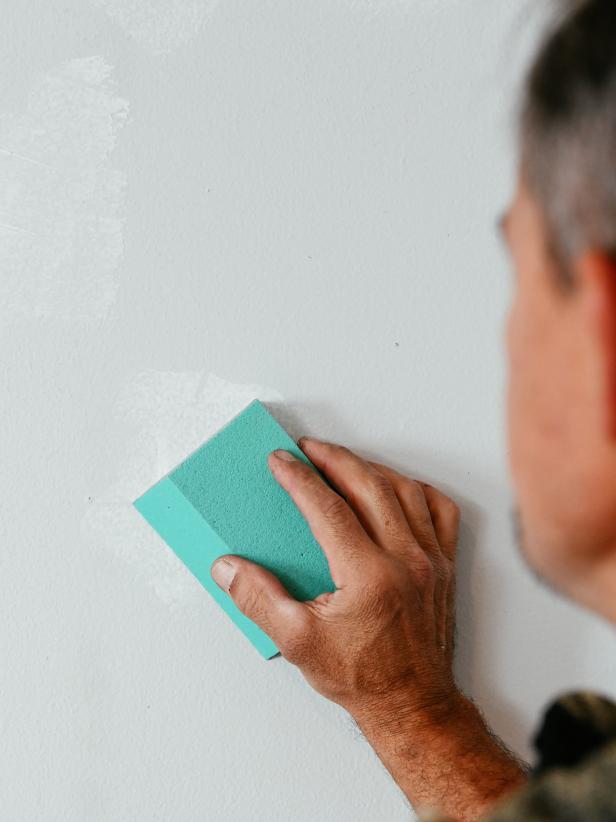
2. Repair Damaged Walls
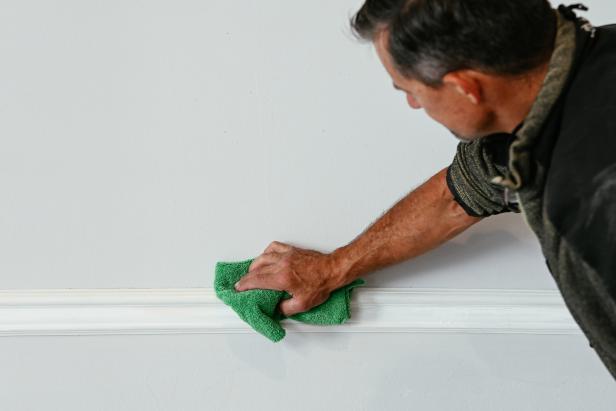
Before you begin painting, take time to repair any holes or divots in the wall. Use a ball peen hammer to gently tap any places where there are bumps caused by nails or old drips of paint. Then scoop a small amount of spackle onto a putty knife. Placing the edge of the knife flat against the wall, angle the knife and drag it across the hole, depositing the spackle into the low spot created by the hammer. Scrape off any excess by repeating the movement. Let the spackle fully dry and then sand until smooth using a 220-grit foam sanding block. Use a clean, damp rag to wipe down the entire wall and all trim.
Jennie Andrews

Jennie Andrews
Jennie Andrews
Jennie Andrews
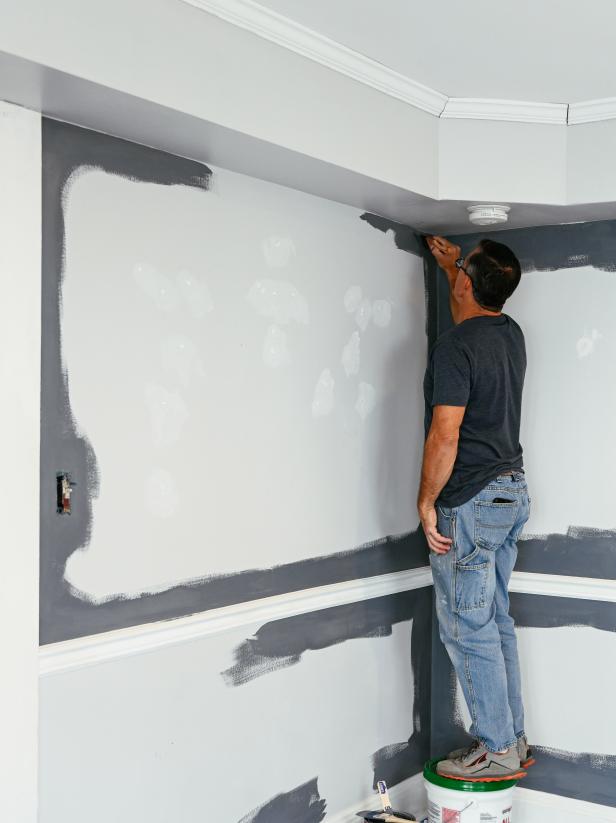
3. Cut In
It is best to tackle one wall at a time, using a brush to cut in around the trim and then filling in the large areas with a roller. The lines between the brushed-on paint and the rolled-on paint will blur better if the paint is still a bit wet. If your walls are big, work in smaller sections and alternate cutting in and rolling as you go.
Load an angled paintbrush with wall paint, and use a rag to wipe away any excess paint. Starting in a corner, hold the brush at an angle and paint along each edge of the ceiling, trim, baseboards and into the corners. Holding the brush at an angle helps keep your paint lines straight and neat. When cutting in below the ceiling, start the first swipe of paint about a 1/8 of an inch from the edge and then work the paint toward the line. Work the paint out away from the corner as well, leaving a feathered edge.
If you are painting the trim after finishing the walls, don’t worry if you get some paint on the trim. Simply wipe away any big drips or splatters with a clean, damp rag and move on.

Jennie Andrews

Jennie Andrews

Jennie Andrews

Jennie Andrews
Jennie Andrews
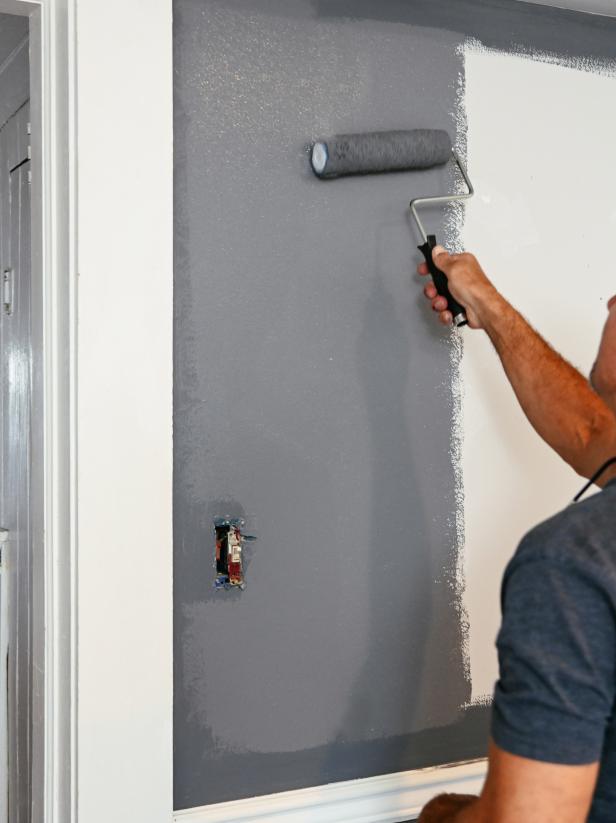
4. Roll the Wall
Pour the wall paint into the paint tray. Load paint onto your roller by dipping it into the paint in the tray. Then, roll the roller back and forth across the textured part of the tray. Continue to roll until the paint uniformly coats the roller without a lot of excess paint on the roller. Working left to right, place the roller against the wall and, with light but steady pressure, slowly roll a vertical line of paint that overlaps the cut-in paint. Using a mix of vertical and diagonal strokes (but still always overlapping), work the paint out to the right, leaving a feathered edge. When you feel that you need to put greater-than-moderate pressure on the roller to deposit paint, reload the roller.
For the second section of paint, place the roller about two inches from the edge of the first section and roll vertically. This time, first work the paint back to the left to overlap and join the two sections, then continue to work it to the right, again leaving a feathered edge. Continue this pattern until the entire section is painted before moving on to cutting in the next area.
One coat of paint is often not enough, you will likely have to repeat the entire process (beginning with cutting in) to ensure full coverage. Once the walls are completely covered, let them dry for at least 24-48 hours.

Jennie Andrews
Jennie Andrews

Jennie Andrews

Jennie Andrews

Jennie Andrews
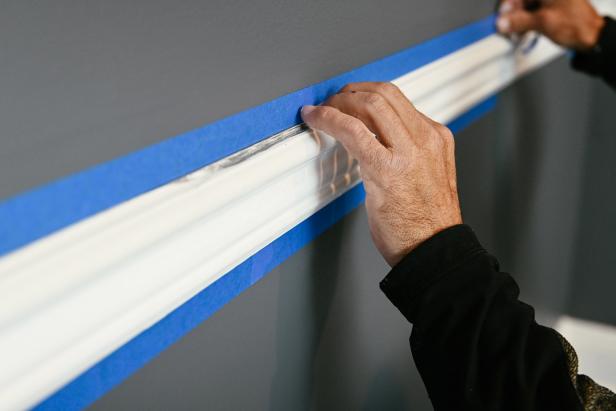
5. Prep the Trim
When the wall paint has had a full 24-48 hours to dry, apply painter’s tape to the wall along each section of trim. If the wall paint is not fully dry, the tape will rip the paint from the wall upon removal, so patience is crucial. Apply about an arm’s length of tape at a time. Be certain that the tape adheres well. To prevent paint from bleeding under the tape and to create nice, crisp lines, run your thumbnail along the edge where the tape meets the trim to create an edge lock.
Jennie Andrews

Jennie Andrews
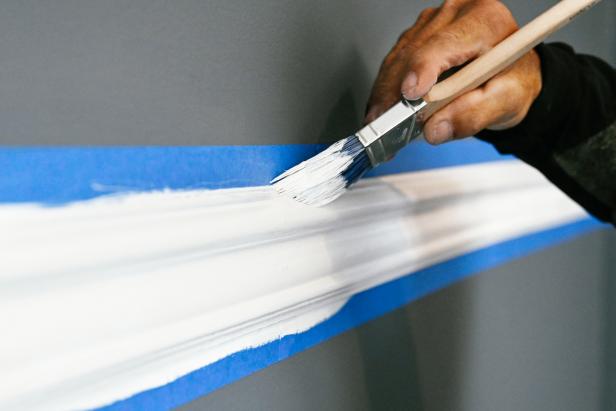
6. Paint the Trim
For wide sections of trim, like door frames, use a 4-inch roller to apply the trim paint. Load the roller in the same manner as the wall roller and paint along the grain of the wood. For trim that runs vertically, use vertical strokes, for horizontal trim, use horizontal strokes. For trim that is smaller or has more detail, a 2-inch paintbrush will likely work the best. Apply the paint using long, steady strokes. Though the wall paint is protected by the tape, take care to keep the paint on the trim as much as possible, thus making the removal of the tape much easier. Let the paint dry completely (at least 24-48 hours) before carefully and slowly removing the tape one piece at a time.
Jennie Andrews

Jennie Andrews
You did it! Just a couple of cans of paint and a small investment of time go a long way with this DIY. Everyone knows that a fresh coat of wall paint can instantly revamp any space, but going the extra step and painting the trim can completely transform a room. The crisp lines create a stylish vibe that is ultra-fresh and oh, so clean.
Jennie Andrews
Shop Paint Tools


How to Match Paint Colors
Whether you're trying to find paint to match an existing wall color or pull your inspiration color from an upholstered sofa, family heirloom or your favorite flower, here's how you can get that perfect color match in a can of paint.

Top 10 Ways to Paint Like a Pro
For a professional-looking paint job, do what the experts do.


