


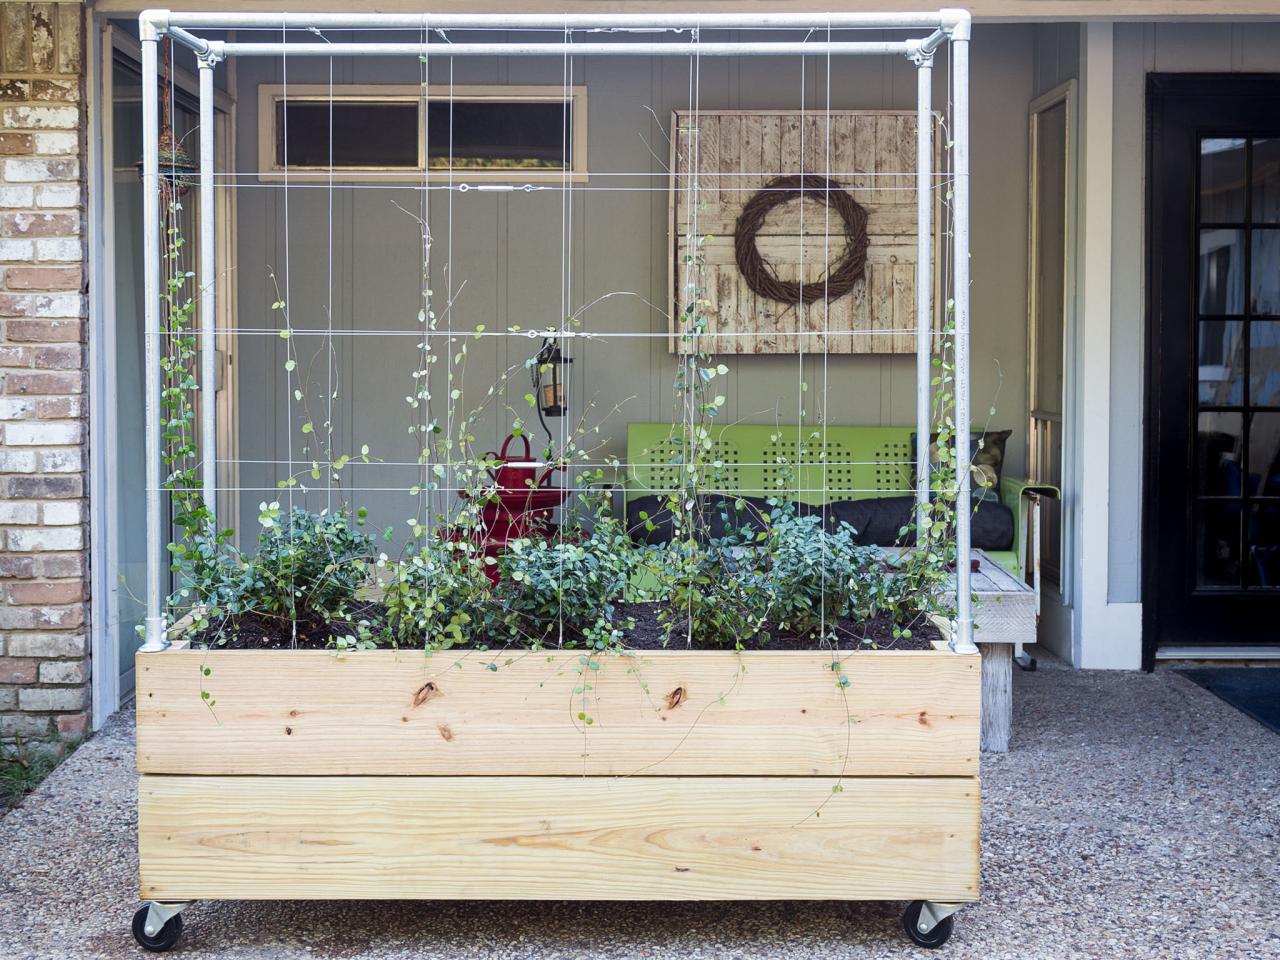
How to Make a Raised Planter With a Trellis
Learn how to build a mobile planter box with a built-in trellis. It's perfect for a small deck or patio, and once your plants grow big and tall, the trellis can also serve as a privacy screen.

Take your plants vertical with this raised garden bed with a metal trellis. The planter box can be a focal point or act as a privacy screen. This simple woodworking project can be built in less than a day and last for years to come.

Tools and Materials
- (4) 2x10 x 8' boards
- (2) 2x4 x 8' boards
- (2) 1x6 x 10' boards
- table saw or circular saw
- 1-1/2" deck screws with wide head
- 2-1/2" deck screws
- clamps, minimum 24" long
- (4) casters, minimum 200 lb. capacity
- paint or stain and sealer
- plastic lining
- (4) 3/4" galvanized rail flanges
- (4) 3/4" 3-way galvanized elbows
- (4) 3/4" galvanized pipe, 48" long
- (2) 3/4" galvanized pipe, 18" long
- (2) 3/4" galvanized pipe, 60" long
- 105' 1/16" galvanized cable
- 9 turnbuckles
- (12) 2" eye screws
- (30) 1/16" cable ferrules
- wire cutting/stripping tool
- potting soil
- trailing plants
Cut List
- From the 2x10 x 8’ boards, cut four pieces 64" long and four pieces 21" long.
- From the 2x4 x 8’ boards, cut four pieces 19" long, two pieces 14" long, and two pieces 57-7/8" long.
- From the 1x6 x10’ boards, cut 10 pieces 20-1/2" long.
Building the Base
Make the shorter sides of the planter box: Place two of the 2x10 x 21” boards on a flat surface with the long edges butted close together. Lay two 2x4 x 19” boards perpendicular on both ends of the boards making them flush with the outside edges of the boards. Use 2-1/2” wood screws to attach the 2x4 x 19” boards at the top and bottom of each of the 2x10 x 21” boards. Make sure that the top and bottom of the wide boards are flush with the ends of the 2x4 boards. Repeat to make the other side of the planter box.

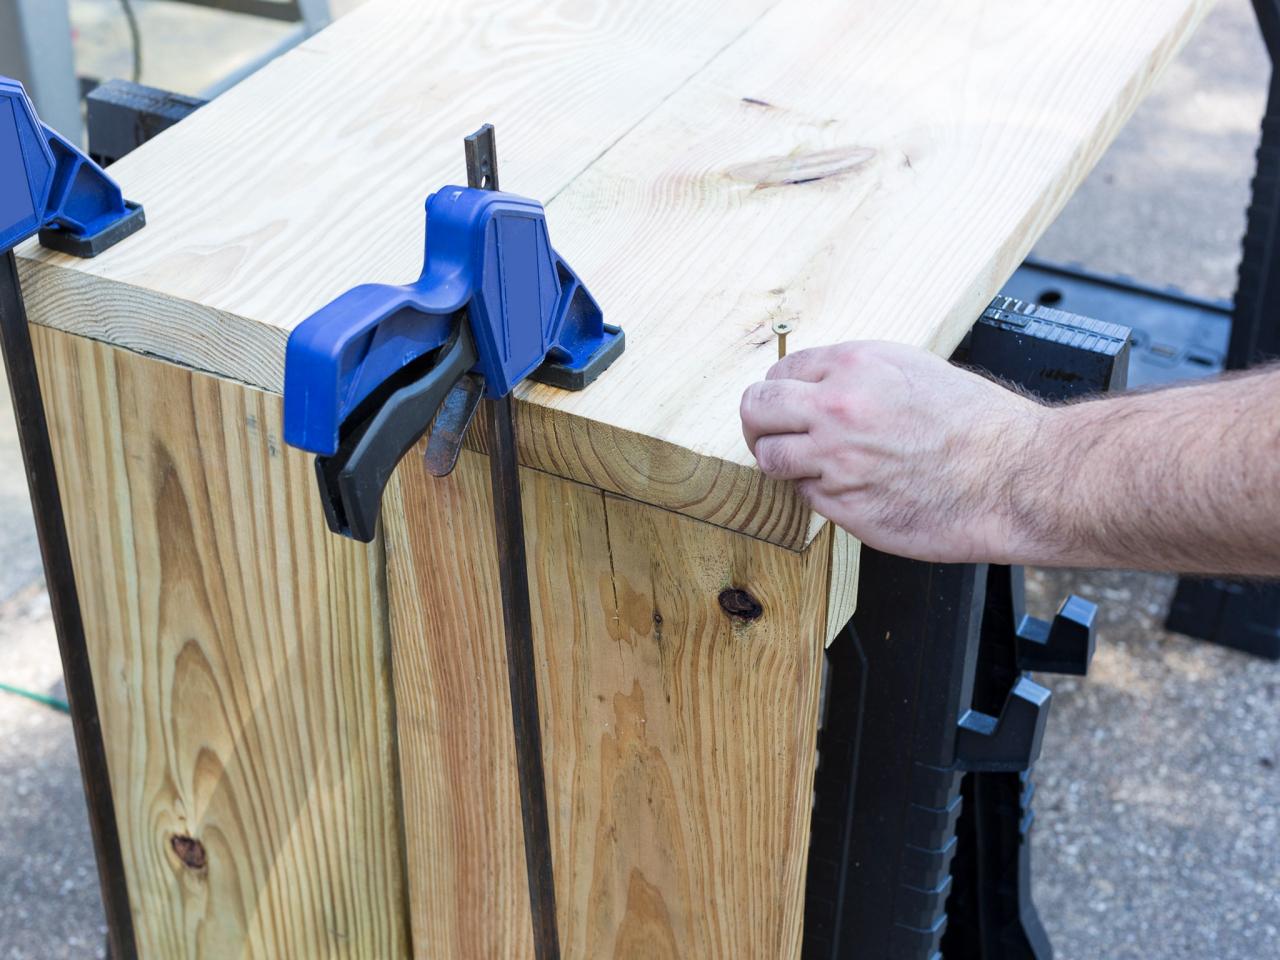
Make the longer sides of the planter box: Lay two of the 2x10 x 64” boards on a flat surface or sawhorses with the long edges butted close together. Clamp one of the side pieces you just made to the 64” boards with the 64” boards extending to the outside edge of the planter, and the 2x4 boards of the planter end on the inside of the corner (see image below). Use 2-1/2” wood screws to attach the 64” boards to the side piece. Repeat for the other side of the 64" boards. Turn this wide U shape over and attach the remaining 2x10 x 64” boards to the other side piece, creating a box.

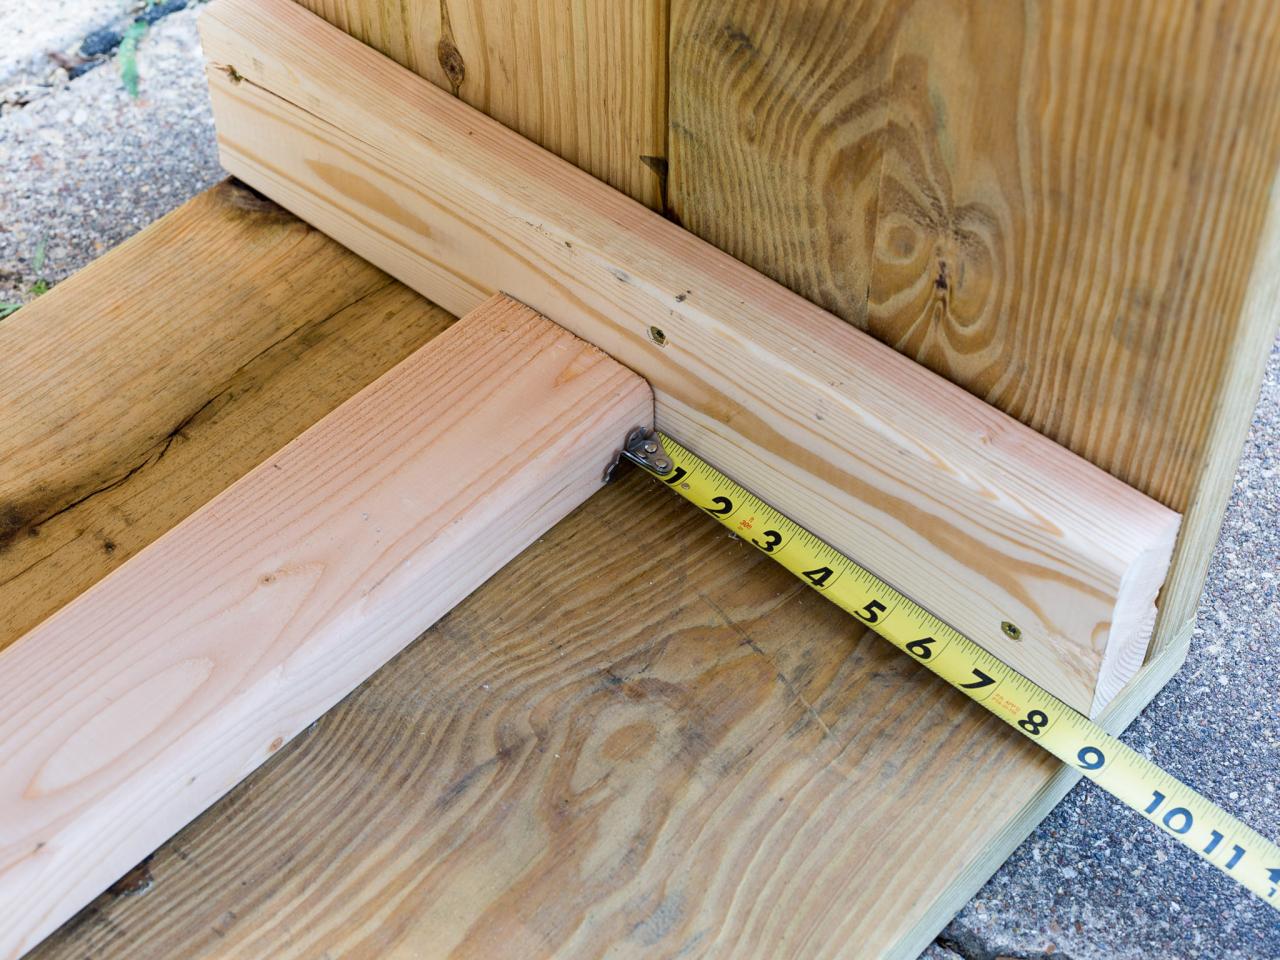
Attach the bottom supports: Measure 8-1/2” from what will be the top of the planter and attach one of the 2x4 x 57-7/8” boards along each of the long sides of the inside of the box. Repeat this process for the short ends with the 2x4 x 14” boards.

Attach Casters
Turn the box top-side down and attach casters to the bottom using 1-1/2” wood screws with wide heads.

Add Bottom Pieces
Turn the box right side up and lay the 1x6 x 20-1/2” boards inside along the supports to form the bottom of the planter. Space them evenly part. The pieces at the ends will need to be notched to accommodate the vertical supports. Attach the 1x6s with 2-1/2” deck screws.

Finish + Line the Planter
Paint or stain and seal as desired. Line the box with heavy plastic by stapling it in place about 1” from the top of the planter. Poke a few holes in the bottom where there are spaces between the slats to allow for drainage.

Building the Trellis Frame
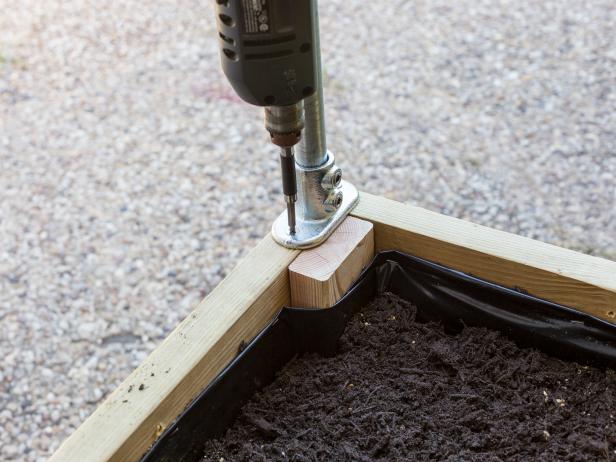
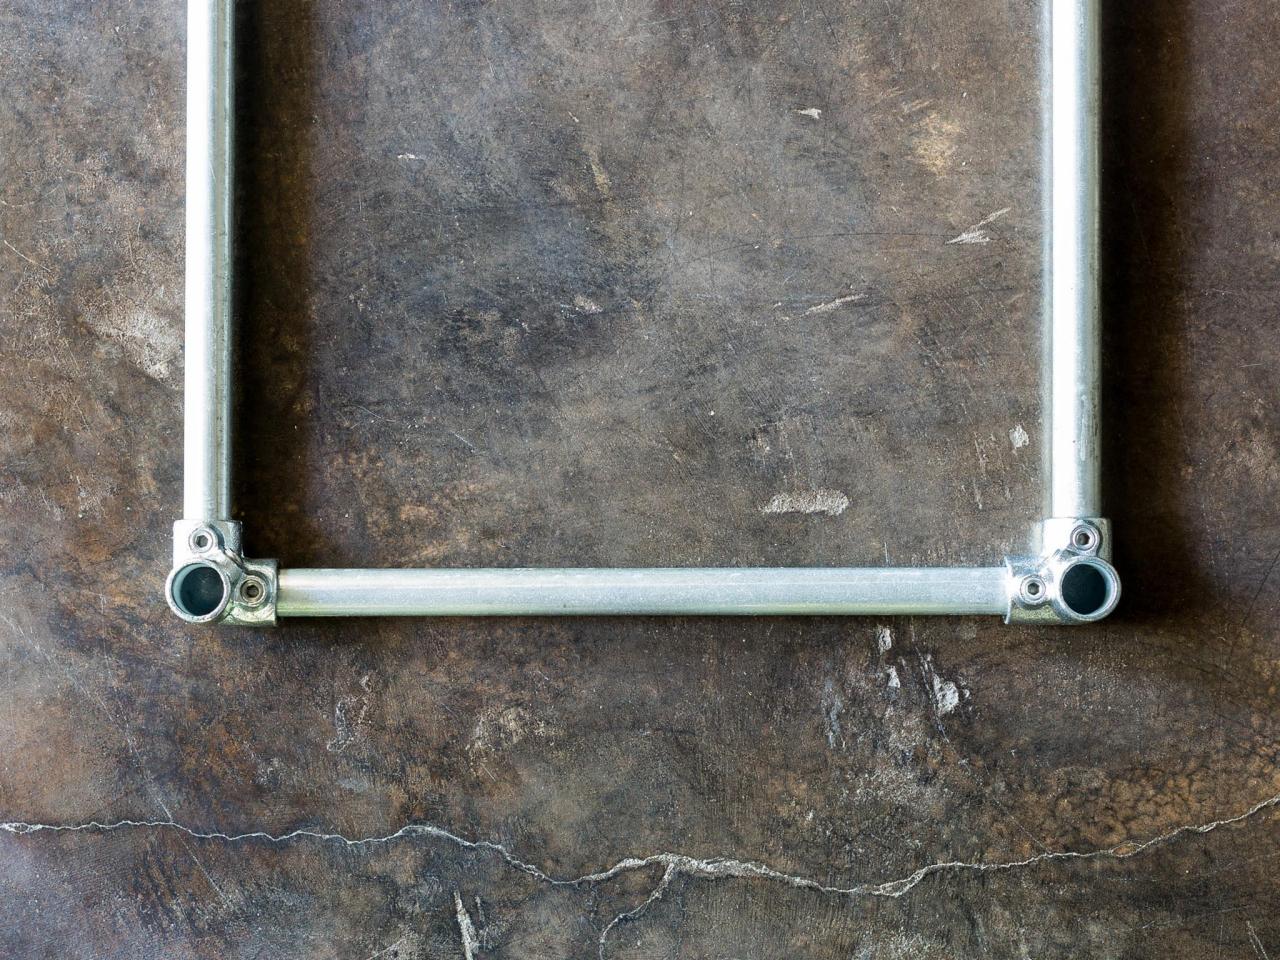
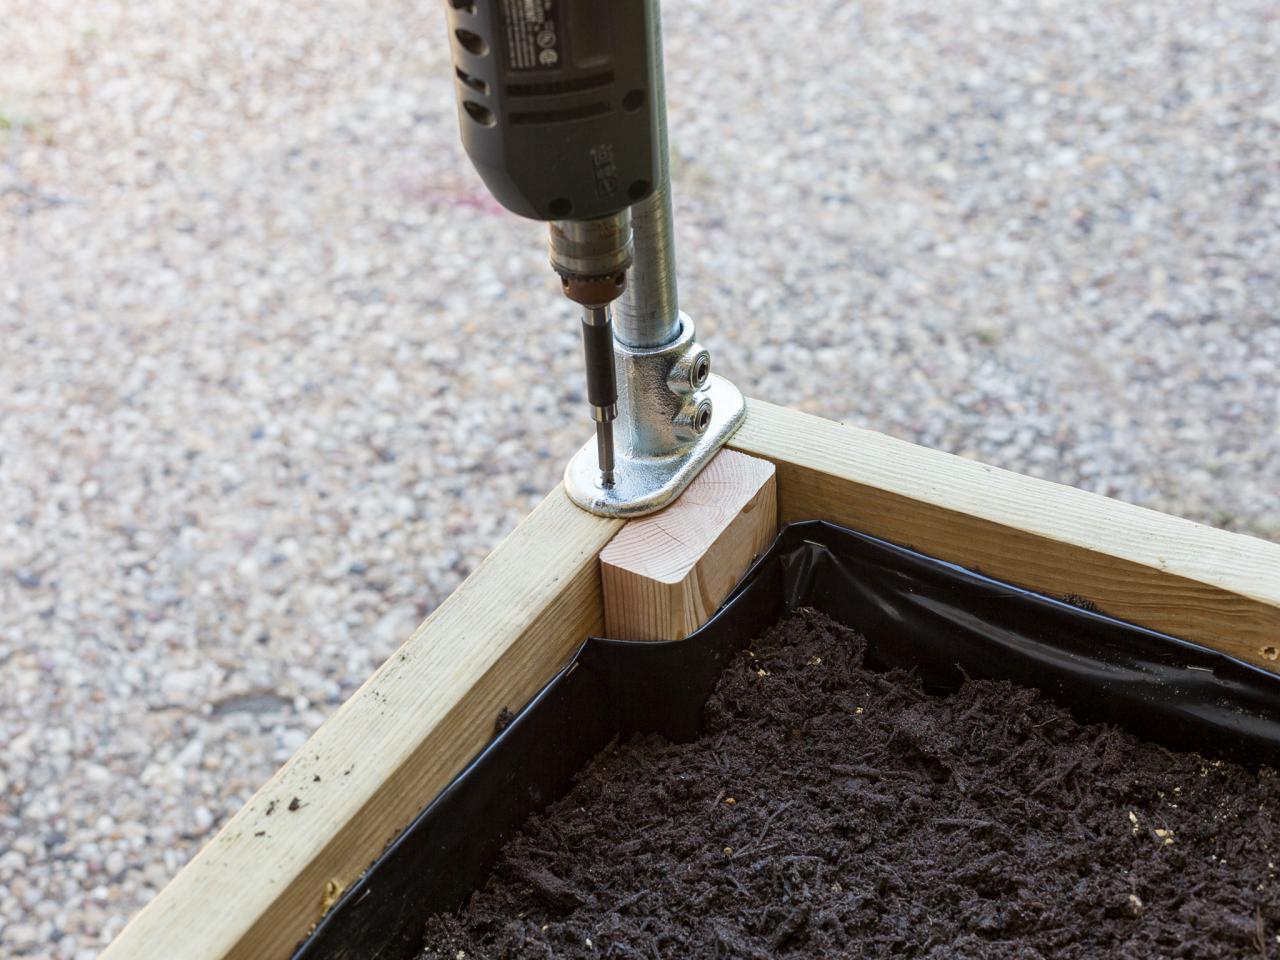
Lay the 60” pipes and the 18” pipes on a flat surface to create a rectangle. Attach a 3-way elbow to each corner leaving the upward-facing hole open. (Image 1) Insert the 48” pipes into each of the upward-facing holes and secure. Add the rail flanges to the opposite ends of the 48” pipes and secure. Turn the pipe assembly over and place it on top of the planter box. Secure the assembly to the planter box with 1-1/2” wood screws with wide heads. (Image 2)

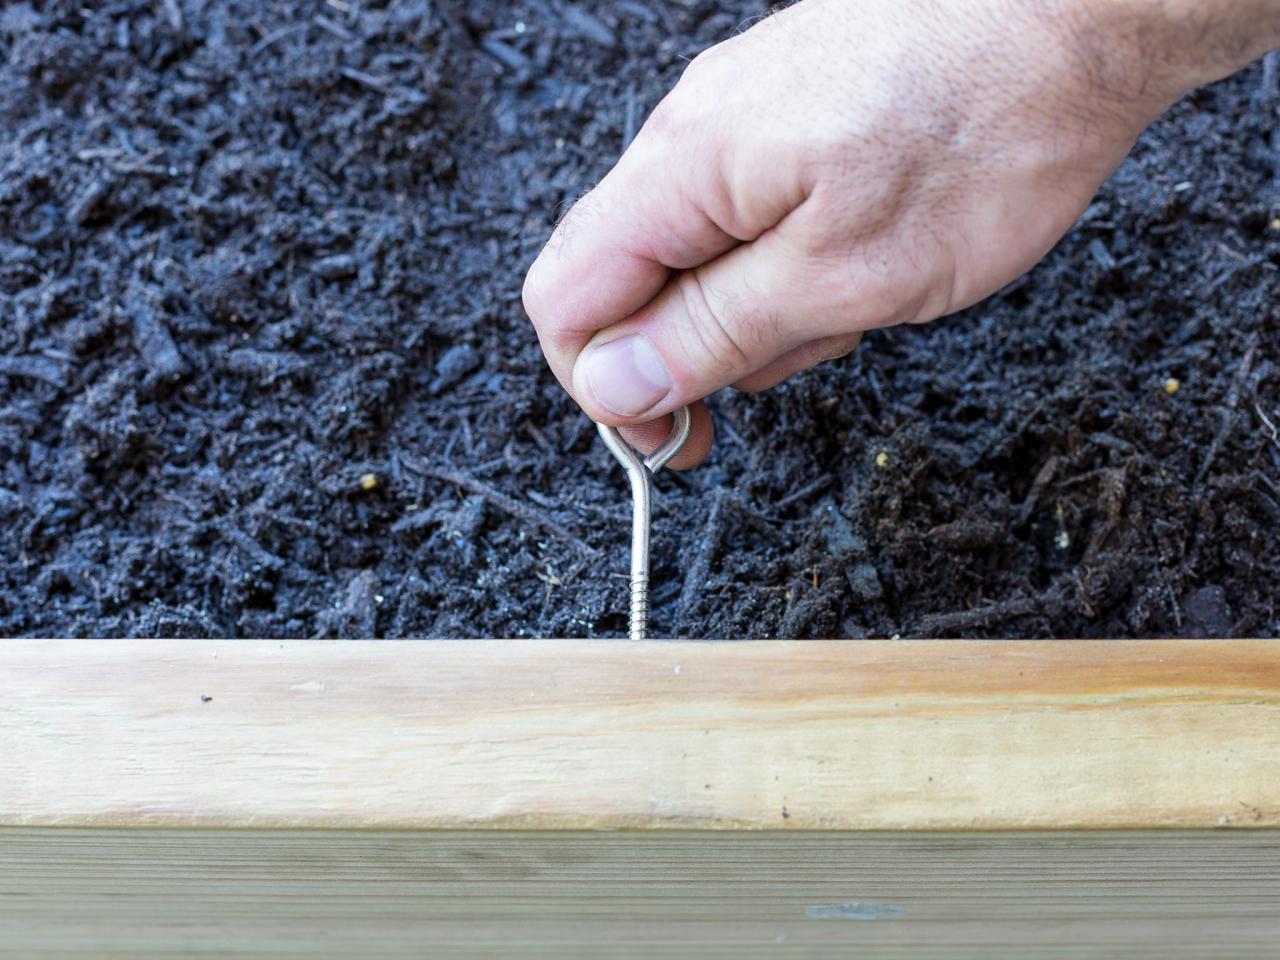
Add Eye Bolts to Planter
On the sides of the planter box, pre-drill holes for the eye bolts 12 inches from the outside edge and about 1 inch from the top. On the long sides of the planter, pre-drill holes at 11-1/2”, 21-3/4”, 32”, 42-1/4” and 52-1/2” from the outside edge. Insert eye screws into each of the holes with the hole of the eye screw facing upward.

Prep the Cables
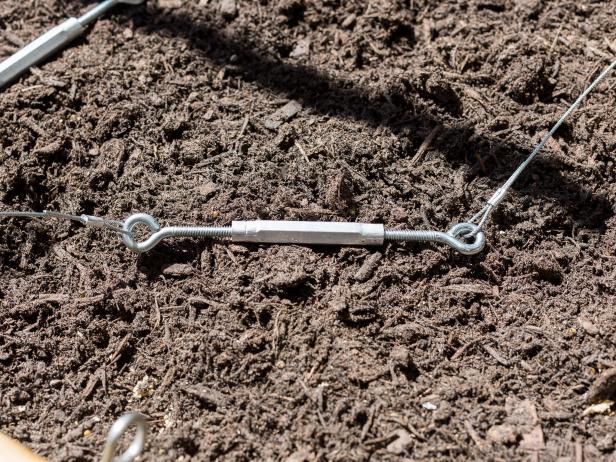
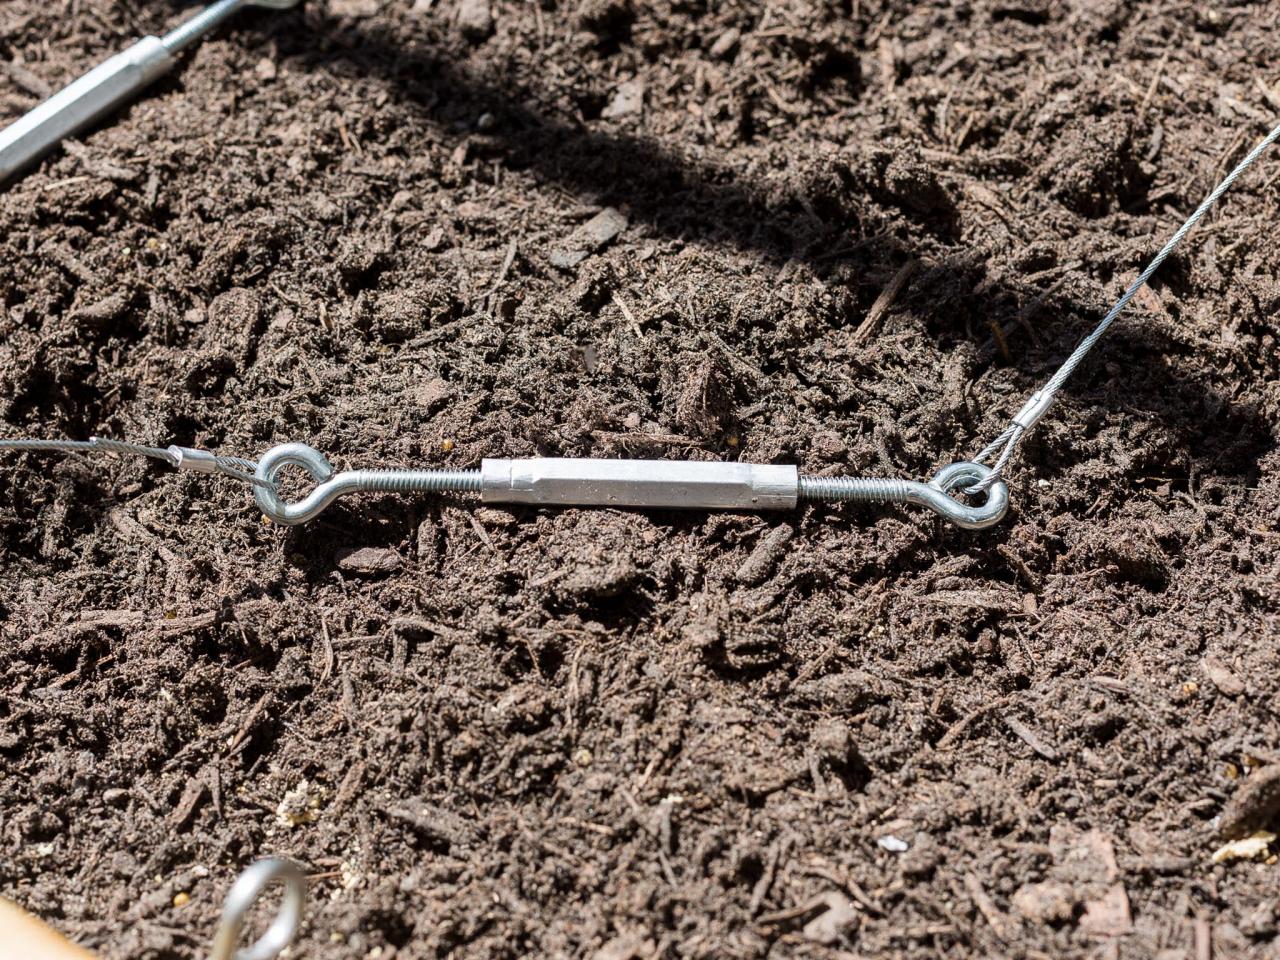
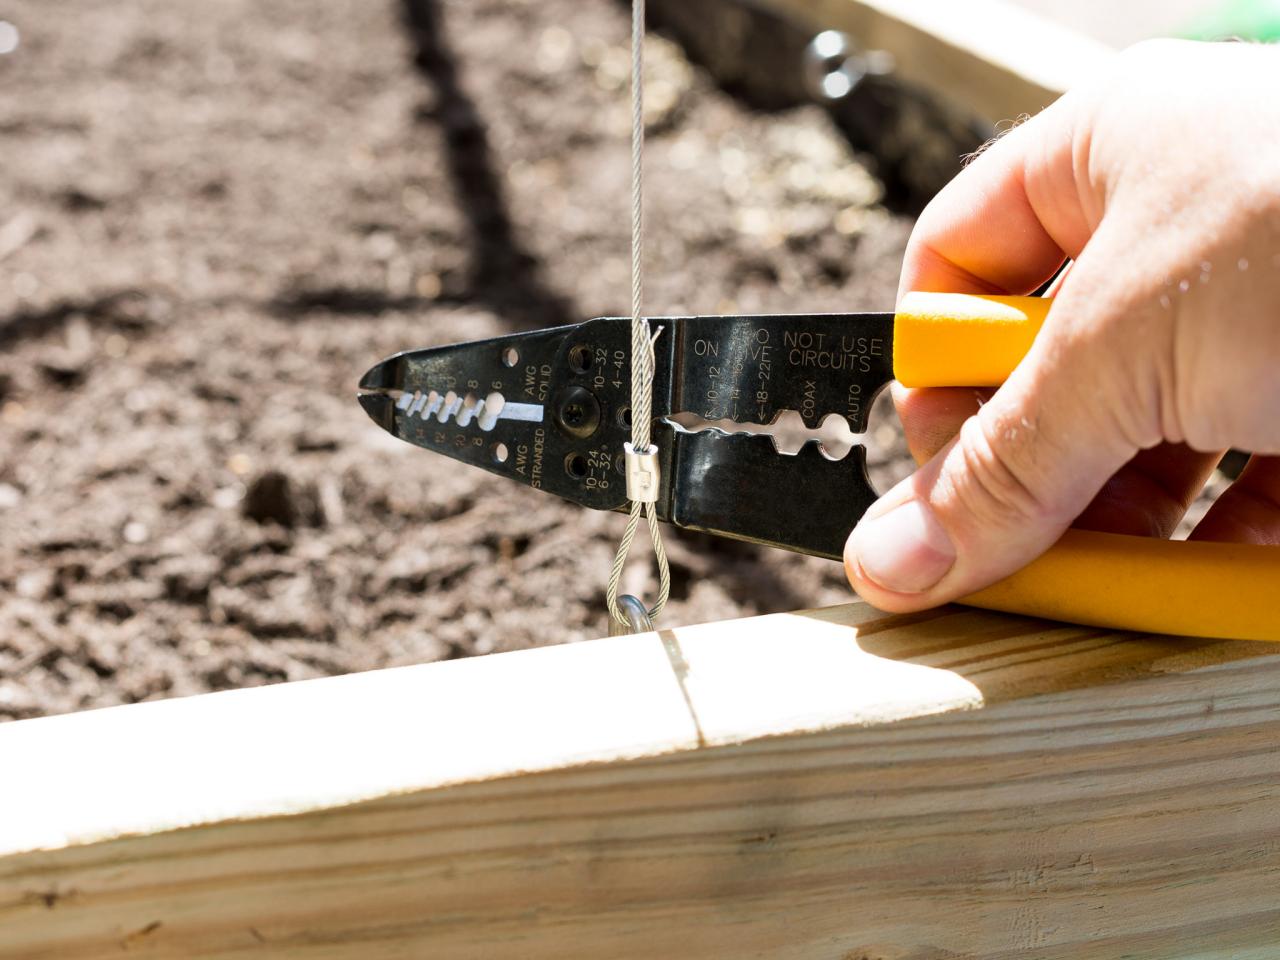
Cut five pieces of the wire cable 10' long and four pieces 13' long. Cut one of the 10-foot pieces in half and attach one end of each half to the holes of a cable turnbuckle using cable ferrules. (Image 1) Unscrew the turnbuckle at least 1" on each end. Attach one end of the cable to an eye screw on the long side of the planter, drape the cable over the pipes and attach the opposite end of the cable to the corresponding eye screw on the opposite long edge of the planter using the ferrule and wire cutting/stripping tool. (Image 2) Tighten the cables by tightening the center of the turnbuckle until the cable is taut. Repeat for the other four pieces of 10’ cable.

Cut one of the 13’ cables in half and attach a turnbuckle in the center as you did for the 10’ cables. Attach one end of the cable assembly to an eye screw on one of the short sides of the planter box, drape it over the top of the pipes and attach the opposite end to the corresponding eye screw on the opposite end of the planter. Tighten the turnbuckle until the cable is taut.
Attach one end of a 13’ cable to one eye of a turnbuckle, wrap the cable around the pipes horizontally, weaving in and out of the vertical cables and pipes. When you are back at the start, attach the opposite end of the cable to the open end of the turnbuckle with a ferrule. Tighten the turnbuckle until the cable is taut. Position this wire 1 foot from the top of the planter. Repeat the process of wrapping the cable horizontally around the pipes for the remaining two 13’ cables leaving 1 foot of space between each cable.

Adding the Plants
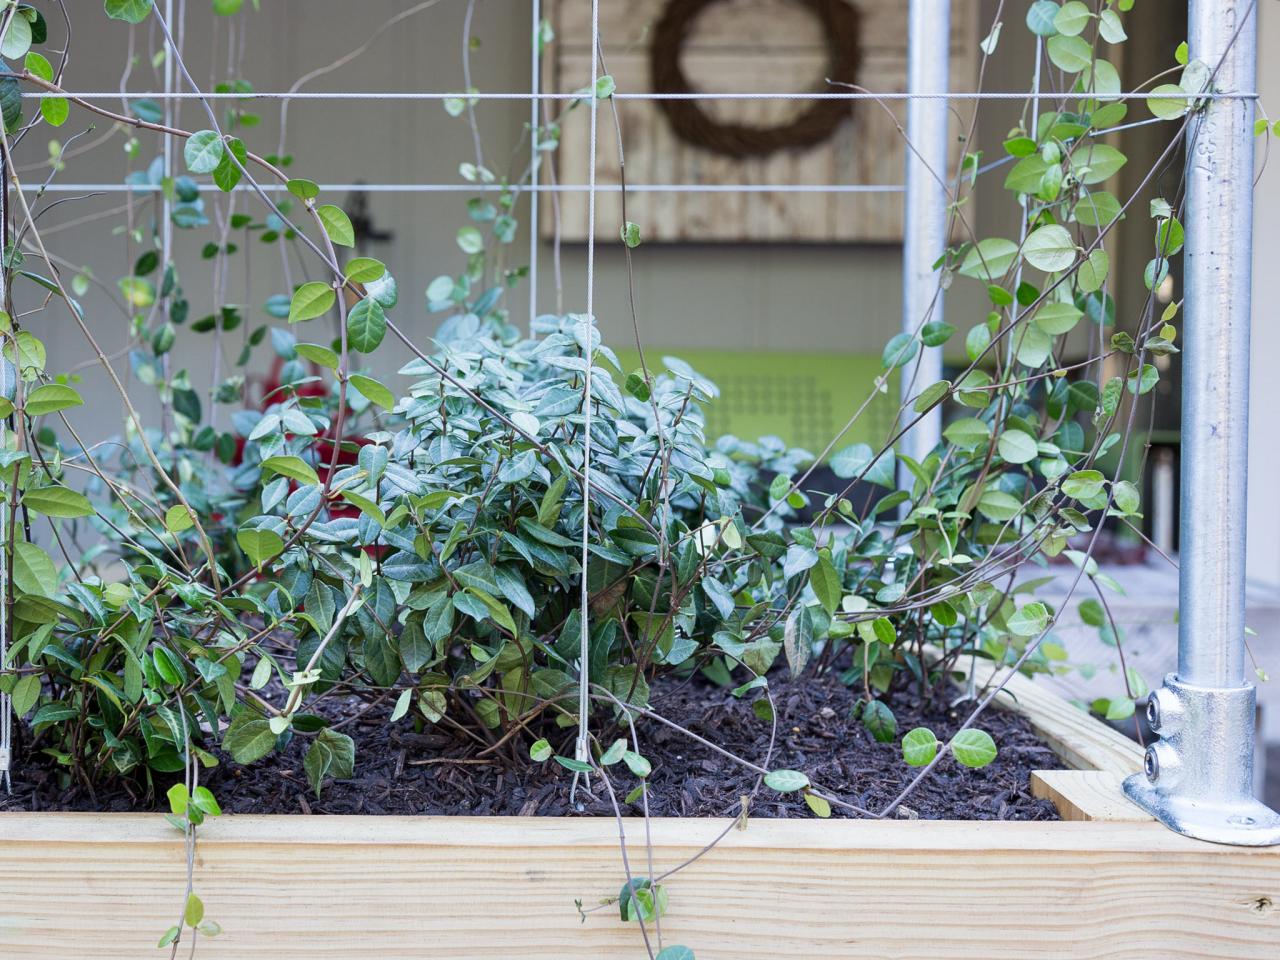
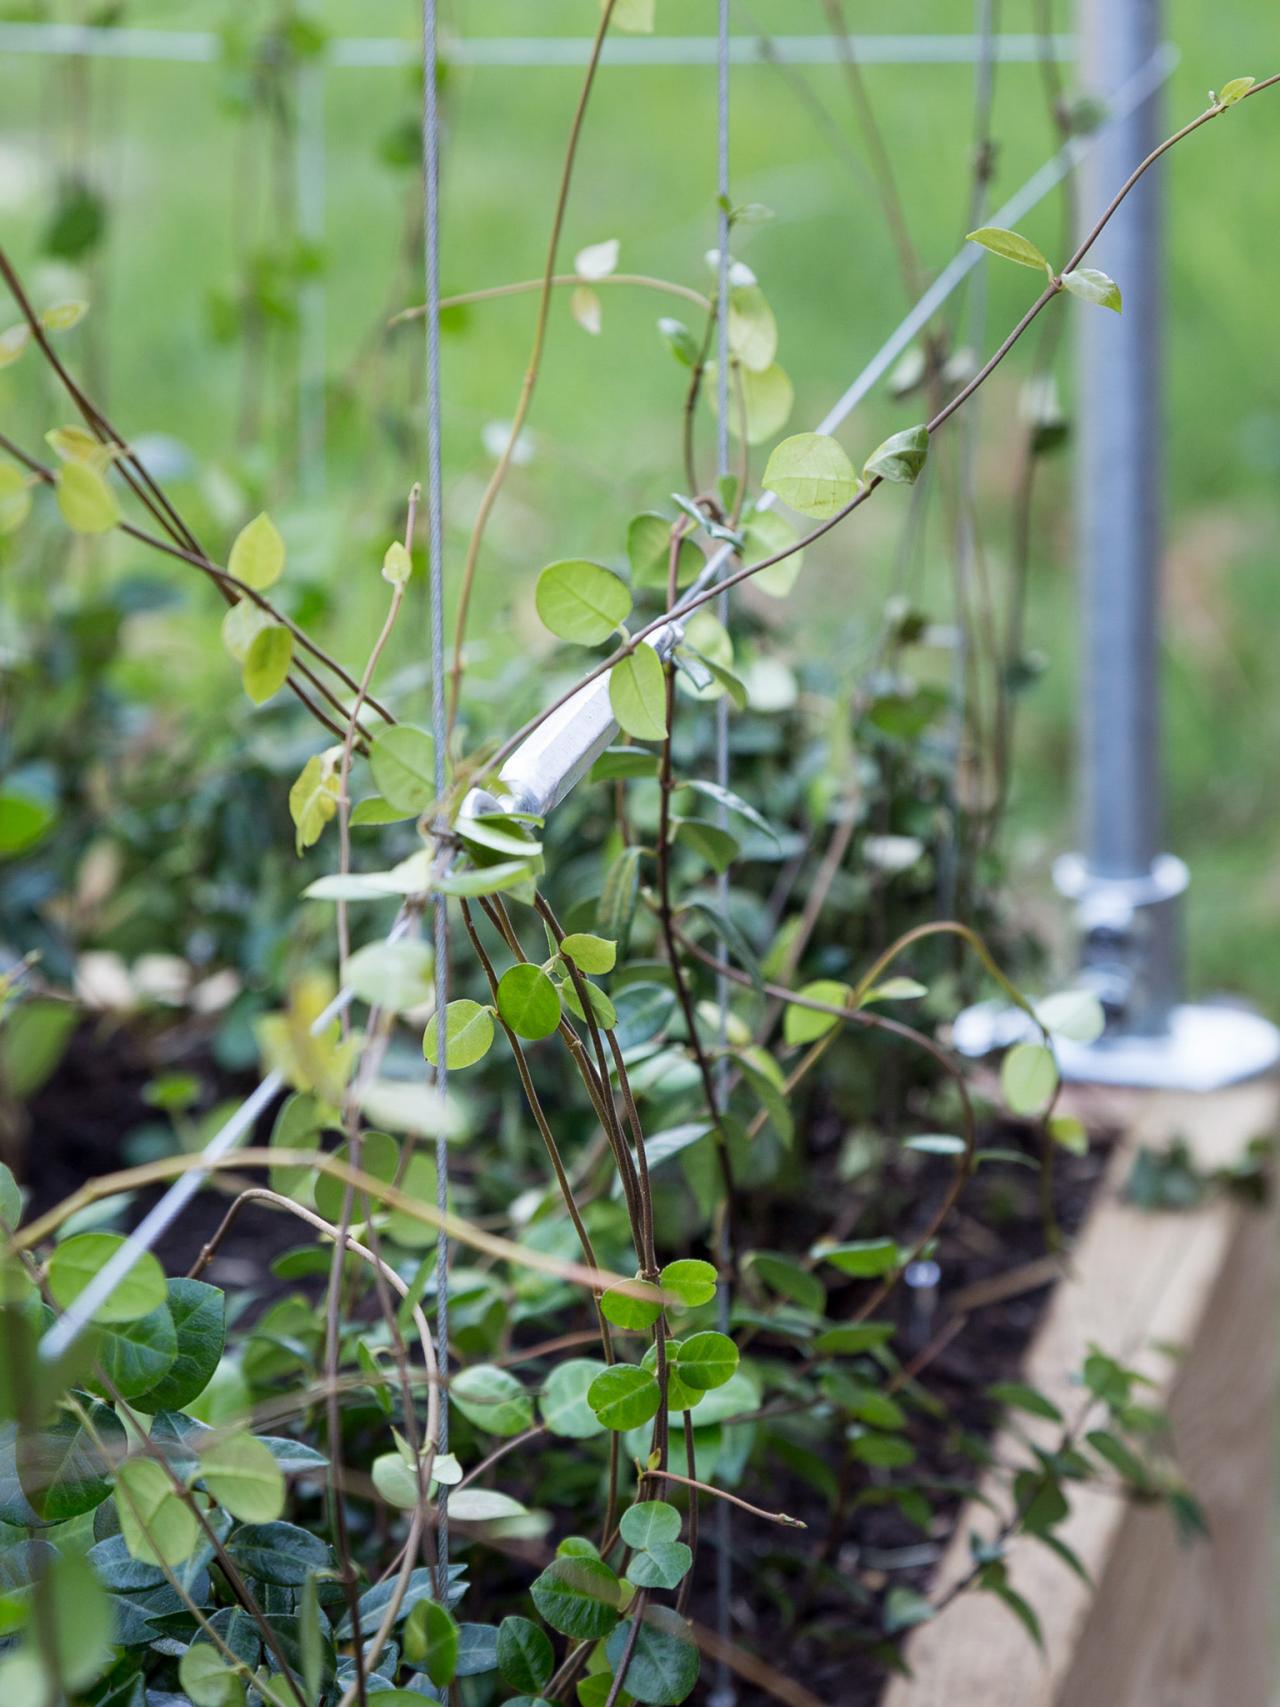
Add edible plants that will trail such as beans, peas and cucumbers. Or try morning glory or clematis for pretty florals. Plant the base of the plant close to each vertical cable. Run the length of the vine up the cable. Initially, you may need to attach the vines with a small piece of wire or fishing filament. Water the plants thoroughly the first time and then maintain as necessary. This planter is great for creating privacy in a small space and, if you are planting edibles, it can be moved to where the sun is best.


24 DIY Outdoor Planter Box Ideas 27 Photos
Give your outdoor living space a refresh with these inexpensive, easy-to-build planters, window boxes and container gardens.


