


Built-In Bench With Butcher-Block Top

Tools and Materials:
finish nail gun and nails
table saw
3/4” 4’ x 8’ birch plywood
2x4’s
butcher block
wood glue
stain
Steps:
1. Cut three equal pieces of birch plywood to create the front, back and bottom of the bench.
2. On the bottom piece, all of the edges should be ripped at a 45-degree miter. The front and back should have three edges mitered — left, right and bottom. They do not need miter cuts on top because the butcher block will sit on top.

3. Using wood glue and a nail gun, fasten the three pieces together.
4. Determine the size of the end pieces then cut them on the table saw with mitered edges on the sides and bottom.
5. Attach the side pieces with glue and nails making sure to have a snug fit on all sides.

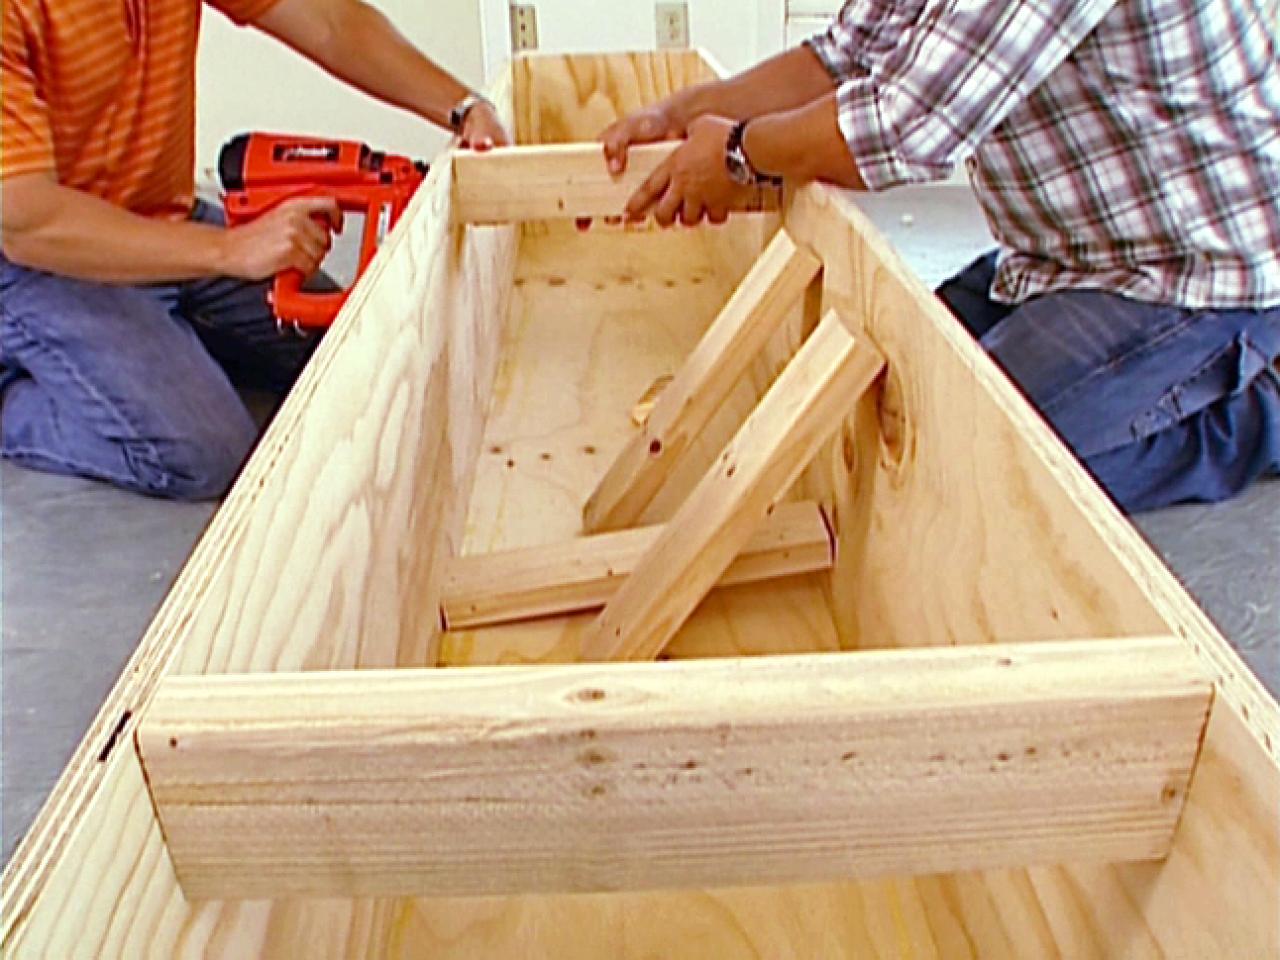
6. Measure the width between the front and back of the bench. Cut several 2x4s to the exact size.
7. Glue and nail the 2x4s equal distance apart so they can support and distribute the weight of the butcher block.

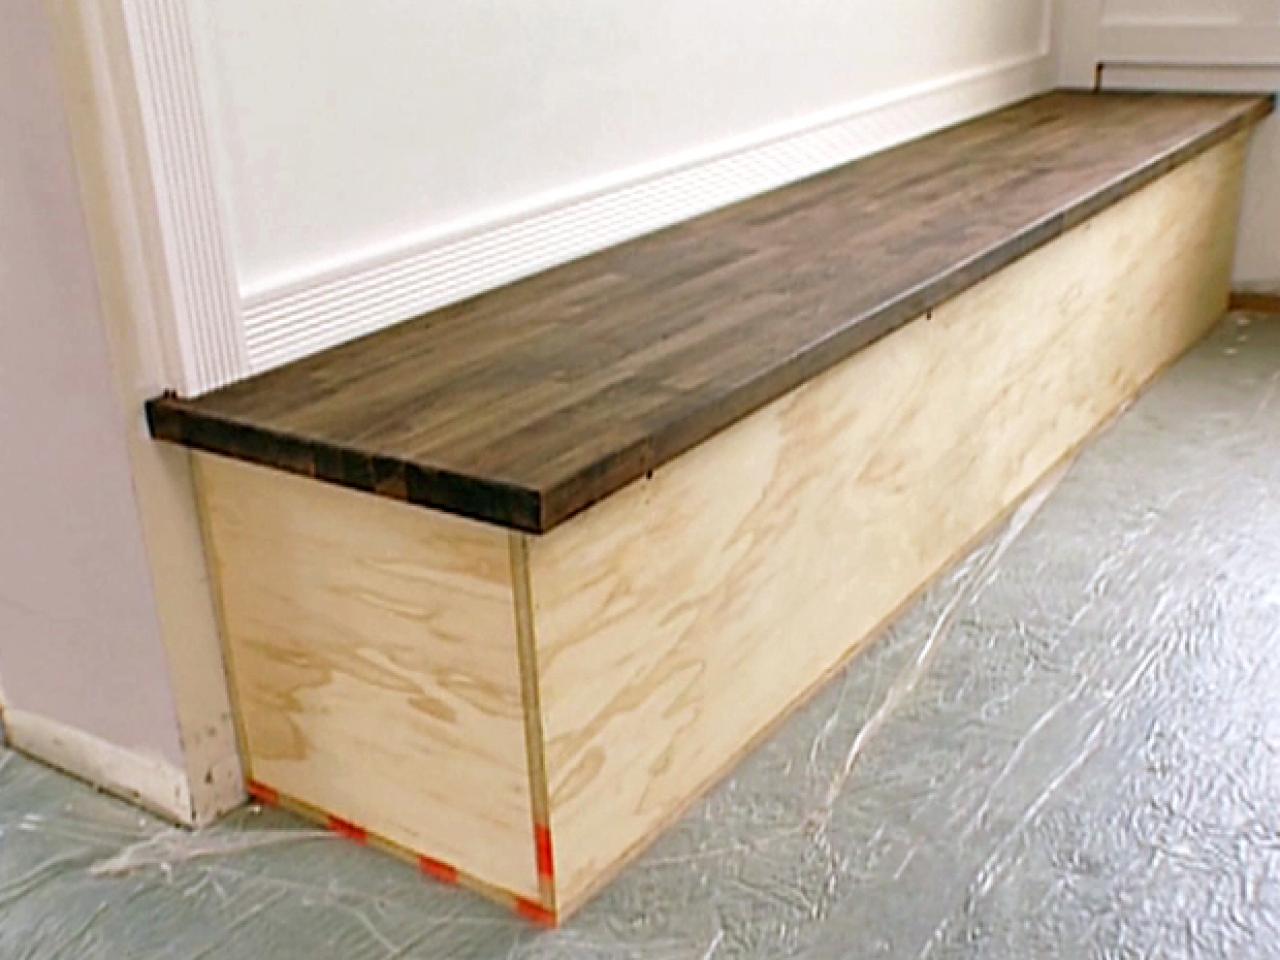
8. Cut butcher block to size and stain if necessary. Lay the butcher block on top of the finished bench and secure with wood glue and nails.


