


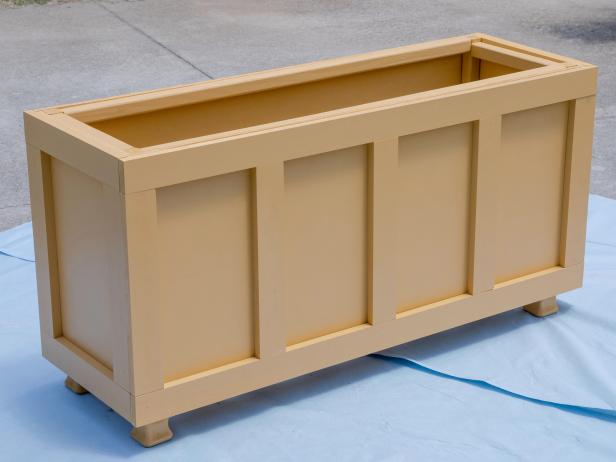
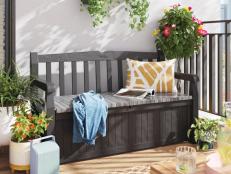
How to Build an Outdoor Storage Bench for Secure Package Delivery
Prevent porch pirates from stealing your parcels with this easy-to-build, locking storage box that can also serve as extra seating on your porch, entryway or stoop.

SHAIN RIEVLEY
Are package deliveries going missing from your front porch? This simple woodworking project will solve that problem and provide extra seating for your front entry. Add a simple lock and let your delivery person know to secure it to keep your parcels safe. This bench is so easy to make, that you’ll probably want to make another one for your backyard or inside your home.

Tools and Materials:
- (2) 2x4 x 8’ pressure-treated lumber
- (1) 1x4 x 8’ pressure-treated lumber
- (4) 1x3 x 8’ pressure-treated lumber
- (2) 2x2 x 8’ pressure-treated lumber
- (1) 1x2 x 8’ pressure-treated lumber
- (1) 4' x 8' sheet of 1/2" plywood
- miter saw
- wood glue
- pocket-hole jig system
- (1) 50-count box 2-1/2" pocket-hole screws
- (1) 50-count box 2” wood screws
- drill
- nail gun and 1" brad nails
- air compressor
- 36” bar clamp, a hand clamp and a right-angle clamp
- (4) furniture legs with leg top plates
- sandpaper
- paint roller and tray
- exterior paint (we used SW6382 Ceremonial Gold)
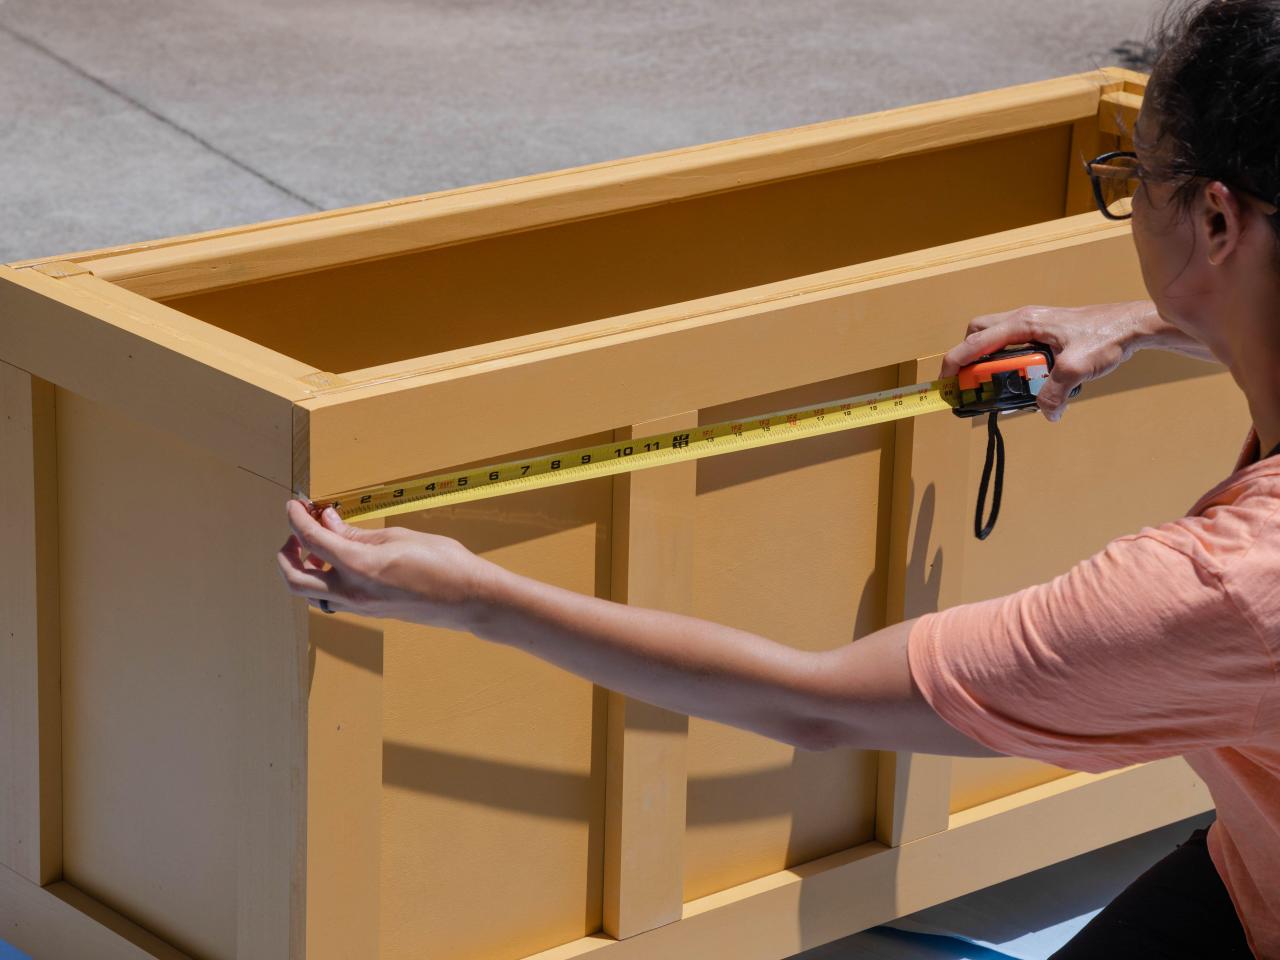
- measuring tape
- (3) 3-1/2" hinges
- (1) safety hasps latch
- combination lock
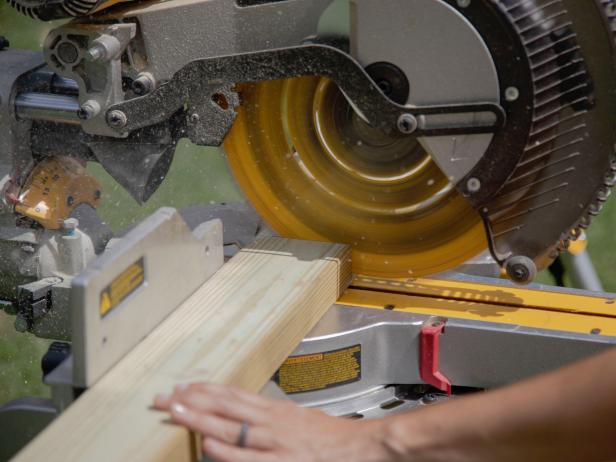
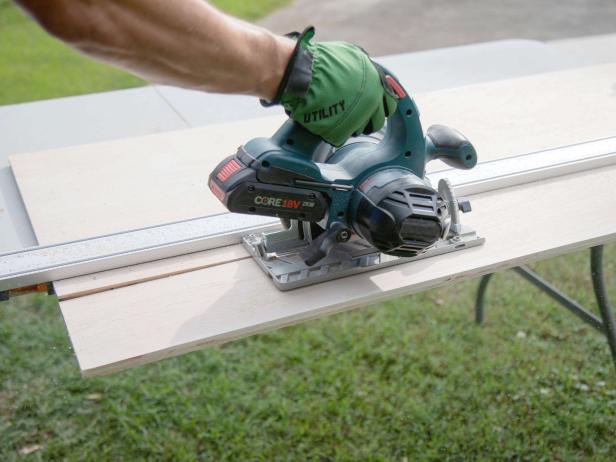
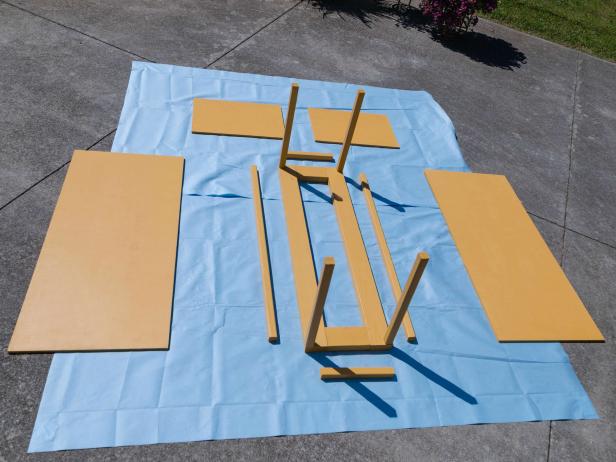
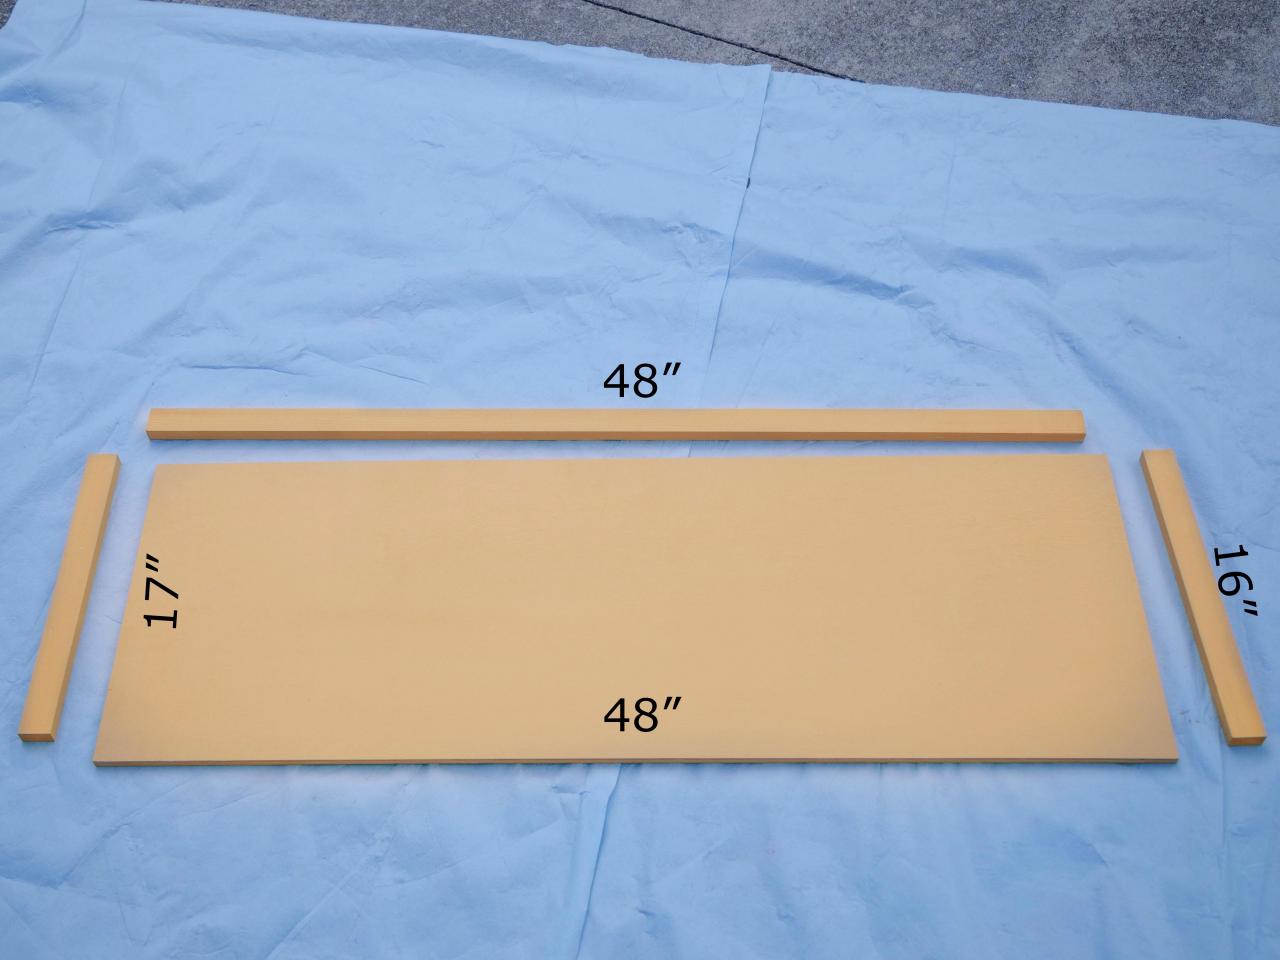
1. Cut List
Use a circular saw and/or a miter saw to cut the wood into the following pieces.
- From the 2x4s — cut (2) @ 44-1/2" and (2) @ 7"
- From the 2x2s — cut (2) @ 42”, (4) @ 19” and (2) @ 11”
- From the 1x4s — cut (6) @ 13-1/2"
- From the 1x3s — cut (2) @ 47”, (4) @ 15” and (9) @ 16”
- From the 1x2s — cut (1) @ 48” and (2) 16”
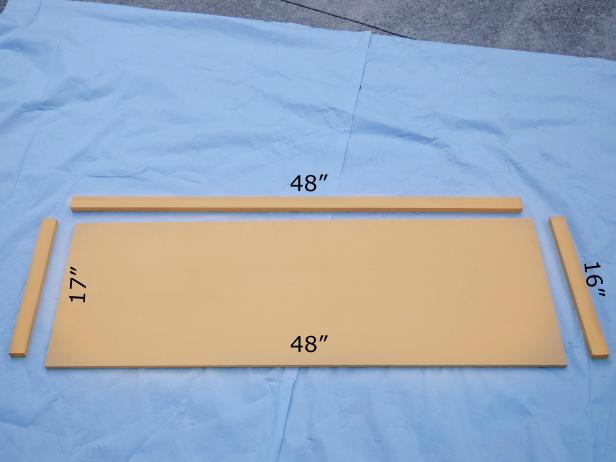
- From the 4’ x 8’ plywood — cut (2) @ 21” x 45-1/2” (front & back), (2) @ 21” x 14” (sides) and (1) @ 48” x17” (lid)
SHAIN RIEVLEY
SHAIN RIEVLEY
2. Sand the Wood
Use an orbital sander or a sanding block to smooth the wood, especially around the edges.
3. Paint
Painting all the pieces now before you put them together is much easier than trying to get inside all of those nooks and crannies after it is built. Use high-quality exterior paint. Two coats should do it.

SHAIN RIEVLEY
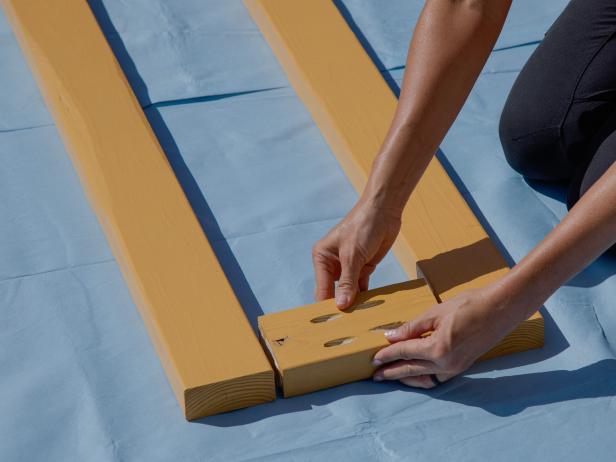
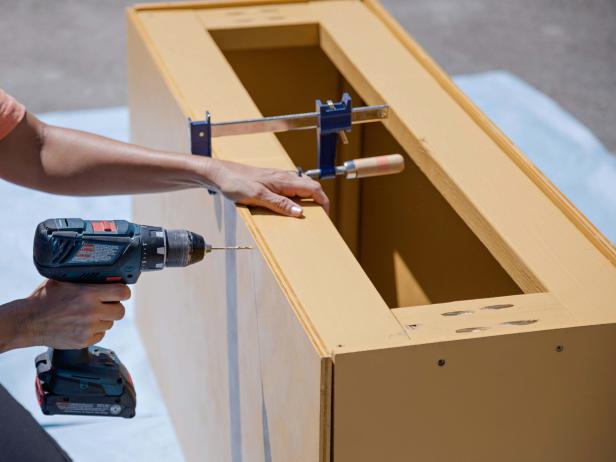
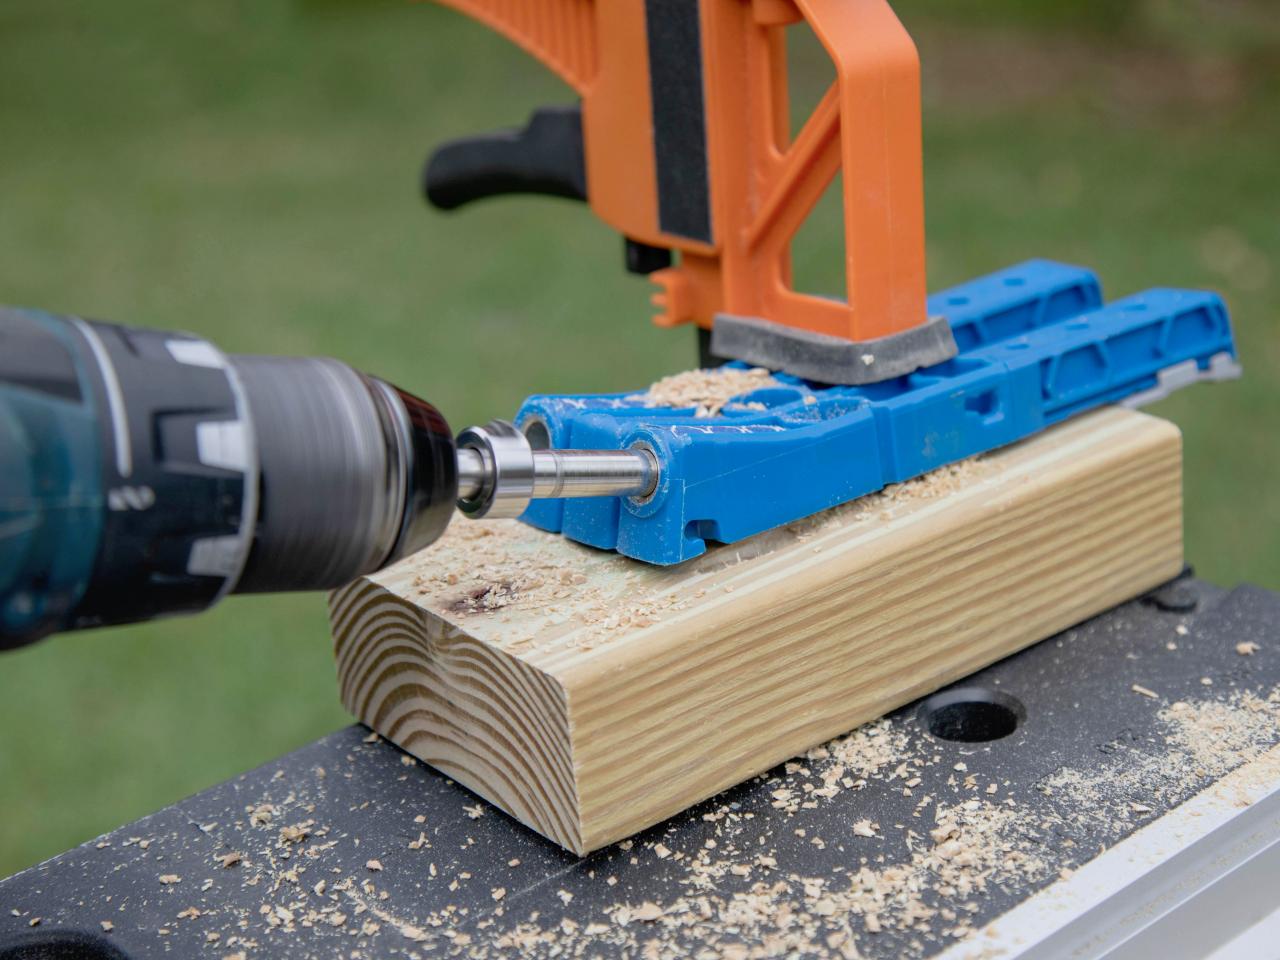
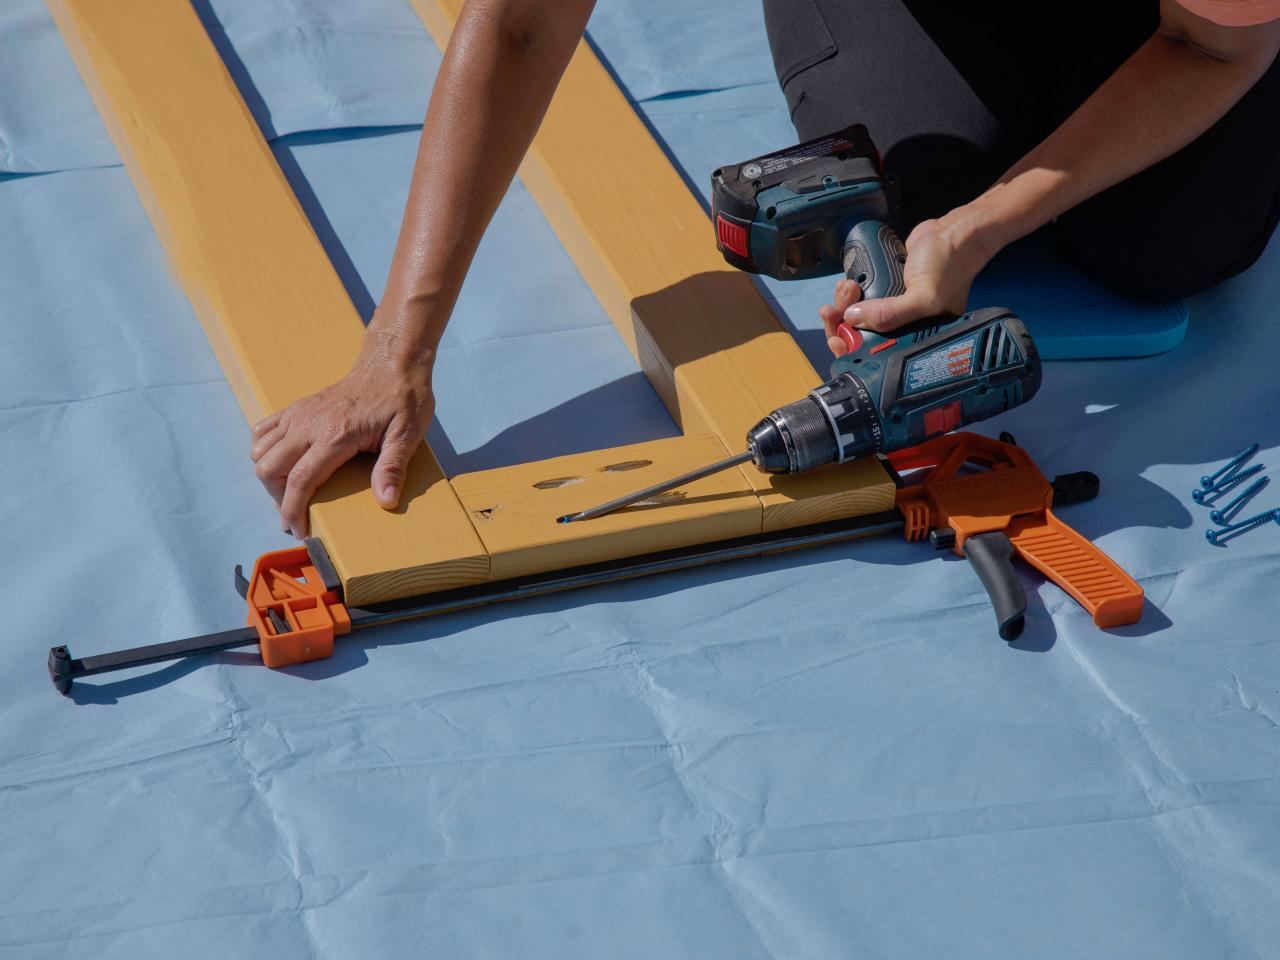
4. Make the Base
Use a pocket-hole jig to create two pocket holes at each end of the 7” 2x4s. Clamp the pieces together to keep everything in place as you assemble. Screw the pieces into the two 44-1/2" 2x4s to create the rectangle base.

SHAIN RIEVLEY
SHAIN RIEVLEY

SHAIN RIEVLEY

SHAIN RIEVLEY
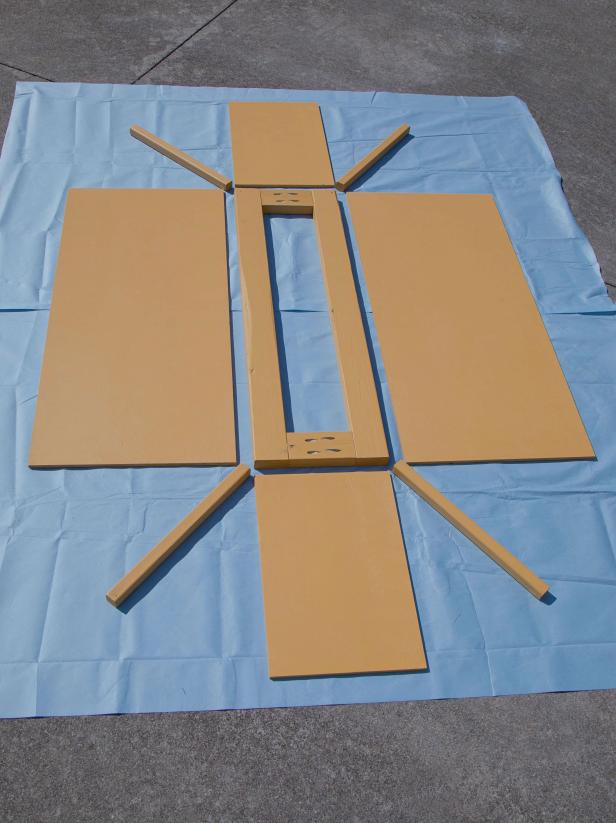
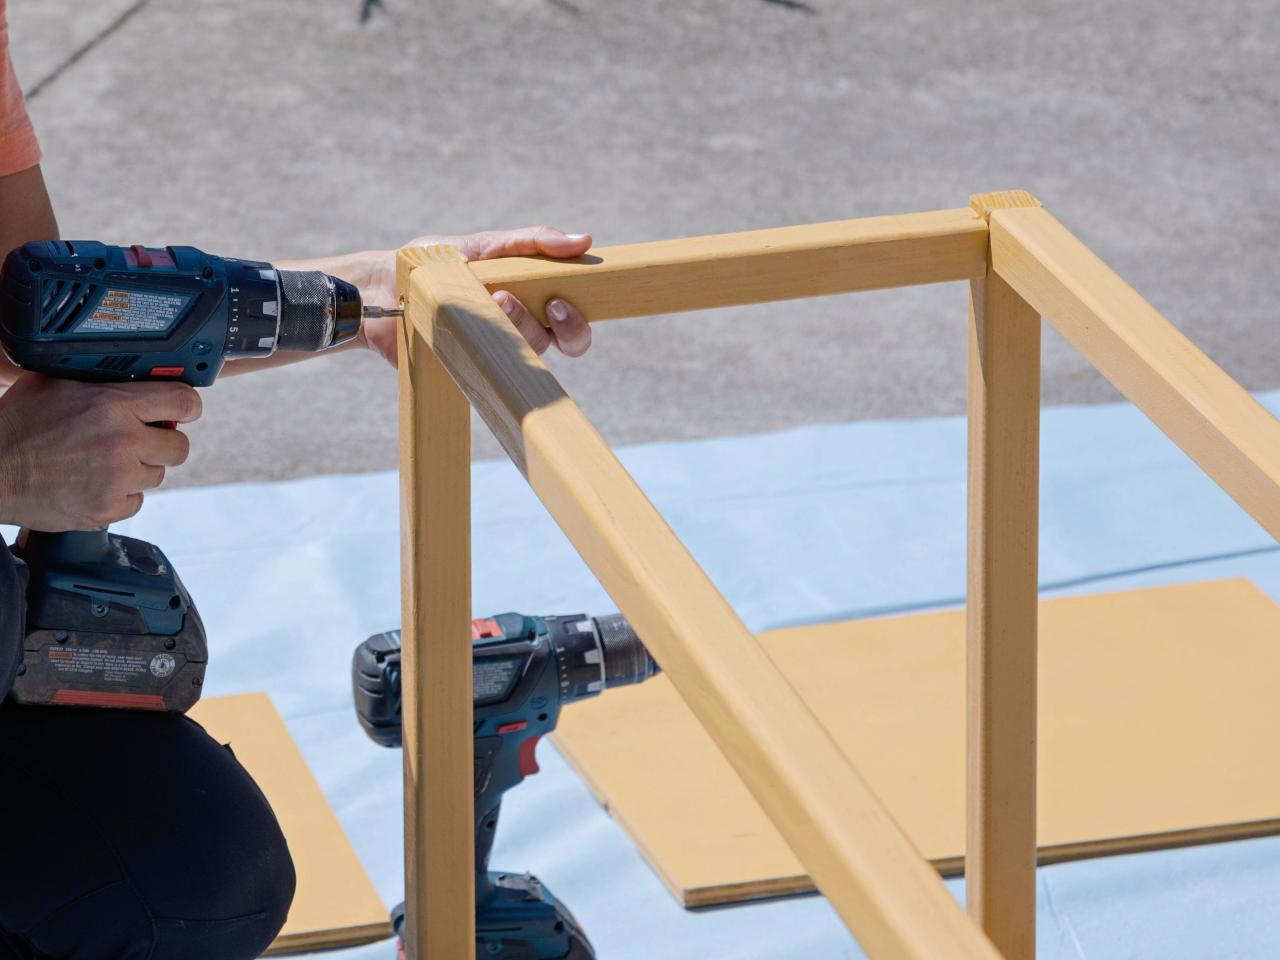
5. Add the Corners
We’ve laid out the pieces for reference; you may want to do the same to make sure you know how everything is going to be assembled. Flip the base on its side. Place a 19” 2x2 on the ground and screw it into one of the corners. Repeat for the other three corners. When all of them are attached, flip the base so the corner posts are standing up. The pocket holes should be facing down while the 2x2 corner pieces are facing up.
SHAIN RIEVLEY

SHAIN RIEVLEY

SHAIN RIEVLEY
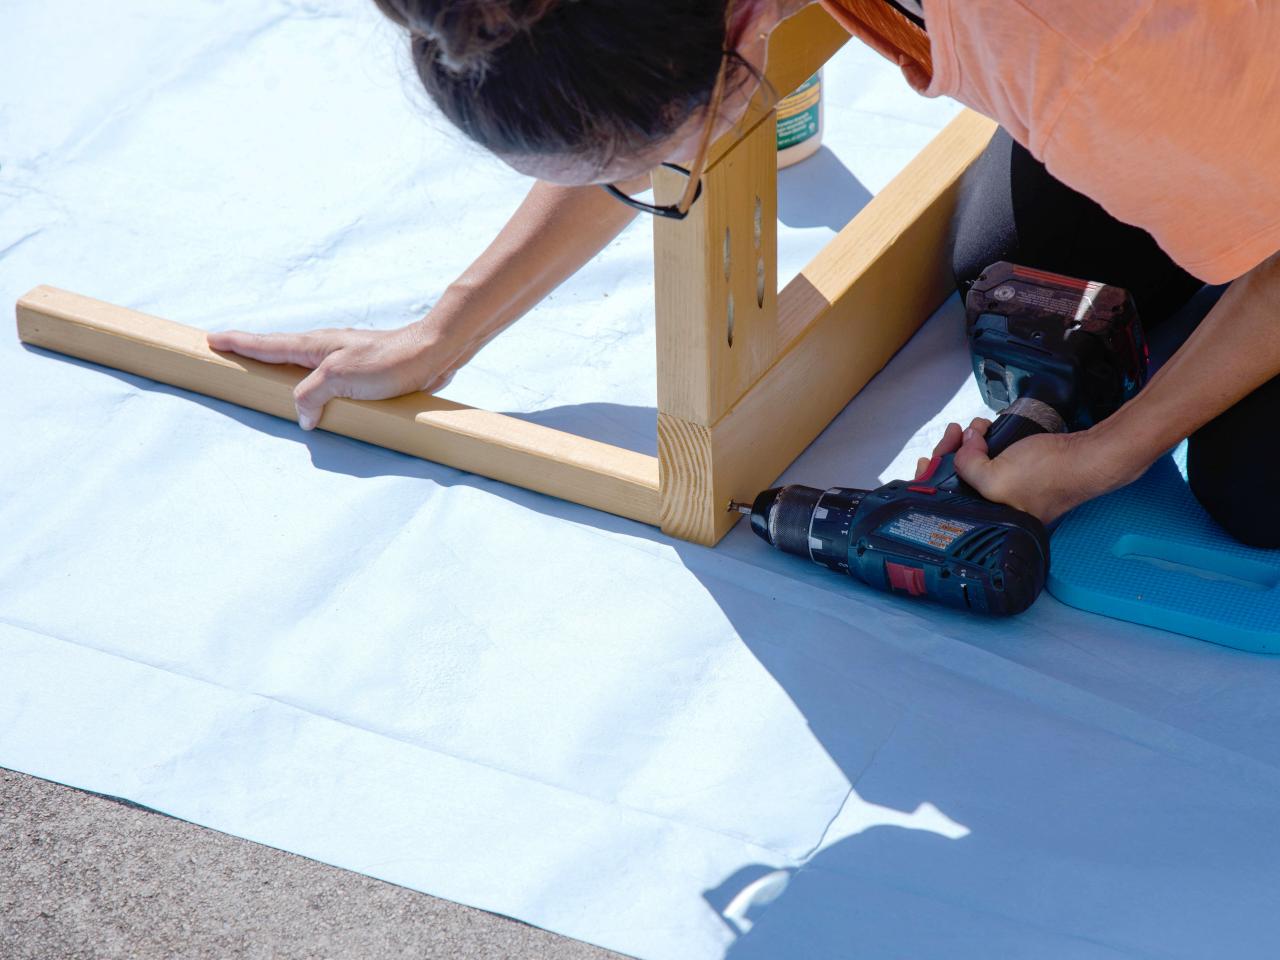
6. Connect the Frame
Again, we’ve laid out the pieces for reference. Span one of the 44-1/2" 2x2s between two corner pieces and attach them together with screws. Repeat for the other long side. Then screw the two 11” 2x2s to the corner pieces on the shorter side. Flip the bench so the bottom is now facing up; you’ll see the pocket holes again.
SHAIN RIEVLEY

SHAIN RIEVLEY

SHAIN RIEVLEY
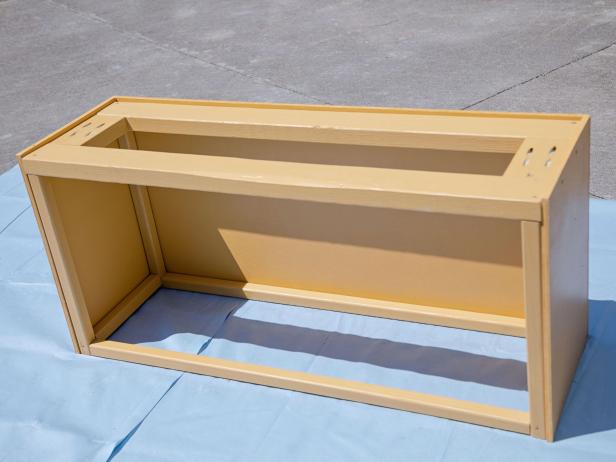
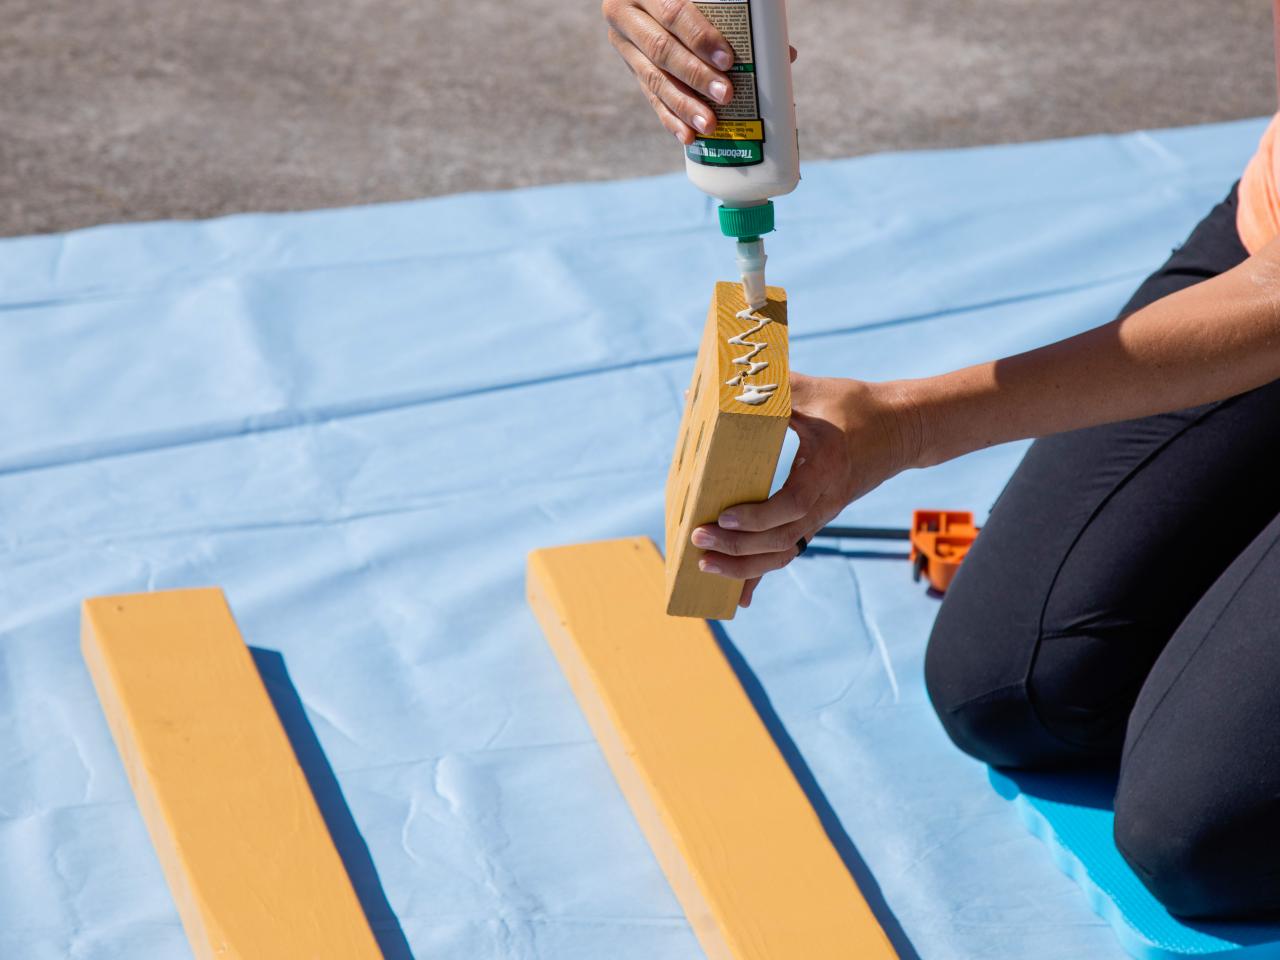
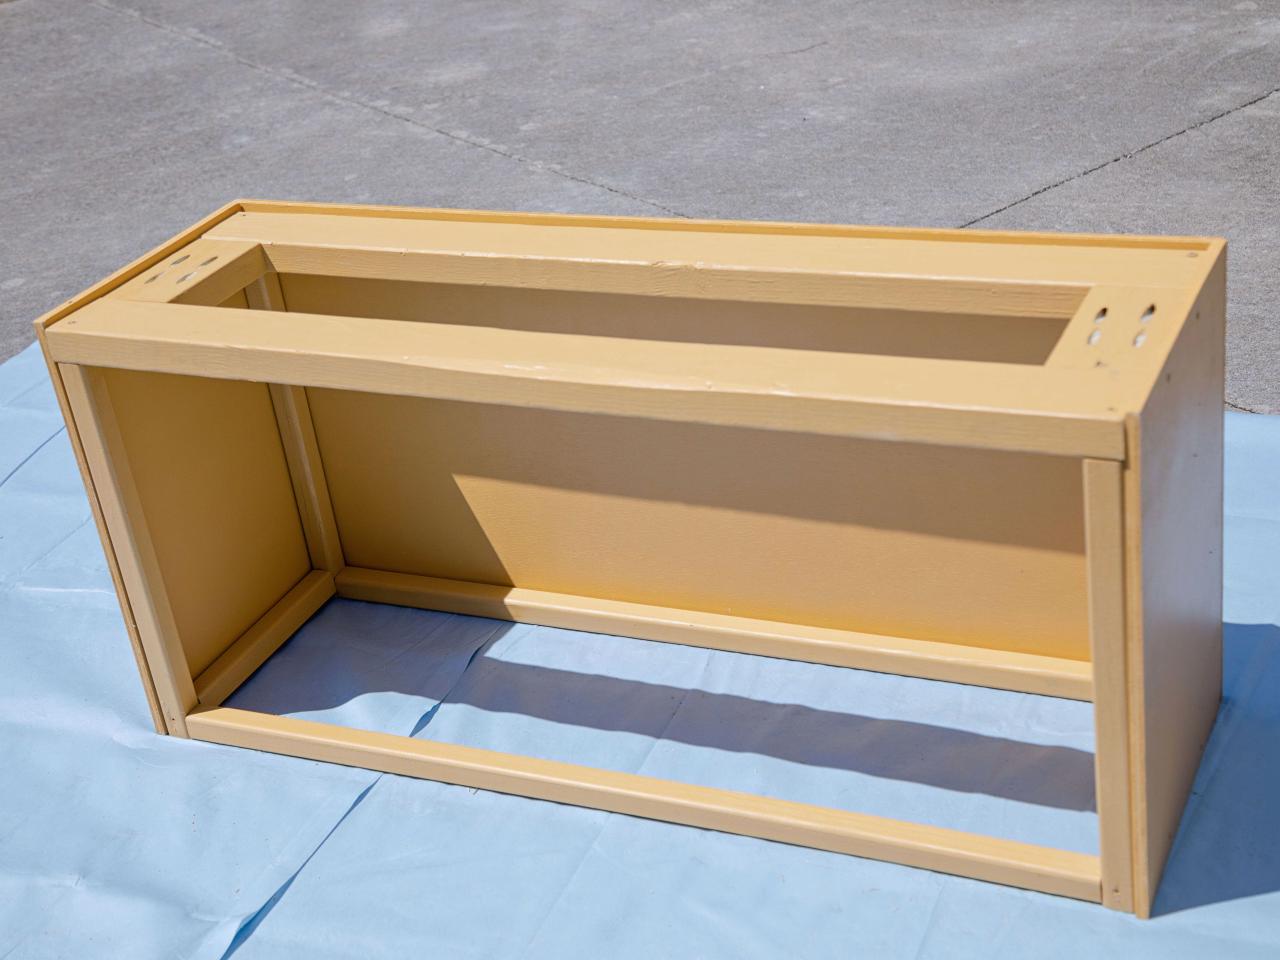
7. Attach Plywood Sides
Apply wood glue to the outside of the frame. Place the 1/2" plywood on the sides and screw them into place. Use the same method to attach plywood to all four sides. Make sure everything fits flush.

SHAIN RIEVLEY

SHAIN RIEVLEY
SHAIN RIEVLEY
SHAIN RIEVLEY

SHAIN RIEVLEY
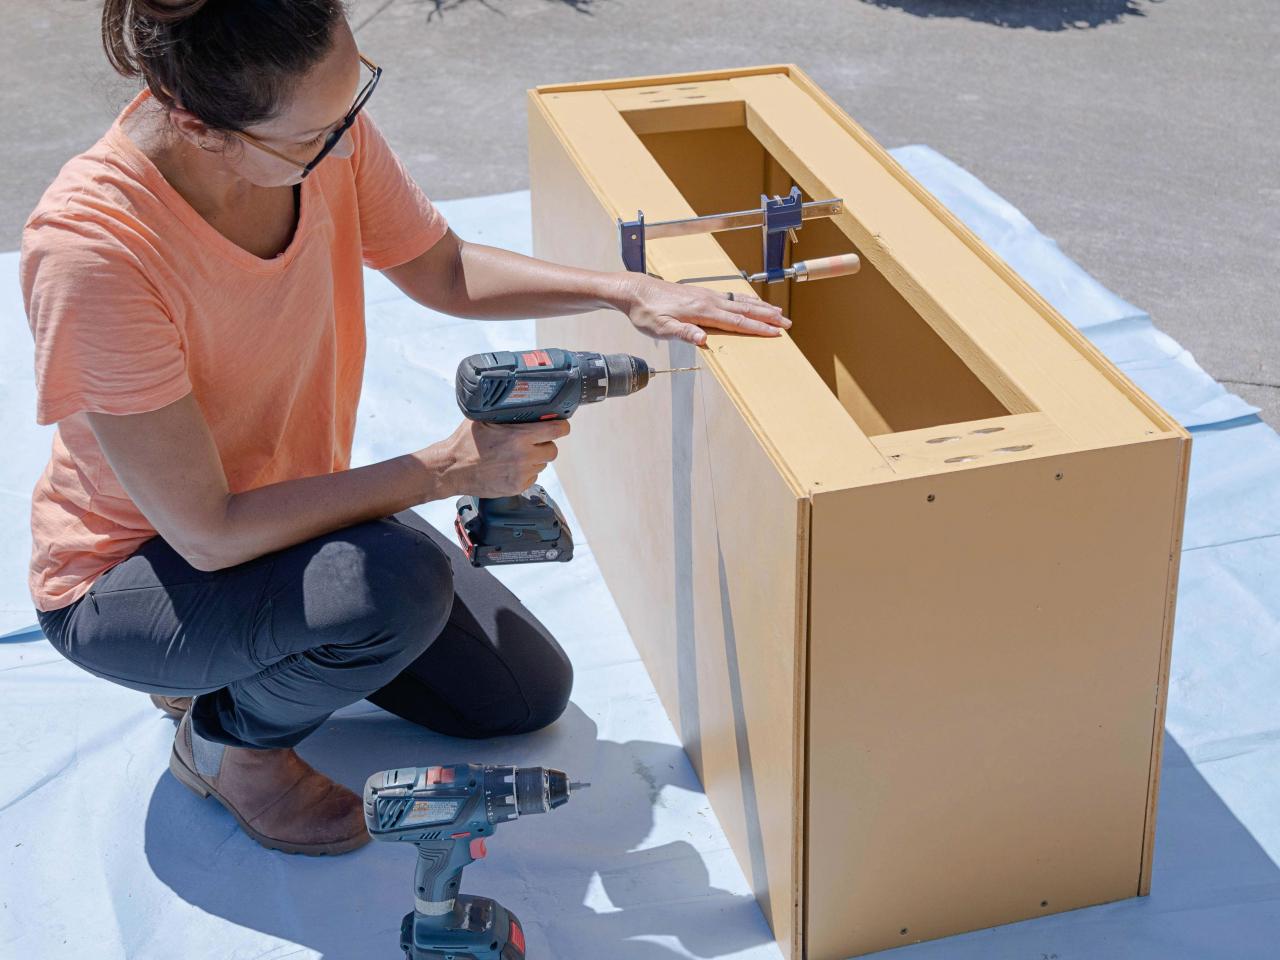
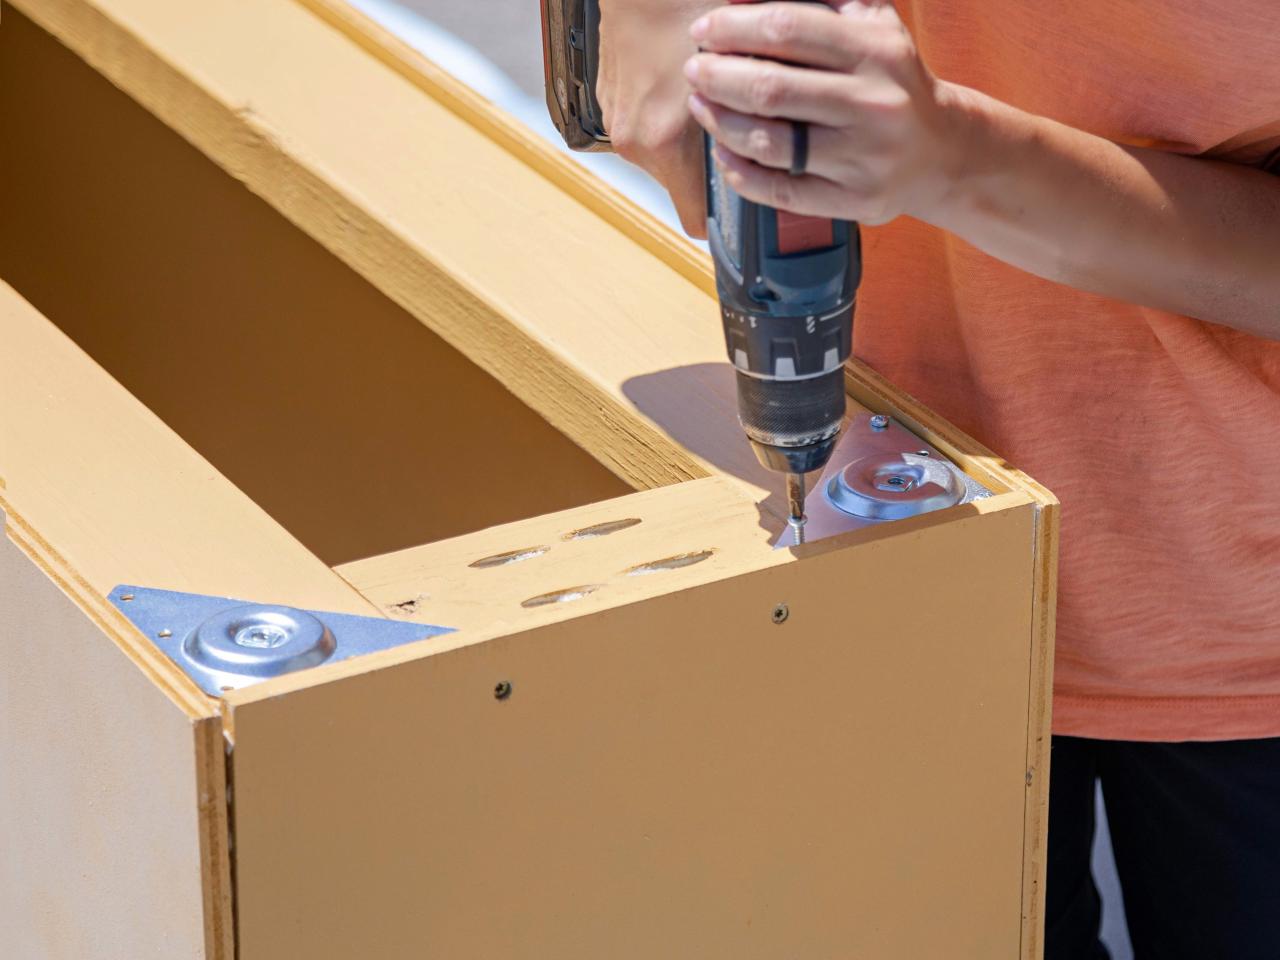
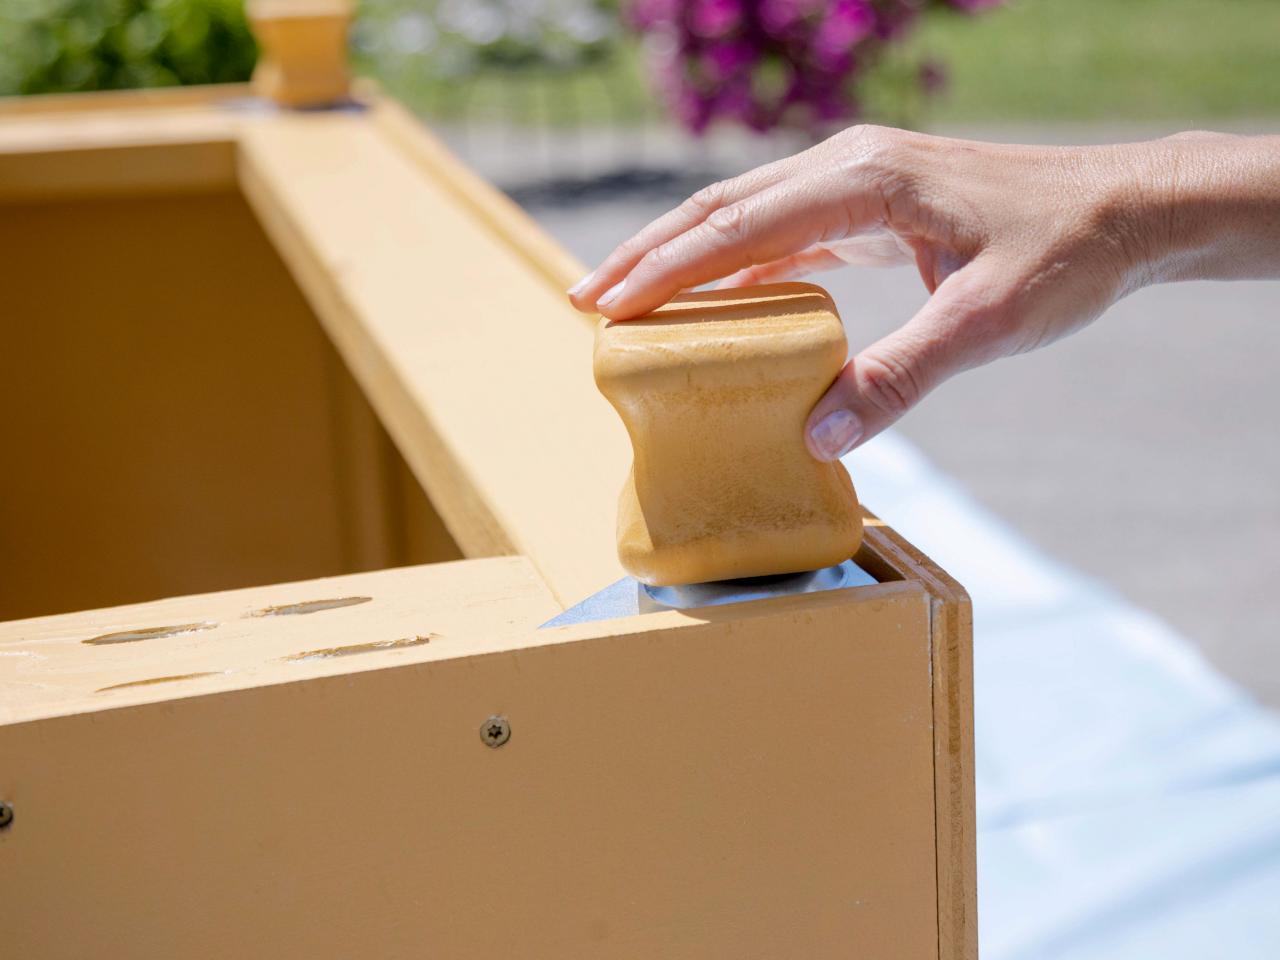
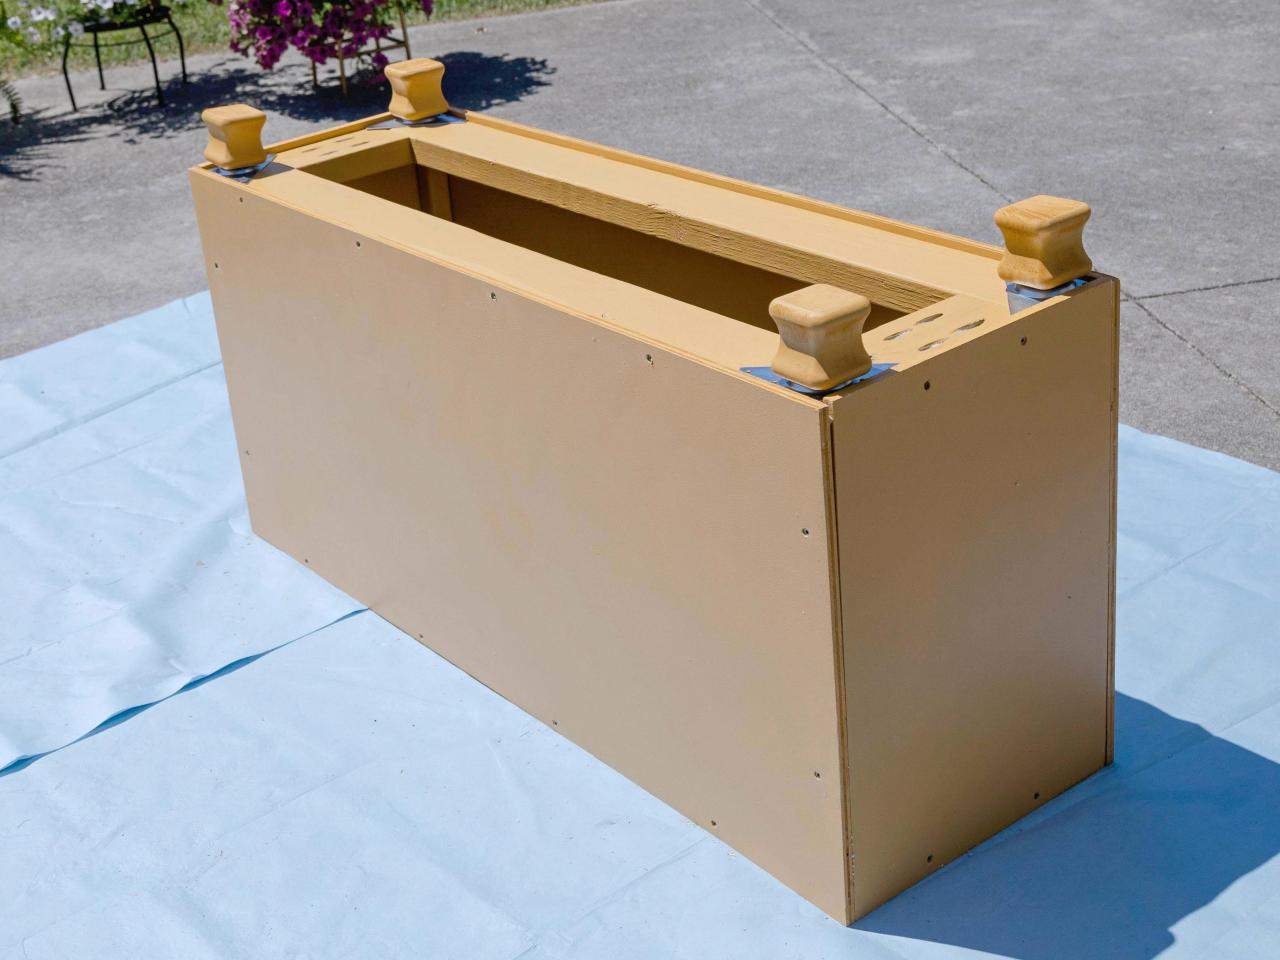
8. Add the Legs
Screw the metal plates for the legs into each corner of the bottom of the bench. Add the legs to the plates. When shopping for legs, choose ones that can adjust so you can correct any uneven surfaces the bench will sit on. This will ensure it doesn’t rock when you open and close it. Flip the bench back to the upright position with legs now holding the weight.

SHAIN RIEVLEY

SHAIN RIEVLEY

SHAIN RIEVLEY
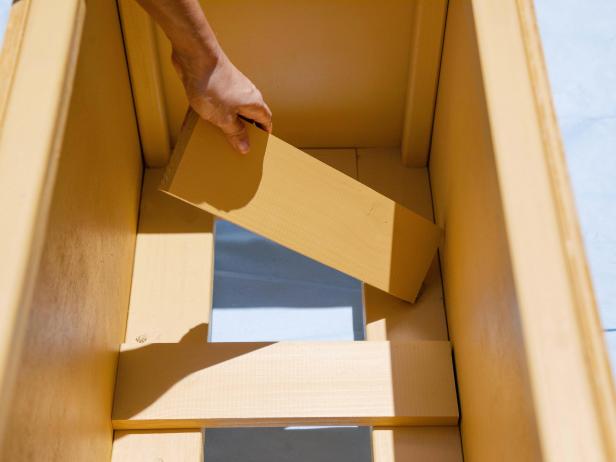
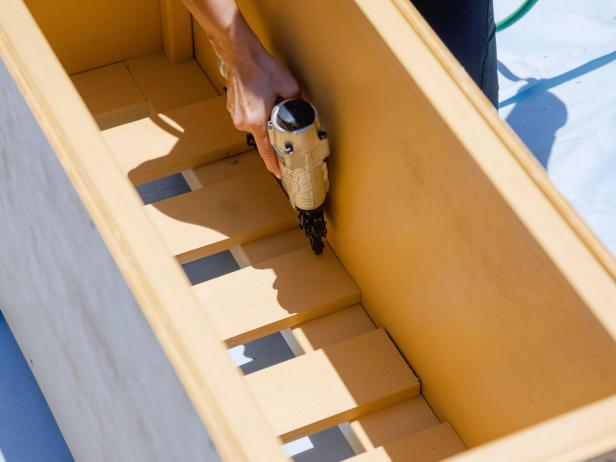
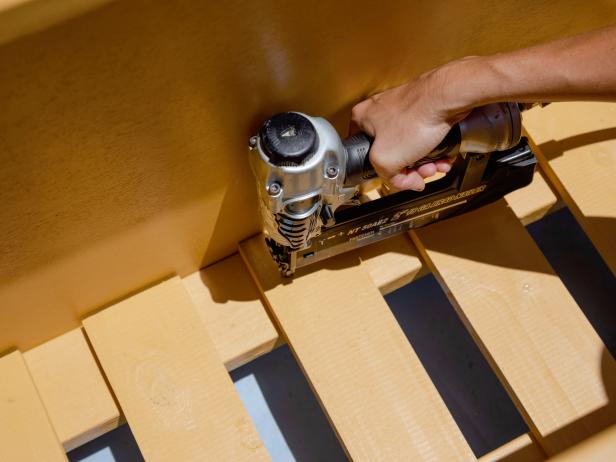
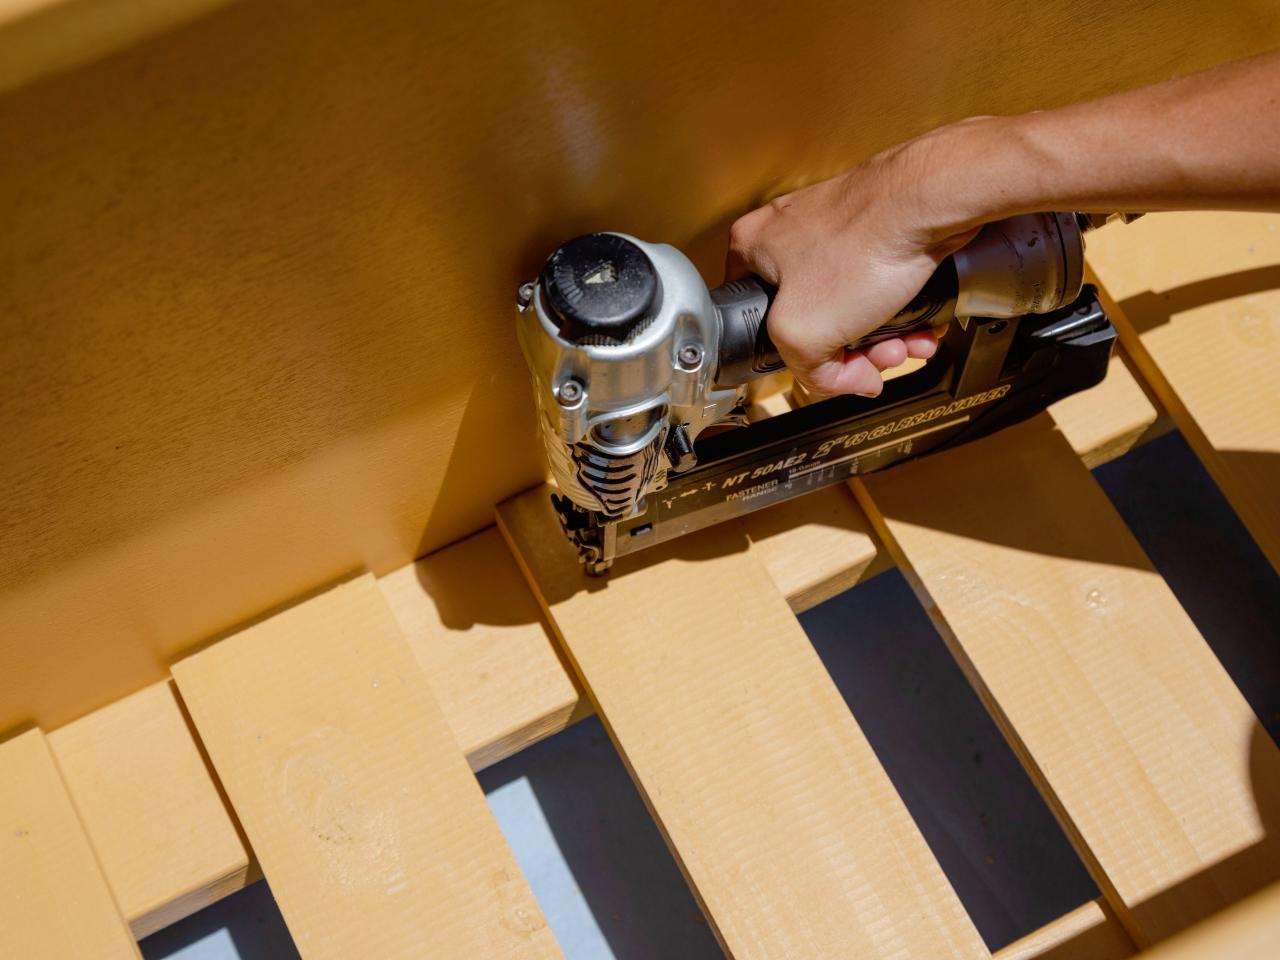
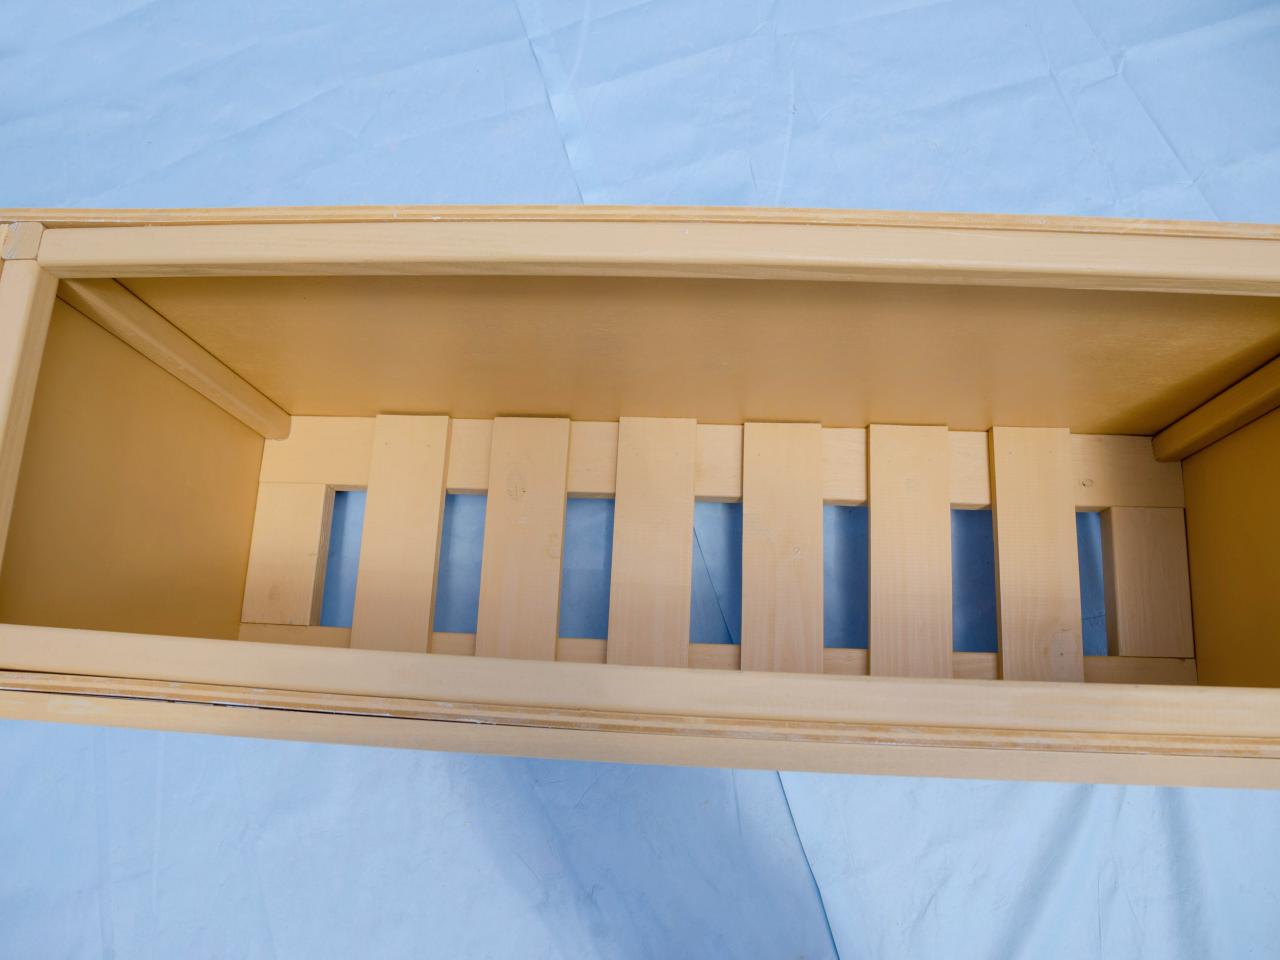
9. Add Bottom Slats
Drop the 1x4s into the box and evenly space them. This will keep packages from falling through the bottom of the bench. Secure the 1x4s in place with finish nails.
SHAIN RIEVLEY
SHAIN RIEVLEY
SHAIN RIEVLEY

SHAIN RIEVLEY
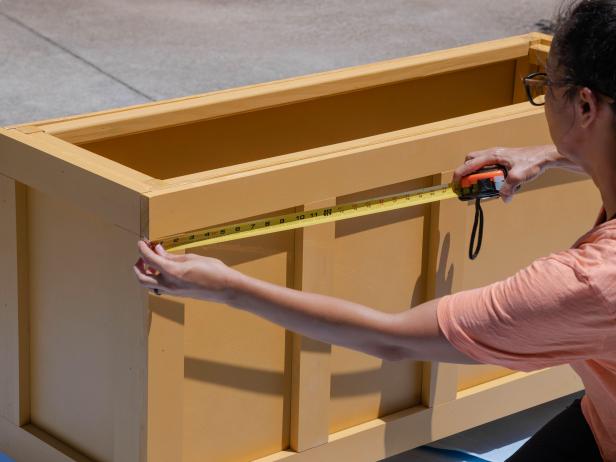
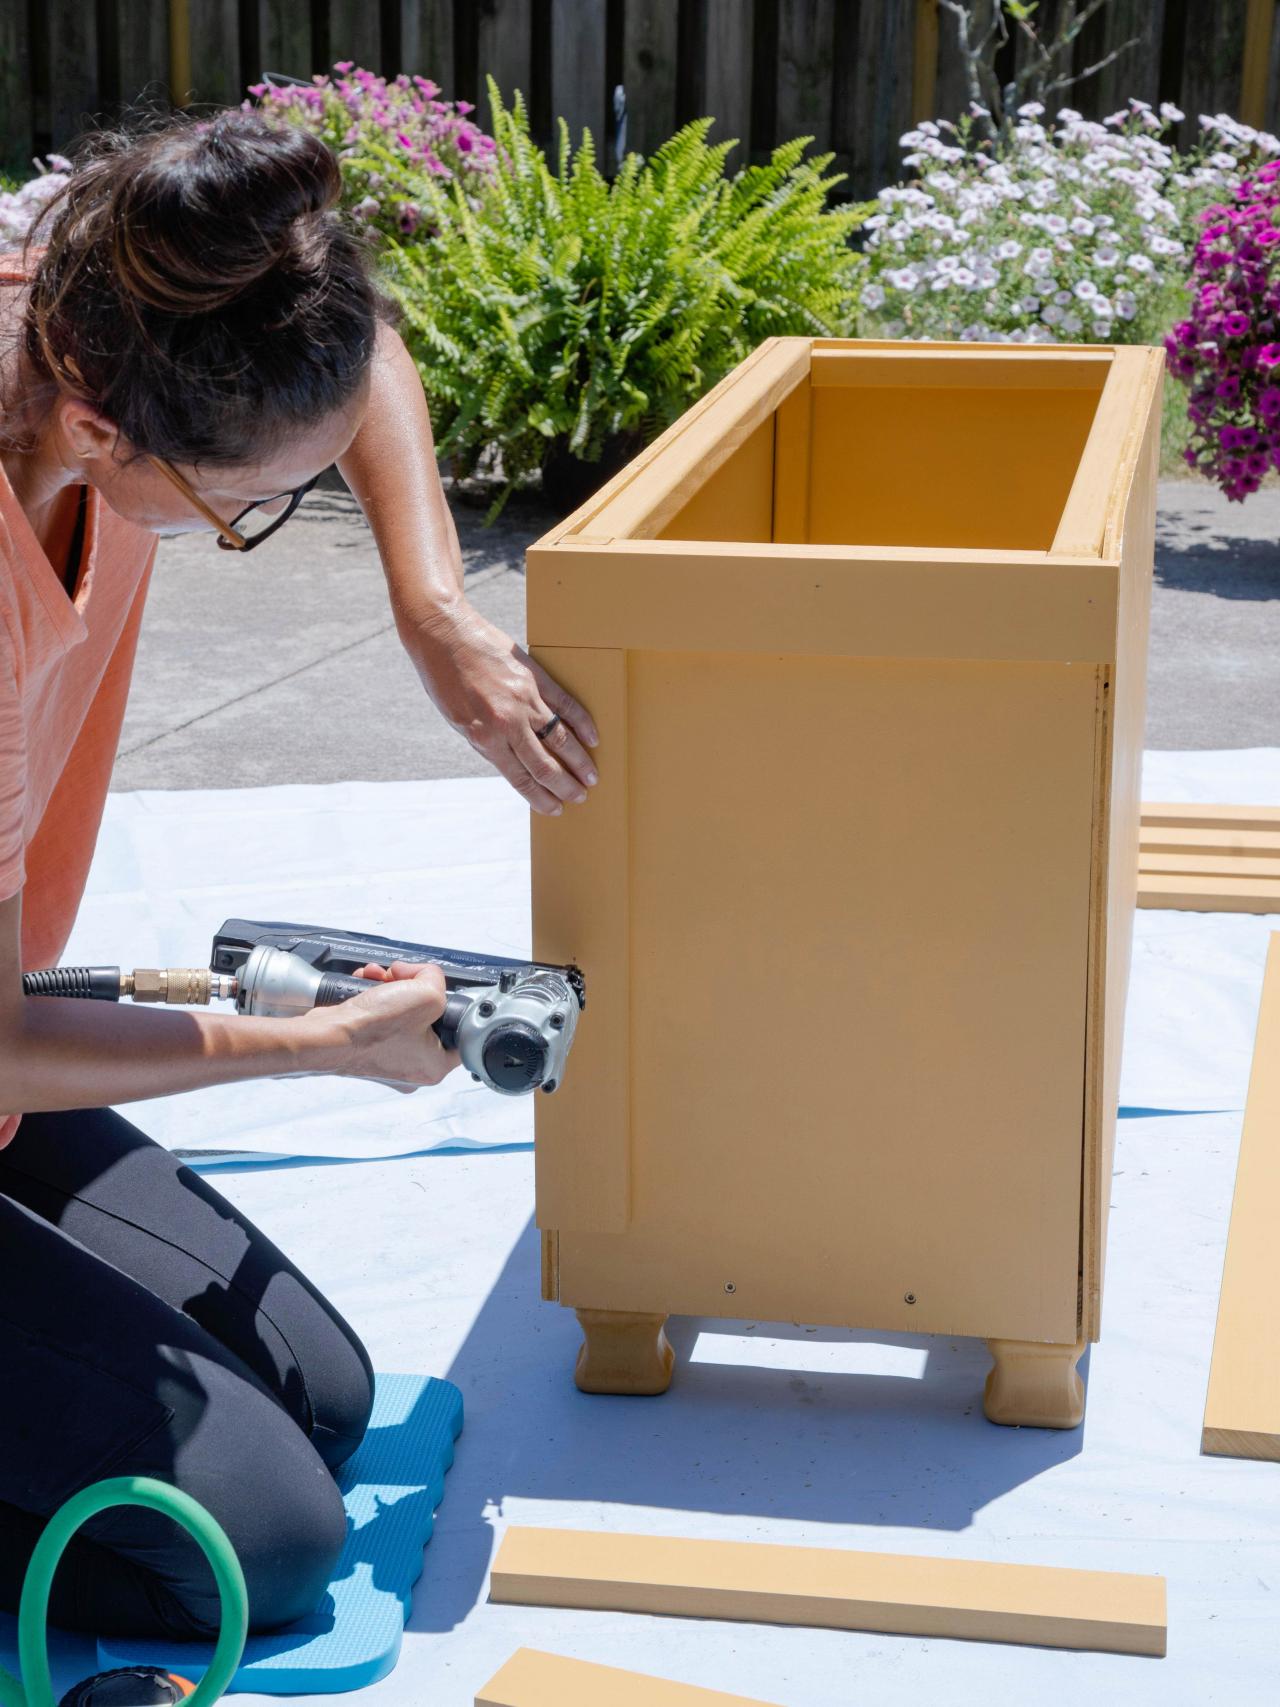
10. Add Trim
Use the 1x3s to trim out the sides and front of the bench. Be sure to add wood glue first and then nail the pieces in place. Run 1x3s along the top, bottom and corners. Evenly place three boards across the front to give it a finished look. Add caulk to fill gaps where needed.

SHAIN RIEVLEY
SHAIN RIEVLEY

SHAIN RIEVLEY
SHAIN RIEVLEY
SHAIN RIEVLEY
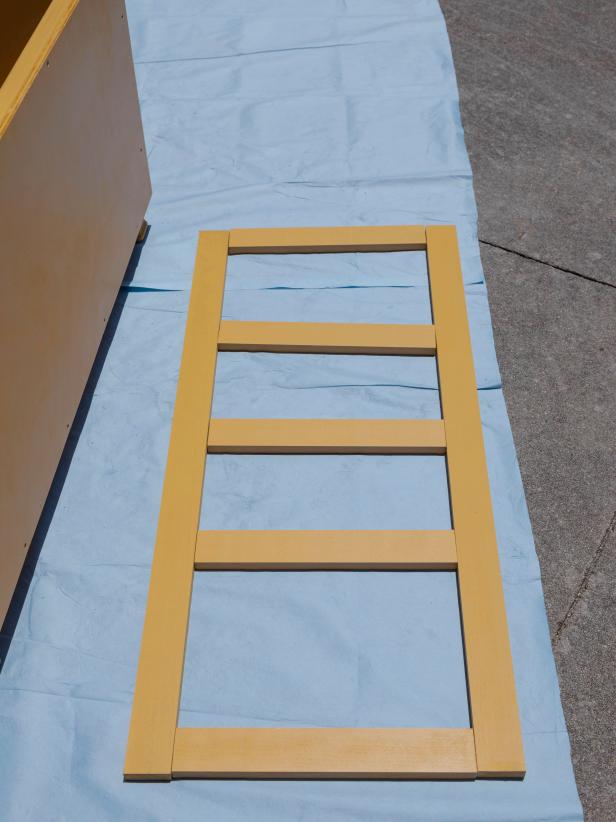
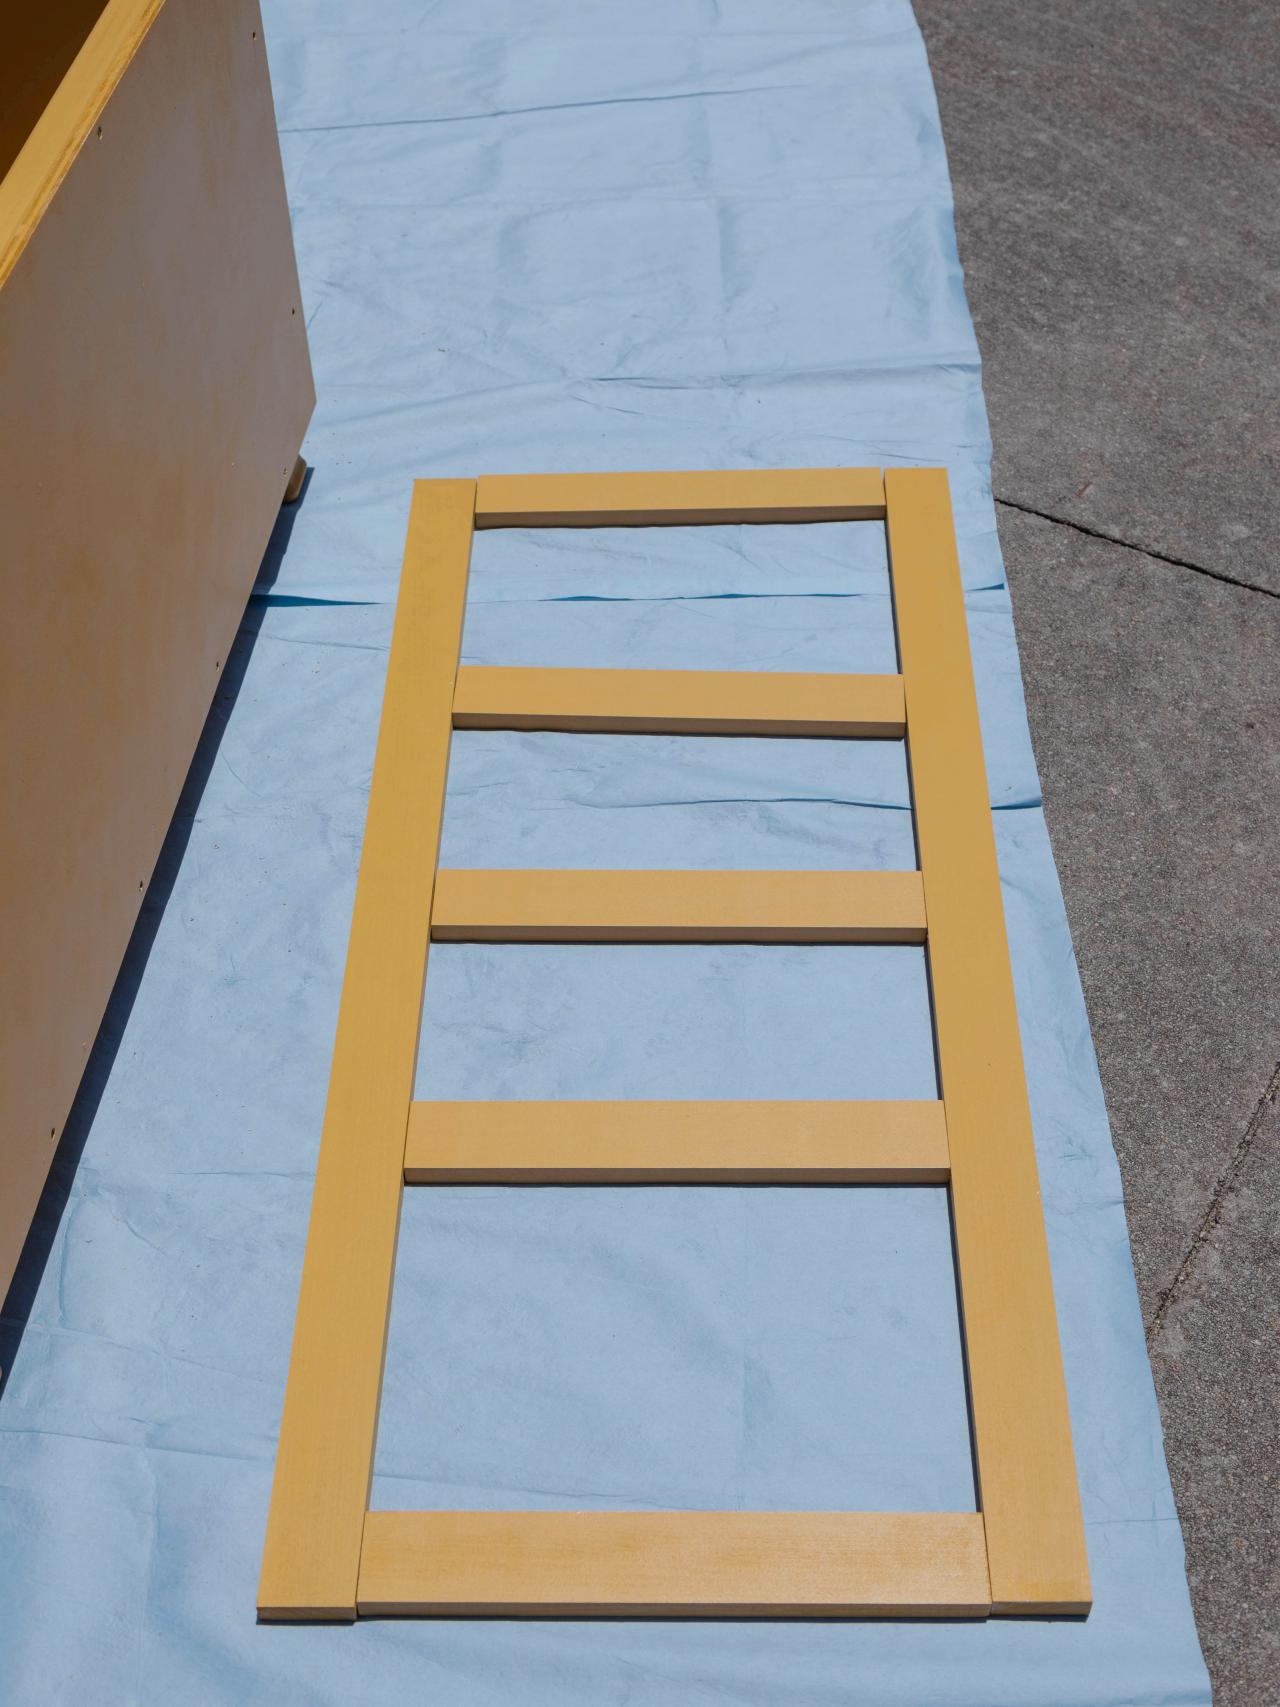
11. Make the Lid
Glue 1x2s to the back and sides of the 48” x 17-1/2" piece of plywood to create the lid. Clamp the pieces in place and secure them with nails.
SHAIN RIEVLEY

SHAIN RIEVLEY
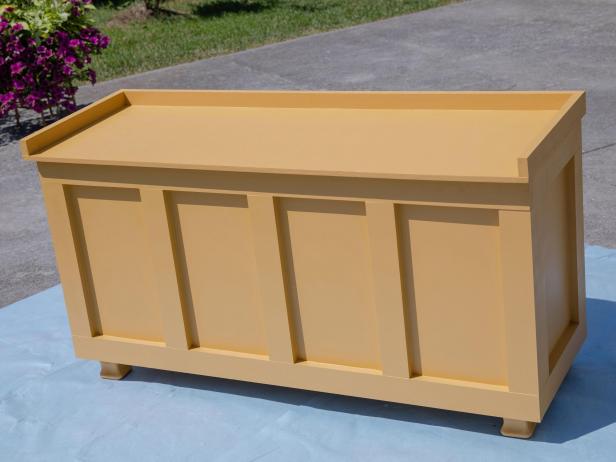
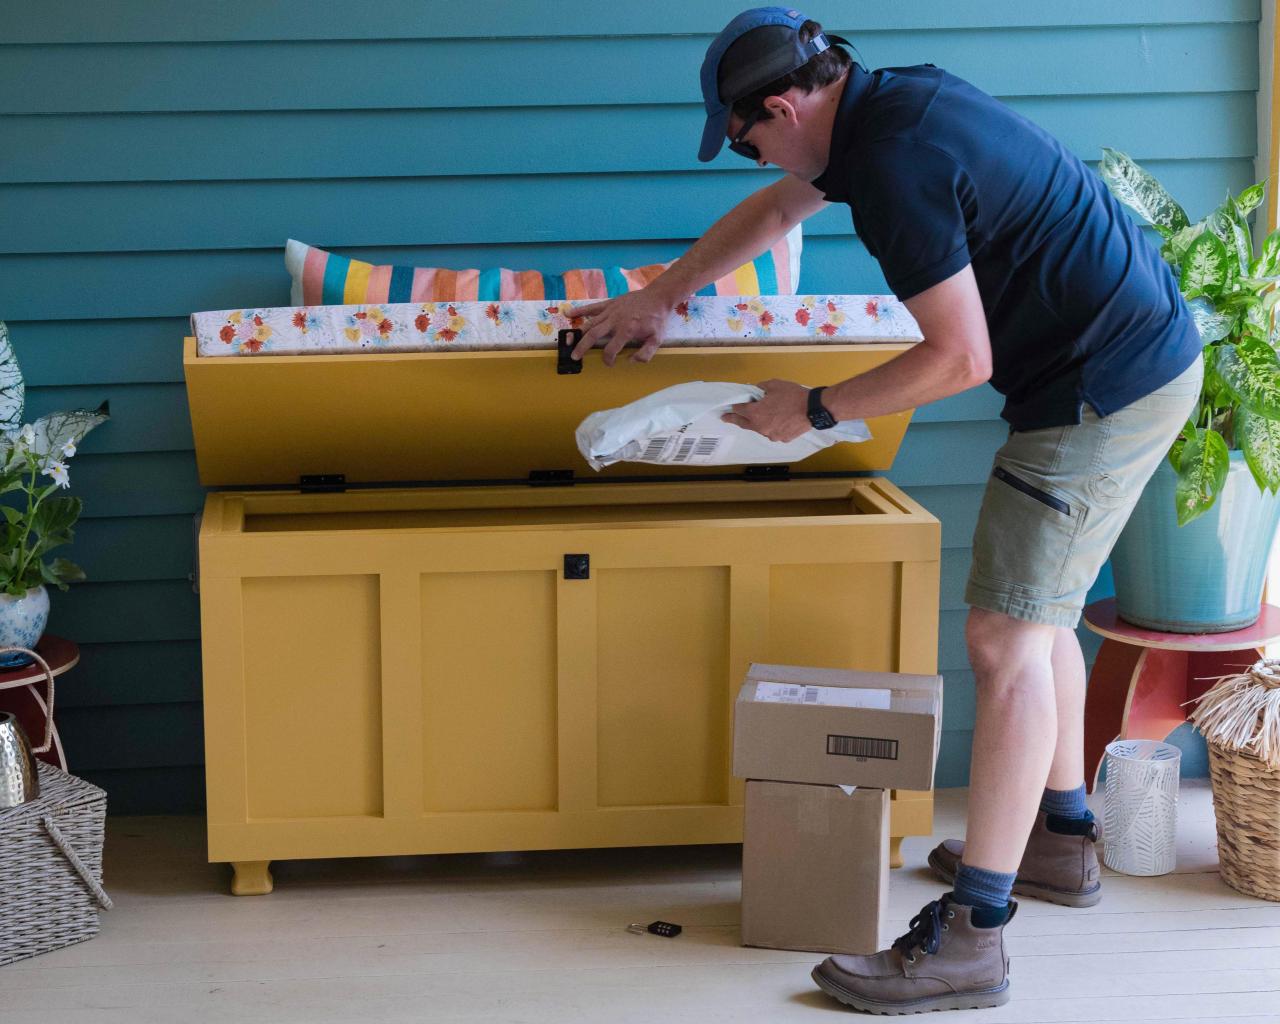
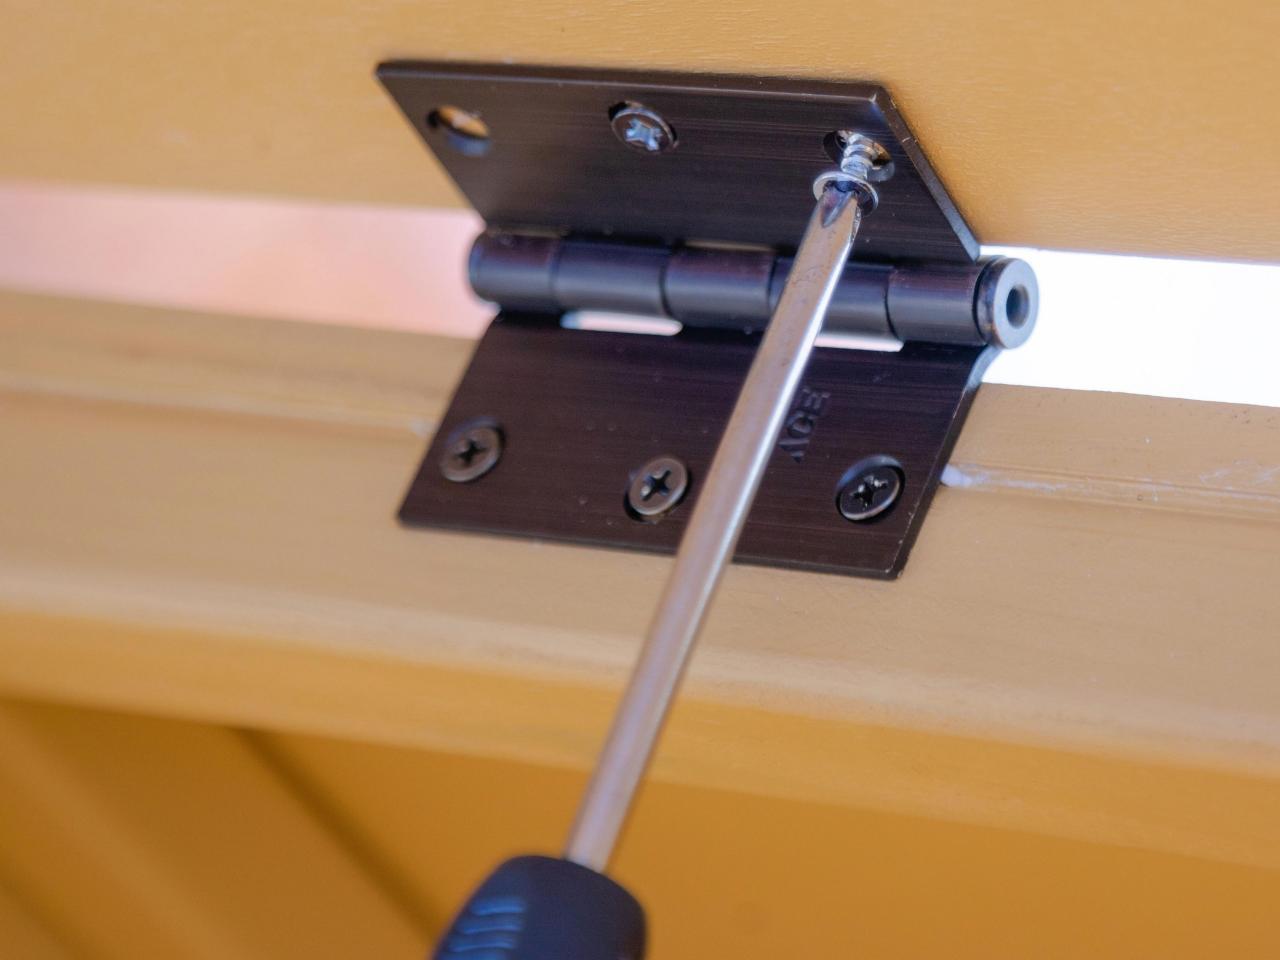
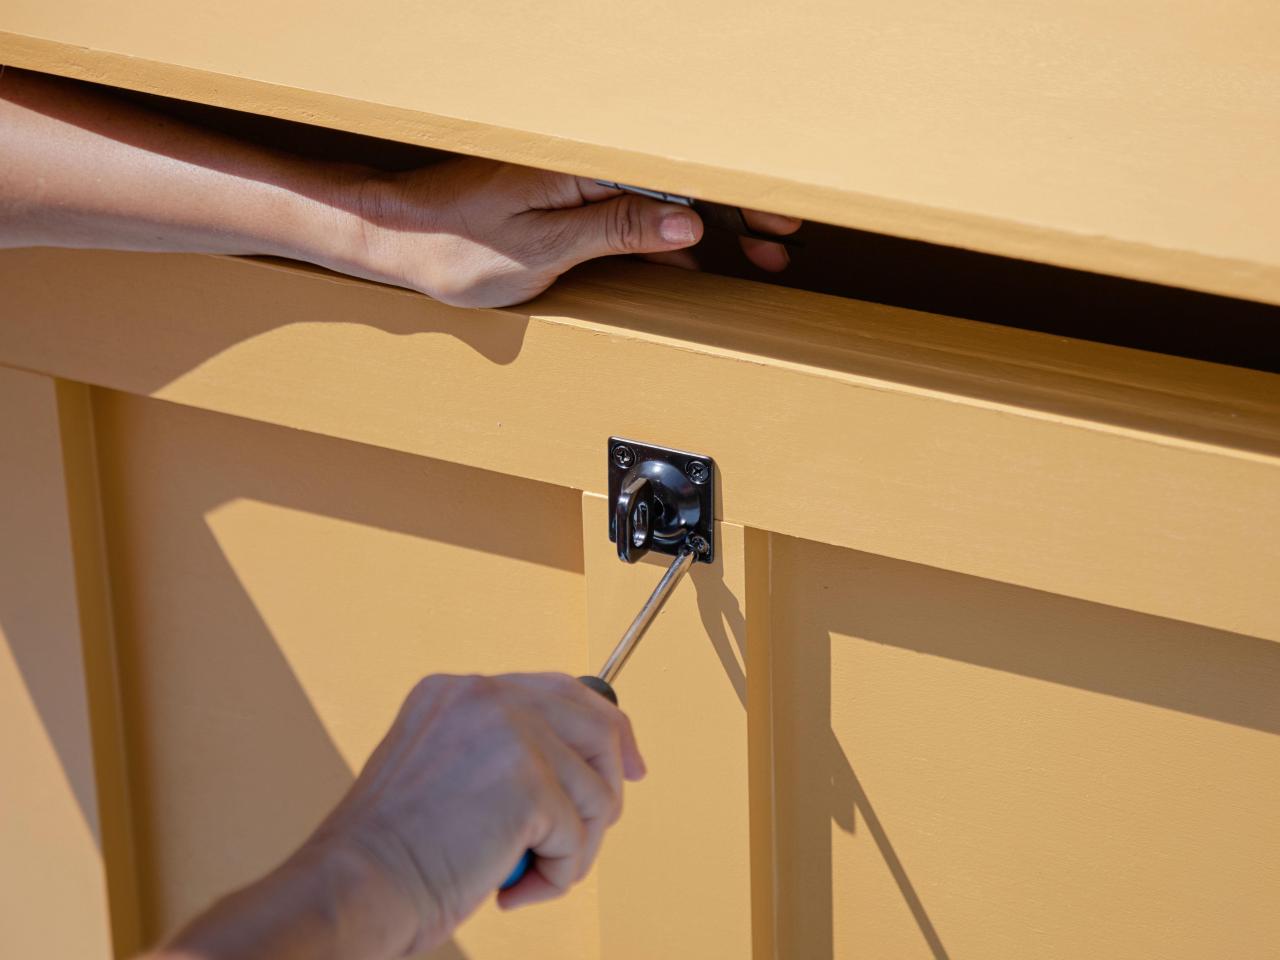
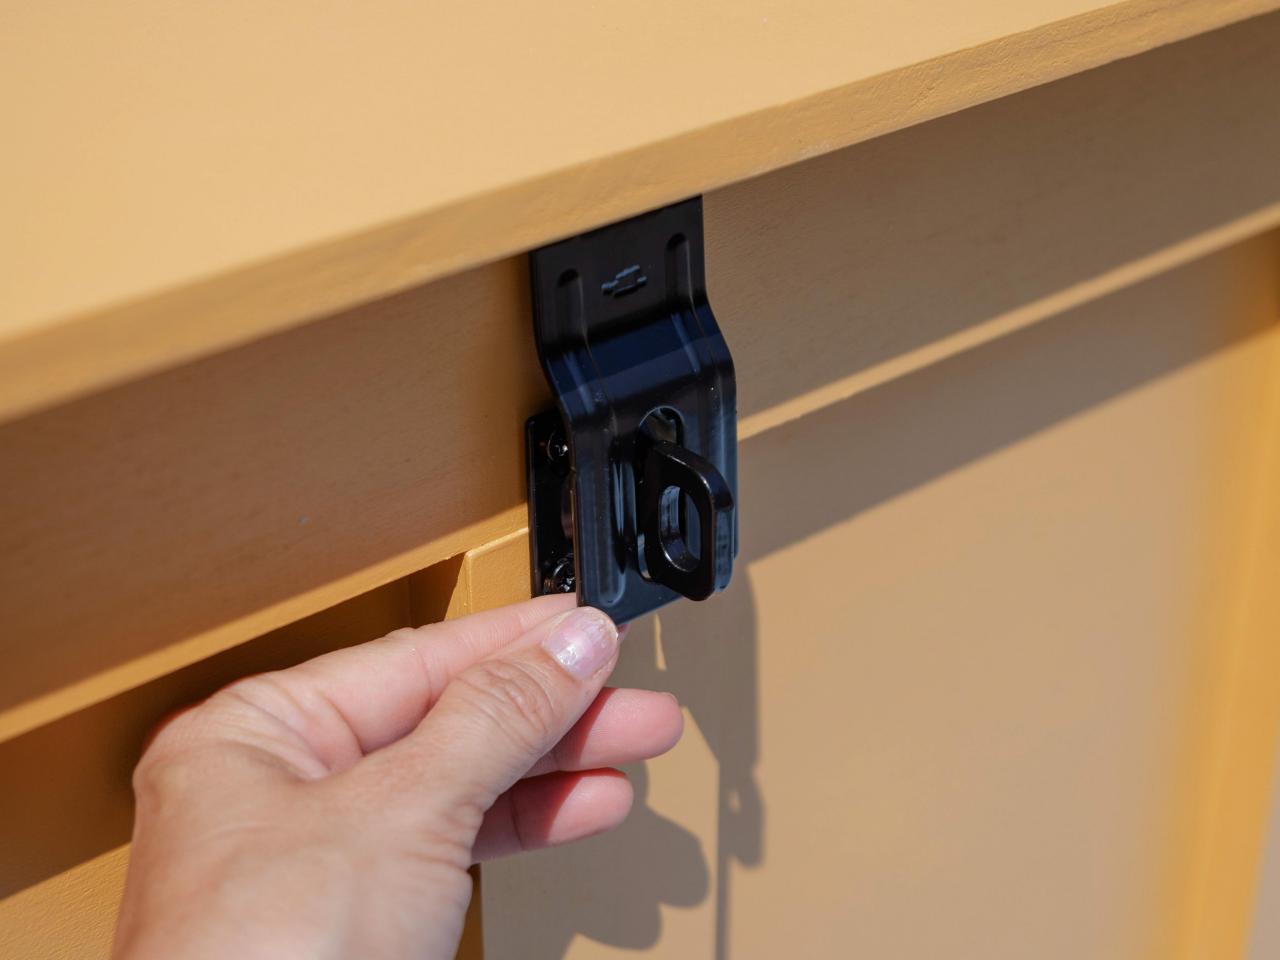
12. Attach Lid
Place three hinges in the back connecting the lid to the box. Add a latch and lock on the front of the bench.

SHAIN RIEVLEY

SHAIN RIEVLEY
SHAIN RIEVLEY

SHAIN RIEVLEY

SHAIN RIEVLEY
13. Make It Comfortable
Add cushions and pillows to your porch package bench to create an inviting cozy space that also conceals your precious deliveries.

SHAIN RIEVLEY


