


Fabric-Pattern Painted Pumpkin

Materials Needed:
- large, smooth-skinned pumpkin
- small paintbrush
- stencil sponge brush
- acrylic craft paint
- damask stencil
- masking tape
- paper plate
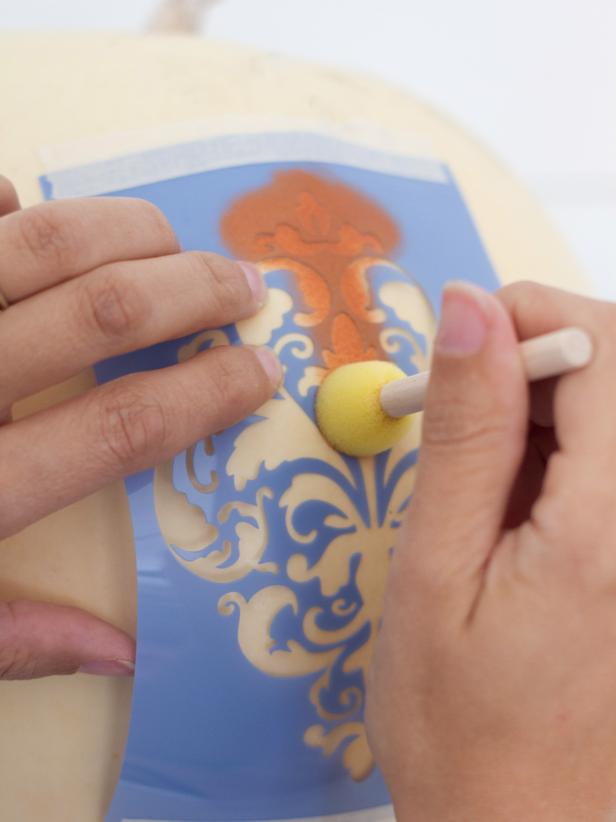
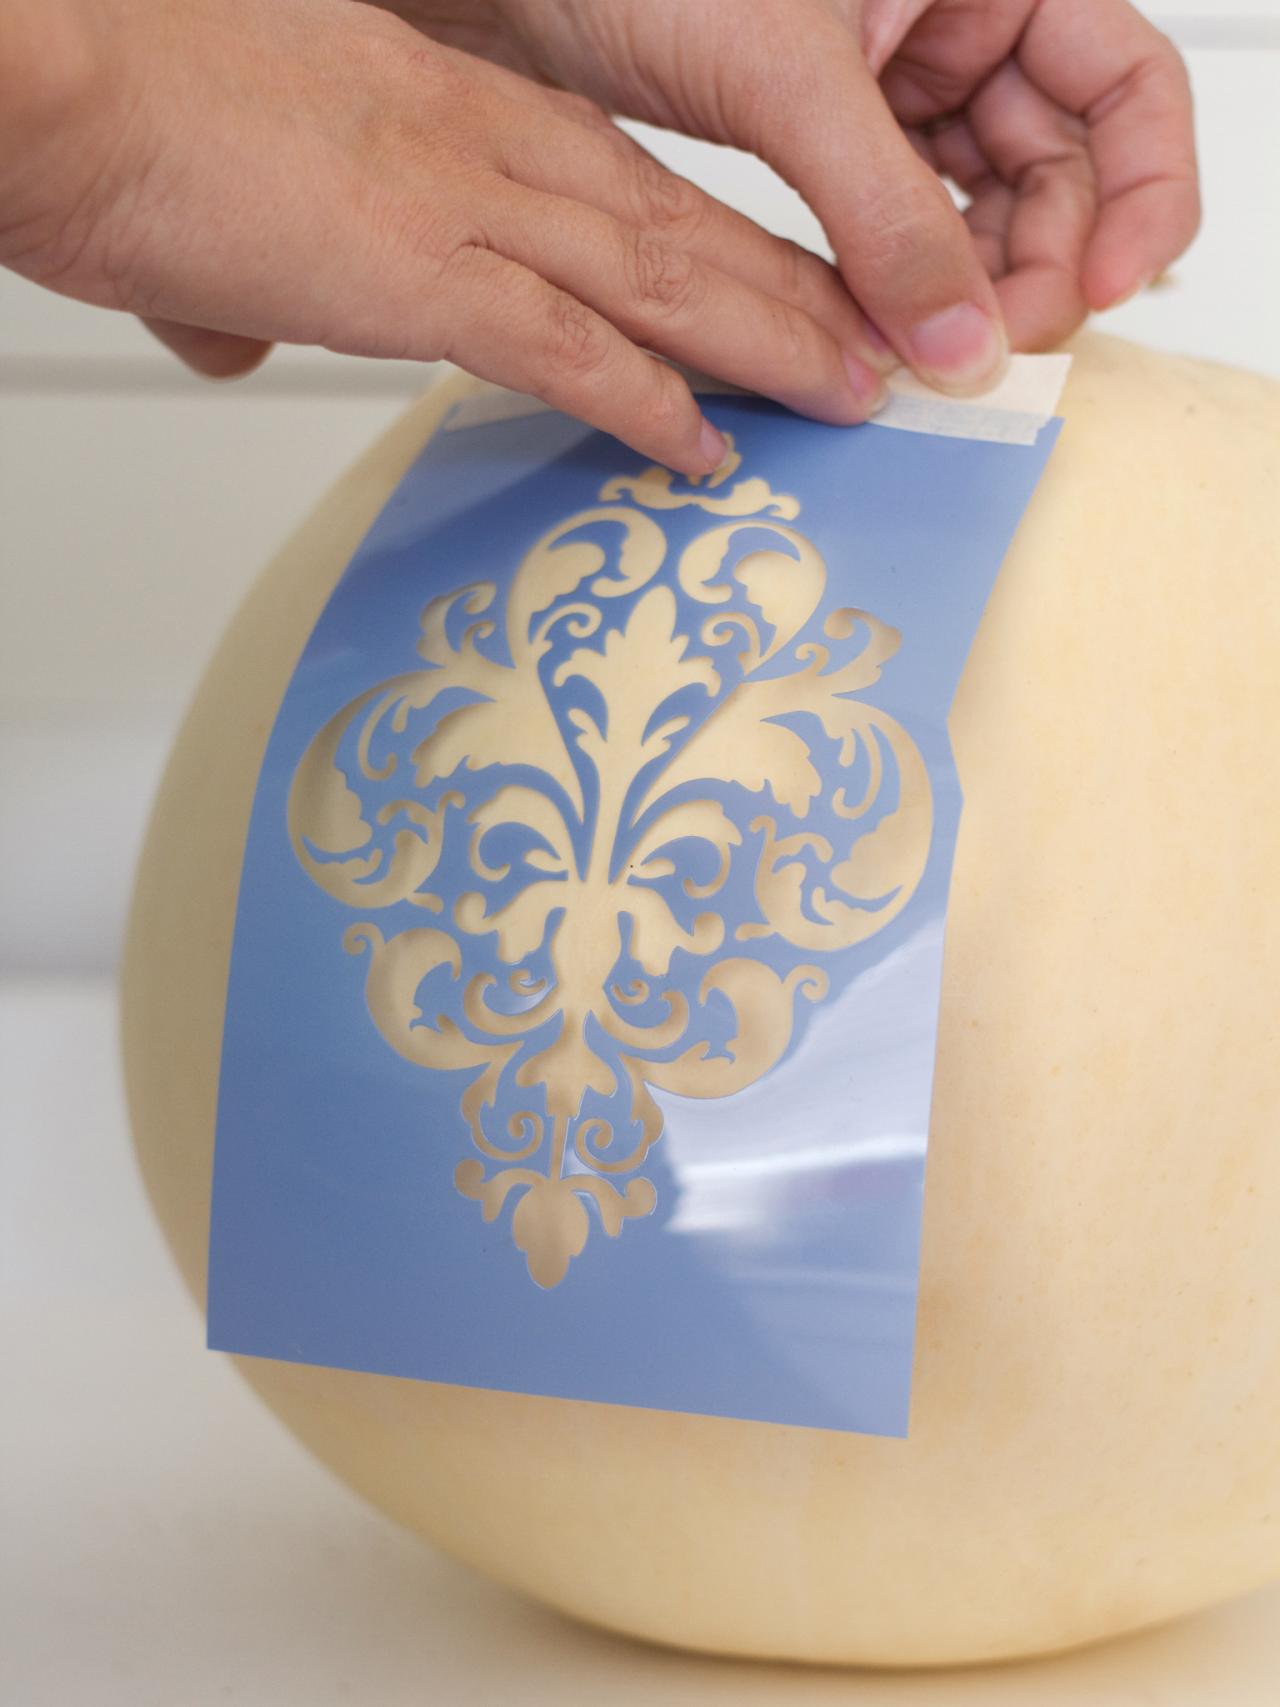
Tape Stencil
Use a piece of masking tape to secure the top and bottom of the stencil to the smoothest side of the pumpkin. Because pumpkins are curved, it's best to tape down and apply paint to the stencil in sections you have taped flat.

Paint Center of Pattern
Load a stencil sponge brush with acrylic craft paint, then blot most of the paint off onto a paper plate. It's important to have a very "dry" brush when using stencils to prevent the paint bleeding under the stencil. Using a light hand, blot paint onto the center portion of the stencil. If any part of the stencil is raised up off the pumpkin, hold it down while continuing to blot. When finished, allow the painted portion to dry completely before moving on to the next step.

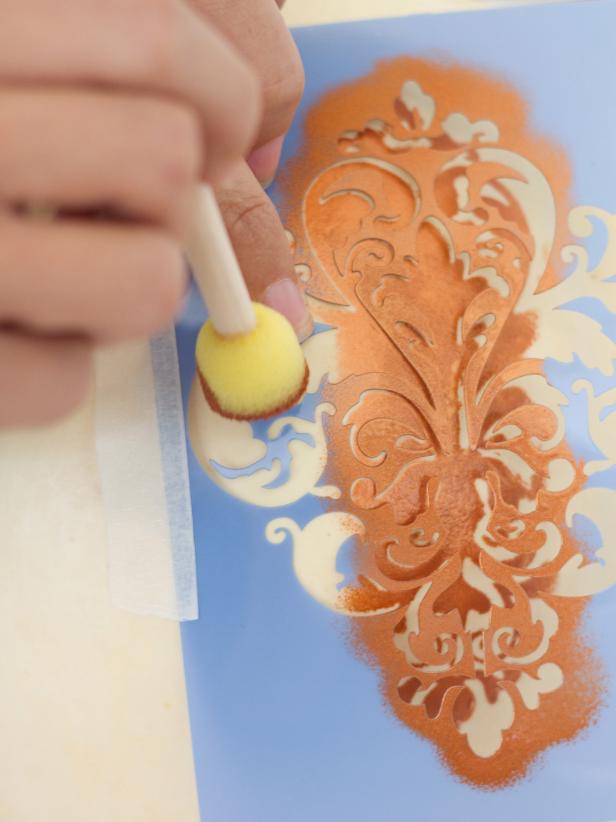
Paint Pattern's Edges
Remove the upper piece of masking tape and use it to secure the left side of the stencil to the pumpkin. Once it's in place, remove the lower piece of masking tape so the left side of the stencil is now lying flat against the pumpkin. Load up your brush and paint the left side of the stencil, using your fingers to firmly hold the stencil in place where necessary. Once that has dried, use a piece of masking tape to secure the right side of the stencil to the pumpkin, then remove the piece of tape of the left. Fill in the right portion of the stencil with craft paint, pressing down where necessary, and allow to dry before removing stencil.

Paint Stem
Use a small paintbrush to paint the stem in a coordinating shade. Allow to dry.


