


How to Refinish and Reupholster a Bench

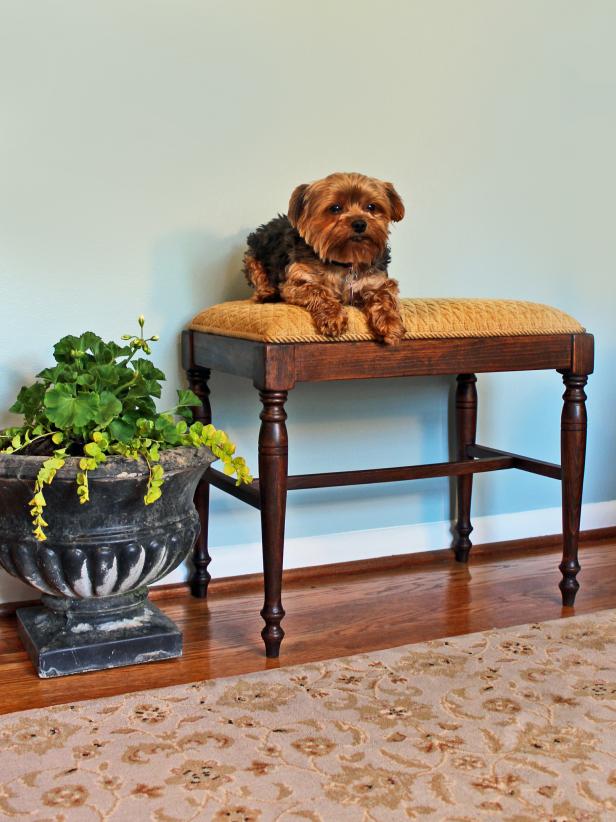
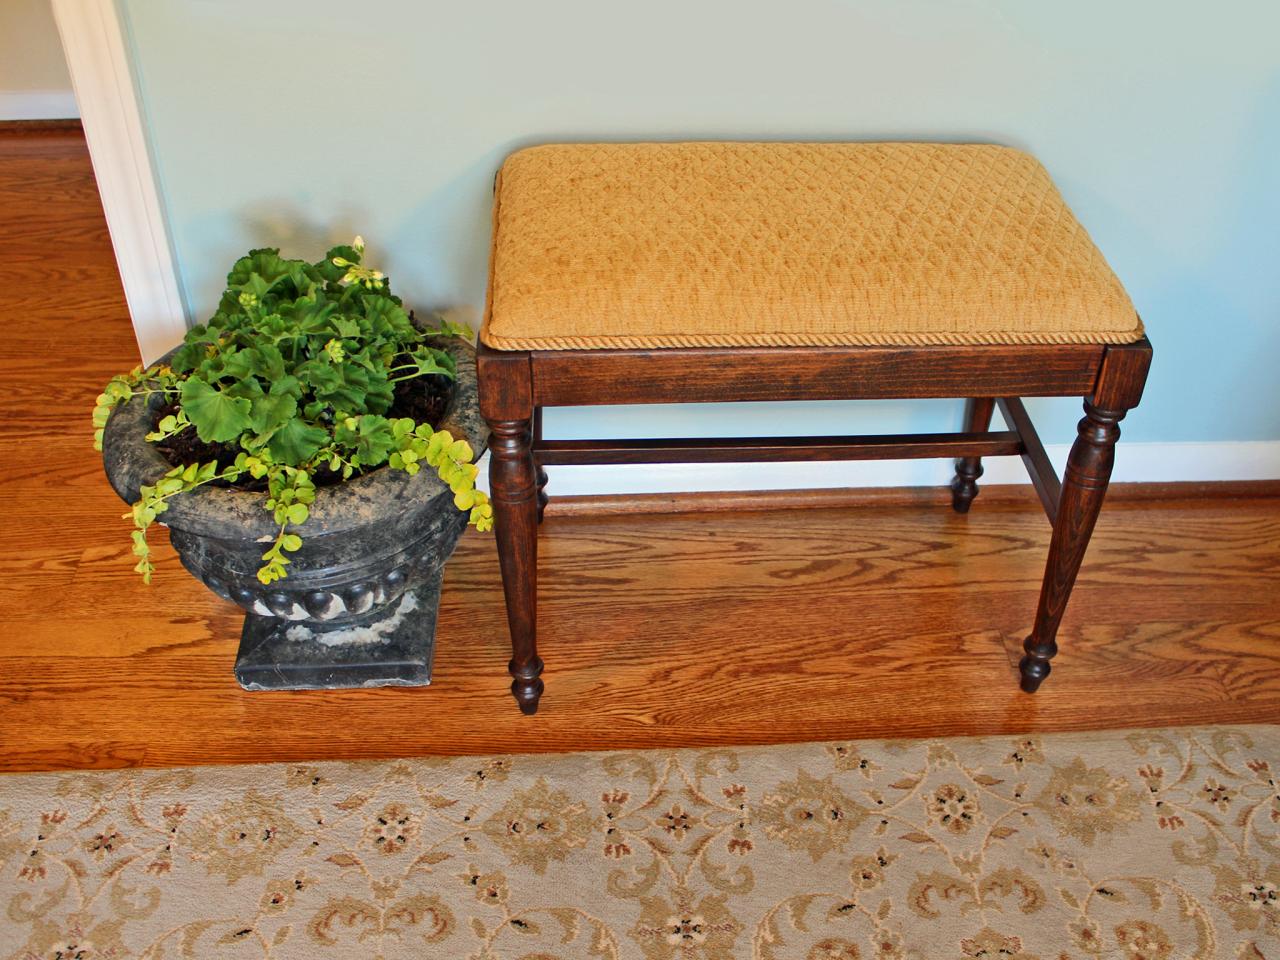
Refinished and Reupholstered Bench

Photo by: H. Camille Smith
H. Camille Smith
Materials Needed:
- old upholstered bench or stool
- sandpaper in coarse-, medium- and fine-grit
- oil-based stain
- spray polyurethane
- 1" chip brush for staining
- screwdriver
- pliers
- staple gun and staples
- foam sheet
- upholstery fabric and coordinating trim
- scissors
- dropcloth or tarp to protect work surface
- optional: chemical stripper
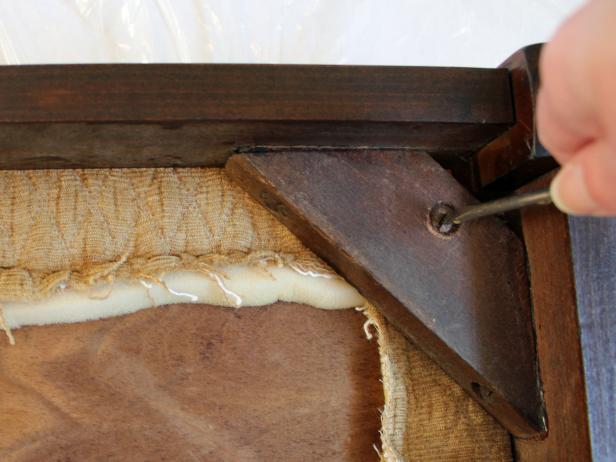
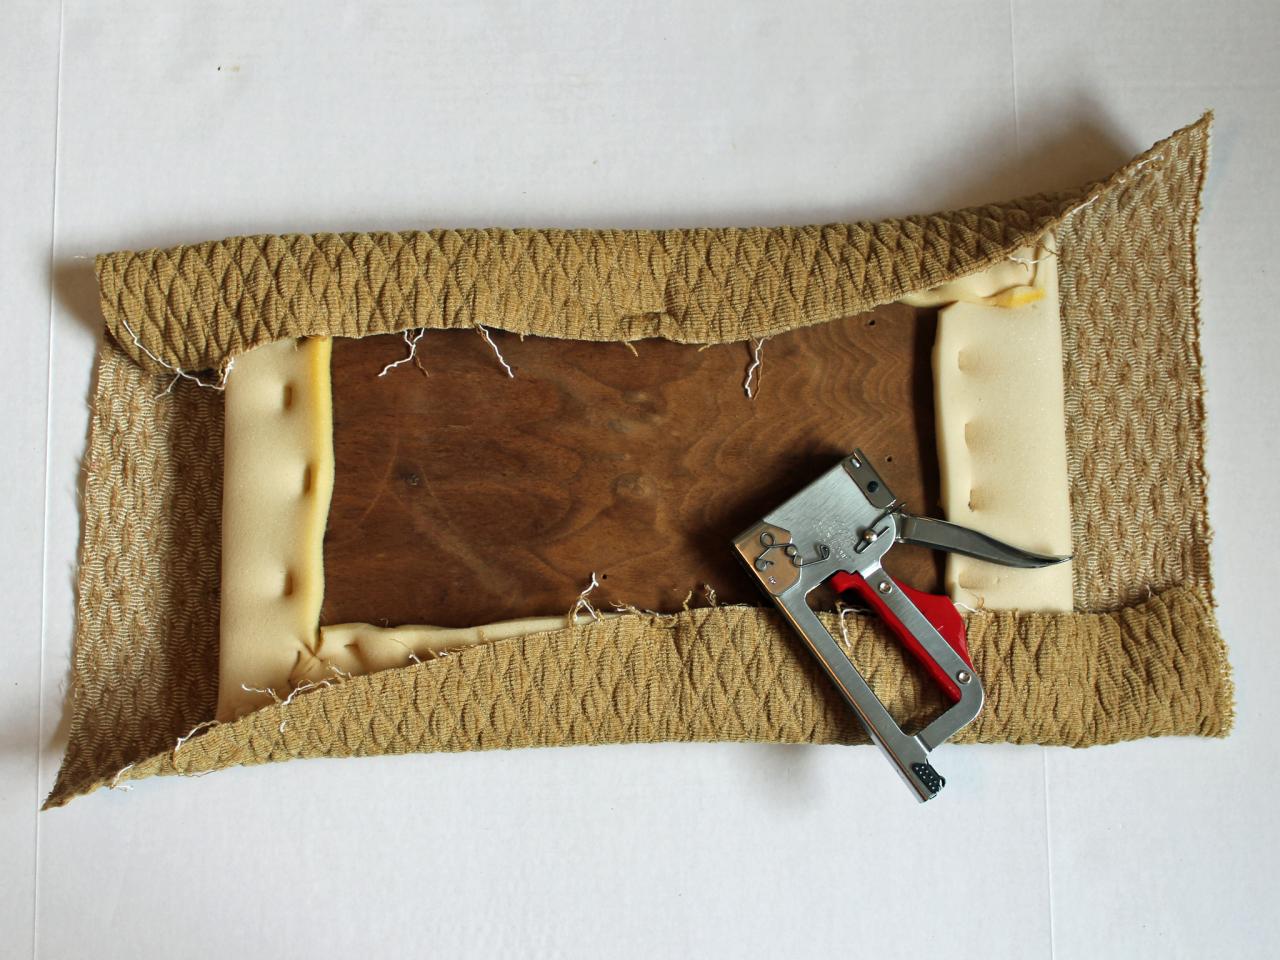
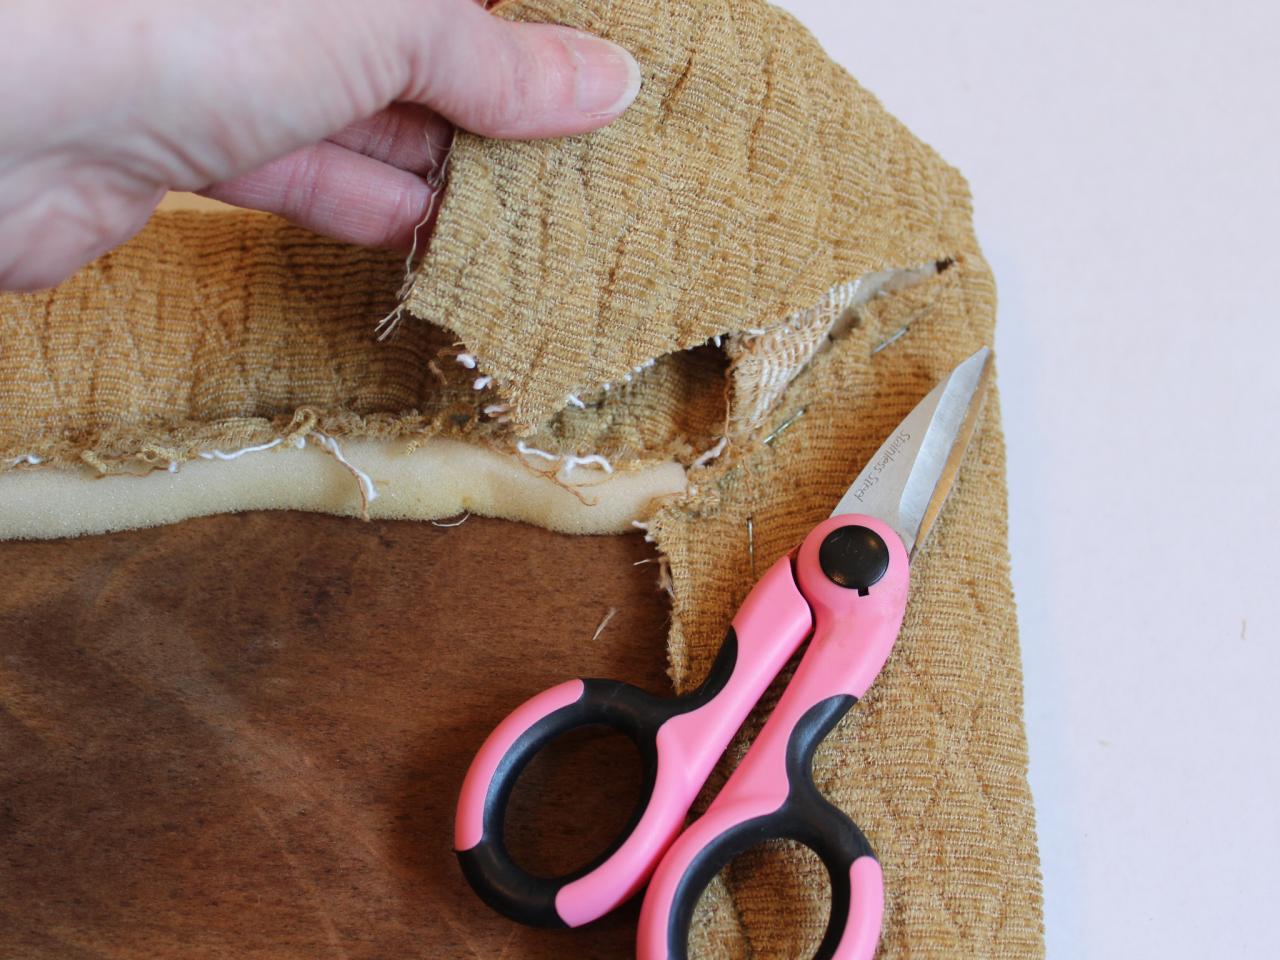
Remove Old Upholstery
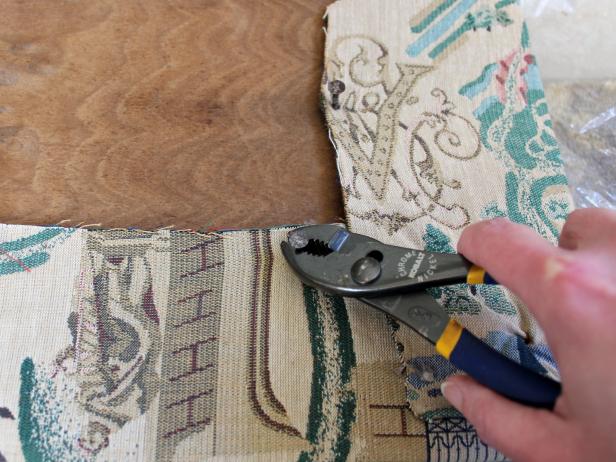
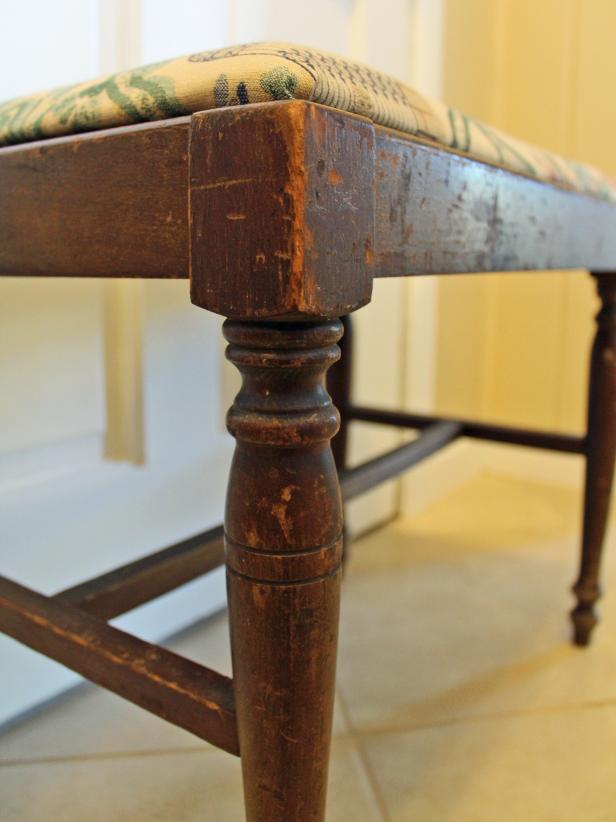
Flip the bench over and using the appropriate screwdriver (either Phillips or flat), remove the screws securing the upholstered top to the wooden legs (Image 1). Note: Tape the screws together or place them in a labeled baggie; you'll need them later to reinstall the seat. Next, use pliers to remove the screws or nails securing the existing upholstery (Image 2). Tip: Remove all layers of fabric, if there are multiples, leaving only the original layer.

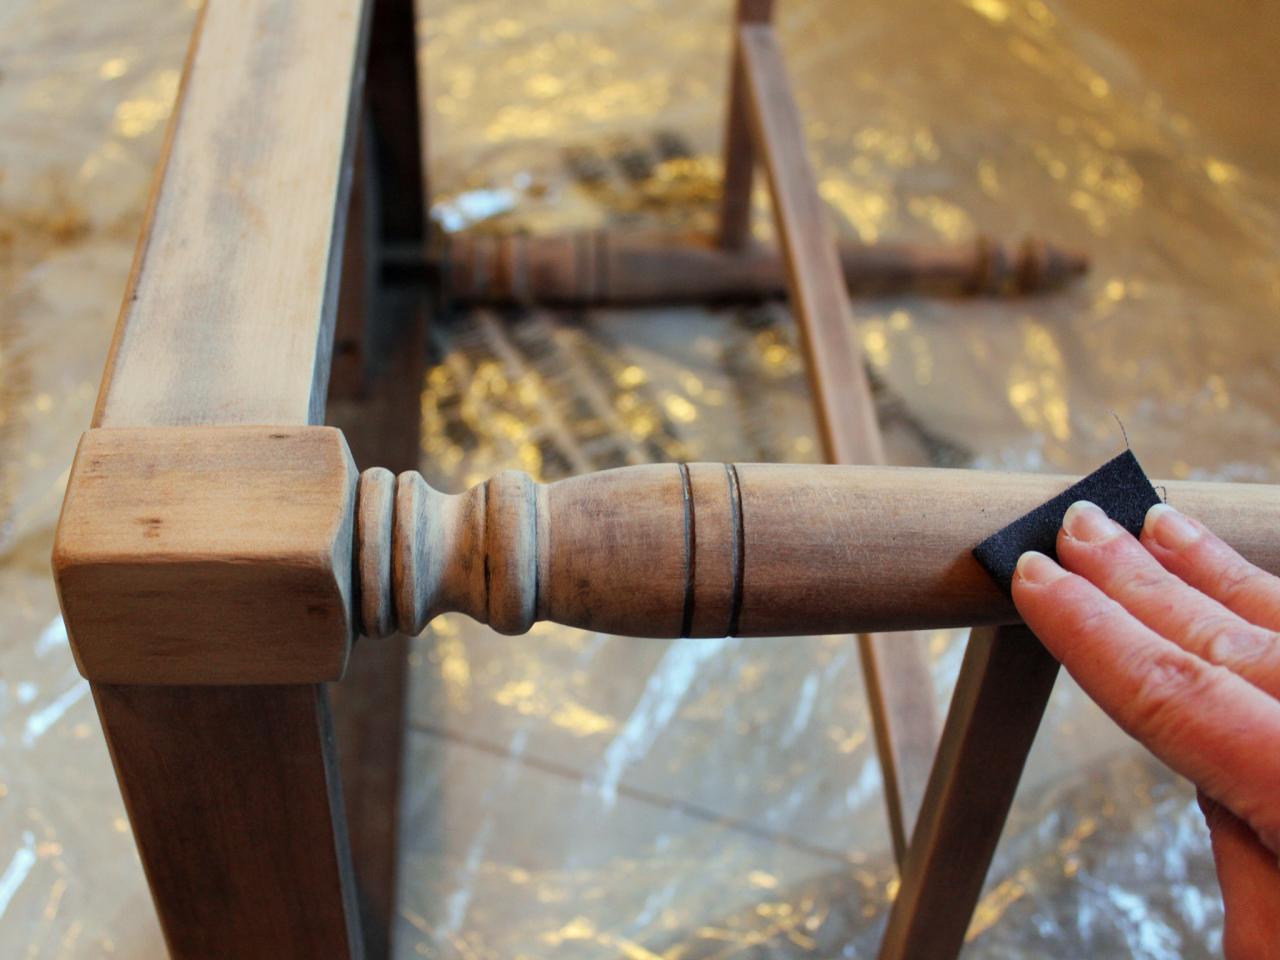
Remove Existing Finish
Starting with coarse-grit sandpaper then working your way down to medium- then fine-grit, go over all areas you plan to refinish to remove the existing stain. Note: If the existing finish is paint or stain in good condition, removing it with a chemical stripper may be necessary. This finish was so old and in such bad shape (Image 2) that a heavy sanding was enough.

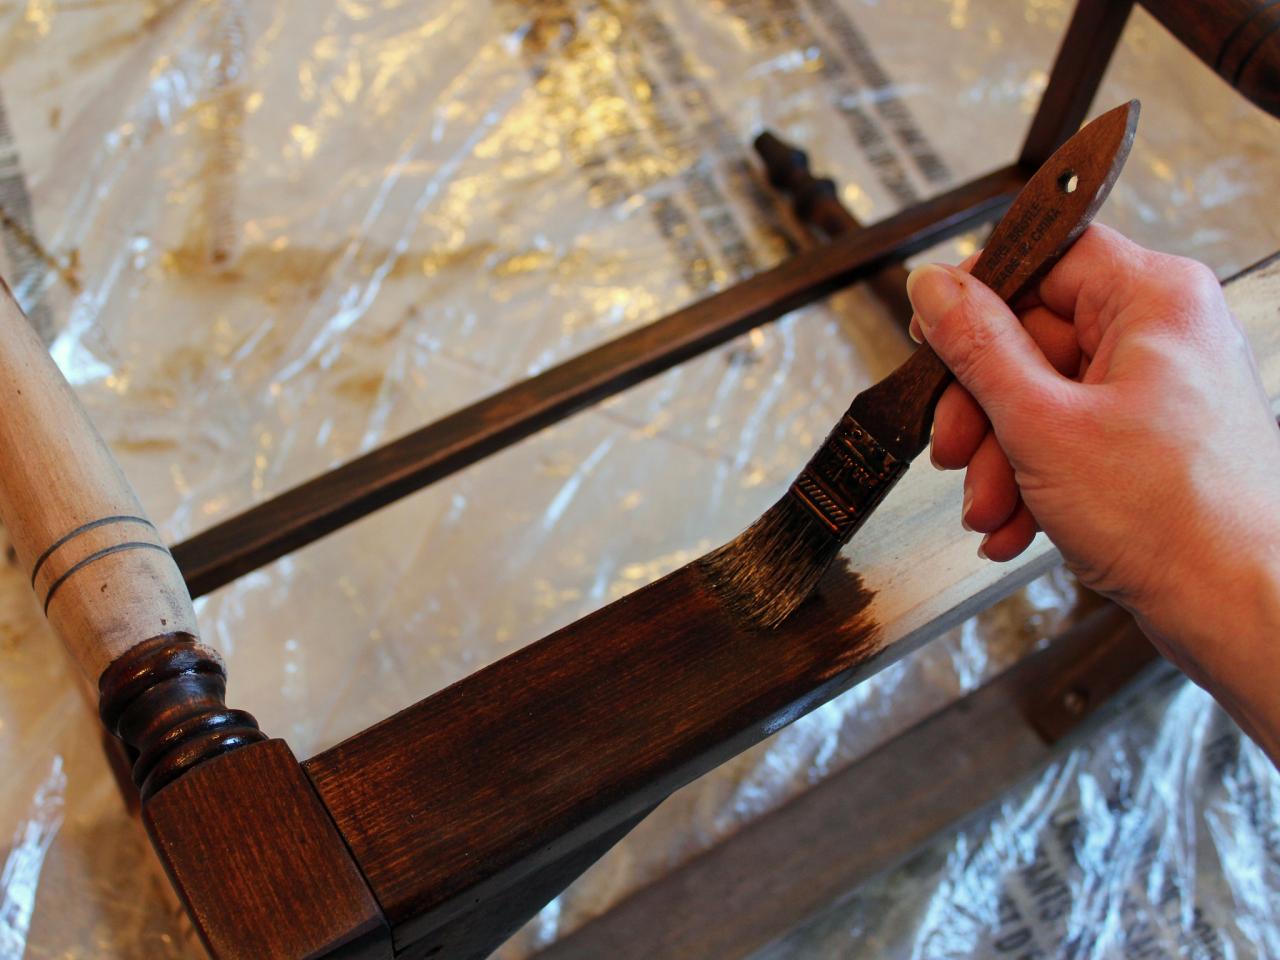
Stain Then Seal Wood
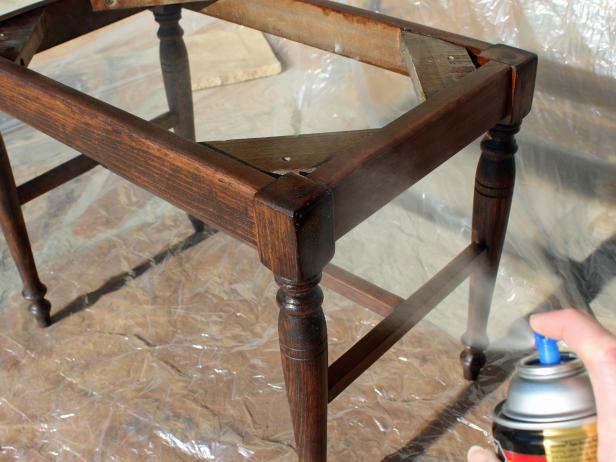
Use a disposible brush to apply stain to the bare wood, being sure to brush it in the direction of the wood grain (Image 1). Allow the stain to fully dry, preferably overnight. Protect work surface, then coat all stained areas with spray polyurethane, being careful to hold the can 10-12 inches from the wood's surface and keep the can moving as you spray to prevent drips (Image 2).

H. Camille Smith
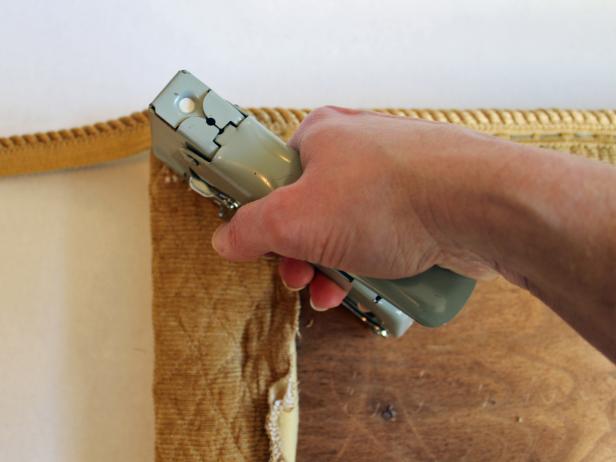
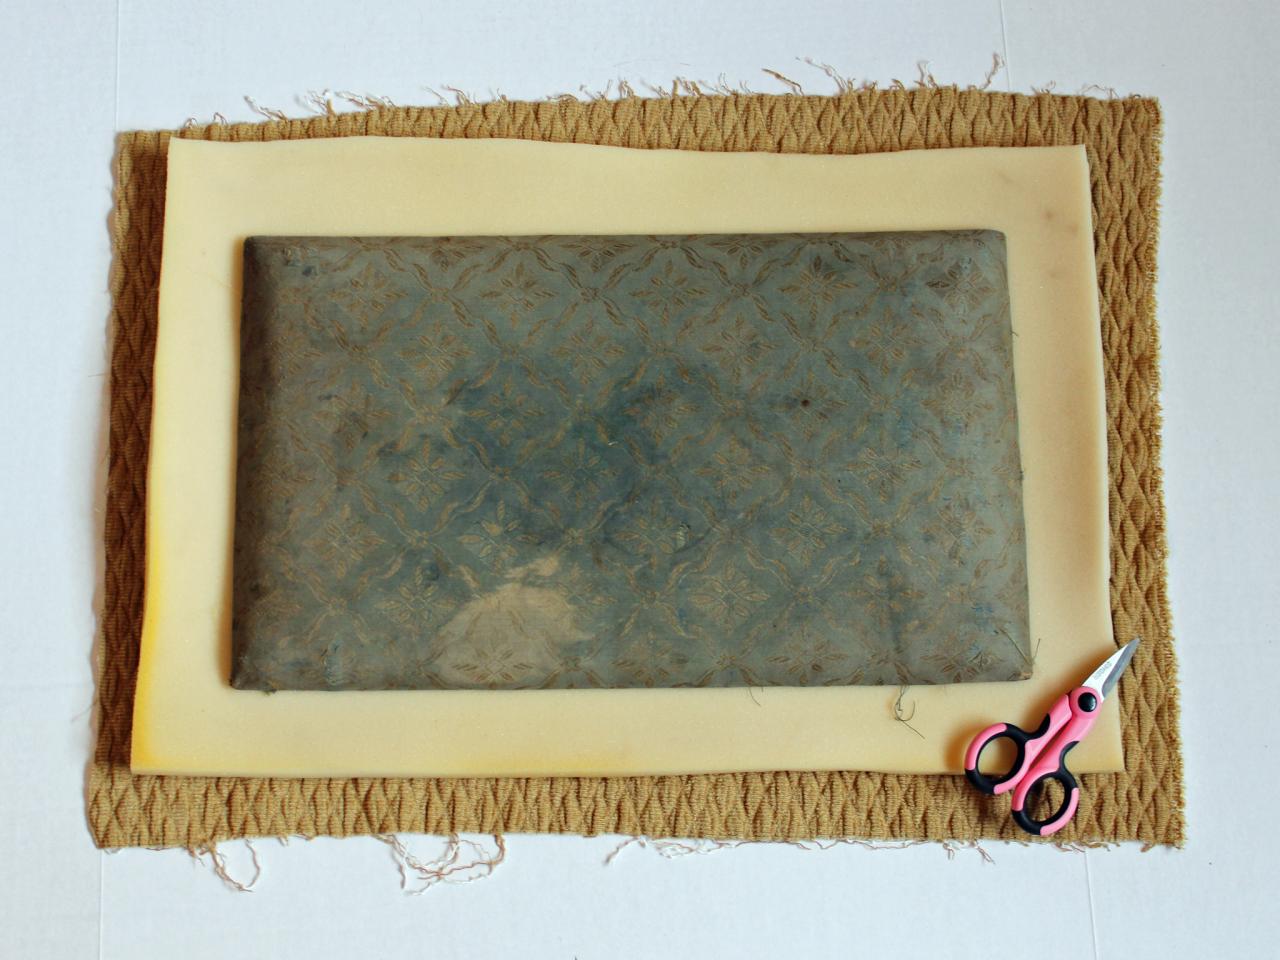
Cut Fabric and Foam for Upholstered Top
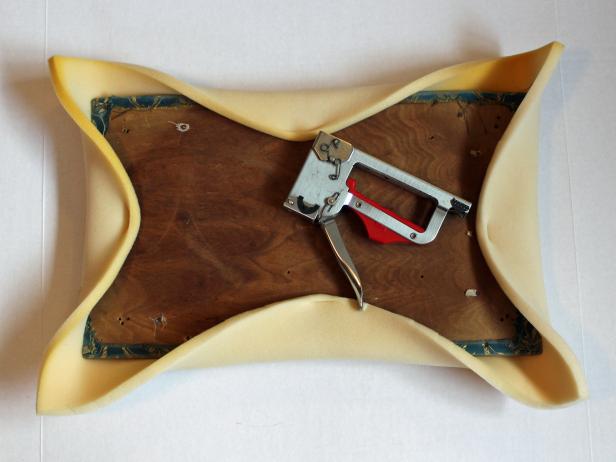
Using existing upholstered seat as a template, cut a piece of foam that's approximately 1" wider on all sides. Next, cut a piece of upholstery fabric that's approximately 1/2" wider than the foam.

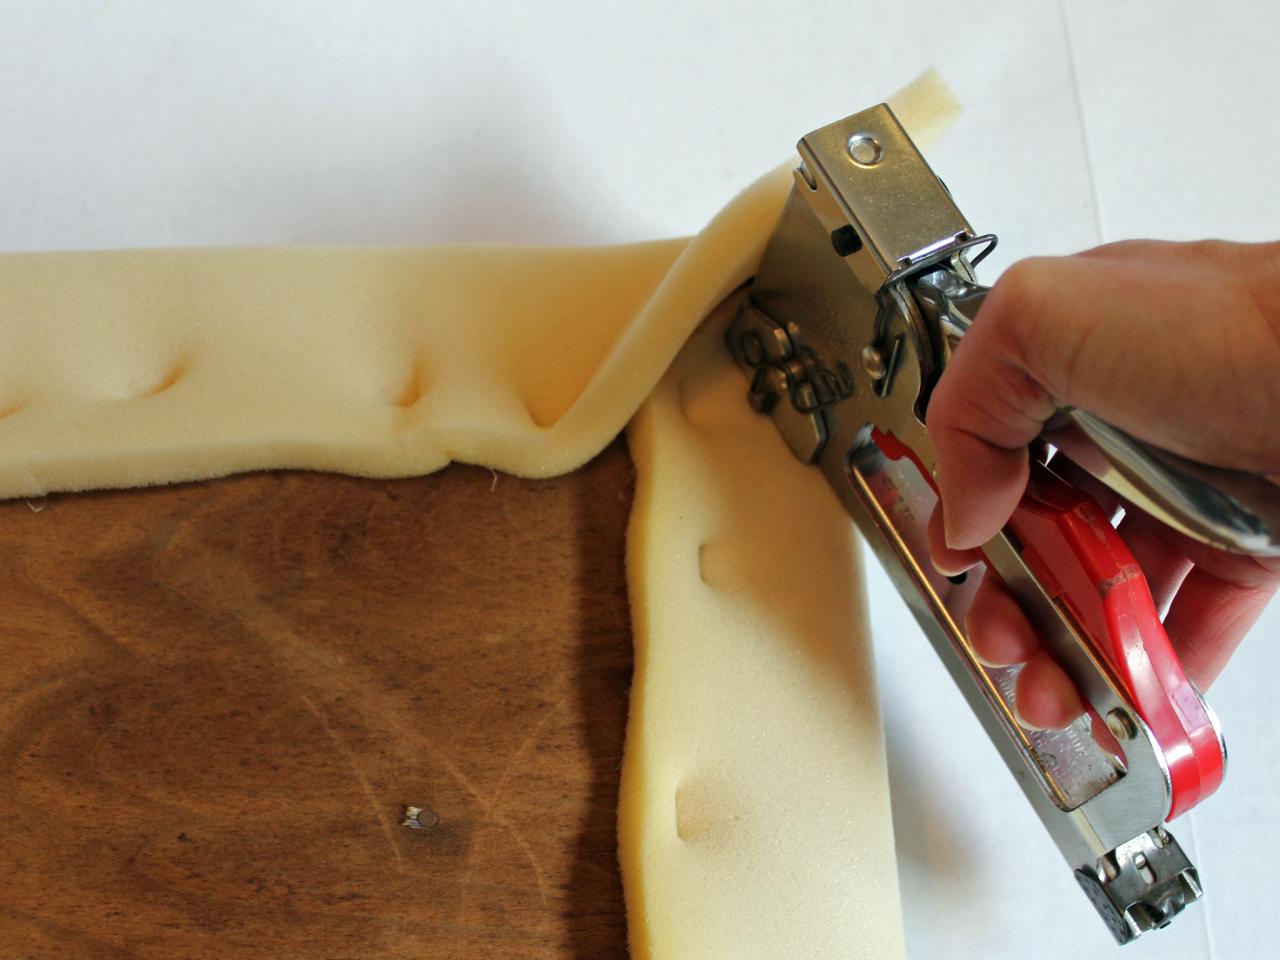
Attach Foam
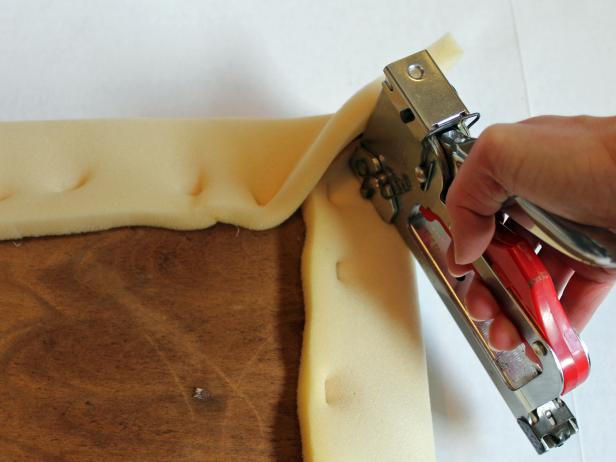
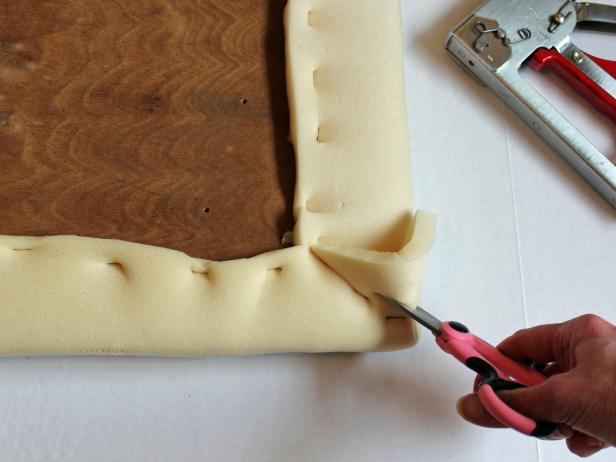
Flip seat over and center on foam sheet. Starting on one long side, pull foam taut (but not so tight that foam could tear) and secure with a staple in the center. Move to the opposite long side and add another staple in the center, then repeat the process on each of the short sides (Image 1). Working out from each center, add a staple about every inch or so until you get to each of the corners, then cut one edge of the foam corner into a 45-degree angle and staple down (Image 2). Wrap remaining corner over the area you just secured then staple it down and cut off excess foam (Image 3).
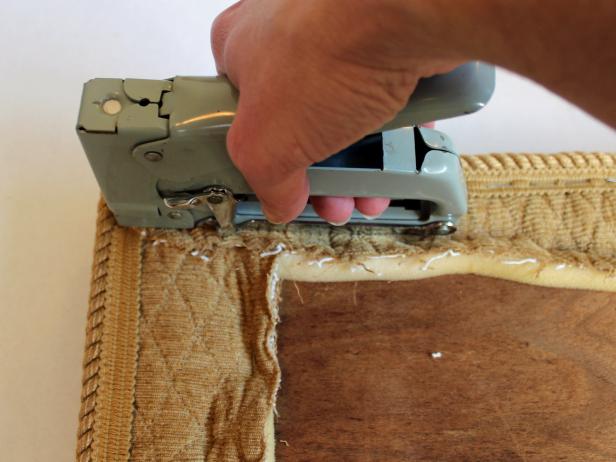
Add Fabric
Place upholstery fabric upside-down on work surface and top with foam-covered seat. Following the same basic steps used when attaching the foam: Pull fabric somewhat taut then secure the fabric to the seat with one staple in the center of each long side (Image 1). Then secure the short sides with a staple in the center of each before continuing the staples on all sides. Secure the corners by stapling along the fabric at a 45-degree angle (Image 2) before cutting off the excess (Image 3). Wrap the remaining fabric over the corner and staple (Image 4).

H. Camille Smith

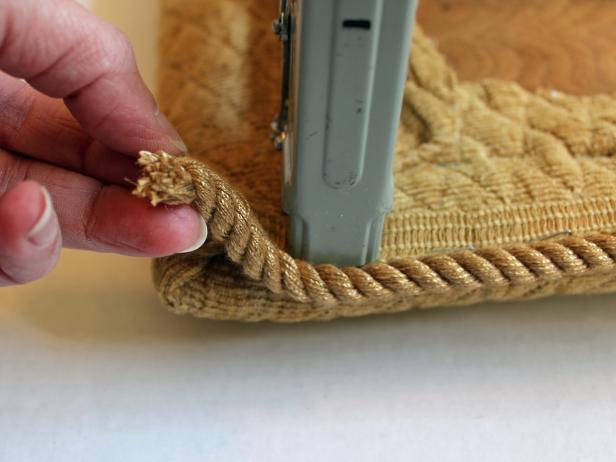
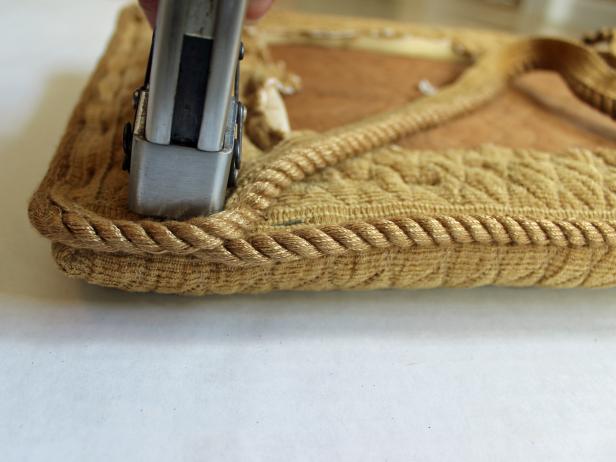
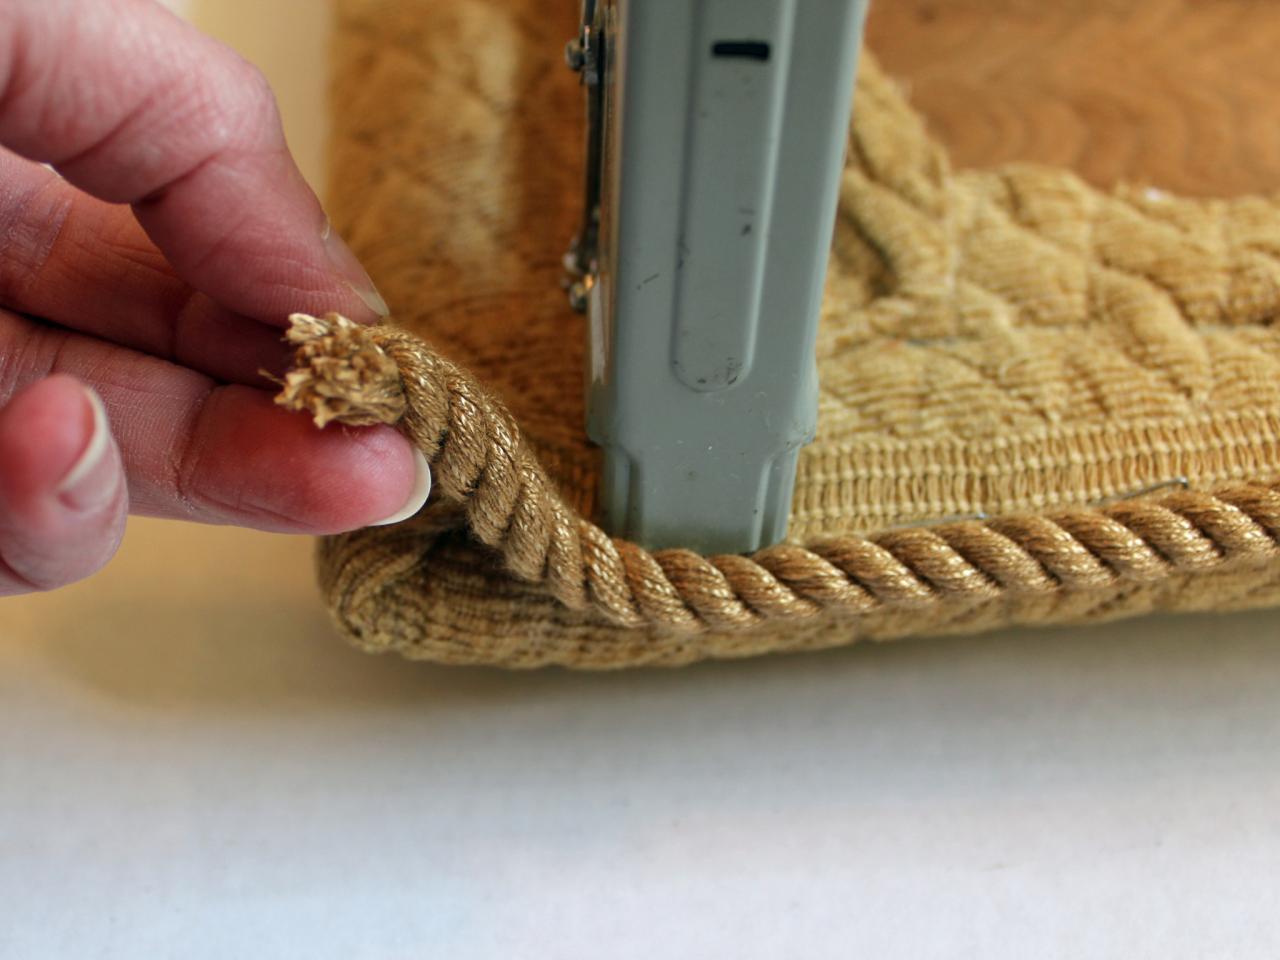
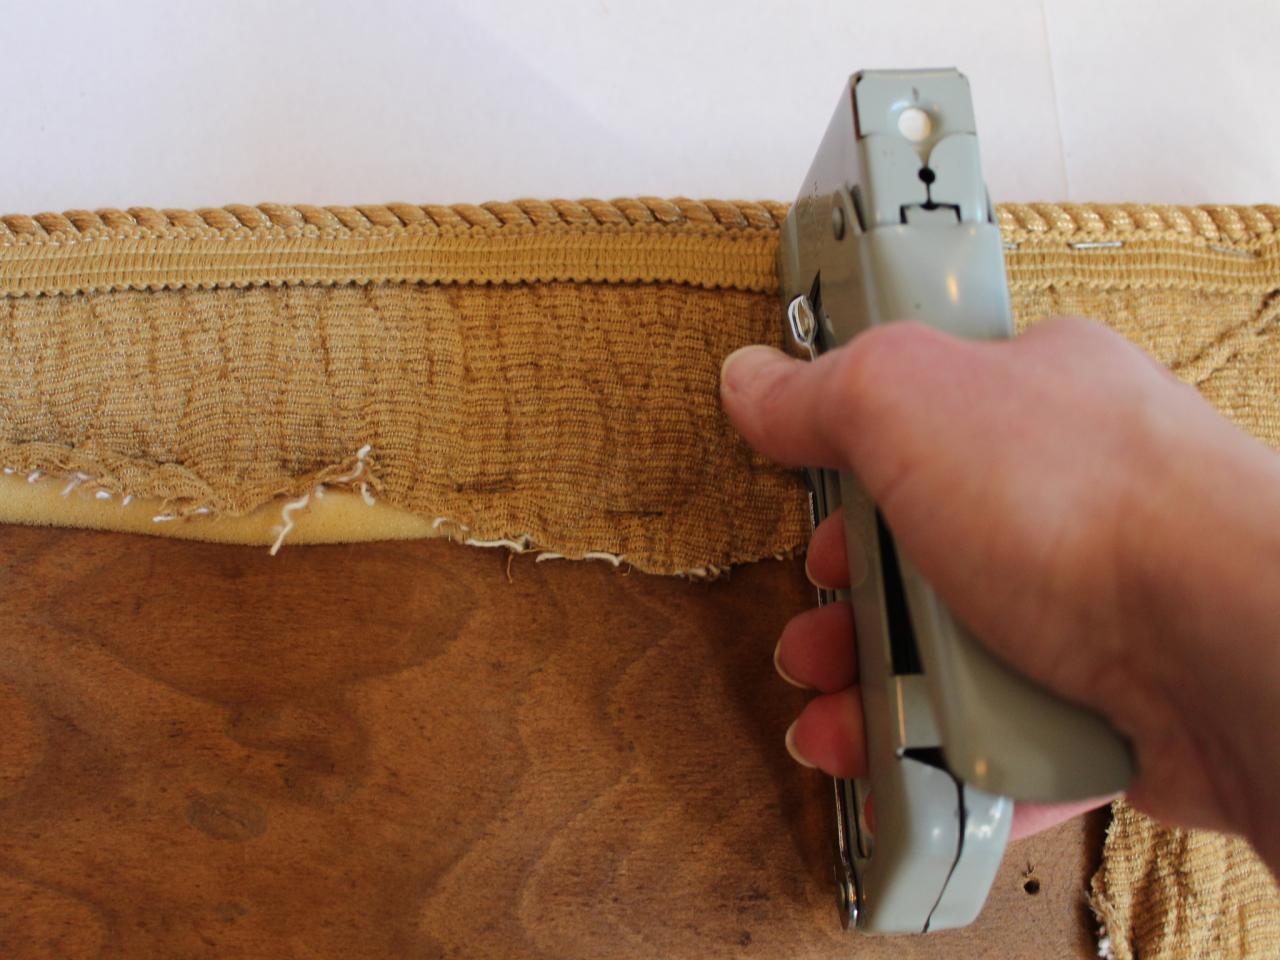
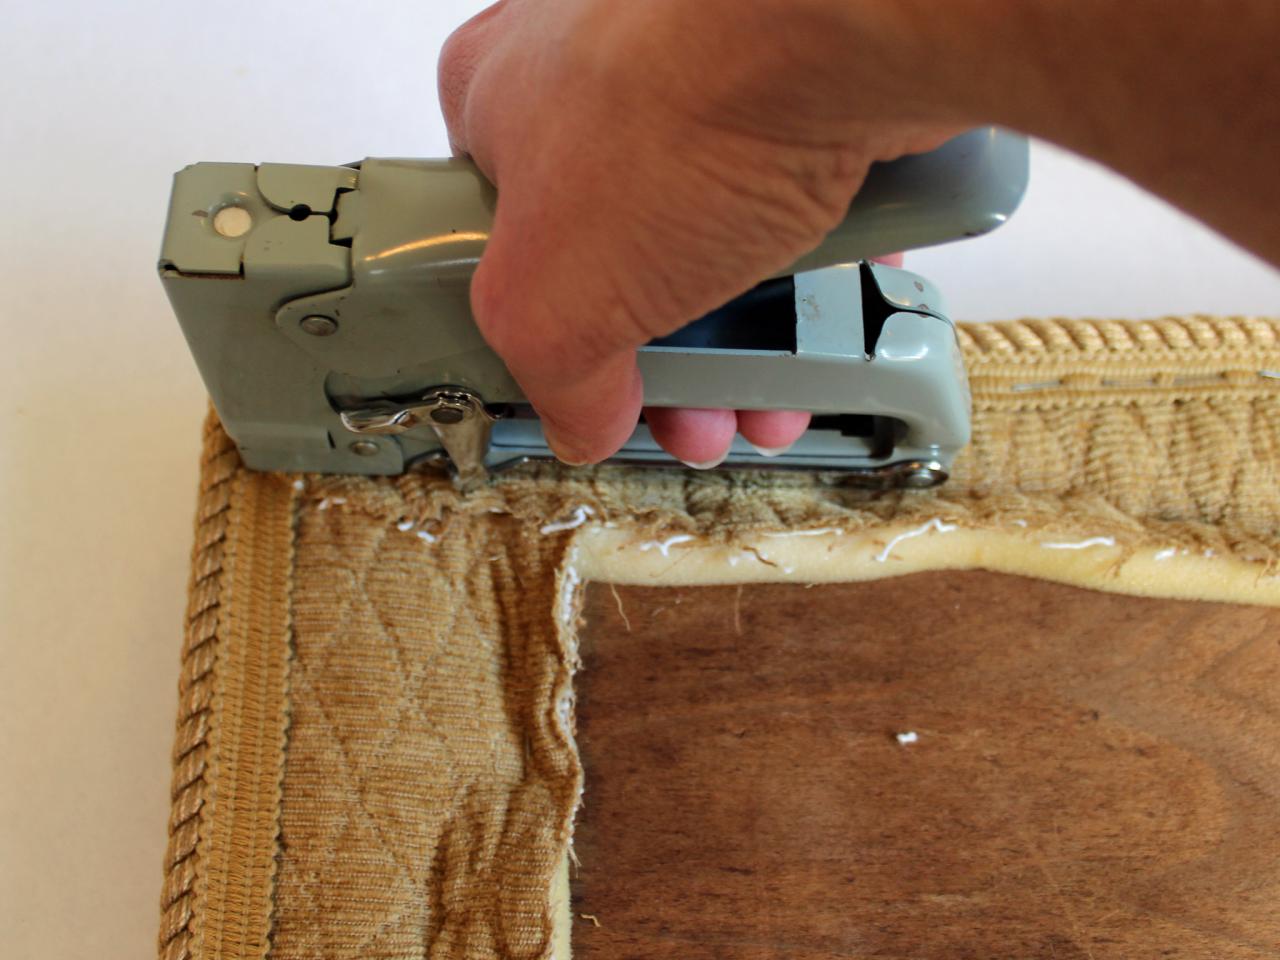
Add Trim
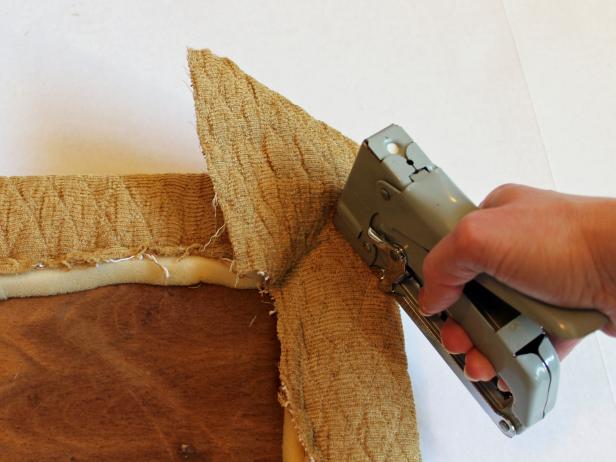
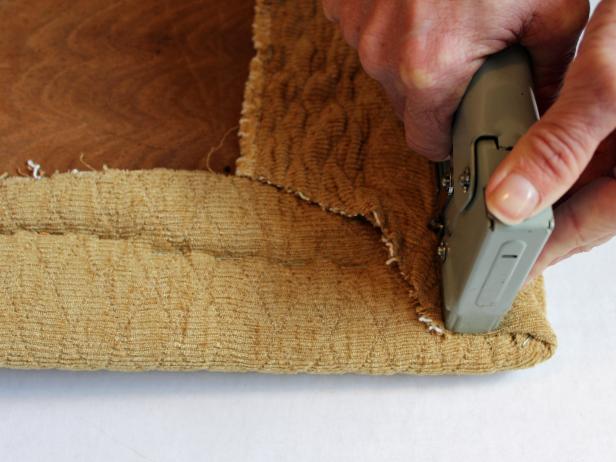
Line upholstery trim up with edge of seat. Secure with staples right along the edge, leaving an extra 1/2" to 1" of trim free that you'll tuck in later to create a clean corner (Image 1). Continue adding staples every inch or so till you reach a corner (Image 2). Add an angled staple in the corner, making sure that the trim stays flush with the edge of the seat (Image 3). Line the trim up along the next side and continue to secure with staples (Image 4). When you reach the last corner, slightly overlap your beginning edge then secure with a staple and cut off the excess trim (Image 5).

H. Camille Smith
Reattach Top
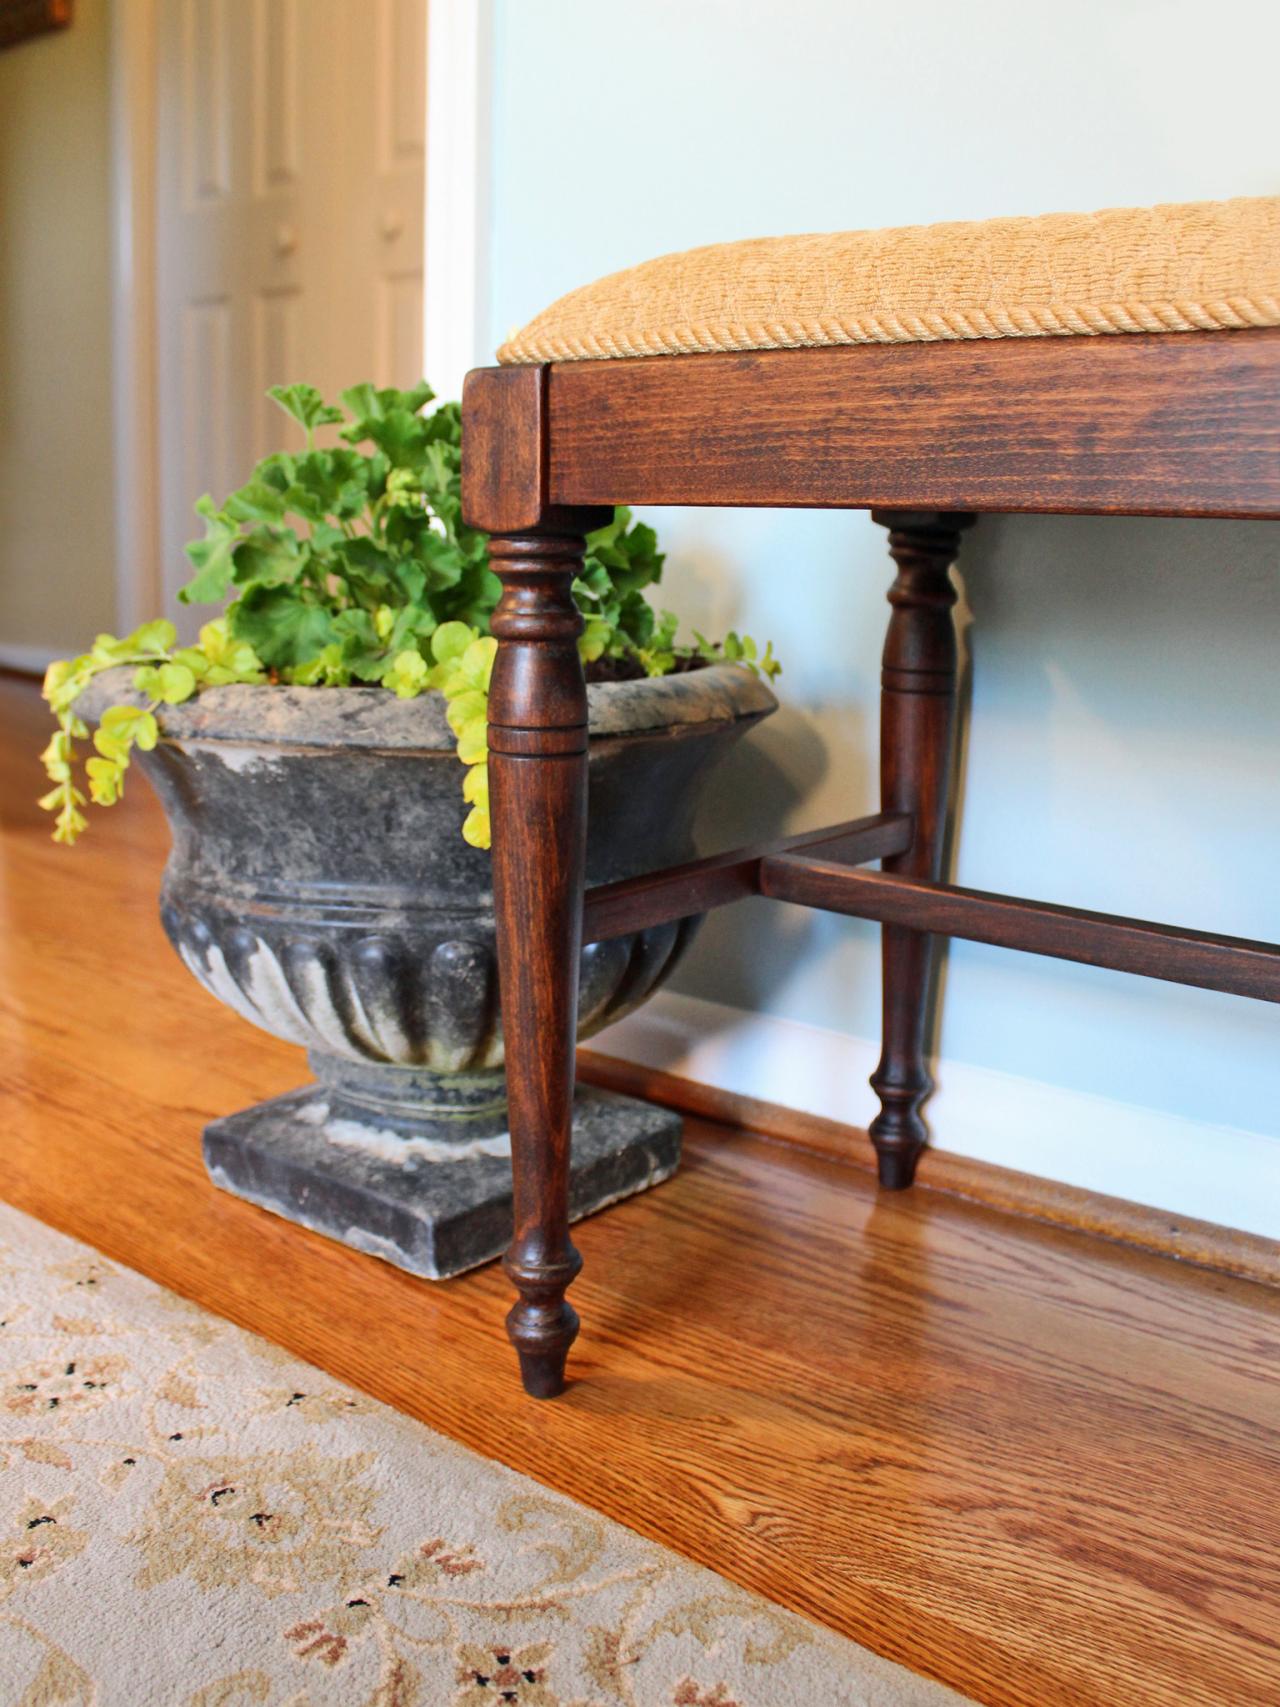
Place upholstered seat on bench legs and carefully check its position to ensure the seat has the same reveal, or overhang, on all sides (Image 1). Holding the seat in place with one hand, flip the bench over, then reinstall the same screws you removed in the first step (Image 2). Tips: To protect hardwood floors, add a felt pad to the bottom of each leg and to keep the upholstery like new, spray it with fabric protector (Images 3 and 4).

H. Camille Smith
H. Camille Smith
H. Camille Smith
Refinished and Reupholstered Bench
Photo By: H. Camille Smith
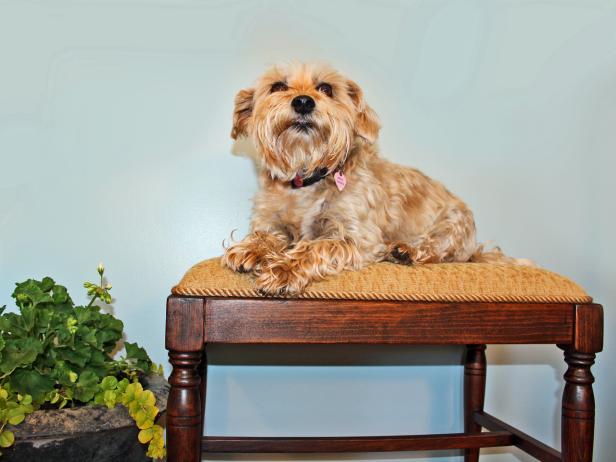
Dog on Bench
Photo By: H. Camille Smith
Dog on Bench
Photo By: H. Camille Smith


