


How to Build a DIY Compost Tumbler
Make a fast-burning home compost bin for under $50. One 50-gallon drum will turn your family’s food scraps into rich, usable soil before the growing season is over. Best of all, the wood base with attached caster wheels makes turning your compost in this DIY compost tumbler a cinch — no shoveling required.

Jalynn Baker
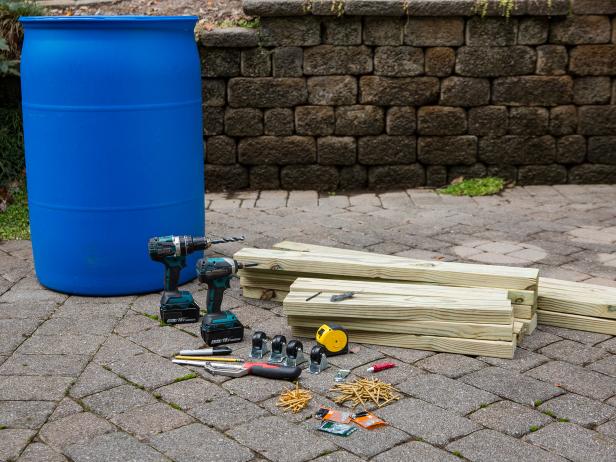
Materials Needed
- food-grade 50-gallon drum
- (4) 3’ pressure-treated 2x4s
- (4) 4’ pressure-treated 2x4s
- (6) 2’ pressure-treated 2x4s
- 2” exterior-grade decking screws
- 3” exterior-grade decking screws
- (4) 1.5” stationary caster wheels
- circular saw
- drill
- 1/2” drill bit
- driver
- utility knife
- hacksaw
- permanent marker
- pencil
- tape measure
- latch
- threadlock
- zinc bolts, washers and nuts
- short segment of wire
Tip: Food-grade 50-gallon drums can often be found for $10 or less from local companies that distribute and refurbish containers.
Why Compost?
Why not just throw your food and yard waste into the garbage? When organic matter gets thrown in the trash, it makes its way to the landfill, where it rots. Rotting and composting are two totally different processes. Rot creates anaerobic digestion and gives off high amounts of methane (a greenhouse gas). By composting, you’re reducing the amount of rottable waste that goes into the landfill while producing a fertilizer for your lawn or garden that isn’t made using petroleum products. It’s a win-win for everyone.

Jalynn Baker
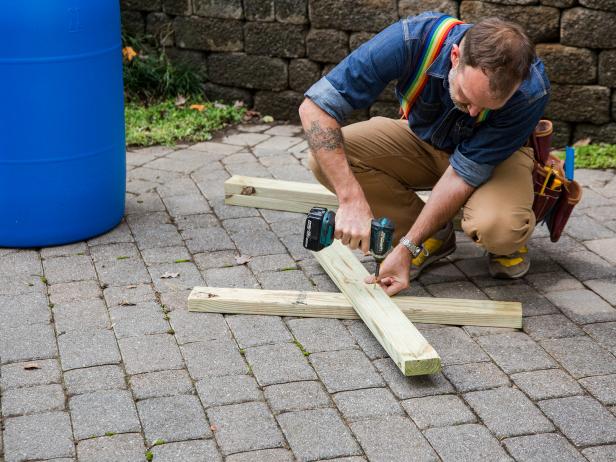
Cut the Lumber
You’ll want to use pressure-treated lumber because your DIY compost tumbler will live outside in the elements. In total, you’ll need (5) 8’ pressure-treated 2x4s, cut to the following lengths: (4) 4’ boards, (6) 2’ boards and (4) 3’ boards. Make the cuts using a circular saw or have your local hardware store cut the boards for you.
Jalynn Baker
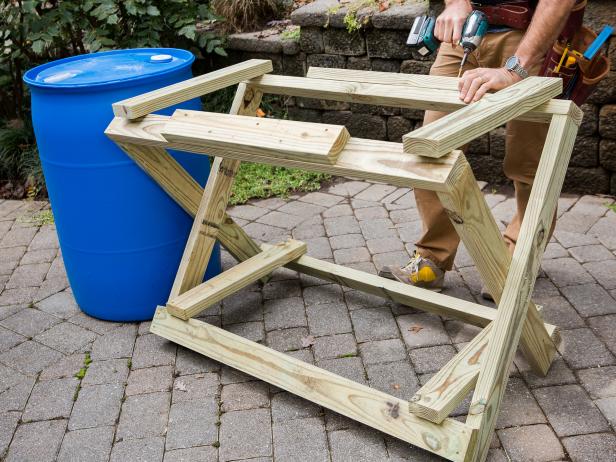
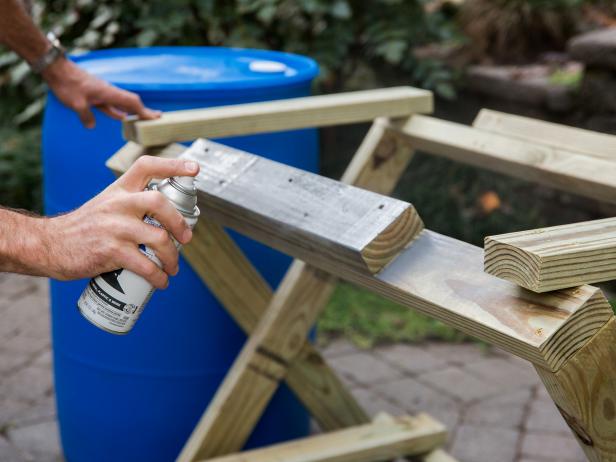
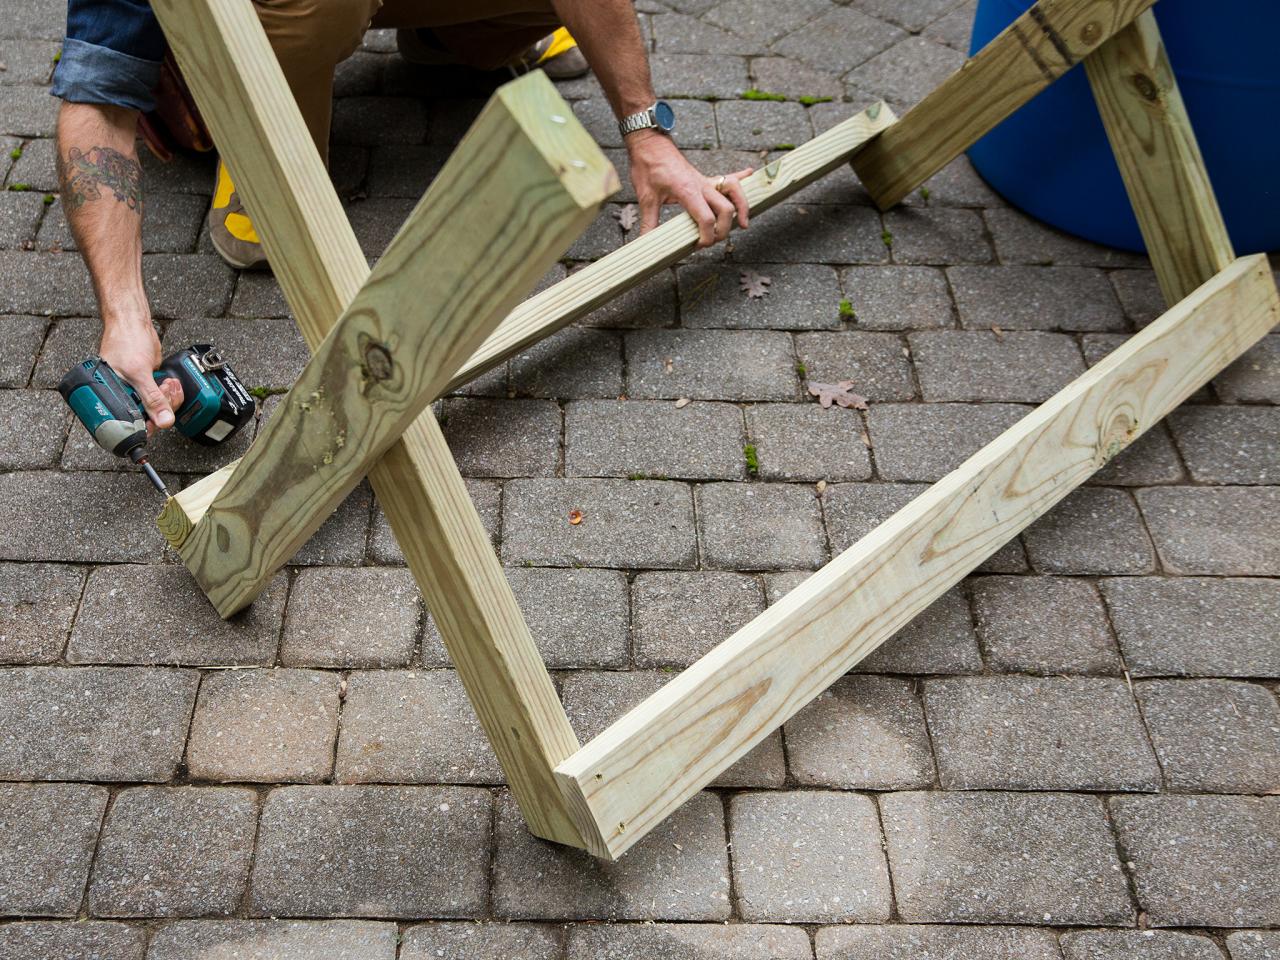
Assemble the Base
Make an X shape that’s 2’ wide at the top and bottom using two of the 3’ boards. Attach the boards in the center of the X using 2” exterior-grade screws (Image 1). Repeat with the other two 3’ boards, making a second, identical X. Attach the 4’ boards to your Xs at the top and bottom so they stand parallel 4’ apart (Image 2). Use four of the 2’ boards as braces for the top and bottom of the base (Image 3). Finally, screw a 2’ board in the middle of each 4’ cross piece (Image 4). If you’d like to spray paint your base, now’s the time to do so (Image 5).
Jalynn Baker

Jalynn Baker

Jalynn Baker
Jalynn Baker
Jalynn Baker
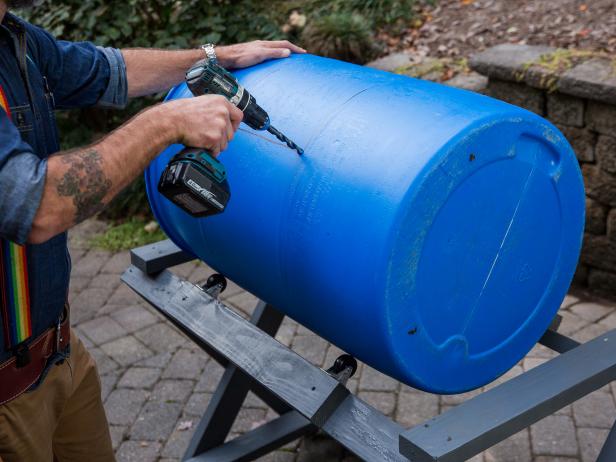
Attach the Casters
You should have a 4’ by 2’ rectangle on the top of your base now. Attach two casters to one of the 4' sides using screws, with the wheels parallel to the 2' sides. Repeat with the remaining two casters on the other 4' side. The casters will help your compost tumbler spin.

Jalynn Baker
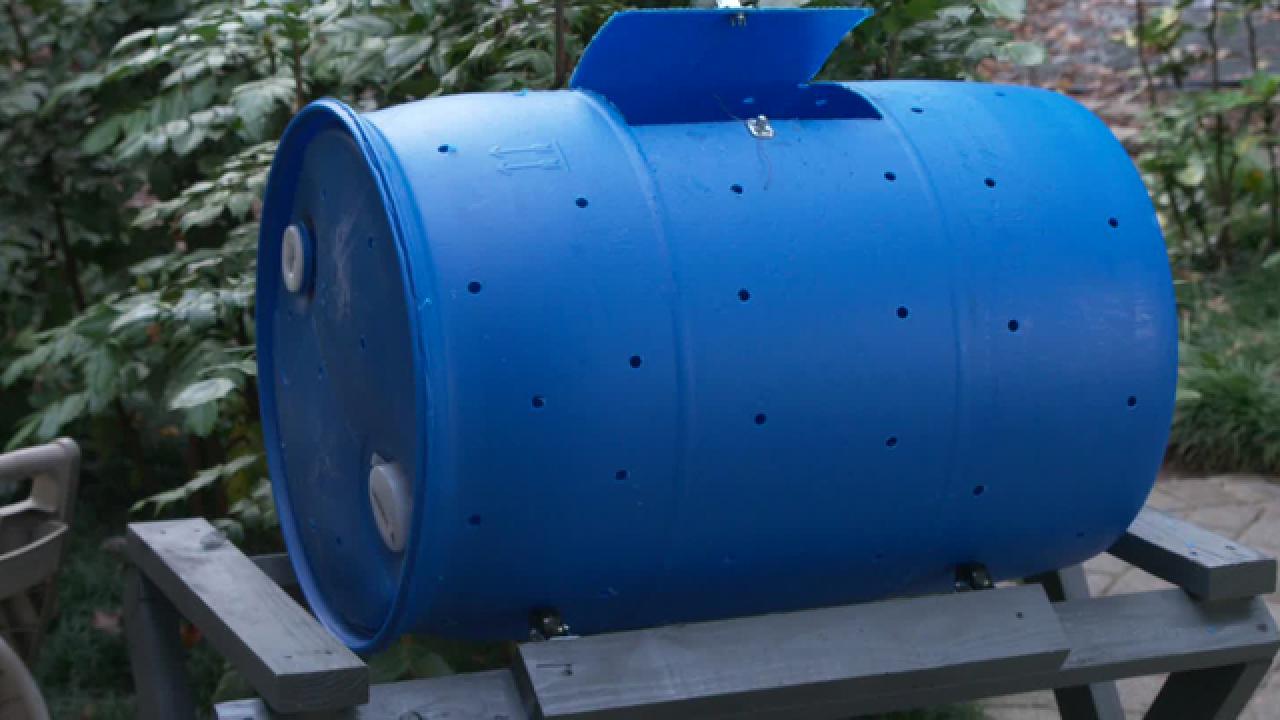
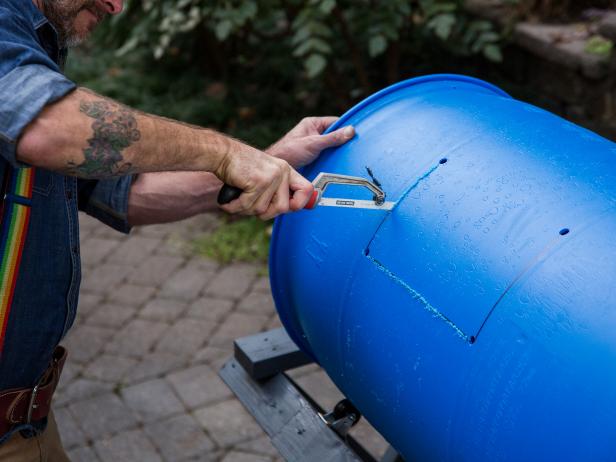
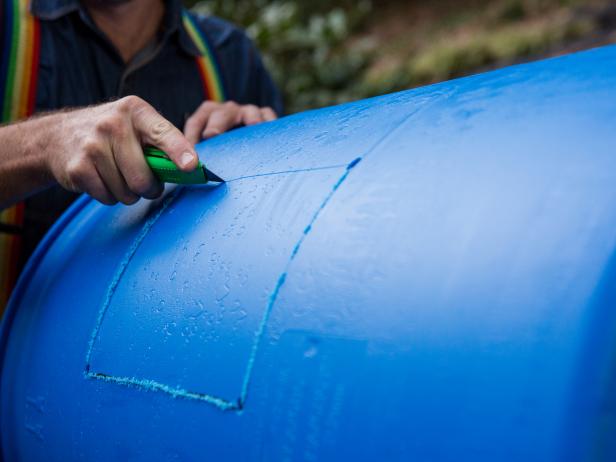
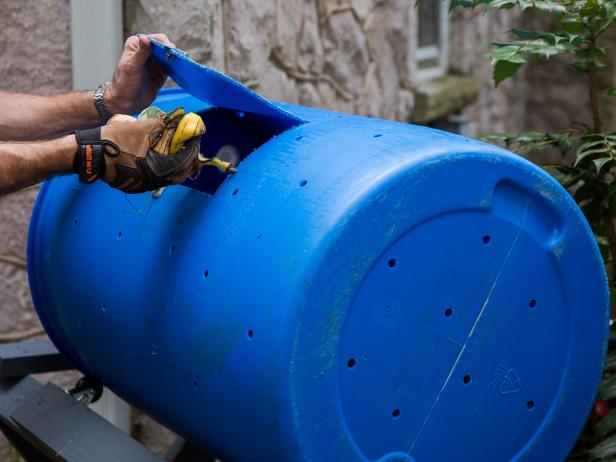
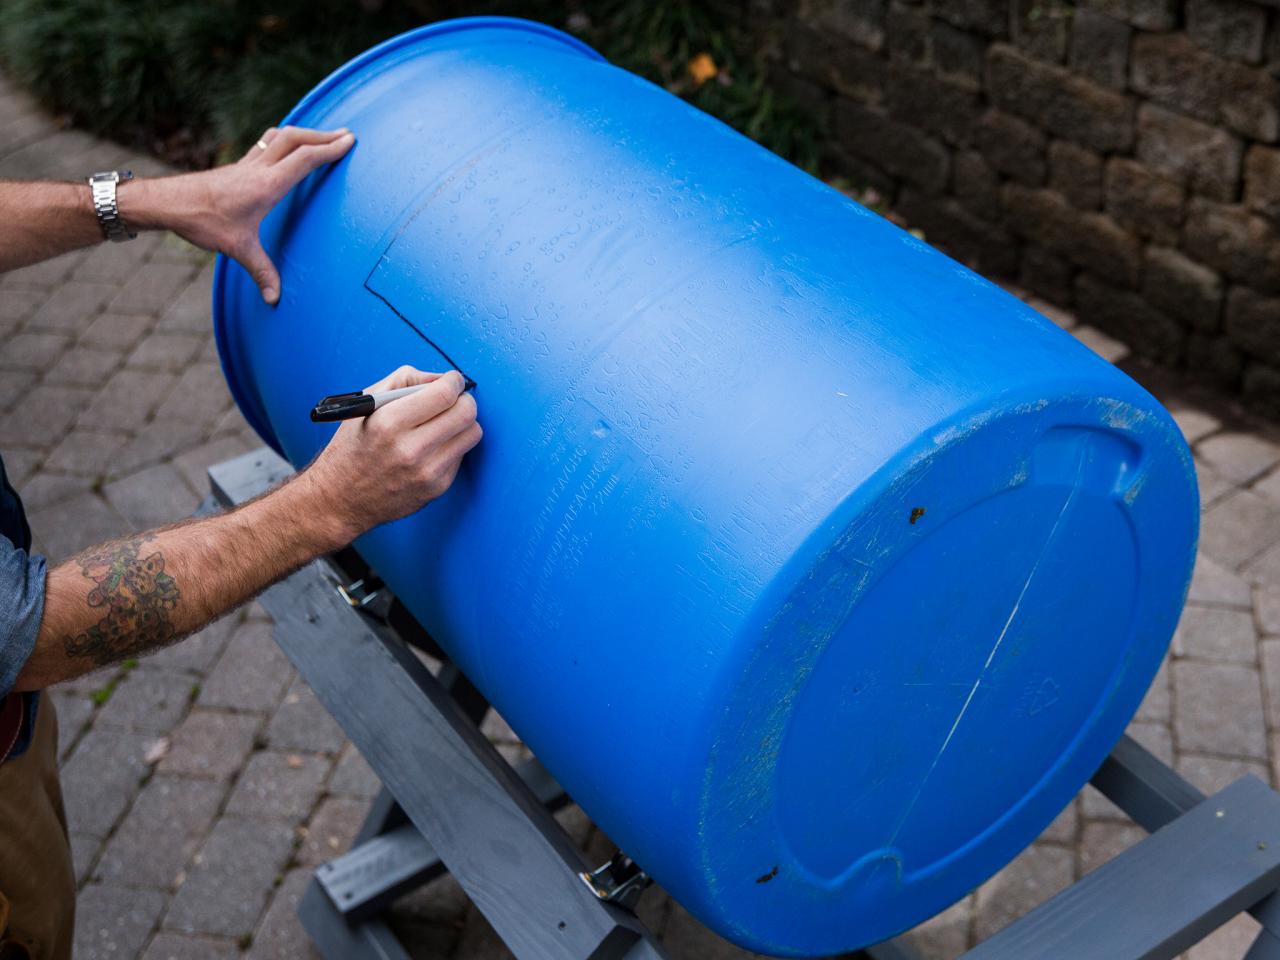
Cut the Hatch
Turn the drum on its side and use a permanent marker to draw a U shape that’s about 10” by 14” (Image 1). Use a drill to make a hole in each corner of the U (Image 2). Cut the bottom three sides of the U using a hacksaw (Image 3), then use a utility knife to score along the top side of the U (Image 4). This will be your hinge. You may want to use a drill to make some small holes along the hinge line to help it open.

Jalynn Baker
Jalynn Baker
Jalynn Baker
Jalynn Baker
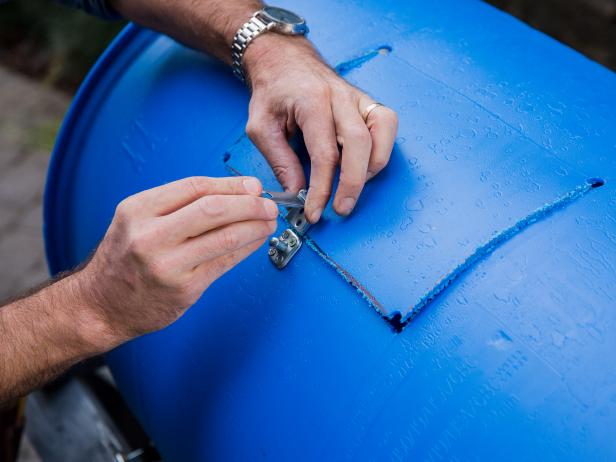
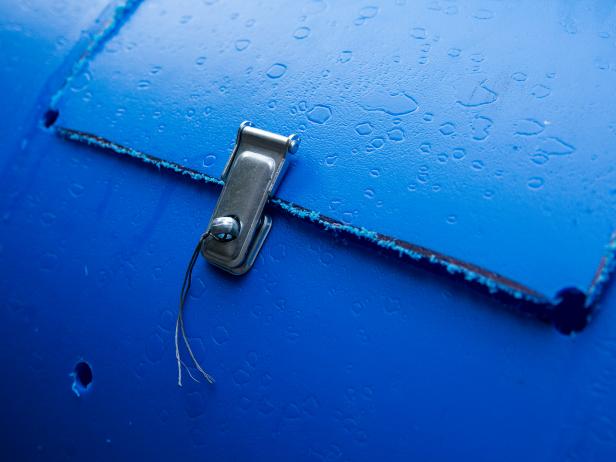
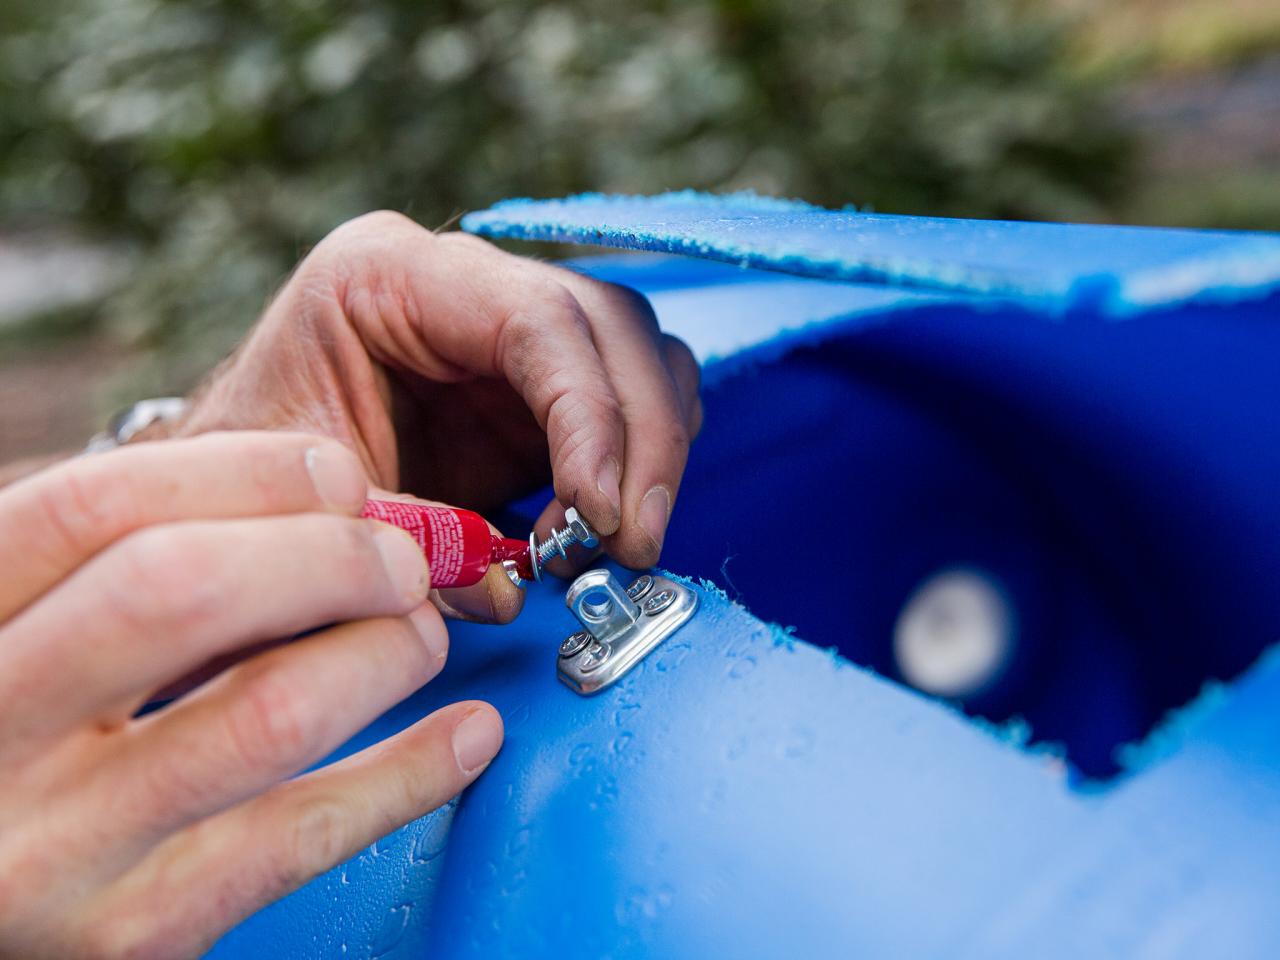
Attach the Hardware
Be sure to use hardware that’s not going to rust; we’re using a galvanized latch. Hold the latch in place and mark the location for pilot holes using a marker. Drill the holes for the bolts and attach each piece of hardware using washers on the inside of the barrel (Image 1). Before you tighten each nut fully, apply some threadlock to each bolt to make sure the hardware stays put over time (Image 2). Use a bit of wire to keep your latch closed when not in use (Image 3).
Jalynn Baker

Jalynn Baker
Jalynn Baker
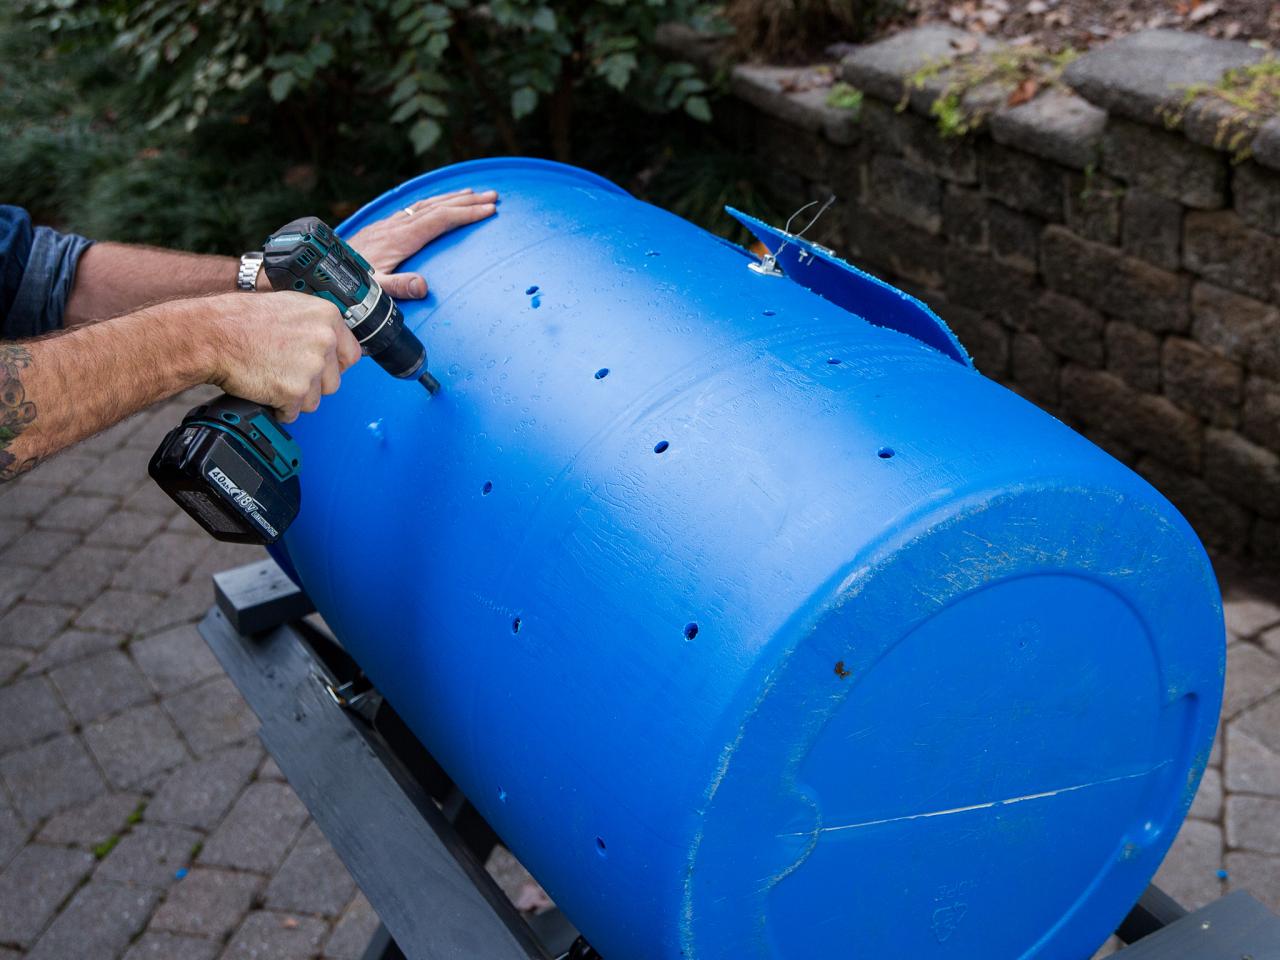
Drill Air Holes
Using a 1/2” drill bit, create air holes in your compost drum about every 10” or so. Composting requires both air and moisture in order to function properly. Make sure to remove the bits of plastic left over after drilling.

Jalynn Baker
Composting 101
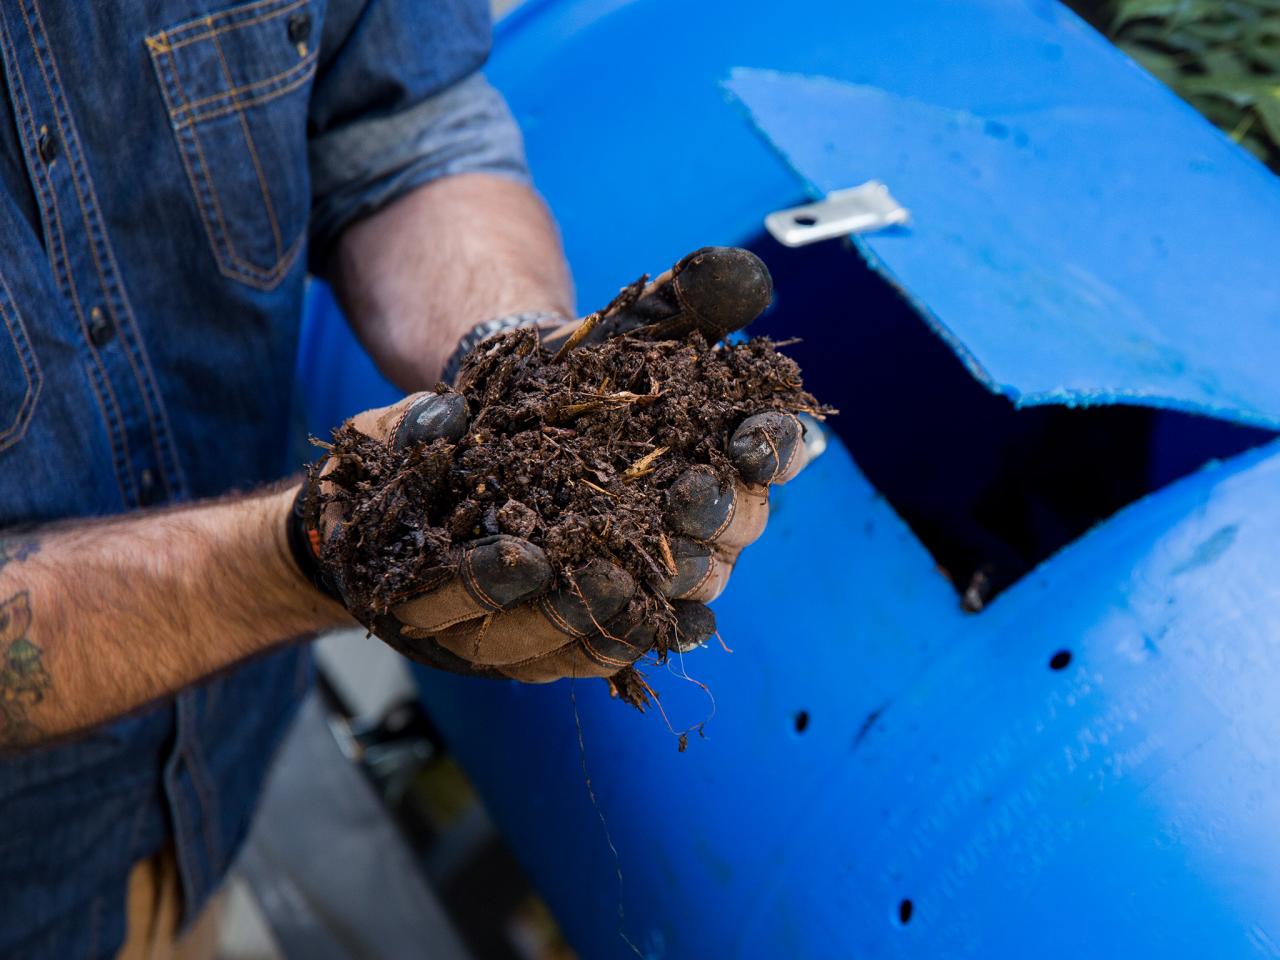
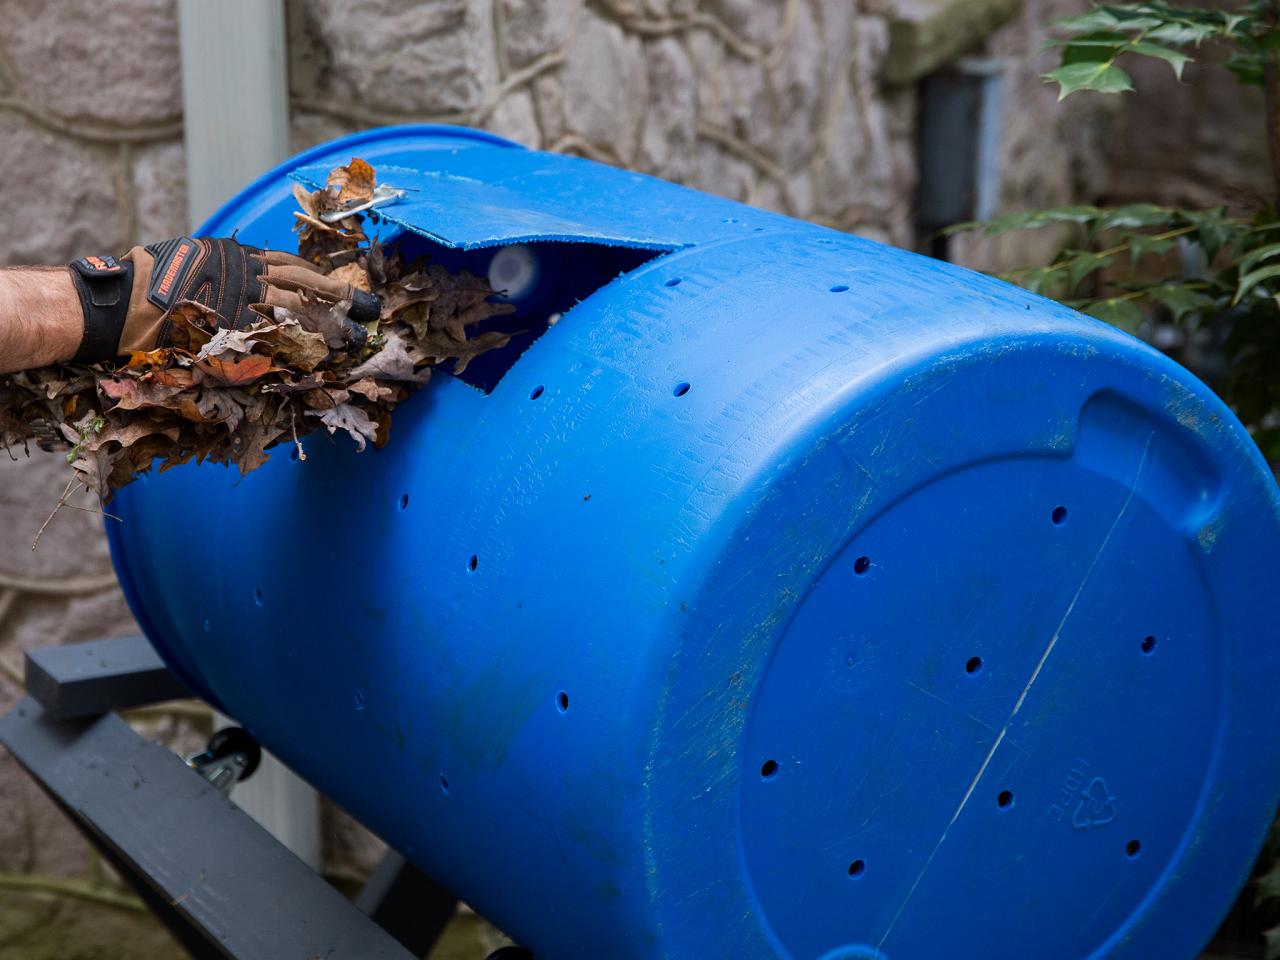
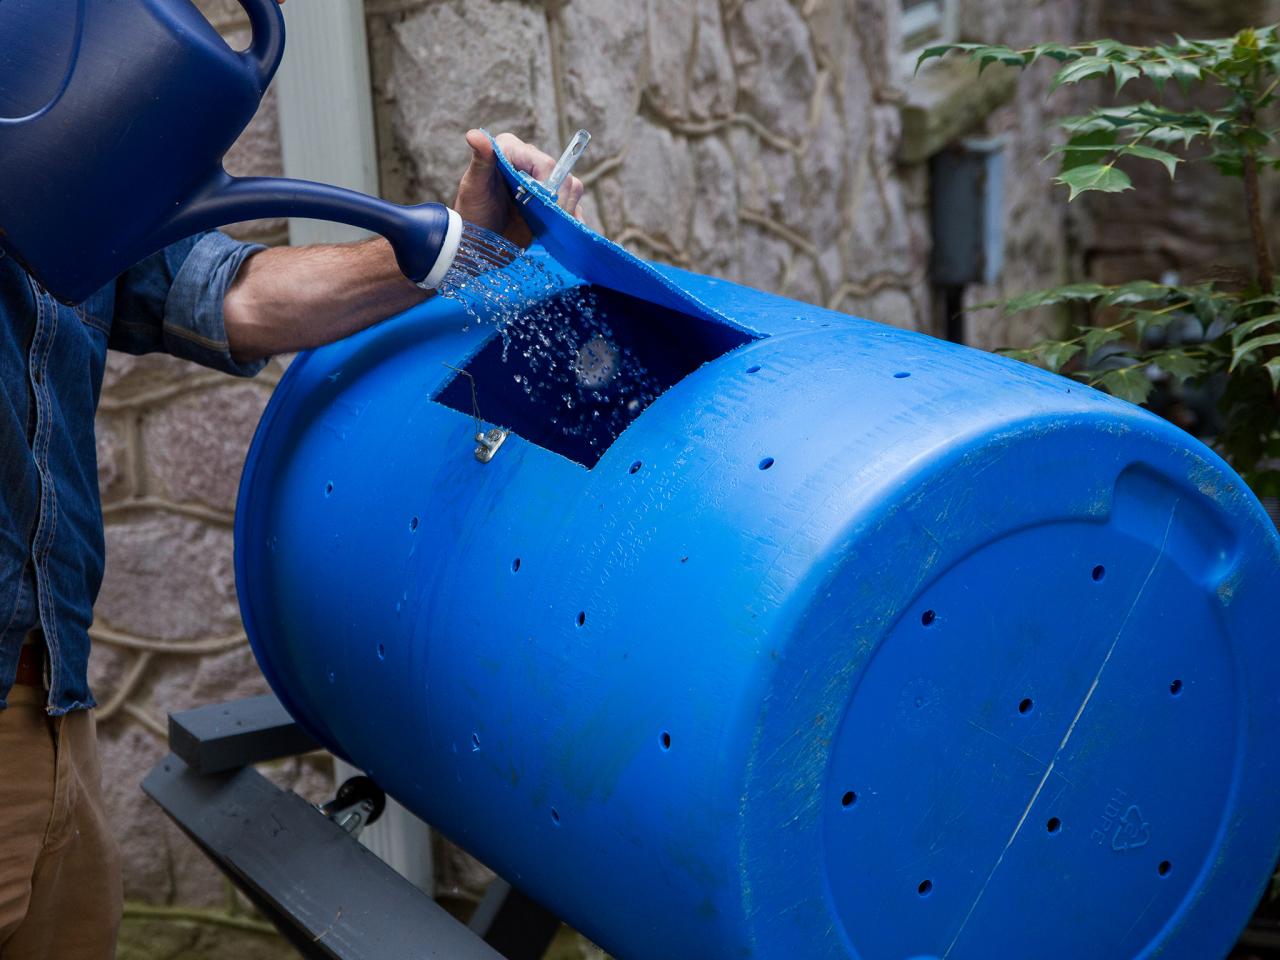
Composting is the aerobic digestion of organic materials using microorganisms. In other words: tiny critters eating and breaking down food and lawn waste. In order for the microorganisms to do their job properly, they need a certain form of food. Most lawn, garden and kitchen waste is composed of two elements: carbon and nitrogen. Every bit of waste has a different carbon-to-nitrogen ratio. Things that are high in carbon are known as “browns”: bark, paper, sawdust, leaves and straw. Things that are high in nitrogen are known as “greens”: grass clippings, fruits and veggies, coffee grounds, manure and eggshells. You want to try to mix three parts browns to one part greens for the best compost. Every time you add your kitchen scraps, throw in some yard waste to get the right mix (Images 1 and 2). Making sure you have the proper ratio of carbon to nitrogen in your compost pile is the best way to ensure success. The only other ingredients are air and water. You add air every time you turn your compost pile. The tiny critters want your compost pile to be about 40 to 60 percent water (damp but not saturated). A handful of compost should yield one or two drops of water when tightly squeezed. Water your compost pile about once a week (Image 3).
Jalynn Baker

Jalynn Baker

Jalynn Baker
Troubleshooting
If your scraps are just sitting there and not breaking down, you’re probably low on nitrogen. Add more greens to your mix and make sure your compost pile is staying moist. If your compost pile has started to stink and is filled with fly larvae or maggots, it’s likely low on carbon. Add more browns and keep the pile turned often. Getting the right carbon-to-nitrogen ratio is essential to successful composting.
When to Use
When your compost pile turns black and 80 percent of it looks like soil, you’re ready to bring it to the garden. Use compost like you would a fertilizer. It’s great to add in when you’re planting vegetable starts and rooted plants. You can also use it as a topdress on established plants to provide a boost of nutrients.

Jalynn Baker


