


How to Refinish Acacia Wood Outdoor Furniture
A more budget-friendly option to pricey teak, acacia wood outdoor furniture is easy to find — and easy to love — thanks to the wood's rich honey-hued finish when new. But over time, acacia wood weathers to a dull, splotchy look with a rough texture. Give your old, weathered outdoor furniture a smooth, like-new finish with our acacia wood refinishing tips.


Photo by: Sarah Busby; Styling by H. Camille Smith
Sarah Busby; Styling by H. Camille Smith
Materials Needed
- weathered acacia wood outdoor furniture
- teak oil
- chip brush (or other disposable, bristled brush)
- coarse-, medium- and fine grit sandpaper
- tackcloth, damp rag or vacuum cleaner
- drop cloth to protect work surface
- clean, lint-free cloth
What Is Acacia Wood?
A native of Australia that's now cultivated in other countries, acacia is an extremely dense hardwood that boasts strong resistance to fungi and pests, making it one of the most popular materials for outdoor wood furniture. Similiar in appearance to pricey teak when new, acacia is a less expensive option that's often used to create teak-look outdoor furniture with a lower price tag. Thanks to teak's high natural oil content, it can withstand the elements without regular maintenance; however, to keep acacia wood looking good and prevent damage, outdoor acacia wood furniture requires regular reapplication of penetrating oil sealants to renew the finish and extend its durability.

Outdoor Furniture Buying Guide 11 Photos
From weather-resistance to cleaning and maintenance, there's a lot to consider when it comes to purchasing the best outdoor furniture. Learn more and select the right furniture for your great outdoors.
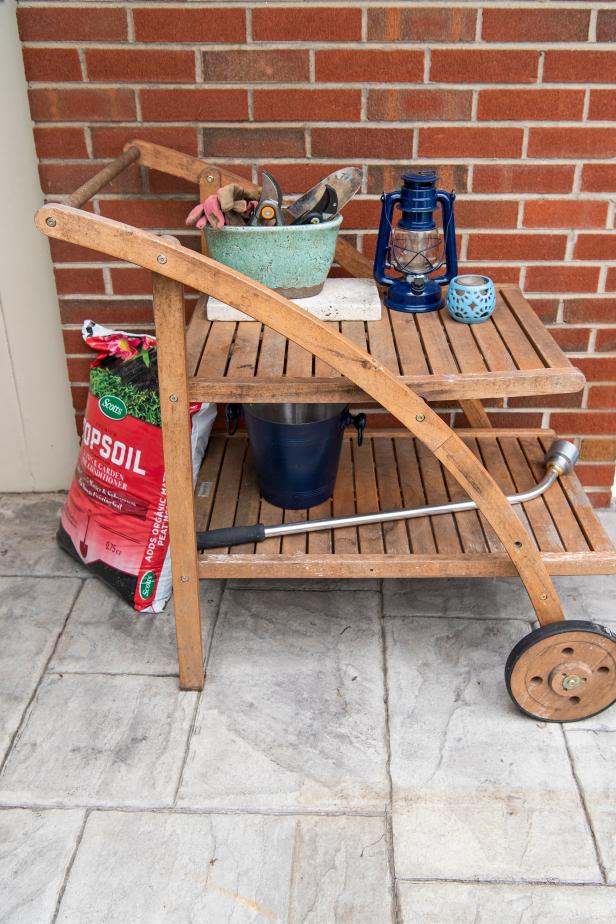
Before: Weathered and Worn
Just 3 years old, this outdoor bar cart is really showing its age with a dull overall color and rough areas where the original warm brown finish has faded to a mottled gray.
Sarah Busby
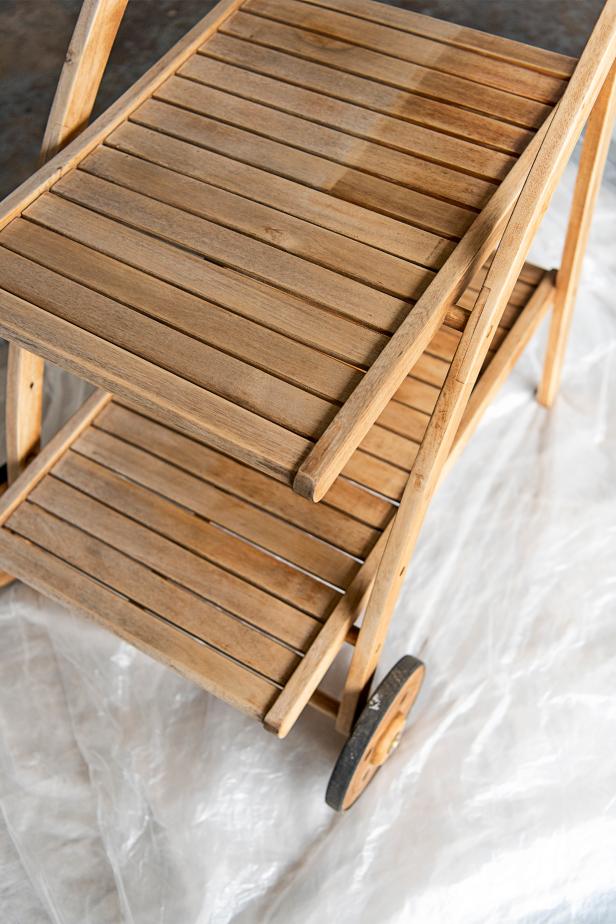
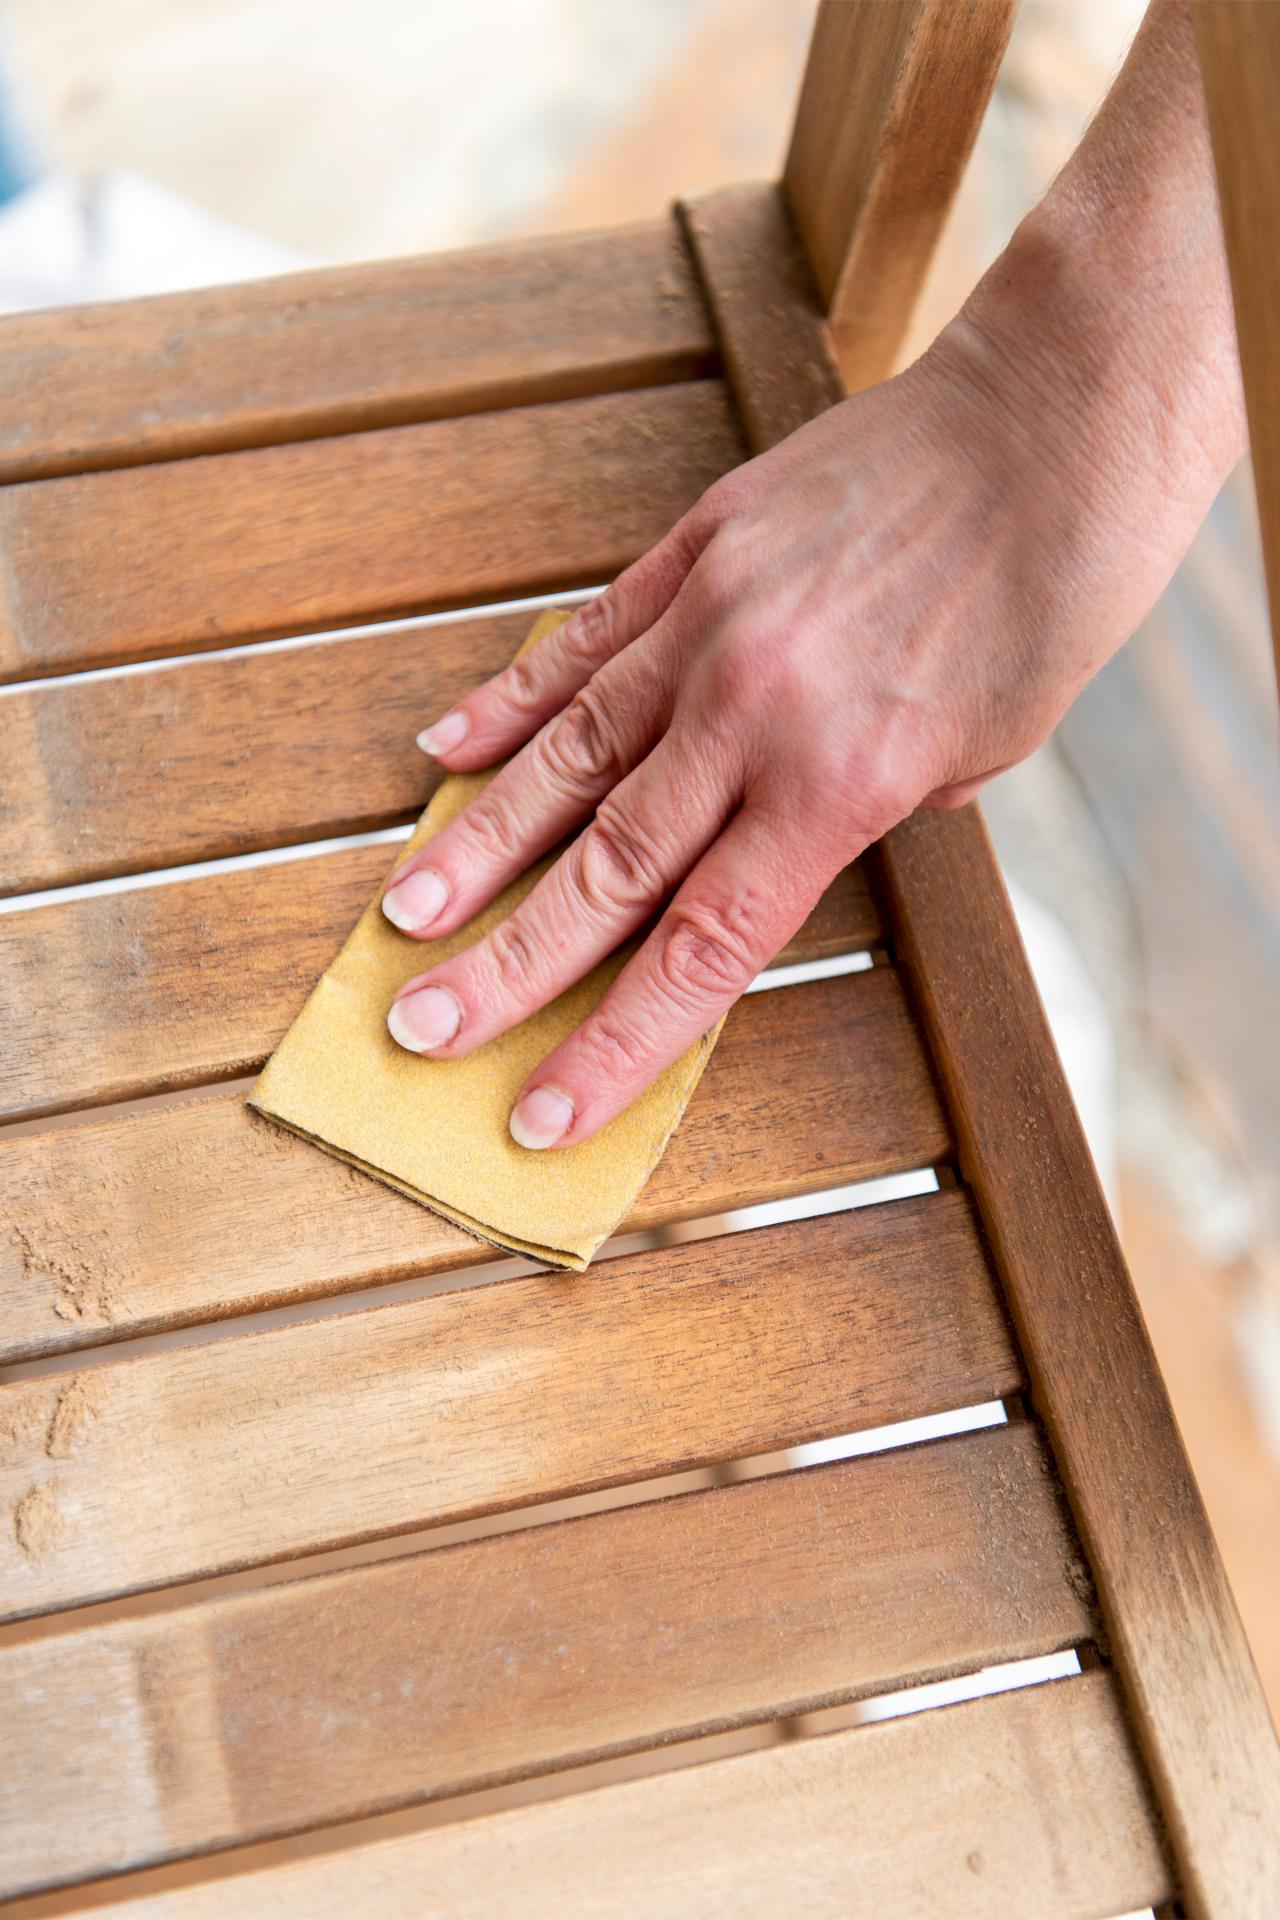
1. Thoroughly Sand All Areas
Before you can revive the wood, you need to first remove all surface dirt along with the wood's weathered surface using sandpaper. Start with coarse-grit, working your way down to medium-, then fine-grit. Tip: It's important to sand with the wood's grain so skip the orbital sander for this project and use sandpaper alone, a sanding block or even a belt sander if you're refinishing a particularly large piece. Note: Also, don't forget to sand all areas, including the piece's underside, handles, wheels, etc.

Sarah Busby
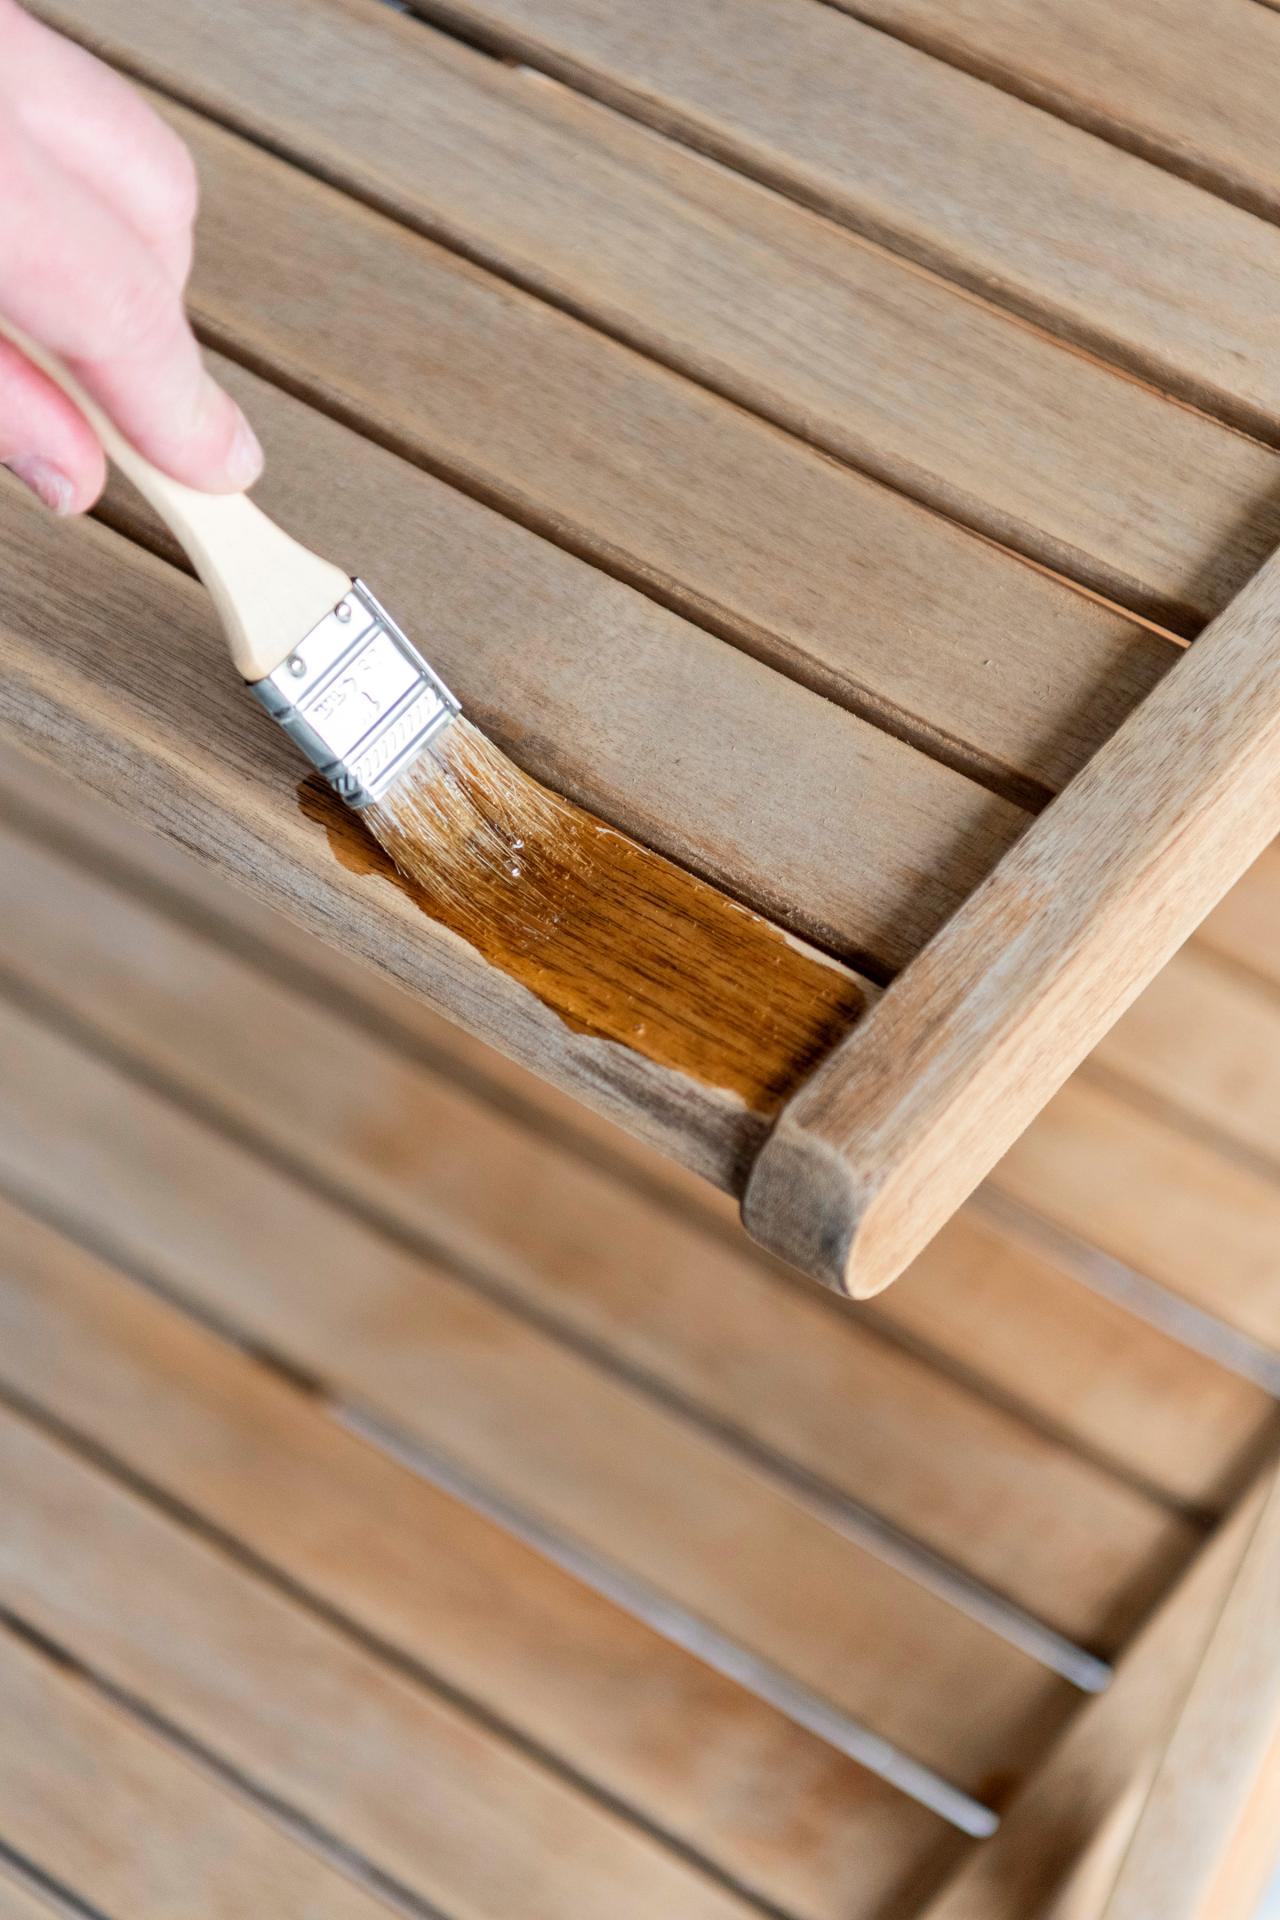
2. Clean, Then Apply Teak Oil
Use a vacuum, tack cloth or damp paper towel to clear your work area of all dust (Image 1). Following manufacturer's instructions, thoroughly stir teak oil. Dip a chip brush (or other disposable, bristled brush) into the teak oil, then brushing with the wood's grain, apply a generous coat to the exposed wood, being sure to also push the oil into any recessed areas, like between wood slats (Image 2). Tip: Really flood the wood with oil for this first coat. The oil will absorb into the wood, replacing the natural oils lost over time, so be heavy-handed in your application and allow the oil to really soak in.
Sarah Busby

Sarah Busby
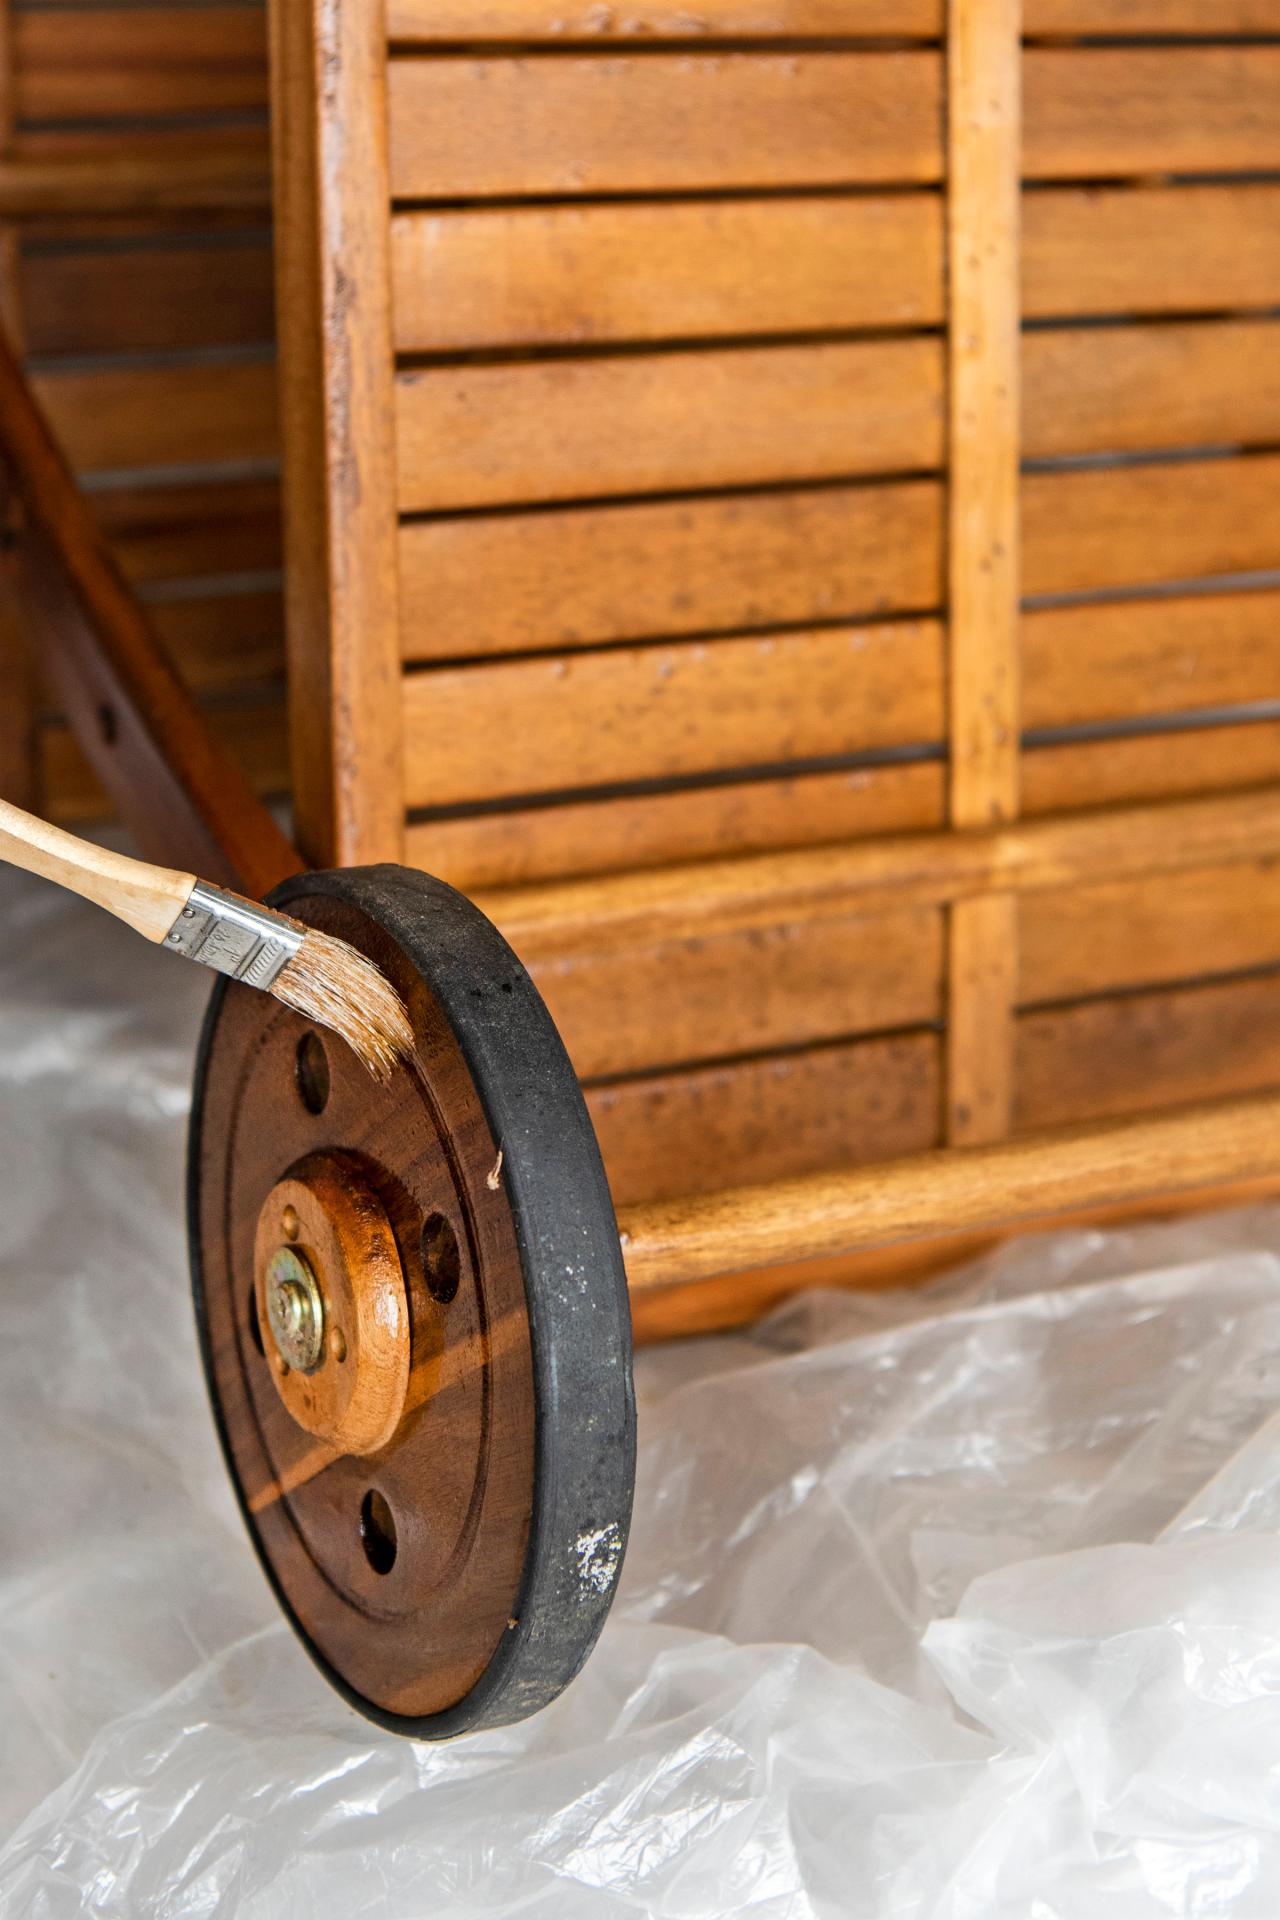
3. Be Sure to Oil All Areas of the Wood
The purpose of the teak oil is to really penetrate the wood, sealing the open pores and adding a layer of both UV and water protection, so don't forget to flip your piece over to brush oil onto the piece's underside, too. Also, be sure to brush a coat of oil onto other wooden areas, like wheels.

Sarah Busby
4. Allow Oil to Dry, Then Apply a Second Coat
Check your piece in 30 minutes to an hour. If the first coat is dry to the touch, brush on a second coat, concentrating on any areas you may have missed or that still have a dull or matte appearance. Allow the oil to soak in, wiping off any drips with a clean, lint-free cloth. Note: Before use, especially outdoors, allow the refinished piece to fully dry for a minimum of 8 hours or ideally overnight.
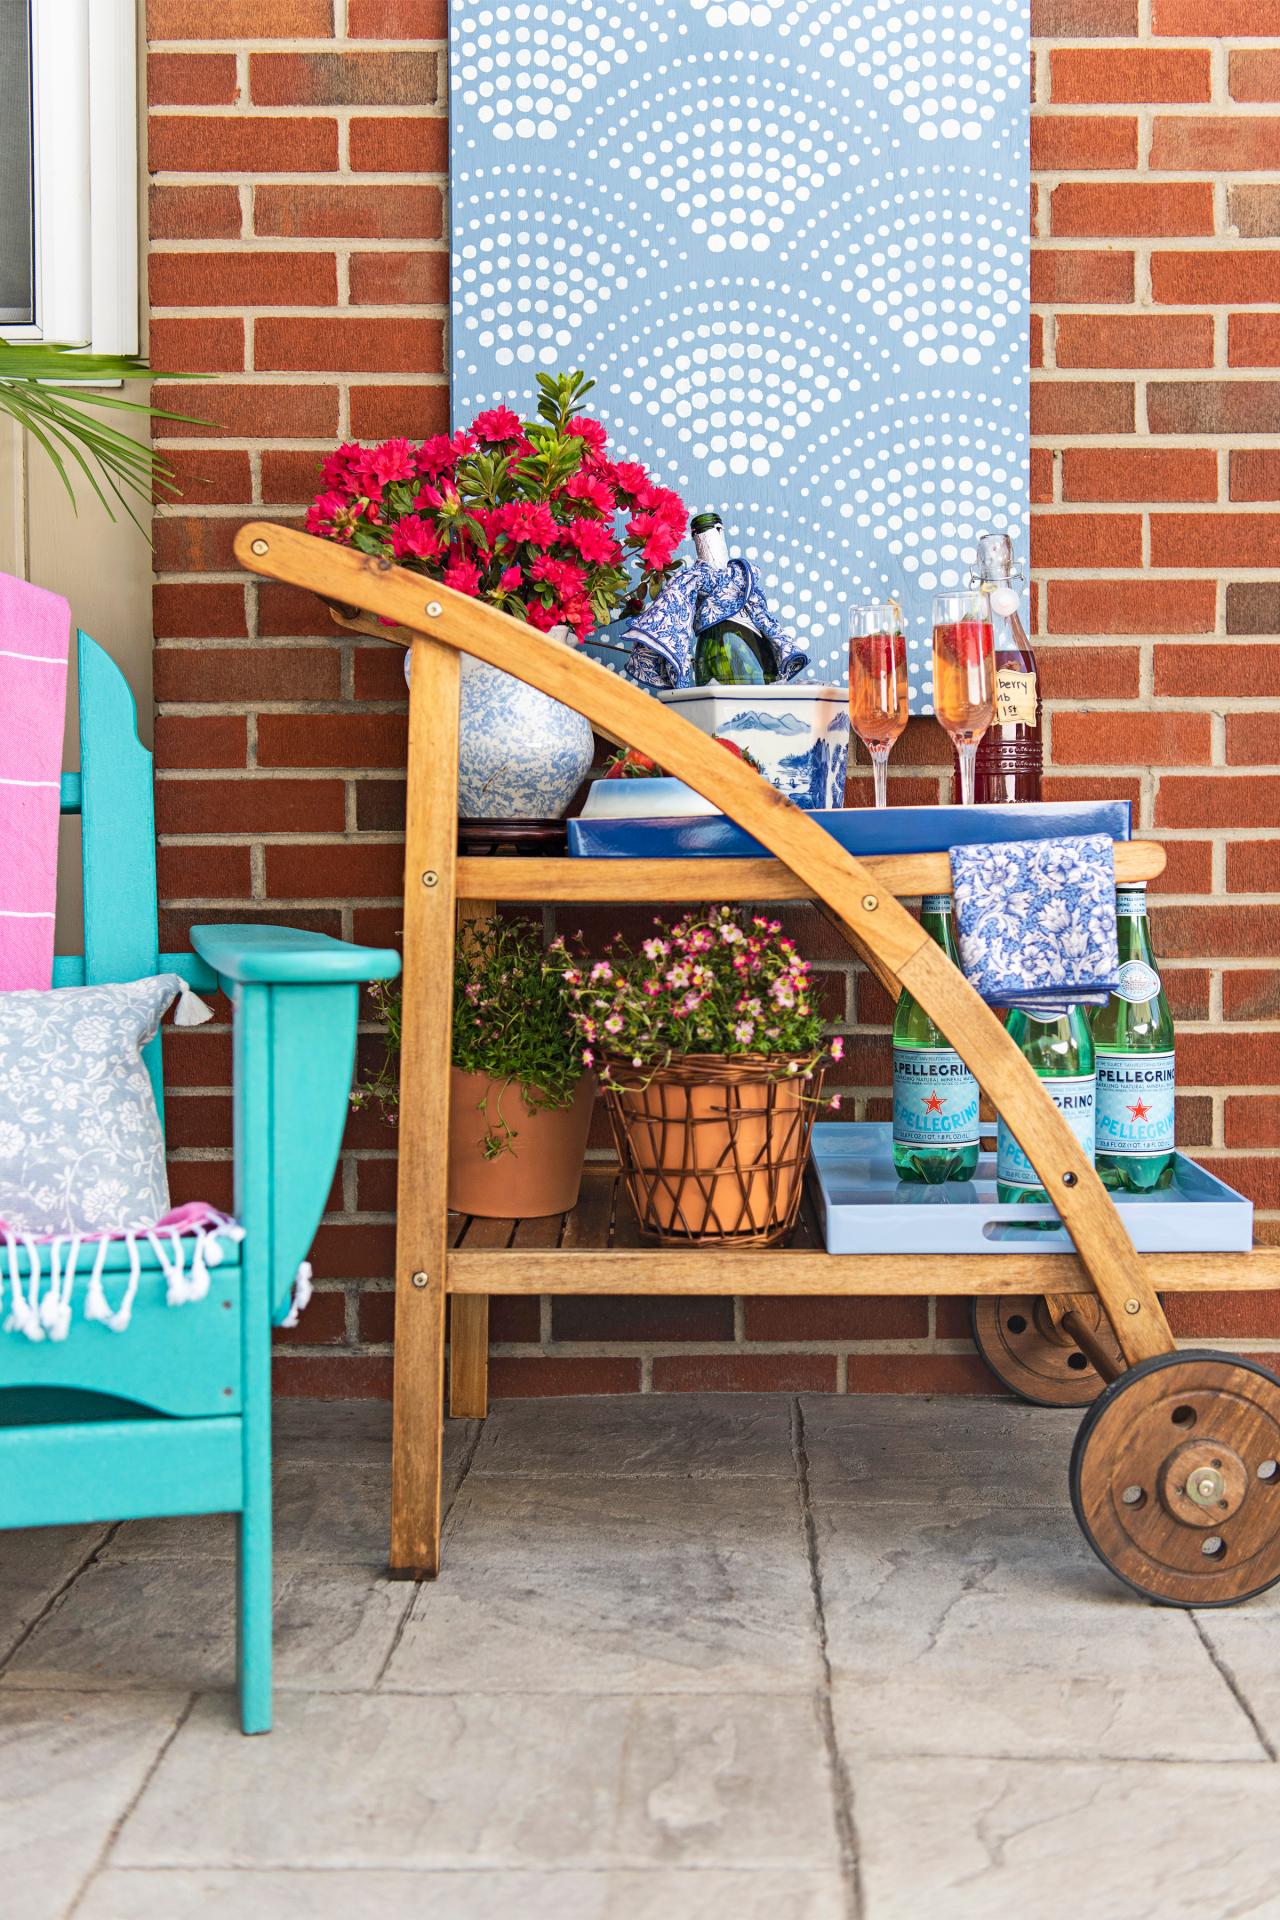
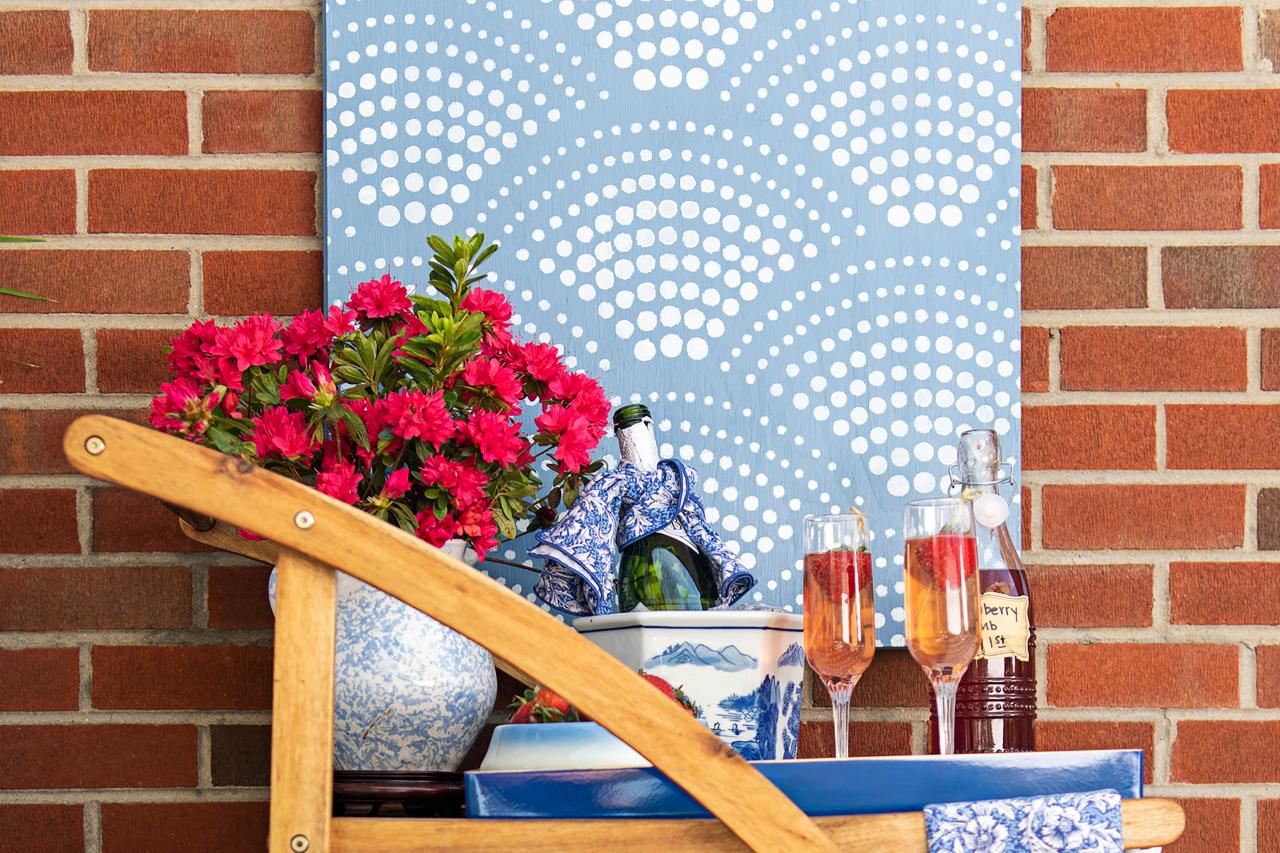
5. Enjoy Your New/Old Outdoor Furniture
With a fresh finish, this old acacia wood bar cart looks like new again and is ready to ditch the gardening gear and go back into service as a patio bar cart that makes outdoor entertaining easy.

Sarah Busby; Styling by H. Camille Smith

Sarah Busby; Styling by H. Camille Smith
Photo By: Sarah Busby; Styling by H. Camille Smith
Photo By: Sarah Busby; Styling by H. Camille Smith


