


How to Make Feathered Angel or Fairy Wings

Feathered Wings Costume
These feathered wings are perfect for occasions that require a costume, like Halloween or a Christmas nativity play, but are also sturdy enough to be worn for everyday imaginative play.

Materials Needed:
- white foam core board
- 150 6"- 8" coquille goose feathers
- 2 yards sheer 1" wide white ribbon
- 1 large package fluffy white craft feathers
- hot glue gun and glue sticks
- scissors
- craft knife
- cutting board or mat
- oval platters or small serving bowls to use as templates
Cut Foam Core Ovals
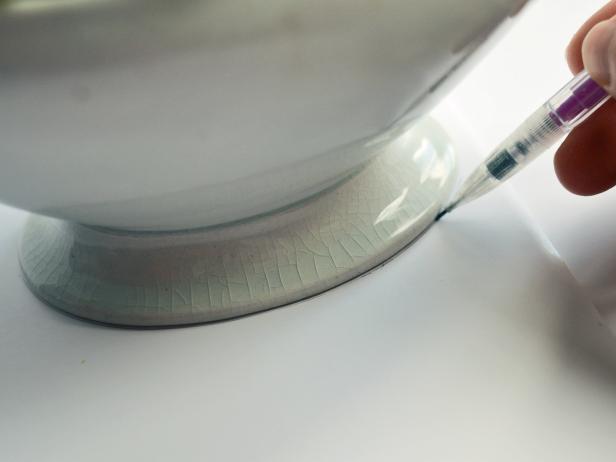
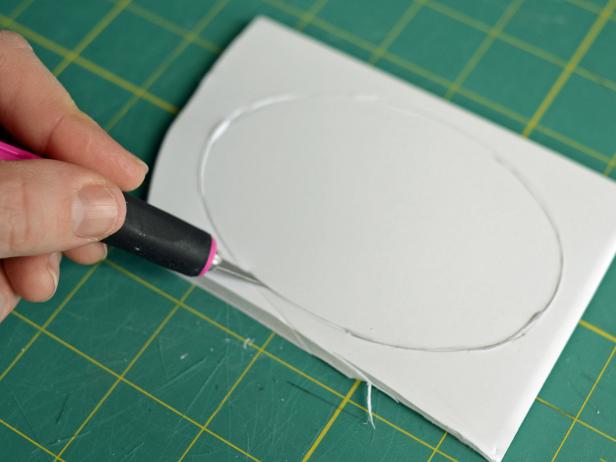
Create a foam core base for wings by tracing around oval platters or small serving bowls to create five ovals in the following approximate sizes: two large ovals that are around 8"x4" and three small ovals that are around 4"x2" (Image 1). Use a craft knife to cut them out (Image 2).
Tracing Wings on a Foam Core Board to Make Feathered Fairy or Angel Wings
Step 1A in creating fairy or angel wings is to fashion the wings from a foam core board. To form the foam core base for wings, with a pencil, trace around oval platters or small serving bowls to create five ovals in the following sizes: two large ovals that are about 8 inches long and 4 inches wide and three small ovals that are about 4 inches long and 2 inches wide.
Cutting Out a Foam Core Board in Oval Shapes to Make Feathered Angel Wings
After creating a foam core base by tracing and making five ovals, Step 1B in making feathered angel wings is to use a craft knife to cut them out.
Create Ribbon Straps
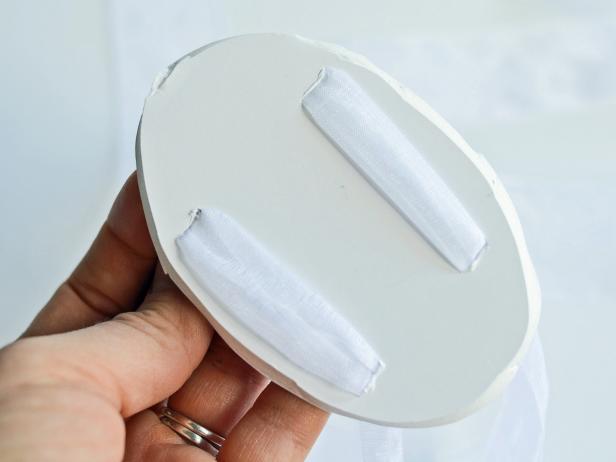
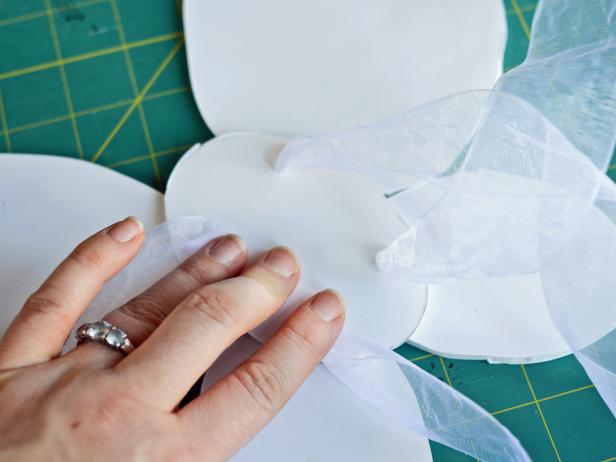
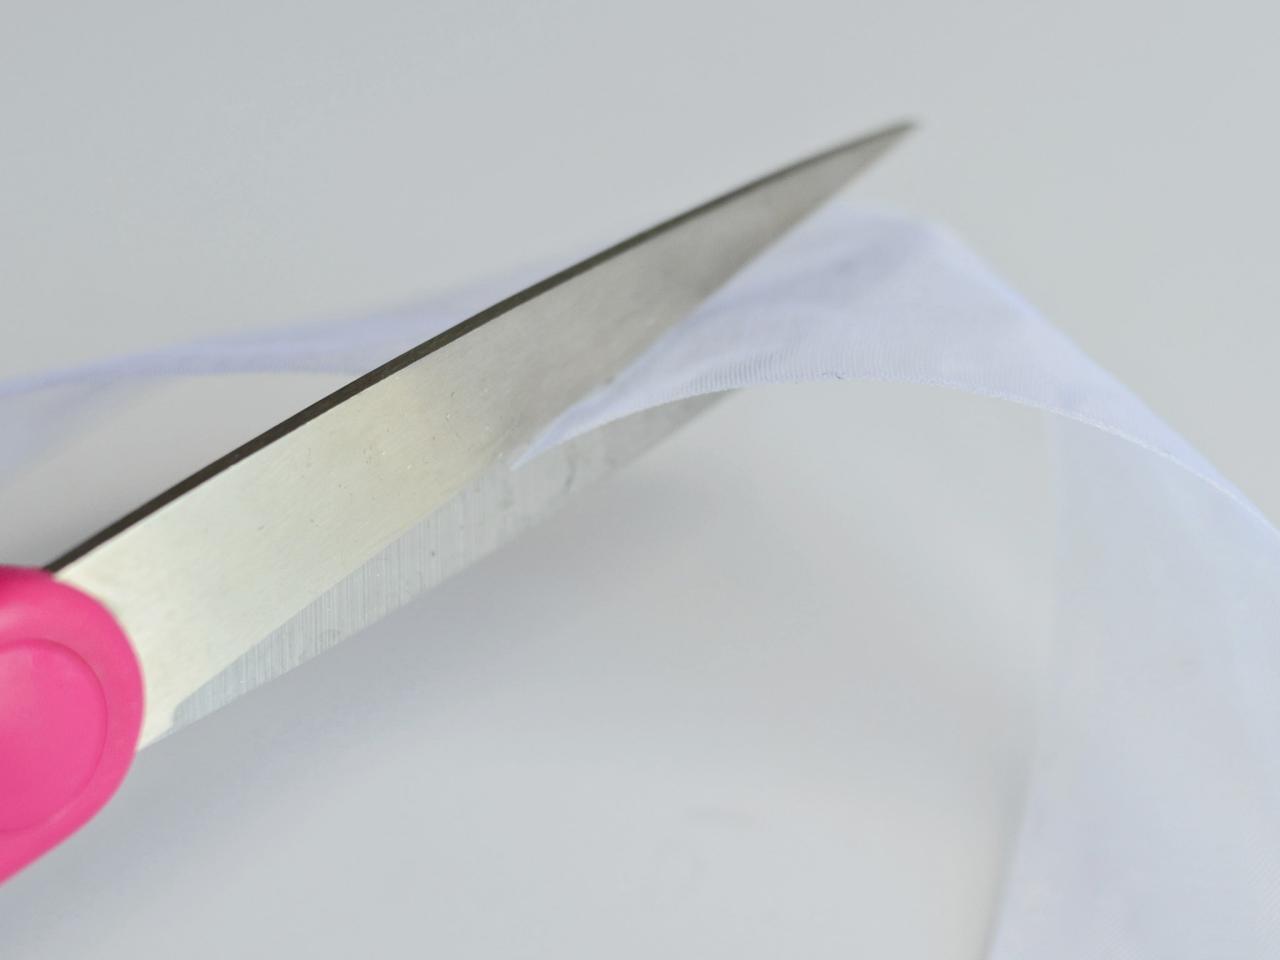
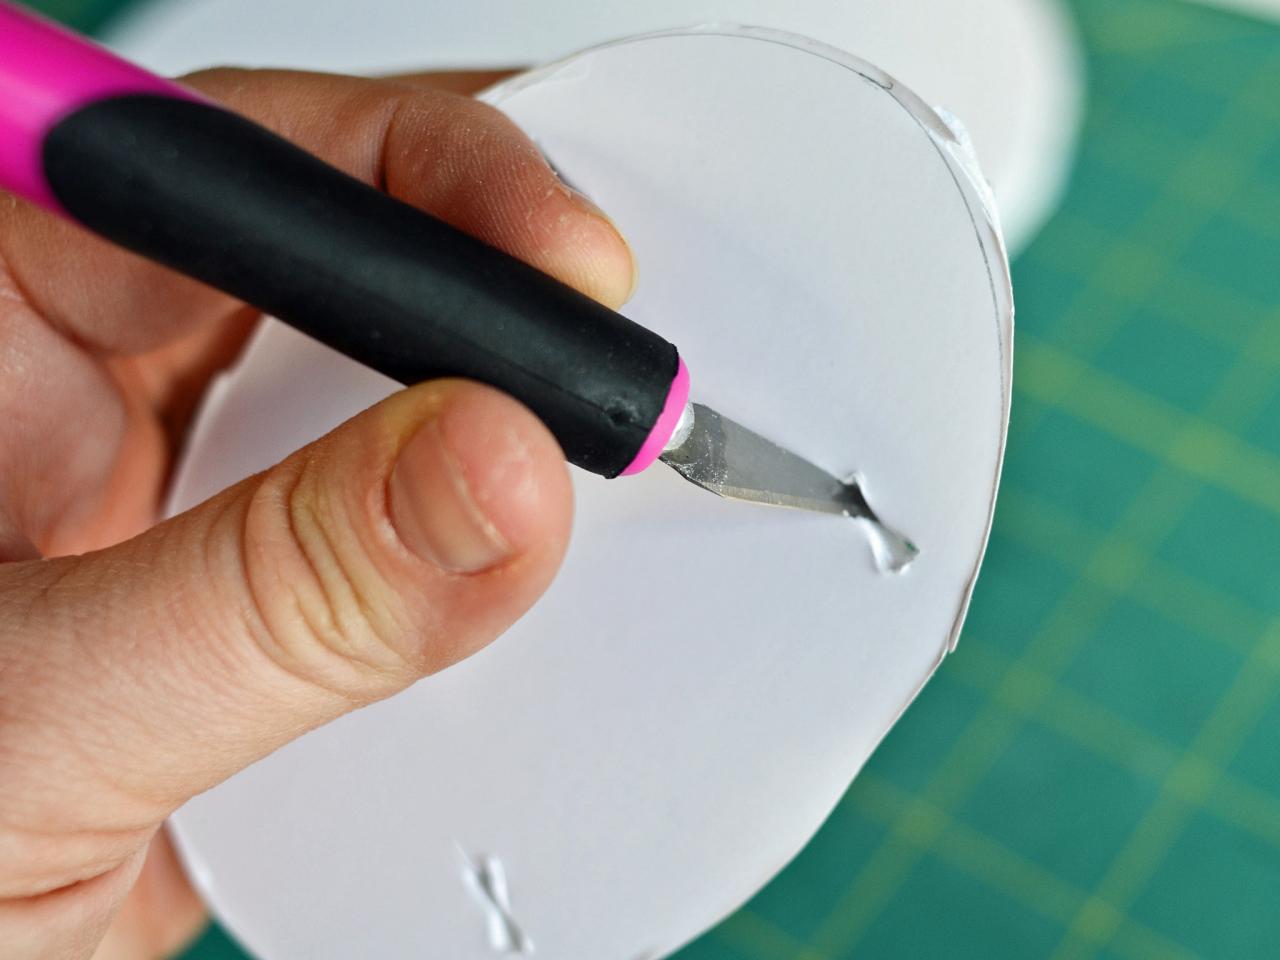
Using sharp scissors, cut a 2-yard piece of sheer white ribbon piece in half (Image 1). Use a craft knife to punch four holes, in the shape of a square, in one of the smaller ovals (Image 2). Thread each ribbon through two holes with all ends facing same direction; these ribbons will be the wings' straps (Image 3).


Cutting White Ribbon to Make Straps for DIY Feathered Angel or Fairy Wings
Step 2A in creating feathered angel or fairy wings is to cut a 2-yard piece of sheer white ribbon piece in half, using a sharp scissors.
Making Ribbon Ties for Feathered Angel Wings
After cutting the ribbon piece in half, Step 2B is to punch four holes into one of the smaller foam core ovals using a craft knife. The holes should be in the shape of a square. The ribbon can then be threaded through the cut-outs
Threading Ribbon to Create Straps for Angel Wings
After punching holes in the oval foam core base, Step 2C is to thread each ribbon through the two holes with all the ends facing in same direction. These ribbons will be the wings' ties.
Assemble Wings' Foam Core Base
Place four ovals, large on top, on work surface in a butterfly wing pattern. Place oval with ribbon straps over the center of the other ovals and trace around its location with pencil (Image 1). Remove then apply hot glue inside the traced area (Image 2) and press oval into hot glue with ribbons facing out. Hold in place until glue dries (Image 3).
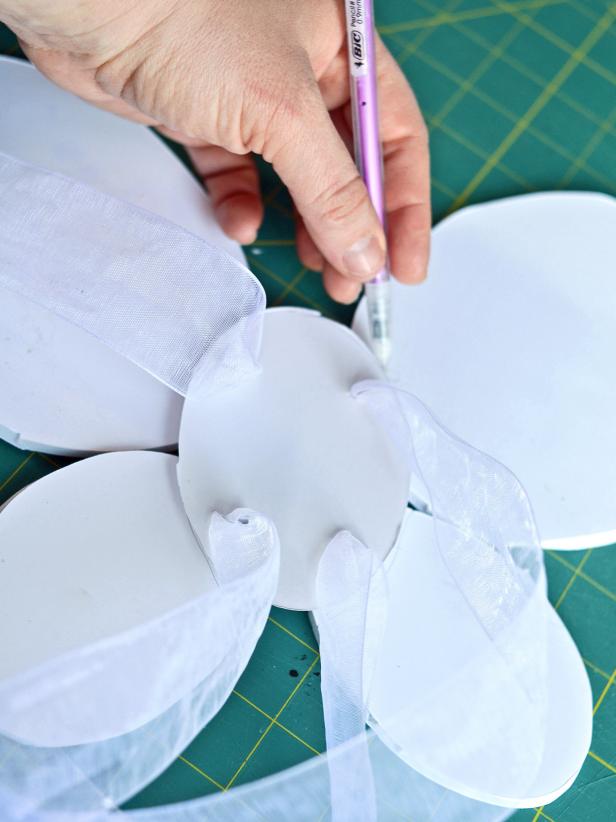
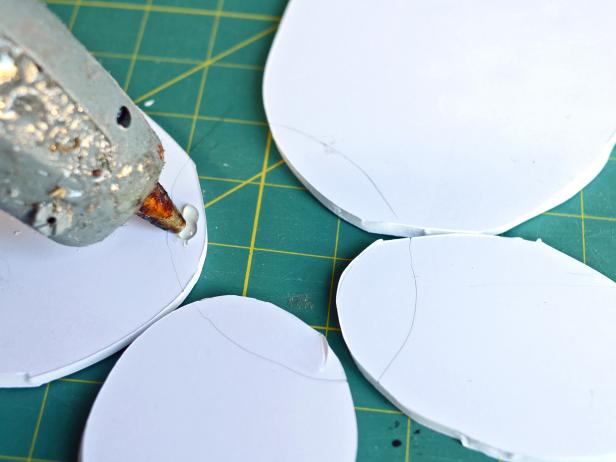
Tracing Oval on Butterfly Pattern to Make a Base for Feathered Angel Wings
Step 3A is to place four ovals, with the large on top, on a work surface in a butterfly wing pattern. Place the oval with ribbon straps over the center of the other ovals and trace around its location with pencil.
Applying Hot Glue to the Traced Ribbon Strap Area When Making Feathered Angel Wings
After tracing the oval with the ribbon strap over the center of the other arranged ovals, Step 3B in making feathered angel wings is to remove the ribbon strap oval. Apply hot glue inside the traced area.
Holding the Glue in Place for Butterfly Pattern When Making Feathered Angel Wings
After using hot glue to secure the ribbon oval in the center of the design, Step 3C is to hold it in place until the glue dries.
Begin Adding Feathers
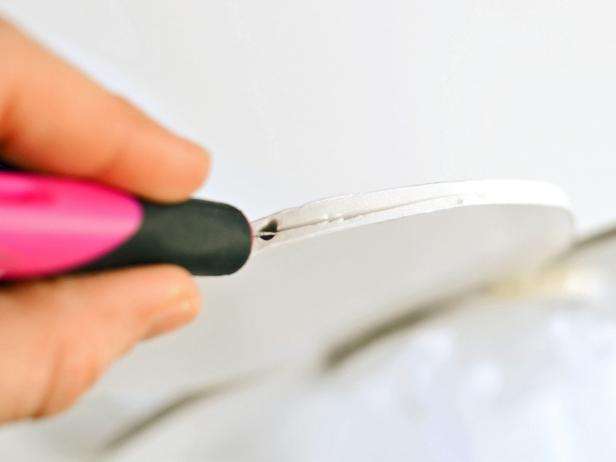
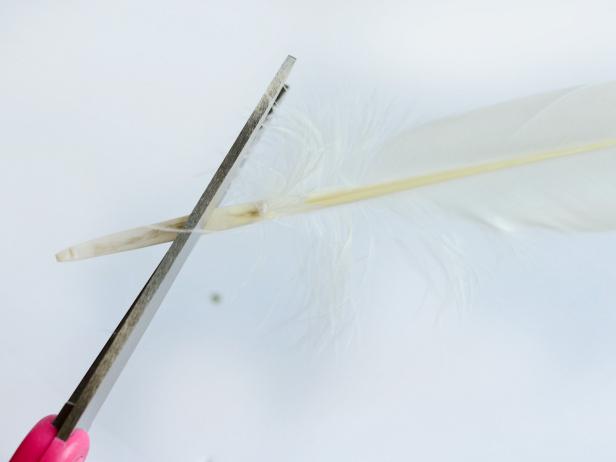
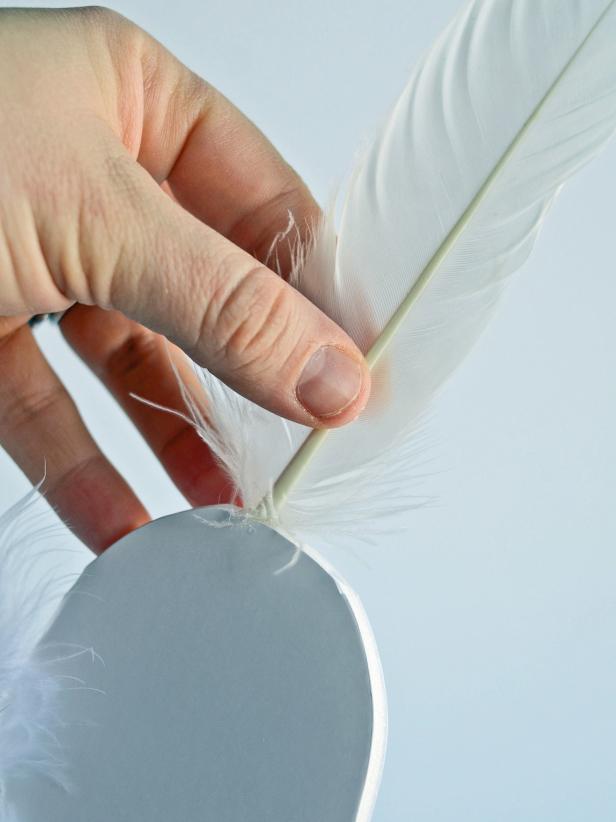
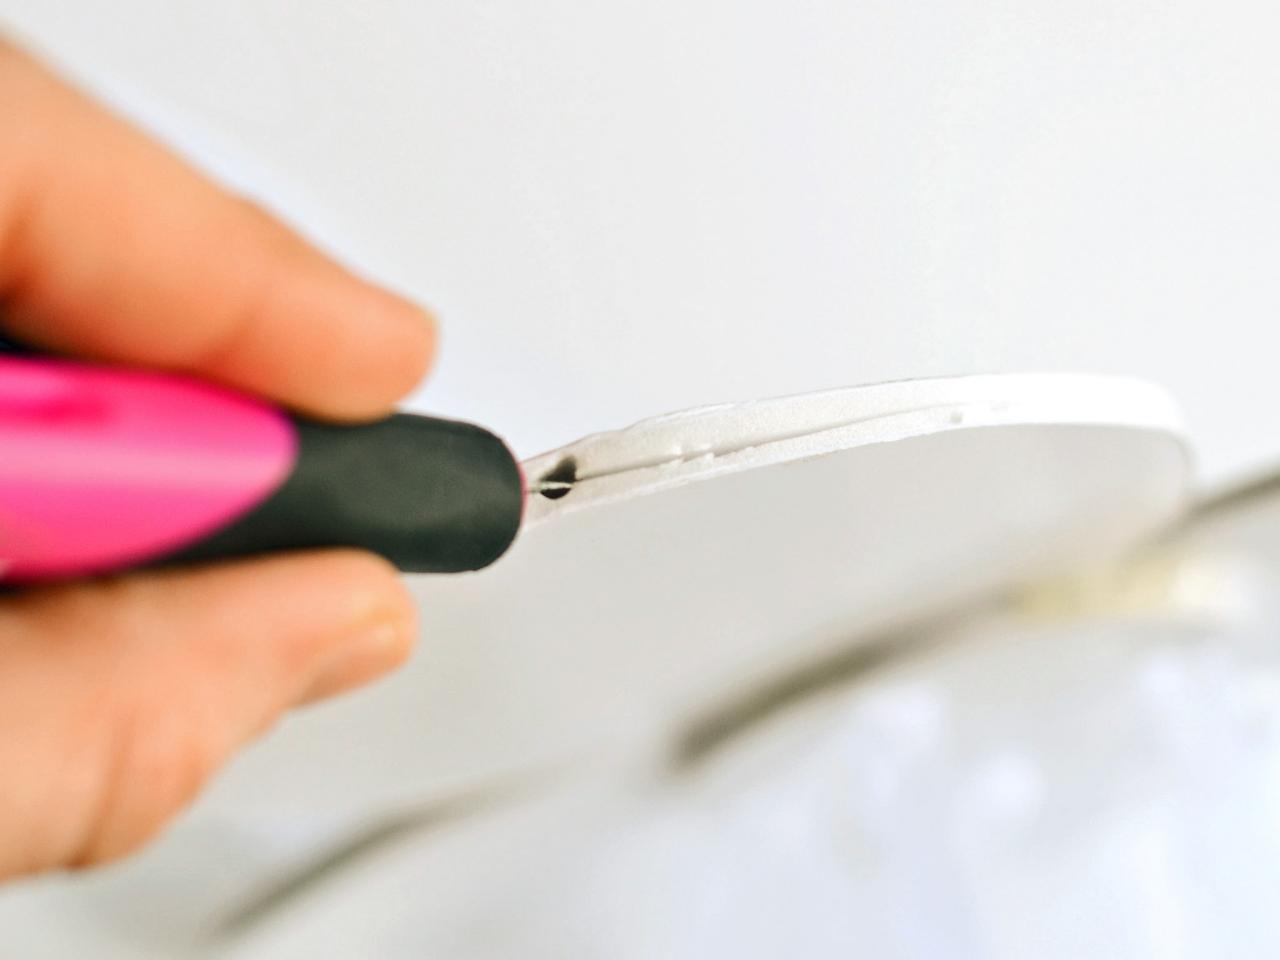
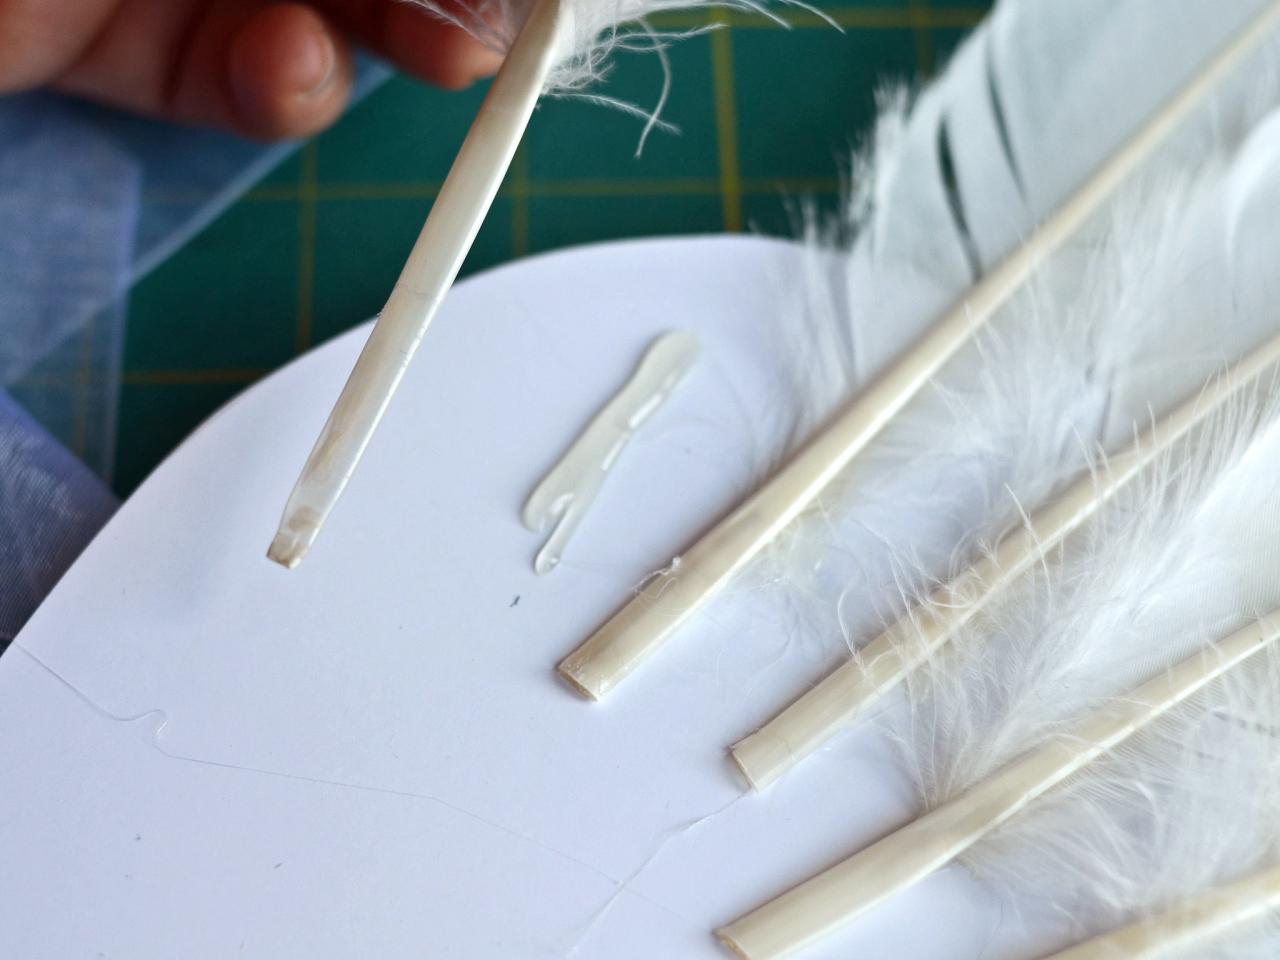
Turn foam core base over so the side with ribbon straps is facing down. Arrange wide coquille goose feathers around the top edge of large ovals to create the outside shape of wings (Image 1). Use a craft knife to cut slits in the foam core board's side where feathers will be inserted (Image 2). Use scissors to clip feather ends to about 1/2" - 3/4" long for a better fit (Image 3). Apply a dab of hot glue to feather end (Image 4) then insert in cut slit. Squeeze sides together with fingers until glue cools (Image 5). Repeat with other feathers until desired wing shape is created.

Begin Adding Feathers for Adorable, DIY Angel or Fairy Wings
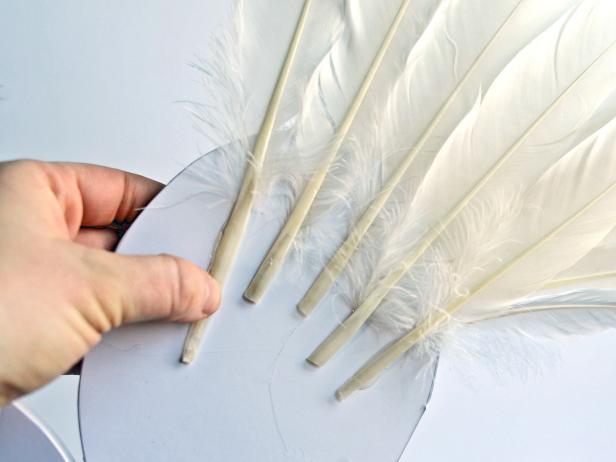
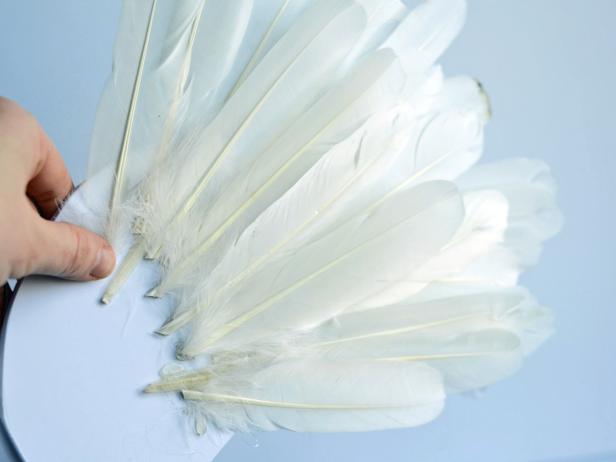
Step 4A is to turn the foam core base over so the side with ribbon straps is facing down. Arrange wide coquille goose feathers around the top edge of the large ovals to create the outside shape of wings.
Cutting Slits in Foam Core Board to Make Feathered Angel Wings
After arranging goose feathers in the shape of wings, Step 4B in making feathered angel wings is to use a craft knife to cut slits in the foam core board's side where the feathers will be inserted.
Clipping Feathers' Ends When Making Feathered Angel Wings
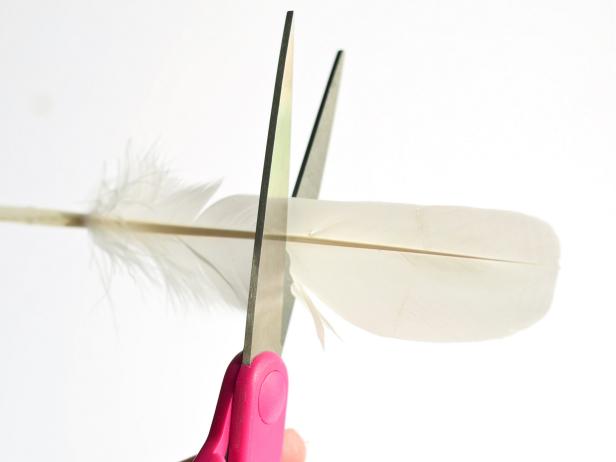
Step 4C is to use scissors to clip the feathers' ends to about 1/2" - 3/4" long for a better fit once they are inserted in the slits of the foam core board.
Gluing Feathers into Cut Slit to Create a Wing Shape
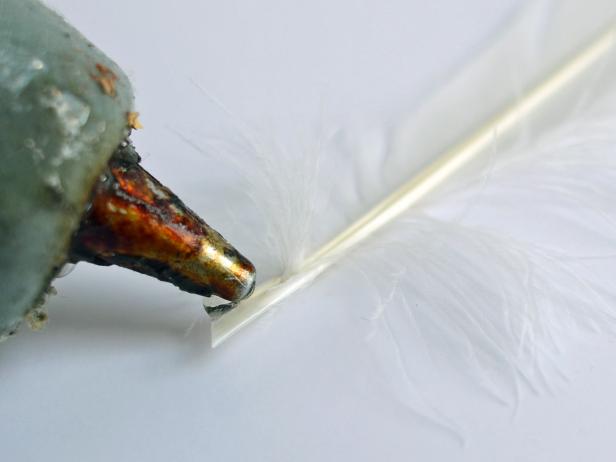
After cutting slits in the foam core board and the feather ends to size, Step 4D in making feathered angel wings is to apply a dab of hot glue to a feather's end. Insert the feather into the cut slit.
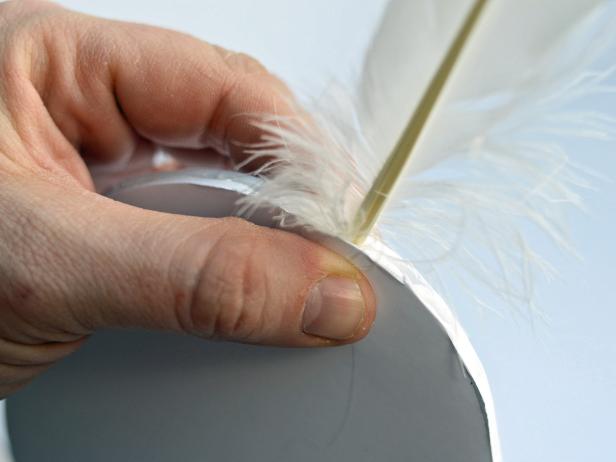
Holding Glue Together When Creating Feathered Angel or Fairy Wings
After applying a dab of hot glue to the feather's end and inserting it in the cut slit, Step 4E in creating feathered angel wings is to squeeze the sides of the foam core base together with your fingers until the glue cools. Repeat the whole process with all the feathers until the desired wing shape is created.
Fill Out Upper Wing
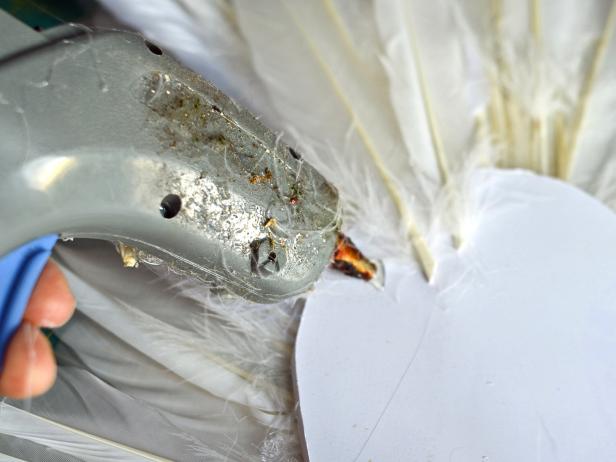
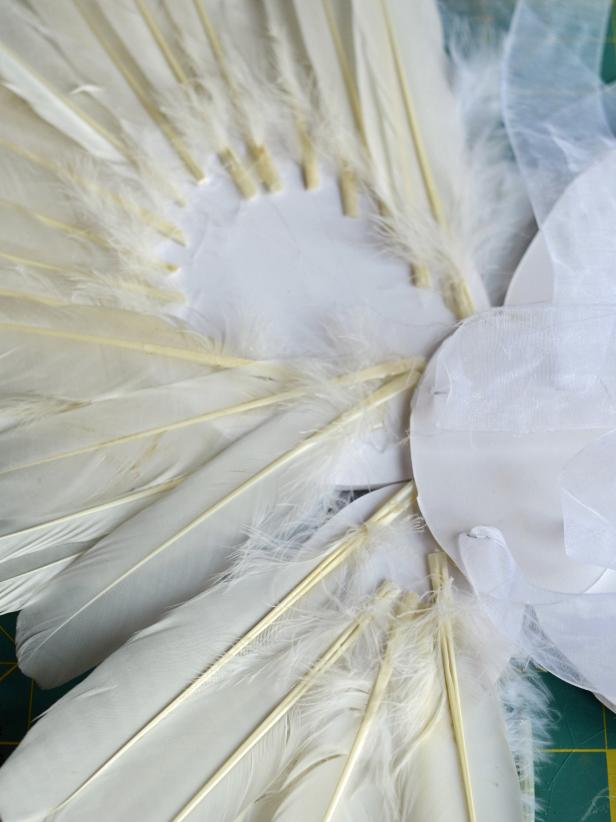
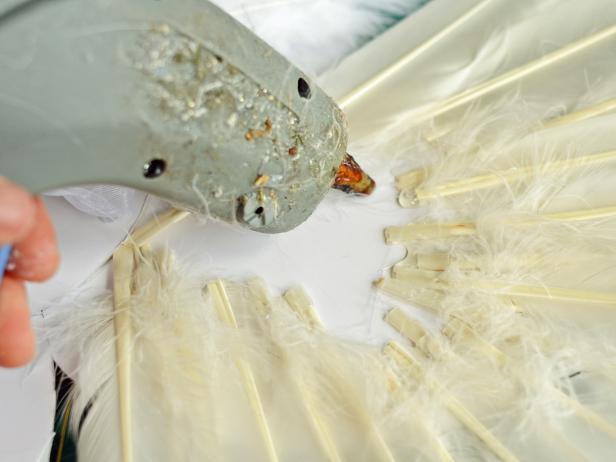
Apply hot glue directly to foam core board a few inches below the feathers that were inserted in Step 4 and attach more rows of feathers. Continue to layer feathers until wing shape is full and most of large oval foam core pieces are covered (Images 1, 2 and 3).

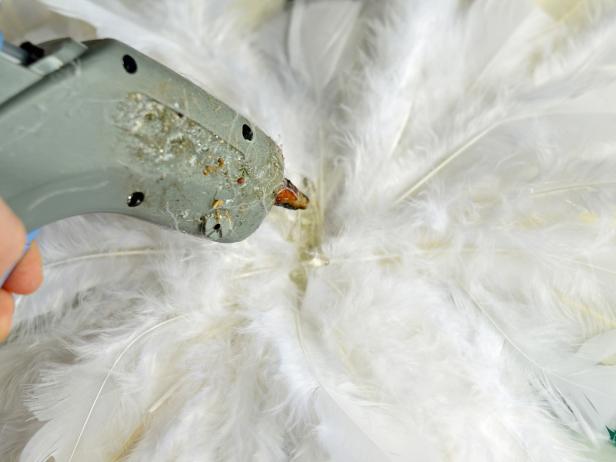
Gluing the Upper Wing With Feathers to Make Angel or Fairy Wings
Step 5 in creating angel or fairy wings is to apply hot glue to a foam core board, a couple of inches below the area where feathers were inserted in Step 4.
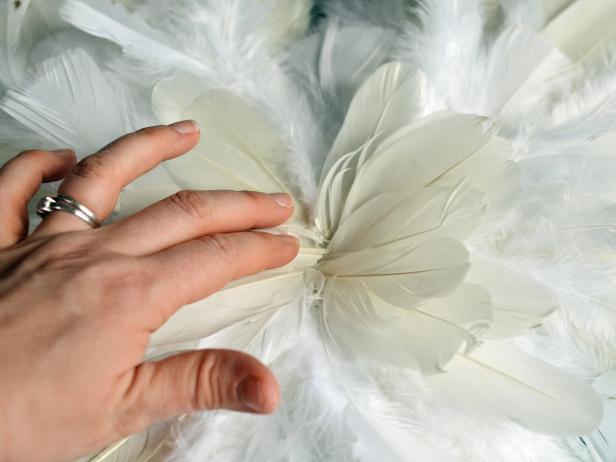
Filling Out Foam Core Wing with Rows of Feathers
Step 5B in making feathered angel or fairy wings is to continue to layer feathers rows on the foam core board with hot glue until the wing shape is full.
Layering Feathers on Foam Core Board to Make Feathered Angel or Fairy Wings.
Step 5C is to apply hot glue directly to the foam core board a few inches below the feathers that were inserted in Step 4 and attach more rows of feathers. Continue to layer the feathers until the wing shape is full and most of the large oval foam core pieces are covered
Add Feathers to Lower Wing and Back Side
Repeat Steps 4 and 5 on lower portion of wings (Image 1). Once completed, flip wings over and add feathers to the outer edges — but not the portion that will touch child's back — of back side, following the wing's outline you created on the front side (Images 2 and 3). Note: At this point, feather tips and some foam core board will still be visible.
Adding Feathers to the Lower Portion of DIY Angel or Fairy Wings
Step 6A is to continue adding feathers and filling out wings as shown in the previous steps on the lower portion of angel wings.
Adding and Gluing Feathers to the Lower Wing and Back of Angel WIngs
Step 6B in making feathered angel wings is to flip the wings over, and following the wing's outline on the front, glue feathers to the outer edges the backside of the foam core board. Note: At this point, feather tips and some foam core board will still be visible.
Angel Wings: Adding Feathers to the Lower Wing and Back
Step 6C in making feathered angel wings is to flip the wings over and add feathers to the outer edges of the wings' back side, following the outline you created on the front side of the wings. Do not add feathers to the part of the wing that will touch the child's back. At this point, feather tips and some foam core board will still be visible.
Finish Wings
Flip wings back over and, working inward from the outside, apply hot glue to foam core then attach small, fluffy craft feathers to cover larger feather points and add a downy texture (Image 1). Continue applying glue and feathers until all foam core is covered. Clip 2" - 3" off the ends of 8-10 larger coquille goose feathers (Image 2). Apply glue in the wings' center then press clipped feather points into glue, allowing them to fan out toward wings' ends (Images 3 and 4). Finally, flip wings over and cover feather points on back side with any remaining fluffy feathers, adhering them with hot glue. Note: Since this side will not be visible when worn, feathers don't need to cover all of the foam core. Have your child try on their wings and if all visible bits of foam core are covered, you're done.
Tip: Feathered wings aren't just for costumes. They've become a popular decorative item over the past few years. Hang them on chair backs or over a mantel for a fanciful touch.

Gluing an Angel or Fairy Wing with Smaller Craft Feathers
Step 7A in creating angel or fairy wings is to flip the wings back over and, working inward from the outside, apply hot glue to the foam core. Then, attach small, fluffy craft feathers to cover the larger feather points and to add a downy texture.
Clipping Larger Coquille Feathers to Finish Feathered Angel Wings
After applying glue and small feathers until the foam core shape is covered, Step 7B in making feathered angel wings is to clip 2" - 3" off the ends of 8-10 larger coquille goose feathers. Glue and apply these clipped feather points, allowing them to fan out toward the wings' ends.
Applying Glue in the Center of the Angel's Wings
Step 7C is to apply glue in the wings' center. The feather points can then be pressed into the glue, allowing them to fan out toward wings' ends. Finally, flip wings over and cover feather points on back side with any remaining fluffy feathers, adhering them with hot glue. Note: Since this side will not be visible when worn, feathers don't need to cover all of the foam core. Have your child try on their wings and if all visible bits of foam core are covered, you're done.
Finishing Angel Wings with Fluffy Feathers.
Step 7E in creating feathered angel or fairy wings is to flip the wings over and cover the feather points on the back side with any remaining fluffy feathers, adhering them with hot glue. Note: Since this side will not be visible when worn, feathers don't need to cover all of the foam core. Have your child try on their wings and if all visible bits of foam core are covered, you're done.
Make Feathered Angel Wings for a Heavenly Costume Complement
These feathered wings are perfect for occasions that require a costume, like Halloween or a Christmas nativity play, but they're also sturdy enough to be worn for everyday imaginative play.


