


How to Build a Rolling Ladder

Tools and Materials:
miter saw
drill press or drill
1-1/4" forstner drill bit
pipe wrench
level and a tape measure
safety glasses
hammer and finish nails, or pneumatic finish nailer and air compressor
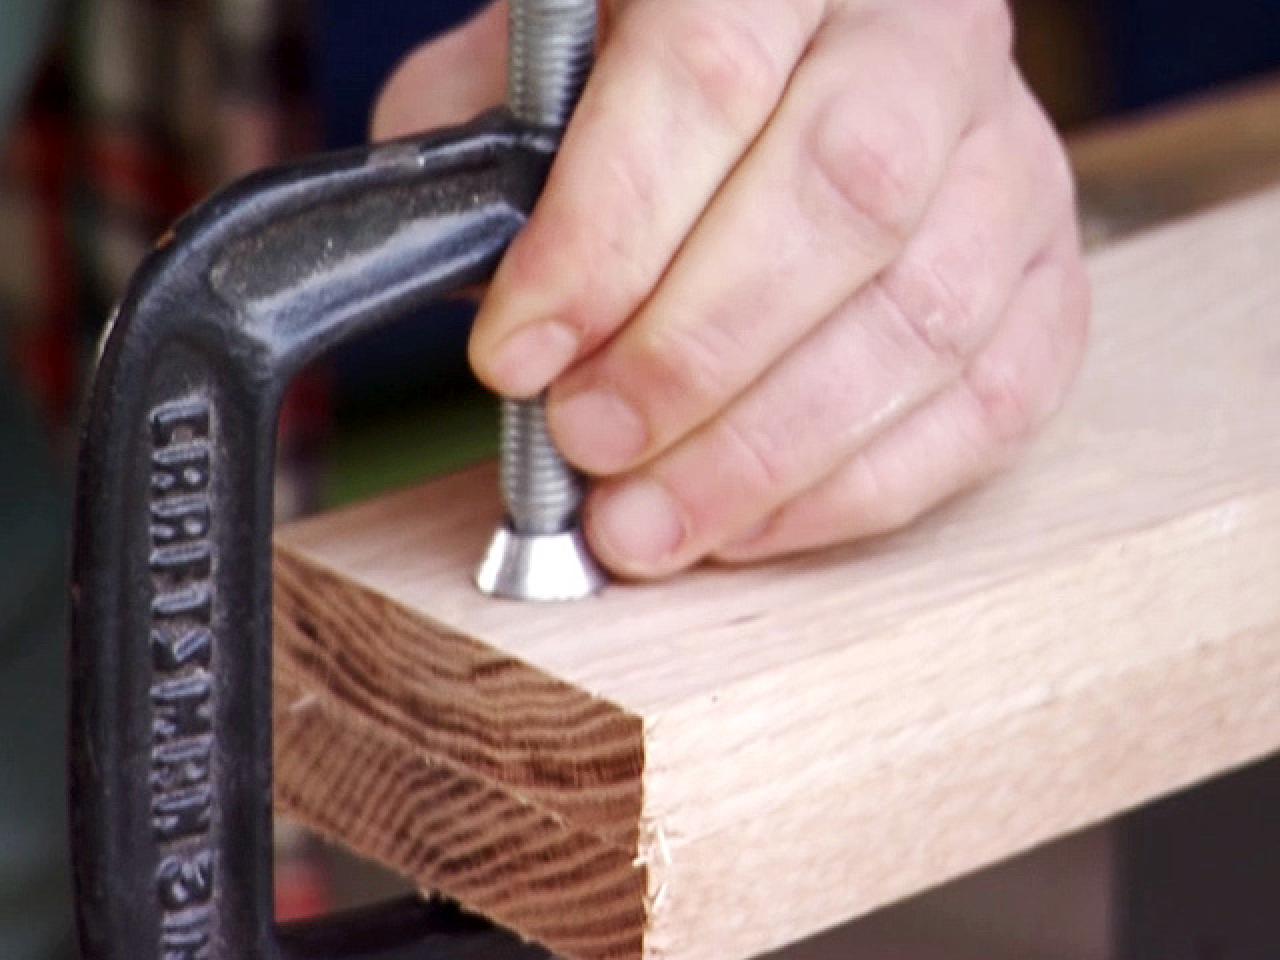
C clamps
three pieces of 1x4x8' oak
one piece of 1x10x3' oak
eight 1" galvanized pipes, threaded at both ends, 24" long
sixteen 1" galvanized end caps
four 2" straight casters
Steps:

1. The most important part of the ladder is having a stable surface for it to ride upon. If you are building a shelving unit from scratch, plan to place the ladder about 36 inches below the top of the shelving unit. Extend that shelf out about 8 to 10 inches past the face of the rest of the shelves. This will allow the rollers of the ladder enough space, but is still small enough to be stable without any extra support. If you are adding the ladder to an existing shelving unit, it's best to extend an existing shelf by cutting a board that is the full depth of the shelf, plus the 8" to 10" overhang, not just attaching an extension to the front of the shelf.
2. Make the track for ladder wheels to slide upon. When the shelf (or shelf extensions) are in place, nail a 3/4" x 3/4" strip of wood to the top of the shelf along the front edge. Holding the caster in place behind the strip, nail a second strip behind the caster. Leave a little "wiggle room" so the caster doesn't bind up. Nail an oak 1x3 to the face of the shelf to hide the casters and the caster track.
3. The easiest way to get the height dimensions is to hold the 1x4s (ladder rails) up and mark them. Put a caster in the track and hold a level from the top of the caster plate over the area where the ladder will be. Hold a 1x4 rail at the appropriate (comfortable) angle and mark the line on the rail. This level line will be the angle of the cut. For our ladder, it was 9 degrees. On the bottom, mark a line 1-1/2” off the floor on the 1x4 rail. Again, keep this line level with the floor and cut at the same angle as the top.
4. Determine the placement of the ladder rungs. They should be spaced between 10” and 13” apart. Divide the height of the rails by your desired spacing then mark the rails accordingly. Be sure to include the height of the bottom casters in the total height of your rails.

5. Using a miter saw, cut the top and bottom marks then transfer those marks to a second board to repeat. Cut a 1x10 top step/seat to 24" and three pieces of 1x4 to 22".
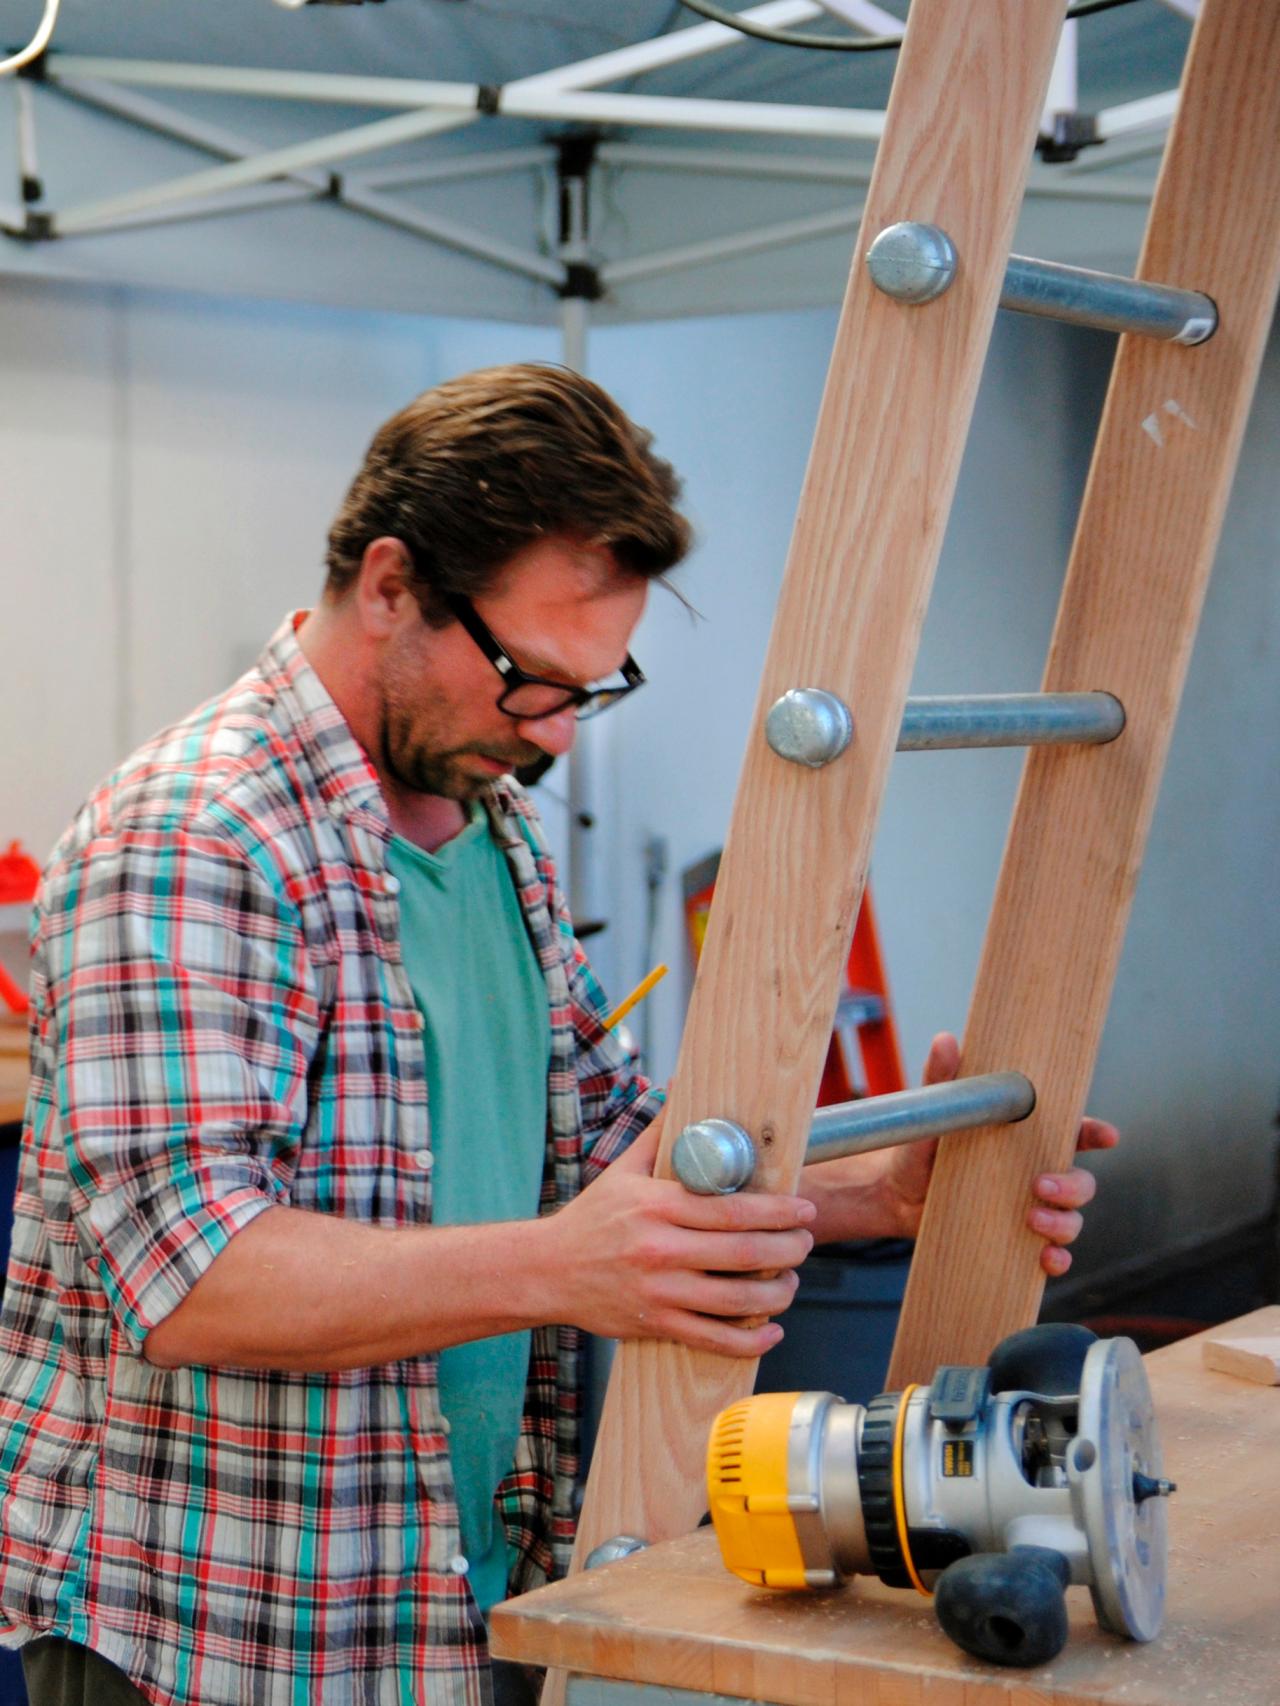
6. Clamp the two side rails together with the ladder rung marks facing out. Drill the holes for the rungs all the way through both boards at the same time to ensure the rungs are level.
7. Glue and nail the top step to the side rails. Make sure the spacing between the rails is 22" and the top step is overhanging the front of the rails by 1". Run a 22-inch 1x4 between the rails 1" from the bottom, parallel to the cut you made. This will be the caster plate for the bottom wheels. Then nail a 22-inch 1x4 between the rails about halfway up the height of the ladder.

8. Either stain and seal the ladder, or prime and paint it. Let it dry completely.
9. Slip all the galvanized pipes into the drilled holes and tighten down the end caps. The end caps should be tightened with a wrench to prevent the rungs slipping out.
10. Finally, screw the straight casters to the bottom caster plate and the underside of the top step using 3/4" wood screws.


