


Halloween Decorating Idea: Black-Glittered Pumpkins

Halloween Glittered Pumpkins
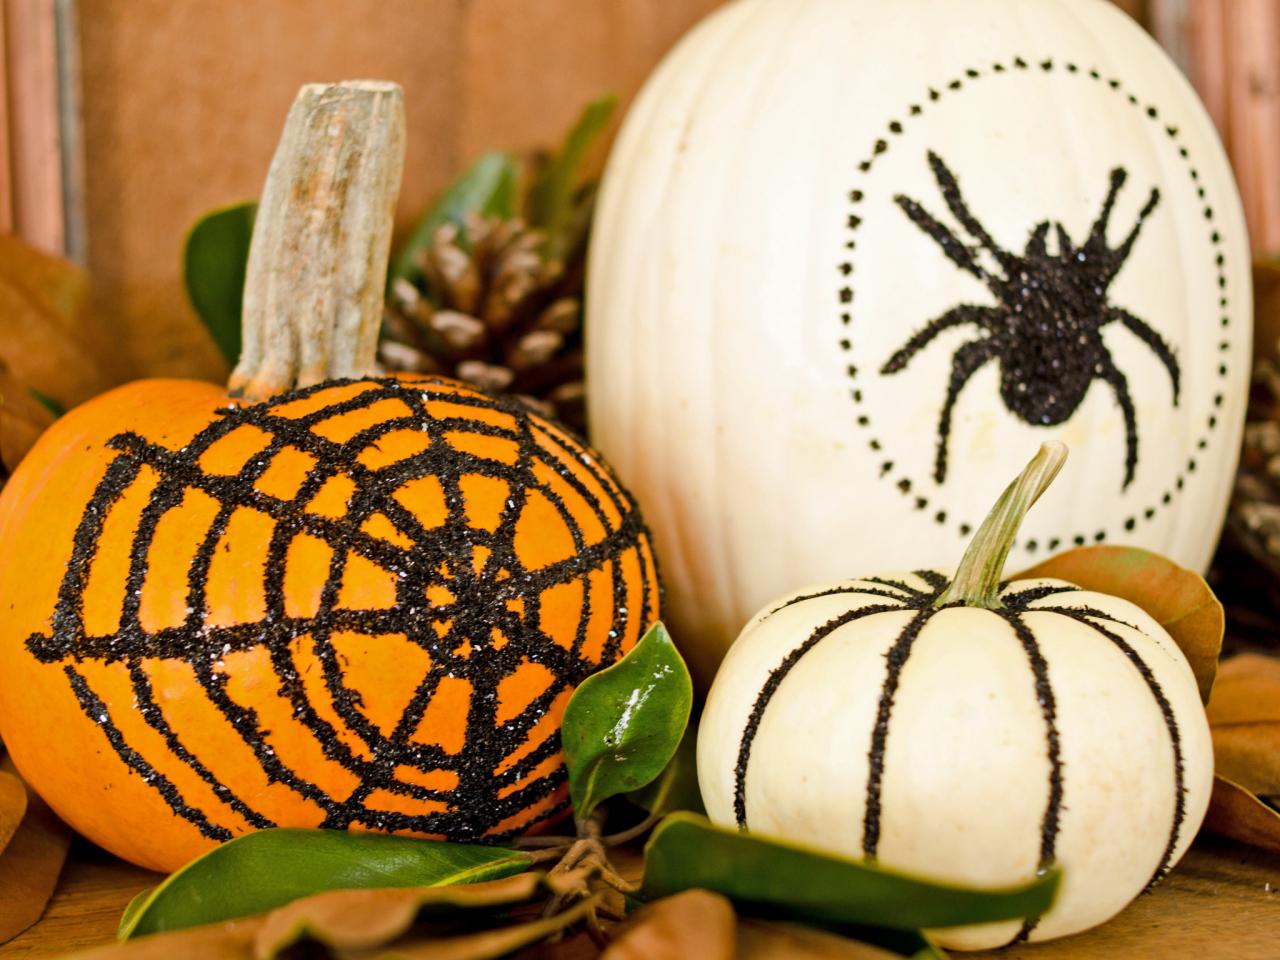
School glue and black glitter are just some simple materials needed to customize pumpkins for Halloween.

Materials Needed:
- faux or fresh pumpkins
- graphite transfer paper
- pencil
- computer
- printer and printer paper
- scissors
- tape
- 1.0 liner artist brush
- school glue
- wax paper
- paper towel
- black glitter
- container or bowl
- spoon
Sketch or Trace Design
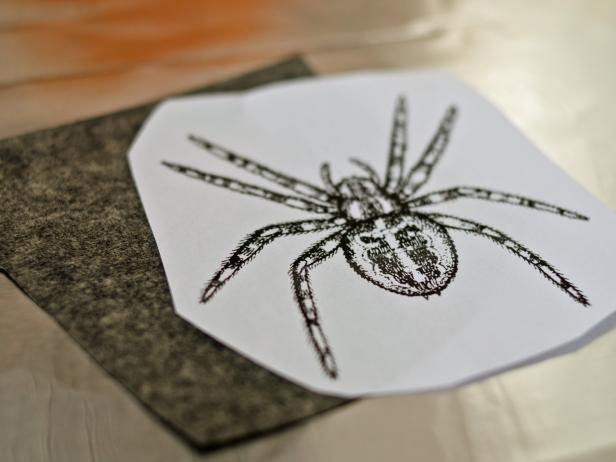
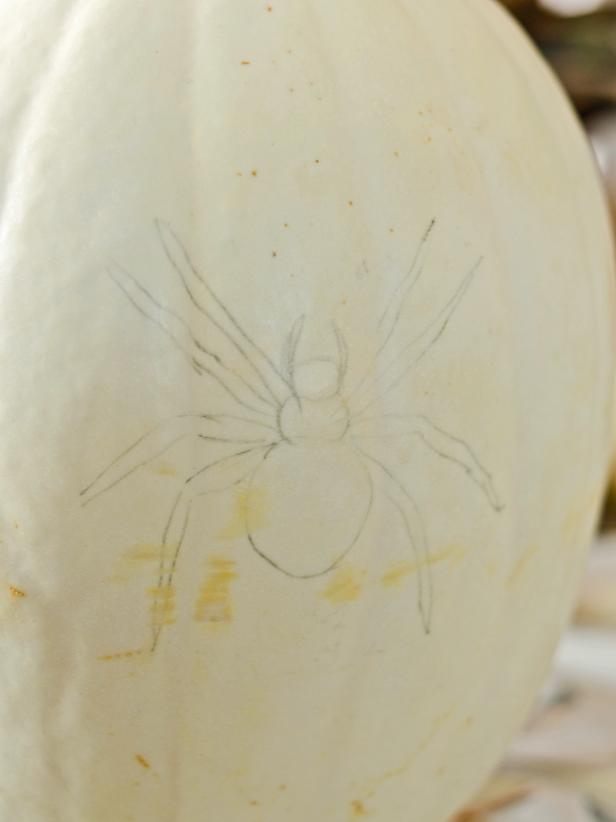
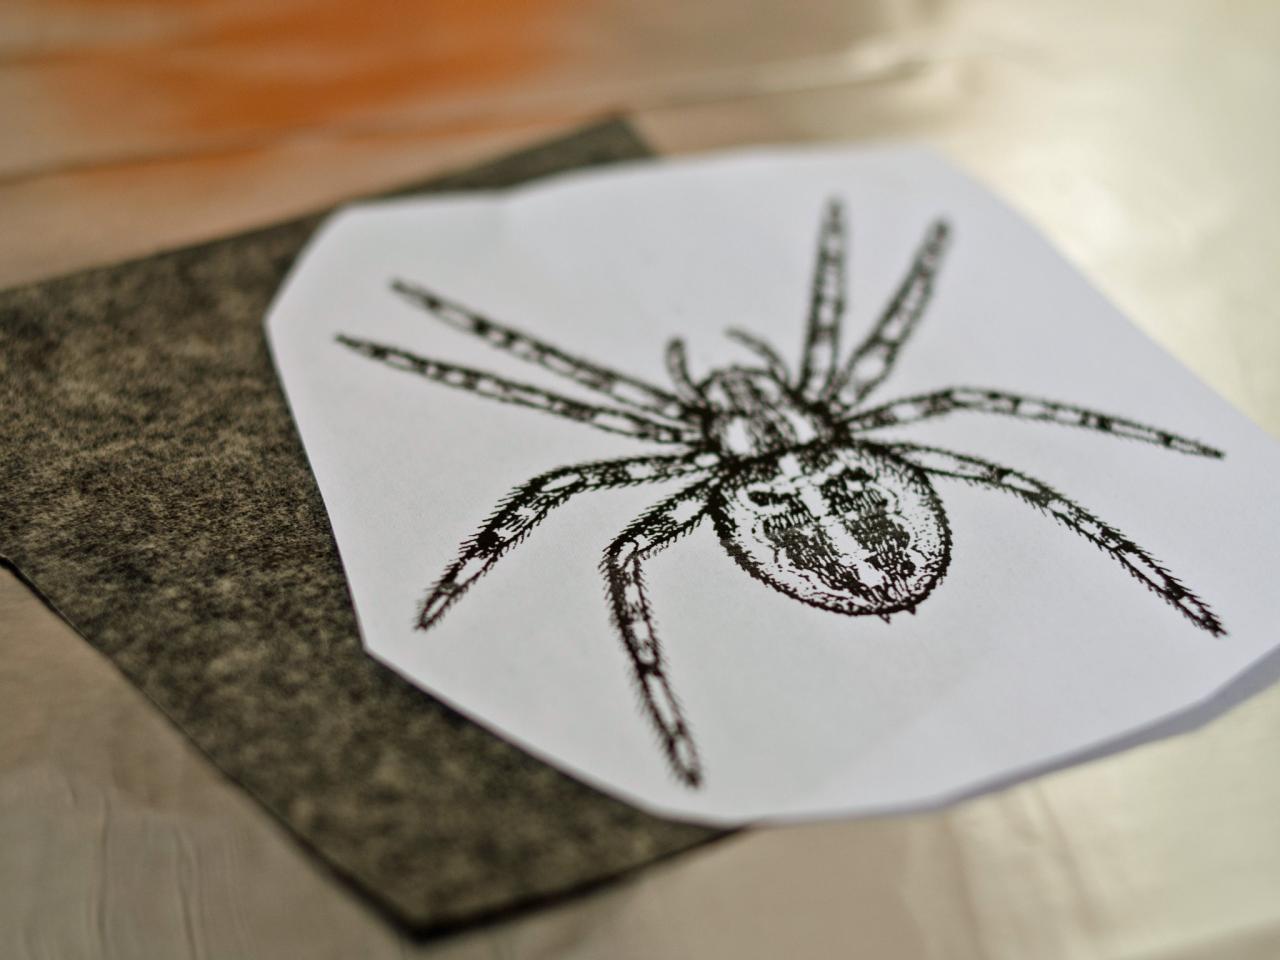
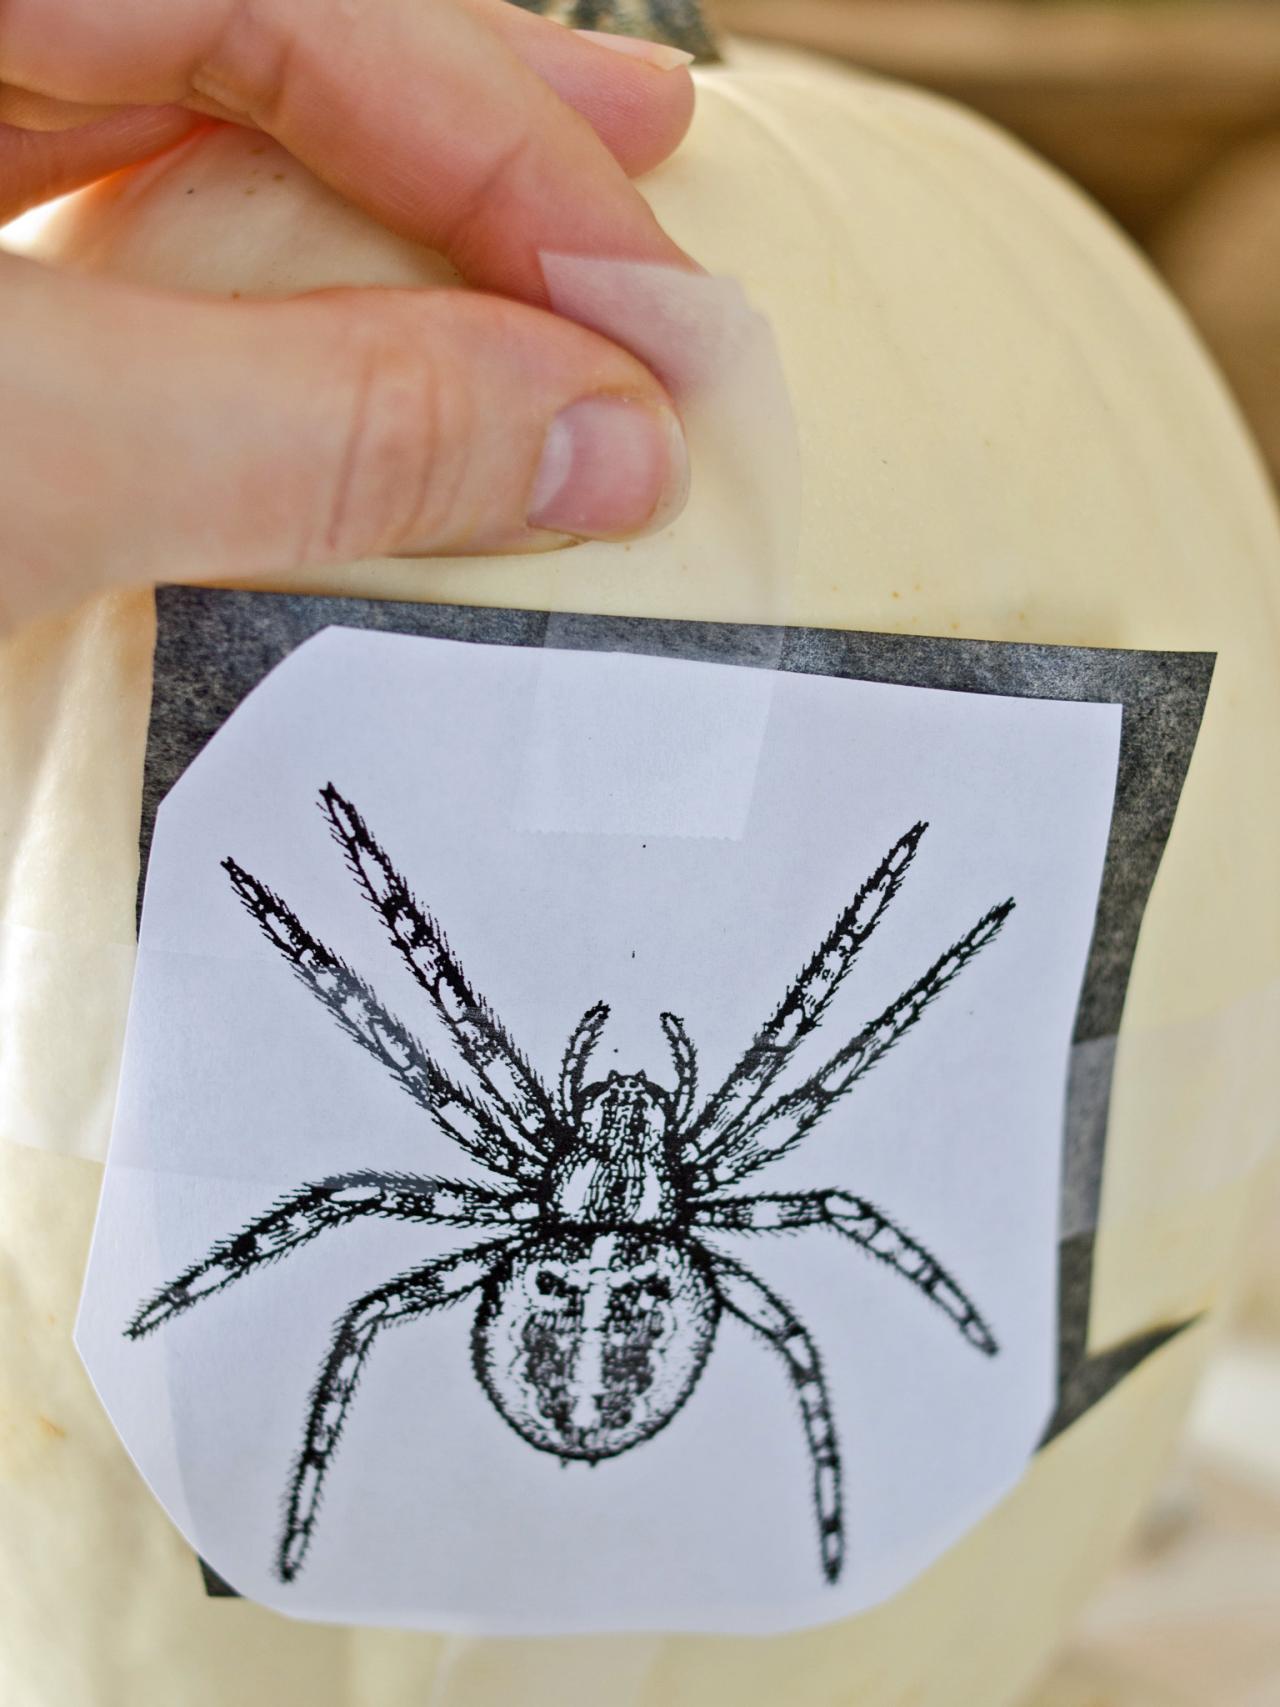
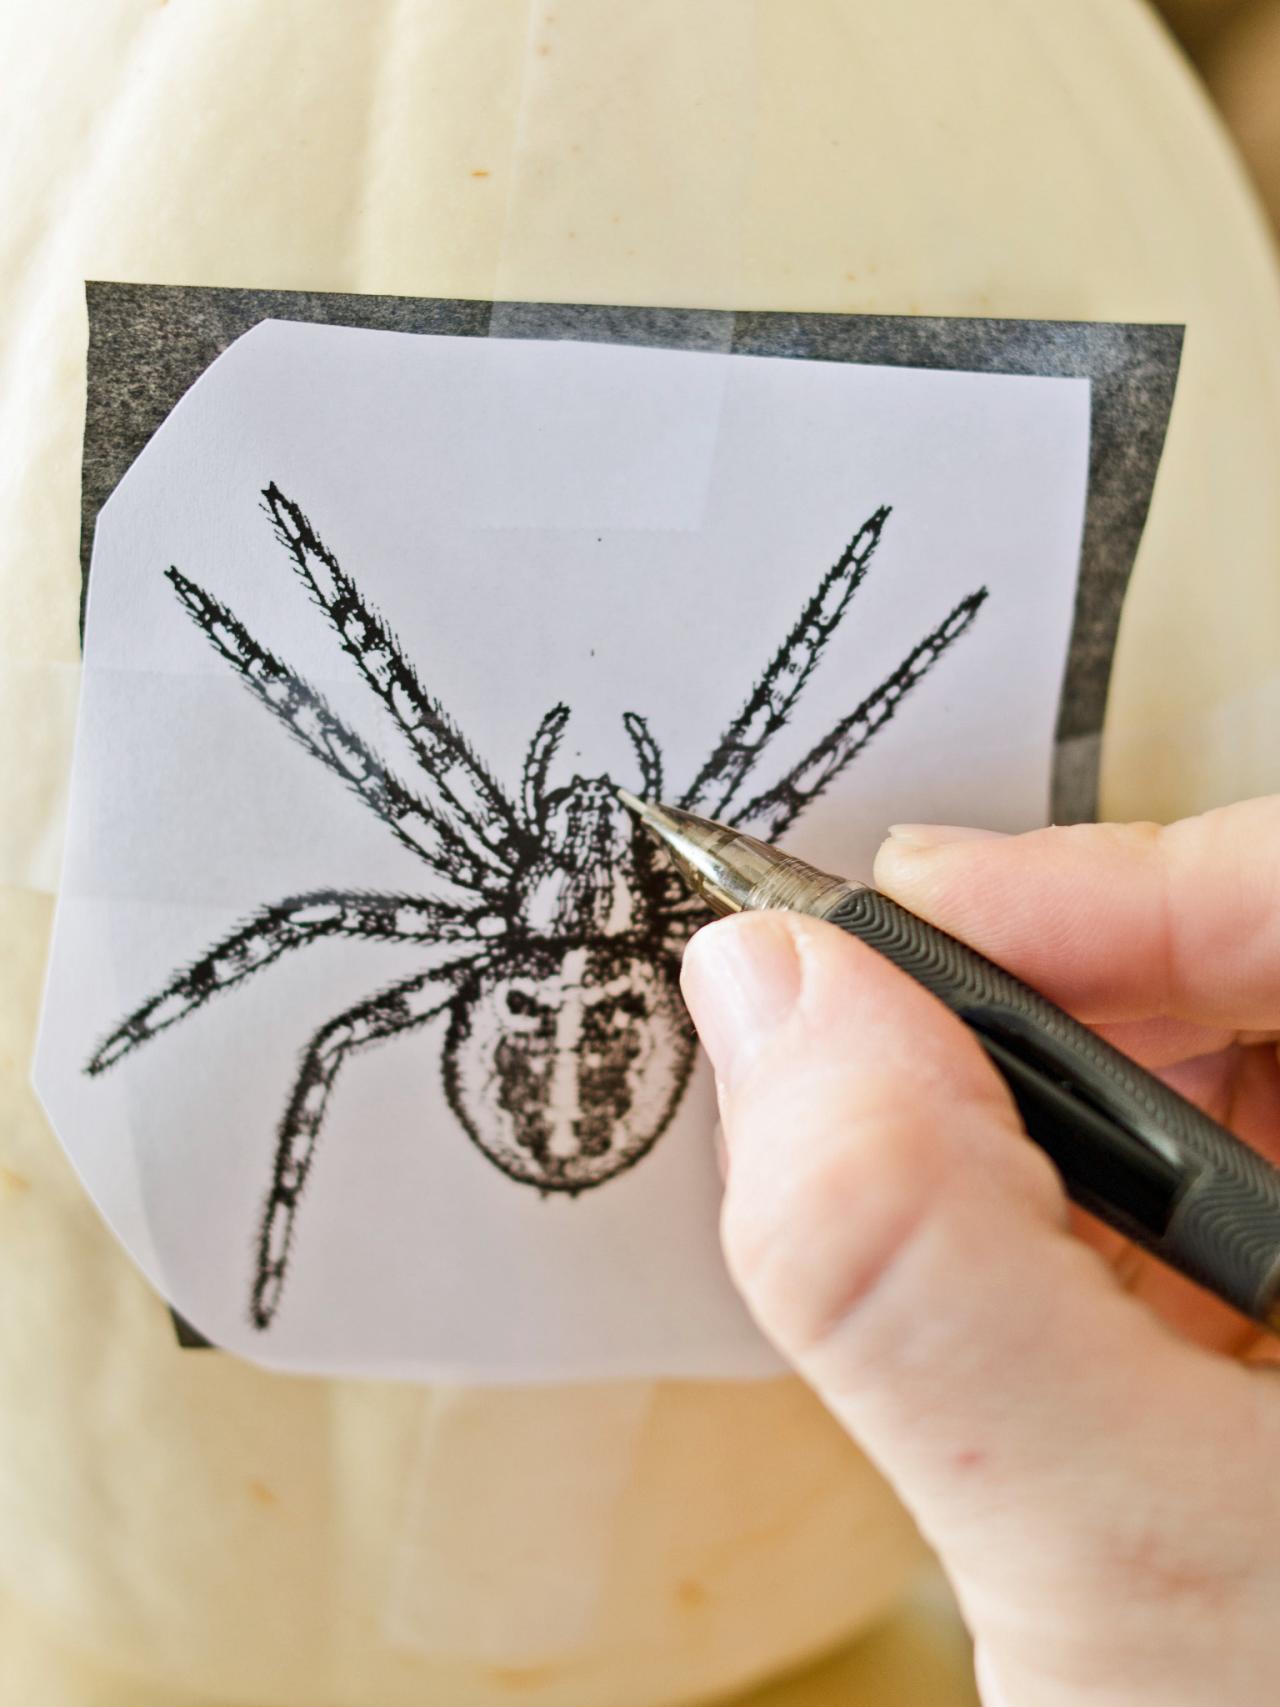
Make sure pumpkin skin is clean and dry. Choose a Halloween-themed design or graphic, scale it to fit your pumpkin and print onto standard printer paper. Cut off excess paper around image to make it more manageable and also cut a piece of graphite transfer paper roughly the same size as graphic (Image 1). Tape both pieces to pumpkin in desired location (Image 2). Gently trace over graphic with a pencil (Image 3). Check under transfer paper occasionally to make sure tracing is successful (Image 4). Tip: Simple graphics like a witch silhouette, large spider or typography will be best for this project.


Halloween Glittered Pumpkins
Step 1: Sketch or Trace Design Choose a Halloween-themed design or graphic, scale it to a size appropriate for pumpkin and print it on standard printer paper then cut off excess paper around image to make it more manageable and also cut a piece of graphite transfer paper roughly the same size as graphic
Halloween Glittered Pumpkins
Step 1: Sketch or Trace Design Make sure pumpkin skin is clean and dry. Choose a Halloween-themed design or graphic, scale it to a size appropriate for pumpkin and print it on standard printer paper. Cut off excess paper around image to make it more manageable and also cut a piece of graphite transfer paper roughly the same size as graphic. Tape both pieces to pumpkin and gently trace over graphic with a pencil. Check under transfer paper occasionally to make sure tracing is successful.
Halloween Glittered Pumpkins
Step 1: Sketch or Trace Design Make sure pumpkin skin is clean and dry. Choose a Halloween-themed design or graphic, scale it to a size appropriate for pumpkin and print it on standard printer paper. Cut off excess paper around image to make it more manageable and also cut a piece of graphite transfer paper roughly the same size as graphic and tape pieces to pumpkin. Remember, to check under transfer paper occasionally to make sure tracing is successful.
Halloween Glittered Pumpkins
Step 1: Sketch or Trace Design Make sure pumpkin skin is clean and dry. Choose a Halloween-themed design or graphic, scale it to a size appropriate for pumpkin and print it on standard printer paper. Cut off excess paper around image to make it more manageable and also cut a piece of graphite transfer paper roughly the same size as graphic. Tape both pieces to pumpkin and gently trace over graphic with a pencil. Remember to occasionally check under transfer paper to make sure tracing is successful.
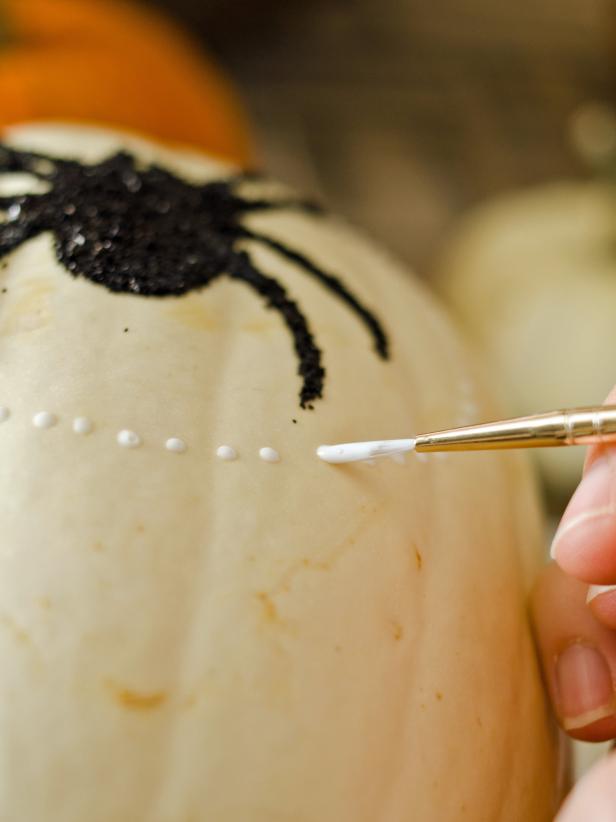
Apply Glue
Place pumpkin over a large piece of wax paper to catch any dripping glue and excess glitter. Tip: Tilt pumpkin onto its back side to reduce dripping. Use the tip of a school glue bottle or a 1.0 liner artist brush to apply glue over transferred lines. Wipe up any excess or dripping glue with a moist paper towel.

Halloween Glittered Pumpkins
Step 2: Apply Glue Place pumpkin over a larger piece of wax paper to catch any dripping glue and excess glitter. Use tip of school glue bottle or a 1.0 liner artist brush to apply glue to sketch. Wipe up any excess or dripping glue with a moist paper towel.
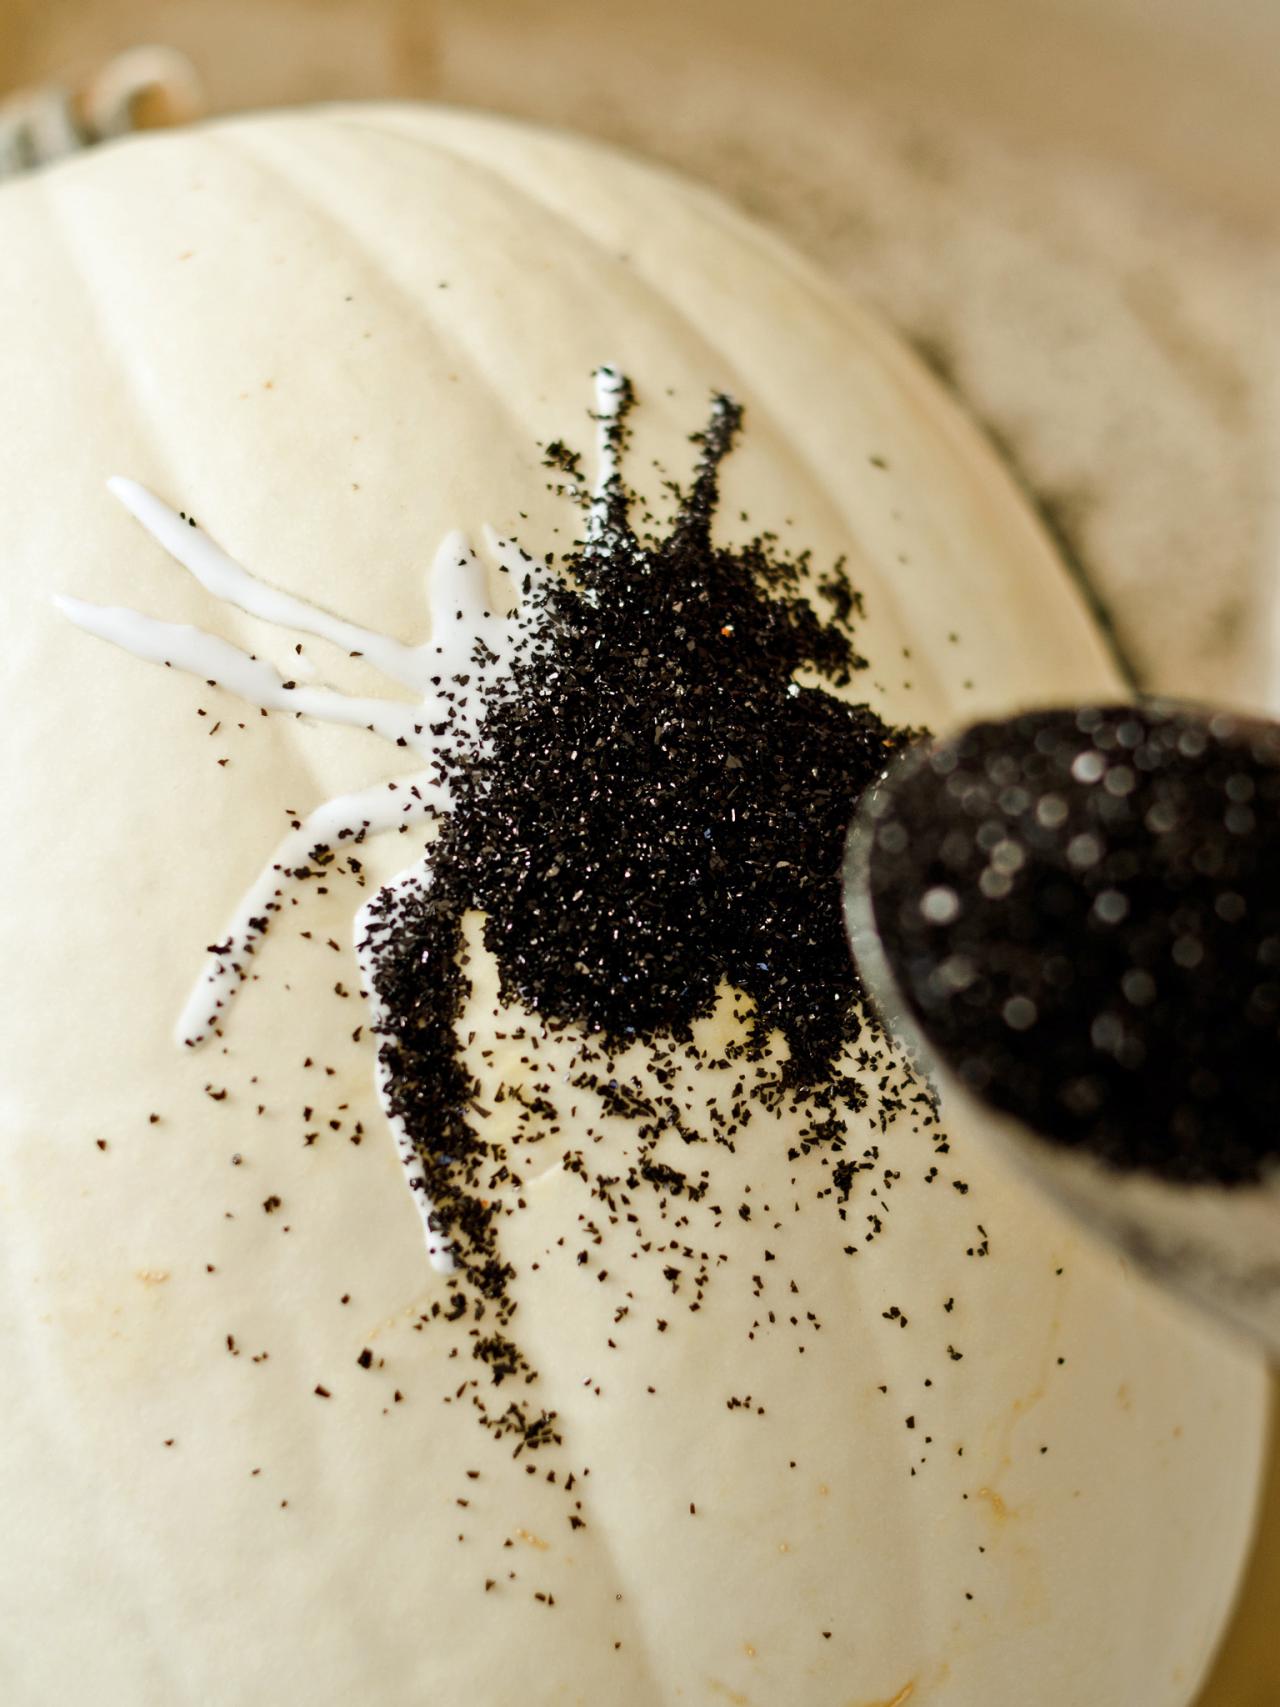
Apply Glitter
Pour glitter into a container or bowl. Use a spoon to sprinkle glitter over wet school glue. Tip pumpkin to shake excess glitter onto wax paper below. Repeat this until entire glued area is coated with glitter. Tip: After applying glitter, roll wax paper into a cylinder and pour excess glitter back into container or bowl to reuse.

Halloween Glittered Pumpkins
Step 3: Apply Glitter Pour glitter into a container or bowl. Use a spoon to sprinkle glitter over wet school glue. Tip pumpkin to shake excess glitter onto wax paper. Repeat this until entire glued area is coated with glitter. After applying glitter, roll wax paper into a cylinder and pour excess glitter back into container or bowl to reuse.
Add Embellishments
It's best to glue and glitter one element at a time. If adding additional graphics, words or embellishments, apply glue with the bottle tip or brush and sprinkle with glitter (Image 1). Glittered pumpkins may be displayed indoors or in a covered outdoor area, like a porch or veranda.

Halloween Glittered Pumpkins
If adding additional embellishments, apply glue with the bottle tip or brush and sprinkle with glitter. Add embellishments one at a time.
Halloween Glittered Pumpkins
For a fun and easy Halloween crafting project, give plain pumpkins a glamorous makeover using school glue and black glitter.


